Going on a Sound Hunt… Outdoor Nature Activities for Kids

sound hunt
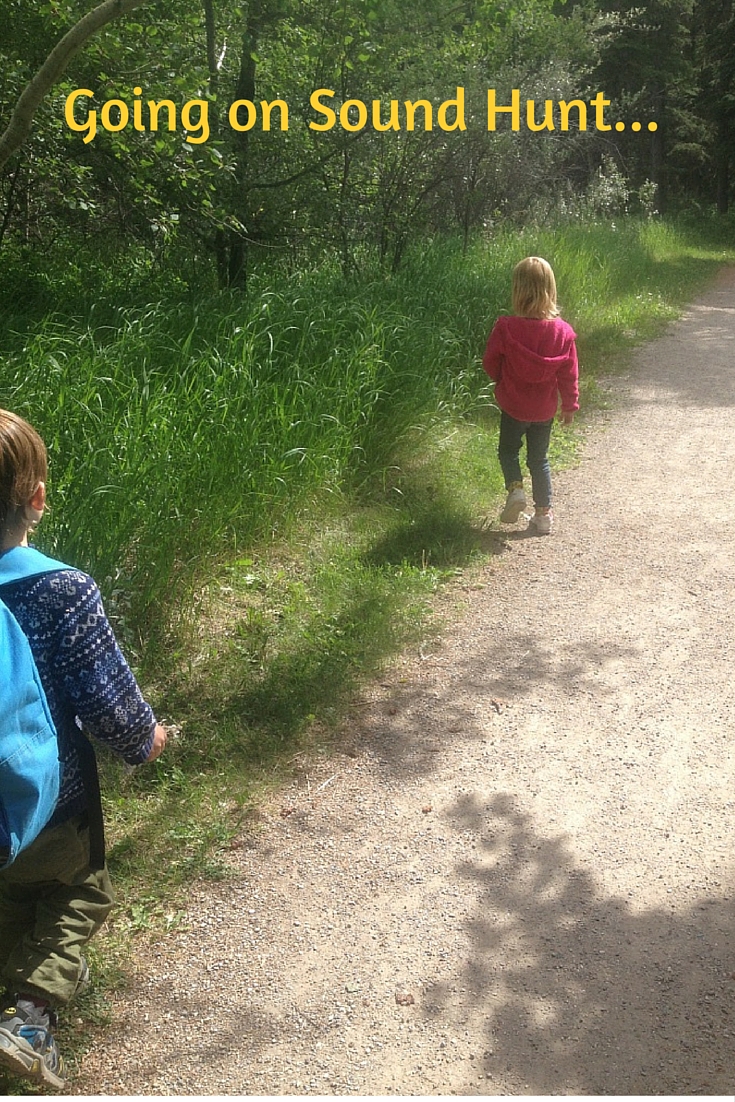
Yesterday I took my kids on a sound hunt. I picked them up from school and we went straight to Fish Creek Park (a provincial park very close to our house) to play and explore. When I announced what we were doing Luke and Chloe were sooo excited. Luke even said so! He said “I don’t know what a sound hunt is but I am so excited to do it.” How wonderful! It made my heart swell how willing and open he was to the whole thing. A sound hunt, sounded exciting, it must be good.

Exploring nature through sound allows children to learn and recognize things they may not have noticed before. By engaging and focusing on sounds it allows children to connect what they hear with what they see. It also enables them to identify the many different sounds of nature. How the wind through the grass can sound slightly different than the wind through the trees. It begins to help them identify not only bird sounds, but that there are different kinds of birds. And once they hear and identify the different bird songs, their innate curiousity leads them to learning visually what the different kinds of birds look like.

As soon as we stepped out of the car Luke and Chloe were already telling me what they heard and named at least 3 things before we formally got started. They really were raring to go!

How to Set Up a Sound Hunt

What you will need:

  • notebook or paper
  • markers/ pencils
  • listening ears
  • a sense of adventure

sound huntI had brought along notebooks and markers to help record what we heard in the forest. I told them that we would be going for a walk through the park and listening for all the different sounds. We were to walk along quietly and when they heard something they were to stop, pause and then share what they heard. They set forth with their listening ears on and wonder in their eyes.

Shortly down the path, Luke stopped and said he heard wind, Chloe birds, an airplane. I said I heard our footsteps along the path. Cause although that was not a sound specific to nature it was one we were hearing in nature, and later could talk about the differences between the natural sounds and the sounds we made in nature and how they could be good or bad (a discussion about noise pollution).

sound huntThey did very well. We’d walk for a bit in silence, they announce some things they heard, chat for a bit about it, then we’d continue along in silence. The listening quickly lead to the visual connection and more discoveries and exploration. Our natural response when we hear something is to turn towards the sound and look. First we heard the squirrel and then turned to see him scampering by. We heard a bee buzz by, then spotted him digging around on the ground. We were able to watch him for a bit, which was quite fascinating and wondered what he was looking for. He was madly using his feet to search for something. After a bit, he flew off but not too far and we were able to watch him land and dig again. Also noticing that as he flew low to the ground searching for the ‘right spot’ to dig that he actually created enough air movement to move the pine needles on the ground without touching them. It was super cool!

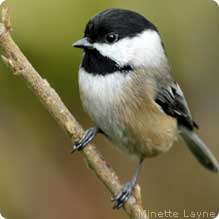
We discovered and learned about woodpeckers and how they peck for insects in trees, examining the holes they left behind. We found chickadees after we heard their call and Luke even imitated their call. We even heard the noisy crow cawing over and over but actually didn’t see him.

chickadeeAt one point, we did stop along the path and I asked Luke and Chloe if they could tell the difference between the wind through the leaves and the wind through the grass, as there was a slight difference. At first they couldn’t but as I pointed out the subtle yet distinct differences they were able to identify them as well.

We heard many sounds. Gophers squeaking (they thought it was neat they squeaked), squirrels chirping, bees buzzing, wind, different kinds of birds (at least 3) and more. One of our favorite sounds was the creek gurgling by and Luke and Chloe were specifically on the hunt for this sound. They knew it was here from being to the park before and kept saying “Where is it?” not resting until they heard and found the creek.

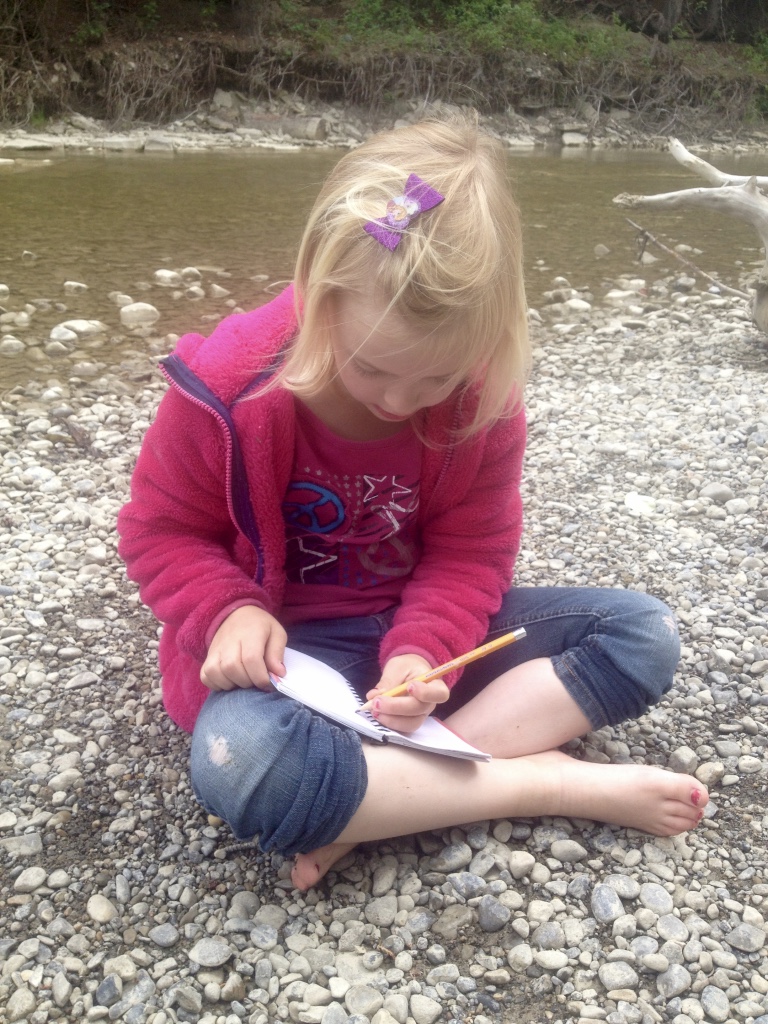
When we did find it, after wading in and playing a bit, we sat by the creek and took out the notebooks. They each spent a few minutes writing or drawing the different sounds they heard in their books. Recording what they had heard and starring their favorites. Taking these extra few minutes to have the kids record what they have heard helps solidfy it and increases retention. It also gave us another opportunity to sit one more time and listen. Seeing if there were any new sounds that they had not yet heard on our sound hunt so far.

sound huntWe spent over an hour in the park playing, listening and learning. And when we returned to the house it was amazing how calm, grounded and happy they were. Chloe stayed outside and blew bubbles, while Luke came in and relaxed doing a guided children’s mediation. The whole experience was amazing! and we definitely reaped the benefits of our outing.

The other neat thing is is that after our adventure, I have heard Luke talking about and sharing it with others. Telling them how much he enjoyed it and what he learned.

Exploring with kids through nature is such a rich and exciting experience. By having them focus on identifying sounds not only heightens their sense of awareness but quickly leads them to connecting visually, engaging their other senses and deepening their exploration.

Like to do more with sound outside? Check out this idea on Making Outdoor Sounds

Seeking and Sorting – Outdoor Nature Activities for Kids

outdoor nature activities for kidsChildren naturally love to be outside. Running, jumping, playing, climbing are all elements of outdoor play. We should not underestimate the value of outdoor nature activities for kids  and playing outside as it has many benefits.

Children who spend more time outside learn to appreciate and care for nature. Their natural curiosity encourages them to explore and learn in ways that we may not even realize. They develop physical and gross motor skills, burn calories, get their Vitamin D and contribute to their aesthetic learning as well. Think of all the colors, sights and sounds out there engaging the senses – from bird song to the feeling of bark under their hands or mud squished through their fingers. These activities are all contributing to the development and growth of your child.

outdoor nature activities for kidsThough free unstructured play in the outdoors definitely has it’s place and benefit, you can enhance your child’s learning experience by doing simple and exploratory outdoor nature activities with them. Deepening their appreciation of nature, teaching them basic skills/ concepts as well as growing their curiosity. Outdoor nature activities for kids can introduce them to something they may not have thought of before or learn about something that they may just take for granted. For instance, the feeling of the bark of a tree – some are rough, some are smooth, while others have a powdery substance on them. Then this can lead them to asking why? why are the barks different? Or looking at and finding all the different colors there are in nature – there is not just green and brown, exploring a little through different activities can show them the many colors of nature and where to look for them.

outdoor nature activities for kidsOver the next 6 weeks, we will explore different outdoor nature activities for children, featuring one activity each week; their benefits and how easy they are to do. You do not need a lot of equipment, just curiosity and a sense of fun and exploration. Depending on the age of the children, will depend on how deep you take their exploration. I find the best is to start simple and then take cues from the child as to where to go with it next and how long to spend on it. Something that might keep one child engaged for 20 minutes, might only engage another for 2. That’s ok, length of time is not important – it is the experience and what they get out of it. Besides the child who is engaged for less time might find another activity of more interest to them and spend longer with that one.

Seeking and Sorting

Children naturally love to collect stuff. They often run outside and collect dandelions, rocks, leaves, etc. This activity uses this concept to start to grow their appreciation as well as some basic math and counting concepts. You can easily do this with a group of children as young as 2 years old or one on one.

  1. outdoor nature activities for kidsGather the children into a circle and show them what it is you want them to collect. Depending on the age of the kids I may ask them to find a specific number or simply to collect as many as they can. For instance, I hold up a dandelion and ask them what it is. If they do not know then I tell them.
  2. Once they have identified what it is I ask them to go and collect 3 of these and bring them back and put them into a pile in the middle. Once they have done that, I will move on to the next item, say a stick. I emphasize that they are only to take sticks from the ground, as we want the ones that are attached to keep growing. I will ask them to collect 4 and bring them back and place it in the pile. Depending on the age group will depend on how many items we go seeking. With preschoolers I usually choose 2-3 items.
  3. Once we have a great big pile, we may pretend it’s a campfire and sing a campfire song. Or I tell them one interesting fact about the items they’ve collected, like pine cones hold the seeds for the new trees.
  4. Then I will get them to sort them into 3 piles, all the dandelions in one, all the sticks in one and all the pine cones in another. Kids not only love to collect, they also love to sort! Sorting activities for children teaches them how to organize, how to determine alike and different as well as beginning math skills.

outdoor nature activities for kidsThe great thing about this activity is it provides the foundation for other activities that you can now use the items you’ve collected to do. Activities like Woodland People, Building a Nature City and Nature Collages all utilize the items you’ve collected and bring in a little creativity and imagination.

Try out this Seeking and Sorting Activity this week and share in the comments below how it went and what favorite things you found!

Next week we’ll build upon this activity by Building a Nature City, that uses what we’ve collected.

Giving Children Choice – Benefits of Empowering Children in Decision Making

giving children choiceMany children grow up unable to make decisions because they have had little experience in doing so. Teaching decision making greatly benefits them in life.

Life involves making decisions and choices. It is something people do everyday, sometimes consciously, sometimes unconsciously. The value of making conscious mindful decisions and choices is key to living a full and happy life. Children if presented with choice at a young age learn this invaluable tool easily and will greatly benefit them in their adolescent and adult lives.

Benefits of Providing Children with Choice

R. Renee Bembry’s article Giving Children Choices Rather Than Commands sites many benefits to giving children choices starting at a young age. Choices, if presented appropriately, will enable children to learn the benefits of making mindful, conscious decisions.

Giving children choices teaches them how to make decisions, builds their self esteem, develops problem solving skills, independence and makes them feel more powerful and in control of their lives. It teaches them to take ownership of their choices, the value of sacrificing one thing for another and makes them feel that their point of view is valued.

As parents, providing the child with a choice helps to avoid power struggles and reduces frustration while gaining the child’s cooperation. Done correctly this still leaves the parent in control as they are the ones who provide the choices.

How to Provide Choices to a Child

Some parents panic thinking that if they give their child a choice that they will soon be ruling the roost. This is not so, as the parent can choose what the choices will be, and therefore can choose things that they can live with. It is a win win for everyone as the child feels empowered because he gets to choose and the parent still holds the reins by providing choices that they are comfortable with either way.giving children choice

Dr. Khrista Boylan, child psychiatrist, says to start teaching a child how to make decisions, the parent needs to ensure the choice is manageable and realistic for the age of the child. Do not offer choices to children younger than 2 years of age, and not more than 2 options, a or b. The choices need to be realistic, appropriate and acceptable, something the child understands, and the options need to be acceptable to the parent. Do not offer a choice if one of the choices is not acceptable.

As the child gets older one can offer them a broader range of choices. This will help eliminate power struggles with older children.

Parents need to be consistent and let the child choose on a regular basis. It is also important to note that not everything has to be a choice -there are times when as a parent, they must tell the child what to do.

Where to Start Offering Choice

giving children choiceJamie Sullivan’s article Parenting Tips – Why Is Giving Choice Important suggests that the parent start to offer children choice with everyday things like choosing what to wear, what to have for dinner or type of sandwich for lunch. They can be asked for input on family decisions such as what type of outing they would like to go on, or who to invite to play. As they get older the choices can become more complex and where the consequences of their choices become more pertinent. The more opportunities they have to make choices the more they will learn and the more confident they will become in making decisions.

The Value of Good Decision Making

The key to success is knowing the child and what they can handle. This way the parent can provide realistic choices that will ensure the child feels empowered and learns from his experience.

As parents, providing choice builds the foundation for children to make good, sound decisions, where they learn to see the outcomes and accept the consequences (if any) of choosing one over another. This helps them make positive choices in their adolescent years when choices can be potentially life threatening. Teaching them early will only benefit them later in life and develop confident, happy adults.giving children choice

Kids Healthy Cooking – Dairy Free Peanut Butter Ice Cream

sugar free dairy free peanut butter ice creamIce cream. One of the many favorite summer treats, wonderful on a hot summer day. But honestly, great anytime and popular with kids. Growing up in my house ice cream was a staple and often requested after dinner. So when we went dairy free, ice cream was definitely something I missed. But like any change (like when we went sugar free) it was just a matter of shifting gears and finding new recipes to meet our ice cream needs. This is when I discovered this sugar free dairy free peanut butter ice cream.

I had been promising the kids in my Mini Chefs class ice cream for a few classes and many of them kept asking when we were going to make it. In our last class of the session I thought I’d throw it in with our chocolate making, making it a bit of an extra treat. This sugar free dairy free peanut butter ice cream recipe is rich, creamy and delicious. No one would ever know that it did not contain dairy (and don’t worry if peanuts are a concern you can use WOW butter, an awesome substitute for peanut butter. Being in a peanut free facility this is what we used and no one noticed a difference in either look, taste or texture). In fact when we made it in class the kids did not question the ingredients at all. They just heard ‘ice cream’ and were ready to make it and eat it.

sugar free dairy free peanut butter ice creamThis sugar free dairy free peanut butter ice cream recipe is super easy to make with kids. Just put all the ingredients into a blender, blend and then pour into your ice cream maker. If you do not have an ice cream maker, you can take the mixture and put into a freezable container and put in the freezer until firm.

All the kids were bouncing off the walls, waiting for the ice cream to be ready. And when it was, they gobbled it up, most of them asking for some more. I was pleased to be able to finish off the class with something a little more special (and considered a treat), but also still healthy and good for them. By this point, none of them were questioning the ingredients that were going into things, and all of them were willing to try it. Which I think is the greatest success – a child who is willing to at least try it will open up their world of healthy foods and possibilities. Not only with foods, but in other areas of their life as well.

Peanut Butter Ice Cream

Ingredients:

1- 14 oz. can coconut milk, chilledsugar free dairy free peanut butter ice cream

¾ c. coconut sugar

½ c. natural peanut butter (or WOW butter if need peanut free option)

1 tsp. vanilla

3 tbsp. dark chocolate shavings

Prepare your ice cream maker ahead of time by freezing the canister overnight. You’ll also need a good blender to whip the ice cream mixture.

Combine chilled coconut milk and coconut sugar in blender and whip until sugar is dissolved. Add in peanut butter and vanilla. Whip until mixture is creamy and frothy.

*If it’s hot in your kitchen and the mixture is warm-ish, chill mixture before adding to ice cream maker; it will freeze better is mixture is cold.

Set your freezing canister in place and turn on ice cream maker. Pour mixture into freezing canister. Add in shaved dark chocolate.

Churn until frozen. Depending on your ice cream maker this could take 10-15 minutes or up to 30 minutes.

Make roughly 3 cups. Serve in small single scoops as it is rich.

Original recipe from Gluten Free Goddess

healthy chocolateCooking with kids really can be easy and fun. I had a great time working with these kids, gently expanding their palates and horizons. I was pleased to see how everyone progressed and to hear from parents how what they did in class was being transferred to home. Whether it be a food they now liked, making supper, or helping with clean up.

My greatest joy was the success I had with the more particular eaters, one’s who said they did not like much of anything, but by the end of our classes were not only trying everything but loving what we were making. Those kids had come a long way and really grown. It just goes to show how cooking with kids,  and letting them make their own food not only encourages them to eat it, but also to start trying and experimenting with new things.

Energy Bites – Easy Healthy Snacks for Kids

energy bitesEnergy bites are a very easy and quick snack that are not only delicious but full of nutrition. They are one of those great recipes that you can basically put anything in them that you like, and they are great to make with kids.

They are easy because you simply put all your ingredients into a bowl and mix together. You then roll them into balls and freeze them for 10 minutes. Done!

The kids in my Mini Chefs really enjoyed making these. There were lots of things to measure and put in, and no one turned up their nose at any of the ingredients. They loved it because they all got a chance to mix and roll their own ball, which was a bit of a sticky process. It didn’t matter to them, as they were really excited to try them out. Even my pickiest eater was licking her fingers after rolling her energy bite – already expressing how much she loved it. I was super pleased! (I had been working hard to find something that this child would enjoy that was really good for her) In fact, when we sat down to eat them she had 3. Yes! Success.

energy bitesNow the original recipe calls for peanut butter, but being in a peanut-free facility we used WOW butter, made from non-GMO soy and allergen free (dairy, gluten, egg) it is a great alternative if needed. It does contain sugar, so not so great if you are avoiding added sugars as well. I can vouch that it tastes just like peanut butter and the kids in the class had no idea whatsoever. It looked and tasted the same to them.

Energy bites are a perfect easy on the go snack, as you can make up a batch ahead of time and just grab them when you need that extra boost. There are also many variations on these balls, you can even create your own adding in or removing whatever you like. Things such as raisins, dried fruit, nuts, cacao powder are just a few of the things you could add in. Once you have the basic recipe that sticks together the options are endless.

Energy Bites

1 c. dry oatmealenergy bites

2/3 c. shredded coconut

½ c. peanut butter (WOW butter is a great non-nut option)

½ c. ground flax seed

½ c. cacao nibs

1/3 c. honey

1 tbsp. chia seeds

1 tsp. vanilla

Stir all ingredients together in a medium bowl. Once thoroughly mixed take approx. 1 teaspoon and roll into a ball – dough will be sticky. Place ball onto a cookie sheet. Continue rolling until all dough has been used. Place balls into freezer for 10 minutes or until firm. Take out and enjoy!

Once frozen balls can be stored in an airtight container and are great quick grab and go snacks.

Makes 20-25 balls

Next week our last class and it’s a good one! We make chocolate and peanut butter ice cream…

Kids Healthy Cooking – Healthy Sweet Treats

IMG_6963As human beings one of our biggest vices is all things sweet. The same goes for our kids as well, they prefer bananas over carrots, the cookie over the banana and so on. But what if we could create healthy sweet treats for kids that they would not only love and meet their need for sweet, but would provide them with a nutritional impact full of vitamins, minerals and other nutrients?

When we decided to go sugar free at our house I got a lot of looks from other people and questions about how can I deny them all the yummy things that are part of a regular kids life, like cupcakes, chocolates and cookies. The truth is they have never been denied, they still enjoy all those things at our house and more. The difference is not in the taste which is just as yummy if not more so than the ‘original’ – but in what they are made of. We have simply switched to natural sweeteners and added in foods that are super high in nutrients. And honestly they not only gobble them up but request them.

It is easy to make the switch at your house too. Just start slowly adding in one or two recipes and go from there. Make it easy. Plus if you get the kids involved in making these healthy sweet treats your chances of them eating them goes up simply because they have helped.

Also starting with ingredients and foods that they like is key to success when getting kids to eat and try new things. If you pick something they like, they are already interested and will be more open. This is why just before Valentine’s Day in our Mini Chefs class I chose two healthy sweet treat recipes for kids that were chocolate. You should have seen the kids eyes get big and how excited they got when I told them what we were making that day was chocolate (same thing happened when we made the chocolate banana smoothie a few weeks ago).

They were all so excited to try it when it was ready to eat, even though they had watched some ‘weird’ ingredients go in like avocado and chia seeds. Chocolate overruled it all.

Raw Chocolate Pudding

The thing I love about this recipe is the fact that you simply put all the ingredients in the blender and mix. In just minutes you have a smooth, fluffy and delicious chocolate pudding.

2 ripe bananas, peeled and slicedhealthy sweet treats for kids

1 avocado, pitted and peeled

2 tbsp. raw cacao powder (this is different than cocao powder)

1 tsp. agave nectar

Put all ingredients in blender in the order listed. Start on low, slowly turn speed up to high. Blend for 30 seconds on high or until desired consistency is reached. *it’s sweet as is, but if you’d like to increase sweetness add more agave nectar to taste – agave is twice as sweet as sugar so use small amounts and taste before adding more 

Avocados are fantastic additions to recipes. Not only are they mild in taste, they are high in vitamins and minerals such as Vitamin K, B5, B6, C and E as well as Omega 3’s. They offer a lot of health benefits like improved mood, reduced stress, good eye health and more. They are also a great food that actually curbs sugar cravings! Because they are high in healthy fats they slow digestion and prevent the body’s blood sugar from spiking after eating. It is also true that when we crave sugar it is often because we are missing certain nutrients and adding a healthy fat will curb this craving as the body becomes satisfied.

No Bake Chocolate Macaroons

1 bananahealthy sweet treats for kids

¼ c. coconut oil, melted

¼ c. pure maple syrup

½ tsp. vanilla or 2-3 drops madagascar vanilla essential oil

6 tbsp. cacao powder

1.5 c. unsweetened coconut

1 tbsp. chia seeds

small pinch sea salt

In a medium size bowl mash banana well until there are no clumps. Stir in melted coconut oil, maple syrup and vanilla. Sift cacao powder and stir into banana mixture. Stir in chia seeds, coconut and salt.

Line baking sheet with parchment paper. Drop a teaspoon at a time onto parchment paper. Put in freezer for 20 minutes or until firm. Store in freezer until ready to enjoy.

Makes approx 15 macaroons

Chia seeds are not only high in dietary fibre and protein as well as many other vitamins, they make you feel full as well as being an ingredient that stabilizes blood sugar. Cacao powder is rich in vitamins and nutrients such as iron, antioxidants and high in B Vitamins. Cacao does differ from cocoa as though they come from the same plant the difference is in how they are processed and the amount of nutrients that are left in it. Cacao is also considered a superfood while cocoa is not.healthy sweet treats for kids

So have fun, enjoy! not only will the kids love these healthy sweet treats you may find that you love them to (I have a hard time eating only one chocolate macaroon at a time…) They are quick easy and so yummy you and your kids will forget that they are actually good for you.

Next week pancakes with super cool faces!

Kids Healthy Cooking – How to Make Tacos

how to make tacos with kidsTacos are one of those great foods that are an quick easy dinner solution that you can easily incorporate many food groups (including vegetables) and taste delicious. They are also a fabulous way to get the kids involved in helping make dinner as there is lots of scooping and use of their hands. You may think it will create a big mess, but here are some easy ways how to make tacos with the kids and be successful!

How to Make Tacos with Kids

1. Prep in advance – Chop, grate, cut the ingredients you are using in advance and put them into separate bowls that the kids can easily scoop or grab things out of. Place a spoon with each item so they don’t mix them.

2. Provide a variety of ingredients – in Mini Chefs we used just lettuce and tomato and cheese, but you could include avocado, cucumber, spinach…basically any vegetable. Providing variety will not only makes the kids curious but it will also encourage them to try a little, especially when they are making their own.

3. Use some kind of dip or spread – sour cream, Veganaise or mayonaise, guacamole, salsa all add a little flavor and variety to their taco. It also makes it less dry and provides nice texture and easier on the palate.

4. Demo what it looks like – make one and show them what you would typically put in it, everything from sour cream to tomatoes and cheese. Let them know that if they choose not to put an ingredient in that’s ok. The example will not only show them what can go in it but might encourage them to put some of those ingredients in themselves.

5. Let them make their own – give them the tortilla or taco shell and show them all the options, then let them decide which ingredients they want to put in and how much. (Remind them that they need to close up the tortilla so not to put too much in). When they make their own they are more likely to eat it.

how to make tacos with kidsWhen I did this with my Mini Chefs class I had everything ready in advance and this made it very smooth when making them. The only thing we prepped together was to cook the ground chicken, which I did and they watched. They all really like watching what is happening as their curiosity makes them interested and that is the best way to get them engaged.

Many of them tried different ingredients, creating their own with various amounts of the things they liked. We used soft tortillas, which I find easier with kids because you can roll them up and have less stuff falling out! but you can use hard taco shells if you prefer. I did have to remind them that though they could put in what they liked, not to put too much in as we needed to roll it up and have it all fit.

Rolling them up was the fun part. I showed them how to do it and then helped each child coaching them through rolling it up themselves, which each of them did quite successfully. Once we had it rolled up then we chowed down and enjoyed our tasty creations.

I even had the next week a Mom share with me that her son had made tacos for supper one night after this particular class, which I was so pleased to hear. She said he insisted on clearing up which he never does and he is now also eating lettuce, which he never ate lettuce. Wrapping it up and presenting it in a different way is one of the many reasons why this has occurred. Plus he (and the other children) were allowed choice in what they could put in and weren’t told that they had to use this ingredient or that one.

I feel that this class has been our most successful class so far and that learning how to make tacos has taken the children’s learning in the kitchen to the next level. It really is a simple nutrition packed meal which can easily be modified if you want it dairy free, vegetarian or packed with protein (add kidney beans or chick peas). There are a large variety of different taco recipes and combinations to try, but I would recommend starting with a basic recipe to get the kids into it, and then expand upon it from there.

Tacos

Ingredients:

1 pkg. ground chicken (or any choice of ground meat)how to make tacos

1 tbsp. taco seasoning (recipe below)

tomatoes, chopped

lettuce, chopped

Daiya cheddar cheese, shredded (or regular cheddar if desired)

Vegan sour cream – I love Earth Island (or regular sour cream)

tortillas

Brown ground chicken in frying pan. Add 1 tbsp. of taco spice and mix.  Lay out one tortilla flat on counter or plate, spread a spoonful of sour cream on tortilla, add spoonful of chicken, tomato, lettuce and cheese. Fold tortilla over once, tuck in ends by folding over on each side, then roll the rest of the tortilla to end.

Taco Seasoning

(this is an easy seasoning that can be made at home with spices you likely already have in your cupboard. Pre-make it and skip the processed package stuff from the store)

Ingredients

1 tablespoon chili powderhow to make tacos

1/4 teaspoon garlic powder

1/4 teaspoon onion powder

1/4 teaspoon crushed red pepper flakes

1/4 teaspoon dried oregano

1/2 teaspoon paprika

1 1/2 teaspoons ground cumin

1 teaspoon sea salt

1 teaspoon black pepper

Mix all ingredients together. Store in an airtight container.

Do you have a favorite taco recipe that your kids love? Share it below

Coming up next…some chocolate delights, macaroons and chocolate pudding!

Don’t miss our other kids healthy cooking recipes such as yogurt parfaits, tuna melts and kids smoothies

Kids Healthy Cooking – How to get your Kids Eating Vegetables

get kids eating vegetablesIt is amazing how many kids do not like vegetables. Or if they do, they like only one, like carrots, or cucumbers, but otherwise that’s it. I know many parents experience this struggle of expanding their children’s vegetable palate. That’s why getting creative to get kids eating vegetables is key.

In our Mini Chefs class last week we created vegetable flowers. This is a great way to get kids eating vegetables – it is fun, offers them diverse food colors and creates a pattern, which are all proven ways to get them eating. The ‘flower’ was a combination of celery, radish, carrot, cucumber, spinach, and grape tomato (lots of colors).

veggie flowerWhen we were creating our vegetable flowers, many of the kids told me right away which vegetables they did not like. Though I acknowledged it, I encouraged them to make the flower anyway and then they could eat the parts they did like and leave the rest (not forcing the kids to eat what they don’t like, but acknowledging and encouraging is another way to get kids eating vegetables, and a variety). I praised and encouraged them as they were creating, telling them how much I liked the ‘grass’ they had made or the ‘petals’ on the flower. When we were done, all the ‘flowers’ were unique. Similar to the example but with their own creative flare!

Then of course we ate them and some of the kids not only ate the parts they liked but branched out and tried something new. I had to laugh when I watched two girls each try a spinach leaf and heard them exclaim “oh this is so yummy!”

This is why cooking with your kids is such a great benefit! It gets them involved, creative and gives them opportunities to try something new. Making food fun, will encourage them to try it out and maybe, hopefully expand their palates. It also is an opportunity to teach them about nutrition and why we need balance in what we eat.

IMG_6922Also that day we made Tuna Melts, which is one of my favorites! It is a simple quick recipe and great to do with kids. All you need is bread, tuna, Veganaise (or your favorite mayonaise) and cheddar cheese. This recipe is a great one for kids to practice stirring and spreading (the tuna). Parents of course should do the opening of the can, cutting and using the oven as these tasks need to be closely supervised with small children.

Again we had a few kids who said they didn’t like tuna, but I encouraged them to at least try it. For some kids, it could simply be the Veganaise (mayo) that they don’t actually like. I remember when I was little I did not care for mayonaise at all. It wasn’t until I was much older that I actually liked it. If you think this may be the case, you can either change your mayo choice (not all mayos are created equal) or you could leave it out and not mix it in your tuna – though this would leave the tuna a little dry the melted cheese on top could help with this. Experiment, let your child taste the items separately to determine what part they don’t care for and then adjust from there.

Cooking with kids is always an adventure and getting kids to eat vegetables just makes it that much more interesting! But recognizing and praising them for what they do and trying new things definitely puts them on a path to enjoying their food and exploring new recipes!

Tuna Meltstuna melt with Daiya cheddar

Ingredients:

Slices of bread

1 can of tuna

Veganaise (or choose your favorite mayonaise)

Slices of Daiya cheddar (or regular cheddar)

Mix tuna with Veganaise. Start with one to two spoonfuls of Veganaise and mix. Add more if needed to taste, you do not want the tuna to be dry, but you don’t want it sopping wet. Spread tuna on slice of bread. Place cheddar slices on top of tuna.

Place on a cookie sheet in oven on broil. When cheese has melted it is ready to eat! this only takes one or two minutes so make sure you keep an eye on it. Take out of oven and let cool slightly, then eat and enjoy!

Vegetable Flower

Ingredients:IMG_6930

Cucumber slices

Celery

1 grape or cherry tomato

1 radish

2 spinach leaves

8 baby carrots

Wash all vegetables. Slice cucumbers, radish and 2 pieces of celery (one big and one small) to make stems of flowers. On a plate place 2 pieces of celery. At the top of the big piece arrange cucumber slices into a flower shape. At the top of the small piece of celery arrange the radish to make petals of flower. Place grape or cherry tomato in middle of the cucumbers to form center of big flower. Place two pieces of spinach on either side of big piece of celery to make leaves. Line the bottom of flowers with baby carrots to create ground/ grass. Take a picture of your creation! Enjoy plain or with your favorite dip.IMG_6925

Missed last week’s kids healthy eating recipe? Click for Yogurt Parfaits and more great tips on cooking with kids

Looking for more creative fun ideas to get kids eating vegetables? Check out these great ideas 

Next week Kids Smoothies – 3 delicious recipes, one with chocolate! how can you go wrong?

Kids Healthy Cooking – Tips and Tricks for making it easy and fun!

kids healthy cooking

Cooking with kids can be a challenge. It’s messier, it’s slower, and often times can try your patience as a parent. Kids healthy cooking can be even more of a challenge with your little munchkins palates changing and developing, being sensitive to textures, smells and levels of salt and sweetness. One day they like a certain food and all of a sudden the next day they don’t? Even with these challenges, there are many benefits to getting little ones into the kitchen at a young age, benefits that will set a foundation for their eating and nutrition choices for life.  And these benefits will outweigh the extra time and patience you have to spend in the kitchen.

fruit2For little hands, time in the kitchen allows them to build basic skills, explore with their senses and create an adventurous palate! You can introduce healthy foods in a fun and unique way that will get them eating and enjoying it. Kids are also more likely to eat what they have made and it creates a foundation for them later in life – when they’re older in college and can actually cook. Not only that, but it creates a great opportunity for you and your child to spend some quality time together, learning and creating together, even having a little fun.

I recently started teaching a preschool class at the Trico Center called Mini Chefs and it is one of my favorite classes. You may think that cooking with a preschooler would be difficult, but when you choose recipes that are simple, easy and appropriate for their age, it is actually a lot of fun. I love how excited the kids are each week, curious about what we are making and what is in it.

IMG_6903One of the keys to making kids healthy cooking successful (especially with preschoolers) is to pick something with less than 5 ingredients and things that they can do themselves, like scooping, mixing, tearing (lettuce). Most kids at this age love to help and get very excited about mixing things, or scooping out the flour. Yes you may have a little more flour on the floor but encouraging them and letting them do it, will make them want to do it again.

For our first class we created Yogurt Parfaits, which is a very easy, hands on recipe with 3 basic ingredients and lots of scooping and sprinkling. They all wondered what a yogurt parfait was, as even my children had not made one of these before. What was in it? How did we make it? When were we going to make it? The when question was the best. They are so keen at this age to get started!

This is why it is very advantageous and less stressful for you to prepare things in advance so that the cooking process goes more smoothly. For the parfaits, I had the yogurt already in a bowl with a spoon for scooping, the fruit cut and the granola in a bowl ready for scooping as well. Parfait glasses were in a stack ready for me to hand out as well as the spoons. This made it easier for each child to do what they could themselves, once I explained how we made the parfaits.

It was so fun to watch each child create their parfait, scooping in their yogurt (some with fairly large scoops and some very small), choosing their fruit, then scooping in some yogurt again. Each parfait was creative and unique, and honestly it was not that messy. Some kids had lots of yogurt in theirs and less fruit, some had a lot of both, while others just wanted the granola off the top. Either way they all had fun and all tried it, it was a new taste adventure for many of them.

Now my kids ask for yogurt and fruit all the time now and it makes a very healthy snack!

Yogurt ParfaitIMG_6905

Ingredients:

Non-dairy vanilla yogurt  – such as coconut, almond or soy   *(can easily substitute dairy yogurts if desired)

Fruit – pick your favorite! Blueberries, strawberries, banana, honeydew

Granola (store bought or make your own – you can also substitute large oats if desired)

In a bowl or cup place desired amount of yogurt. Then place fruit of choice on top, layer with yogurt then another layer of fruit. One more layer of yogurt and top with granola. Enjoy!

And don’t forget, get the kids to help you clean up after as well. They are willing at this age and that way they learn that cooking whether creative, messy or fun, requires clean up at the end.IMG_6904

Next week… Tuna melts and Vegetable Flowers – who says vegetables can’t be fun!