Earth Day Crafts for Kids

earth day crafts

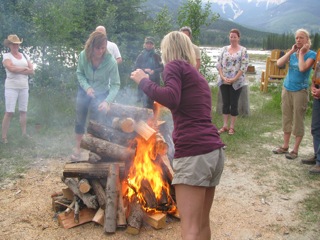
I love taking kids outside and teaching them about nature. It’s so simple too, especially when they are young. They love being out there anyway and I love to nurture that wonder and curiosity, fostering that appreciation for the world around them.

It’s one of the reasons I really like celebrating Earth Day – though I believe we should be doing things every day to save and protect the Earth, it’s a great opportunity to enhance that experience and perhaps expand on it a little more.

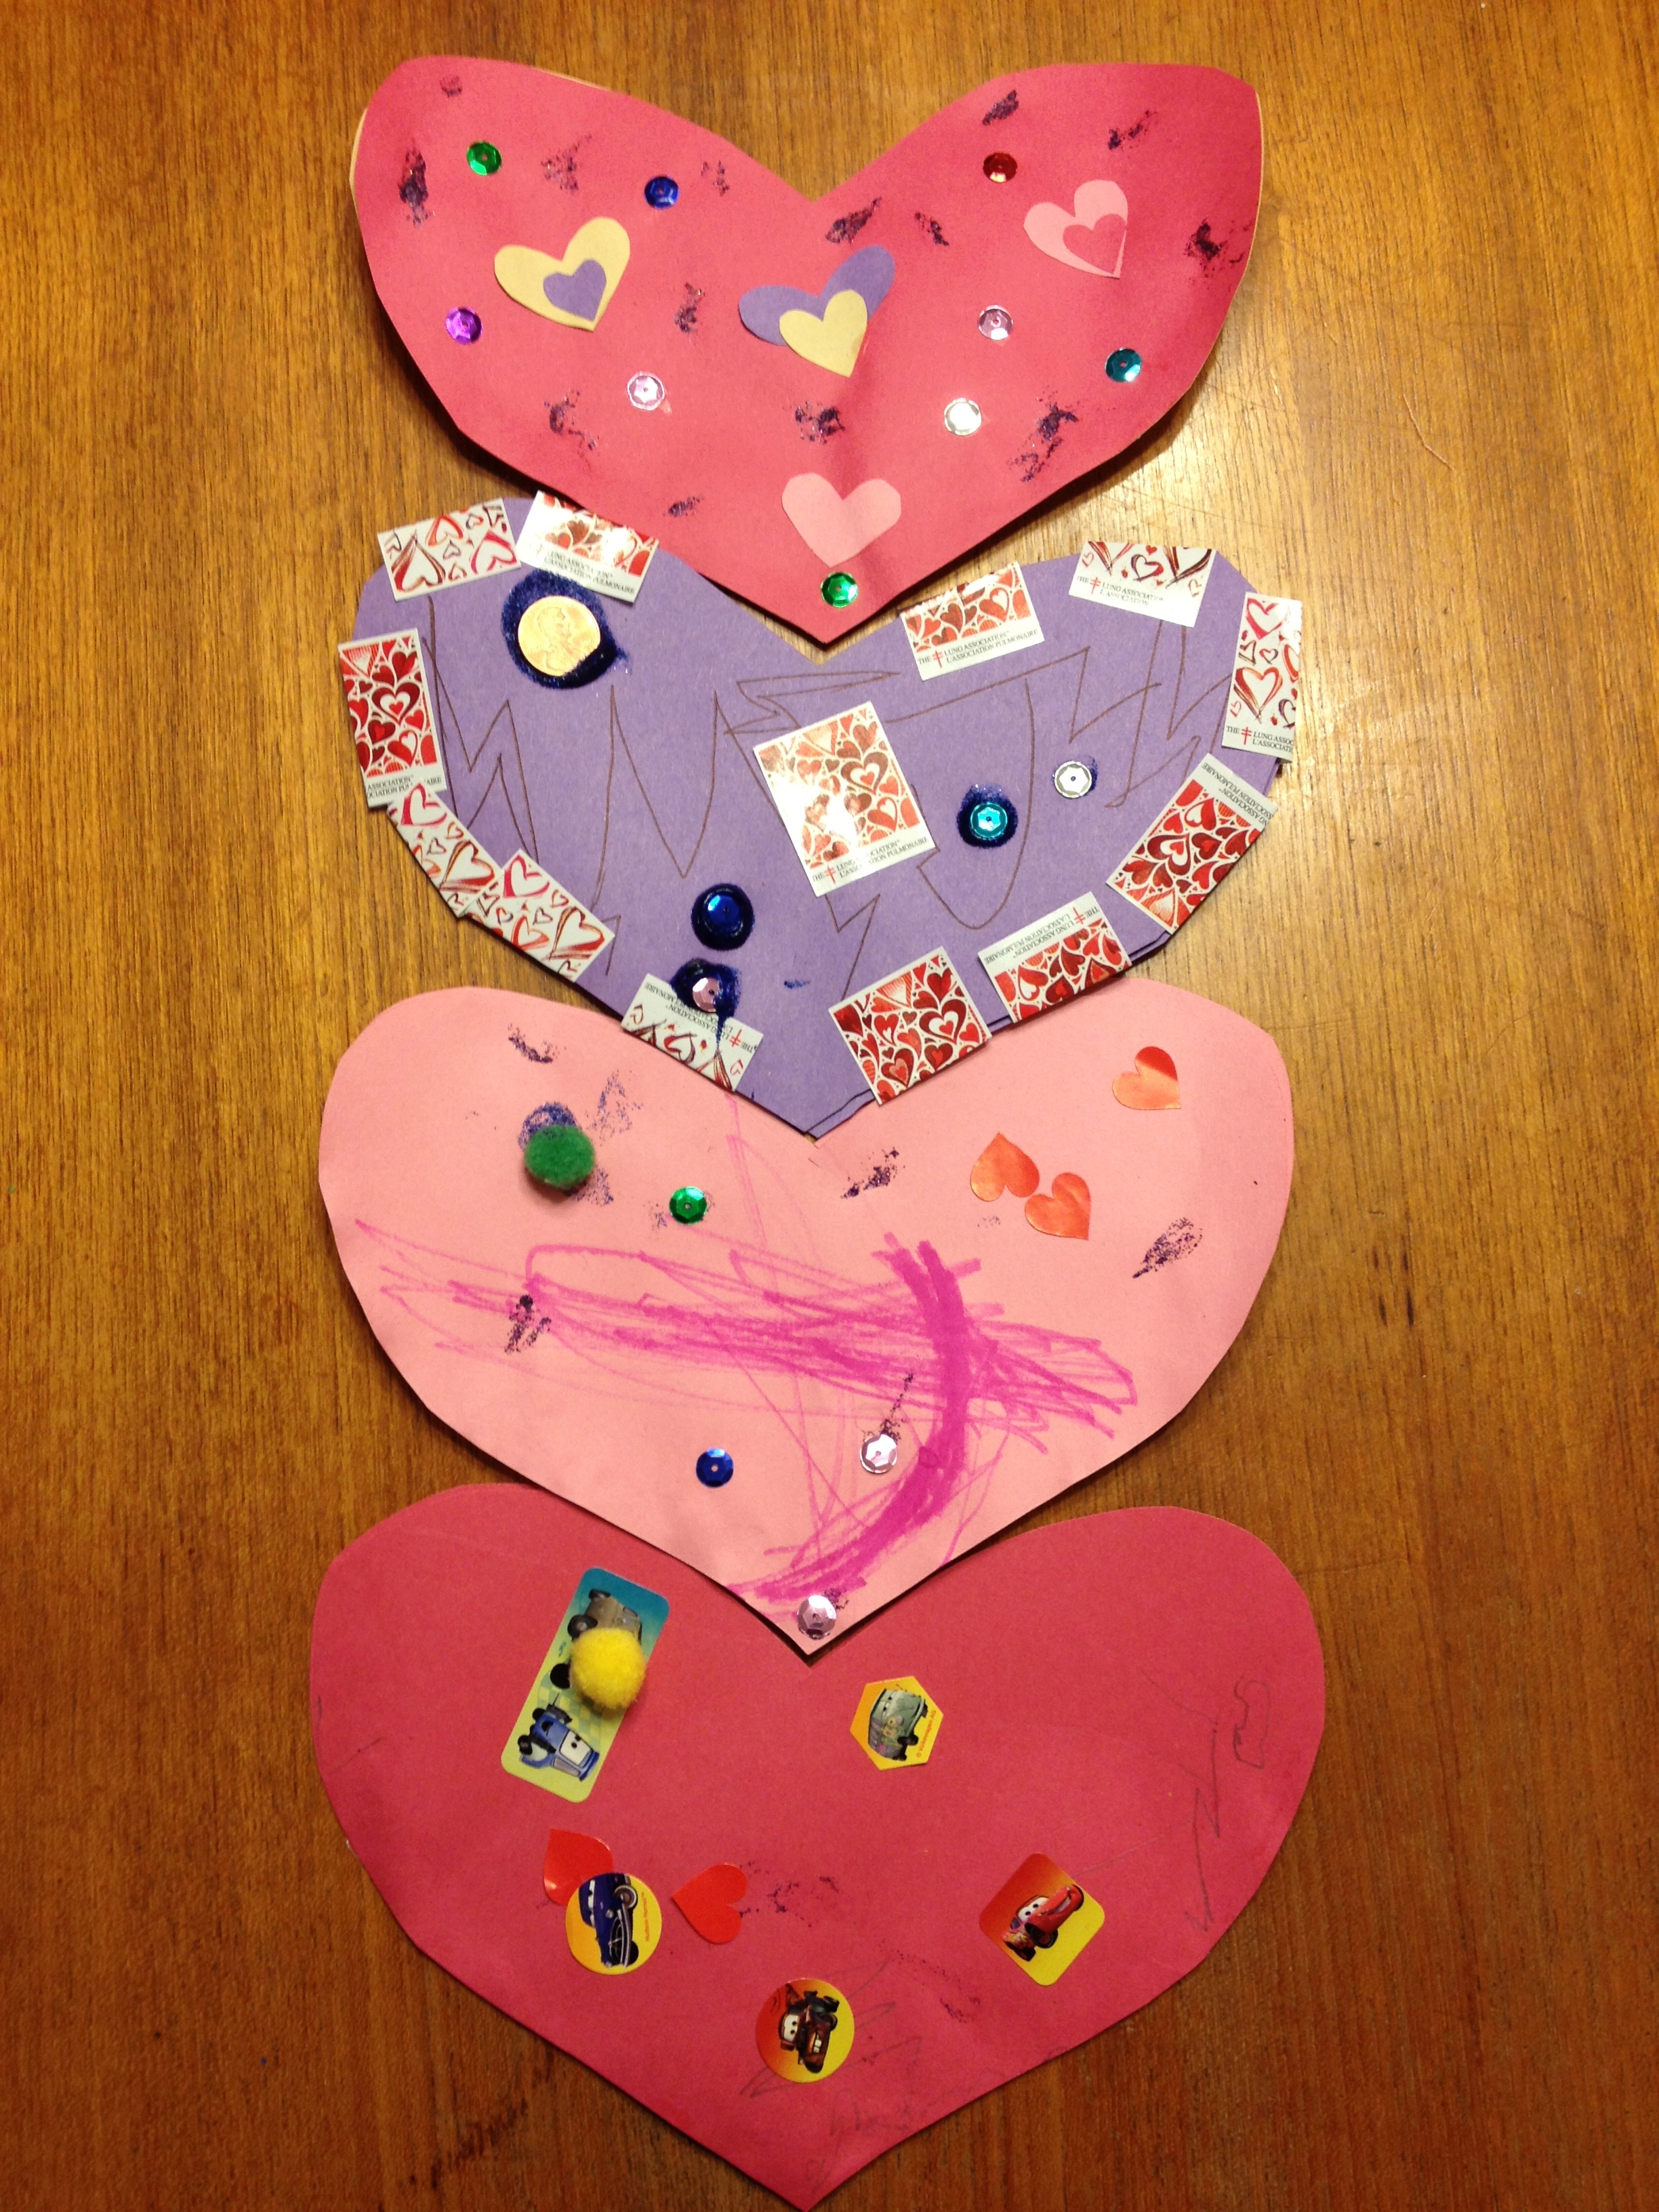
One of the things I like to do is find ways to create natural or environmental crafts that either highlight nature or are created from recycled/ reused materials to demonstrate that there are other uses for things we have around the house.


I also find that it encourages them to expand their mind and look at things a little differently. Like I need a watering can but don’t have one. What can I use that I have or create in order to meet that need? Or how can I take this natural item and turn it into something else, learning a little more about it at the same time?

Plus it reduces our impact on the planet by reusing things creatively (and teaches children to do so as well).

Try these Earth Day Crafts from Recycled Materials

Children of all ages enjoy making crafts, and it is an excellent way to teach them about reusing and recycling. Make these fun and easy crafts with items from around the house.

Plastic Jug Watering Can

What is needed:earth day crafts

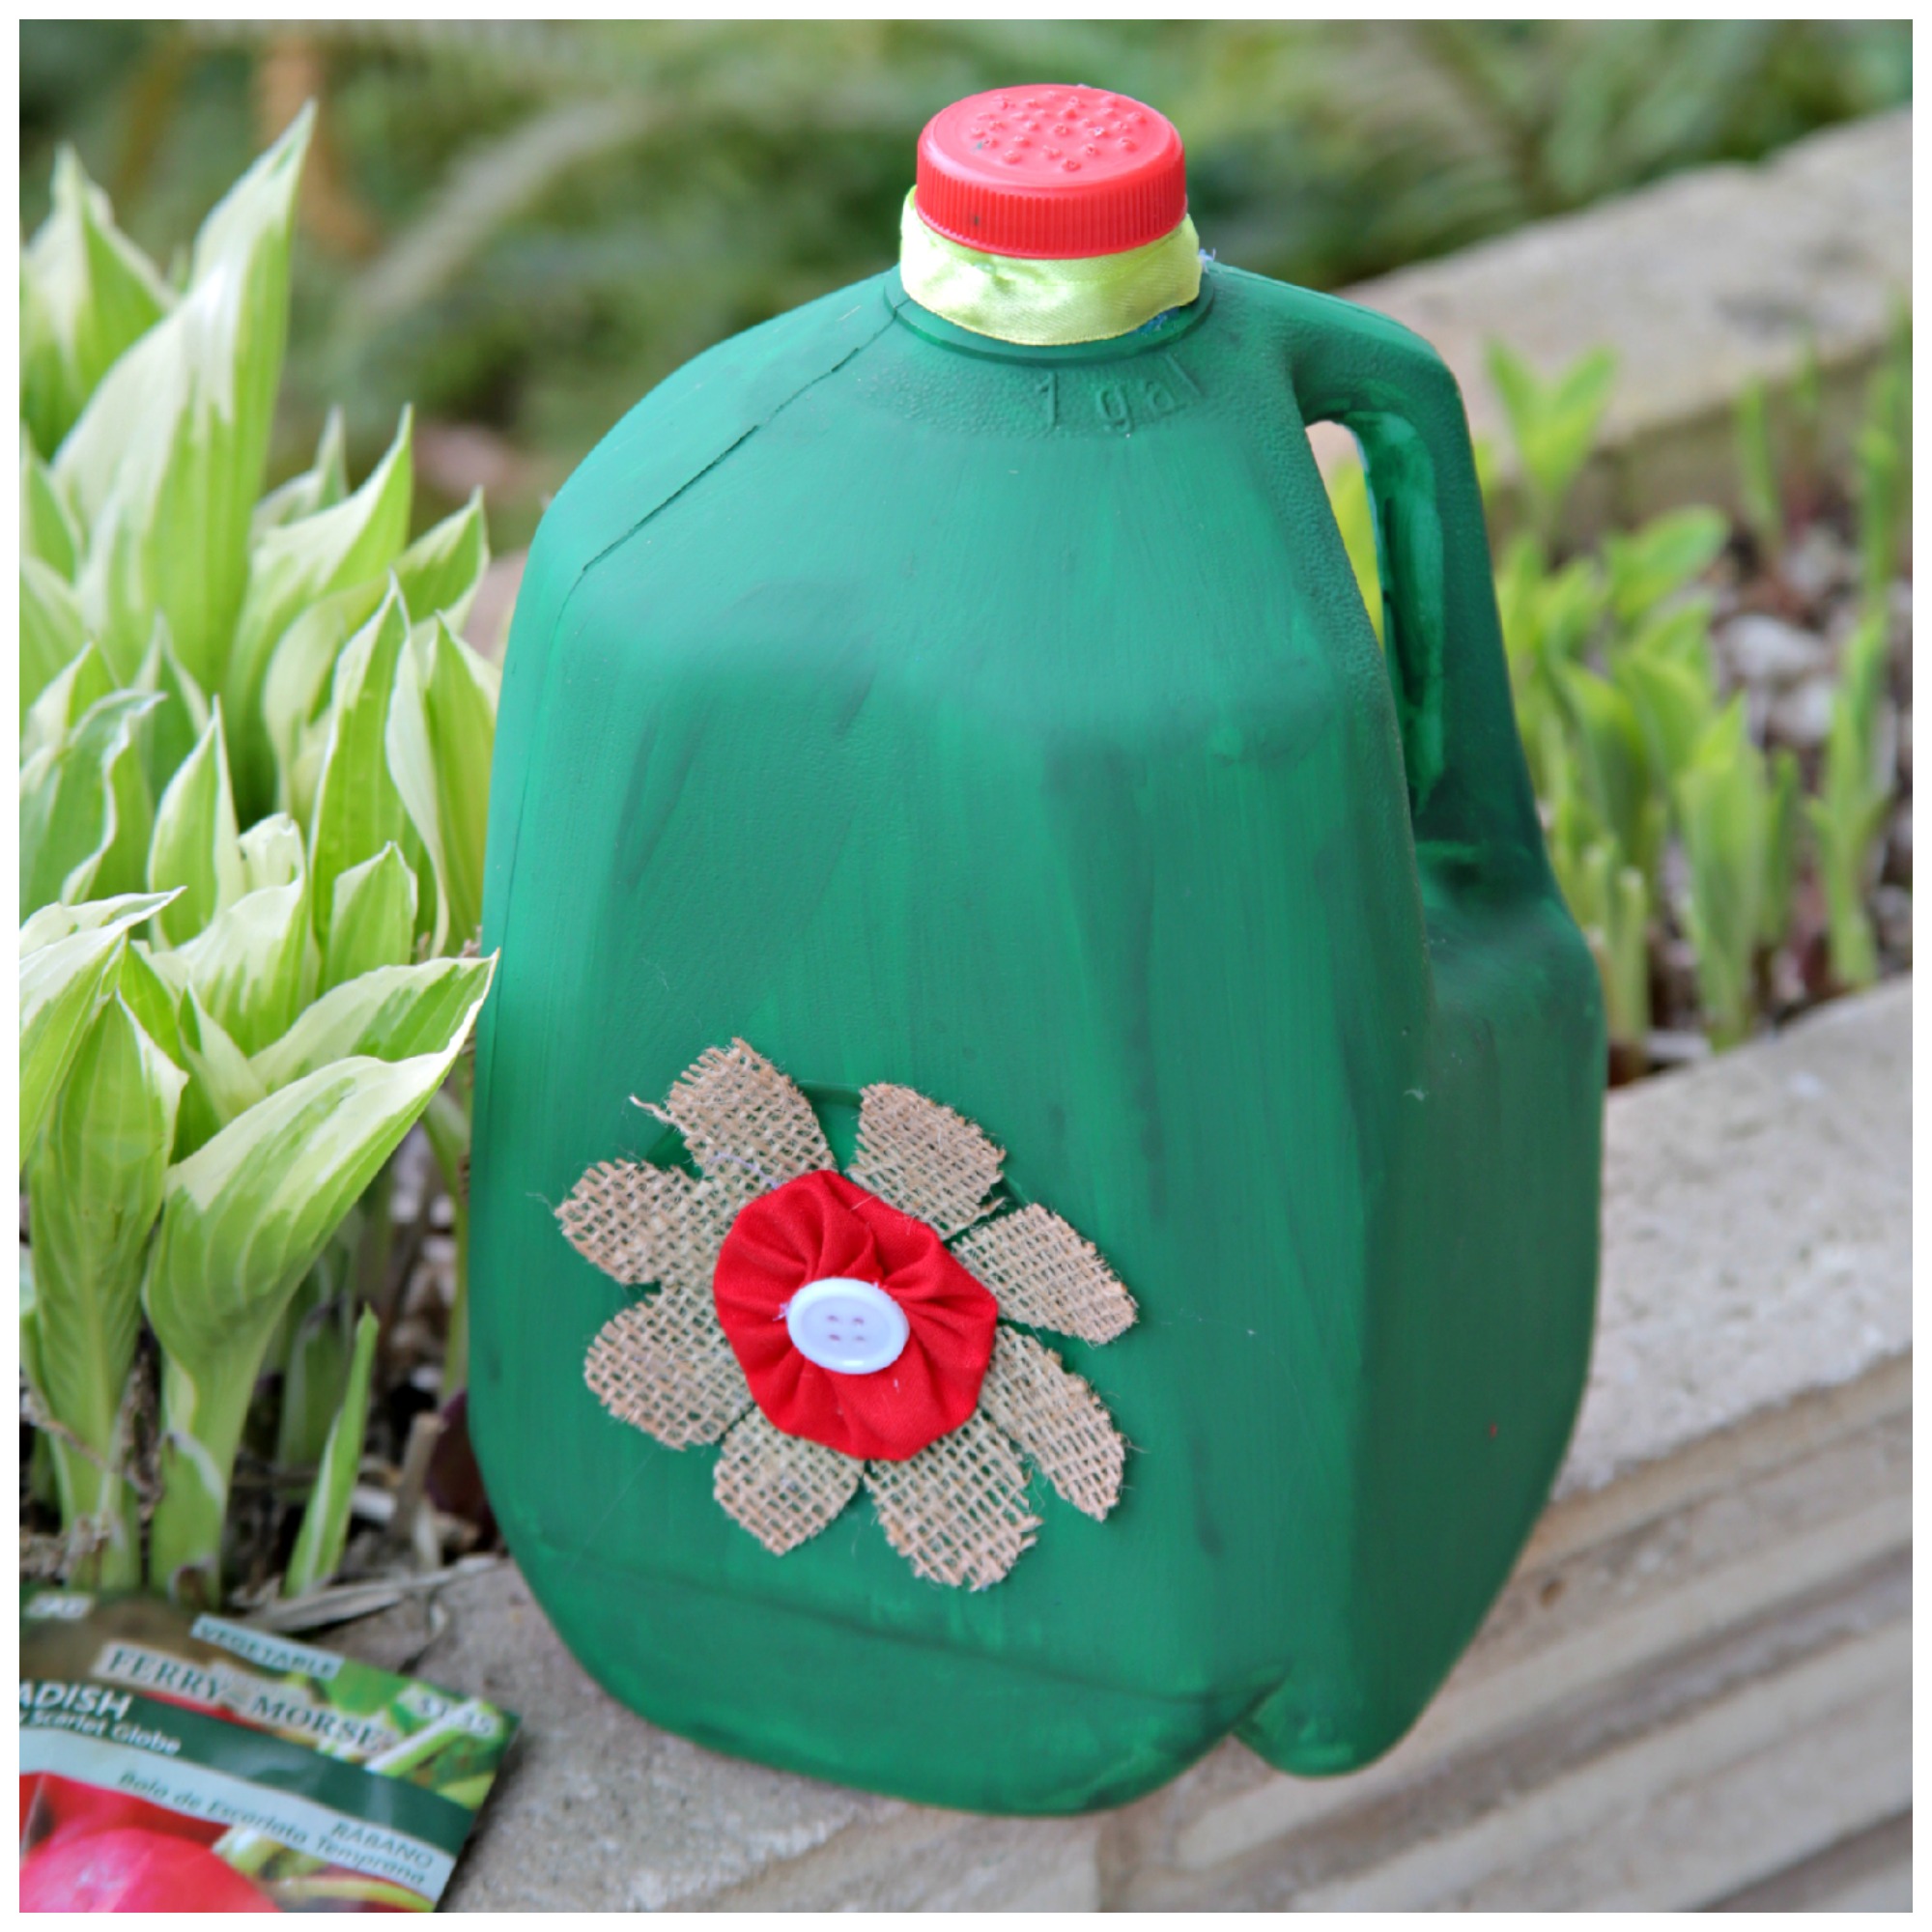
  • 2 litre plastic milk jug
  • small nail
  • hammer
  • stickers

Wash milk jug out thoroughly. Using nail, poke holes in the lid of the milk jug; this should be done by an adult. Have the child decorate the jug with stickers. Child may also decorate by painting the jug or gluing on buttons, beads or yarn instead of or in addition to the stickers. When finished, fill the jug with water, put on the lid and show the child how to tip the jug to water the garden.
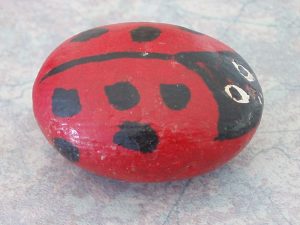
Ladybug Rocks

What is needed:

  • smooth, round, oval rocksearth day crafts
  • acrylic paint in colors of choice
  • 2 googley eyes per ladybug
  • black sharpie marker
  • acrylic matte sealer
  • white glue

Wash and dry rocks. Paint the rocks in desired colors, let dry. Paint 1/4 of the rock black for the head and let dry. Using the black sharpie, draw a line straight down the center of the rock. Dip the paintbrush in black paint and paint dots on the back of ladybug. Once paint is dry spray with acrylic sealer. Glue on the eyes when the sealer is dry.

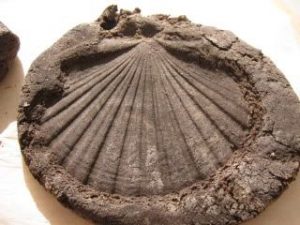
Coffee Ground Fossils

What is needed:

  • 1 cup of used coffee groundsearth day crafts
  • 1/2 cup of cold coffee
  • 1 cup of flour
  • 1/2 cup of salt
  • wax paper
  • mixing bowl
  • some small objects to make impressions in dough
  • empty can or butter knife
  • toothpicks
  • string to hang fossil, optional

Mix together coffee grounds, cold coffee, flour and salt. Knead dough and flatten it out on to waxed paper. Use the can or knife to cut out circles of dough large enough to fit “fossil” objects. Press objects firmly into the dough. Take object out. To hang fossil, poke holes into the edge to hold string. Let fossil dry overnight.

Paper Plate Earth (makes a nice keepsake)

What is needed:earth day crafts

  • small paper plate
  • blue paint
  • green paint
  • red construction paper – cut in shape of heart
  • white paper
  • paint brush
  • marker

Place the white piece of paper on table or counter. Make sure they child will be able to reach it easily. Paint one of the child’s hand green. Have them place their hand on the white paper, press down and then lift straight up to make a print. Let the hand dry.

Paint the paper plate blue, covering it entirely, so it looks like the Earth. Write the name of the person making the craft on the heart (if the child or person is old enough they can write their name themselves). While the paint is still wet place the heart on the left side of the plate – the wet paint will act like glue and it will stick. Cut out the green hand print in a circle shape, stick the hand on the blue plate on the right side. Let the whole thing dry.

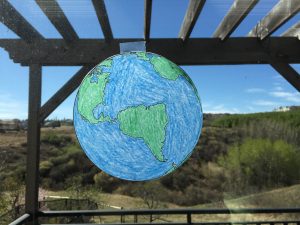
I also recently found this Stained Glass Earth and Earth Day Balloon Stamping that I really enjoy. In fact, love the balloon stamping! Can’t wait to try it with the kids.

earth day crafts

Whatever you choose to make the kids will love it, and though they may not connect all the dots today about what it’s all about, an impression will have been made and you’ll be surprised what they remember and appreciate! And if your child’s not the crafty type you can always try out some of these great Earth Day hands on nature activities.

What are your favorite Earth Day or Recycled Crafts?

Spring Rally in the Alley

Spring Rally in the AlleyI always love a trip to Heritage Park and this weekend was no exception. I was excited to check out Spring Rally in the Alley an event that I discovered while researching free activities for March Break. It sounded so cool and I couldn’t wait to take the kids and find out what it was all about.

Spring Rally in the Alley runs from March 18-28 and has a variety of activities for kids 3-12. The thing that I love about this is the activities are not just a random bunch of activities they have a theme that connects them! Yes I said I theme and I love a good theme. The Rally is set up around the Isle of Man Tourist Trophy Race, which is a real international motorcycle race that happens annually in May or June around the Isle of Man. Apparently, it is a super popular race that lasts two weeks and people who want to participate have to register 3 years in advance!

Spring Rally in the AlleyThis made the Spring Rally in the Alley even more exciting. When you enter, you receive a Milestone Challenge list, which is a passport with all the activities listed on it. You complete the activities in random order and once completed you receive a different colored stamp. Once you complete all the activities or challenges and get your stamps, you come back to the front to receive a ballot to be entered for the Isle of Man prize basket.

Now I am a person who loves going from station to station and collecting my stamps. And what a great way to engage the kids because they wanted all the stamps too! It encourages you to go to every activity and at least check it out. And for me personally, it made me do the “Find the Ride” Scavenger Hunt where you had to answer trivia questions, which I wasn’t really in the mood to do, but I wanted that stamp!

Spring Rally in the AlleyI thought the activities were very well put together, with something of interest for everyone (even my 12 year old enjoyed the remote control cars, selfie and scavenger hunt). There were crafts, where you made your own Rider’s Wristband, Practice Run, where you get to drive a remote control car, and my favorite the Cycle Selfie, where you can dress up in leathers and sit on a 1975 Ducati 860GT for a photo!

Spring Rally in the AlleyChloe loved Racing Down the Isle, where you race a tricycle and learn a little trivia about the actual Isle of Man race. Even after she finished her trivia she kept riding around and around on her trike. We went back to the remote control cars twice as well as the Hill Climb, where you try and get your motorcycle up the hill and just on the edge, before it falls over the cliff.

The bonus to all this? Is Reflections in Chrome – A Motorcycle Retrospective, a temporary exhibit “that sheds a little light and insight on our love affair with these two-wheelers”, is also part of the package. Entrance to Spring Rally in the Alley also gains you entrance to these motorcycles! Featuring 40 bikes from the Canadian Vintage Motorcycle Group. And wow, I love motorcycles, so it was super cool to see the evolution of this vehicle, as well as all the shiny new ones.

Though regular winter admission rates apply to Gasoline Alley, Spring Rally in the Alley is an event I would highly recommend for the family this weekend. Kids and adults alike will become quickly engaged and excited about what this event has to offer. And even if you don’t make it out this weekend, Reflections in Chrome goes until April 24th and is definitely worth the visit! (Where you can still have your photo op on the Ducati- because seriously that is super fun)Spring Rally in the Alley

Valentine’s Day Crafts for Kids

valentine's day crafts

Valentine’s Day is a great holiday to get creative with kids. There are endless crafts ideas with very little materials or preparation needed. Kids will love these easy, simple Valentine’s Day crafts from hearts to cupid!

All you need are things that are red, pink and white, some hearts and a little imagination! Children of all ages can make these easy crafts. Of course, parent supervision is recommended when doing any crafts, besides it is a great opportunity for you to be creative and use your imagination too. My two favorites are the Valentine Person (I love any craft with accordion folding arms and legs) and the Cardboard Tube Cupid (I just think he is super cute!)

Depending on the age of the children you may want to do some prep in advance, pre-cutting shapes or strips depending on the craft you are making. During the craft you may have to assist gluing and folding depending on the ability of the child; but some 3 years olds do very well with these activities with little or no help. The key is to let the child do as much as they can themselves not only because it is their craft but to help them learn certain skills and achieve success. This will also instill a sense of pride in their finished Valentine’s Day craft.

Valentine Heart Wreath

This very pretty, easy craft can be done with children of all ages. Younger children may need assistance with cutting.

What is needed:Valentine's Day crafts

  • different colors of construction paper
  • scissors
  • glue stick
  • markers/pencil crayons
  • cereal box

Trace a circle, about the size of a dinner plate onto the cardboard from the cereal box and cut it out. Trace a smaller circle about the size of a small plate inside the first circle and cut out the middle. Cut hearts that are approximately the same size out of construction paper, using a variety of colors. Note: smaller hearts will take longer to cover the wreath than larger ones.

Write different valentine words on each of the hearts like love, hugs, kisses, best friend, etc. Then glue the hearts around the cardboard ring until the circle has been covered.

Valentine Person

This is great for children 3 years and up. Younger children may need assistance with cutting out hearts, or have the hearts ready for them. Very easy craft that is lots of fun. Kids love the accordion arms!

What is needed:Valentine's Day crafts

  • red and pink construction paper
  • white paper
  • glue
  • scissors
  • markers

Cut one large heart out of red construction paper, this will be the body. Then cut 4 medium sized hearts out of pink for the hands and feet. Cut one small pink heart for the person’s nose. Put pink hearts aside.

Cut 4 long strips of white paper, these will make the arms and legs. “Accordion fold” the strips then glue them onto the red heart, one on each side for arms and 2 on the bottom (where the point is) for legs. Glue on one pink heart at the end of each strip for the hands and feet.

Glue small pink heart in middle of red heart for the nose. For the eyes children can cut out 2 more hearts and glue them on; they can glue on google eyes; or they can draw eyes on using markers. Similar options can be used for the mouth of either cutting out small hearts or gluing them on to form the mouth or draw it on.

Valentine Photo Frame

Great for kids 4 and up. Younger children may use only 1 or 2 colors if desired. Recommended that parent use the acrylic sealer when younger children are doing this craft.

What is needed:

  • small wooden unpainted photo frame
  • acrylic paint
  • paint brushes
  • craft jewels, buttons or stickers
  • acrylic sealer
  • white glue

Paint frame in 4 different colors, a different color on each side. Allow the paint to dry, then spray the frame with the acrylic sealer and allow to dry.

Once the sealer is dry select whatever decorations desired and glue them onto the frame. Some craft jewels may not require gluing as they have a self adhesive backing that can be peeled off and stuck onto the frame.

Add a picture of the child in the frame once dry and there is a wonderful gift for Mum, Dad, or that someone special.

Cardboard Tube Cupid

This craft is best done with children 7 years and up. It has many steps but is easy to do and very cute!

What is needed:Valentine's Day crafts

  • cardboard tube (toilet paper roll is perfect)
  • acrylic paint – peach, pink, white, black
  • paint brush
  • 1″ strip white construction paper
  • 1 gold (pipe cleaner) chenille stem
  • 1 red chenille stem
  • 1 silver chenille stem
  • 2 cotton balls
  • small piece peach felt
  • pencil
  • white glue
  • scissors

Paint cardboard tube with peach paint; let dry. Bend 2/3 of gold chenille stem into a letter “D”. Twist ends to secure and cut remaining long piece of chenille off. Remaining piece will be used to make arrow.

Bend end of red chenille into a small triangle; this will be the point of the arrow. Twist ends and trim long end off. Take remaining red chenille and bend into a red heart; this will be the back end of the arrow. Twist to secure and trim off excess. Take the remaining piece of gold chenille, twist one end onto the arrowhead and one end onto heart. Lay the bow on the table and glue the arrow across the front of it.

Cut the silver chenille stem in half to make wings. Bend both halves into tear drop shapes and twist ends to secure.

About an inch up from bottom of cardboard tube, apply some glue. Glue the 1″ wide strip of white construction paper around the tube and trim any extra. This is cupid’s diaper.

Stand the tube on end, diaper toward the bottom. Poke a hole on each side of tube with a pencil for the wings. Insert twisted ends of silver chenille wings into the holes.

Unroll the two cotton balls. Place some glue on the ends of both and attach to top of cardboard tube for hair.

Lay tube down on its side, wings sticking out to the left and right. Glue bow and arrow to the front of tube. Allow to dry completely. Cut two small circles from flesh-colored felt and glue to the front of the bow as the hands. In place of the felt, paint a piece of white paper peach and then cut out hands.

For cupid’s face, use a cotton swab or a roughed up paintbrush to dab some pink paint on for cheeks. Use the handle end of a paintbrush to dot on two white eyes. Let dry. When white is dry, dot on black. Two google eyes may be used instead of painting on eyes.

Valentine’s Day Crafts for All Ages

Valentine’s Day crafts are fun and enjoyable. One will find that there are many ideas and levels of crafts available, from very easy to a little more involved. Kids of all ages enjoy working with their hands and getting creative. Valentine’s is a great way to teach them about love and giving in a fun, interactive and creative way!

For more ideas on Valentine’s Day crafts check out Kaboose and Enchanted Learning.

Easter Activities and Ideas

easter-bunny-2Well I have to admit that Easter has snuck up on me again! You would think that with calendars and the kids talking about Easter for the past month or more that I would have been more on top of it. But here we are the week before, actually only a few days away, and I have ‘clued in’ that maybe I should get ready for Easter.

We did dye eggs last weekend, which Luke and Chloe have been asking to do since the beginning of March, but that has been it so far. I always find there are so many cute and fun things to do around Easter and I have such great ideas! Then it comes and goes and we have done very little. And honestly the kids don’t notice really, but it is me who knows that we could do so much more!

easter activitiesThe things we typically do for Easter are an Easter Brunch on the Sunday, an Egg Hunt and search for Easter baskets. Prior to the day we usually color eggs and make a craft or two. We used to participate in some of the community Easter events, which usually include an egg hunt, but the challenge is now, the treat at the end contains ingredients that we do not eat, so I think it’s unfair to take the kids out and not let them have the prize. So we find other things to do.

We also now have a sugar free Easter, which is a little more costly, but pretty easy to do. The Easter Bunny brings socks and toys, chalk, bubbles, play doh and the like. The twins love it and don’t know any different because that is what it has always been for them. Matthew still struggles with the lack of candy in his basket but overall does ok as they are all getting the same. It is challenging though as the kids get older and hear and see what other kids get for Easter, or any other holiday for that matter. I guess that’s one of our many challenges as parents, making a decision for your family and hope for the best, trusting that you have made that decision for a good and sound reason – though the children, nor others, may not always agree with you.

easter activitiesThe bottom line is my kids still get to enjoy Easter and the many things that are part of it. The Easter Bunny still comes to see them, he’s just changed what he puts in the baskets and eggs. I have an Easter mold so I make some chocolates, so still get chocolate to enjoy and it’s better for us. Yes it takes a little more prep and effort but it’s worth it in the end.

So if you’re looking for ideas for things to do this Easter here are some great crafts and activities I have found over the years. Our favorites are the Easter Chick and dying Easter Eggs.

easter activitiesThere’s also some great tips and ideas on how to reduce or eliminate the sugar fest in the Easter baskets, as well as ideas to plan your own Easter Egg Hunt. Also some fabulous recipes for Easter Brunch, my favorite is always the Impossible Quiche, quick easy and I have modified it to make it dairy free and no one knows the difference!

What are some of your favorite activities and crafts or Easter Brunch recipes?


Party! Party! Party!

scaled_photoWelcome! I am very excited to be joining the Ultimate Blog Party 2014 again this year! I think this is a great opportunity to get out there and connect with other bloggers while sharing the things that you love, including your own blog! Thank you to Janice and Susan of 5 Minutes for Mom for hosting this fabulous event.

If you are new to Momma on the Move I’d like to thank you for stopping by and for those of you who are returning welcome back. It is a pleasure to have you all here.

8095971047_2a93f46d0a_bMy name is Carmen and I have 3 beautiful children, 4 year old boy/ girl twins and an older son. I grew up on the East Coast and have a deep love for the ocean. I love the outdoors, travelling, exploring new places and to getting out there to enjoy and embrace life!

The kids keep me busy with the twins now in preschool and our decision to eat sugar and dairy free at our house. When not playing with or helping the kids, I am in the kitchen trying out or modifying recipes to meet our needs. I have even been dabbling in some gluten free recipes over the past year as well.

IMG_2646We made the decision to remove sugar, back when my Matthew, my oldest was in grade 2, due to behavorial and sleep challenges with him. It was amazing the difference it made! Shortly after we went dairy free as I discovered both myself and my daughter had an intolerance and the gluten well, when I discovered I was still feeling tired after eating a dairy free/ sugar free muffin, gluten was the only thing left!

I have always loved to write but started blogging because I felt that I could share more faster and reach a larger audience. I find that there are so many things to share and explore, as life is a story. Everywhere we go I am taking pictures and thinking about how I make this into an informative, yet interesting blog post for my readers. Everything from crafts and activities for kids, our adventures camping and in the outdoors, to the many sugar and dairy free recipes, I like to blog about it!

I also like to include tidbits about the importance of taking time for ourselves, gratitude and being ambassadors for our planet.

I like creating a community where we can share, interact and learn from each other. Plus it’s stretched me in the world of technology as well!

IMG_2106Now that you’re here, sit down grab a cup of coffee and take a look around. Let me know what your favorite posts are, what you’d like to see more of. Leave a comment sharing with me who you are and where I can find you so we can connect and get to know each other. I’m looking forward to visiting everyone’s sites and making new friends.

Here are some of my favorite posts:

Firewalking

Rainy Day Activities

All Things Pumpkin

Natural Sugar Substitutes

RAK your Brain

Firewalking

Firewalking


Grasshopper Popsicles

Enjoy! See you at the party!

Let’s stay connected! Here’s where you can find me

Facebook

Twitter

Pinterest

Google+

The Art of Appreciation

IMG_2699Well Valentine’s Day is around the corner and even though it is one of my favorite holidays, it often tends to sneak up on me! Each year I find that February starts and then all of a sudden we are in the week before Valentine’s Day and I have not done much at all.

All of a sudden we have Valentine’s to buy for the kids classes, treats to make and some kind of plan to celebrate this fun loving day. See though I love the romance and having someone treat me royally on this special day, I also love to make it special for my kids. I believe that Valentine’s is not just for lovers but is a day to celebrate love in general and there are all kinds of love.

So I usually make a nicer dinner that night, I make heart shaped chocolates for treats that day. This year I made heart shaped cupcakes! as I found a heart shaped cupcake pan at Superstore. I also saw heart shaped ramekins but didn’t buy them when I saw them and missed out 🙁 They actually sold out within the week!

8095938392_66f01dc36d_bI also like to have the kids do a craft of some kind, yes it’s usually heart shaped, so today we did something really simple. We made heart shaped pockets. We cut out two hearts the same size decorated one and then glued the two together leaving the top open so we could put things in it. Then each day from now until Valentine’s we are going to put a nice note in everyone else’s heart. Something we like about them, enjoy doing with them, etc. I am also a believer in extending these holidays, why do they have to only be one day? Especially when there is such a nice message attached with Valentine’s in particular.

5973578-heart-shaped-chocolates-isolated-on-white-backgroundBesides we could all use a little pick up during the day. A reminder of the good in us and in the world. My intention is not only to do this this week but see if we can’t start something like this on a more regular basis, Valentine’s day or not. I think we often forget to tell people in our lives how much we appreciate them and mean to us. We shouldn’t just save it for birthdays, Valentine’s or other holidays. You never know how a kind comment or an act of love can make a difference in someone’s day.

So maybe after Valentine’s is over we’ll make new ‘pockets’ out of paper bags and continue the warm fuzzies, encouraging comments and notes of appreciation to each other. And I have a feeling it will not only make a big difference in our home but in our lives and the lives of others that we touch on a daily basis.

Valentine’s Pockets

Materials:

Red, pink, white and purple construction paperIMG_2696

pom poms (variety of colors)

Valentine stickers

sequence

markers

glitter glue

white glue

scissors

Method:

Select color of construction paper that you desire. Fold paper in half. Trace a heart on one half of construction paper. Cut out heart through both halves  – you will end up with 2 hearts the same size. Young children may need help tracing and cutting the hearts, while older children can do this on their own.

Decorate one of the hearts with stickers, markers, pom poms, glitter glue, etc. Allow the child to create whatever decor they would like. Once they are finished decorating glue the two hearts together leaving the top open so that it creates an opening to put things in.

Allow glue to dry. Once dry hang hearts in a prominent spot where everyone can access them to put in their notes to each other.

Playing with the Fairies

As a child, growing up fairies were not uncommon. They were in our books and stories and parents would often refer to them as helpers of some kind or another. Magical, whimsical creatures that are playful and fun, yet can also be mischievous.

As I grew up I never thought much about it until I embarked on my spiritual path and started learning more about Angels, Fairies and other realms. It’s all pretty fascinating and if you choose to believe and work with them, can be quite magical.

Fairies are the protectors of animals and the environment. They are wonderful healers, helpers and help us to remember the importance of play. Though they are the most abundant outside they can also reside inside as well. They love lush, wild and natural gardens and will help you create a beautiful garden if you wish (among many other things).

Children especially can relate to and connect with the Fairies. Because they are so open, creative, imaginative and accepting with pure hearts full of love, the fairies often easily connect with children.

A great way to welcome fairies to your garden or home is to create fairy houses – and whether you choose to believe in them or not, this is a great craft for the kids that is lots of fun and can add wonderful decor to your garden.

In fact I taught a class a number of years ago with children about fairies and we made our own fairy houses. In a class full of only boys, they were so focused and engaged for 45 minutes! making their houses with great attention and detail. I was also so excited about it I started my own fairy house.

You can make your house out of pretty much anything but here’s what you need to get started:

popsicle sticks

white glue

glue gun (kids use with adult supervision)

small glass beads – clear or colored 

twigs

leaves

acorns or pinecones

play doh or clay

small pieces of bark

small stones

tin foil

For the base you can either make four walls out of popsicle sticks or you can take twigs and glue crossing over each other, log cabin style. This is how I started my house and then made a popsicle stick roof. Basically what you want to do is create a base for your house, four walls and a roof and then decorate it adding in things like a stone chimney (toilet paper roll with small stone glued to it and put on the roof), glass beads to outline doors and windows, clay to cover the roof and give it texture, etc. Get creative!


You can either have the kids sit down and design their house first on paper or if they like to create as they go along that works too. What I did was take the kids outside to create their design and then gather materials to make their house. They gathered things like leaves, twigs and small stones – I had brought old branches from my raspberry bush – to make their houses. The more natural materials you can use the better as the fairies will appreciate it! Also ensure that you are not picking live things to create your house, gather things that are already on the ground.

Whatever the kids come up with will be beautiful and appreciated. You can also make a house within your garden by building around existing trees and bushes, setting up paths, etc. And the fun part is putting it in your garden and then watching for signs of the fairies coming there!

*Note: if you are putting your homemade fairy house outside you’ll need to use a sealer once you are done building to make it waterproof, so that it is protected in the rain.

Would you like to learn more about the Fairies? Join me live on April 14th for a free workshop all about the Fairies!


For more information and ideas on how to make a fairy house check out these websites http://www.fairyhouses.com/about-fairy-houses/how-to-build/ http://www.wikihow.com/Make-a-Fairy-House

Learn more about the Fairies in Fairies 101 by Doreen Virtue. This is a very easy read and a great introduction to them and what they are all about.

Easter Crafts for Kids

I tend to get very excited about Springtime, especially Easter. The sense of rebirth in the air, the warmth of the sun on my face, the flowers beginning to peek through. The kids get excited and start asking to play outside more, enjoying the warmer weather and all that comes with it – the mud, the grass and the rubber boots. It truly is a time of year when things re-emerge and come out of the darkness, the long ‘hibernation’ of winter.

With Easter of course there is the excitement of the Easter Bunny and all the other cute springtime animals, such as chicks and lambs. The hunt for eggs and Easter Baskets and the goodies that they find.

I often get the kids ‘into’ the holiday by doing some crafts around that holiday. I find it fun because I like to search out and try new crafts with them, and they love it, well because they just love crafts! Yesterday we made paperplate bunnies, which were easy and simple for them.

It’s neat to watch Luke and Chloe do their crafts as you can really notice the differences in how they do things. Chloe is definitely more of a follow the rules and the pattern when it comes to crafts and Luke is more of take the concept and get creative with it kind. He takes things more out of the box and expands upon the idea – which I just let him do, as I believe that is all part of learning and growing, and enhances his creativity.

Paperplate Bunny

What you will need:

  • small paperplate
  • white paper
  • googley eyes
  • small pom poms
  • ribbon
  • black and pink markers
  • glue
  • scissors
Trace bunny ears on piece of white paper. Cut them out and set aside. Take one small paperplate and glue on googley eyes and pom pom for nose. Using black marker draw in the mouth. Using pink marker color inside of bunny ears a little. Glue ears to paperplate at the top. Tie ribbon into a bow and glue on bottom of paper plate. Let glue dry completely.

Fluffy Pinecone Chick

This adorable little chick is completed in steps, but is well worth the waiting time in between. We made this a couple of years ago with Matthew and he loved it, in fact he kept it in his room for a long time before it made it’s way out of the house. Children 3 years and up can easily complete this craft with parent help.

What you will need:

  • large fat pinecone
  • pencil
  • yellow paint and paintbrush
  • fiberfill (cotton batting)
  • felt scraps in white, blue, orange, yellow
  • green construction paper
  • Easter grass
  • glue
  • scissors

Paint the pinecone yellow and let it dry. Once dry, wrap the pinecone in thin layer of fiberfill. Use pencil to poke the fluff between the scales of the pinecone. From the felt scraps cut out wings, a beak and eyes and glue them onto the body. Cut a 10cm circle out of the green construction paper and glue the Easter grass on top. Then glue the pinecone chick onto the middle of the grass.

Stained Glass Egg

What list of Easter Crafts is complete without an Easter Egg! This super easy craft is great for little ones as the tearing of the tissue paper will utilize their little hand muscles and strengthen their hand eye coordination.

What you will need:

  • colored tissue paper
  • construction paper
  • scissors
  • hole punch
  • ribbon
Trace a large egg on a piece of white construction paper. Cut out egg. Tear different colors of tissue paper into small pieces. Glue the tissue paper onto the construction paper egg. Let glue dry. When dry punch a hole in top of egg, lace ribbon through and tie at top to make a loop for hanging.
No matter which craft you choose the kids will have a great time and some great decorations for Easter. Splashes of color for spring and lots of fun while doing it.
Now my kids are asking to color Easter Eggs – yes the whole dye the eggs – which my 9 year old has never done -oh dear I have neglected my duty as a mother. That should be an interesting experience…


Leprechaun’s, Shamrocks and More – St. Patrick’s Day Crafts for Kids


Chloe and Luke making their Shamrock Man

St. Patrick’s Day is one of those fun unique holidays that you can really get into if you choose to. I’ve always loved the concept of green beer, (as an adult of course), shamrocks and leprechaun’s and pots of gold. And it is the one day that you can never get too sick of the color green!

I always find holidays like this so much more fun when you can celebrate with kids, whether it be your own, nieces, nephews or children you work with. As usual there is a plethora of St. Patrick’s Day crafts that are fun and colorful to make surrounding this holiday.

I had planned to make a couple of these crafts with the kids only to find when I went to our craft supplies that we were missing a few things. No matter, tomorrow a trip to the dollar store will remedy that. We were able to make Shamrock Men, which is one of my favorite crafts due to the accordion arms and legs (I have done a similar heart man for Valentine’s Day).

Luke and Chloe enjoy making crafts and as soon as I announced that we were making one they ran into the kitchen and sat down at the table. I had precut the shamrocks and strips of paper but I let them do all the folding and glueing and Chloe even drew a face on her shamrock’s by herself. Chloe was very into it, while Luke though interested got easily distracted with trains and playdoh, but he did finish it.

Both Luke and Chloe squealed with delight when they were done and started making their shamrocks dance and sing. It was pretty cute to watch. Tomorrow I would like to make the pot of gold which will probably end in a lot of glitter everywhere, but that’s ok we can all sparkle for a while.

I love the make your own Blarney Stone idea as well (below,) but we needed to gather a few supplies to do that one and could easily get away with making it after St. Patrick’s Day. I myself, have been to Blarney to kiss the Blarney Stone, set high up in the castle of Blarney; and it is quite a unique experience. I am not going to spoil it by telling you what happens as I think half the fun is experiencing it for yourself, but let’s just say it was not what I expected! Needless to say if you have the chance go and do it, it’s worth it. In the meantime you and your little ones can enjoy your own little Blarney Stone at home.

I imagine the kids will love creating their own and will be kissing them in no time (reminds me of kissing frogs for some reason – ha ha).

St. Patrick’s Day Crafts

Pot of Gold

black and green construction paper

white glue

gold glitter

scissors

paper plate

something small and round to use as stamper to make gold coins

Draw and cut out pot on black construction paper. Glue the pot onto a piece of green construction paper, centering it and leaving enough room at the top to make the ‘gold coins’.

Pour glue on paper plate, dip stamper into glue and press it onto paper above pot. Pour gold glitter on paper until glue is completely covered. Gently tap the back of paper to remove any excess gold glitter. Tip – tap it onto another paper plate or piece of paper so you can use excess glitter for future crafts. 

St. Patrick’s Day Shamrock Man

green construction paper

white paper

googley eyes

glue

scissors

black marker

Draw a large shamrock on green construction paper and cut it out. Draw 4 small shamrocks on green construction paper and cut them out (these will be for hands and feet).

Cut 4 strips of white paper about 1 inch wide. Fold the strips back and forth like an accordion. Glue 2 strips either side of large shamrock for arms, glue the other 2 at the bottom for legs.

Glue small shamrocks on the ends of each strip for hands and feet. Glue googley eyes on large shamrock and draw in mouth with black marker.

Blarney Stone

Blarney Castle, Ireland

smooth clean river rock

brush

green paint

glue

markers

glitter, sequins, jewels, bits of yarn

Make sure rock is clean and dry. Paint it green. Let dry.

Once paint is dry decorate with glitter, sequins, etc. When glue is dry from decorating draw on face using markers.

Luke folding his accordion arms

Voila! Your own kissable Blarney Stone.


Deals of the Week: New deals every week, online only!

Groundhog Day

Groundhog Day is one of those holidays that although is only a one day event can be a wonderful celebration. Groundhog Day is when the groundhog emerges from his hollow after winter hibernation and predicts the arrival of spring. If the groundhog sees his shadow when he emerges he pops back into his hole and there will be six more weeks of winter. If he does not see his shadow then he remains out of his hole and means it will be an early spring.

There is a long tradition of celebration on this day from early morning festivals to see the groundhog emerge, with family and kids activities, parades, crafts and concerts. Some zoos have events as well that usually feature a presentation about the groundhog.

Bill Murray in Groundhog Day

The most famous groundhog is Punxsutawney Phil of Punxsutawney, Pennsylvania. (This is also where the 1993 film starring Bill Murray, Groundhog Day takes place. This is a wonderful and delightful film that is family friendly, if you haven’t already seen it, I would recommend it). But each town/ area has their own groundhog.

There are lots of things you can do with the kids on and around groundhog day too. There are crafts and activities, coloring pages and tongue twisters,  community events and of course the zoo!

Groundhog Day is a unique holiday that is recognized around the world. Why not take advantage of the day and check out what activities there are to go out and celebrate. (It’s a great opportunity for learning for the kids too – as well as a lot of fun).

What are you going to do for Groundhog Day this year?