How to make Raw Organic Chocolates

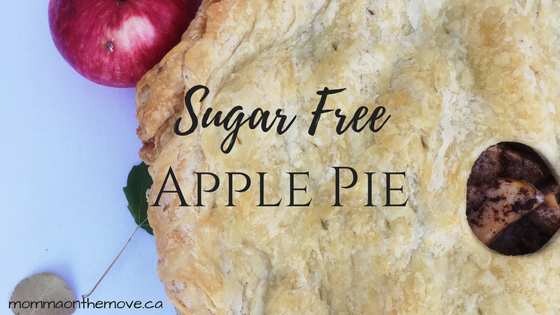
About 8 years ago I took a class at The Light Cellar, here in Calgary, on how to make Raw Organic Chocolate. No sugar, no dairy and all natural ingredients. I was thrilled to find this course as I had been looking for an alternative so that we could enjoy chocolates at Christmas, Easter (and whenever else we wanted some!) without the refined sugars.

I had taken a chocolate making class before, bought the kit, came home and never made chocolates again. This time was different. The difference was you actually make your chocolate from scratch, from natural ingredients and it is very easy (the other class you made your chocolates from premade chocolate bars or pieces that you melted and molded into your own chocolates. I found this process finicky and the pieces were presweetened; so you could not choose your own sweetener).

Chocolate actually comes from a cacao nut, which is made into various forms, such as cacao powder, paste, butter, etc. Making the chocolate is super simple, using four basic ingredients and only takes a few minutes. All you need is cacao powder or paste, cacao butter, some kind of sweetener (honey, agave nectar, pure maple syrup, etc.), and vanilla.

The first step is to melt the cacao butter in a bowl – use the double bowl method with the butter in the top bowl set over a bowl of boiling water (boil water put it into bowl and set on counter; then set your smaller bowl with cacao butter on top)- be very careful not to get any water into the top bowl as it will ruin your chocolate! Once the butter is melted add the vanilla bean and let it infuse (with a knife slice vanilla bean down the middle and scrape out the seeds with a spoon – put into cacao butter). Sift your cacao powder in another bowl and add to taste, then add sweetener of choice. Voila! you now have a nice chocolate sauce which you can leave as is, pour into a pan refrigerate or freeze, or use as a base and add other ingredients.

The instructor did not give us exact amounts of ingredients to make our chocolate. He would provide a starting point and then encouraged us to taste it; to make it how we wanted. He recommended we start with a 1:1 ratio, mix it and go from there. More cacao powder made it a darker, richer chocolate, more sweetener made it sweeter – adjusting it according to our palette and preferences, so we had to taste it as we went along! He also encouraged us to use natural sweeteners and ingredients. For instance, we were using vanilla beans for our vanilla -actually cutting them open and scrapping out the inside. He said we could use vanilla extract but encouraged us to use pure extract if we did, not artificial.

Cacao powder

He described using these pure ingredients as “upgrading” – making it more natural, tastier and better for you. He also told us how we can add other natural ingredients to our chocolates that not only taste good but are high in nutrients, minerals and vitamins,  making it a superfood. Ingredients like goji berries, nuts and seeds, coconut and algae and essential oils. Maca root powder, honey and mesquite powder. He even recommended in one recipe that we try a little cayenne. It was actually really good!

As for the cost, the ingredients to make your chocolate is quite reasonable. The instructor said that in the time it takes for us to go and buy chocolate at the store, we can make it at home faster with fresh ingredients for about $1.50 to $2 per 50 g – which is comparable to what you would pay at the store.

Shaped ice cube trays work great as chocolate molds

I also love the fact that I can add all these “superfood” ingredients to my chocolates so that chocolate really is good for me and the kids. So when they ask if they can have some chocolate, I can say “yes” without feeling guilty or worrying if they are having too much.

It’s also so much fun to make (I’ve already made 3 dozen caramel cups and orange ginger snowmen for Christmas) and easy to do with the kids. You can get different kinds of molds to make different shapes for your chocolates. Experiment and have fun!

In one of my previous posts I described various natural sweeteners that you can use not only in your everyday cooking and baking but for your chocolates as well. Check out that post for more details.

In an upcoming post I will share more about what you can add to your chocolates.

For your information The Light Cellar sells ingredients to make chocolate in bulk and is very well priced. I buy all my ingredients there and usually come out of the store with a big box of items! I find it hard to get out of there with only one or two things.

You can also find many of these products online – Amazon.ca as well as Superfoods.com will carry these products at reasonable prices.

Sugar Free Thanksgiving Recipes

Thanksgiving Turkey

Thanksgiving is one of my favorite holidays. I am not sure if it is because the meal contains so many foods that I love, such as turkey, stuffing and gravy, or my favorite pumpkin pie! (Actually I love anything pumpkin – pumpkin muffins, pumpkin spice lattes)! Or if it is because of the warm, comforting feeling that surrounds the holiday. The fall season, that makes me think of burning candles and cozying up by the fire.

Pumpkin muffins

Either way I thoroughly enjoy it, and it is something that I look forward to. Last year, when we went sugar free at our house, I was a bit concerned, in fact I was very concerned about how to make my pumpkin pie. This was not something that I wanted to give up. Was it possible to find or create a recipe that would be just as good? I hoped there was, so I started looking and within a short time discovered a recipe that met my requirements and was just as easy to make. I found the recipe at Honey Bunny, the same company that makes the Bodacious Tomato Ketchup and BBQ sauce that we now buy. The Honey Bunny recipe called for evaporated milk and since we are also a dairy free household made a simple adjustment and used coconut milk instead. It turned out beautifully! and was just as delicious if not more, than what we were used to. In fact I think we all had 2 pieces!

The other thing that I adjusted last year was our cranberry sauce, as store bought brands contain a lot of sugar. I have never been a fan of cranberry sauce, but others in the family enjoy it. So I decided to make my own. I got the original recipe off the bag of fresh cranberries and simply substituted honey for the sugar. Again I had great success! and even I enjoyed some cranberry sauce last year.

I find that the highest amounts of sugar that we consume are around the holidays, and Thanksgiving marks the beginning of a lot of feasting and delectable delights. I know many people who feel like they have overindulged during the holidays and put themselves on a strict diet after Christmas. But if we had treats that were good for us and did not contain the sugar than we could enjoy the holiday feasting and not feel guilty or like we have overdone it. Eating healthy and well can be done, regardless of what is going on.

There are many alternatives out there and ways to still enjoy the foods you love without the sugar or worry. You will also feel so much better and so will your family! Perhaps this Thanksgiving is a great time to start. Try these recipes below and add them to your dinner feast. You’ll be amazed how good they are and if you don’t tell anyone else at the table, I bet they won’t even notice.

Honey Pumpkin Pie

1-398 ml can pumpkin puree
2 eggs
1/2 cup honey
1/2 teaspoon salt
1 teaspoon cinnamon
1 teaspoon ginger
1/2 teaspoon cloves
1-398 ml can coconut milk

Preheat oven to 425°F.

Combine all ingredients together. Pour into 9 inch pie crust.
Bake at 425 F for 15 minutes, then reduce heat to 350 F and cook for 35 minutes. Test with cake tester, if it comes out clean pie is done, and centre will move only slightly when gently shaken.

*note: if you do not have any of the above spices, you can use doTERRA essential oilsCinnamon Bark, Ginger & Clove or On Guard blend. Use 1-2 drops of cinnamon and ginger, 1 drop of the clove. Also note that not all essential oil brands are created equally and not all essential oil brands are safe to ingest. If using an essential oil other than doTERRA (which is safe to take internally) ensure you research the brand you are using to make sure it is safe for use internally.


Cranberry Sauce

1 -12 oz. pack fresh or frozen cranberries, rinsed and drained

1/4- 1/3 cup honey

1/2 cup water

1-2 drops Wild Orange essential oil (or grated orange zest)

Put all ingredients (except Wild Orange essential oil) in a large saucepan and bring to a boil. The amount of honey you add will depend on your desired level of sweetness. If you prefer your cranberry sauce more tart then use 1/4 cup of honey, if you prefer sweeter than add up to 1/3 cup. Let boil until berries start to pop (about 5 minutes). Stir as they cook.

Once all berries have popped remove from heat, cover and cool completely at room temperature. Refrigerate until serving time.

Makes 2 1/4 cups

Happy Feasting!


Natural Sugar Substitutes

It’s been over a year now since we have completely eliminated sugar from our home. We did so because our oldest son, Matthew required it. We found that the effects of sugar on his body were too extreme, leaving him moody, angry and disruptive and it was also affecting his sleep at night. He would go to bed at a reasonable time, and I know it was reasonable because I checked around with other parents and experts, and it would take him almost an hour or more to fall asleep at night. Now as an adult I find it very frustrating when I go to bed and it takes me a while to fall asleep. I can only imagine my son’s frustrations around this.

It was a huge learning curve discovering what I could use instead of sugar and products that did not contain it. Because as we began our journey we discovered very quickly that sugar is in almost everything.

The biggest challenge was finding yummy alternatives for Matthew that equated to what the other kids were having, and all the foods that he enjoyed and was used to, such as chocolate, cake, pies and muffins. With diligence I rolled up my sleeves and have been able to find replacements for all these things, as you have seen with some of the recipes on my blog in previous posts. It was just a matter of learning what the natural sugar substitutes were that he could have and how to easily substitute them in a recipe. Once I started looking I found that there were many to choose from and I had a lot of them already in my home.

Here is what I have learned/ discovered to be great substitutes for sugar in recipes. What you choose as the substitute will depend on your recipe as well as personal preference. Many of these natural sweeteners also have great health benefits as well, such as being rich in vitamins and minerals or aiding in the prevention of certain ailments and diseases.

Honey

Honey -choose a honey that is local to you. It has been shown that local honey provides immunity for you against environmental illnesses because the bees are local to your area. Honey has many other health benefits as well such as being a natural energy booster and remedy for many ailments. I use honey as a sugar substitute in crumble and muffins as well as in my bread recipes.

Agave nectar – simply the nectar from the agave plant. Make sure you get a good quality brand as some agaves are more processed with more additives. Ojio agave by Ulitmate Superfoods is a good quality one. When substituting agave for sugar use 3/4 to 1/2 the amount as agave is 25% sweeter than sugar. You also reduce your liquids in your recipe because the agave is a liquid itself, by 1/4 cup. Agave is great in anything but I use it mostly in cakes, muffins and pies.

Maple Syrup

Maple syrup – use 100% pure. If you are using the processed kind then it is not a natural sweetener and you might as well use sugar. This is great in icing, marinades and glazes.

Stevia – is a strong leaf powder that is very sweet, also found in a liquid form. It is considerably sweeter than sugar so you use 1 tsp. stevia to 1 cup of sugar when substituting. It also has many health benefits such as reduced blood pressure and aids in digestion. Stevia is great in cakes and muffins, but also for your coffee, tea, or to sweeten other drinks.

Coconut sugar -comes from the nectar of the flowers of a coconut tree, and is available in a granulated or liquid form. Rich in vitamins such as potassium, zinc and iron. Coconut sugar is great because it melts like brown sugar, so I find that this works well in crumbles, on oatmeal or things like apple cinnamons when you want to create a syrupy texture.

Date Sugar

Date sugar -is made from dried dates and adds a rich sweetness to recipes. It does not melt or dissolve in liquids. When using date sugar substitute 2/3 cup to 1 cup of the sugar, as it is sweeter than sugar. I use date sugar in some bread recipes, muffins, pancakes or waffles.

Yacon syrup -sweetener extracted from the roots of the yacon plant. Some of yacon’s health qualities are strengthening the immune system and calcium absorption. Use 3/4 cup of yacon to 1 cup of sugar.

Barley Malt – is a wonderful replacement for molasses and is made from sprouted or malted barley. I use this in some cookie recipes, and my homemade baked beans. Yum!

Coconut Nectar

Coconut nectar – naturally sweet, nutrient rich “sap” from coconut tree blossoms. High in amino acids, minerals and vitamin C. It can be used just like agave or maple syrup in recipes instead of sugar. I have only used it so far in cookies and they have turned out delicious!

Fruit is also a great natural sweetener, using apples (applesauce, make sure there is not sugar added) or bananas can add the sweetness you desire.

The best thing to do is experiment with these sweeteners, determine which ones work best in your recipes and which flavors you prefer. It can be fun to experiment in the kitchen as long as you are prepared to ‘let it go’ if one doesn’t turn out so well 🙂 Personally I have had success with my substitutions and if you follow these guidelines you’ll have no trouble whatsoever and soon it will become second nature, just like it is for me!


Homemade (Sugar Free) Apple Pie

apple pie

It was a busy weekend at our house with the Fall activities beginning, soccer evaluations, Ju Jitsu and Leaders in Training. Rallying the kids, getting them ready and myself ready was quite the challenge, but we managed to get it all right. Well almost all. Somehow we mixed up the times for Matthew’s Ju Jitsu grading and unfortunately he missed it. He was pretty upset and now can’t grade until December, but his Dad ended up taking him for a motorcycle ride to ease his disappointment and they had a glorious time! It was a gorgeous warm, fall afternoon, with bright sunny blue skies.

In the midst of all this activity, I still had a huge basket of apples in my kitchen, and though we were diligently eating them, there were still quite a few. So Saturday afternoon while Matthew was out I decided to make apple pie. I had yet to try a sugar free version of this pie but was fairly confident after the success I had with the cherry pie in the summer (see earlier post for Sugar Free Cherry Pie recipe).

I had pulled my pie crust from the freezer earlier that morning. (I make a it from scratch, simply using the recipe on the Tenderflake® box, making a whole batch at once which is six pie crusts, and freeze it for later). This makes it a lot easier and quicker to make a pie when the crust is ready. Plus I make a killer pie crust, even my sister, who loves to cook and bake, is envious of my crust as she cannot make one as light and flaky as mine 🙂 I simply roll it out, prepare the filling with the pie in the oven within 15-20 minutes.

I used my apple peeler corer slicer once again to prepare my apples, also a great time saving device as you can peel, core and slice an apple in less than a minute. Mixed up the filling, estimating the amount of honey to substitute for the sugar, poured it over, put the crust on top and placed it into oven.

sugar free apple pieWhen substituting honey for sugar you reduce the amount of honey by 1/2 to 2/3 of the amount of sugar. Honey can be is 2-3 times sweeter than sugar so you don’t need to use as much. The amount of honey you will use will depend on the kind of honey you’re using (as some flavors are sweeter than others), and how sweet you like things. I found that using 1/2 cup of honey for the pie worked really well. Not too sweet that it overtook the flavour of the apples, but nice enough to sweeten it up a bit.

The pie turned out beautifully. Matthew jumped for joy when he came in from his ride and saw it on the counter. The twins, who were dubious at first, wanted apple crumble, not understanding or knowing what apple pie was, as they had never had it before.

Chloe especially insisted that she have crumble, but once she tasted her pie, she was sold and had 2 pieces! In fact, everyone loved it, ooed and awed and almost polished off the the whole pie! We had one piece leftover, which Matthew was lucky enough to take in his lunch to school.

I managed to put a good dent in my apples but I still need to make a few more things to use them up. I’ll make applesauce for the kids, but I may have to make another crumble or a pie…

Apple Pie

apple pie2 – 9 inch pie crusts (store bought or make your own)

5 c. apples (6-8 medium apples)

1/2 c. honey

2 tbsp. flour

Cinnamon

Roll bottom pastry and fit into a 9 inch pie plate. Let excess drape over the edge of plate.

Peel, core and slice apples and put into pie plate, arranging evenly. Sprinkle apples with cinnamon, to taste.

Mix honey and flour together. Pour evenly over apples. Roll out top pastry, dampen edges with water and place top pastry covering apples. Press and crimp edges together, then cut off excess pastry. Cut several slits in the top to allow steam to escape.

Bake in 350 F oven until apples are tender, about 45 minutes. Serves 6-8.

Enjoy!


An Abundance of Apples! & Sugar Free Apple Crumble

Tis the season of apples! Fresh juicy apples right from the tree or at the local farmers market. They are sweet and delicious and in abundance at this time of year.

Apples have long been a symbol of good health and an easy grab and go snack. They are a great source of vitamin C, K and B vitamins; as well as a great source of fiber and natural sugar. They aid in the prevention of cancer, tooth decay and heart disease and are a great natural substitute for sugar in recipes as well as an enjoyable snack for the kids.

Luke and Chloe picking apples

A few years ago we planted an apple tree in our backyard. I have always liked going out into my own yard and being able to pick fresh fruit from the tree. There is just something about having grown it yourself and being able to go and help yourself that gives me a feeling of pride as well as a good feeling knowing that it is pesticide free and where it has come from.

The kids love the apple tree. Once those blooms in the spring start growing into apples it is hard to get the kids to not pick them off the tree. Matthew is now at the age where he understands that they need to grow and will get bigger, that they won’t be ready until September. But Luke and Chloe just see an apple, they are curious so they pick it. It’s pretty challenging to explain to a 2 year old that they aren’t ready yet.

Chloe placing apples in the basket

Nonetheless, we had many apples ‘make it’ to September and they are now ripe and ready for eating. They are so ripe that they were starting to fall off the tree, and I knew that in order to keep them from rotting on the ground that it was time to pick them.

So yesterday morning we went out with Luke and Chloe and picked the apples from the tree. I didn’t think there were that many, but we ended up filling a huge basket. Now the challenge with having a tree and so many apples is what to do with them. Though apples keep fairly well, they do tend to go soft eventually. And I hate to waste good apples, so I make many apple recipes. Apple pie, apple muffins, applesauce, and my favorite apple crumble. I think it is the crumble I enjoy the most, I usually double the topping so that there is more 🙂 but that’s ok.

Apple Streusel Muffins

I find crumble to be a quick and easy dessert that I can make in about 10 minutes and pop into the oven. It is great with ice cream, whip cream or all by itself. We use a non-dairy ice cream called Rice Dream or a non-dairy whip cream. I also have an apple peeler, corer, slicer, that makes making any apple dessert very easy. It peels, cores and slices the apple all at once in less than 10 seconds. I would recommend one of these for anyone who makes things with fresh apples, it saves you a lot of time and is very easy to use.

Pampered Chef® Apple Peeler Corer Slicer

My recipe, originally from my mother, I have adjusted to a dairy free, sugar free version which is just as delicious as the original. The first time I did it without sugar I used honey in place of the brown sugar which worked well. But recently I have discovered coconut sugar, which melts just like brown sugar would. We now use it on our oatmeal in the morning and for our cinnamon apples when we go camping! And when I made the crumble yesterday I used coconut sugar instead of honey and I would have to say this is now my preference. It tasted just like the one with brown sugar.

So when you make this crumble, you choose which sweetener you prefer, perhaps make 2, each with the different sweeteners and test it out for yourself. I am sure your family will have no problems eating them up!

Unfortunately for me I only used 4 apples in my crumble, which hardly put a dent in the apples I have. I am going to have to get creative over the next little while and see what else I can come up with! In the meantime, enjoy this wonderful apple crumble, whether the apples come from your own tree or the local market, it is going to be delicious!

sugar free apple crumbleSugar Free Apple Crumble 

Topping

1/3 c. coconut sugar or honey

1/3 c. flour

3/4 c. rolled oats

1/3 c. Earth Balance

Filling – 4 large apples * peeled, cored and sliced

Place prepared apples in a 1 liter/ 4 c. corningware dish. If your apples are more tart, drizzle with a little honey, then sprinkle with cinnamon. Mix topping in a separate bowl. Place topping over apples and pat firmly.

Bake at 350 F for 30 minutes in a covered corningware. Remove cover for the last 5 minutes to brown top.

*use your favorite fruit in this crumble instead of apples, such as peaches, blueberries, etc.

Serves 4

Chloe and Mum by the apple tree

sugar free apple crumble

Homemade Jam Sugar Free and Just as Delicious!

For years now I have been making my own jam, a tradition that I have learned and carried on from my mother. In the summer, we would go strawberry picking, bringing home flats of strawberries and Mum would make fresh jam.

Our kitchen would become a production center with flats of strawberries, jam jars, and other ingredients all laid out to make the jam making process easy and smooth. Mum would make jars and jars of it; because as a family of 5 we ate a lot of jam.

Many times we would have enough left over to make some great desserts too, like strawberry shortcake or strawberry rhubarb pie. Often too, Mum would simply freeze the berries for later.

Jam is very easy to make and with a few simple ingredients, a pot and your stove you can whip up a batch quite quickly and have fresh homemade jam. There are sugar free, reduced sugar and regular jam recipes, but regardless of your preference they are all delicious! The first time I made jam my husband looked at me weird and asked me why was I making jam when we could buy go some at the store. I smiled and said, “Just wait.” He did, and when he tasted it, his eyes got big and he promptly started eating it with a spoon!

When we were first eliminating sugar at our house, I wondered what I would do about making jam, as the recipe I usually used had tons of sugar in it and there were no jams in the store without sugar. The regular Certo recipes use up to 8 cups of sugar per batch, so I had to find an alternative. Last year I discovered Pomona’s Universal Pectin, which is 100% pure citrus pectin and you can use honey or other sweeteners for your jam.

I was so pleased to have discovered this I made a batch of jam right away. It turned out beautifully and my family continues to gobble it up! We tend to go through a jar of jam a week. The favorite is peach jam, but I like variety, so I also make apricot, raspberry, strawberry, blueberry and cherry.

The thing that I really like about this pectin is that I can double or triple my batch. I found that with the Certo recipes doubling or tripling did not work well and therefore was having to do one batch at a time. Ugh! Though I enjoyed making it, the process was slow and as I am sure all parents can relate, we are happy when we can do things faster and still maintain quality!

With all the fresh summer fruit I tend to make a lot of jam; as I said we go through a lot. I usually buy cherries in the Okanagan when I am there visiting my parents, I also get fresh peaches as they have a peach tree. We have our own raspberry bush, and when the children have not picked it clean and eaten them all, I will make a batch.

There’s nothing like the taste of fresh homemade jam, it is so delicious that even I would eat it with a spoon!

Making jam is very easy. Below is a recipe for Peach Jam (the favorite at our house) using Pomona’s Universal Pectin. Recipe can easily be doubled or tripled.

Other jam recipes are included inside both Certo and Pomona’s pectin boxes, and vary slightly depending on the kind of jam you are making. They also offer cooked and no cook jam freezer recipes.

Peach Jam

4 c. mashed peaches, peeled

1/4 c. lemon or lime juice

1 c. honey (you may use as little as 1/2 c. honey depending on how sweet you like it)

3 tsp. Pomona’s Universal Pectin

4 tsp. calcium water *

Jam jars with seals/lids and rings

Large pot to make jam in

Small pot to boil lids

Wash and rinse jars. Heat jars in 225 F oven for 10 minutes, keep warm until ready to use. Boil lids and rings in small pot. Turn down heat and let stand in hot water.

Prepare peaches by peeling, slicing and mashing to make 4 cups. Put fruit with lemon or lime juice in large pot. Add calcium water and stir.

Measure honey into a separate bowl. Add pectin powder; stir thoroughly.

Bring fruit to boil. Add pectin-honey mixture, stir vigorously about 1-2 minutes to dissolve pectin. Return pot to a boil and remove from heat.

Peach Jam on toast

Fill jars to 1/4″ from top. Wipe rims clean, place lid/seal and screw ring on top. Screw on tightly. Put filled jars in boiling water to cover and boil for 10 min. Remove from water, let jars cool. Lids will ‘pop’ as they cool to seal and should be sucked down. Store in a cool place until ready to eat.

Makes 5 -250 ml jars.

*calcium water is 1/2 tsp. white calcium powder (provided in Pomona’s Universal Pectin box) and 1/2 c. water

Note: if you do not have time to complete your jam but have the fruit; you can measure and prepare your fruit and freeze it for later use. I have done this and it works well.

Happy Jamming!

Matthew enjoying a piece of toast with freshly made peach jam