Sweet Potato Pecan Pie

IMG_2489One of the many things I have always enjoyed about the holidays is all the treats and goodies that come with the season. Yummy cookies and squares, family favorites and traditions that I grew up with.

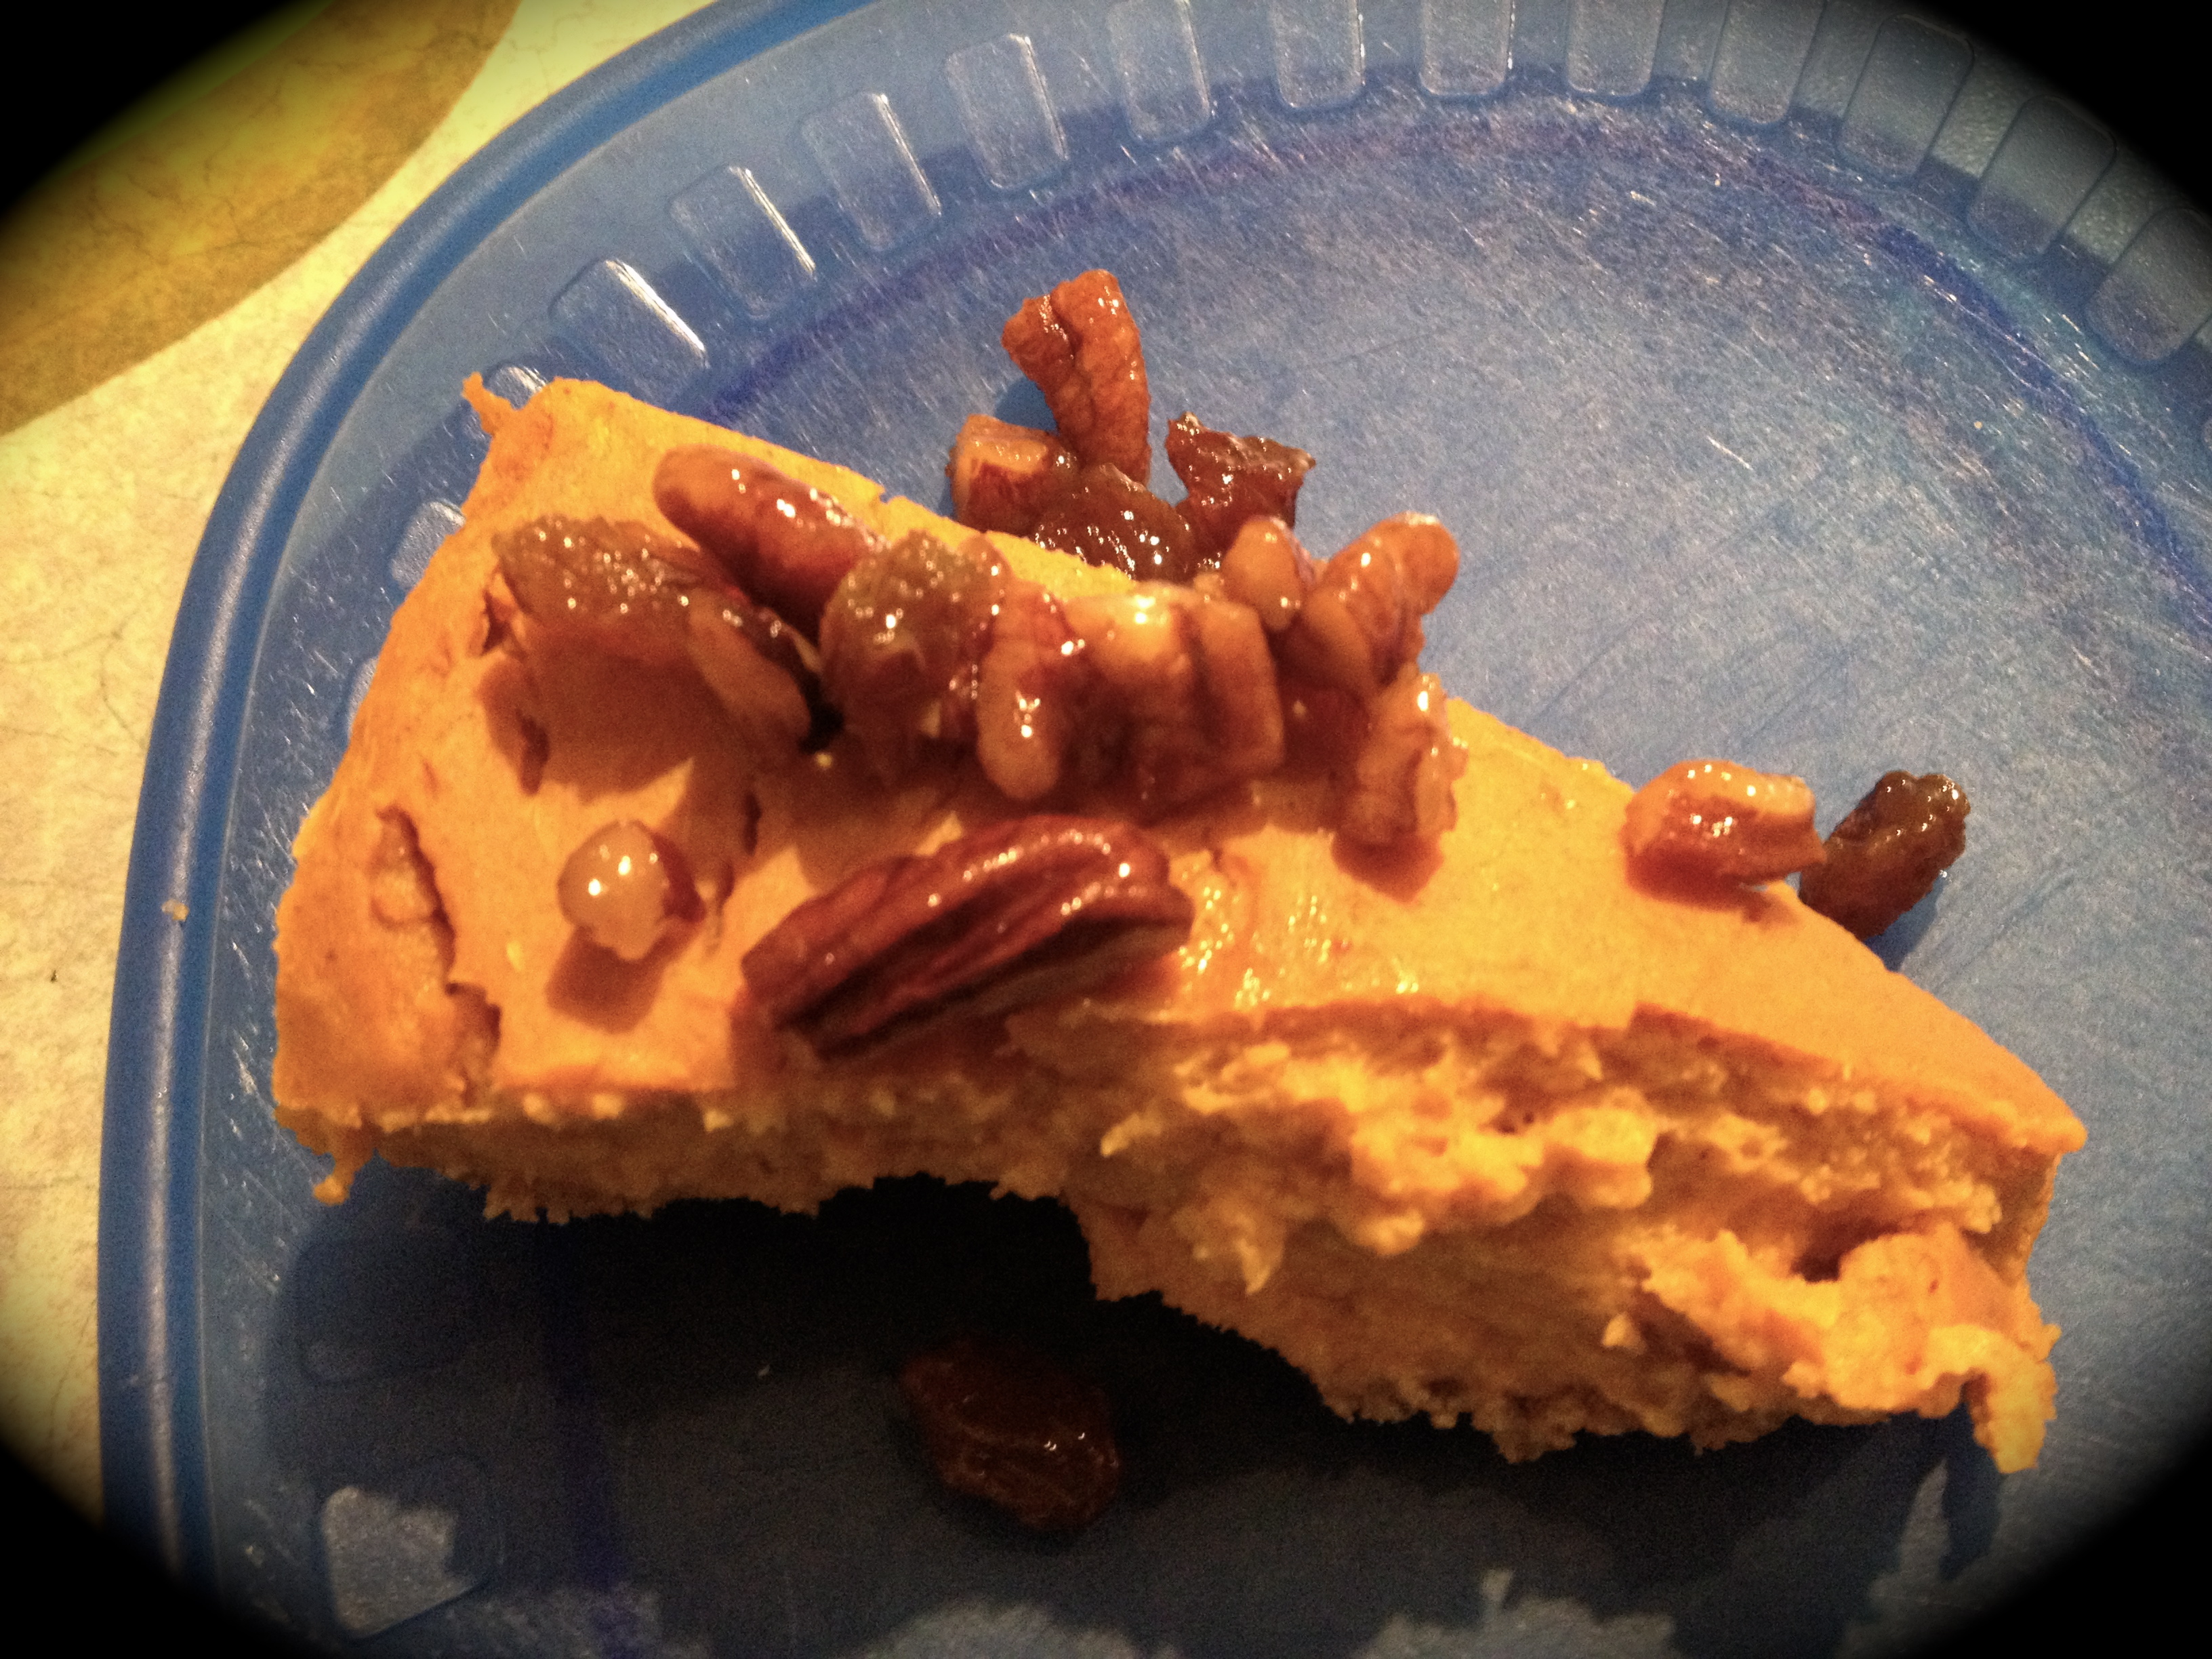
Slowly I have been adjusting these favorites, such as Chocolate Peanut Butter Cereal Squares, Candy Cane cookies and Isch Tartlets, to name a few, to a sugar and dairy free version for us to enjoy. But I love it when  I find a new recipe that I think fits the ‘holiday bill’, that requires no adjusting. This was the case with the Sweet Potato Pecan Pie which I found in Clean Eating magazine. The picture alone looked scrumptious so I knew I had to try it!

I have to admit I did make some adjustments to the original recipe, not because it was not fine as it was, but because I decided to make some different choices. For instance it called for olive oil in the crust and though I am sure it would have turned out fine, the thought of it made my stomach roll, so I used coconut oil instead.

The pie was a hit with everyone, all the kids loved it and my Mum, as she was visiting (though she loves sweet potatoes so it wasn’t a hard sell). Of course it is super good for you too!

Sweet Potato Pecan Pie

2 sweet potatoes, peeled and chopped
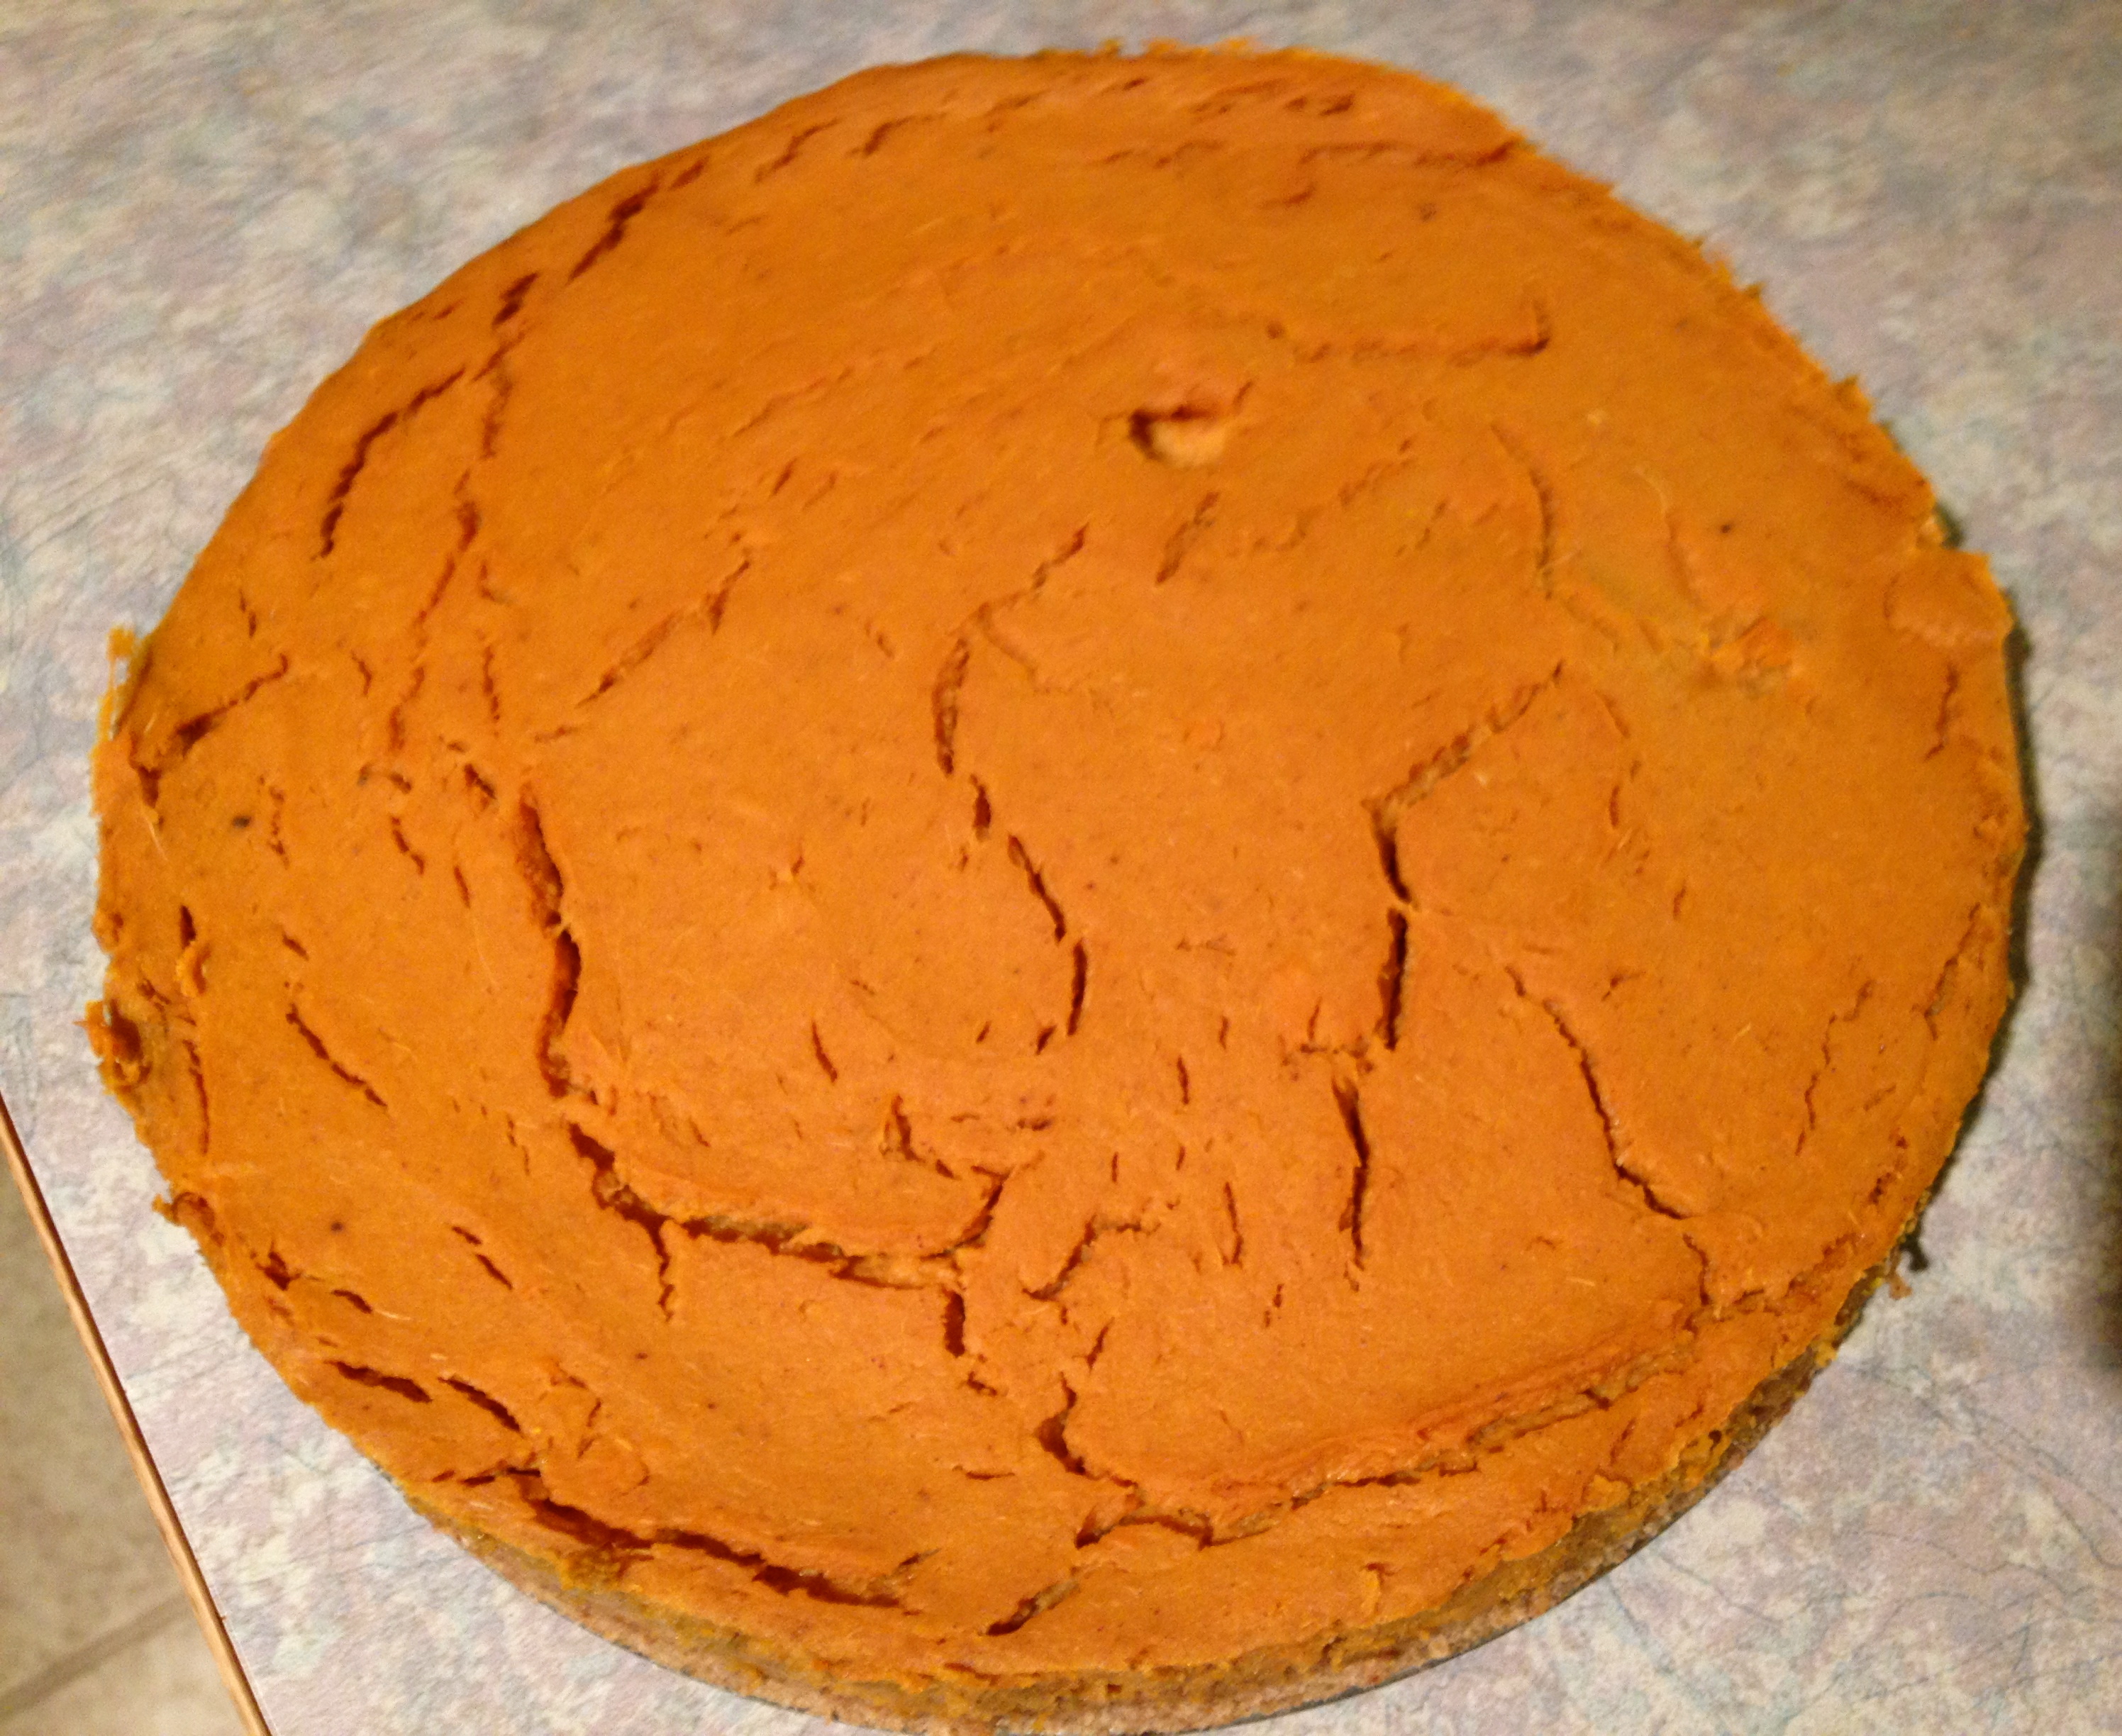
IMG_2487

1 ¼ c. rolled oats

¾ c. pecan halves

1/3 c. almond flour

¾ c. coconut sugar

2 tbsp. plus 2 tsp. coconut oil

1 ½ tsp. pumpkin pie spice

1/8 tsp. plus ¼ tsp. sea salt

1 cup organic firm silken tofu

1 tsp. pure vanilla extract

½ c. unsweetened golden raisins

2 tbsp. pure maple syrup

Place potatoes in medium saucepan and add enough water to cover. Bring to boil and cook until potatoes are tender, 12-15 minutes. Drain potatoes and transfer to a food processor. Puree until smooth. Transfer to fridge and chill completely about 30 minutes.

Prepare crust by putting rolled oats and ¼ c. of pecans into food processor. Puree until in a fine powder. Add almond flour, ¼ c. coconut sugar, 2 tbsp. coconut oil, ½ tsp. pumpkin pie spice, 1/8 tsp. sea salt. Pulse until combined. Gently press mixture evenly into the bottom of a non stick 9 inch spring form pan. Place pan in oven and bake for 18-120 minutes or until crust is golden brown. Remove from oven and let crust cool completely.

Pecan topping

Pecan topping

Prepare filling by pureeing tofu, remaining ½ c. coconut sugar, vanilla, remaining 1 tsp. pumpkin pie spice and remaining ¼ tsp. salt until smooth.

Add chilled potato puree and pulse until just combined and smooth. Pour into cooled pie crust and smooth top with spatula. Bake for 40-45 minutes, until filling is just firm in the center, light golden on top and cracks begin to form in the center of the filling. Remove from oven and let cool completely, about 2 hours.

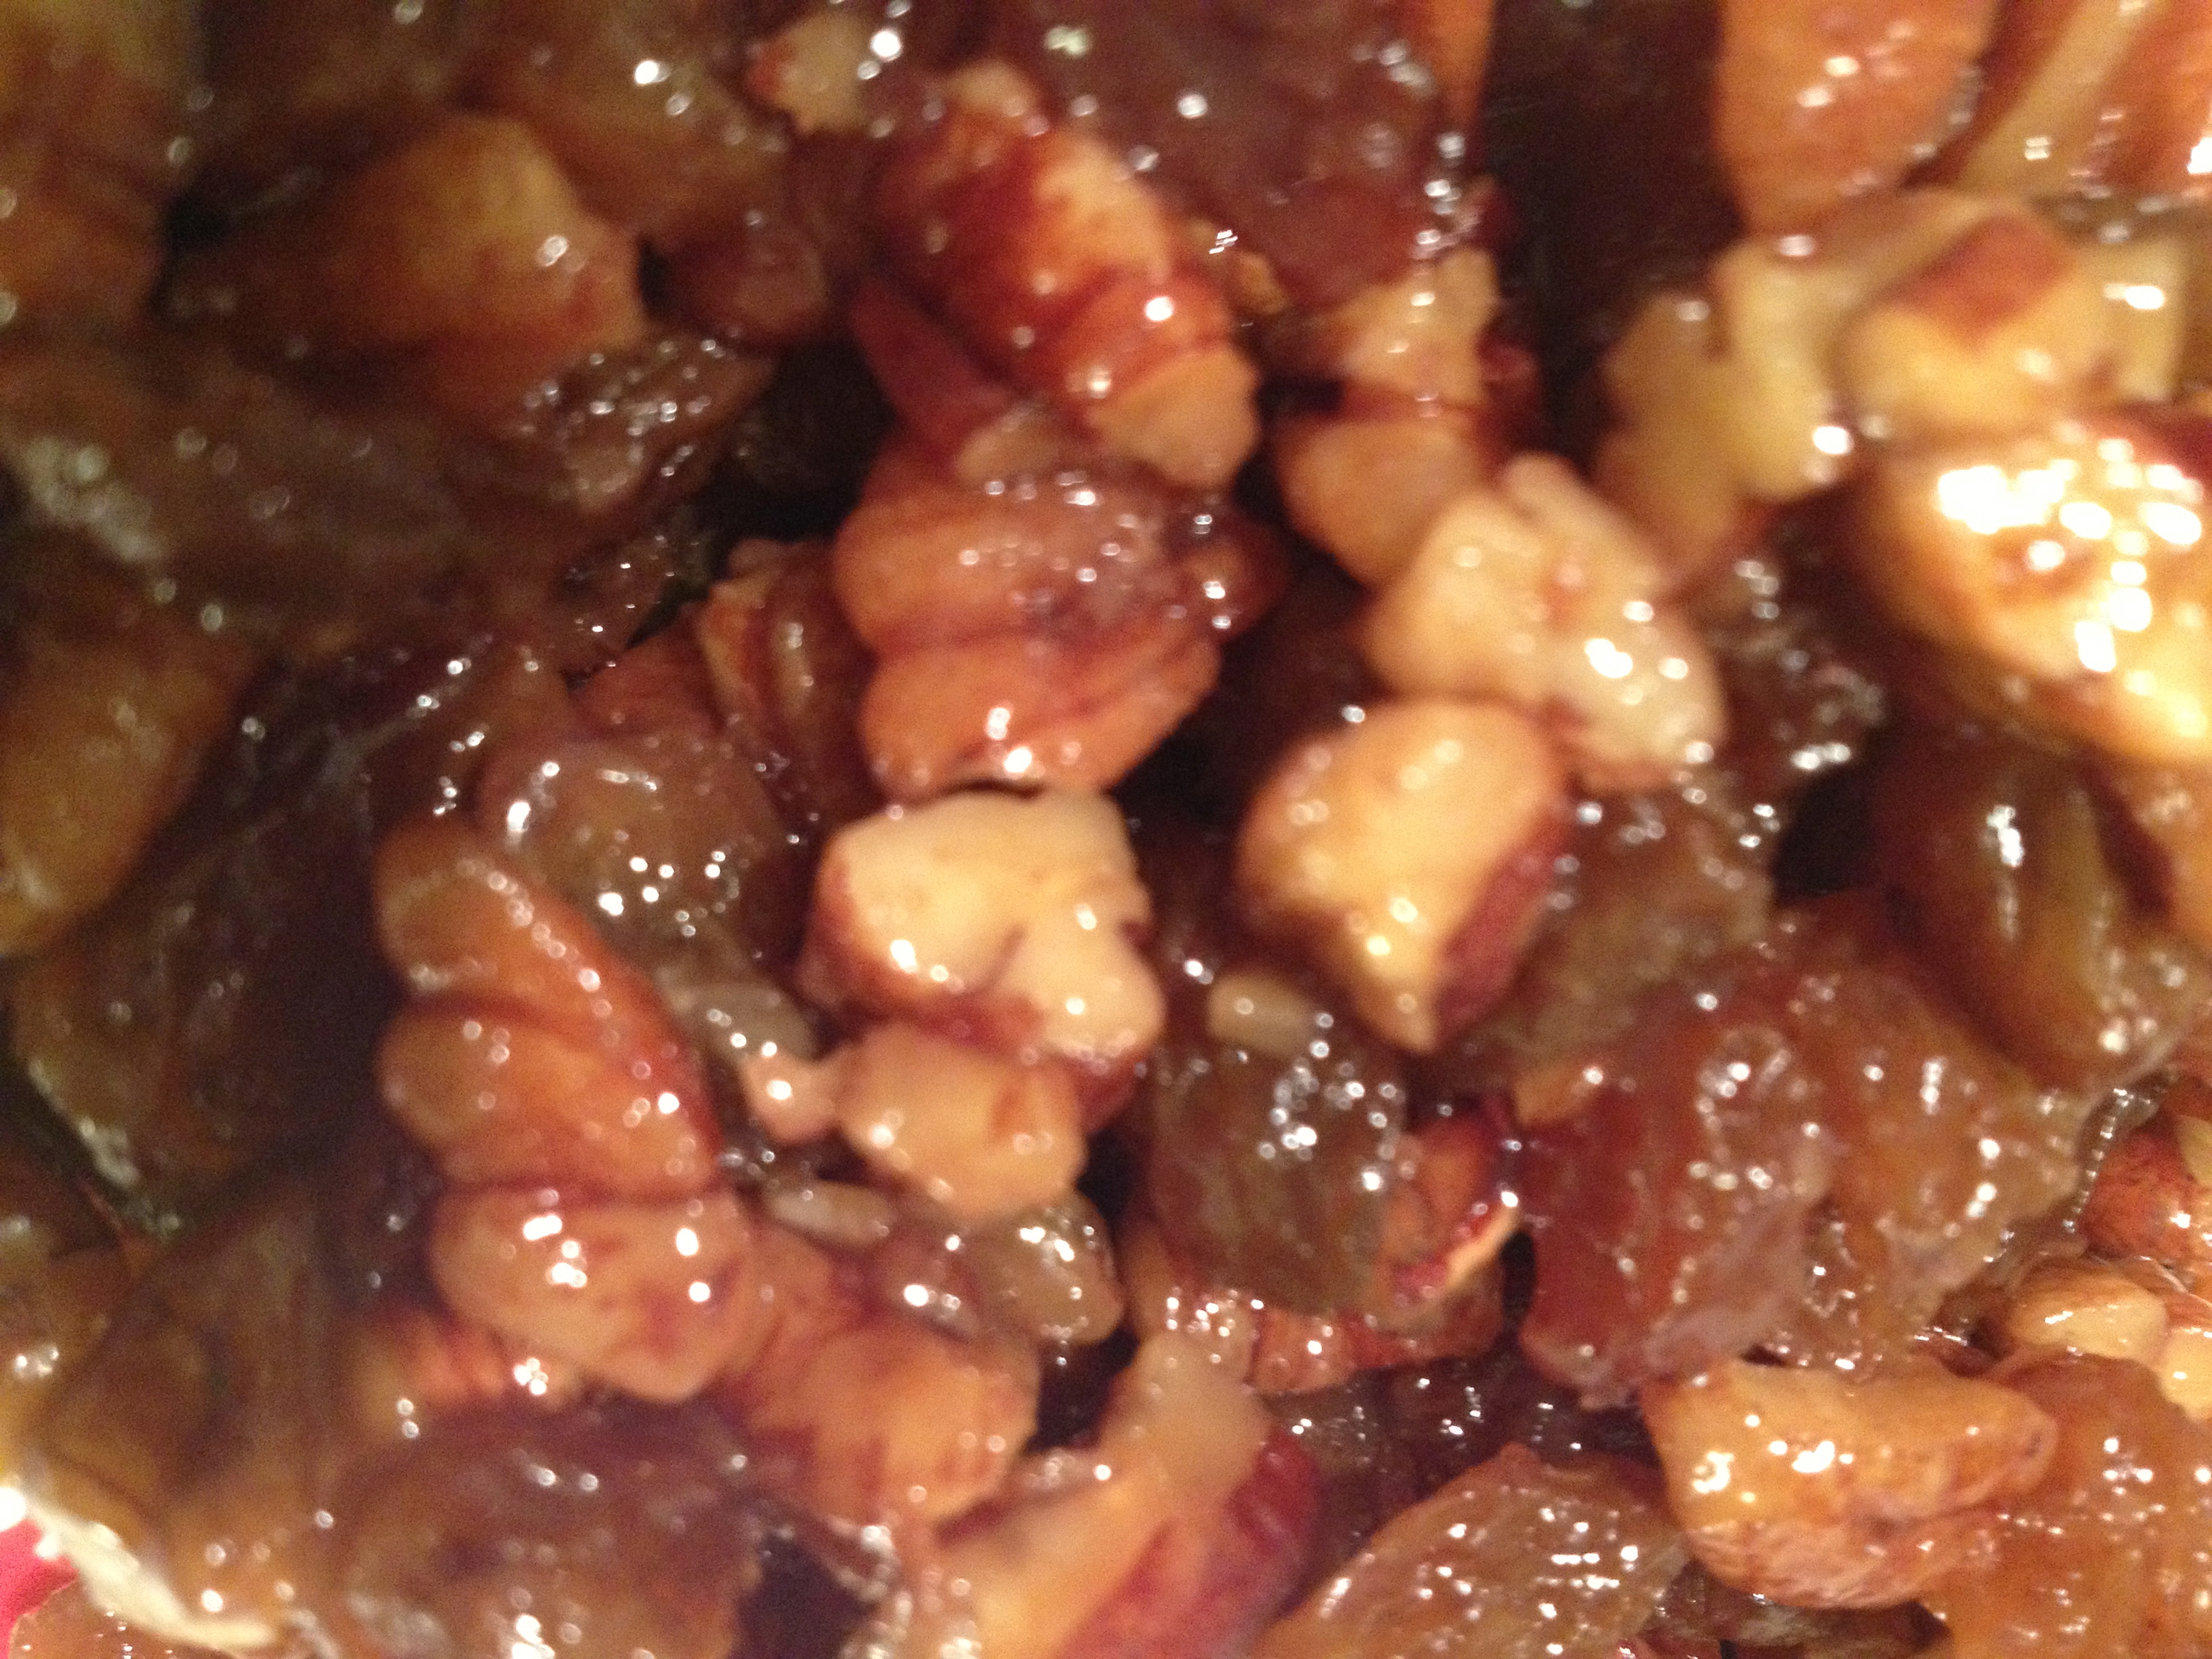
While pie cools, prepare pecan topping.  In a small saucepan on high, heat remaining ½ c. pecans, raisins, maple syrup, 2 tsp. coconut oil and 2 tbsp. water until simmering. Reduce heat to medium and simmer stirring frequently, for about 5 minutes, until no liquid remains in pan. Transfer mixture to bowl and let cool completely.

To serve run a sharp paring knife around the outside of pie to loosen from sides. Remove sides from spring form pan. Sprinkle pecan topping over top of pie and slice.

Serves 10

A Few Apple Muffins

Apple Cinnamon Muffins

For those of you who caught up with me last week, you’ll be pleased to know that I am still plugging away at using up the apples from my apple tree. Which is really good for you because I am finding and testing some great apple recipes which I then share. Plus my kids and D’Wayne are thoroughly enjoying being the taste testers, as are some of my neighbors.

Like I said there is a serious amount of baking at my house right now. There is not a day that goes by that I am not whipping up something in the kitchen and I am getting good at doing it quickly. Yesterday morning I whipped up some apple muffins between breakfast and heading out to my friends for coffee at 10 am.

Yesterday’s Apple Cinnamon muffin was a gluten, dairy and sugar free muffin, sweetened with maple syrup with coconut oil and flax seed meal. I am finding that I really like those recipes with that little extra kick of nutrition in there. You just mix it in and can’t even taste it.

I found this recipe on another blog site called the The Simple Veganista who shares raw and vegan recipes – who actually found it originally on the blog The Vanilla Bean. And I have to say these muffins are very good! In fact my oldest son Matthew’s response when he came home afterschool was “Damn these are good!” with his face all lit up with excitement.

They are super moist and very tasty. The only downside to this recipe is that one batch does not make enough – only 9 muffins! I did stretch it to 12 but got some very small muffins out of it.

Apple Cake Muffin

Last week I tried the Gluten Free Goddess’s Apple Cake muffin recipe, which we also enjoyed as this muffin has chunks of apple in it which I really liked. Many of the recipes I found called for grated apple and though this was good I wanted to really taste and notice the apple, so I liked the chunks. Her recipes still call for refined sugar so a quick substitution of coconut sugar and I was able to whip these babies up! It even called for powdered sugar sprinkled on top once they were done baking and I was able to substitute for this as well! See recipe below.

I love muffins that have a little sprinkle of something on top, and both these muffin recipes do -the first being a coconut sugar and cinnamon mixture. Yum! There is just something fun about sprinkling something on top 🙂

The only thing I find with the Gluten Free Goddess is many of her muffin recipes are the same base with slight changes in them to make them apple, blueberry or whatever kind of muffin it is. Though I do admire her, as all her recipes are original, tried and true; I like a little more variety in my muffins, which is why I search out other recipes to try. Regardless I do have to say even though her base is the same, I have never gone wrong with one of her recipes. They are always delicious!

Either way I would recommend either recipe if you are looking for a gluten free apple muffin, though the Apple Cinnamon one is the favorite at our house (I used coconut milk for our non-dairy milk, though you can use rice or almond milk if you prefer).

I still have a huge basket full of apples and am not sure what to do with them next as I am really looking for something that will use them up in large amounts! If you have any apple recipes to share please post them in the comments for everyone to try, especially me.

In the meantime go whip up one of these and then sit down for a few minutes and enjoy, savor, maybe grab a cup of coffee, while the kids play quietly….ha ha oh I’m dreaming again!

Regardless enjoy!

Sugar Free Powdered Sugar (replacement for regular icing sugar)

1 cup nonfat dry milk (for dairy free use powdered coconut milk)

1 cup cornstarch

2/3 cup Krisda Stevia for baking

Combine all the ingredients in a food processor or blender and whip until blended and powdered. Store in an airtight container.

This replacement can be used in any recipe calling for icing sugar.

The Magic of Chia Seeds

Chia seeds

Recently I have discovered a lot of recipes with chia seeds in them. I haven’t been purposely looking for them, the recipes I have been picking up lately (such as Chocolate Macaroons) just happen to have them in it. The nice thing about this, I discovered, is that chia seeds are considered another superfood with multiple health benefits. They stabilize blood sugar, reduce cravings for sweets, improve mental focus, are a high quality protein, improve cardiovascular health and many more.

When I first heard about chia seeds I actually wasn’t sure what to do with them and thought they were funny things, these tiny seeds that look like poppy seeds. I knew they had great health benefits but what was the use if I could not use them? Then I found this recipe for chia seed pudding, which I have to admit when I first looked at it thought “Eww! seeds in my pudding”. But since I am into expanding my repertoire of sugar free and dairy free treats I thought I would try it.

I decided to make it for the first time when I was in BC this summer visiting my parents. My Mum is into these things as well and I always like a willing crowd to be my guinea pigs. The first thing I loved about this recipe is that it takes no time at all to make; less than 5 minutes. You literally whisk together the ingredients in a bowl and let it sit. That’s it. I didn’t even divide it amongst individual glasses like it suggested, I just left it in the bowl I made it in. (I also found that though this recipe says serves 4 but you can easily serve 6 and everyone has a decent sized portion).

chia seed pudding

Raspberry Chia Seed Pudding

The second thing I really liked is that when you let the chia seeds sit for a bit they actually expand (size and weight), so it gives the pudding some texture, similar to tapioca. Which is another health benefit, as this ‘gelling action’ when the seed is exposed to water gives you a full feeling for hours – which is great for maintaining a healthy weight. (I also think it’s fascinating 🙂

The pudding was a hit with my parents and the kids. Enough that I have made it again recently and will do so again. I have also discovered a recipe for a Raspberry Chia Seed Pudding, which I have yet to try, but imagine will be just as good.

Chocolate Chia Seed Pudding

chia seed pudding

Chocolate Chia Seed Pudding

1 1/2 c. coconut milk

4 tbsp. maple syrup or honey

2 tbsp. cacao powder

1 tbsp. vanilla extract

1/3 c. chia seeds

**top with berries or coconut cream if desired

Whisk coconut milk, maple syrup or honey, cacao powder and vanilla until smooth. Stir in chia seeds. May divide evenly between 4 glasses or leave in bowl. Let sit at room temperature for 2 hours and serve.

Serves 4 **(You can easily serve 6 with this recipe and have decent sized portions if desired)


Wintery Fun in Kananaskis

Today the kids and I spent the afternoon in Kananaskis, having been invited by our neighbors to join them for quading, a campfire, food and fun. It was a wonderful afternoon with certainly no shortage of food, laughs and friendship.

The kids got a chance to go out on the Razor, Matthew usually riding in the front passenger seat and Luke and Chloe being pulled along in the toboggan on the back. Luke, being the trooper that he is, was the first to try it out.  Hopping into the toboggan with no worries, totally trusting that he would be safe and wanting to find out what it was all about. Chloe being less sure refused the first time, but was then upset when Luke set off without her.

Luke on his toboggan ride

Riding with the neighbor Mr. Koop, Luke simply enjoyed the ride, taking it all in. As they were riding Mr. Koop would ask Luke if he was having fun and Luke would just nod. He would later ask if he wanted to ride some more and Luke would nod again. That’s my boy, he just sits and observes, but it doesn’t mean that he is not having a good time, he is just quietly enjoying it.

While others in our group took their turns on the Razor/ toboggan we cozied up around a campfire in the trees, having hot chocolate, brownies and roasting hot dogs. Everyone brought something and shared, there was plenty to go around. Now for us it’s a bit challenging to share foods with our requirements of no dairy and no sugar. But I was prepared and  brought our own hot chocolate, made with almond milk and sweetened with maple syrup, a little mesquite and lucuma powder; as well as cinnamon salted caramel brownies. This recipe, (sugar free, dairy free and gluten free), I discovered while shopping at Community Natural Foods earlier in the week. They are sooo good!

Chloe enjoying her hot chocolate

I managed to whip up a batch before we headed out so that the kids would have something to enjoy. Cause like I said sharing can be challenging, not for us to share with others, but for others to share with us. Everyone was fascinated by the brownies and many had a taste. Sheila commented that she would never know they had no sugar in them if I had not told her (and thought they were delicious).

Matthew was a bit frustrated by the amount of things that were there that he could not have, while the twins didn’t know the difference. But it challenged Matthew to branch out a little; he tried roasting grapes over the fire and seeing what it was like. He said they were not bad. It also demonstrated how much of our food has sugar in it – which I pointed out to Matthew. So many of our convenience foods and foods we choose to bring to gatherings contain sugar! Many of these things, like baked beans or chocolate cake I can make with natural alternatives, but they also take time and I am not always able to pull these things together if we get invited on short notice.

Roasting grapes

Overall though Matthew survived and though he felt a bit slighted and a little upset with me, he had a great afternoon. He got 3 rides on the Razor and even Chloe eventually got on. Chloe, Luke and I took a turn together in the toboggan and had a great time. We did flip over at one point and tumbled out, but we got back in and enjoyed the ride. Luke and Chloe screamed in delight and we returned to our site with rosy cheeks and covered in snow. (Now just so you know Conroy was driving very slowly with the little ones in the back but it was just the right speed for me and enjoyable and safe for the twins) Even though there were moments where Chloe was a bit concerned, if you asked her if she had fun, her eyes glowed and she nodded adamantly.

It was so great to get out for the afternoon and enjoy the winter snow. It’s amazing that we have hardly any snow in Calgary but to drive half an hour down the road into Kananaskis there is tons! It was a beautiful mild winter day with gently falling snowflakes that came off and on. We totally skipped Luke and Chloe’s afternoon nap to go and I left the house in a mess and came home to the same mess, but sometimes you have to do those things in order to enjoy life. I am a big believer in routine and rarely deter from it (in fact some people call me militant), but sometimes you need that change, that spontaneity.Yeah I had to clean up when I got home, and supper was a little late, but I was able to handle it all calmly and cooly just doing what I needed to do. And because I had that break and that socialization it did not bother me at all that I still have to clean up a little or stay up a little later (yes there are still dishes awaiting me in the sink).

We went out and connected with nature, fed our spirits and just had fun! Which my goodness sometimes we just need to do in life. Leave the laundry, dishes, cleaning and go play! Enjoy this life and the time we have on this planet cause we are only here for a short time, might as well make it excellent!

Plus we created some wonderful memories for the kids (the kind that will be “Remember when we fell out of the sleigh…”, connections with others and some great pictures. (it’s unlikely that the same can be said for the laundry) Now who can put a price on that?

What adventures did you have this weekend? Leave a comment and share below

How to make Raw Organic Chocolates

About 8 years ago I took a class at The Light Cellar, here in Calgary, on how to make Raw Organic Chocolate. No sugar, no dairy and all natural ingredients. I was thrilled to find this course as I had been looking for an alternative so that we could enjoy chocolates at Christmas, Easter (and whenever else we wanted some!) without the refined sugars.

I had taken a chocolate making class before, bought the kit, came home and never made chocolates again. This time was different. The difference was you actually make your chocolate from scratch, from natural ingredients and it is very easy (the other class you made your chocolates from premade chocolate bars or pieces that you melted and molded into your own chocolates. I found this process finicky and the pieces were presweetened; so you could not choose your own sweetener).

Chocolate actually comes from a cacao nut, which is made into various forms, such as cacao powder, paste, butter, etc. Making the chocolate is super simple, using four basic ingredients and only takes a few minutes. All you need is cacao powder or paste, cacao butter, some kind of sweetener (honey, agave nectar, pure maple syrup, etc.), and vanilla.

The first step is to melt the cacao butter in a bowl – use the double bowl method with the butter in the top bowl set over a bowl of boiling water (boil water put it into bowl and set on counter; then set your smaller bowl with cacao butter on top)- be very careful not to get any water into the top bowl as it will ruin your chocolate! Once the butter is melted add the vanilla bean and let it infuse (with a knife slice vanilla bean down the middle and scrape out the seeds with a spoon – put into cacao butter). Sift your cacao powder in another bowl and add to taste, then add sweetener of choice. Voila! you now have a nice chocolate sauce which you can leave as is, pour into a pan refrigerate or freeze, or use as a base and add other ingredients.

The instructor did not give us exact amounts of ingredients to make our chocolate. He would provide a starting point and then encouraged us to taste it; to make it how we wanted. He recommended we start with a 1:1 ratio, mix it and go from there. More cacao powder made it a darker, richer chocolate, more sweetener made it sweeter – adjusting it according to our palette and preferences, so we had to taste it as we went along! He also encouraged us to use natural sweeteners and ingredients. For instance, we were using vanilla beans for our vanilla -actually cutting them open and scrapping out the inside. He said we could use vanilla extract but encouraged us to use pure extract if we did, not artificial.

Cacao powder

He described using these pure ingredients as “upgrading” – making it more natural, tastier and better for you. He also told us how we can add other natural ingredients to our chocolates that not only taste good but are high in nutrients, minerals and vitamins,  making it a superfood. Ingredients like goji berries, nuts and seeds, coconut and algae and essential oils. Maca root powder, honey and mesquite powder. He even recommended in one recipe that we try a little cayenne. It was actually really good!

As for the cost, the ingredients to make your chocolate is quite reasonable. The instructor said that in the time it takes for us to go and buy chocolate at the store, we can make it at home faster with fresh ingredients for about $1.50 to $2 per 50 g – which is comparable to what you would pay at the store.

Shaped ice cube trays work great as chocolate molds

I also love the fact that I can add all these “superfood” ingredients to my chocolates so that chocolate really is good for me and the kids. So when they ask if they can have some chocolate, I can say “yes” without feeling guilty or worrying if they are having too much.

It’s also so much fun to make (I’ve already made 3 dozen caramel cups and orange ginger snowmen for Christmas) and easy to do with the kids. You can get different kinds of molds to make different shapes for your chocolates. Experiment and have fun!

In one of my previous posts I described various natural sweeteners that you can use not only in your everyday cooking and baking but for your chocolates as well. Check out that post for more details.

In an upcoming post I will share more about what you can add to your chocolates.

For your information The Light Cellar sells ingredients to make chocolate in bulk and is very well priced. I buy all my ingredients there and usually come out of the store with a big box of items! I find it hard to get out of there with only one or two things.

You can also find many of these products online – Amazon.ca as well as Superfoods.com will carry these products at reasonable prices.