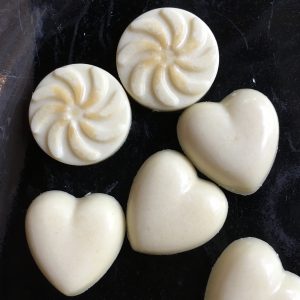
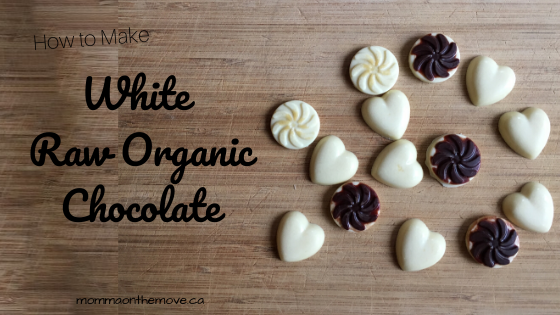
Raw Organic White Chocolate

white chocolate

When I first learned how to make my own chocolate I never even considered that making white chocolate would also be an option. I was so excited about just making the regular chocolate that I didn’t even think about white.

It wasn’t until years later, when I was looking at making white chocolate macadamia nut cookies that I wondered if I could somehow create white chocolate? Of course it had to be possible, it existed, so someone somewhere would have had to have figured out how to do it.

So I poked around a little bit, did a little googling and had my answer within minutes. Of course when I read what needed to be done it made perfect sense. Why I had not thought of it myself, who knows. But you know how sometimes you need someone to point out the obvious to you….

The basic trick in making raw organic white chocolate was that you need to use another powder than cacao powder, that was white. You need to use the powder to thicken it and bring it all together, because otherwise you would literally just have the cacao butter, though the right color, on it’s own is kind of oily and tasteless, which kind of defeats the purpose.
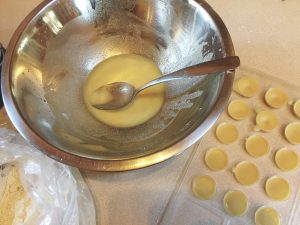
white chocolateThe magic answer is simply, milk powder. It is the right color and consistency and the good news is, ANY milk powder will do. If you want to keep your chocolate dairy free, there are non-dairy milk powders such as soy or coconut to make that work. It was so easy!

Another thing to keep in mind when creating white chocolate is using a fresh vanilla bean will no longer work, unless you want little black dots in your white chocolate. Even regular vanilla extract is brown in color, so to keep it purely white, use clear vanilla extract instead.

Otherwise go to it! If you have already tried the regular raw organic chocolate recipe you’ll be able to white with ease. And if you are new to chocolate making, it really is easy, so you’ll be a pro in no time!

Raw Organic White Chocolate

3/4 – 1 cup cacao butter

2-6 tbsp Soy milk powder or Coconut milk powder (just a caution if choosing soy milk powder, it is not pure white and has a slight tan tinge to it, so if you want it more of a caramel color perfect! but if you want white then I would choose coconut milk powder instead)

1-2 drops of clear vanilla extract (use a pipette if using vanilla extract as you only need a tiny bit, adding too much can ruin your chocolate)

2 tsp. to start Natural Sweetener of choice (again consider color I find clear stevia drops are best or even white stevia powder – honey and pure maple syrup will make your white chocolate more tan or caramel)

  1. In a medium metal bowl add boiling water about halfway up the bowl. *a metal bowl is best as it retains the heat well but can get hot to the touch Place second smaller metal bowl on top of large bowl so that it sits on top of the rim of the first bowl.
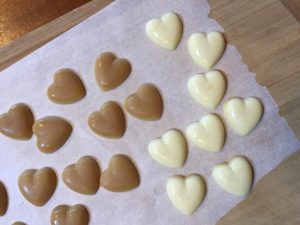
  2. Put desired amount of cacao butter into top bowl. Cacao butter will start to melt.
  3. While cacao butter is melting, add clear vanilla extract. Drop 1-2 drops at the most into cacao butter and stir.
  4. Once cacao butter is completely melted add 2-4 tablespoons of coconut milk powder. Taste for desired level of chocolatey-ness. If you’d like it richer add more milk powder.
  5. Once satisfied with amount of coconut milk powder add natural sweetener of choice. Start with 10 drops of clear stevia drops. (You may choose another sweetener but be aware that if you choose something like pure maple syrup this may darken your white chocolate, if so start with 3 teaspoons to sweeten). Taste, if desired level of sweetness has not been reached, add 2-5 drops of stevia and taste again (1-2 teaspoons if using another natural sweetener). Once level of desired sweetness has been reached you have your base chocolate.
  6. For plain white chocolate, spoon your white chocolate into molds and let set in freezer or fridge.
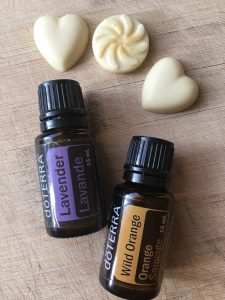
  7. white chocolateIf desired, before setting add additional ingredients such as nuts, dried fruit, coconut, essential oils such as Wild Orange, Peppermint, Lavender, etc. Ensure that the essential oils you are using are safe to ingest, as not all essential oil brands are created equal and many have synthetics and fillers in them that you definitely don’t want in your body! Also if oils are naturally colored they may change the color of your chocolate slightly (like Wild Orange). Pour white chocolate onto a cookie sheet or into a pan to let set for bulky additions, like fruit and nuts. If using essential oils you can pour into molds to set if desired.
  8. Put pan or molds into the freezer for about 5 minutes. Check to see if firm. If firm you can pop them out of your molds or break it up from the pan. If not leave in the freezer for a few more minutes and check again. Chocolate is best set in freezer (and ready faster!) but may also be set in fridge.

More Tips for Making White Chocolate

*Be very careful not to get any water into your chocolate as it will not work if you do. If your second bowl sits nicely on top, this should not be an issue as you do not need to lift the second bowl off the one with the water in it until you are done making your chocolate.

**you could use a vanilla bean in this recipe if you wanted, but because it is white chocolate you will see small black dots in the chocolate. If you would prefer solid white stick with the clear vanilla extract.

***when adding essential oils to your chocolate, measure 1 drop onto a teaspoon and stir it into your chocolate. This way if 2 or 3 drops come out instead, it’s on your spoon and not in the chocolate with the flavor way too strong!

****when popping out the chocolate from your molds, use a cutting board on parchment paper or plate. Popping them out directly onto the counter not only makes it hard to pick up, but it also may start to melt as often times the counter is warm.

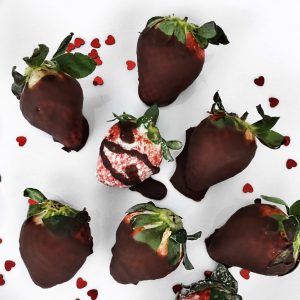
*****You could also make the chocolate with fillings such as caramel, nuts or other desired filling, in the middle. For this you simply put a bit of chocolate in the bottom of your mold, let it set then add your filling and top up the mold with chocolate and let set completely. If you wanted to get really fancy, make a batch of regular chocolate as well and make layers – have them be white and dark. White chocolate is also great to use for Chocolate Dipped Strawberries! In fact, I discovered a cute Halloween treat this year that are strawberry ghosts. What a great idea! Fun and healthy.

sugar free valentines treats

Making white chocolate opens up a whole new world of possibility and is just as fun as making regular chocolate. And now you can get even more creative with it! Who knows maybe next you can make swirls!

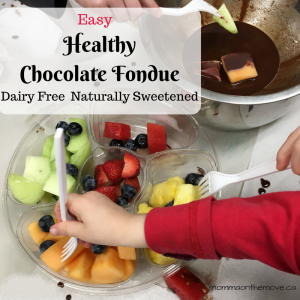
Easy Healthy Chocolate Fondue

healthy chocolate fondue

Chocolate Fondue is one of those easy fun desserts or treats that everyone can get into. Dipping fresh fruit in chocolate (or other yummy things like rice krispie bits, cake, pretzels, marshmallows) is delightful and delicious.

A lot of people find though that chocolate fondue can be a little messy and a little bit too much of a sugar rush – with the chocolate burning if your fondue pot is not just right, or it getting too thick to dip in. Not to mention all the sugary treats you are dipping into an already sugar filled chocolate.

The good news is it doesn’t have to be this way – you can create a healthy chocolate fondue with the yummy treats for dipping (also healthy) and no burning or thickening of your chocolate. And it’s super easy! even the kids can do it.

healthy chocolate fondueYears ago I learned how to make raw organic chocolate, made from cacao butter and cacao powder, then naturally sweetened with your sweetener of choice. It is quick easy and very good for you. Cacao is an ingredient that is considered a superfood, as it is very high in vitamins and minerals like calcium, magnesium, sulfur, copper, iron and zinc, vitamins E, B2, B1, B5, B3 and B9. And it is super high in antioxidants, healthy fat, fiber and protein. Plus when you use a natural sweetener you are now adding in the benefits of that natural sweetener as well (like honey, pure maple syrup, stevia).

You might think well I can just use cocao it’s the same – the fact is it’s not. Though both cocao and cacao come from the same bean they are processed very differently which is why one product (cocao) is stripped of most of it’s vitamins and minerals, while the other (cacao) preserves them.

When you’re making raw organic chocolate, you use a double bowl where you place boiling water in the bottom bowl and place another smaller bowl (that sits on the rim without falling into the bottom one) on top. You simply make your chocolate in the top bowl, using the heat from the water underneath to do your melting and create your chocolate. It’s like a double boiler method without using the stove and creating the risk of burning it!

Once you’ve made your chocolate, you simply keep it in the liquid form for your fondue (as opposed to putting it into molds or a pan to set), by leaving the top bowl on top of the hot water. Place it in the middle of your table or serving area and voila! you are ready to dip and indulge. You do have to be conscious of the lower bowl being hot though and advise those who are sharing the fondue to not touch the bottom bowl (especially important with kids). The chocolate will stay liquid as long as the water is hot and will not burn. As the water starts to cool, the chocolate will set, but all you have to do is add fresh boiling water to your bottom bowl and the chocolate will melt and return to liquid quite quickly. One thing to note is you do need to be careful that you do not get any water into your top bowl with the chocolate as this will ruin your chocolate, so just be aware of that when you’re moving things around.

Otherwise, grab your fork and favorite dipping items and enjoy!

Healthy Chocolate Fondue (this will make enough for 4-6 people and ready in 10 minutes!)

3/4 – 1 cup Cacao butterhealthy chocolate

2-6 tbsp. Cacao powder

1 Vanilla Bean

2 tsp. to start Natural Sweetener of choice (honey, pure maple syrup, etc.)

  1. In a medium metal bowl add boiling water about halfway up the bowl. *a metal bowl is best as it retains the heat well but can get hot to the touch Place second smaller metal bowl on top of large bowl so that it sits on top.
  2. Put desired amount of cacao butter into top bowl. Cacao butter will start to melt.
  3. While cacao butter is melting slice vanilla bean down the middle and scrape out the inside seeds with a spoon. Put seeds into melted cacao, it is ok if cacao butter is not completely melted yet. Stir.
  4. Sift cacao powder into a separate bowl. Once cacao butter is completely melted add 2-4 tablespoons of cacao powder. Taste for desired level of chocolatey-ness. If you’d like it richer add more cacao powder.
  5. Once satisfied with amount of cacao powder add natural sweetener of choice. Start with 3 teaspoons and mix. Taste, if desired level of sweetness has not been reached, add 1-2 more tablespoons and taste again. Once level of desired sweetness has been reached you have your base chocolate.
  6. Leave in liquid form and bowls on top of each other and serve. Use pot holder or oven mitt to transfer bowls if moving to another spot.

*Be very careful not to get any water into your chocolate as it will not work if you do. If your second bowl sits nicely on top, this should not be an issue as you do not need to lift the second bowl off the one with the water in it until you are done making your chocolate. 

Items for dipping:

Basically you can dip whatever you want into your chocolate (some people love chocolate dipped bacon 🙂 Fruit is the most popular and the quickest to prepare as it is most likely on hand – but if you’re feeling adventurous or just want to change it up a bit try out these other options – which can be healthy and sugar free too! below

Fresh fruit of choice – banana, apple, orange, strawberries, pineapple, cantalope, etc.

Pretzelshealthy chocolate fondue

Healthy sugar free marshmallows (yes these can be healthy to! make your own here)

Sugar free cake bits

Sugar free rice krispie square pieces

Nuts

Make sure you have forks or other utensils to facilitate dipping without items being lost in the chocolate. Fondue forks work great but are not required as regular forks work just as well.

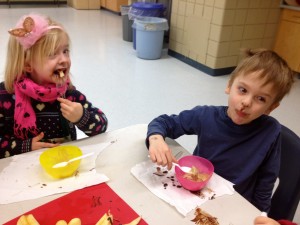
This is super super easy to do with kids and is always a hit. I did it with my Mini Chefs class, 3-5 year olds and they loved it! There were many chocolate faces that day and I did not send them home to parents on a sugar high.

I’ve also succesfully done this with adults many a time and I usually have someone licking the bowl at the end 🙂 The nice thing is you can make as much as you want and if you run out you just make more!

Ok I’m off to make my own chocolate fondue now… all this talk about it is making me crave some…

What are your favorite things to dip in chocolate fondue?

Kids Healthy Cooking – Healthy Chocolate with Natural Sweeteners

healthy chocolate

Kids and chocolate. They go together well. All the memories of chocolate covered faces, whether from ice cream or pudding or just a good old fashioned chocolate bar. Yes they say too much chocolate is not good for you, but honestly there is such a thing as healthy chocolate.

A lot of the trouble with chocolate is the amount of sugar in it, but chocolate without sugar and natural sweeteners instead, is a different story. Chocolate itself is rich in antioxidants and is actually very good for us. It is the sugar that is the problem.

healthy chocolateWhen I learned to make my own healthy chocolate, I was surprised at how quick and easy it was. It was so easy that I came home and made it with my oldest son, who at the time was only 6. Four simple ingredients gave us our base chocolate, and then we could create whatever we wanted. He loved it! and wanted to make more. Now my twins who are also 6, love making it as well. It is so easy to make with kids.

So when it came to our last class of Mini Chefs, making healthy chocolate was really a no brainer. I wanted a nice sweet, fun, but healthy treat, so this was perfect. In class, we made the plain chocolate and kept it in liquid form for fondue, dipping a variety of fruit into it; such as apples, oranges and bananas. All of the kids loved it! And yes ended up with chocolate faces 🙂

Raw Organic Chocolate

Ingredients:

3/4 – 1 cup Cacao butterhealthy chocolate

2 -6 tbsp. Cacao powder

1 vanilla bean or 1-2 drops vanilla extract (use a pipette if using vanilla extract as you only need a tiny bit, adding too much can ruin your chocolate)

2 tbsp. to start of pure maple syrup or honey

*amounts depend on how much chocolate you want to make

Boil water in kettle. Pour boiled water into a large metal bowl, place second smaller metal bowl on top of large bowl so that it sits on top. Place cacao butter into top bowl. Cacao butter will start to melt. While cacao butter is melting slice vanilla bean down the middle and scrape out the inside seeds with a spoon. Put seeds into melted cacao, it is ok if cacao butter is not completely melted yet. Stir.

*Be very careful not to get any water into your chocolate as it will not work if you do. If your second bowl sits nicely on top, this should not be an issue as you do not need to lift the second bowl off the one with the water in it until you are done making your chocolate. 

Sift cacao powder into a separate bowl. Once cacao butter is completely melted add 2-4 tablespoons of cacao powder. Taste for desired level of chocolatey-ness. If you’d like it richer add more cacao powder. Once satisfied with amount of cacao powder add natural sweetener of choice. Start with 3 teaspoons and mix. Taste, if desired level of sweetness has not been reached, add 1-2 more tablespoons and taste again. Once level of desired sweetness has been reached you have your base chocolate. This can now be kept liquid and used as a fondue, or can be poured into chocolate molds to form chocolates.

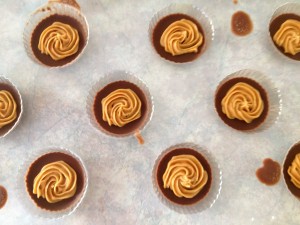
Another option at this point is to add additional ingredients such as nuts, dried fruit, coconut, essential oils (ensure that the essential oils you are using are safe to ingest), etc and pour onto a cookie sheet to let set. Or  make it with fillings such as peanut butter for peanut butter cups (as pictured above) or nuts in the middle or caramel. For this you simply put a bit of chocolate in the bottom of your mold, let it set then add your peanut butter (or other chosen filling) and top up the mold with chocolate and let set completely. Chocolate is best set in freezer but may also be set in fridge.healthy chocolate

I had also been promising the kids we would make ice cream for a number of classes and many of them kept asking when we were going to make it. Since it was the last class we did make peanut butter ice cream as well. Sugar free, dairy free and super easy to make with kids. Look for the peanut butter ice cream recipe in the next kids healthy cooking post.


Camping Desserts – Sugar Free Banana Boats

IMG_4190As camping season begins, I start to think about all the delicious camping meals and snacks that we enjoy. Planning carefully which ones to include, because we can’t go without the favorites, and which new ones to try.

Growing up we had many favorites, such as tin foil dinners, cinnamon apples, s’mores etc. But when we decided to modify our diets and go sugar free this made some of our favorite camping recipes a little more tricky to enjoy. Slowly but surely I have been figuring out how to adjust them to meet our needs, and not miss out on the delectable tastes!

One of the recipes I have been working on is banana boats. A delectable mix of banana, chocolate and marshmallows, warmed and melted over hot coals from the fire. Mmmm, that mix of melted chocolate marshmallow is to die for! I had figured out early on how to remedy the chocolate situation, having taken a raw organic chocolate making course a few years ago. But it was the marshmallows that stumped me – until last year – when I finally found a recipe to make marshmallows; completely healthy and sugar free!

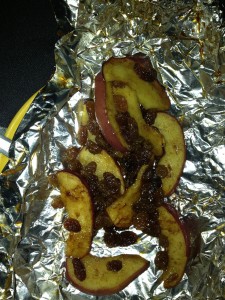
Cinnamon Apple

Cinnamon Apple

Now that I had all my ingredients we were able to try it out. So one lovely and sunny fall afternoon we packed up what we needed and headed out to Bragg Creek Provincial Park to enjoy a short hike and a fire, where we would enjoy roasted hot dogs and try out the banana boats.

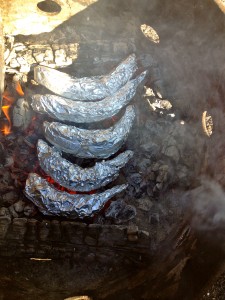
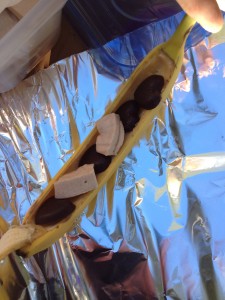
The kids were super excited to get things started! Luke and Chloe listening attentively to the directions on how to make their banana boat. First they needed to eat out a bit of the banana, then put in their chocolate pieces and marshmallows. Then wrapped it up in tin foil and place on the hot coals. Turning once, approximately 4 minutes a side.

Luke and Chloe watched in anticipation, asking if it was ready yet, hoping that by watching it it would cook faster. The trick with banana boats is you want them cooked long enough so that the chocolate and marshmallows melt but do not disintegrate and the banana is warm and soft. Depending on the heat of your coals the cooking time could vary slightly. Notice I said coals. You want those hot red embers, not flame and fire, in order to cook your banana boats. Flame will cause your dessert to burn and cook too fast, and who wants a charred banana? 🙁IMG_4191

Once they were ready we took them out of the fire, using tongs as they are very hot, and placed them on the table. Carefully we unwrapped them and Luke, Chloe and Matthew, spoons in hand, were ready to dig in! I warned them that it would be hot so to let it cool slightly and/or small bites blowing on it. They heeded my advice and tentatively took a bite.  Immediately their faces lit up with hugs smiles and exclamations of how yummy it was! Then quickly diving in for more. All done and faces covered in chocolate, they eagerly asked for another. Unfortunately I had only brought enough for one each, so said we’d have to make them again soon. But I was so pleased that they worked and were a hit! I cannot wait to get out there this camping season and have some more! And this time I will plan for 2 each!

What are your favorite camping desserts? Share in the comments below.


Banana Boats

*to make banana boats you will need one banana per person

Firm ripe bananas

sugar free chocolate pieces (either homemade or use unsweetened bakers chocolate)

sugar free marshmallows

heavy duty tinfoil

tongs

spoons

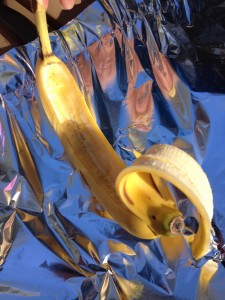
IMG_4188Cut peel of banana down the sides and across top of banana, creating a flap that you can open. Do not cut the bottom. With a spoon eat out part of the banana. Eat/ scoop out enough to create a space to put in chocolate and marshmallows, but do not eat down to the peel on the other side, you want to leave some banana there.

Place chocolate and marshmallow pieces inside banana. You can put in as much as you want but you do not want to overstuff it! The flap must be able to close over top, otherwise a lot of your fillings will leak out while cooking.

Place flap of banana overtop to close it. Take a medium size piece of heavy duty tinfoil (you want heavy duty as putting it in the fire is intense heat and regular foil will cause it to burn before actually cooking), wrap up your banana tightly.

IMG_4189Place tin foil wrapped banana on hot coals and cook for approximately 4 minutes (cooking times may vary depending on the heat of your coals). After first 4 minutes, flip over to the other side and cook for another 4 minutes.

Remove tin foil wrapped banana from fire using tongs. Open foil very carefully, foil will be very hot! Check banana, if chocolate and marshmallows are melted, then you are ready to eat! If it is not melted as much as  you would like, rewrap banana in foil and place back on coals for a few more minutes.


Yummy Easy Vegan Treats (with chocolate!)

I love shopping at Community Natural Foods, a local organic and natural food store. Not only do they have a wide variety of products available and good prices, they often have someone there sampling yummy recipes. Not only do they provide the samples for you but they also have the recipe printed out and ready for you to take a copy!

Not only are the recipes delicious they are good for you, often a vegan recipe with natural sweeteners and usually a little pinch of some kind of superfood in there. This is where I have gotten the Cinnamon Salted Caramel Brownie recipe that I made and shared with all my friends in Kananaskis last January – which everyone loved and would never have known that it was no dairy, no sugar unless I had told them. So I was quite excited when I went in on Saturday and discovered 2 yummy recipes to try.

I was so excited I came right home and made them both, even having to run back out to the store to grab a missing ingredient. Fairly quick and easy they both turned out fabulously! I even shared a sample with a couple of my neighbors who quickly asked for the recipe.

I love it when I find good recipes like this as I think that a lot of people feel that eating healthy means more fruits and vegetables and that you have to give up a lot of the sweet treats, which just isn’t true. You can find many, if not even more delicious in some cases, treats that not only satisfy your ‘treat fix’ but provide many essential vitamins and nutrients that our bodies need. It’s great, have a sweet and it’s actually healthy and beneficial for you!

No Bake Chocolate Macaroons

1 banana

1/4 c. coconut oil

1/4 c. pure maple syrup

1/2 tsp. vanilla extract or 2-3 drops madagascar vanilla essential oil

6 tbsp. cacao powder

1.5 c unsweetened coconut

1 tbsp. chia seeds

small pinch sea salt

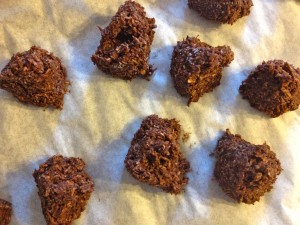
In a medium size bowl mash banana well until there are no clumps. Stir in melted coconut oil, maple syrup and vanilla. Sift cacao powder and stir into banana mixture. Stir in chia seeds, coconut and salt.

Line baking sheet with parchment paper. Drop a teaspoon at a time onto parchment paper. Put in freezer for 20 minutes or until firm. Store in freezer until ready to enjoy.

Makes approx 15 macaroons.

Almond Butter Rice Crispy Treats

1/2 c. chunky almond butter

1/2 c. brown rice syrup

1 tbsp. vanilla

1 tbsp. Earth Balance

1/2 tsp. sea salt

3.5 c Erewhon Brown Rice Crisp cereal

Chocolate Drizzle

1/4 c. homemade raw organic chocolate, left in liquid form

1 tbsp. almond butter

pinch salt

Shredded coconut for garnish

Line an 8×8 inch square pan with parchment paper.

In a large pot put in brown rice syrup, Earth Balance, almond butter and salt. Melt over medium low heat until well combined and heated through. Remove from heat, stir in vanilla; then stir in brown rice cereal.

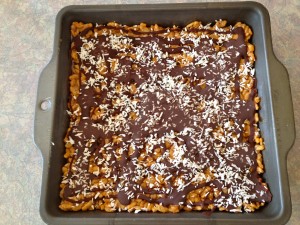
Scoop and spread evenly into 8×8 pan. Press down with finger or roll with a pastry roller (just a note about the pastry roller – I had never thought of using this before and seriously it is the cat’s meow. Way easier then trying to press it into the pan with your fingers and makes it flatter and smoother). Place in freezer for 5 minutes while you make chocolate glaze.

Make raw organic chocolate according to recipe (cacao butter, vanilla, natural sweetener and cacao powder – for full recipe and directions go here). Stir in almond butter and salt.

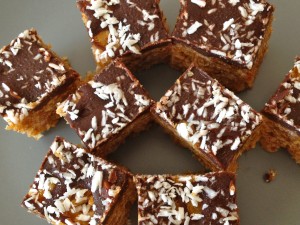
Remove pan from freezer and drizzle with chocolate. Sprinkle with coconut and place in freezer until firm – about 15 minutes. Slice into squares.

Bars will hold their shape quite well at room temperature but may be stored in freezer or fridge.

Sugar Free Banana Bread

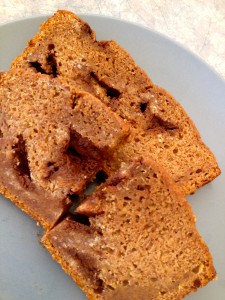
A traditional favorite in most homes, banana bread is a great way to use up those overripe bananas, turning them into something delicious! I have tried a few banana bread recipes from the one my Mom makes to one from my roommates in university and all have been delicious. But when I discovered this banana bread recipe I was in heaven! It was the most moist and the best banana bread that I had ever had. Containing no sugar, sweetened with applesauce and honey, and a boost of flaxseed, this is one healthy, but extremely yummy banana bread.

When I make it at our house, it never lasts more than a day because the kids and I gobble it up 2 or 3 pieces at a time.

I use my own *applesauce and chocolate, both homemade and of which I usually have on hand. The twins enjoy applesauce and cinnamon each morning at breakfast and I make up plain chocolate pieces that I keep in the fridge or freezer for whenever we need our chocolate fix.

Though you may have a favorite banana bread recipe, give this one a try, you won’t be disappointed!

*to make the applesauce I simply slice and core 6 apples, boil them on the stove until soft, then drain the water and blend the apples in the blender until smooth. I do not peel the apples as the skin contains lots of vitamins that you lose when you peel them and blends up so small that you don’t  notice it in the sauce.

Banana Bread

1 1/2 c. whole wheat flour

flaxseed

1 1/4 tsp. baking powder

1/2 tsp. baking soda

1 tbsp cinnamon

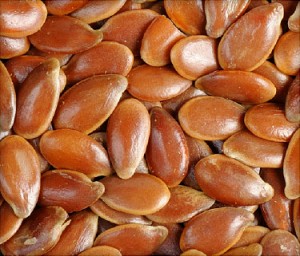
1 tbsp ground flaxseed

pinch of sea salt

3 ripe mashed bananas

2 egg whites

1/4 c. unsweetened applesauce

1/2 c. honey

1/4 c. flaxseed oil

1/3 c. chopped dark chocolate

chopped walnuts, optional

In a medium bowl combine flour, baking powder, baking soda, cinnamon, flaxseed and salt.

In a large bowl beat bananas until smooth. Add egg whites and mix. Gradually mix in applesauce, honey and flaxseed oil. Mix dry ingredients into banana mixture. Stir in chocolate.

Grease a 9×5 inch loaf pan with Earth Balance Vegan spread. Pour batter into pan and bake for 45 minutes or until cake tester when inserted comes out clean.

Chocolate Additions

In my last post, I shared the basic recipe for making raw organic chocolate. Very easy to do, it is a healthy and delicious way to enjoy chocolate without the guilt!

Now here is the fun part! Once you have the basic chocolate made you can add all kinds of things to your chocolates that not only make them delicious, but also add vitamins and nutrients that are good for you! You can ‘soup up’ your chocolates and no one will even know what’s in there.

I make peppermint Christmas trees and add E3 Live to them, which is a form of algae, very high in protein and minerals. It darkens your chocolates but does not alter the taste, no one would ever know it’s in there. And Matthew loves them and as a result asks me to make them all the time!

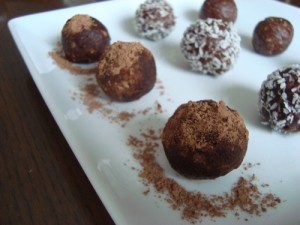
chocolate additionsMatthew even helps me make chocolates; as it is very easy for kids to do. He loves to experiment so we have made a variety of kinds of chocolate. We make our base chocolate, which is a combination of cacao butter, cacao powder, vanilla bean and sweetener of choice, (see my previous posts for the basics on how to make it and natural sweeteners), then we add different ingredients depending on the kind of chocolate and flavor we want. We make peanut butter cups, caramel cups, orange ginger and peppermint; and this is only what we have done so far – there are many ingredients that can be added to your chocolates to achieve the flavors that you want.

When adding ingredients to chocolate this can be done in a few ways – mix it in, usually with essential oils or powders, you can pour the ingredients on top of the chocolate, after you have poured it onto a cookie sheet, for instance with nuts and seeds, berries, coconut or you can make/ use a filling. The ingredients you add depend on what type of chocolate you want and personal preferences. Here are some ingredients to try.

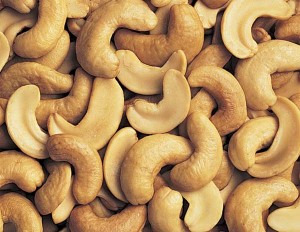
Nuts such as almonds, brazil nuts, cashews.

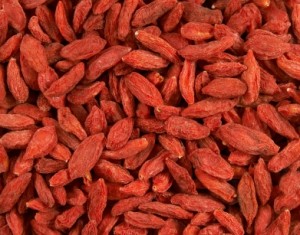
Goji berries

Seeds such as hemp seeds, sesame, sunflower or pumpkin.

Berries such as goji, incan or mulberry.

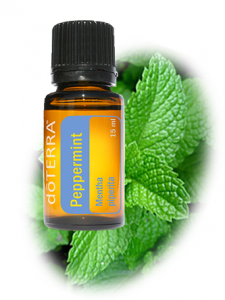
High quality essential oils such as peppermint, wild orange, cinnamon bark, etc. to flavor your chocolate. Use only a few drops and use the highest quality oils you can – they are better for you and could alter your chocolate if they are not.

Spices, such as ginger, cayenne, cinnamon, allspice.

Algae such as E3 Live, Spirulena or Chlorella. All are very high in protein, minerals and a variety of vitamins.

You can create combinations using ingredients that are high in vitamin C like coconut nectar and spirulena, or a high content of magnesium and calcium using ingredients such as mesquite and carob powder with any algae.

Some people even add medicinal mushrooms to their chocolates, which might sound distasteful, but the neat thing is is you can’t taste it, so would have no idea that it is in there if no one told you. We have recently discovered banana flakes as an addition to our chocolate making. They are quite yummy on their own and are delicious in chocolate.

The amounts you add will depend on the size of your batch of chocolate, how strong a taste you want and also depends on the herb/ spice that is being added (some are stronger than others). A good rule of thumb is to start with half a teaspoon, taste it, and then decide if you want to add more. The great thing about making your own chocolate is that there is lots of taste testing to get it just the way you want it!

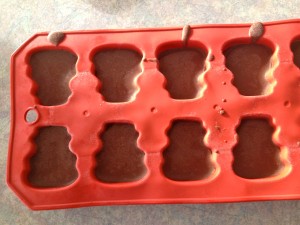
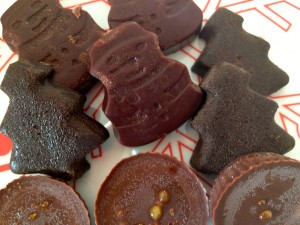
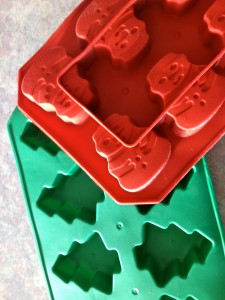
Once you have what you want you can set your chocolates in a number of ways. I buy silicon ice cube trays in a various shapes and fill those up to set. (tip – you don’t have to fill these all the way up as your chocolates can be quite thick if you do, but you want to fill them up enough so they are not too thin and break when you pop them out of the molds). There are lots of shapes to choose from; squares to hearts and around the holidays stores usually carry fun shapes related to that holiday. I have snowmen, trees and Halloween pumpkins. You can also use any of the candy molds that stores like Michael’s sell, this is where I found the mold to make peanut butter cups, they also have a variety of themes and shapes.

Of course you do not have to set your chocolate in shapes, you can just pour it onto a cookie sheet, let it set, then break it into pieces. You can also make clusters simply by mixing everything together and then dropping them by the teaspoon onto a cookie sheet lined with parchment paper.

For chocolates with fillings, make or find your filling (I use unsweetened peanut butter for my peanut butter cups and make the caramel filling using dates, vanilla, mesquite and lucuma powder), pour some chocolate let it set for a few minutes til firm, then drop or spread the filling over the chocolate, then add more chocolate on top and let set completely.

There are lots of things you can add when making chocolate. Many different flavors and combinations, depending on what you want and what you like. It is also fun to experiment with different combinations, flavors and shapes and it is easy to get the kids involved – they’ll love it. So get in there and try stuff out, worse case scenario is it does not turn out the way you want it and you might have to eat it yourself!

How to make Raw Organic Chocolates

About 8 years ago I took a class at The Light Cellar, here in Calgary, on how to make Raw Organic Chocolate. No sugar, no dairy and all natural ingredients. I was thrilled to find this course as I had been looking for an alternative so that we could enjoy chocolates at Christmas, Easter (and whenever else we wanted some!) without the refined sugars.

I had taken a chocolate making class before, bought the kit, came home and never made chocolates again. This time was different. The difference was you actually make your chocolate from scratch, from natural ingredients and it is very easy (the other class you made your chocolates from premade chocolate bars or pieces that you melted and molded into your own chocolates. I found this process finicky and the pieces were presweetened; so you could not choose your own sweetener).

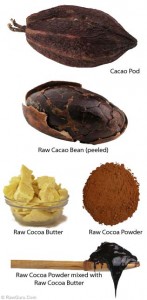
Chocolate actually comes from a cacao nut, which is made into various forms, such as cacao powder, paste, butter, etc. Making the chocolate is super simple, using four basic ingredients and only takes a few minutes. All you need is cacao powder or paste, cacao butter, some kind of sweetener (honey, agave nectar, pure maple syrup, etc.), and vanilla.

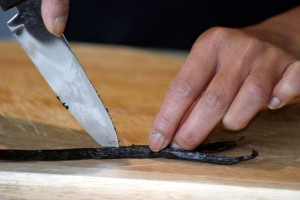
The first step is to melt the cacao butter in a bowl – use the double bowl method with the butter in the top bowl set over a bowl of boiling water (boil water put it into bowl and set on counter; then set your smaller bowl with cacao butter on top)- be very careful not to get any water into the top bowl as it will ruin your chocolate! Once the butter is melted add the vanilla bean and let it infuse (with a knife slice vanilla bean down the middle and scrape out the seeds with a spoon – put into cacao butter). Sift your cacao powder in another bowl and add to taste, then add sweetener of choice. Voila! you now have a nice chocolate sauce which you can leave as is, pour into a pan refrigerate or freeze, or use as a base and add other ingredients.

The instructor did not give us exact amounts of ingredients to make our chocolate. He would provide a starting point and then encouraged us to taste it; to make it how we wanted. He recommended we start with a 1:1 ratio, mix it and go from there. More cacao powder made it a darker, richer chocolate, more sweetener made it sweeter – adjusting it according to our palette and preferences, so we had to taste it as we went along! He also encouraged us to use natural sweeteners and ingredients. For instance, we were using vanilla beans for our vanilla -actually cutting them open and scrapping out the inside. He said we could use vanilla extract but encouraged us to use pure extract if we did, not artificial.

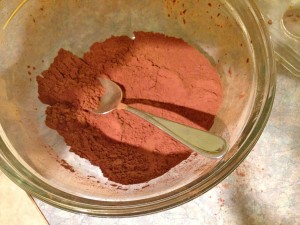
Cacao powder

He described using these pure ingredients as “upgrading” – making it more natural, tastier and better for you. He also told us how we can add other natural ingredients to our chocolates that not only taste good but are high in nutrients, minerals and vitamins,  making it a superfood. Ingredients like goji berries, nuts and seeds, coconut and algae and essential oils. Maca root powder, honey and mesquite powder. He even recommended in one recipe that we try a little cayenne. It was actually really good!

As for the cost, the ingredients to make your chocolate is quite reasonable. The instructor said that in the time it takes for us to go and buy chocolate at the store, we can make it at home faster with fresh ingredients for about $1.50 to $2 per 50 g – which is comparable to what you would pay at the store.

Shaped ice cube trays work great as chocolate molds

I also love the fact that I can add all these “superfood” ingredients to my chocolates so that chocolate really is good for me and the kids. So when they ask if they can have some chocolate, I can say “yes” without feeling guilty or worrying if they are having too much.

It’s also so much fun to make (I’ve already made 3 dozen caramel cups and orange ginger snowmen for Christmas) and easy to do with the kids. You can get different kinds of molds to make different shapes for your chocolates. Experiment and have fun!

In one of my previous posts I described various natural sweeteners that you can use not only in your everyday cooking and baking but for your chocolates as well. Check out that post for more details.

In an upcoming post I will share more about what you can add to your chocolates.

For your information The Light Cellar sells ingredients to make chocolate in bulk and is very well priced. I buy all my ingredients there and usually come out of the store with a big box of items! I find it hard to get out of there with only one or two things.

You can also find many of these products online – Amazon.ca as well as Superfoods.com will carry these products at reasonable prices.