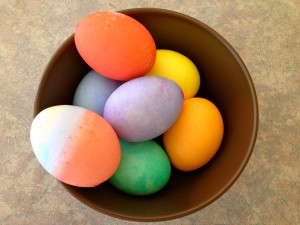
 As a kid I always enjoyed dying Easter Eggs at Easter. I loved watching the eggs as they transformed from white to red or whatever color we had chosen. Experimenting with different colors and patterns, adding stickers or other decorations on our eggs. Dying Easter eggs with children can be lots of fun and this was a tradition I wanted to continue with mine. This year the kids and I dyed eggs for the first time. Yes this was the first time even for Matthew, although he is already 9 years old. I baulked when I realized this and felt that I had let him down as a mother. I feel it is my duty to do these kinds of things with my kids and to realize that Matthew was already 9 and had never done it, I was appalled! This was going to be quickly remedied. I made sure that I picked a time when we had a large block of time, where we didn’t have to run anywhere or stop and get a meal prepared. Though dying Easter eggs with children is fairly simple I knew that I needed to be available to help, especially the twins. Plus I wanted to get in there and participate. What is the fun of doing these things with the kids if I can’t get in there and play myself?
 I had bought a dozen eggs for our project. When I got up in the morning I put them in a pot to boil right away, that way I knew they could boil and cool so when we were ready to dye them they would be cool enough to do so. I kept out 4 eggs as I planned to blow these ones out. The only thing I find with dying hard boiled eggs is that the eggs tend to get wasted. I know that some people dye them and then eat them the next day but I always found that we never did. I knew that the twins would need their eggs to be hard boiled so that they could handle them without breaking, but I figured that Matthew could handle a blown egg (which is simply an egg shell without the actual egg white and yolk inside it). The thing I like about blowing the egg out of the shell is that you can then use the eggs insides in something else and you can keep your decorated eggs longer.
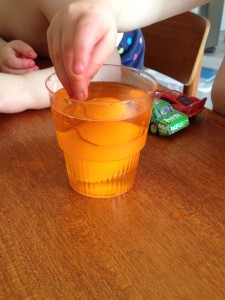
 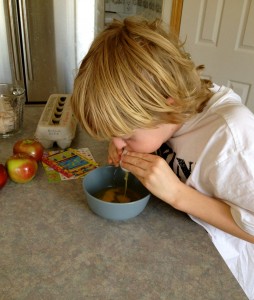 Matthew even helped me blow out the eggs. He watched me do the first one and decided he wanted to try. Turned out he did the other 3 all by himself. When I announced that it was time to dye the Easter Eggs Luke and Chloe ran into the kitchen and sat down waiting. They knew what was going on as I had already told them earlier in the week. Matthew and I had already mixed the dye ahead of time, as well as gotten the eggs ready. The challenge was we only had one holder/ stick to dip the eggs into the dye and 3 kids. At first they all wanted to do it but when I explained that we only had one stick and that we needed to take turns, we managed to work it out. In fact, by the end we were dropping our eggs into the cup without the stick and only using it when they were ready to fish them out of the dye. I will be saving the stick for next year so that when we buy another kit we will have 2.
 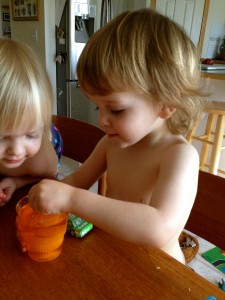 They each got to dye four eggs the color of their choice and then we left them to dry. We intended to come back to them when they were dry to add stickers or sequins, etc. but we never did. But it really doesn’t matter, they had a great time and were very proud of their eggs as they showed everyone who came in the door that day their eggs.
Tips for dying Easter Eggs with Children (best for children ages 3 & up)
- Have the eggs ready beforehand -whether you are going to hard boil them (best for young children so they can handle them without breaking) or blow them out
- Mix up the dye beforehand as well – I found small plastic disposable cups work well
- Put kids in old clothes – make sure that they are in clothes that it doesn’t matter if they get dye on. If the dye gets on clothing it will stain and is hard to get out. You can also put an apron on them or just get them to take off their shirt altogether (depends on their age and who they are dying eggs with)
- Have an adult available who can assist the kids
- Do one egg at a time, one color at a time – I had all the dye on the island in the kitchen and brought the color that Luke and Chloe chose to the table when they wanted it. With older children this may not be necessary.
- Let eggs dry completely – you may need to flip egg over so that the bottom dries
- Decorate with stickers, sequins, markers, etc. or leave as plain colorful Easter Egg
- Be patient and have fun!
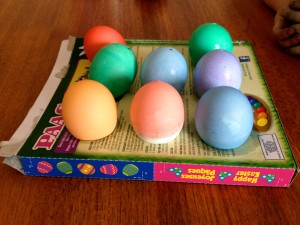 Matthew really got into dying the eggs, getting creative using more than one color, partially coloring half and then doing another color. On one egg he even did 3 colors. We did a dozen eggs but had quite a bit of dye leftover so Matthew started dying and drying paper, creating a lattice design. It kept him busy for over an hour and he only stopped because he had his Ju Jitsu grading to attend.
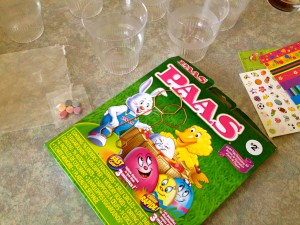 I had bought one of those kits that are cheap and abundant at Easter but there are lots of natural dyes that you can use, and may be preferable especially if you are going to eat them. Things like leftover coffee to make brown, tea, turmeric (yellow), blueberry, chili powder and red cabbage (blue). I think we may try the natural dyes next year. Dying Easter eggs with children is easy and fun. You can keep it super simple or make it more fancy if you want. Either way the kids will love it and you will have fun getting in there too!
How to blow out an egg
- Gently poke a small hole on each end of the egg using a pin. Trick is to make hole big enough that you can get air through without breaking the egg.
- Hold egg over a bowl.
- Place mouth over hole on one end and blow. Egg will slid out the hole in the other end into the bowl.
- Keep blowing until entire egg is out.
- Gently wipe off egg.


Pingback: Easter ActivitiesMomma On The Move
Pingback: How to Set up an Easter Egg HuntMomma On The Move
Pingback: Tips and Ideas for a Sugar Free EasterMomma On The Move