 This flower printing activity not only teaches children about nature through art but also introduces some basic science concepts in a fun and engaging way.
We are all drawn to flowers. Vibrant colors, beautiful scents and sometimes intricate patterns in the blossoms and leaves. Children especially want to reach out and touch flowers, check out what they are like, exploring texture and getting their noses in there to see what they smell like. How often have you seen a child bent over sniffing a flower? (You can picture it right now can’t you?)
Flower printing is a way to deepen this experience for the child and allow them to learn and explore even more with their senses while adding art, creativity and imagination.
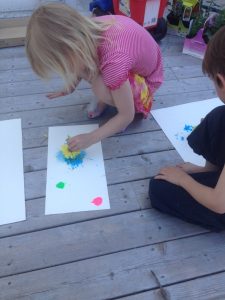
 When I introduced this activity to my kids, my daughter was very excited about it (she’s my artsy one), while my son wasn’t so sure about it. But it did not take long before he became engaged, creating with colors and experimenting with designs.
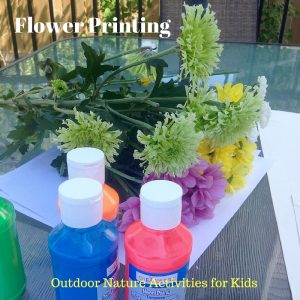
I made sure that I had a variety of colors, even going out and buying some cool neon paints in addition to the basic colors. I also made sure that I had a variety of textures and shapes of flowers for them to try. I had purchased an inexpensive bouquet of flowers but you could use blossoms from your garden or even some of the natural flowers in your backyard. (I had pulled some dandelions and toad flax from our driveway as additional options). I would discourage going out and picking wildflowers for this project as one of the important things when teaching children about nature is that it is also important to preserve it. Appreciate it, take a picture, but leave it for others to enjoy (explain to the children that if they pick wildflowers they may not grow back and then others cannot see them anymore).
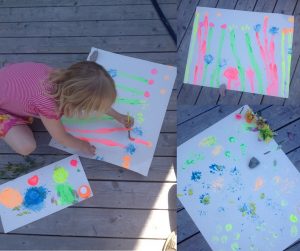
We used big poster paper for our flower printing but you may also use a regular size piece of paper to create your project. The nice thing about art is the sky is the limit when creating!
When we were finished we ended up with two very different pictures, both beautiful, unique and something they can be proud of.
Flower Printing Activity
white paper or poster board
tempera paint – variety of colors
blossoms (variety of shapes and sizes), leaves and stems of flowers
paint brush
pallet for paints (we used a large piece of cardboard, but small paper plates also work – you want the paint on something that is large enough that you can dip the flower in flat)
- Cut blossom off flower
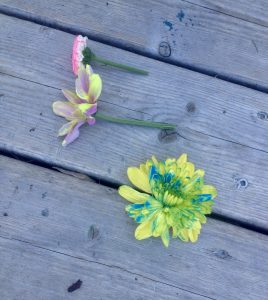
- Dip in paint color of choice *you do not need a lot of paint on the blossom just enough to cover it
- ‘Stamp’ the blossom onto your paper, press down gently and lift – you will be able to stamp with the blossom to make more than one print before you need to dip it in the paint again *tell the kids to press gently, if they press too hard their flower will break
- If you’d like to choose a different color paint, take a new blossom and dip it in the paint, repeating above process.
- Once you have ‘printed’ all your blossoms, you can then add stems and leaves if you like. You may do this two ways, one is to simply paint them in with a brush. The second is to put paint on the stem or leaf and then press it onto the paper in the spot you want it like you did with the blossom. Do this as many times as desired.
 The other thing I love about this flower printing activity is the many learning benefits and basic science concepts that children are introduced to by doing it. It enhances eye and hand coordination, fine motor skills, introduces them to scientific concepts such as observing, communicating, experimenting, patterning, and investigating. Not to mention the sensory engagement! Plus it is fun! I did this activity again with one of my preschool classes and it was amazing to see the variety in their creations and how engaged they became. Not one flower print was the same and they were all beautiful.

