Wintery Crafts

We all know that kids love crafts! and as a parent/ teacher it is fun to find things that are fun for them while teaching them developing skills. I love searching the internet to find different craft ideas. There are so many different things you can do with simple materials (many you already have around the house) and for little expense. I find that my kids just love making a craft, they are not picky about what it is they are making as long as they get to cut, glue and color; and they are so proud of what they made when they are done that they have to show everyone who comes in the door for the next few days.

Here are a few simple crafts that we have done recently that the kids really enjoyed. With the winter theme many of the crafts are based on snowmen, snowflakes, penguins, and mitts (or other winter wear). There are also some polar bears or other winter themed crafts to be found, but those are the most popular and you can find many variations on them that will meet the needs of any aged child.

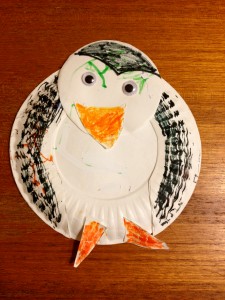
Paperplate Penguins (Luke and Chloe loved this one! They both worked diligently to create it and then proudly showed Daddy – they added a little extra color too)

small paperplates

googley eyes

orange and black markers

white paper

scissors

glue

On piece of white paper trace a small paper plate. On the tracing draw two half circles on the sides for wings and a small circle for the head. On the top third of the small circle draw half circle with a dip or point going down in the middle for the crown of the penguin. On the same sheet of paper, draw 3 triangles, one large one for the beak and two smaller ones for feet. (Depending on the age of the child they can draw these themselves, if not have an adult draw them) Child colors the triangles orange and the wings and crown on head black. Once they have completed coloring them they can cut them out.

Glue the wings onto the backside of the paperplate. Glue the head at the top of the plate and the feet at the bottom. Glue googley eyes on the head to make the face and the beak slightly beneath them in between the two eyes.

Cut Out Snowflakes (one of my favorites!)

white paper

scissors

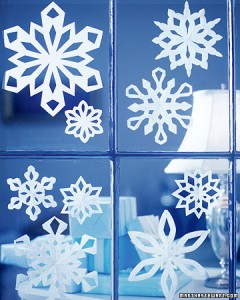
Fold piece of white paper in half, then in half again and one more time (so that you have folded it 3 times in total). Using scissors cut designs into the paper, child may do this by cutting off a corner, making a half circle on an edge, etc. Child cuts as many ‘designs’ into the paper as they would like. Once they are done child unfolds the paper and they have a beautiful snowflake with various patterns and designs.

Doing this will create a square snowflake. If you wish to have a circular one trace a circle on the paper and cut it out before folding it. You can also do this with smaller pieces of paper (to make smaller snowflakes) and/or colored paper. Children can make more than one and hang on the window creating their own ‘snowstorm’.

Note: Depending on the age of the child an adult may need to assist with cutting the snowflake. This craft is best for children who have good motor control and can use scissors well on their own.

Hot Chocolate Mug (love this!)

lightweight cardboard (cereal box)
paint – brown and any other color

paint brushes

white pom poms small or mini marshmallows

stickers

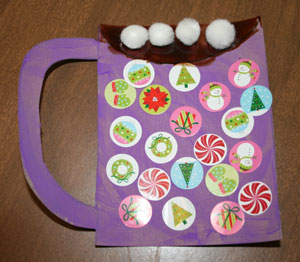
Draw a picture of mug on cardboard. Cut it out. Paint cardboard mug with color of choice.  Let paint dry.

When the paint is dry the child can then decorate it with stickers. Draw a half moon at the top of the mug. Child paints in the half moon with brown paint and sticks on pom poms (for marshmallows). Let dry. Pom poms should stick onto wet paint without needing to use glue. If when it dries pom poms haven’t stuck then a little glue can be used to secure them.

Note: Colored construction paper can be used in lieu of the cardboard and painting the main part of the mug.

Crafts are not only fun they are great ways to enhance children’s developing motor skills and enable them to learn to grasp things with their fingers. It also feeds their creativity and imagination as well as a sense of pride when they are finished!

In my search for crafts I discovered this wonderful link with some fantastic and innovative ideas. Check it out for more great wintery craft ideas!



Christmas Crafts for Kids

Over the past month the little ‘elves’ have been busy at our house making their Christmas crafts. Experimenting with googley eyes, glitter and cotton balls, they have created some wonderful wintery and Christmas crafts to add to the decor of our home.

Matthew’s Christmas Reindeer

Since Christmas is a holiday that most of us begin celebrating early in December (and for some even sooner in November -or the die hards right after Halloween :); it allows us lots of time to get ready and enjoy the season. Whether it be through games, activities, Christmas shopping and events or crafts, there is lots to do.

Luke and Chloe have really been enjoying making crafts this year and our nanny has created some wonderful crafts for them to make that use their developing skills and aid in their development of motor skills and creativity.

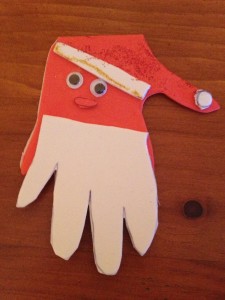
Chloe is very diligent and careful when she makes her crafts and though Luke is careful too, he tends to be a little ‘freer’ with his creations. One of the first crafts they made was a Santa Claus handprint, with googley eyes and sparkles that can be strung to hang on the tree as a Christmas ornament.

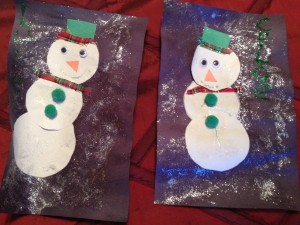
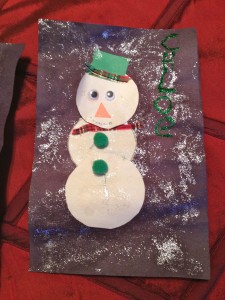
Another one was a snowman on a glittery snowy background complete with hat and scarf. They enjoyed them both and were very easy for them to do.

Santa Handprint Ornament

red foam sheet

white foam sheet

googley eyes

gold and red glitter glue

scissors

string

Trace child’s hand on red foam sheet and again on white foam sheet. Cut both pieces out (depending on the age of the child adult may need to cut out the handprints). Cut the white handprint in half and place on bottom half of red handprint to create beard. Cut out a white strip long enough to go across the top of the red hand between the thumb and the rest of the hand to make fur on hat. Cut out small circle for pom pom on hat and place at the end of the red thumb. Glue on googley eyes. Cut out small mouth out of red foam, Decorate with red and gold glitter glue. Put a string through the top of the red foam hand to  hang on tree.

Wintery Snowman

black, orange, green and white construction paper

silver glitter glue

pom poms

ribbon

glue

scissors

Cut one sheet of black construction paper in half. Cut 3 circles, the same size out of the white construction paper. Cut a small square out of the green construction paper (for hat). Glue the white circles sitting one on top of the other to build snowman on one of the halves of black construction paper. Glue on googley eyes on top circle to make face, add orange triangle from construction paper for nose. Use glitter glue to draw mouth. Use pieces of ribbon to make scarf for snowman and for brim on hat. Glue on. Use silver glitter glue on background of snowman (on black construction paper) to create ‘snow’. Add child’s name, if desired on right hand side of snowman.

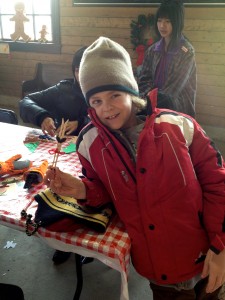
Chloe gluing her bear puppet

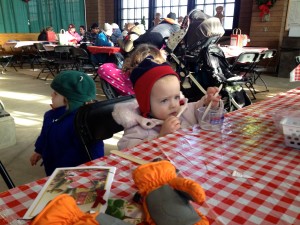
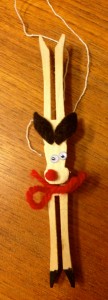
When we went to Heritage Park for their Once Upon a Christmas event they had some great crafts there too. Matthew made a clothespin reindeer and the twins each made a puppet out of an old Christmas card. This was a really simple idea where they traced a pattern onto an old Christmas card (they chose a bear), then we cut it out and glued it onto a popsicle stick. Not only is this a great use for old Christmas cards but Luke and Chloe loved it! They picked the card they wanted to use and after I helped with the cutting, they glued on the stick. Chloe got a little over zealous and decided to eat the glue, not sure why kids do that, I never did – but she finished her craft in the end.

There are a plethora of creative ideas out there for Christmas crafts for all ages such as paperplate snowmen, handprint wreaths and reindeer puppets. The ideas are endless and it is easy to create your own crafts as well. Here are some of my favorite links for more Christmas crafts and ideas.

Make your own snowglobe

Pipecleaner Snowflakes

Enchanted Learning

DLTK crafts

Enjoy and happy crafting as you enjoy this holiday season!


Shop our huge selection of folk art!  Free Shipping Available.

Thanksgiving Crafts for Kids – aka Turkeys, turkeys and more turkeys

Pine cone turkey

What holiday would be complete without crafts made by the kids to decorate? And believe me there is no shortage of craft ideas out there for any holiday, especially Thanksgiving. Turkey crafts alone number in the 20’s, with many variations that kids can do. From turkey handprints to pine cone turkeys there is something out there for every age and every possible craft supply you may have.

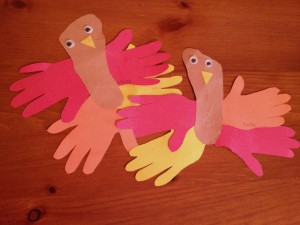
This is the first year that Luke and Chloe were old enough to do crafts so we tried a (surprise!) turkey craft. The Thanksgiving Handprint Craft is easy and fun, it also creates a bit of a momento if you decide to keep it; as you trace their hand and footprints to make it.

Our nanny, Elaine came up with the craft, which she found on the all kids network. It is an easy craft that can be done with all ages.

Thanksgiving Handprint Craft

Luke and Chloe's Handprint Turkeys

You will need brown, red, yellow, and orange construction paper, googley eyes, glue stick, scissors, pencil.

Trace your child’s foot on the brown construction paper. Depending on your child’s age you may need to assist or cut it out for them.

Trace your child’s hand on the red, yellow and orange construction paper and cut out. Cut a small triangle out of the orange for the turkey’s beak. Also cut little feet out of the orange.

Using glue stick, glue handprints to back of the foot. Glue eyes and beak on the front, with the little feet at the bottom. Use the wider part of the foot for the top of the turkey.

Another version of the handprint turkey is to have the kids write things that they are grateful for on each finger of their turkey, which I think is kind of unique and appropriate, considering the holiday. I also believe that it is important for us to teach our children to be grateful and this is a fun way to do it.

Garland of Leaves and Thankful Sunflower

I discovered 2 other versions of thankful crafts; the Garland of Leaves and Thankful Sunflower.

Garland of Leaves

For the Garland of Leaves you will need red, yellow and orange construction paper, a black marker, mini clothespins and some string or yarn. Kids cut leaves out of the different colors of construction paper and then write things that they are grateful for on each leaf. They also invite guests who come for dinner on Thanksgiving to write what they are thankful for on a leaf. Hang all the leaves on the string using mini clothespins and hang up on the wall to decorate. Then you are surrounded by gratefulness at dinner.

The Thankful Sunflower is a similar concept except it is in the shape of a sunflower and kids write what they are grateful for on the petals of the flower.

Lacing Crafts

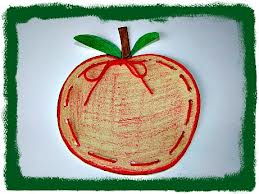
Lacing crafts are great for kids 2 years and up, as it helps them with their fine motor skills. All you need is card stock, a hole punch, yarn or ribbon, and a pencil. For Thanksgiving you can find templates for turkey drumsticks, cornucopia, pumpkins, or you can make your own.

Pumpkin Finger Paint

I always like to include at least one craft that includes painting as kids love it! Whether it be with brushes or fingers kids become very focused and attentive to their creations. This craft is very easy to do. You will need orange finger paint, card stock, green construction paper and yarn (if you wish to hang it).

Cut pumpkin out of cardstock and let the kids to paint it orange! Let them enjoy the paint squished between their fingers as they move and create. Let paint dry. Once it is dry cut out green stem out of construction paper, glue it on. Punch hole in top of stem and string through yarn to hang.

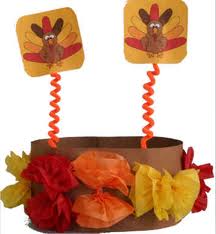
Thanksgiving Crown

What a great way to make Thanksgiving dinner more festive for the kids with their own Thanksgiving Crown. A simple construction paper hat, you will need

  • brown, orange, yellow or red construction paper,
  • 2 pipe cleaners
  • pencil
  • scissors
  • tape
  • printer
  • paper
  • tissue paper (orange, yellow and red — but you can use any combination of autumn colors you like)
  • brown thread
  • optional:  stickers, markers, glitter or gel pens to decorate
This craft is very well explained on the dltk website I found it on so simply click the link to take you there for instructions on how to complete it.
With any craft adult/ parent supervision is advised. Let the kids do as much of the craft themselves, but depending on their age may require more assistance with things like cutting. The important thing is to let the kids take their time and feel proud of what they made. It is a great learning for them as it develops their imaginations, creativity and motor skills.
Regardless of what crafts you choose this Thanksgiving, enjoy them and decorate your home with them, proudly displaying what your children can do. Count your many blessings this weekend as  you celebrate with family and friends enjoying the holiday and all the delectable delights that come with it. Happy Thanksgiving!
Tomorrow, guest blogger Nina Manolson talks about how to get your kids to eat healthy without the fight! Be sure to check out tomorrow’s post.