Valentine’s Day Crafts for Kids

valentine's day crafts

Valentine’s Day is a great holiday to get creative with kids. There are endless crafts ideas with very little materials or preparation needed. Kids will love these easy, simple Valentine’s Day crafts from hearts to cupid!

All you need are things that are red, pink and white, some hearts and a little imagination! Children of all ages can make these easy crafts. Of course, parent supervision is recommended when doing any crafts, besides it is a great opportunity for you to be creative and use your imagination too. My two favorites are the Valentine Person (I love any craft with accordion folding arms and legs) and the Cardboard Tube Cupid (I just think he is super cute!)

Depending on the age of the children you may want to do some prep in advance, pre-cutting shapes or strips depending on the craft you are making. During the craft you may have to assist gluing and folding depending on the ability of the child; but some 3 years olds do very well with these activities with little or no help. The key is to let the child do as much as they can themselves not only because it is their craft but to help them learn certain skills and achieve success. This will also instill a sense of pride in their finished Valentine’s Day craft.

Valentine Heart Wreath

This very pretty, easy craft can be done with children of all ages. Younger children may need assistance with cutting.

What is needed:Valentine's Day crafts

  • different colors of construction paper
  • scissors
  • glue stick
  • markers/pencil crayons
  • cereal box

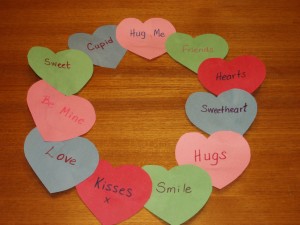
Trace a circle, about the size of a dinner plate onto the cardboard from the cereal box and cut it out. Trace a smaller circle about the size of a small plate inside the first circle and cut out the middle. Cut hearts that are approximately the same size out of construction paper, using a variety of colors. Note: smaller hearts will take longer to cover the wreath than larger ones.

Write different valentine words on each of the hearts like love, hugs, kisses, best friend, etc. Then glue the hearts around the cardboard ring until the circle has been covered.

Valentine Person

This is great for children 3 years and up. Younger children may need assistance with cutting out hearts, or have the hearts ready for them. Very easy craft that is lots of fun. Kids love the accordion arms!

What is needed:Valentine's Day crafts

  • red and pink construction paper
  • white paper
  • glue
  • scissors
  • markers

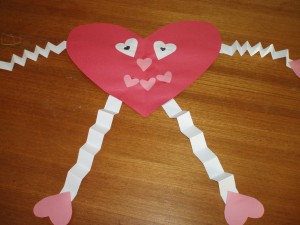
Cut one large heart out of red construction paper, this will be the body. Then cut 4 medium sized hearts out of pink for the hands and feet. Cut one small pink heart for the person’s nose. Put pink hearts aside.

Cut 4 long strips of white paper, these will make the arms and legs. “Accordion fold” the strips then glue them onto the red heart, one on each side for arms and 2 on the bottom (where the point is) for legs. Glue on one pink heart at the end of each strip for the hands and feet.

Glue small pink heart in middle of red heart for the nose. For the eyes children can cut out 2 more hearts and glue them on; they can glue on google eyes; or they can draw eyes on using markers. Similar options can be used for the mouth of either cutting out small hearts or gluing them on to form the mouth or draw it on.

Valentine Photo Frame

Great for kids 4 and up. Younger children may use only 1 or 2 colors if desired. Recommended that parent use the acrylic sealer when younger children are doing this craft.

What is needed:

  • small wooden unpainted photo frame
  • acrylic paint
  • paint brushes
  • craft jewels, buttons or stickers
  • acrylic sealer
  • white glue

Paint frame in 4 different colors, a different color on each side. Allow the paint to dry, then spray the frame with the acrylic sealer and allow to dry.

Once the sealer is dry select whatever decorations desired and glue them onto the frame. Some craft jewels may not require gluing as they have a self adhesive backing that can be peeled off and stuck onto the frame.

Add a picture of the child in the frame once dry and there is a wonderful gift for Mum, Dad, or that someone special.

Cardboard Tube Cupid

This craft is best done with children 7 years and up. It has many steps but is easy to do and very cute!

What is needed:Valentine's Day crafts

  • cardboard tube (toilet paper roll is perfect)
  • acrylic paint – peach, pink, white, black
  • paint brush
  • 1″ strip white construction paper
  • 1 gold (pipe cleaner) chenille stem
  • 1 red chenille stem
  • 1 silver chenille stem
  • 2 cotton balls
  • small piece peach felt
  • pencil
  • white glue
  • scissors

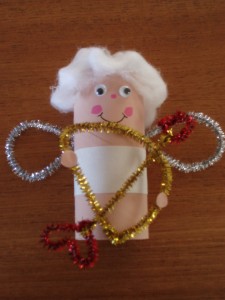
Paint cardboard tube with peach paint; let dry. Bend 2/3 of gold chenille stem into a letter “D”. Twist ends to secure and cut remaining long piece of chenille off. Remaining piece will be used to make arrow.

Bend end of red chenille into a small triangle; this will be the point of the arrow. Twist ends and trim long end off. Take remaining red chenille and bend into a red heart; this will be the back end of the arrow. Twist to secure and trim off excess. Take the remaining piece of gold chenille, twist one end onto the arrowhead and one end onto heart. Lay the bow on the table and glue the arrow across the front of it.

Cut the silver chenille stem in half to make wings. Bend both halves into tear drop shapes and twist ends to secure.

About an inch up from bottom of cardboard tube, apply some glue. Glue the 1″ wide strip of white construction paper around the tube and trim any extra. This is cupid’s diaper.

Stand the tube on end, diaper toward the bottom. Poke a hole on each side of tube with a pencil for the wings. Insert twisted ends of silver chenille wings into the holes.

Unroll the two cotton balls. Place some glue on the ends of both and attach to top of cardboard tube for hair.

Lay tube down on its side, wings sticking out to the left and right. Glue bow and arrow to the front of tube. Allow to dry completely. Cut two small circles from flesh-colored felt and glue to the front of the bow as the hands. In place of the felt, paint a piece of white paper peach and then cut out hands.

For cupid’s face, use a cotton swab or a roughed up paintbrush to dab some pink paint on for cheeks. Use the handle end of a paintbrush to dot on two white eyes. Let dry. When white is dry, dot on black. Two google eyes may be used instead of painting on eyes.

Valentine’s Day Crafts for All Ages

Valentine’s Day crafts are fun and enjoyable. One will find that there are many ideas and levels of crafts available, from very easy to a little more involved. Kids of all ages enjoy working with their hands and getting creative. Valentine’s is a great way to teach them about love and giving in a fun, interactive and creative way!

For more ideas on Valentine’s Day crafts check out Kaboose and Enchanted Learning.

Christmas Crafts for Kids

Over the past month the little ‘elves’ have been busy at our house making their Christmas crafts. Experimenting with googley eyes, glitter and cotton balls, they have created some wonderful wintery and Christmas crafts to add to the decor of our home.

Matthew’s Christmas Reindeer

Since Christmas is a holiday that most of us begin celebrating early in December (and for some even sooner in November -or the die hards right after Halloween :); it allows us lots of time to get ready and enjoy the season. Whether it be through games, activities, Christmas shopping and events or crafts, there is lots to do.

Luke and Chloe have really been enjoying making crafts this year and our nanny has created some wonderful crafts for them to make that use their developing skills and aid in their development of motor skills and creativity.

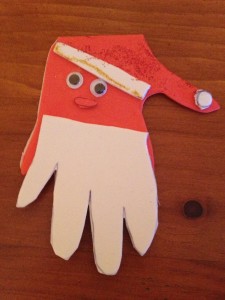
Chloe is very diligent and careful when she makes her crafts and though Luke is careful too, he tends to be a little ‘freer’ with his creations. One of the first crafts they made was a Santa Claus handprint, with googley eyes and sparkles that can be strung to hang on the tree as a Christmas ornament.

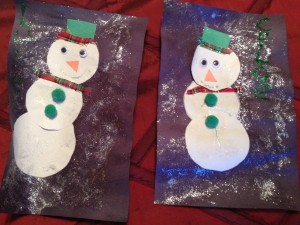
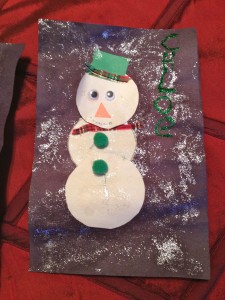
Another one was a snowman on a glittery snowy background complete with hat and scarf. They enjoyed them both and were very easy for them to do.

Santa Handprint Ornament

red foam sheet

white foam sheet

googley eyes

gold and red glitter glue

scissors

string

Trace child’s hand on red foam sheet and again on white foam sheet. Cut both pieces out (depending on the age of the child adult may need to cut out the handprints). Cut the white handprint in half and place on bottom half of red handprint to create beard. Cut out a white strip long enough to go across the top of the red hand between the thumb and the rest of the hand to make fur on hat. Cut out small circle for pom pom on hat and place at the end of the red thumb. Glue on googley eyes. Cut out small mouth out of red foam, Decorate with red and gold glitter glue. Put a string through the top of the red foam hand to  hang on tree.

Wintery Snowman

black, orange, green and white construction paper

silver glitter glue

pom poms

ribbon

glue

scissors

Cut one sheet of black construction paper in half. Cut 3 circles, the same size out of the white construction paper. Cut a small square out of the green construction paper (for hat). Glue the white circles sitting one on top of the other to build snowman on one of the halves of black construction paper. Glue on googley eyes on top circle to make face, add orange triangle from construction paper for nose. Use glitter glue to draw mouth. Use pieces of ribbon to make scarf for snowman and for brim on hat. Glue on. Use silver glitter glue on background of snowman (on black construction paper) to create ‘snow’. Add child’s name, if desired on right hand side of snowman.

Chloe gluing her bear puppet

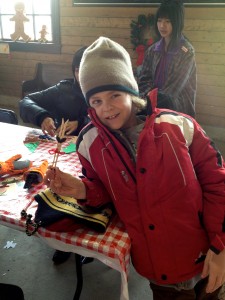
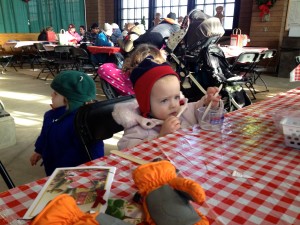
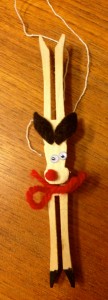
When we went to Heritage Park for their Once Upon a Christmas event they had some great crafts there too. Matthew made a clothespin reindeer and the twins each made a puppet out of an old Christmas card. This was a really simple idea where they traced a pattern onto an old Christmas card (they chose a bear), then we cut it out and glued it onto a popsicle stick. Not only is this a great use for old Christmas cards but Luke and Chloe loved it! They picked the card they wanted to use and after I helped with the cutting, they glued on the stick. Chloe got a little over zealous and decided to eat the glue, not sure why kids do that, I never did – but she finished her craft in the end.

There are a plethora of creative ideas out there for Christmas crafts for all ages such as paperplate snowmen, handprint wreaths and reindeer puppets. The ideas are endless and it is easy to create your own crafts as well. Here are some of my favorite links for more Christmas crafts and ideas.

Make your own snowglobe

Pipecleaner Snowflakes

Enchanted Learning

DLTK crafts

Enjoy and happy crafting as you enjoy this holiday season!


Shop our huge selection of folk art!  Free Shipping Available.

Fall Activities for Kids

Fall is my favorite time of year. The vibrant colors, the leaves changing on the trees. I often find a sense of renewal and excitement in the fall. Change and new beginnings, an expectation of things to come. Now I know that spring is typically the time for renewal and new things but for some reason this applies more to me in the Fall. There is just something about the energy, the way the warm sun glints through the trees, the crisp cool mornings, and the cozy afternoons. It’s magical, inviting and I look forward to it every year.

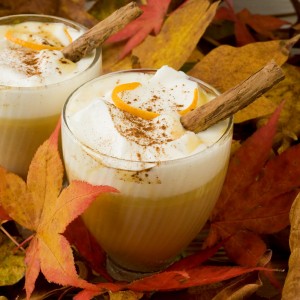
Pumpkin Spice Latte

I also enjoy all the activities that you can do in the Fall with the kids, the Fall recipes like warms hearty stews, specialty coffees like Pumpkin Spice Lattes, the bonfires, the festivals. It creates a warmth, a coziness and welcoming feeling that I love. It’s the time of year that I start to light more candles and fill my house with scents of pumpkin, cinnamon and cloves. It’s also a great time of year to be outside enjoying the warm sunny autumn afternoons.

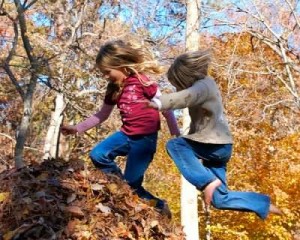
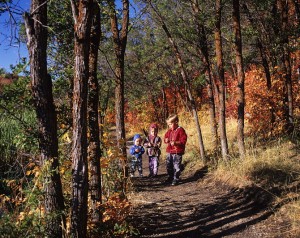
One of my favorite things to do in Fall is to just go for a walk, letting the kids explore and play in the leaves. The leaves are the best part of Fall. Whether we are kicking them up and dancing with them as they blow in the wind or gathering them for crafts and decorations for later. And I still love jumping in them! When I was growing up my sisters and I would love raking up the leaves, piling them high and jumping in them. Now as a parent and adult I love to jump in the leaves with my kids.

Taking the kids out for a walk is a great opportunity for them to not only have some fun but to teach them to learn about and appreciate their natural environment. There are lots of simple activities you can do while you’re out with very little equipment. If you bring a few items with you such as a magnifying glass, some paper, crayons, pencils and a cloth bag, this will get you started.

Many of these activities will engage kids of all ages. Here are some of my favorites:

Tree & Leaf Rubbings

Leaf Rubbings

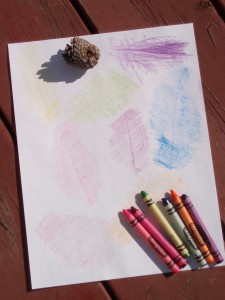
Have the children pick a tree, then take a piece of paper and a crayon. Put the paper up against the bark of the tree and then gently rub over the paper with their crayon. Younger children may need assistance holding their paper. Once they are finished they can leave the tree rubbing on it’s own or then add to it and make it part of another picture. They can also do leaf rubbings with leaves they have found on the ground, but will need a flat surface to do the rubbing. If there is nothing close by then take the leaves home and they  can do the leaf rubbings there.

More Leaf Fun…

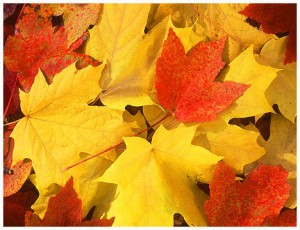
Have the kids gather a variety of leaves, different shapes, sizes and colors. (Please note to get the children to take the leaves off the ground not off the trees!) The kids will love gathering them and it is an easy way for them to explore and teach them about the different kinds of trees. Take a moment to help them figure out which leaves belong to which trees. If you aren’t familiar with which trees are which, you can get a tree identification book from the library. With young children only talk about one or two, with older more.

With their gathered leaves they can also make a bouquet to put in a vase and use as a centerpiece on your table, or cut a circle out of cardboard and glue the leaves on to make a  leaf wreath.

They can trace their leaves on construction paper using different colors, cut them out then decorate their room or a part of the house. Also using construction paper they could make their own Autumn tree by cutting out a trunk and glueing the leaves on the branches or creating leaf people out of their leaves. Younger children may need help with cutting.

Find a Tree

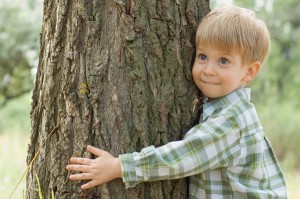
This is an environmental game that I do with all ages of children, from my 2 year old twins to the Leaders in Training who are 12-14. You can adjust it accordingly depending on the age of the children but the premise is the same. In partners, one is blindfolded and the other leads their partner to a tree. While blindfolded they explore the tree using their other senses. Touch, smell, etc. Once they feel that they have explored the tree thoroughly then the partner takes them back to where they started, removes the blindfold. The blindfolded partner then goes and sees if they can find their tree. With younger children use a small area with only a few trees to choose from with older you can use a larger area to make it more challlenging.

Fall Festivals

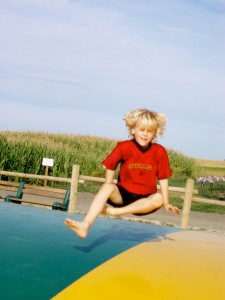
On the Jumping Pillow at the Calgary Corn Maze

Many communities Fall Festival celebrations, from pumpkin patches to hayrides, corn mazes and barbeques. We have a variety here in Calgary, from the Calgary Corn Maze, where they have a petting zoo, jumping pillow and corn cannons; to events at Heritage Park such as the Harvest Sale and Railway Days. Check out your local community events to find something that speaks to you.

Other Crafts and Activities

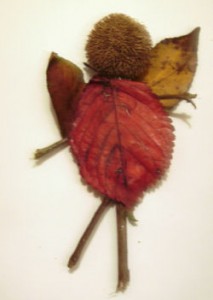
Twig Fairy

There are so many materials in the natural environment, especially in the Fall, to create all kinds of wonderful crafts and activities. When gathering materials for crafts please encourage the children to take things from the ground (whether it be leaves, pine cones, etc.) and not from the live trees and plants as this could damage or kill them. There are great crafts such as twig fairies, autumn looms (to display all the natural treasures they find), word searches and coloring pages. Just GoogleFall Activities and Crafts’ and all kinds of great websites will come up. Some of my favorite sites are Enchanted Learning and Family Fun.

Fall is a beautiful season, so get out and explore it, let the kids fill a bag of goodies (natural items) and then come home and see what you can do with them. Encourage the kids to create their own crafts and games from what they have found. It is a wonderful time to be creative and use their imagination and they’ll be learning about the natural world and all she has to offer at the same time!