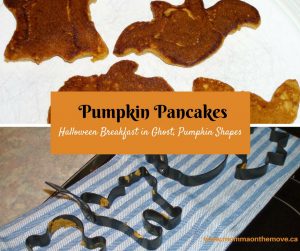
Last year I made Pumpkin pancakes Halloween morning for the kids. I found these mini Halloween pancake molds at Williams Sonoma -in the shape of a cat, pumpkin, bat and ghost. It came with the pancake recipe so I thought I would try it out. It was so fun! It was a great way to start the day and to make it fun especially when meeting our no sugar requirement.
I am planning to make them again this year, except I will make them the night before and reheat them in the morning. Because Halloween falls on a school day, I would have to get up quite early to make them fresh and I am having a hard enough time getting up on school days as it is 
Tips for Using Molds for Pumpkin Pancakes
When using the molds there are a few tips and tricks that I would recommend in order to make your pancake making experience successful.
First, is to buy a pancake pen. They are also available at Williams Sonoma and it is well worth the money spent. You fill the pen with batter on one end and then you squeeze it out of the tip on the other when you are ready. It has a cover on the “pen” end so you can stand it up with the batter at the end and ready to go. This is way easier and faster than spooning it into the molds.
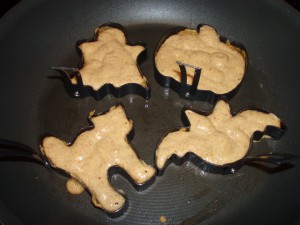
Second, make sure that your griddle or pan is hot before you start and that you grease the pancake molds with a little bit of oil. They are non stick molds but you still need that extra grease to keep the batter from sticking, especially in the corners. And even with that I found that I had to gently push around the edges with a butter knife to get them to come out. And grease them EVERY time you put in a new batch of batter.
Third, don’t overfill the molds. If you use the recipe below they will puff up so only fill them about halfway. If you overfill them they will be hard to get out regardless if you grease them.
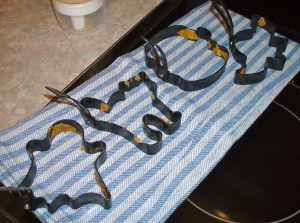
Fourthly, they do have little handles on them to help you take them out, but they become hot as they are metal like the rest of the mold – make sure you use a pot holder or oven mitt to handle them.
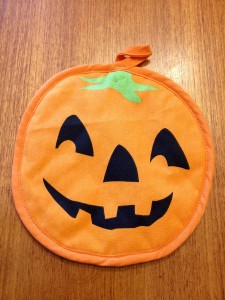
Interestingly last year I discovered I had no pot holders as I never found them to be useful and were just taking up space, so I gave them all away. Now I have found a reason to have at least one around, as using an oven mitt is too bulky and awkward to handle the molds. Fortunately I found a Halloween pumpkin pot holder on sale after Halloween last year, so I’ll put it to perfect use.
My last tip is be patient with yourself and give yourself enough time to make them; hence doing them the night before. I have to admit they are a bit finicky to make but once you get the first few under your belt you get the hang of it and it becomes easier. By the time I was done my batch I could get the pumpkin and the ghost shapes out without having to use my butterknife around the edges.
And oh they are delicious! The kids loved them. They found the shapes super fun and now ask for them each year.
So try something unique this Halloween for breakfast; even if you don’t have the molds the kids will still gobble them up. You could Hallloween -ish by simply make faces on them using pieces of fruit like sliced bananas, blueberries, strawberries, apples, etc.
I adjusted the original recipe to sugar and dairy free to meet our needs and is the recipe posted here.
Pumpkin Pancakes
1 1/2 c. flour (I used half whole wheat and half white)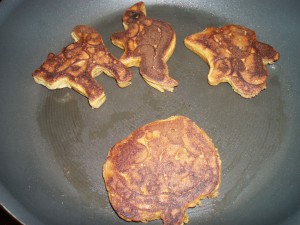
1/4 c. date sugar
3/4 tsp. baking powder
1/2 tsp. baking soda
1/2 tsp. salt
2 tsp. cinnamon (or 1 drop Cinnamon Bark essential oil)
1/2 tsp. ginger (or 1 drop Ginger essential oil)
1/4 tsp. ground allspice (or 1 drop OnGuard essential oil)
4 eggs, separated
3/4 c. canned unsweetened pumpkin
1 1/2 c. almond milk or other preferred non dairy milk
4 tbsp. melted Earth Balance
1 tsp. vanilla extract
100% pure maple syrup (for serving)
In a large bowl whisk together flour, date sugar, baking powder, baking soda, salt, cinnamon, ginger and allspice. Set aside.
In another bowl, beat the egg whites until medium peaks form. Set aside.
In another bowl, whisk together the egg yolks, pumpkin puree, rice milk, Earth Balance and vanilla until well combined. Whisk the pumpkin mixture into the flour mixture just until the batter is smooth and no lumps of flour remain. Fold in egg whites in 2 additions.
Heat griddle over medium heat until a few drops of water flicked onto the surface skitter across it. Lightly grease the griddle and the inside surface of the mini pancake molds. Set the molds with handles up on the griddle and heat until hot.
Pour 1/4 c. pancake batter into each mold. If necessary use a butter knife of small spatula to spread the batter into the corners of the molds. Cook until bubbles form on top and the batter is set, 3 to 4 minutes. Remove molds, and flip the pancakes over. Cook until golden brown on the other side, about 3 minutes more. Keep warm until all pancakes are cooked. Makes between 24-32 pancakes.
*Please note that if using essential oils in this recipe to ensure that your essential oil brand is safe to take internally. Not all essential oil brands are created equally and some use synthetic fillers and chemicals in their processing of the oil or added to the oil itself. Due to no governing regulations on producing essential oils a company can say they are 100% or Organic. Due your due diligence and research the brand you are using to ensure your safe usage.
Enjoy! And Happy Halloweening!



Really good post!
very good and cool,thank you for your sharing.
I’ve recently started a blog, the info you offer on this site has helped me greatly. Thank you for all of your time & work.
thank you, I have learned a lot of knowledge in this area. Nice post,thanks for share.
I could not refrain from commenting. Perfectly written!
Pingback: Apple Cinnamon Pancakes | Momma On The MoveMomma On The Move
Pingback: Halloween Dinner Ideas - Monster Brains | Momma On The MoveMomma On The Move