The Art of Gratitude

Many of us spent this past weekend celebrating Thanksgiving. Spending time with family and friends sharing a savory meal of turkey, veggies and pie. It is a time when many of us recognize and acknowledge the blessings in our lives and give thanks.

It’s great. It gives me a warm fuzzy feeling just thinking about it. But it makes me wonder, if it feels so good and makes us happy, why do so many of us wait until the holidays to express our gratitude? Wonderful things happen everyday, in every moment that we should be grateful for.

Oprah Winfrey

Studies have shown that the more grateful you are for things in your life, the happier you are and the more good things will come to you. Leaders and prominent figures in the world are leading the way by talking about gratitude and it’s effects on their lives. Sixteen years ago, Oprah Winfrey started a gratitude journal, in which she writes down 5 things everyday that she is grateful for. She believes that this is one of the best things she has ever done in her life.

Being grateful is easy. If you appreciate and love what you have you will receive more. Even the simplest things, like someone holding the door open for you, or bringing you flowers, smiling. We often forget how some of the simplier things in life can bring us such joy and beauty. When we take note of them, they increase. We become more alive and receptive to the goodness that is in our lives and it keeps us living in the present moment.

I know there are many challenges in life and there are days when you wonder how you can be grateful for anything. On those days especially it is important to identify things that you are grateful for. If the kids have been screaming and you have been going crazy, then all of a sudden you have 5 minutes of silence and the kids playing happily, be grateful! Say thank you – you’ll get more!

Being grateful changes your state of being, brings a sense of peace, contentment and more overall happiness in your life. If you practice being grateful everyday, then everyday will be beautiful and wonderful, no matter if it seems like the world is falling down around you.

The key thing is to write down the things you are grateful for. Writing them down creates more power in your words; and your hands are a direct connection to your heart, so writing them down strengthens this connection. Creates more love and genuine appreciation.

I know you may be sitting there grumbling that this is all mumbo jumbo, so if you don’t believe it do an experiment. Start a gratitude journal and write down 3-5 things every day that you are grateful for. Do this for a week and notice what happens, notice how you feel, notice what has come to you. Then do it for another week and notice again. You may find that things not only are improving in your life but that your overall sense of well being has improved.

And it is easy to teach this to your kids. Most families are very diligent about teaching our children to say please and thank you, but if we can teach them to do a bit more then this will open them up to such beauty in their lives.

Yesterday when Luke and Chloe came home they noticed the snowsuit and snowpants that I had brought up. They had not seen these before so to them they were new. As soon as they saw them they were both saying, “Oh! thank you Mommy!” like they were the best things in the world. They immediately were trying them on, oohing and awing. It was a totally simple thing but they were showing gratitude. No one prompted them, no said they had too. They just did. I feel that if we can all nuture this in each of our children we will create a very different world.

With young children you can ask them at the end of each day before they go to bed what they are grateful for. With older children you can have them tell you but also write them down in their own journal. I believe that if we share what we are grateful for it increases, spreads out like the ripple effect. And doing it before bed is a wonderful time to do so because ending your day with things you are grateful for and make you feel good, happy; you are more likely to wake up in the morning feeling the same way. And isn’t that a great way to start your days? for you and the kids?

Gratitude is not a new thing and there are many ways to express it. But it is important that we do, everyday, not just on holidays or special occasions. It’s all part of creating what we want in our lives, focus on what is good and you will create more good. And I am guessing that we would all like more of the good things in our lives.

Thanksgiving Crafts for Kids – aka Turkeys, turkeys and more turkeys

Pine cone turkey

What holiday would be complete without crafts made by the kids to decorate? And believe me there is no shortage of craft ideas out there for any holiday, especially Thanksgiving. Turkey crafts alone number in the 20’s, with many variations that kids can do. From turkey handprints to pine cone turkeys there is something out there for every age and every possible craft supply you may have.

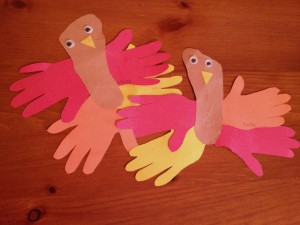
This is the first year that Luke and Chloe were old enough to do crafts so we tried a (surprise!) turkey craft. The Thanksgiving Handprint Craft is easy and fun, it also creates a bit of a momento if you decide to keep it; as you trace their hand and footprints to make it.

Our nanny, Elaine came up with the craft, which she found on the all kids network. It is an easy craft that can be done with all ages.

Thanksgiving Handprint Craft

Luke and Chloe's Handprint Turkeys

You will need brown, red, yellow, and orange construction paper, googley eyes, glue stick, scissors, pencil.

Trace your child’s foot on the brown construction paper. Depending on your child’s age you may need to assist or cut it out for them.

Trace your child’s hand on the red, yellow and orange construction paper and cut out. Cut a small triangle out of the orange for the turkey’s beak. Also cut little feet out of the orange.

Using glue stick, glue handprints to back of the foot. Glue eyes and beak on the front, with the little feet at the bottom. Use the wider part of the foot for the top of the turkey.

Another version of the handprint turkey is to have the kids write things that they are grateful for on each finger of their turkey, which I think is kind of unique and appropriate, considering the holiday. I also believe that it is important for us to teach our children to be grateful and this is a fun way to do it.

Garland of Leaves and Thankful Sunflower

I discovered 2 other versions of thankful crafts; the Garland of Leaves and Thankful Sunflower.

Garland of Leaves

For the Garland of Leaves you will need red, yellow and orange construction paper, a black marker, mini clothespins and some string or yarn. Kids cut leaves out of the different colors of construction paper and then write things that they are grateful for on each leaf. They also invite guests who come for dinner on Thanksgiving to write what they are thankful for on a leaf. Hang all the leaves on the string using mini clothespins and hang up on the wall to decorate. Then you are surrounded by gratefulness at dinner.

The Thankful Sunflower is a similar concept except it is in the shape of a sunflower and kids write what they are grateful for on the petals of the flower.

Lacing Crafts

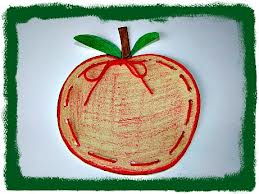
Lacing crafts are great for kids 2 years and up, as it helps them with their fine motor skills. All you need is card stock, a hole punch, yarn or ribbon, and a pencil. For Thanksgiving you can find templates for turkey drumsticks, cornucopia, pumpkins, or you can make your own.

Pumpkin Finger Paint

I always like to include at least one craft that includes painting as kids love it! Whether it be with brushes or fingers kids become very focused and attentive to their creations. This craft is very easy to do. You will need orange finger paint, card stock, green construction paper and yarn (if you wish to hang it).

Cut pumpkin out of cardstock and let the kids to paint it orange! Let them enjoy the paint squished between their fingers as they move and create. Let paint dry. Once it is dry cut out green stem out of construction paper, glue it on. Punch hole in top of stem and string through yarn to hang.

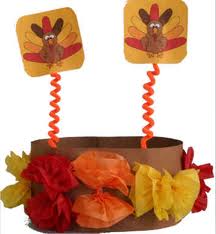
Thanksgiving Crown

What a great way to make Thanksgiving dinner more festive for the kids with their own Thanksgiving Crown. A simple construction paper hat, you will need

  • brown, orange, yellow or red construction paper,
  • 2 pipe cleaners
  • pencil
  • scissors
  • tape
  • printer
  • paper
  • tissue paper (orange, yellow and red — but you can use any combination of autumn colors you like)
  • brown thread
  • optional:  stickers, markers, glitter or gel pens to decorate
This craft is very well explained on the dltk website I found it on so simply click the link to take you there for instructions on how to complete it.
With any craft adult/ parent supervision is advised. Let the kids do as much of the craft themselves, but depending on their age may require more assistance with things like cutting. The important thing is to let the kids take their time and feel proud of what they made. It is a great learning for them as it develops their imaginations, creativity and motor skills.
Regardless of what crafts you choose this Thanksgiving, enjoy them and decorate your home with them, proudly displaying what your children can do. Count your many blessings this weekend as  you celebrate with family and friends enjoying the holiday and all the delectable delights that come with it. Happy Thanksgiving!
Tomorrow, guest blogger Nina Manolson talks about how to get your kids to eat healthy without the fight! Be sure to check out tomorrow’s post.


Apples, Apples, Apples

apple activities for kids

Inspired by our apple picking the other day and with the abundance of apples in my kitchen, I decided to hop on the internet and look for fun crafts, games and ideas to do with the kids around an apple theme. Of course, I was not disappointed by the abundance of ideas out there, especially at this time of year.

After checking out a number of websites, I made a list of my favorites and have been trying them with the kids over the last few days. Here are the highlights and my faves.
Apple Crafts

apple activities

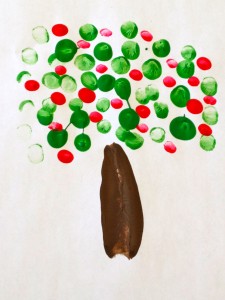
Fingerprint Apple Tree

Fingerprint Apple Tree – this craft is super easy and fun! You will need brown, red and green tempera paint and some paper. The kids place the side of their hand in the brown paint and then stamp it on the paper. Then using their index finger they dip it in the green paint to make leaves. Lastly using their pinky finger, they dip it in the red paint and touch it to the paper to make apples.
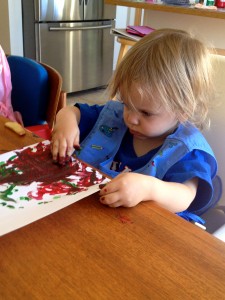
Matthew and I did ours just like the picture showed while Luke and Chloe, though they started out the same, ended up getting very creative with their tree. It was so cute to watch, both very focused, creating their tree. It was actually their first time using paints and they loved it! and have beautiful apple trees to show for it. And even though it doesn’t ‘look’ like the picture, they proudly call it their apple tree and share it with others.
Luke’s apple tree

Along the theme of apple trees, kids can also make a Pom Pom Apple Tree. Again very simple and easy. You will need brown paper, a brown marker, green paint, scissors, white glue and red pom poms. For this one I am going direct you to the website I found it on as they have done a great job of explaining how to put it together with great pictures.

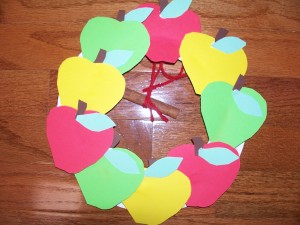
There are other easy apple crafts I discovered that I like – Cinnamon Apple Wreath, Toilet Paper Roll Apple, Stained Glass Apple and one of my favorites, the Worm in Apple.

You can even do apple prints, like potato stamping, and create beautiful lunchbags, dish towels or a homemade greeting cards. A craft from Martha Stewart of course.

Cinnamon Apple Wreath

Apple Games

Hot Apple – Just like hot potato except you use an apple instead. Children sit in a circle passing around the apple while there is music playing. Children pass the apple from one to another; they want to pass the apple quickly because when the music stops if they are holding the apple, then they are out of the game. Game continues until there is only one child left.

Apple Relay – Divide the children into 2 teams. Designate a starting line and an end line.  Teams line up one behind the other at the start line. The first person on each team places the apple on their head and must balance the apple on their head while they walk to the end line and back. If they drop the apple they must stop, count to three, then place the apple back on their head and continue. Once they are back to the start line, the next person goes. The first team to have everyone on their team finish wins.

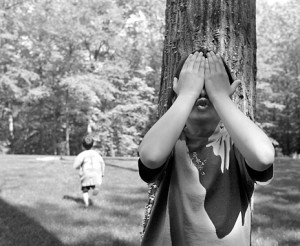
Apple Hide & Seek – this is great for younger children. Have the children sit in a circle and close their eyes. While their eyes are closed hide the apple. Once it is hidden children may open their eyes and then move around the room looking for the apple. Once they find the apple they leave it where it is hidden and simply return to the circle. The last person to find the apple can hide the apple for the next round.

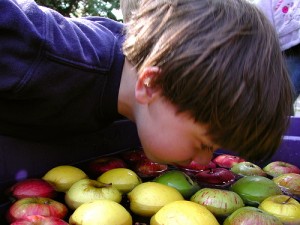
Bobbing for apples

Of course there is the traditional Bobbing for Apples, which we typically do around Halloween, which is always a riot. I like the version where you have to bob for the apple, then go and use your nose to find a candy in the flour bowl. It can get quite messy but it’s a hoot!

Apple Books

An apple theme would not be complete without books about apples. From Apples, Apples, Apples to How to Make an Apple Pie and See the World
there are many stories that will teach and delight children of all ages.

apple activities

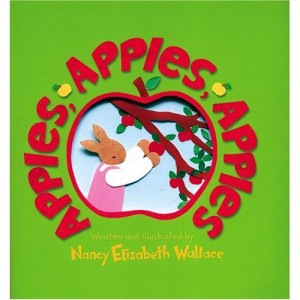
Apples, Apples, Apples is a wonderful children’s book that I discovered while doing my research on the internet. Written by Nancy Elizabeth Wallace, it’s about the bunny family’s trip to Long Hill Orchard where Mr. Miller takes them on a wobbly wagon ride and tells them all sorts of fun things about Fall’s favorite fruit. It also includes apple songs, sayings and a recipe to try.

How Do Apples Grow? is a delightful story about how apples grow from flower to fruit, ready for you to eat. Written by Betty Maestro, it is beautifully illustrated and easy to read.

Regardless of the apple activities you try, the kids will be sure to enjoy themselves learning about this abundant and delicious Fall fruit and you may even learn something new yourself!

apple activities

Chloe’s ‘Apple of her eye’

Fall Activities for Kids

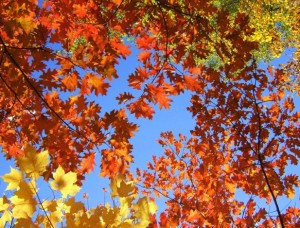
Fall is my favorite time of year. The vibrant colors, the leaves changing on the trees. I often find a sense of renewal and excitement in the fall. Change and new beginnings, an expectation of things to come. Now I know that spring is typically the time for renewal and new things but for some reason this applies more to me in the Fall. There is just something about the energy, the way the warm sun glints through the trees, the crisp cool mornings, and the cozy afternoons. It’s magical, inviting and I look forward to it every year.

Pumpkin Spice Latte

I also enjoy all the activities that you can do in the Fall with the kids, the Fall recipes like warms hearty stews, specialty coffees like Pumpkin Spice Lattes, the bonfires, the festivals. It creates a warmth, a coziness and welcoming feeling that I love. It’s the time of year that I start to light more candles and fill my house with scents of pumpkin, cinnamon and cloves. It’s also a great time of year to be outside enjoying the warm sunny autumn afternoons.

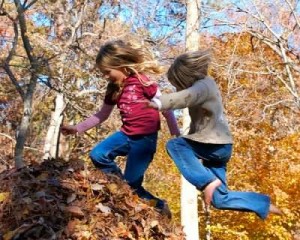
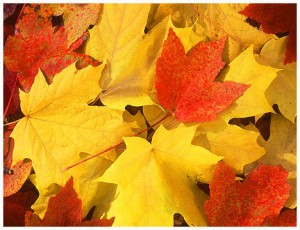
One of my favorite things to do in Fall is to just go for a walk, letting the kids explore and play in the leaves. The leaves are the best part of Fall. Whether we are kicking them up and dancing with them as they blow in the wind or gathering them for crafts and decorations for later. And I still love jumping in them! When I was growing up my sisters and I would love raking up the leaves, piling them high and jumping in them. Now as a parent and adult I love to jump in the leaves with my kids.

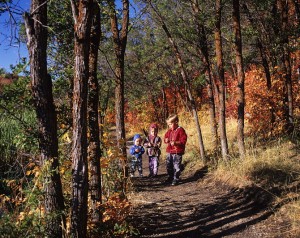
Taking the kids out for a walk is a great opportunity for them to not only have some fun but to teach them to learn about and appreciate their natural environment. There are lots of simple activities you can do while you’re out with very little equipment. If you bring a few items with you such as a magnifying glass, some paper, crayons, pencils and a cloth bag, this will get you started.

Many of these activities will engage kids of all ages. Here are some of my favorites:

Tree & Leaf Rubbings

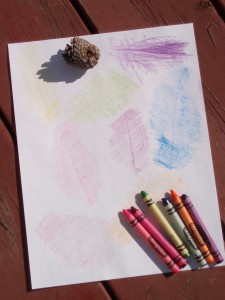
Leaf Rubbings

Have the children pick a tree, then take a piece of paper and a crayon. Put the paper up against the bark of the tree and then gently rub over the paper with their crayon. Younger children may need assistance holding their paper. Once they are finished they can leave the tree rubbing on it’s own or then add to it and make it part of another picture. They can also do leaf rubbings with leaves they have found on the ground, but will need a flat surface to do the rubbing. If there is nothing close by then take the leaves home and they  can do the leaf rubbings there.

More Leaf Fun…

Have the kids gather a variety of leaves, different shapes, sizes and colors. (Please note to get the children to take the leaves off the ground not off the trees!) The kids will love gathering them and it is an easy way for them to explore and teach them about the different kinds of trees. Take a moment to help them figure out which leaves belong to which trees. If you aren’t familiar with which trees are which, you can get a tree identification book from the library. With young children only talk about one or two, with older more.

With their gathered leaves they can also make a bouquet to put in a vase and use as a centerpiece on your table, or cut a circle out of cardboard and glue the leaves on to make a  leaf wreath.

They can trace their leaves on construction paper using different colors, cut them out then decorate their room or a part of the house. Also using construction paper they could make their own Autumn tree by cutting out a trunk and glueing the leaves on the branches or creating leaf people out of their leaves. Younger children may need help with cutting.

Find a Tree

This is an environmental game that I do with all ages of children, from my 2 year old twins to the Leaders in Training who are 12-14. You can adjust it accordingly depending on the age of the children but the premise is the same. In partners, one is blindfolded and the other leads their partner to a tree. While blindfolded they explore the tree using their other senses. Touch, smell, etc. Once they feel that they have explored the tree thoroughly then the partner takes them back to where they started, removes the blindfold. The blindfolded partner then goes and sees if they can find their tree. With younger children use a small area with only a few trees to choose from with older you can use a larger area to make it more challlenging.

Fall Festivals

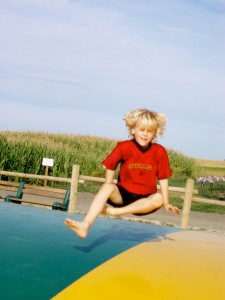
On the Jumping Pillow at the Calgary Corn Maze

Many communities Fall Festival celebrations, from pumpkin patches to hayrides, corn mazes and barbeques. We have a variety here in Calgary, from the Calgary Corn Maze, where they have a petting zoo, jumping pillow and corn cannons; to events at Heritage Park such as the Harvest Sale and Railway Days. Check out your local community events to find something that speaks to you.

Other Crafts and Activities

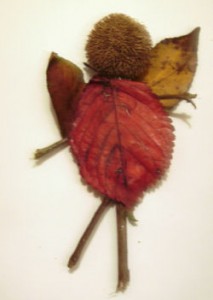
Twig Fairy

There are so many materials in the natural environment, especially in the Fall, to create all kinds of wonderful crafts and activities. When gathering materials for crafts please encourage the children to take things from the ground (whether it be leaves, pine cones, etc.) and not from the live trees and plants as this could damage or kill them. There are great crafts such as twig fairies, autumn looms (to display all the natural treasures they find), word searches and coloring pages. Just GoogleFall Activities and Crafts’ and all kinds of great websites will come up. Some of my favorite sites are Enchanted Learning and Family Fun.

Fall is a beautiful season, so get out and explore it, let the kids fill a bag of goodies (natural items) and then come home and see what you can do with them. Encourage the kids to create their own crafts and games from what they have found. It is a wonderful time to be creative and use their imagination and they’ll be learning about the natural world and all she has to offer at the same time!


The Giant Cedars Boardwalk – aka Luke and Chloe’s First Hike

giant cedars boardwalk

One of the great things about children is that if you introduce things to them when they are little they usually just accept it. They approach everything with wonder and delight, curiousity and a willingness to try.

When you introduce it at a young age they do not have the fears or hang ups that we do as adults, the beliefs that we can’t or shouldn’t, or the stubborness to refuse what you are suggesting because they ‘don’t want to’. This is one of the beautys of being a child and spending time with a child. They remind us to try it all and to move forward fearlessly because you never know what joys you are going to experience.

We have introduced things early on with all of our children, in many things, but specifically in introducing camping and hiking to them; all at around the age of 2. Matthew’s first hike was the Fenland Trail in Banff, a 2 km loop through a lush forested area. He completed it easily and then we did another short hike after lunch that day. I think he did 5 km total that day and he was only 2 or 3.

Luke and Chloe’s first hike was a few weeks ago on our way to visit my parents in Oliver, BC. We had stopped for lunch at the Giant Cedars trail in Mt. Revelstoke National Park, British Columbia. There was a picnic area and washrooms to use and after our tummies were full, we went for a walk along the trail.

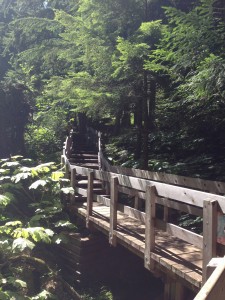
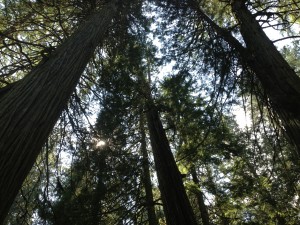
The Giant Cedars trail is an easy, self guided, 500 m loop with some of the oldest trees in the Columbia Mountains. Featuring the largest western red cedars and dark brown western hemlocks, this boardwalk trail is lush, green and alive. As soon as you enter the trail you can feel the warmth and comfort of a such an old forest.

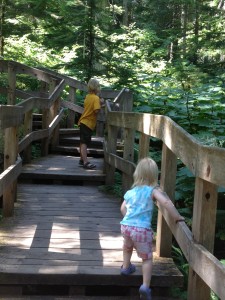
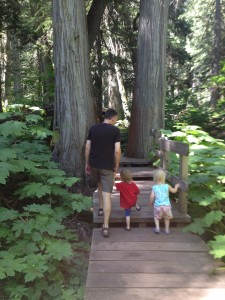
Chloe taking the stairs at the beginning of the trail

It is a great trail for kids with lots to discover and explore. There are benches along the way so you can sit and relax, enjoying the serene atmosphere and the magic of an old growth forest. Both Chloe and Luke effortlessly went up the stairs that start the trail. Chloe was delighted by the little brook flowing by and would stop every time she saw water. She would scream in delight, “water!” and then bend over, hands on her thighs to take a closer look.

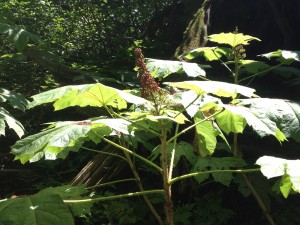
Devil’s Club

We meandered along the trail checking things out, the Giant Devil’s Club, the nurse logs and fungi. We read the interpretive signs at different points along the trail describing the age of the trees (over 500 years old), the animals who live there, such as bats, bears and caribou; and how they all make up an important and healthy functioning ecosystem.

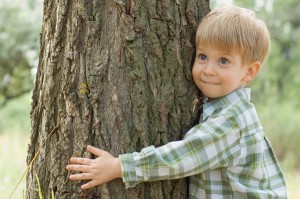
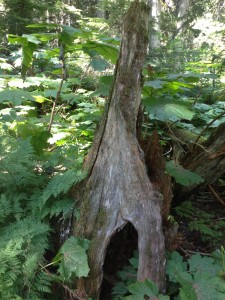
Luke was very excited about the fairies which he shared were in their houses; which he told me were the splits in the trees or under the lush underbrush. Both Luke and Chloe walked the whole way, with Chloe stopping to hug and kiss trees and Luke checking out the flowers. Matthew of course ran the trail, cause as usual he had energy to burn. It took us half an hour to do the trail, but is typically done in 15-20 minutes, depending on how fast you move along the trail and if you stop to linger.

Fairy Houses

It is a great place to relax and unplug for a while, to just sit and soak up the atmosphere. It is also a super easy hike for kids and will be a great first or early experience for them.

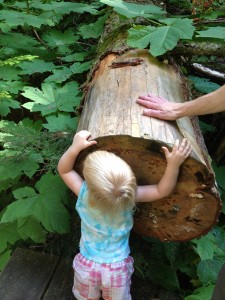
Hugging a tree

The key to hiking with kids to make their first experiences easy (short enough that they can walk it without feeling tired or have to be carried), achievable (something that they can do all by themselves without feeling discouraged at the end), interesting (lots of things to see, check out and explore) and in proper footwear. Now I would not run out and buy hiking boots for my 2 year old, but it is a good idea to ensure that they have sturdy, closed toed shoes, like runners. If you make their first experiences enjoyable and memorable than they will quickly and easily develop a love for hiking (and an appreciation for their natural environment) as they grow up.

Rainy Day Activities

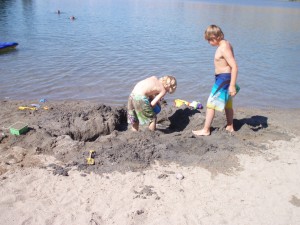
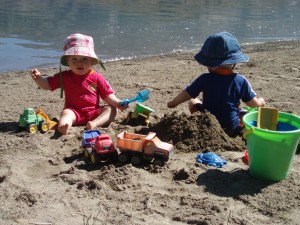
Playing at the lake in Oliver, BC

We have been blessed this year with a very beautiful summer. Many warm, sunny days filled with clear blue skies and days at the lake. Fortunately we have not had many rainy days at all, which has been great for those of us who want to play outside, but probably not so good for the farmers.

When we do have the odd rainy day and as the weather cools as we move into fall, it can be challenging to keep the kids entertained and prevent the inevitable ‘cabin fever’ that sets in from being inside for too long. I have found that having a ‘backpocket’ full of activities for the kids is a great way to keep them busy and you happy.

Here are some activities that I have enjoyed as a child and have used with my own kids to keep us all sane on those rainy days. Of course there are the typical things like watching movies and playing video games, but I always find that it is great to have some creative ideas and activities to engage their minds and imagination, as I feel that being in front of the tv all day is not always the best.

Build a fort

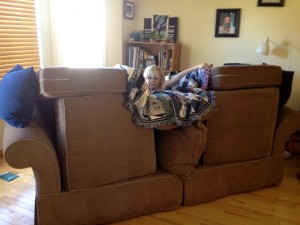
My favorite indoor activity has always been to make a fort. My sisters and I would get chairs and blankets and set things up so that we could then get inside and play all day. We would spend hours setting it up and enjoying it. My kids tend to use the couch cushions and pillows, in addition to blankets to set up their forts. Yes my couch comes apart for a while but the deal is at the end of the day they put it all back together, and everybody’s happy. They have had hours of fun and I have had hours of stress free activity.

Matthew in his couch fort

Kids can also use cardboard boxes to build a fort, this is something that they could leave up for awhile and use if it was in a space that worked for everyone. They can experiment with all shapes and sizes, decorate it with crayons or markers.

The important thing with forts is to let the kids be creative. Let them build it and knock it down a few times, let them use their imaginations. Regardless of what they create ensure it is safe to play in and is under adult supervision.

Play Board Games

Candyland

Also another favorite when I was growing up. We had all kinds of board games, from Monopoly to Pay Day and would often spend all day playing them. We would often set up Monopoly and have a tournament. The game would last all day and Mum never had to worry about what we were up to. There are lots of board games out there for all ages, like Candyland, Yahtzee, Connect Four, etc. that once you get the kids set up they can play on their own or join in.

Create a Play

Have the kids write their own play, assign parts and do a performance. Kids will be very occupied creating the stage, costumes, props as well as practicing the play itself. They can then present to friends and family at the end of the day.

Play Hide and Seek

Who says this is just an outdoor game? Set clear guidelines and boundaries about where they can and can not hide, then let the games begin. You can add a variation by changing the game to Sardines, where only one person hides and then everyone else has to find them. The catch is when you find the person who is hiding you have to then hide with them in that space. This can get very tricky if the space is a little small.

Have a Puppet Show

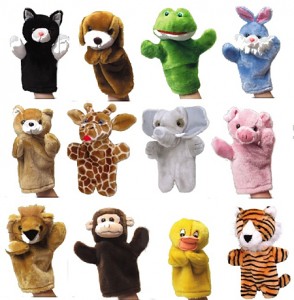
If you already have puppets, grab them; otherwise, the kids can make their own. They can use brown paper lunch bags and decorate them with markers, glitter, construction paper, etc. You could also use old mitts or sew little hand puppets for them to decorate. I know you are saying “Yes I am going to whip out the sewing machine and make a few puppets for them while they are waiting”. Perhaps have some ready beforehand and just put them away ‘for a rainy day’. They can also make a puppet theatre to do their show in using a cardboard box, blankets or a combination of both. Other great ‘theatres’ could be the island in the kitchen if you have one, or simply standing behind the couch.

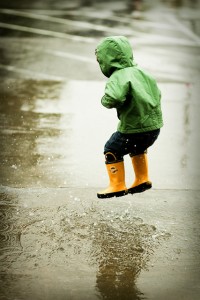
Go outside and Play in the Rain!

Yes if all else fails, put on their rainboots, raincoats and send them outside in the backyard. One rainy afternoon we had all 3 kids going crazy by 4 o’clock. They were running around the house screaming and I was ready to scream myself. With an hour to go til dinner, I dressed them and sent them all outside. They had a great time, they ran around the deck, splashed in puddles and just plain enjoyed themselves. The stress level in the house went down, everyone was happier and I was able to make dinner in peace while still watching the kids.

The important thing is to keep on eye on them and make sure they are not getting cold, that they stay close to the house in case they need to come inside if they are. Otherwise let them play and jump in puddles. Challenge them to make as small a splash as possible, then a big one. You can also take out buckets and shovels and they can fill them up and scoop water out. My daughter loves transfering water from one bucket to another, filling it up and then dumping it. She can do that for an hour straight without getting bored or distracted. Who says that just because it’s wet outside that you can’t go out? The fresh air does everyone good and keep us all sane!

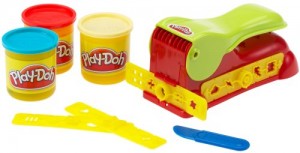
Play-Doh Fun Factory

This is just a sampling of ideas of what you could do, there are many other things that kids love that you could do with them on a rainy day, like playing with Play-Doh, various crafts, even some baking. You just have to do a little planning and have some materials on hand, so when it does rain you know what you can do. Believe me, it is worth the time spent planning to have a smooth and stress free rainy day!


Wapta Falls

wapta falls hike

On the weekend that Matthew and I did the Burgess Shale hike (read more in earlier post) we also did a few shorter hikes the following day. We did this for a few reasons, one was that Matthew was up bouncing around and had some energy to burn (yes after 22 km the previous day, he was neither tired, nor sore) and I also felt it was a good idea to move a little and do a short hike so we wouldn’t stiffen up. Not that Matthew would.

Plus I love going and exploring. We’re often driving through Yoho National Park on our way to somewhere else and don’t make any stops to check things out. So as I’m driving through I mentally make a list of places/ hikes I would like to go and see for the time that we do stop and stay awhile.

Spiderweb in a Tree

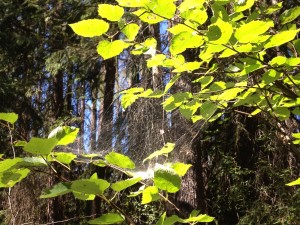
Wapta Falls is an easy 5 km return hike in Yoho National Park in British Columbia, along a treed path to a beautiful waterfall at the end. Though fairly flat, the trail ends in a slight incline to get to the falls but is a great trail for beginner hikers and for kids. There are lots of things to explore and discover along the way; we found a beautiful spider web between the branches of a tree and an interesting bump on another tree.  Of course there is the anticipation of the falls at the end, which as you are hiking along the path, can hear before you actually see it. Drawing you, beckoning you.

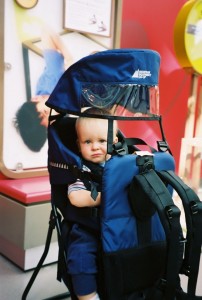
MEC Happy Trails Baby Carrier

Though the trail is suitable for children, it is not suitable for strollers. There are bumps and tree roots along the way that make it quite difficult to navigate a stroller on it. If the children are not walking on their own then I would recommend one of those backpack carriers for small children. There are many different styles and brands out there, we have one from Mountain Equipment Coop we really like, as well as one from Baby Trend.

Matthew practically ran down the trail and we had to ask him a few times to slow down, or pause to take a break. The rush of the waterfall was drawing him in and he was getting excited!

There are 3 spots where you can look at the falls. It is a bit deceiving when you first come to the falls as it looks like that is where the trail ends. There is a fenced area overlooking the falls with a bench to sit and relax. A lot of people assume that this is where the trail ends but if you continue down the trail, you can go off to the left for a different view or continue all the way to the bottom.

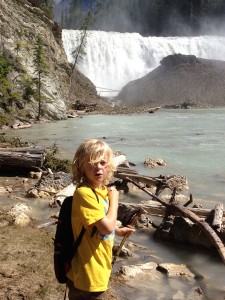
Matthew at the bottom of Wapta Falls

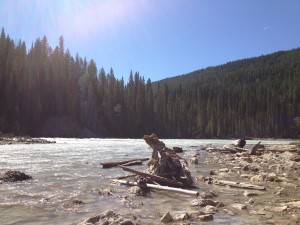
If you go all the way to the bottom, the trail ends by coming out onto a beach along the river at the bottom of the falls. It is a great place to sit and just be, soaking up the beauty and absorbing yourself in this calm, peaceful environment. The kids will love playing in the sand or throwing rocks into the water, or you can even move down along the shore a little ways and continue to explore. It’s a lovely spot to sit and have a snack or enjoy your lunch as you gaze at the waterfalls.

After spending some time at the falls we hiked out, Matthew again running – oh to have the energy of a child, and enjoyed some nice relaxing quiet time back at the campsite. Well I did, Matthew on the other hand was busy as usual, chopping wood.


Summer Road Trips -Car Games for Kids

car games for kids

One of the many things I love about summer is road trips. The ability to hop in the car and take off and explore! The challenge can be what to do with the kids on the long car rides to your destination.

Some parents may just let their children play on their hand held devices or set up the DVD player, but I feel that it is important for children to learn to entertain themselves without those devices, as it is good for their brains and imaginations. And sometimes those electronic devices break down so it is great to have things to do that don’t require all kinds of fancy equipment.

When I was little we would often take along books on tape and listen to those in the car following along in the book. One of my fondest memories is when my sister Cathy and I read the Star Wars story to our youngest sister, Leslie, without the tape and doing all the sound effects for her. Doing Darth Vader was definitely the most fun!

I often find as well that playing these games creates some wonderful interaction and quality time with your kids in a fun and easy way. Everyone is laughing and playing and a little friendly competition doesn’t hurt either.

From my experience as a child and with my own children, here are some great car games and activities to do with your children in the car. They are simple, appropriate for all ages and require little or no equipment.

The Alphabet Game –Each person needs to go through the alphabet using letters on signs. Starting at A, the first person to reach Z wins. For example if a person sees the letter A on a sign they call “A in maximum” and then move on to the letter B. This can also be done with numbers starting at 1 going up to whatever number you choose.

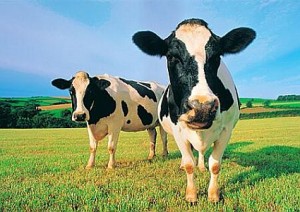
Counting Cows – Each person or team counts cows on the side of the road keeping a running tally. This can be quite challenging as you could pass a field that has lots of cows and since you are moving you have to count fast! If you pass a cemetery you lose all your cows and start at zero, but only if the other team calls, “your cows are buried!” This can be lots of fun as people try to create distractions so others miss cows or cemeteries.


Virtual Hide and Seek – Think of your house and pick a place to hide, imagine yourself there. This is fun as you can be any size and hide in some unique places. The other players ask questions to narrow down where you are. “Are you in the kitchen?”, “Are you in a cupboard?” etc. Kids have lots of fun “hiding” in places they normally couldn’t.

License Plates –There are a couple of games that you can play using license plates. One is to take the numbers on a license plate and see who can add them up correctly. Another is to “collect” license plates by trying to find one of each province and state. This game could last the whole trip or be played throughout the whole summer.


Word Game – Starting with the letter A, you go around and each person says a word starting with that letter. You keep going until no one can come up with a new word, then you move on to B, etc.

Going on a Picnic – This game is simple and has a trick to it that is fun for the kids to figure out. You start by saying “I’m going on a picnic and I am going to bring ….” then fill in the blank. You can bring whatever you want but you need to bring something that starts with the first letter of your name. For example, Susan can bring string, socks, skateboard, while Mary can bring marshmallows, milk, meatballs. Do not tell the ‘trick’ to the kids let them figure it out by continuing to model what you may bring.

I also find it handy to have read along stories, crayons and coloring books, an etch a sketch and magna doodle. There’s always songs to sing or listen to as well. I find that children are adaptable and easy to entertain as long as they know what to expect and have some resources/ variety available to them. Sometimes children just enjoy watching the world go by as you drive along, watching the trees whiz by and enjoying the landscape. That in itself has great value as well.

So next time you are heading down the road try out some of these games and find your favorites! Let me know too which ones you have enjoyed the most by commenting below.

Looking for more? These sites are really good resources momsminivan.com and activitiesforkids.com

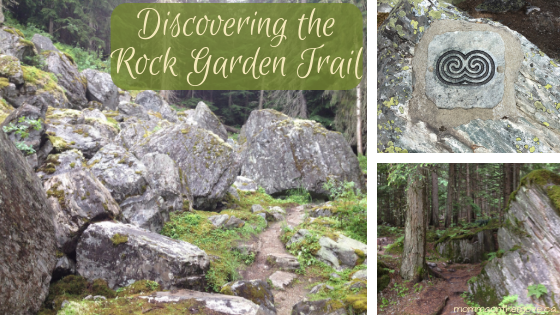
Discovering the Rockgarden Trail

rock garden trail

I’m always on the lookout for new trails to hike and explore with the kids. I love the outdoors and it is one of my greatest joys to share this passion and excitement with my children.

For years we have been driving up and down the #1 highway west on our way to visit family or on some kind of adventure. I love this drive, it is a beautiful, lush and full of places to discover and explore. Often though we are pushing through to our destination or have another ‘planned stop’ and don’t always have the opportunity to stop at the trails and sites that I would like to see.

There are 4 National Parks along this route, Banff, Yoho, Glacier and Mount Revelstoke. All are unique and beautiful in their own way with so much to do and explore.

Ever since Matthew was little I have wanted to go on the Rockgarden trail. It is a short 20 minute hike on the east side of the Rogers Pass, in Glacier National Park. We discovered it one time when we stopped for a bathroom break and pulled into the parking lot for the outhouse.

Entering the Rockgarden Trail

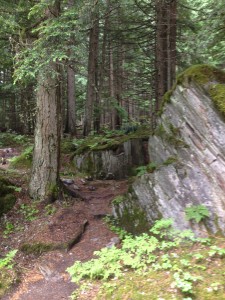
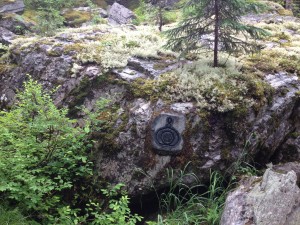
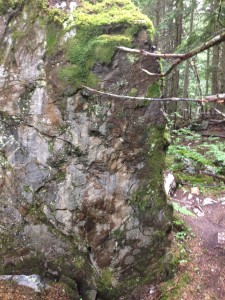
This trail though short is not meant for strollers or young children. If you have young children you will need a baby carrier to take them with you.  It is a steep, rocky trail with high drops in some places. It has rock stairs and winds through boulders and lush forest. It is considered a miniature landscape all it’s own, rich in lichens and mosses that are more than 2000 years old.

Lichens and Mosses

For one reason or another we have always passed it by, timing not working out with the kids, weather or the desire to push through and get to our destination. But this weekend we went! I was driving Matthew out to my parents for the week, and I had already decided before we left that this would be our planned stop. I was very excited that we were finally going! I kept my fingers crossed that the weather would be decent, as it was a little rainy.

When Matthew and I entered the trail we were in awe of what we saw. Piles of rocks/ boulders settled along the trail, part of the trail. It was truly entering a rock garden.

At the beginning of the trail be sure to pick up a brochure that describes different areas of the trail by matching the symbols in the brochure. This provides you with more insight into what is/ has happened in the area and you can appreciate the wonder and life of the area. It is also a great educational tool for the kids! When I was little I always loved reading the signs and learning more. My parents would read the signs to us and as we grew we would read them on our own. Sometimes we would even set up a scavenger hunt using the signs and information and that was fun too!

As we meandered and explored the rock garden we noticed the faces in the rocks and the energy of the forest. It is a magical place, one where you could sit and rest awhile before carrying on on your journey.

So next time you’re heading down the #1 and need a break, or a chance to stretch your legs, I would highly recommend this beautiful and magical place tucked within the Canadian Rockies. Stop a while and take a breath, enjoy and discover a place you may not have noticed before.

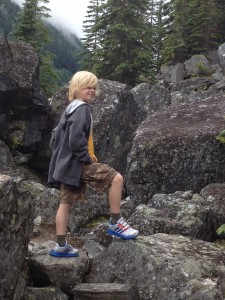
Matthew conquering the Rockgarden Trail

Check out some of these other wonderful hikes along the #1 highway on the East side of the Rogers Pass – Giant Cedars Boardwalk, Skunk Cabbage Trail, Hemlock Grove.