Bonding 40 feet in the Trees

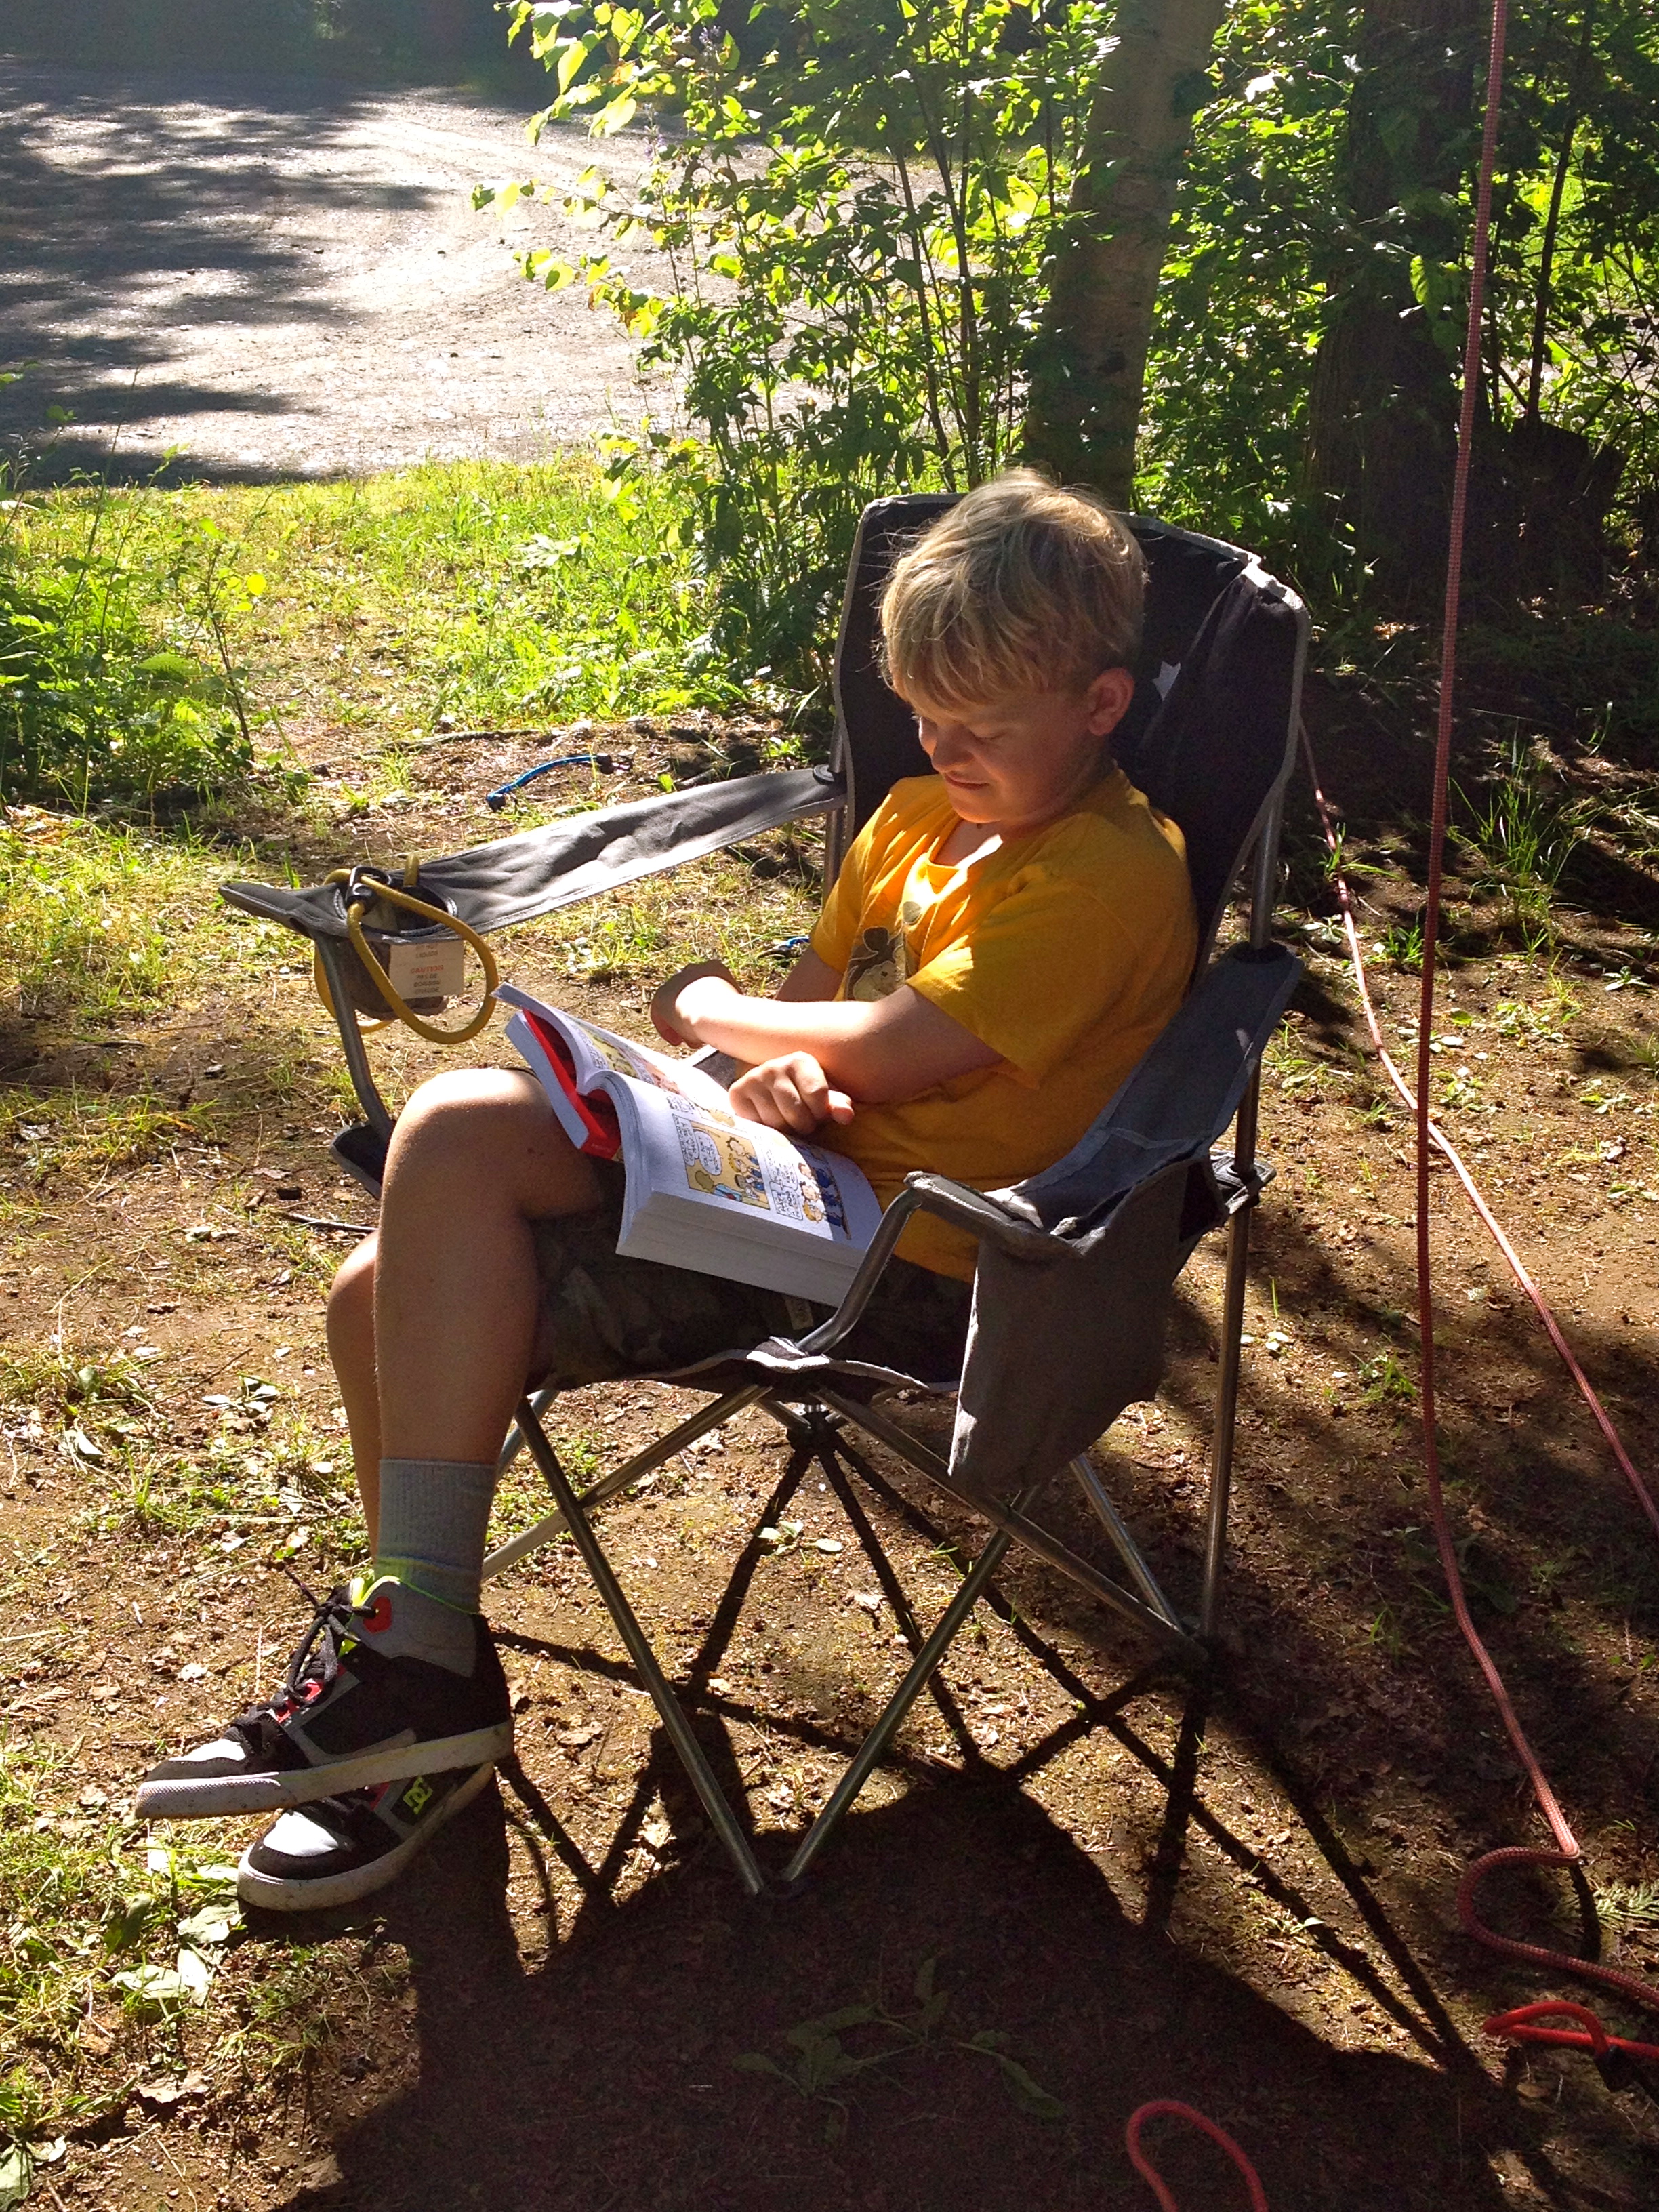
Bonding with my oldest son is a bit of a challenge these days. He’s 11 and into all kinds of things that are not a huge interest to me. I’m 41 and his Mom, so there are not a lot of things that I like that are of interest to him. We do have some common ground of course, we both love board games, especially Settlers of Catan, so you will often find us in the evenings battling it out for the longest road and the most settlements.

Sometimes it’s a timing thing to, I’m making supper, or having to tend to his younger brother and sister. So when we had the opportunity to go to Sky Trek in Revelstoke, British Columbia to do the high ropes course; I jumped all over it.

P7290215
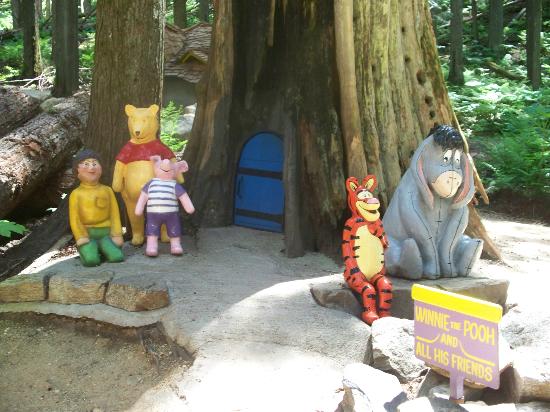
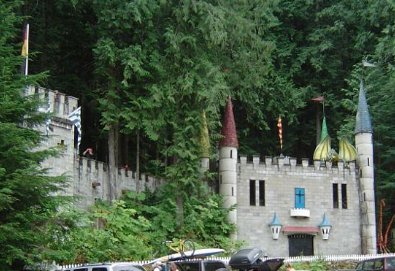
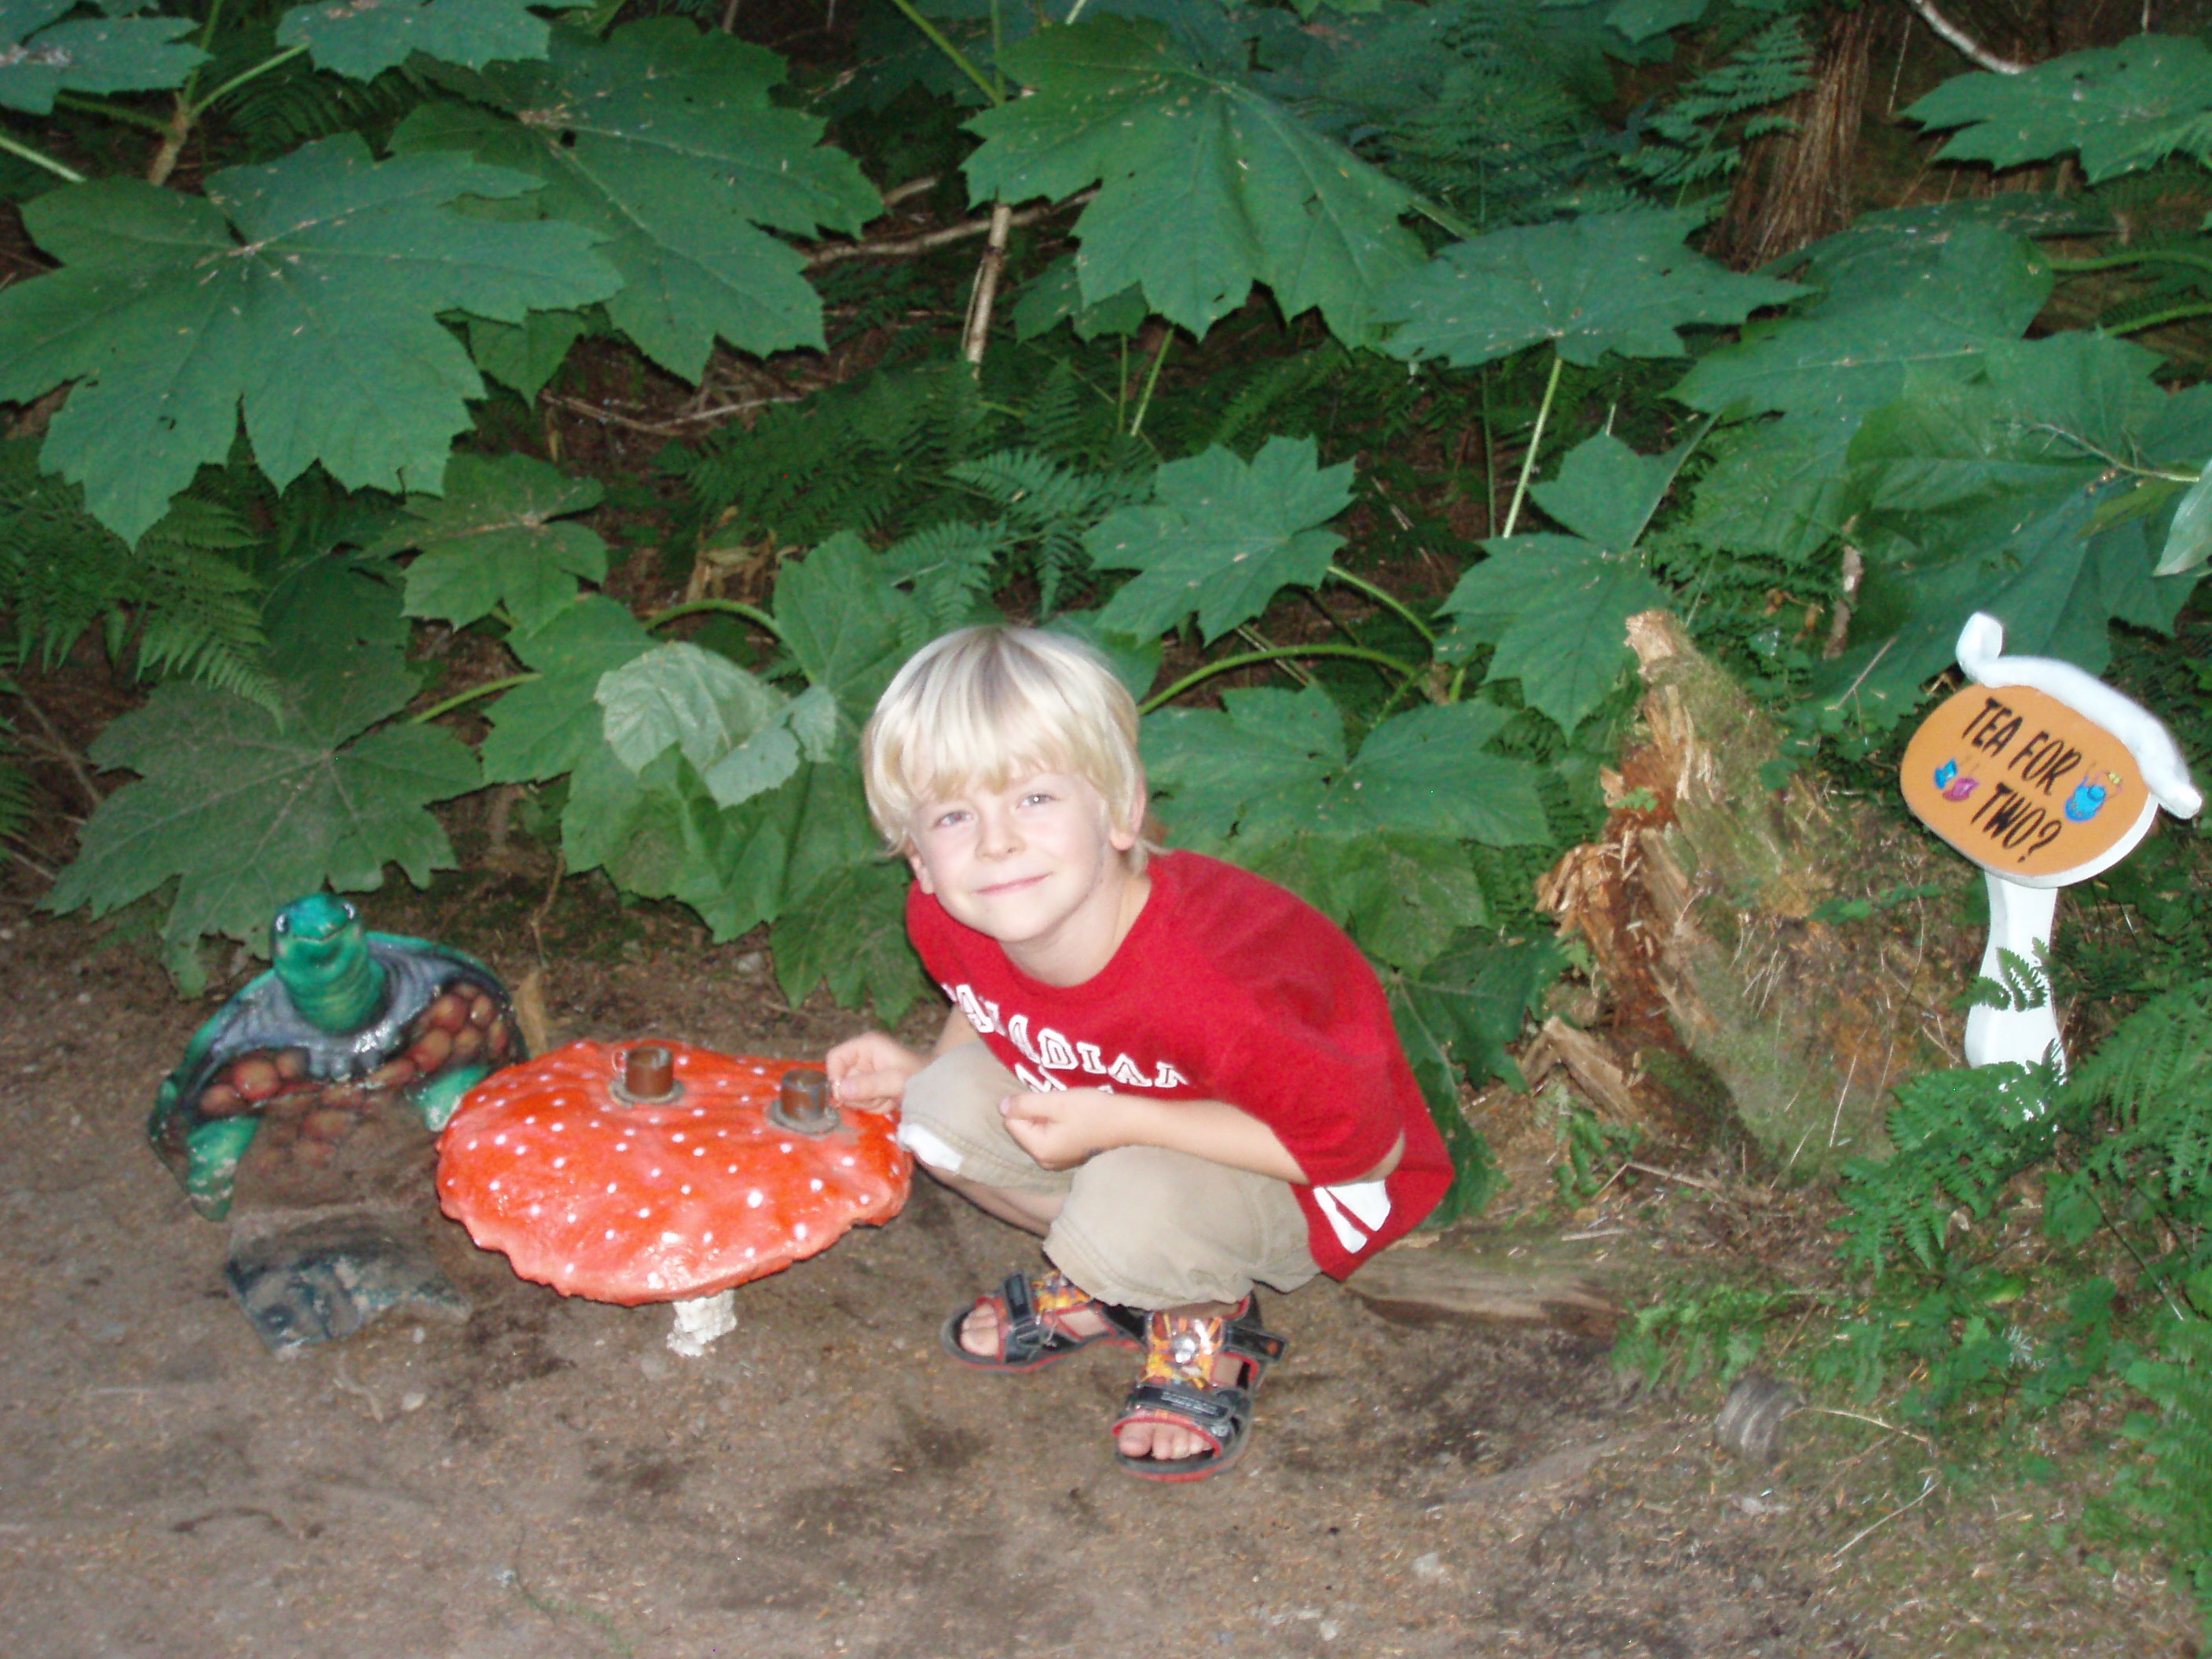
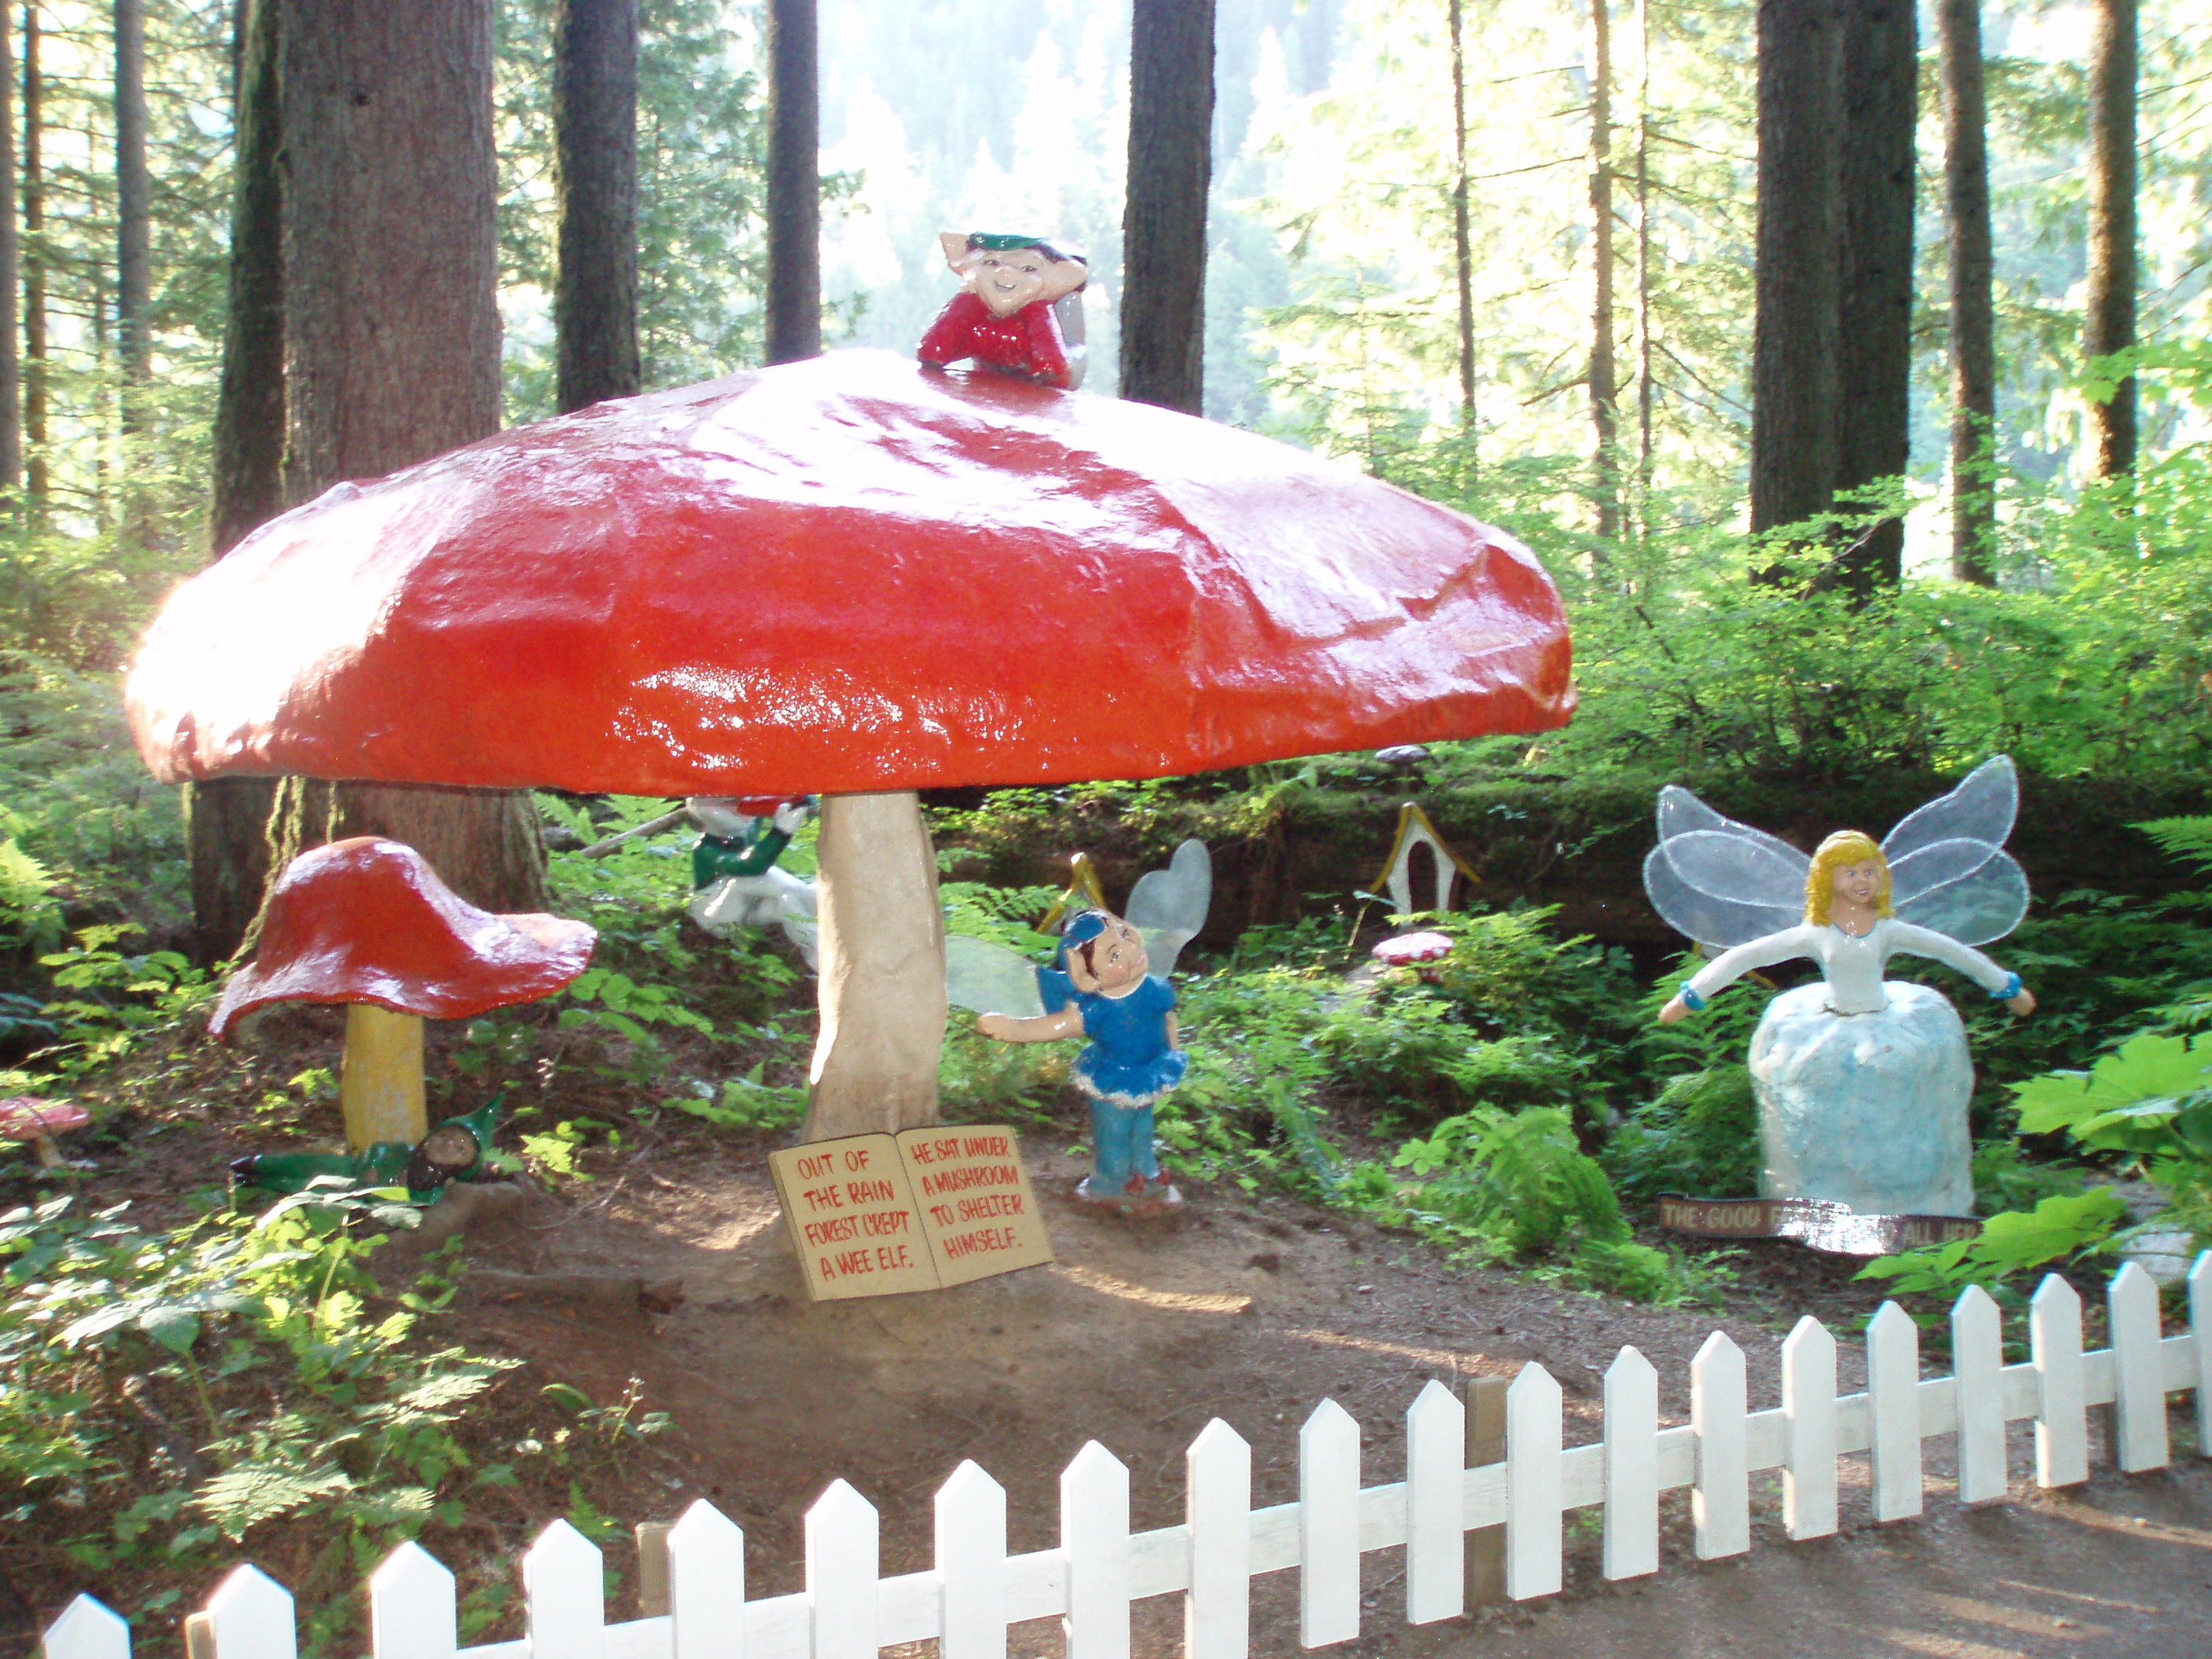
We had been to the Enchanted Forest next door earlier that morning with my Mom and the twins, which we thoroughly enjoyed. But Matthew and I were both kind of eyeing the course through the trees. I had always wanted to go there since they opened and though Matthew had had the opportunity when he was about 5 to do the kids course, he wanted to get up high in the trees. So when Matthew asked about the course I said well let’s go check it out.

His eyes lit up, he was so excited with just the prospect of ‘maybe’ going. We discovered that the course took 1-3 hours to complete and though reasonably priced we wondered what Gran and the twins would do for that long.

My Mom graciously offered to watch the twins while we went and did the course. So after a quick lunch, off we went! I grabbed my closed toed shoes from the car, which I was glad I had thrown in that morning, as there are no open toed or flip flops allowed. Though I wish I had also had the foresight to put in socks, which would have been much more comfortable.

Matthew and I were both excited and almost ran up to the clerk to get going. First of course we had to fill out waivers, then pay, then meet our guide to get geared up and ready to go.

online-skytrek-02
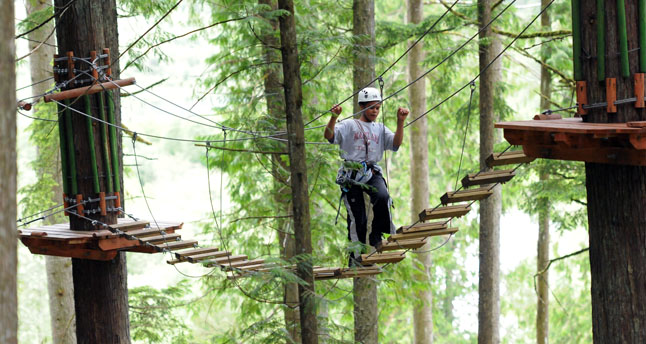
The course consists of 4 components, each one getting higher and more difficult as you go. Training is first, where your guide gives you a demonstration of the elements and obstacles, what equipment to use and how to keep yourself strapped in and safe. We all had helmets, harnesses and carabiners. We had 2 that we needed to clip in and each had to be done in a certain way in a certain order. He showed us how to use our zipline attachment as well as telling us only 3 people to a platform and to remember to call clear after we completed an element – which was the cue for the next person to go.

Then there’s the green, blue and black courses, each one getting higher and more difficult as you go. So by the time you hit the black course you are 40 feet in the air and challenged!

Matthew went first and I was following along behind him. At points when we were waiting for others in front of us we would chat or connect, discussing the last element or what was coming up; continually moving higher and higher. I found the first 3 parts comfortable and easy to navigate, but by the time I hit the black I was not only tired but a little freaked out. Some of the elements were pretty tricky and they definitely pushed my comfort zone.

The very last leg of the black course you could choose to do the double black diamond or stay on the single. The double black offering shorter lengths, more rests, but more challenging (lots of swinging obstacles), while the single black was one long haul across a rope net, which was more tiring but a lot easier to do.

Matthew, the trooper, chose the double black. In fact in his mind there was no question as to whether he would do it or not. I applauded him, but said I was going to stick to the single. Matthew did very well, I was so proud of him. The last leg on the double black he was there legs spread apart between two triangle elements, and ‘resting’. I could tell he was tired, but he was almost there and he was determined. It was one of many moments that I was proud of him or maybe got a little teary eyed watching him and how he confidently navigated the course, though at times I knew he was a little freaked out like I was.

We completed the course with one final zip line to the bottom and high fived each other on the ground. We were surprised to discover that it had indeed taken us 3 hours to complete the course. No wonder we were tired!  And thirsty! as you can’t take water or any extra stuff up there with you. In fact I asked a lady on the ground if she would take a few photos of us and send them to me (unfortunately I don’t have them yet), as though there were times when I could have taken a really nice picture or two, there was no way I would have been able to carry the camera!

Some people may argue that because it was an individual activity that it was not really a bonding experience. But I would disagree. We connected and shared an experience where we both pushed our limits and can now share and discuss this experience. I also have etched in my mind some of those great ‘shots’ of him in the trees which will last forever in my mind.

I enjoy experiences like that with my kids and hope I get to have all kinds with each one of them. And I hope that they enjoy them to and that they will stand out in their minds as some of the best experiences they had, even though it was with Mom.

The Enchanted Forest

Winnie the Pooh and Friends

Winnie the Pooh and Friends

One of the most magical places on earth is The Enchanted Forest. Found along the TransCanada highway between Revelstoke and Sicamous, this beautiful old growth forest is like a child’s dream.

No matter how many times I there I always enjoy it. The beauty and energy of the old growth forest is calming and peaceful. With the delightful storybook and nursery rhyme characters in amongst the trees it truly makes for a magical and wonderful experience.

enchanted-forestIt is a must stop for our family and every time we drive by on the way to Oliver, BC the kids are asking if we can stop there. This summer was the first time for Luke and Chloe. Being 4 years old this was the perfect age for their first experience.

Once you enter your first stop is the Enchanted Castle where the resident wizard welcomes you. You can clamp yourself in the gallows (or any misbehaving children) or explore the dungeons below. Word of caution: the dungeons I find to be dark and scary and definitely not for small children.

Tea for Two

Tea for Two

You can climb the stairs to the tower and enjoy being ‘King of the Castle’, before you continue along the path through the forest. The path then takes you around the forest with stops along the way to play and enjoy the fairytale characters. There is everything from the Three Little Pigs, Snow White, and Winnie the Pooh, to Hansel and Gretel, Old Mother Hubbard and the Cow that Jumped over the Moon.

The forest also hosts the biggest Tree house in British Columbia, with 3 levels and a gorgeous view at the top.

The Three Little Pigs House of Sticks

The Three Little Pigs House of Sticks

There is also a Nature Trail which takes you back further onto the property with opportunities to see beaver dams, row boats and explore other nature items.

Luke and Chloe dashed and explored everything. Checking out the houses, which are just the right size for 4 year olds, going down the slide at the Old Lady in the Shoe’s house and enjoying the cage at the witches house (Hansel and Gretel). At the end of the trail there is a duck pond where you can buy duck food for 25 cents to feed the ducks.

IMG_3270

Little Bo-Peep

You can easily spend a couple of hours in there and not feel rushed. The great thing is once you’ve paid your admission you can return to the forest throughout the day if you choose to. We went through it twice and they wanted to go a third!

Even my oldest who is almost 11, and has gone many times, still enjoys exploring here. Whether you are exploring the Revelstoke area or just passing through, the Enchanted Forest is a must see for all ages, children and adults alike.P7290227

Camping Essentials – Making your own Firestarters

IMG_3240I’m an avid lover of camping. All my family vacations growing up were camping and exploring different places in the Maritimes and I have many fond memories of those trips. Luckily my kids are also avid campers and when I introduced camping to the twins last summer, we kicked off the ‘rebirth’ of camping in our family (after a short siesta between when the twins were born and still quite little). We got out quite a bit last season and even snuck in one final night in mid September.

So when this season kicked off I started looking at the calendar to plan in as much camping as possible between my part time work schedule and other regular commitments. I’m pretty impressed with myself as so far in about 2 weeks we have done 3 different camping trips and places. Some old some new, but loving it all the same.

Drumheller, AB

Drumheller, AB

I think everyone in our household (and probably most campers) would agree that one of the best things about camping is having a fire. Whether you are cooking on it to make dinner or just sitting around and enjoying it, it really is essential. It’s so lovely to sit around the fire on a summer evening and relax, chat or just hang out.

Even when its raining, if you can get a fire going it just makes that camping experience so much nicer. When I was in Girl Guides growing up, of course one to the things I learned was fire building. There is the traditional log house or teepee style, some use newspaper or  dry moss to start the fire. But the best thing that I have ever discovered (and did learn how to make these in Girl Guides) is a firestarter. Made out of materials that you have around the home anyway, these firestarters will burn for 20 minutes and will work easily in the rain. They make starting a fire quick and easy and I won’t go camping without them!

IMG_3059All you need to make them is a cardboard egg carton (stryofoam ones do not work), some dryer fluff and some wax (you know all those candle ends and bits of wax you throw out? Keep them in a ziploc bag and save it for making firestarters). See easy. And you’re probably thinking wow that’s great that I can use dryer fluff for something other than just throwing it out!

Here’s how you do it:

  • cardboard egg carton
  • dryer fluff
  • melted wax
  • newspaper
  1. Cut top off of the egg carton.
  2. Place egg carton on top of a sheet of newspaper.
  3. Fill each hole in the egg carton with dryer fluff. Be generous and stuff them full!
  4. Then pour melted wax over the egg carton – ensuring that each ‘hole’ is filled with wax and has soaked through all the way to the bottom. This is very important as the wax needs to cover it in it’s entirety in order for the firestarter to work properly.
  5. Leave egg carton on newspaper and let wax dry completely.
  6. Once wax is dry cut between the holes in the carton to make 12 firestarters. Store in a large ziploc bag and voila! Done!

IMG_3062You can do more than one egg carton at a time depending on how much dryer fluff and wax you have available. I made 2 dozen last week and that’ll likely be enough for the summer.

I also recommend that you melt the wax slowly on low heat on the stove. And once you use that pot designate it as the wax melting pot and just keep it for when you make more.

I was amazed how easy and well these worked when I first discovered them. I don’t remember who exactly in Girl Guides came up with it, but thank you so much they are awesome!

IMG_3068

Completed Firestarter

So if you’re going camping this summer, or just like having an outdoor fire, make some of these and give them a try.

The Ease of Pallet Gardening

Pallet Gardening

More and more people are going back to growing their own gardens. With the move to eating more organically, and taking care of our planet, many are reconnecting to the Earth. Nurturing and growing flowers, fruits and vegetables is increasing. From community to container gardening people are making the most of what they have to produce organic sustainable gardens.

For many though the challenge is space. With the newer houses and smaller yards – to put in a decent garden would take up a good part or all the yard space! Not to mention people who are in apartments or condos, where do you put it?

containergardenonstepsWith container gardening being one solution, the newest discovery is pallet gardening, using an old pallet to grow plants or vegetables in. When I first learned about this last year I thought this was a really great idea. It allowed me to put the pallet wherever I wanted, so it did not take up space on my grass, I could expand my garden and grow more! and it was using materials that were easy to find and inexpensive. I could also move it around if I wanted to, though a bit heavy it’s great to have that option.

To make your own pallet garden you need:

  • an old pallet
  • landscape fabric
  • stapler
  • dirt
  • whatever you would like to plant

When you are looking for a pallet, you want one that is in good condition, not rotting, nails sticking out or broken boards. (And if you are growing vegetables in it you should opt for one that is heat treat as opposed to fumigated).

Measure out landscape fabric so that it covers the back and up the sides. Do this twice, as using a double layer will make it more durable and stronger. Once you have the fabric to size, put both pieces on top of one another and staple along the bottom, doing one corner, then pulling it taught and securing the opposite corner, etc. until all corners are secured. Then go along the bottom edge of the rest of the pallet. Pull the fabric taught and staple the sides.

Flip the pallet over and fill it with dirt. I would recommend a bag of dirt from your local garden center as it will contain more nutrients than the soil from your garden/ yard. Soils like organic potting soil or triple mix are excellent choices.

Plant your plants in rows between the slats of your pallet. You can start from seed or plant plants that have already been started inside or purchased. Water pallet well.

Stacking pallets

Stacking pallets

Now comes the fun part. If you have planted plants that are already started you can wait a few days until the roots are established then you can move your pallet. You can set it upright against a wall or fence. You could also plant another pallet and stack pallets on top of each other. This takes a bit of planning to ensure that everything is getting enough sun, but it is a great space saver and create a huge garden in a small space.

If you have planted from seed, you will have to wait longer if you wish to stack or put the pallet upright, as things need to be established before doing this.

Remember to water your pallet regularly as they tend to dry out much quicker than your regular garden.

plants-in-a-palletThe great thing about pallet gardening is that you can get really creative with it. You can create eye catching designs for vegetable, herb and flower gardens in just about any space! Morning Chores has a fabulous resource with 43 different ideas for all kinds of pallet gardens. There is no end to what you can with your pallet!

I also think this is a great way to garden with kids, as they can get really creative. Not only are they able to help you with planting but could also decorate the pallet by painting or suggesting ideas on what to create.

It is also easy and accessible for them. Both Luke and Chloe helped me plant our pallet this year and enjoyed picking the seeds to put in. We usually plant vegetables in our pallet as we love to eat the fresh veggies from the garden. This year we have green and yellow beans, spinach, two kinds of lettuce, and a variety of herbs. Some we started from seed and some were all ready small plants we had purchased.

It sits on our deck which gets lots of sun, but is a great place for the kids to ‘watch’ what is happening as we go by it everyday on our way out to the car. So far our beans have started to come up as well as the spinach. Looking forward to seeing what the harvest brings this year 🙂

Bonding with Grandpa

I love camping with my kids. Even though the days are longer, bedtimes later and way too many trips to the bathroom (which is usually a long walk to get to), I love being in the outdoors with them, where we literally putz around, relax, have tea, sit by the fire and really just enjoy each other’s company.

Yes our trips are mixed with trips to the playground, or a walk to go and explore somewhere (other than the bathroom), but overall it is just a beautiful go with the flow couple of days where we eat well and hang out.

This year we had the pleasure of heading out camping 4 times for varying number of days, which is more camping than I have done in years. This is due to having a great man come into my life who loves to camp! I also had the pleasure of my parents joining us on one of our trips at Kicking Horse Campground in Yoho National Park.

On this trip we visited Takakkaw Falls, went to the amphitheatre and learned about bears and sat by the fire drinking lots of tea! Both Luke and Chloe enjoyed just sitting and hanging out, which is so different than my oldest Matthew, who needs to be constantly on the move. And Luke, well he is always up for a conversation. Featured in the picture here is my Dad and Luke enjoying some great bonding time while hanging out at the campsite.

The Skunk Cabbage Trail

skunk cabbage trail

Often times on road trips I look for a nice little place to stop along the way. I feel that the journey along the way can be just as much fun as the destination. In fact we often find/ discover little treasures or places to explore that we might not otherwise.

The road between Calgary and Oliver is full of these little places. Many a time I have driven thru making a mental list of all the places I would like to stop. Completing this list often takes a while as there are so many, and we typically only make one stop (or it would take forever for us to get to Oliver). We also tend to stop at some places more than once because they are favorites. (I have been to the Enchanted Forest so many times now I have lost count! but I do love it there)

It was about that time to stop, stretch our legs, and take a break. Something I like to make sure we do at least once during a long drive and we were coming up on the Skunk Cabbage trail.

Nestled in Mount Revelstoke National Park this is a short, quaint little boardwalk trail. I was starting to feel tired and Luke and Chloe who had been sitting so well for the whole trip, needed to get out and move a bit.

When I told them that we were going to stop and go for a walk on the Skunk Cabbage trail they got very excited and chatted about it excitedly until we got there. I had been on this trail before with my oldest son Matthew when he was about 3 years old and this was one of my favorite trails. Luke and Chloe had never been and I knew that it was a short 1.2 loop they could easily handle.

This loop is a valley bottom wetland – one of the rarest environments found in the Columbia Wetlands and is full of Skunk Cabbage (hence the name), a plant that is found in wetland areas and has a beautiful yellow flower in the spring. It is called Skunk Cabbage because of the distinctive ‘skunky’ odor it emits.

We set off along the trail, crossing a wooden bridge over a rushing creek. Luke and Chloe stopped to check out the sight leaning through the rail, saying “Mommy look water!”. We could have stayed there watching the water for awhile, going no further and Luke and Chloe would have been totally satisfied. But me, being a typical mother wanted to move on as I not only wanted to walk the trail but was concerned about them falling over the railing into the water – ha ha.

On the other side of the bridge we entered into a cool old growth forest making our way to the beginning of the boardwalk itself. Interpretive signs highlighting the rich diversity of the plants and animals found in this area were spaced out along the loop. We would stop at each sign and I would ask Luke and Chloe if they wanted me to read it to them and they always said yes. So we learned about the bird migration project they were doing, that black bears like to eat Skunk Cabbage and other plants and animals such as Devils’ Club and frogs.

It was a hot afternoon and I was glad that it was only a short walk. The kids had their water cups with them while I had left mine in the car. We took our time, stopped to rest and enjoyed the trail. Luke kept asking where the skunks were, as that is what he thought we were going to see. I explained to him that it was a skunk plant and not an actual skunk. I kept pointing out the plants along the trail. Chloe caught on quickly and started to point out the plants as well. Luke was still asking about the skunks by the time we got back to the car but enjoyed his walk none the less.

I always enjoy doing little walks like that with my kids and this trail was the perfect size for what we needed that day. There are other short walks along that stretch of highway like the Giant Cedars and the Rock Garden trail, which are fairly easy and just the right size for a little breather (and a bit of an education too!)

Though we did this walk in the summer, you could still easily do it in the Fall and if you have the chance I would definitely recommend it in the spring; as that is when the Skunk Cabbage flowers and it is a very cool sight to see – these huge plants with big yellow flowers in the middle.

Discovering Hidden Gems -The Grist Mill

Orvieto, Italy

I love those neat little gem discoveries that we make by accident on our travels and in our lives. Places that you did not know of or intend to go but somehow ended up there. This happened to my mother and I when we were in Italy. We were in Naples planning to go to Orvieto the next day but when we checked the train schedule discovered the train left at night so we had a whole other day there. That’s when we looked around and discovered Pompei was not very far and could easily be done during the day and then catch our evening train. For me that was one of the best parts of our trip.

Pompei

This happened again recently for my family this summer when we were out in British Columbia visiting my folks. I had always wanted to take the kids out to Farmer John’s Petting Zoo in Keremeos but the timing had never worked out. So this one particular day I told them we were going to pet some animals and off we went; only to discover when we got there that it no longer existed and the farm was for sale 🙁 (Thankfully Luke and Chloe were not too upset and just kept looking for the animals).

But as we were traveling up and down Upper Bench Road looking for the farm, I noticed a Provincial Heritage site called the Grist Mill and Gardens. So not to waste our trip to Keremeos and in the spirit of an adventure we went to check out the Grist Mill.

The Grist Mill is an actual old flour mill rebuilt from 1877. The grounds include not only the mill, but beautiful gardens, tea room and gift shop as well as some other replicated buildings from that time. It is a an educational family fun site in a beautiful setting along a creek, with an apple orchard and walking paths. The site also has picnic tables for those who wish to bring their own and enjoy it out in the gardens. There is a small admission fee to the site.

The kids were very excited and interested in what there was to see. They were lots of hands on interactive things that they could do and before we were even in the door Matthew found an old tractor that he could sit on and maneuver. Inside the General Store, was an area where they could look at and ‘process’ different kinds of grain, as well as a log cabin to build. Luke and Chloe loved the cabin building and Matthew and Grandpa thoroughly enjoyed processing the wheat and making it into flour (as Matthew got to grind and then sift the flour).

Matthew & Grandpa grinding wheat

The tour of the actual flour mill was fascinating, with a demonstration of how everything worked. It was interesting to see how the waterwheel worked and how much work it took to actually produce a small amount of flour. I would not have wanted to do that job!

Building a log cabin

With such beautiful grounds they also offer various workshops and events such as watercolor, evening concerts and guest speakers. A very rich and beautiful spot literally tucked away, but totally worth going to!

So Luke and Chloe did not get to see the animals as I had promised, though we did see a couple of Llamas, but we all enjoyed our little adventure and learned a little something too!

Though we were there in the summer they are still open into the Fall and it would make a great Fall outing. So if you’re in the Keremeos area before Thanksgiving it’s worth going off the road a bit to discover this little gem.


Tips for Camping with Kids

Camping is one of my favorite summer activities. Growing up, that is how we spent our family vacations, each year going somewhere different, though we did have our favorite spots; looking forward to it each year.

I always found that our trip was never long enough and that we never got enough camping in for the summer. I could have stayed out there for weeks, even the whole summer. There is something about being out in nature, with just the basics, playing and hanging out that I love.

I find there is a whole different mentality when I’m out camping, no matter what is going on it is more relaxing, more go with the flow and even in some respects ‘lazy’. Routine goes out the window and I just enjoy the fact that we don’t really have to be anywhere at any particular time.

Relaxing at the campsite

This is not to say that we don’t do things while we are camping. Growing up we would often go on a hike or an interpretive walk, or sometimes go and explore a local attraction or historic site. But the whole pace of it is different. There’s no rush, no deadline.

Naturally, I wanted to share and continue these experiences with all of my children. Matthew’s first camping trip was when he was 1 year old, for 1 night and it poured rain. But we have since ventured out again and Matthew loves it. He is quite the good little camper, will help around the site when asked and even learned how to safely chop wood last year (under the supervision and guidance of Grandpa Blue Eagle).

With Luke and Chloe I did not take them out as early, though I wanted to. So they went out camping for the first time this year (and like their Mom and brother), love camping as well. Up until recently I did not have another responsible adult to go with me and I didn’t feel it was prudent or safe to take the kids out by myself (and yes I am a little spooked after reading The Shack, very good book but tragic beginning).

I knew this was the year to go, I had already asked my parents to come with me one weekend and introduce the twins to the camping world, so the intention and plan was there. Interestingly though, I took them out a little earlier then planned, as one day I picked up and packed up at the last minute, when my friend at the time invited me out camping. Literally in 3 hours I had us all packed up and ready to go. When I told the twins we were going camping they were so exicted! Asking when we were leaving. I found this so interesting as they had no idea what camping even was at that point, and yet here they were clapping and excited waiting in anticipation for their trip.

We only ventured out for one night, which I think was smart considering they are still young and it was their first time. We drove out to a Provincial Park near Carseland and joined some friends in their trailer. The kids loved it, though it took them quite a while to settle when I put them to sleep, it being almost 11 pm before they went to sleep.

Bison at Elk Island

Recently we went out again, this time for 3 nights and in a tent. We camped at Elk Island National Park (where Bison are a plenty), just east of Edmonton as I wanted to make a side trip to the Jurassic Forest – a prehistoric park I learned about and wanted to check out (it was fabulous btw and I would recommend for any dinosaur lovers, young and old)

D’Wayne braved it and came with us once more (what a wonderful man!). It still took til 10 or 11 each night for the twins to settle and go to sleep, though I put them down about 8 each night, and usually with them asking to go to bed because they were tired. And though I stuck to a similar bedtime routine from home, pyjamas, brush teeth and story, they still bounced around and played no matter what we did to try and get them to sleep.

And honestly I found the same with Matthew when he was younger. There was no way we could get him to go to bed, and it was even worse because he was by himself and would come out of the tent (at least the twins play with each other and stay in the tent, well for the most part). So we ended up just keeping him up with us and all going to bed together.

The blessing was though they went to sleep late they would sleep in til 9 or 10 in the morning, which threw everything off, but isn’t that what camping is about, throwing routine out the window?

Overall though we had a great time, though all a little tired when we came back and brave enough to head out again one more time in August!

Other than the sleep challenges I think camping in general can be easy with kids with the right attitude, the right support and person to go with. Here are some tips to make not only the kids first camping trip successful but any future ones as well.

Tips for a Successful Camping Trip with Kids

Keep to a routine – I know I said above that one of the things I love about camping is that there is no routine or deadline but even if it is not your regular routine at home I think having some kind of routine, even if it is a loose one, will help the kids and you to have a good time. Keep it somewhat predicatable so they know what’s coming i.e. breakfast, clean up, walk, lunch, play at the beach(or other activity), supper, clean up, hang out at the campsite, bed (and I would recommend keeping whatever bedtime you choose the same while you are out camping, even if it is a later one)

Breakfast time

Feed them on a regular basis – this may sound silly I know but I myself get kind of lazy when camping about meal times. Keep meal times predictable and consistent and provide more snacks (I find I am more hungry when I am out camping and we eat more in general) – don’t give the kids lunch at 4 in the afternoon, and if you’ve just finished breakfast and they say they are ready for lunch, feed them, or at least give them a snack and have lunch sooner rather than later

Plan meals that are fast, healthy and easy – there are lots of great camping recipes out there that are fun, easy and nutritious. You can get creative with those or use some of your regular ones. Make it easy on yourself by ensuring that they are not overly involved and they can be prepared quickly for hungry kids. This will reduce stress on yourself and prevent you from having grumpy children simply because they are hungry.

Have them drink lots of water – when they are outside they tend to burn more energy, are spending more time in the sun and are just more active all around. Keeping them hydrated will make a big difference in their fatigue and hunger levels, as well as preventing them from overheating or getting sick.

Have a consistent bedtime – whether they are sleeping in a tent or camper and end up playing before they actually go to sleep, at least they have a predictable bed time (even if it is later than usual) and wind down before sleep. They will also be contained and even though they might be up the adults can have some kind of adult time. And you never know they might go to sleep sooner… ha ha

Pick a site close to the bathroom and a playground (or as close as possible) – this is especially important with toddlers who need to go to the bathroom more frequently. This will save you making long treks back and forth to the bathroom (I can’t tell you how many times I went to the bathroom with the twins and then went back again what felt like minutes later). Being close to the playground is also a God send as the kids can play and be entertained and you can still keep a close eye on them as you do things around your campsite. My parents always got a spot close to the playground when we went out and it made it easier for everyone.

Bring some outdoor toys and toys that they love (things that make them feel secure – favorite blanket, pillow, stuffed toy)- my son Luke loves to play with his trucks in the sand, so when we go camping I always bring his sand toys. On our last trip our site was close to a big sand pit which he would just go and play in for long periods of time. It was great cause he was within eye sight, not too far away and engaged for a long time. We also bring other toys like a ball and glove, soccer ball, plastic horseshoes.

Start small – for the first few times out do not go on a week long camping trip or a with a long drive to get there. Take the kids out in little bits, one or two nights at a time with shorter drives, not only for the kids to get used to it but for yourself as well 🙂

Bring a nature bag – include crayons, paper, magnifying glass, plant or flower book. Kids love to explore and play in nature, some of these simple tools will enrich and enhance their experience and keep them occupied.

Mom this is a huge dandelion!

Go for a walk/ hike – Take a short walk on a nearby trail. Bring your nature bag and explore.

Do a Scavenger Hunt – you can create one yourself for around the campsite or you’ll find some campgrounds that have some pre made for you to just pick up and follow

Sleep – do your best to get enough sleep not only for the kids but yourself as well. Although tempting to stay up once the kids are finally asleep, if you are well rested you will be better able to handle the kids regardless of their moods. Maybe stay up a little but not so late that you are exhausted the next day

Patience – Be patient with yourself and the kids. You are out there to relax and enjoy yourselves. It is a time to be together and enjoy and appreciate nature as well as each other. You get to know each other on a different level when you are out camping, it is a unique and rich experience. You can adopt a go with the flow attitude and still keep the kids fed and rested so you can all have a wonderful time!

On the Lookout

I am always on the lookout for new places to go see and explore. I feel that there is so much out there in the world that it is not only important but fun to go and find out what’s out  there. I especially love being able to take my kids to these places to show and share with them the richness and variety of our world; that there is so much to see and do. So much to go and learn, experience and appreciate.

Our latest adventure took us to the Jurassic Forest, which is just north of Gibbons, Alberta. It is an animatronic dinosaur display where you walk along 2 different loops to experience and learn about dinosaurs. It is extremely well done.

I could have just stood there for hours watching just one, but the kids would look watch enjoy and then be saying, “Come on, come on Mum” to go and see what’s next.

There is lots of information around the trails, excellent interpretive signs as well as some of the staff wandering around with special items, like a T-Rex tooth or beaver pelt, to explore or to answer any questions. I am a sign reader 🙂 I want to read every sign and every bit of information that is on it. I am not sure if this is just me or if perhaps my parents taught me this (as my sisters seem to be sign readers too) but I like to read and learn all the information. I don’t want to miss a thing! I try to relay some of the information to the kids by sharing a fact or two but this does not always work.

Entrance to the park is reasonably priced, $40 for a family of 4 and $8 for an additional child. Our adventure there was quite interesting as we started out with warm sunny weather and clear blue skies, while part way through we ended up with a thunder shower and rain.

Still exploring after the rain

One of the rules we had when we went on any trip growing up was that we had to have 2 things – our bathing suit and our rain gear. If we had those two things then we were set no matter what. I have adopted this with my children as well and though the twins are too young yet to know it, Matthew always smiles when I bring it up and can answer very quickly what the 2 things are that he should have; and dutifully packs them without fuss or question.

My point is we were prepared, so that when it started to rain we just put on our raincoats and carried on, while others rushed through the rest of the path to find shelter. Ok well almost all of us had our raincoats. I have to admit that though we had brought them I only had mine in the park and had left all the kids raincoats in the car. Oops! That did not work out so well.  Regardless, we still did not rush for shelter and mosied along the path finishing our tour. As my aunt said (who joined us at the park that day), we’re here we might as well check it all out.

There are other things there to enjoy as well, they have an interactive display where you can actually ride a dinosaur, a paleontological site where you can discover and help identify dinosaur remains, an adventure play area and a flora and fauna walk. You can also find scavenger hunts for each of the loops on the Jurassic Forest website that you can print out and search for clues. They have even added two new loops The Evolution of Mammals and Taking Flight (about birds and their link to the dinosaurs).

Riding the dinosaur

They have a photo contest each month with a different theme where you can win a Jurassic Forest prize pack. And the gift shop is really good. I often find that the gift shops at these places have a bunch of junky trinkets that break easily and overly priced. This one is quite well done with lots of neat, quality items, such as dinosaur bone ice cube trays, dinosaur puppets and models.

All in all we had a fabulous time with Luke asking the next day if we could go back. We all really enjoyed the dinosaurs, especially my aunt who thanked us profusely for inviting her to come, with a a big smile and a gleam of excitement in her eye. So if you’re looking for an adventure this summer, have a some dinosaur lovers or just looking for somewhere to take the kids you have not been before, I would highly recommend you venture out to the Jurassic Forest.


Summer Tidbits

Summer is here! Hooray! It seems like we wait all year for this season and when it finally gets here there is so much to do. I always find that the summer is so short and chalk full of activities. Before summer even begins we have it fully planned out with lots of trips, adventures and explorations. I am often thinking about summer in April or May making the plans that I want to make as I know it fills up so quickly.

We do a lot of car travel in the summer, going to the mountains, camping and visiting my family in the Okanogan. It is busy but we have a great time as I like to make the most of the season and do and see as much as we can.

With these things in mind I am recapping my favorite summer posts, activities, recipes, games that help make the road trips easier, the hot summer days more enjoyable and keep everyone eating healthier. Of course I’ll add more as this summer goes on but here are some great tidbits to get you started – with my favorite Car Games for Kids! (I have to say Counting Cows is my absolute favorite and one that we play again and again)

Summer Road Trips – Car Games for Kids http://www.mommaonthemove.ca/index.php/archives/111

Grasshopper Popsicles http://www.mommaonthemove.ca/index.php/archives/44

Crunchy Broccoli Feta Salad http://www.mommaonthemove.ca/index.php/archives/1597

Hiking with Children http://www.mommaonthemove.ca/index.php/archives/295