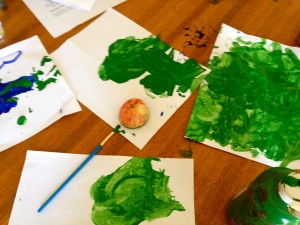
Apple Stamping

My kids love to paint. They make a glorious mess while doing it, but it keeps them occupied and happy and the mess they make is usually worth it for the amount of time it keeps them busy. They can sit there for a good half hour or more working on painting after painting. As long as I keep an eye on them and supply them with fresh paper they are happy and I can do a few things nearby while they are creating.

I like to try different methods of painting with the kids, allowing them to explore and create, showing them that there is more to painting than just using paint and a brush. This allows them to explore different textures, colors and methods of creating pictures. Now this does not always work out as planned but at least I am able to introduce the concept to them.

So the other day we did apple stamping (yes more apples). Similar to potato stamping it is a unique and interesting way to create a picture. We have so many apples, so many that I have been baking daily to use them up before they go bad; that I felt covering one or 2 in paint would not be a waste. Besides there are more things to do with apples other than eat them, at least I thought so.
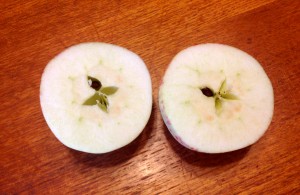
Apple stamping is quite easy to do. Simply cut an apple in half crosswise, so that you have the ‘star’ pattern in the middle. Cover the cut side of the apple with paint and then stamp it on your paper. Do this repeatedly making any pattern you desire.

Now with the twins, at first I put a bit of paint on a piece of paper and let them dip the apple in the paint and stamp it on the paper. This method put too much paint on the apple and did not create the pattern when it was stamped; instead just created a large glob. Then Luke decided to get a paint brush and brush paint onto his apple. This worked much better. It enabled him to put on enough paint to get a good stamp and he could stamp it a few times before needing to reapply. It also created less mess and minimized the amount of paint everywhere else!
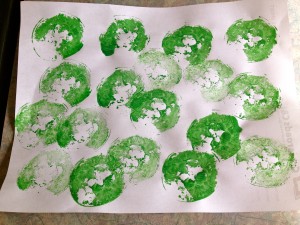
Painting with kids though can be messy. It is challenging to get away from it and I feel as that getting messy can be part of the fun, and the creating. Some things I have learned though to at least minimize the mess when painting with young children, are the following:

  1. Put out the paint in little bits at a time by filling a container like an egg carton or something similar. Do not leave the paint bottle out as when they feel they need more paint they will pour it out where they see fit or fill the egg carton themselves. The other day I made this mistake and turned around to find Luke filling each space in the egg carton with green paint. Way more than they would use at the time as well as no room for any other colors.
  2. Always use an old shirt or paint smock as there is bound to be paint everywhere including the children. You do run the risk of the children becoming painted themselves as Luke and Chloe decided to purposely paint their bodies as well as making their pictures.
  3. Put out a small cup of water for color changes for their brush. Only use a small bit of water though as this can get water everywhere as they are learning how to do this.
  4. Set some guidlelines for them, where to put the paint, how to dip your brush to change colors, etc. Simple and few guidelines for small children, more with older children if needed.
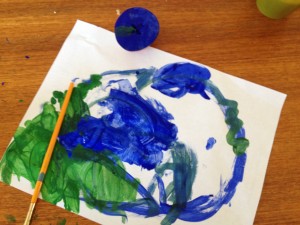
  5. Be patient. Take the time to show your children what to do and how to do it; but don’t insist they do it exactly the way you want or envision it. My vision of what the apple stamp pictures would look like was very different than what they ended up with. And it was ok, they tried it and then branched out and created from there. They took what they needed out of it and had fun.
What I want to try next is dinosaur footprints! I found this idea on the internet where you take a plastic dinosaur dip the feet in paint and then stamp them along the paper. Looks so cool, but I bet will turn out very differently! (Maybe the dinosaurs will eat up the rest of my apples – ha ha)
Enjoy painting, creating, the mess that comes with it and your children!

Welcome to my Fairy Garden

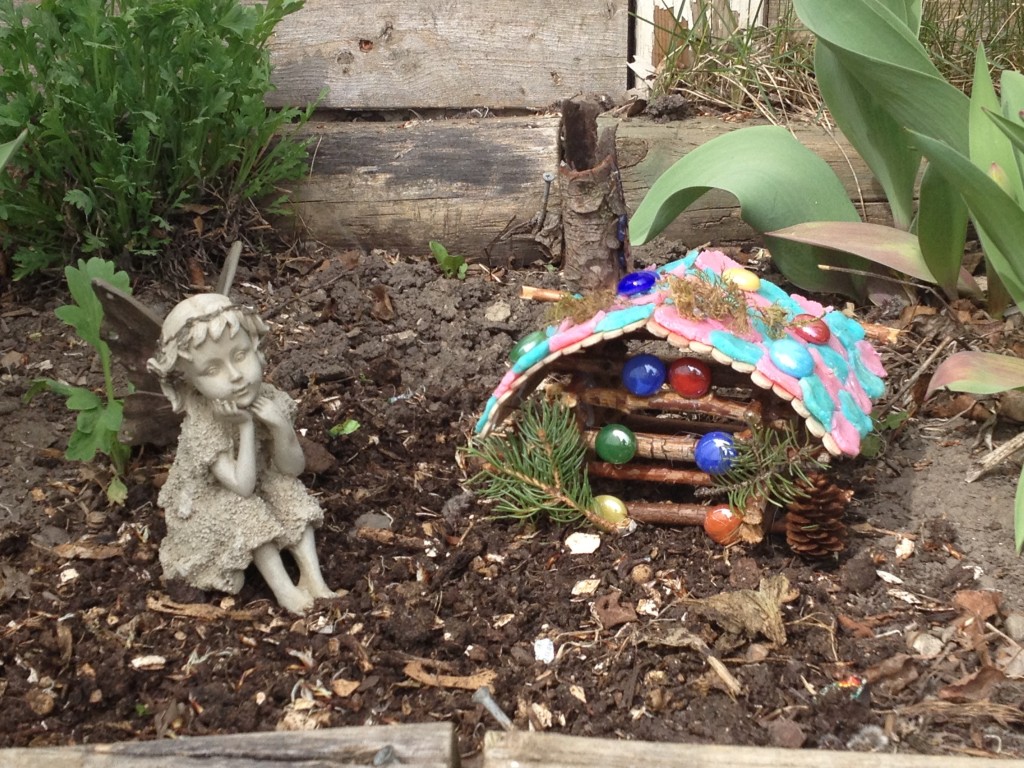
A couple of weeks ago I taught a class for children about fairies. It was a great experience and the kids loved it! We got to play outside, do sketches, learn more about fairies and how they help us and make Fairy Houses!

Making the Fairy Houses was the part that everyone enjoyed the most, including me! I even had one of the staff members from the store come in just to join us to make them. The boys worked diligently and it was neat to watch what everyone created. I had provided a variety or materials for them such as popsicle sticks, twigs, glass beads, tin foil, etc. to create whatever they wanted.

I was really excited about these Fairy Houses as I had seen some in Greengate Garden Center and thought it was a fabulous idea. They had all kinds with miniatures to add, but I found them to be expensive. Then when I was searching on the internet I found ideas to make your own and I liked how they used natural materials to make them. This was also a less expensive way to go and I could easily make more than one. So I incorporated into my class.

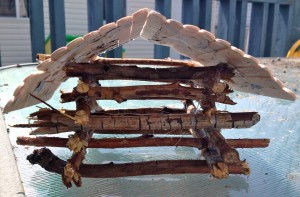
Unfortunately I did not get a chance to finish it in the class so I brought it home incomplete. I had intentions of getting back to it to finish it up but seemed to be unable to. Finally yesterday I sat down with the twins while they played play doh (I love that stuff) and finished making my house. I was very happy with how it turned out and immediately put it out in the garden. Now when I go by and see it it makes me smile and the kids love it too. I think we might just have to make some more…


Playing with the Fairies

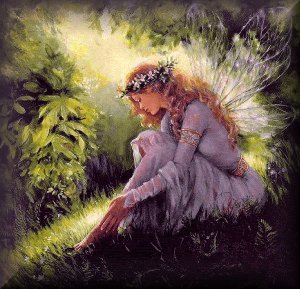
As a child, growing up fairies were not uncommon. They were in our books and stories and parents would often refer to them as helpers of some kind or another. Magical, whimsical creatures that are playful and fun, yet can also be mischievous.

As I grew up I never thought much about it until I embarked on my spiritual path and started learning more about Angels, Fairies and other realms. It’s all pretty fascinating and if you choose to believe and work with them, can be quite magical.

Fairies are the protectors of animals and the environment. They are wonderful healers, helpers and help us to remember the importance of play. Though they are the most abundant outside they can also reside inside as well. They love lush, wild and natural gardens and will help you create a beautiful garden if you wish (among many other things).

Children especially can relate to and connect with the Fairies. Because they are so open, creative, imaginative and accepting with pure hearts full of love, the fairies often easily connect with children.

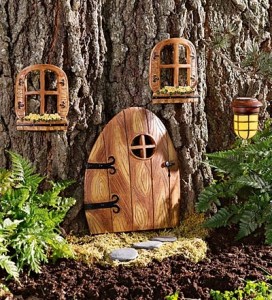
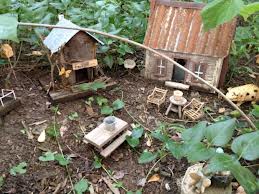
A great way to welcome fairies to your garden or home is to create fairy houses – and whether you choose to believe in them or not, this is a great craft for the kids that is lots of fun and can add wonderful decor to your garden.

In fact I taught a class a number of years ago with children about fairies and we made our own fairy houses. In a class full of only boys, they were so focused and engaged for 45 minutes! making their houses with great attention and detail. I was also so excited about it I started my own fairy house.

You can make your house out of pretty much anything but here’s what you need to get started:

popsicle sticks

white glue

glue gun (kids use with adult supervision)

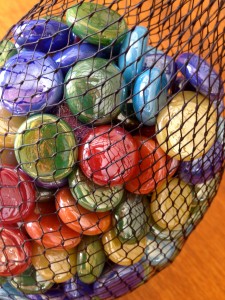
small glass beads – clear or colored 

twigs

leaves

acorns or pinecones

play doh or clay

small pieces of bark

small stones

tin foil

For the base you can either make four walls out of popsicle sticks or you can take twigs and glue crossing over each other, log cabin style. This is how I started my house and then made a popsicle stick roof. Basically what you want to do is create a base for your house, four walls and a roof and then decorate it adding in things like a stone chimney (toilet paper roll with small stone glued to it and put on the roof), glass beads to outline doors and windows, clay to cover the roof and give it texture, etc. Get creative!


You can either have the kids sit down and design their house first on paper or if they like to create as they go along that works too. What I did was take the kids outside to create their design and then gather materials to make their house. They gathered things like leaves, twigs and small stones – I had brought old branches from my raspberry bush – to make their houses. The more natural materials you can use the better as the fairies will appreciate it! Also ensure that you are not picking live things to create your house, gather things that are already on the ground.

Whatever the kids come up with will be beautiful and appreciated. You can also make a house within your garden by building around existing trees and bushes, setting up paths, etc. And the fun part is putting it in your garden and then watching for signs of the fairies coming there!

*Note: if you are putting your homemade fairy house outside you’ll need to use a sealer once you are done building to make it waterproof, so that it is protected in the rain.

Would you like to learn more about the Fairies? Join me live on April 14th for a free workshop all about the Fairies!


For more information and ideas on how to make a fairy house check out these websites http://www.fairyhouses.com/about-fairy-houses/how-to-build/ http://www.wikihow.com/Make-a-Fairy-House

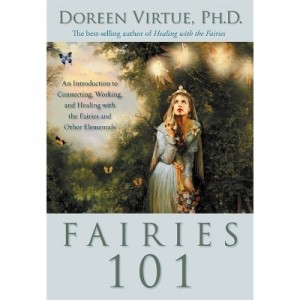
Learn more about the Fairies in Fairies 101 by Doreen Virtue. This is a very easy read and a great introduction to them and what they are all about.

Dying Easter Eggs with Children

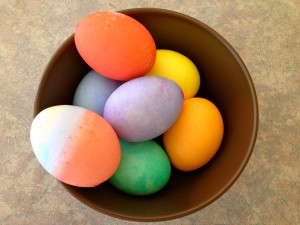
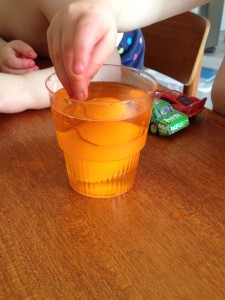
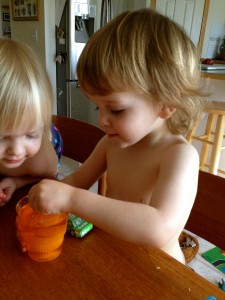
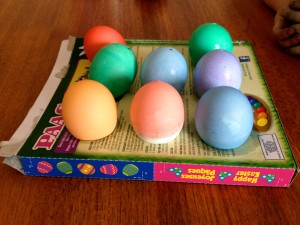
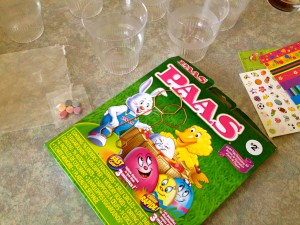
As a kid I always enjoyed dying Easter Eggs at Easter. I loved watching the eggs as they transformed from white to red or whatever color we had chosen. Experimenting with different colors and patterns, adding stickers or other decorations on our eggs. Dying Easter eggs with children can be lots of fun and this was a tradition I wanted to continue with mine. This year the kids and I dyed eggs for the first time. Yes this was the first time even for Matthew, although he is already 9 years old. I baulked when I realized this and felt that I had let him down as a mother. I feel it is my duty to do these kinds of things with my kids and to realize that Matthew was already 9 and had never done it, I was appalled! This was going to be quickly remedied. I made sure that I picked a time when we had a large block of time, where we didn’t have to run anywhere or stop and get a meal prepared. Though dying Easter eggs with children is fairly simple I knew that I needed to be available to help, especially the twins. Plus I wanted to get in there and participate. What is the fun of doing these things with the kids if I can’t get in there and play myself?dying Easter eggs with children I had bought a dozen eggs for our project. When I got up in the morning I put them in a pot to boil right away, that way I knew they could boil and cool so when we were ready to dye them they would be cool enough to do so. I kept out 4 eggs as I planned to blow these ones out. The only thing I find with dying hard boiled eggs is that the eggs tend to get wasted. I know that some people dye them and then eat them the next day but I always found that we never did. I knew that the twins would need their eggs to be hard boiled so that they could handle them without breaking, but I figured that Matthew could handle a blown egg (which is simply an egg shell without the actual egg white and yolk inside it). The thing I like about blowing the egg out of the shell is that you can then use the eggs insides in something else and you can keep your decorated eggs longer. dying Easter eggs with childrenMatthew even helped me blow out the eggs. He watched me do the first one and decided he wanted to try. Turned out he did the other 3 all by himself. When I announced that it was time to dye the Easter Eggs Luke and Chloe ran into the kitchen and sat down waiting. They knew what was going on as I had already told them earlier in the week. Matthew and I had already mixed the dye ahead of time, as well as gotten the eggs ready. The challenge was we only had one holder/ stick to dip the eggs into the dye and 3 kids. At first they all wanted to do it but when I explained that we only had one stick and that we needed to take turns, we managed to work it out. In fact, by the end we were dropping our eggs into the cup without the stick and only using it when they were ready to fish them out of the dye. I will be saving the stick for next year so that when we buy another kit we will have 2. dying Easter eggs with childrenThey each got to dye four eggs the color of their choice and then we left them to dry. We intended to come back to them when they were dry to add stickers or sequins, etc. but we never did. But it really doesn’t matter, they had a great time and were very proud of their eggs as they showed everyone who came in the door that day their eggs.

Tips for dying Easter Eggs with Children (best for children ages 3 & up)

  1. Have the eggs ready beforehand -whether you are going to hard boil them (best for young children so they can handle them without breaking) or blow them out
  2. Mix up the dye beforehand as well – I found small plastic disposable cups work well
  3. Put kids in old clothes – make sure that they are in clothes that it doesn’t matter if they get dye on. If the dye gets on clothing it will stain and is hard to get out. You can also put an apron on them or just get them to take off their shirt altogether (depends on their age and who they are dying eggs with)
  4. Have an adult available who can assist the kids
  5. Do one egg at a time, one color at a time – I had all the dye on the island in the kitchen and brought the color that Luke and Chloe chose to the table when they wanted it. With older children this may not be necessary.
  6. Let eggs dry completely – you may need to flip egg over so that the bottom dries
  7. Decorate with stickers, sequins, markers, etc. or leave as plain colorful Easter Egg
  8. Be patient and have fun!

dying Easter eggs with childrenMatthew really got into dying the eggs, getting creative using more than one color, partially coloring half and then doing another color. On one egg he even did 3 colors. We did a dozen eggs but had quite a bit of dye leftover so Matthew started dying and drying paper, creating a lattice design. It kept him busy for over an hour and he only stopped because he had his Ju Jitsu grading to attend.dying Easter eggs with children I had bought one of those kits that are cheap and abundant at Easter but there are lots of natural dyes that you can use, and may be preferable especially if you are going to eat them. Things like leftover coffee to make brown, tea, turmeric (yellow), blueberry, chili powder and red cabbage (blue). I think we may try the natural dyes next year. Dying Easter eggs with children is easy and fun. You can keep it super simple or make it more fancy if you want. Either way the kids will love it and you will have fun getting in there too!

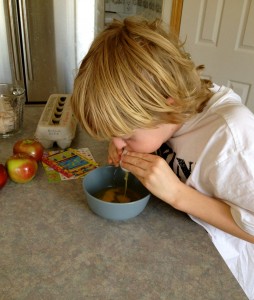
How to blow out an egg

  1. Gently poke a small hole on each end of the egg using a pin. Trick is to make hole big enough that you can get air through without breaking the egg.
  2. Hold egg over a bowl.
  3. Place mouth over hole on one end and blow. Egg will slid out the hole in the other end into the bowl.
  4. Keep blowing until entire egg is out.
  5. Gently wipe off egg.

Easter Crafts for Kids

I tend to get very excited about Springtime, especially Easter. The sense of rebirth in the air, the warmth of the sun on my face, the flowers beginning to peek through. The kids get excited and start asking to play outside more, enjoying the warmer weather and all that comes with it – the mud, the grass and the rubber boots. It truly is a time of year when things re-emerge and come out of the darkness, the long ‘hibernation’ of winter.

With Easter of course there is the excitement of the Easter Bunny and all the other cute springtime animals, such as chicks and lambs. The hunt for eggs and Easter Baskets and the goodies that they find.

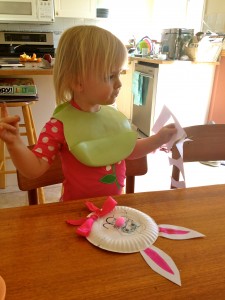
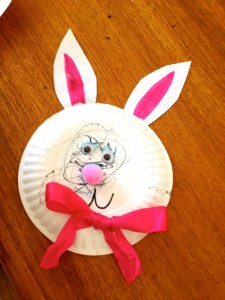
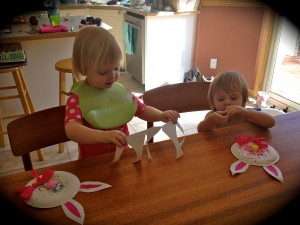
I often get the kids ‘into’ the holiday by doing some crafts around that holiday. I find it fun because I like to search out and try new crafts with them, and they love it, well because they just love crafts! Yesterday we made paperplate bunnies, which were easy and simple for them.

It’s neat to watch Luke and Chloe do their crafts as you can really notice the differences in how they do things. Chloe is definitely more of a follow the rules and the pattern when it comes to crafts and Luke is more of take the concept and get creative with it kind. He takes things more out of the box and expands upon the idea – which I just let him do, as I believe that is all part of learning and growing, and enhances his creativity.

Paperplate Bunny

What you will need:

  • small paperplate
  • white paper
  • googley eyes
  • small pom poms
  • ribbon
  • black and pink markers
  • glue
  • scissors
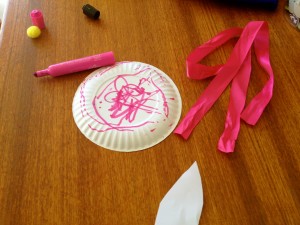
Trace bunny ears on piece of white paper. Cut them out and set aside. Take one small paperplate and glue on googley eyes and pom pom for nose. Using black marker draw in the mouth. Using pink marker color inside of bunny ears a little. Glue ears to paperplate at the top. Tie ribbon into a bow and glue on bottom of paper plate. Let glue dry completely.

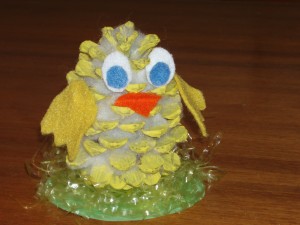
Fluffy Pinecone Chick

This adorable little chick is completed in steps, but is well worth the waiting time in between. We made this a couple of years ago with Matthew and he loved it, in fact he kept it in his room for a long time before it made it’s way out of the house. Children 3 years and up can easily complete this craft with parent help.

What you will need:

  • large fat pinecone
  • pencil
  • yellow paint and paintbrush
  • fiberfill (cotton batting)
  • felt scraps in white, blue, orange, yellow
  • green construction paper
  • Easter grass
  • glue
  • scissors

Paint the pinecone yellow and let it dry. Once dry, wrap the pinecone in thin layer of fiberfill. Use pencil to poke the fluff between the scales of the pinecone. From the felt scraps cut out wings, a beak and eyes and glue them onto the body. Cut a 10cm circle out of the green construction paper and glue the Easter grass on top. Then glue the pinecone chick onto the middle of the grass.

Stained Glass Egg

What list of Easter Crafts is complete without an Easter Egg! This super easy craft is great for little ones as the tearing of the tissue paper will utilize their little hand muscles and strengthen their hand eye coordination.

What you will need:

  • colored tissue paper
  • construction paper
  • scissors
  • hole punch
  • ribbon
Trace a large egg on a piece of white construction paper. Cut out egg. Tear different colors of tissue paper into small pieces. Glue the tissue paper onto the construction paper egg. Let glue dry. When dry punch a hole in top of egg, lace ribbon through and tie at top to make a loop for hanging.
No matter which craft you choose the kids will have a great time and some great decorations for Easter. Splashes of color for spring and lots of fun while doing it.
Now my kids are asking to color Easter Eggs – yes the whole dye the eggs – which my 9 year old has never done -oh dear I have neglected my duty as a mother. That should be an interesting experience…


Leprechaun’s, Shamrocks and More – St. Patrick’s Day Crafts for Kids


Chloe and Luke making their Shamrock Man

St. Patrick’s Day is one of those fun unique holidays that you can really get into if you choose to. I’ve always loved the concept of green beer, (as an adult of course), shamrocks and leprechaun’s and pots of gold. And it is the one day that you can never get too sick of the color green!

I always find holidays like this so much more fun when you can celebrate with kids, whether it be your own, nieces, nephews or children you work with. As usual there is a plethora of St. Patrick’s Day crafts that are fun and colorful to make surrounding this holiday.

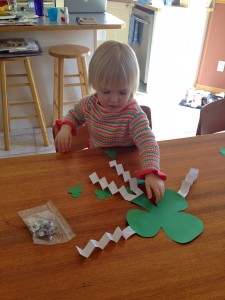
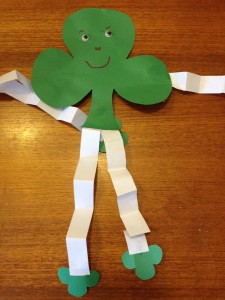
I had planned to make a couple of these crafts with the kids only to find when I went to our craft supplies that we were missing a few things. No matter, tomorrow a trip to the dollar store will remedy that. We were able to make Shamrock Men, which is one of my favorite crafts due to the accordion arms and legs (I have done a similar heart man for Valentine’s Day).

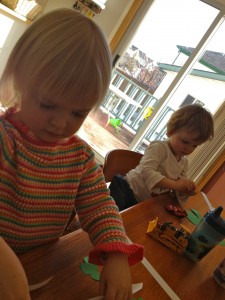
Luke and Chloe enjoy making crafts and as soon as I announced that we were making one they ran into the kitchen and sat down at the table. I had precut the shamrocks and strips of paper but I let them do all the folding and glueing and Chloe even drew a face on her shamrock’s by herself. Chloe was very into it, while Luke though interested got easily distracted with trains and playdoh, but he did finish it.

Both Luke and Chloe squealed with delight when they were done and started making their shamrocks dance and sing. It was pretty cute to watch. Tomorrow I would like to make the pot of gold which will probably end in a lot of glitter everywhere, but that’s ok we can all sparkle for a while.

I love the make your own Blarney Stone idea as well (below,) but we needed to gather a few supplies to do that one and could easily get away with making it after St. Patrick’s Day. I myself, have been to Blarney to kiss the Blarney Stone, set high up in the castle of Blarney; and it is quite a unique experience. I am not going to spoil it by telling you what happens as I think half the fun is experiencing it for yourself, but let’s just say it was not what I expected! Needless to say if you have the chance go and do it, it’s worth it. In the meantime you and your little ones can enjoy your own little Blarney Stone at home.

I imagine the kids will love creating their own and will be kissing them in no time (reminds me of kissing frogs for some reason – ha ha).

St. Patrick’s Day Crafts

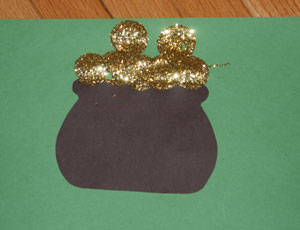
Pot of Gold

black and green construction paper

white glue

gold glitter

scissors

paper plate

something small and round to use as stamper to make gold coins

Draw and cut out pot on black construction paper. Glue the pot onto a piece of green construction paper, centering it and leaving enough room at the top to make the ‘gold coins’.

Pour glue on paper plate, dip stamper into glue and press it onto paper above pot. Pour gold glitter on paper until glue is completely covered. Gently tap the back of paper to remove any excess gold glitter. Tip – tap it onto another paper plate or piece of paper so you can use excess glitter for future crafts. 

St. Patrick’s Day Shamrock Man

green construction paper

white paper

googley eyes

glue

scissors

black marker

Draw a large shamrock on green construction paper and cut it out. Draw 4 small shamrocks on green construction paper and cut them out (these will be for hands and feet).

Cut 4 strips of white paper about 1 inch wide. Fold the strips back and forth like an accordion. Glue 2 strips either side of large shamrock for arms, glue the other 2 at the bottom for legs.

Glue small shamrocks on the ends of each strip for hands and feet. Glue googley eyes on large shamrock and draw in mouth with black marker.

Blarney Stone

Blarney Castle, Ireland

smooth clean river rock

brush

green paint

glue

markers

glitter, sequins, jewels, bits of yarn

Make sure rock is clean and dry. Paint it green. Let dry.

Once paint is dry decorate with glitter, sequins, etc. When glue is dry from decorating draw on face using markers.

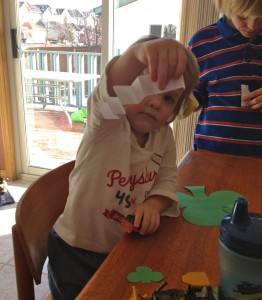
Luke folding his accordion arms

Voila! Your own kissable Blarney Stone.


Deals of the Week: New deals every week, online only!

Valentine’s Day Ideas for Kids

I love Valentine’s Day! I have no idea why really, I have yet to have the real romantic Valentine’s that I have dreamed of, but it is one of my favorite holidays.

I find the energy in the air is charged with hope and positive vibes and whether you have a sweetie or not, it is a great day.

I love doing things with the kids as they get so excited about it. I usually make a treat of some kind, whether it be chocolates, brownies or chocolate dream pie (yes there is a chocolate theme here) and I give them a little something, usually a homemade valentine, which might be as simple as a construction paper heart with a note on it.

I usually set up a little scavenger hunt for them as well, something simple but gives them chance to roam the house and explore, looking for things. They love it!

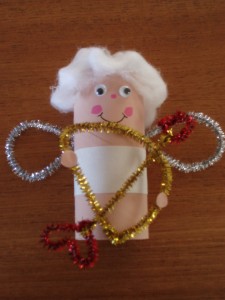
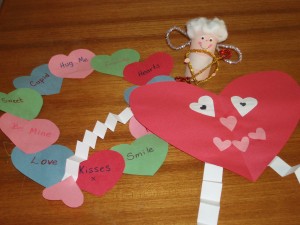
I also love the crafts as there are so many fun and easy things to make around this holiday. One of my favorites is the Toilet Paper Roll Cupid. He is very cute and fun to make. He is a little involved with a few steps that may not be suitable for younger children but they could certainly do it with some adult help.

Cardboard Cupid

I have always loved to the Stained Glass Hearts, where you use tissue and construction paper and put them up on your window. Easy, fun and full of love.

Years ago I was writing for a site call Suite 101 and created an article there which includes cupid as well as some other great crafts such as a Valentine Wreath, photo frame and another of my favorites – the Valentine Person! (I think I love that one because of his ‘accordian’ legs and arms). Go here for details on all these great crafts.

The thing I like about Valentine’s Day crafts is that you can pretty much do anything with hearts – from pictures to people to wreaths and even crystal hearts, which Matthew was making in his class at school, there is no end to the creative ideas and fun that the kids can have this Valentine’s Day!


Groundhog Day

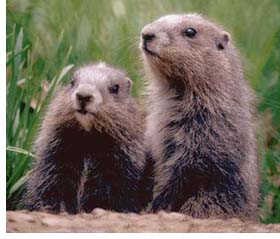
Groundhog Day is one of those holidays that although is only a one day event can be a wonderful celebration. Groundhog Day is when the groundhog emerges from his hollow after winter hibernation and predicts the arrival of spring. If the groundhog sees his shadow when he emerges he pops back into his hole and there will be six more weeks of winter. If he does not see his shadow then he remains out of his hole and means it will be an early spring.

There is a long tradition of celebration on this day from early morning festivals to see the groundhog emerge, with family and kids activities, parades, crafts and concerts. Some zoos have events as well that usually feature a presentation about the groundhog.

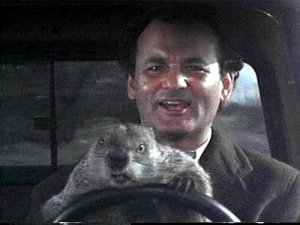
Bill Murray in Groundhog Day

The most famous groundhog is Punxsutawney Phil of Punxsutawney, Pennsylvania. (This is also where the 1993 film starring Bill Murray, Groundhog Day takes place. This is a wonderful and delightful film that is family friendly, if you haven’t already seen it, I would recommend it). But each town/ area has their own groundhog.

There are lots of things you can do with the kids on and around groundhog day too. There are crafts and activities, coloring pages and tongue twisters,  community events and of course the zoo!

Groundhog Day is a unique holiday that is recognized around the world. Why not take advantage of the day and check out what activities there are to go out and celebrate. (It’s a great opportunity for learning for the kids too – as well as a lot of fun).

What are you going to do for Groundhog Day this year?

Wintery Crafts

We all know that kids love crafts! and as a parent/ teacher it is fun to find things that are fun for them while teaching them developing skills. I love searching the internet to find different craft ideas. There are so many different things you can do with simple materials (many you already have around the house) and for little expense. I find that my kids just love making a craft, they are not picky about what it is they are making as long as they get to cut, glue and color; and they are so proud of what they made when they are done that they have to show everyone who comes in the door for the next few days.

Here are a few simple crafts that we have done recently that the kids really enjoyed. With the winter theme many of the crafts are based on snowmen, snowflakes, penguins, and mitts (or other winter wear). There are also some polar bears or other winter themed crafts to be found, but those are the most popular and you can find many variations on them that will meet the needs of any aged child.

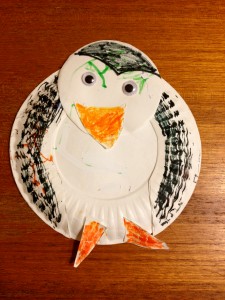
Paperplate Penguins (Luke and Chloe loved this one! They both worked diligently to create it and then proudly showed Daddy – they added a little extra color too)

small paperplates

googley eyes

orange and black markers

white paper

scissors

glue

On piece of white paper trace a small paper plate. On the tracing draw two half circles on the sides for wings and a small circle for the head. On the top third of the small circle draw half circle with a dip or point going down in the middle for the crown of the penguin. On the same sheet of paper, draw 3 triangles, one large one for the beak and two smaller ones for feet. (Depending on the age of the child they can draw these themselves, if not have an adult draw them) Child colors the triangles orange and the wings and crown on head black. Once they have completed coloring them they can cut them out.

Glue the wings onto the backside of the paperplate. Glue the head at the top of the plate and the feet at the bottom. Glue googley eyes on the head to make the face and the beak slightly beneath them in between the two eyes.

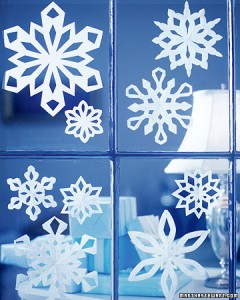
Cut Out Snowflakes (one of my favorites!)

white paper

scissors

Fold piece of white paper in half, then in half again and one more time (so that you have folded it 3 times in total). Using scissors cut designs into the paper, child may do this by cutting off a corner, making a half circle on an edge, etc. Child cuts as many ‘designs’ into the paper as they would like. Once they are done child unfolds the paper and they have a beautiful snowflake with various patterns and designs.

Doing this will create a square snowflake. If you wish to have a circular one trace a circle on the paper and cut it out before folding it. You can also do this with smaller pieces of paper (to make smaller snowflakes) and/or colored paper. Children can make more than one and hang on the window creating their own ‘snowstorm’.

Note: Depending on the age of the child an adult may need to assist with cutting the snowflake. This craft is best for children who have good motor control and can use scissors well on their own.

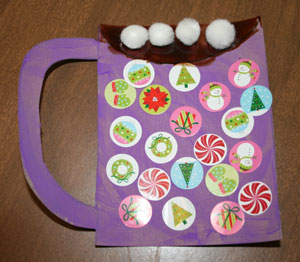
Hot Chocolate Mug (love this!)

lightweight cardboard (cereal box)

paint – brown and any other color

paint brushes

white pom poms small or mini marshmallows

stickers

Draw a picture of mug on cardboard. Cut it out. Paint cardboard mug with color of choice.  Let paint dry.

When the paint is dry the child can then decorate it with stickers. Draw a half moon at the top of the mug. Child paints in the half moon with brown paint and sticks on pom poms (for marshmallows). Let dry. Pom poms should stick onto wet paint without needing to use glue. If when it dries pom poms haven’t stuck then a little glue can be used to secure them.

Note: Colored construction paper can be used in lieu of the cardboard and painting the main part of the mug.

Crafts are not only fun they are great ways to enhance children’s developing motor skills and enable them to learn to grasp things with their fingers. It also feeds their creativity and imagination as well as a sense of pride when they are finished!

In my search for crafts I discovered this wonderful link with some fantastic and innovative ideas. Check it out for more great wintery craft ideas!


Christmas Crafts for Kids

Over the past month the little ‘elves’ have been busy at our house making their Christmas crafts. Experimenting with googley eyes, glitter and cotton balls, they have created some wonderful wintery and Christmas crafts to add to the decor of our home.

Matthew’s Christmas Reindeer

Since Christmas is a holiday that most of us begin celebrating early in December (and for some even sooner in November -or the die hards right after Halloween :); it allows us lots of time to get ready and enjoy the season. Whether it be through games, activities, Christmas shopping and events or crafts, there is lots to do.

Luke and Chloe have really been enjoying making crafts this year and our nanny has created some wonderful crafts for them to make that use their developing skills and aid in their development of motor skills and creativity.

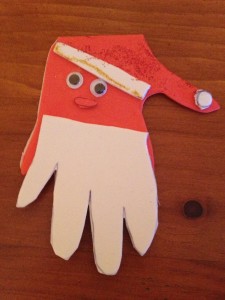
Chloe is very diligent and careful when she makes her crafts and though Luke is careful too, he tends to be a little ‘freer’ with his creations. One of the first crafts they made was a Santa Claus handprint, with googley eyes and sparkles that can be strung to hang on the tree as a Christmas ornament.

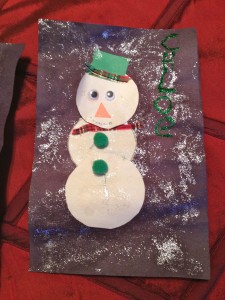
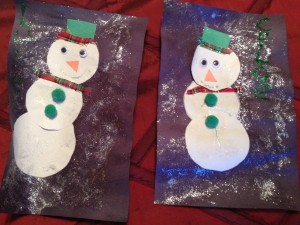
Another one was a snowman on a glittery snowy background complete with hat and scarf. They enjoyed them both and were very easy for them to do.

Santa Handprint Ornament

red foam sheet

white foam sheet

googley eyes

gold and red glitter glue

scissors

string

Trace child’s hand on red foam sheet and again on white foam sheet. Cut both pieces out (depending on the age of the child adult may need to cut out the handprints). Cut the white handprint in half and place on bottom half of red handprint to create beard. Cut out a white strip long enough to go across the top of the red hand between the thumb and the rest of the hand to make fur on hat. Cut out small circle for pom pom on hat and place at the end of the red thumb. Glue on googley eyes. Cut out small mouth out of red foam, Decorate with red and gold glitter glue. Put a string through the top of the red foam hand to  hang on tree.

Wintery Snowman

black, orange, green and white construction paper

silver glitter glue

pom poms

ribbon

glue

scissors

Cut one sheet of black construction paper in half. Cut 3 circles, the same size out of the white construction paper. Cut a small square out of the green construction paper (for hat). Glue the white circles sitting one on top of the other to build snowman on one of the halves of black construction paper. Glue on googley eyes on top circle to make face, add orange triangle from construction paper for nose. Use glitter glue to draw mouth. Use pieces of ribbon to make scarf for snowman and for brim on hat. Glue on. Use silver glitter glue on background of snowman (on black construction paper) to create ‘snow’. Add child’s name, if desired on right hand side of snowman.

Chloe gluing her bear puppet

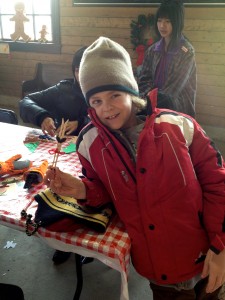
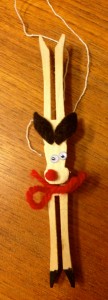
When we went to Heritage Park for their Once Upon a Christmas event they had some great crafts there too. Matthew made a clothespin reindeer and the twins each made a puppet out of an old Christmas card. This was a really simple idea where they traced a pattern onto an old Christmas card (they chose a bear), then we cut it out and glued it onto a popsicle stick. Not only is this a great use for old Christmas cards but Luke and Chloe loved it! They picked the card they wanted to use and after I helped with the cutting, they glued on the stick. Chloe got a little over zealous and decided to eat the glue, not sure why kids do that, I never did – but she finished her craft in the end.

There are a plethora of creative ideas out there for Christmas crafts for all ages such as paperplate snowmen, handprint wreaths and reindeer puppets. The ideas are endless and it is easy to create your own crafts as well. Here are some of my favorite links for more Christmas crafts and ideas.

Make your own snowglobe

Pipecleaner Snowflakes

Enchanted Learning

DLTK crafts

Enjoy and happy crafting as you enjoy this holiday season!


Shop our huge selection of folk art!  Free Shipping Available.