Taste of Nature – a Fabulous Sugar Dairy & Gluten Free Snack in a Package

Today I am very excited to be doing my first official product review!

When we decided to go sugar free in our home, it meant making a lot of things that we normally purchased and enjoyed, from scratch. Bread, salad dressings, treats, and granola bars were some of the items that contain refined sugars, which was one of the ingredients we were avoiding. I spent hours in the kitchen creating and trying new recipes, finding things that worked and we liked. And though I was happy to be making this healthy change for my family, I was not loving being in the kitchen for most of my day. My oldest son, was also struggling with wanting the prepackaged stuff that everyone else had even though what I was providing was indeed tastier and better for him.
IMG_2951Each time I went to the grocery store I would look in the organic/ health food section to see what ‘packaged’ products they had come up with. Yes you could find all kinds but they usually contained ingredients that we couldn’t have, like dairy, refined sugar and on some occasions gluten. I could find a dairy free product but it had gluten, or sugar free but it had dairy and nowhere could I find one that met all 3 (and tasted good, we have tried some that looked promising but they did not taste good at all).

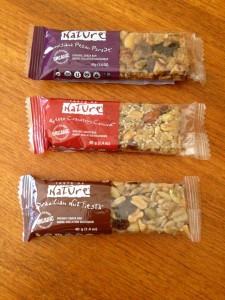
So last week when doing my regular shopping trip I was very pleased to discover these fruit and nut bars by Taste of Nature! A Canadian company, these organic snack bars are delicious and come in a variety of flavors such as Canadian Maple Forest, Quebec Cranberry Carnival and California Almond Valley. Each flavor is a different mix of nuts, seeds and fruit, such as raisins, almonds, sesame seeds to exotic ingredients like dried cherries, pomegranite and cashews.

I immediately bought a couple and brought them home to try. We didn’t even make it out of the parking lot and the twins were asking to have one. So we sampled and shared the Brazilian Nut Fiesta. Wow! These bars were good! Sweetened with agave nectar and brown rice syrup these bars contain no artificial flavors or additives, have no dairy and no gluten! They are also certified organic, vegan, and kosher! We had hit the mother load!

I was so excited to have found these that I immediately came home and checked out their website. I was thrilled to see that they offered many more flavors such as Niagara Apple Country, Nova Scotia Blueberry Fields and Persian Pomegranite Garden. This is where I also learned this company aims to produce zero carbon footprint, uses green business practices and that providing quality products and caring for our environment are very important to them.
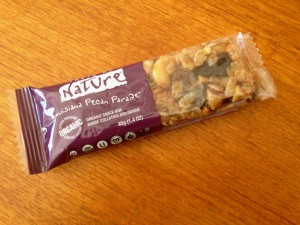
IMG_2955I was sold! This was a great company and one that met all our dietary needs. Woohoo! I could now spend a little less time in the kitchen 🙂

Over the course of the next week we tried a few more flavors, Canadian Maple Forest, Quebec Cranberry Carnival and Louisianna Pecan Parade (one of their newest flavors and my favorite as it has cashews and dried cherries in it!) Their other new flavor is Polynesian Coconut Breeze, which I am very excited to try as I love coconut as well!

Of course the twins have enjoyed all the flavors and my oldest son’s favorite is also the Louisianna Pecan Parade.

I am so pleased to see Canadian companies being innovative and creating products that are meeting the growing demands and changes of a healthier population and recognizing that there is a need and market out there. And the variety that this company provides is fabulous!

The other thing I was pleased with was the price for this product. At less than $2 per bar I thought this was quite reasonable considering the quality and variety of ingredients. We will definitely be purchasing more of these great bars and adding them to our healthy snacks!

I’d like to thank Taste of Nature who provided a variety of their fabulous bars for us to try. Thank you! They are delicious!

Yummy Easy Vegan Treats (with chocolate!)

I love shopping at Community Natural Foods, a local organic and natural food store. Not only do they have a wide variety of products available and good prices, they often have someone there sampling yummy recipes. Not only do they provide the samples for you but they also have the recipe printed out and ready for you to take a copy!

Not only are the recipes delicious they are good for you, often a vegan recipe with natural sweeteners and usually a little pinch of some kind of superfood in there. This is where I have gotten the Cinnamon Salted Caramel Brownie recipe that I made and shared with all my friends in Kananaskis last January – which everyone loved and would never have known that it was no dairy, no sugar unless I had told them. So I was quite excited when I went in on Saturday and discovered 2 yummy recipes to try.

I was so excited I came right home and made them both, even having to run back out to the store to grab a missing ingredient. Fairly quick and easy they both turned out fabulously! I even shared a sample with a couple of my neighbors who quickly asked for the recipe.

I love it when I find good recipes like this as I think that a lot of people feel that eating healthy means more fruits and vegetables and that you have to give up a lot of the sweet treats, which just isn’t true. You can find many, if not even more delicious in some cases, treats that not only satisfy your ‘treat fix’ but provide many essential vitamins and nutrients that our bodies need. It’s great, have a sweet and it’s actually healthy and beneficial for you!

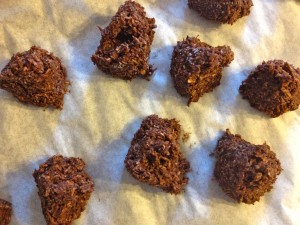
No Bake Chocolate Macaroons

1 banana

1/4 c. coconut oil

1/4 c. pure maple syrup

1/2 tsp. vanilla extract or 2-3 drops madagascar vanilla essential oil

6 tbsp. cacao powder

1.5 c unsweetened coconut

1 tbsp. chia seeds

small pinch sea salt

In a medium size bowl mash banana well until there are no clumps. Stir in melted coconut oil, maple syrup and vanilla. Sift cacao powder and stir into banana mixture. Stir in chia seeds, coconut and salt.

Line baking sheet with parchment paper. Drop a teaspoon at a time onto parchment paper. Put in freezer for 20 minutes or until firm. Store in freezer until ready to enjoy.

Makes approx 15 macaroons.

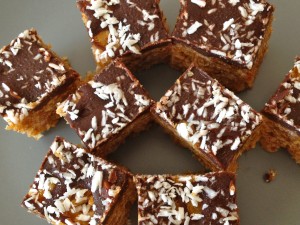
Almond Butter Rice Crispy Treats

1/2 c. chunky almond butter

1/2 c. brown rice syrup

1 tbsp. vanilla

1 tbsp. Earth Balance

1/2 tsp. sea salt

3.5 c Erewhon Brown Rice Crisp cereal

Chocolate Drizzle

1/4 c. homemade raw organic chocolate, left in liquid form

1 tbsp. almond butter

pinch salt

Shredded coconut for garnish

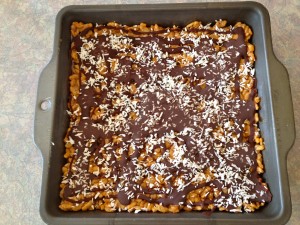
Line an 8×8 inch square pan with parchment paper.

In a large pot put in brown rice syrup, Earth Balance, almond butter and salt. Melt over medium low heat until well combined and heated through. Remove from heat, stir in vanilla; then stir in brown rice cereal.

Scoop and spread evenly into 8×8 pan. Press down with finger or roll with a pastry roller (just a note about the pastry roller – I had never thought of using this before and seriously it is the cat’s meow. Way easier then trying to press it into the pan with your fingers and makes it flatter and smoother). Place in freezer for 5 minutes while you make chocolate glaze.

Make raw organic chocolate according to recipe (cacao butter, vanilla, natural sweetener and cacao powder – for full recipe and directions go here). Stir in almond butter and salt.

Remove pan from freezer and drizzle with chocolate. Sprinkle with coconut and place in freezer until firm – about 15 minutes. Slice into squares.

Bars will hold their shape quite well at room temperature but may be stored in freezer or fridge.

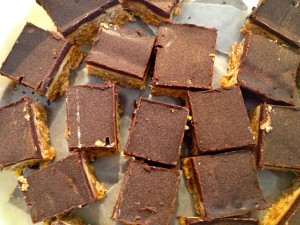
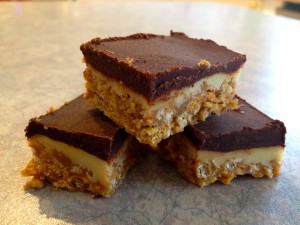
Chocolate Peanut Butter Cereal Squares

As promised I am sharing with you today the sugar and dairy free recipe for one of my all time favorite sweet treats. I have no idea where this recipe originally came from. It was one that my Mum made all the time when we were growing up and we all loved! It was very hard to have just one or two, as they were so good.

When we went sugar free at our house I thought that I would simply not make these anymore as they are so full of sugar and I had no idea what the possible substitutes could be. It seemed like a daunting task as many of the ingredients needed to be changed. But as I learned and adapted other recipes, discovering the various natural sugar substitutes out there I started to feel that I could easily adapt this recipe too. It might be a challenge and take a little time but I felt I could do it.

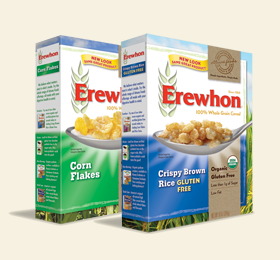
The first challenge was finding a brand of rice krispies and cornflakes that did not have any added sugar (because many cereals do). In my search I discovered Erewhon, a cereal company by Attune Foods that had both of the cereals I needed. Their brown rice krispies are sweetened with brown rice syrup, while their cornflakes have no added sugar at all.

Slowly slowly over the period of about a year I found what I was looking for and determined what alternatives could work in this recipe. And finally a few weeks ago I had everything I needed so I gave the new recipe a try. I am happy to report that they turned out great! and taste very similar to the original square. Taste tested by Matthew, he said that they did not taste different at all! And they must be good because he kept going to the fridge and scooping a few at a time.

Pleased with the results I shared the new recipe with my Mum and sisters – happy to have an alternative to our favorite treat. And today I am sharing the recipe with you. They are an easy no bake square and can be put together in less than 30 minutes. Make sure that you have your powdered sugar alternative ready and premixed as this can add to your time if you have to make this as well. The recipe for this is below.

My only tip is once they have set in the fridge, take them out and leave on the counter for a few minutes so they soften a little, this will make them easier to cut. I usually precut the whole pan and put them in a container in the freezer – the only downside is that they are too easy to grab and feast on! But great when you want to pull something out for company!

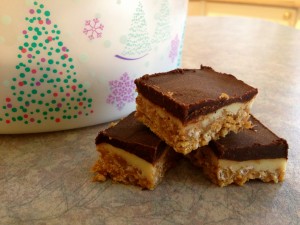
Chocolate Peanut Butter Cereal Squares

Bottom:

3/4 c. coconut nectar

1/2 c. coconut sugar

1 c. unsweetened peanut butter

1 1/2 c. crushed Erewhon Corn Flakes

1 c. Erewhon Brown Rice Krispies

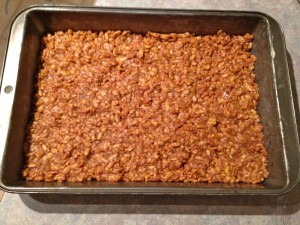
Heat the coconut nectar and coconut sugar until coconut sugar melts. Add peanut butter. Mix well. Then add corn flakes and rice krispies. Mix together well and press into greased 9×13″ pan.

Filling:

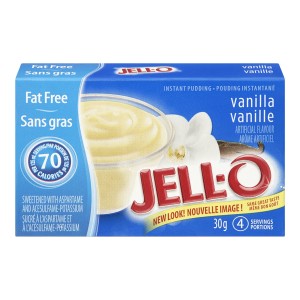
2 tbsp. fat free Jell-o vanilla instant pudding (this is not an ideal replacement due to the asparthame in it, but it is sugar free – I am on the lookout for a better substitute for this)

Rice or almond milk (approx. 2 tbsp.)

1/4 c. melted Earth Balance vegan spread

2 1/2 c. powered sugar replacement

Beat together well. Pour over bottom.

Top:

4 squares unsweetened chocolate, melted

1/2 c. Earth Balance vegan spread

Melt chocolate and Earth Balance in a small pot on the stove over medium heat. Stir frequently to ensure that chocolate does not burn. Lower heat if necessary. Mix together. Once completely melted spread on top and refrigerate.

Sugar Free Powdered Sugar (replacement for regular icing sugar)

1 cup nonfat powdered milk (for dairy free use powdered coconut milk)

1 cup cornstarch

2/3 cup Krisda Stevia for baking

Combine all the ingredients in a food processor or blender and whip until blended and powdered. Store in an airtight container.

This replacement can be used in any recipe calling for icing sugar.

Yummy!


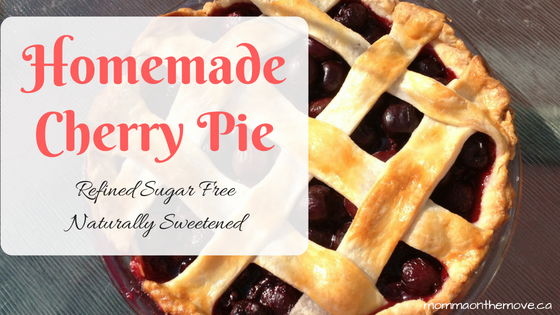
Summer Treats – Sugar Free Cherry Pie

sugar free cherry pie

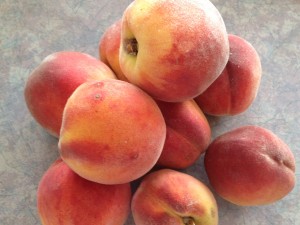
One of the things I love about summer is all the fresh fruit that is available. Cherries, peaches, strawberries, blueberries, etc. It’s abundantly available, and it’s fresh, sweet and luscious, a taste sensation when you put it in your mouth.

I feel lucky that my parents live in the Okanagan where fresh fruit is rapidly abundant. Fruit stands and u-picks line the sides of the roads where it is not a matter if there is fruit but where you would like to get it from.

I always tend to get a little over zealous and buy lots of fruit to bring home. I make jam, freeze, eat it straight or make various desserts like crumbles and pies.

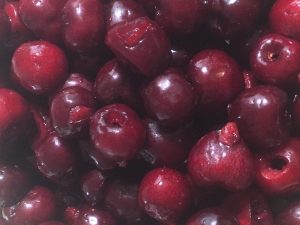
In fact last weekend when I was in the Okanagan I bought 20 lbs of cherries for $20. It was a steal of a deal! The only thing is when you buy that much fresh fruit you have to do something with it fairly quickly or your ‘steal of a deal’ ends up going rotten and moldy very quickly.

sugar free cherry pieSo there I was Tuesday night for 3 hours pitting and jamming cherries, trying to give some away to friends, and getting creative with what I was going to do with this fruit.

(I would highly recommend using a cherry pitter as this makes it much easier to pit cherries. It is also something the kids can do and help with – my son loves using the cherry pitter and I can easily enlist his help).

By the time I was done I was covered in cherry juice (and so was my kitchen), with a mound of cherry pits and stems in the sink and a huge mess to clean up. I never wanted to see another cherry again…

The benefit of all this was cherry pie. Cherry pie is one of my favorite pies, other than pumpkin and coconut cream, so when I was getting to the end of the cherries and still had a lot left I decided to treat myself.

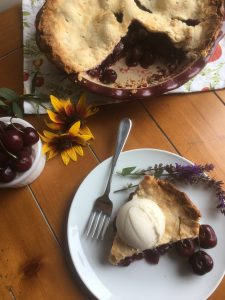
sugar free cherry pieAs you may know there is lots of sugar in pie, but as sugar and dairy free household, I have become adept enough to make the appropriate substitutions and still have a delicious experience (where it tastes just as good as one with sugar, if not better). My mouth was already watering at the thought of this pie, with ice cream on top.

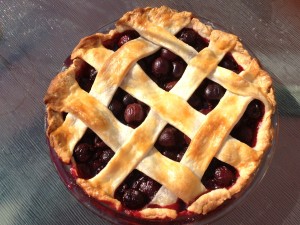
I used Martha Stewart’s Sweet Cherry Pie recipe that I found on the internet and adapted it accordingly using honey instead of sugar. It turned out beautifully and everyone had 2 pieces! With ice cream of course!

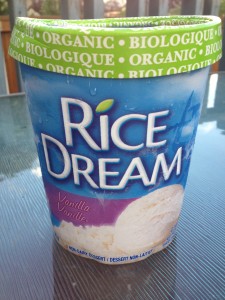
Vanilla Rice Dream

As for the ice cream, I have recently discovered Rice Dream, a lactose and gluten free ice cream available in stores. It is also sugar free, as it is sweetened with brown rice syrup and agave nectar. It is quite good, in fact it is so good I had way more ice cream than I actually did pie!

I make my own crust (and have been praised for how good it is) simply by following the recipe on the Tenderflake® box, which I use in my crust. It creates a beautiful light and flaky crust.

This pie recipe used a lattice top crust, which I don’t usually do but decided to try it out, and though I found it did look very pretty, I prefer a full crust on the top. A good crust is something we really enjoy at our house, so the more of it the better! Plus it’s really hard to cut once it’s baked (as in getting it out in a decent piece)!

Cherry Pie
  • 4 cups cherries
  • sugar free cherry pie1/4 cup honey
  • 2 -3 tablespoons arrowroot powder or cornstarch
  • 2 tablespoons fresh lemon juice
  • All-purpose flour, for rolling
  • 1 large egg yolk, beaten with 1 tablespoon water, for egg wash
  • 2-9 inch pie crusts (make your own or store bought)
  1. Preheat oven to 400 degrees. On a floured surface, roll out pie crust one to a 14-inch round. Fold dough in half and gently place in middle of a 9 inch pie plate. Once centered unfold dough so that it fits evenly in the plate (do not stretch dough). Using pering knife trim dough to a 1-inch overhand all around.
  2. In a large bowl, combine cherries, honey, arrowroot powder, and lemon juice; toss until cherries are well coated. Pour into prepared bottom crust.
  3. Roll out second crust to a 14-inch round. If creating lattice, cut into eight 1 1/2-inch-wide strips; discard the shortest two. Weave strips over filling to form a lattice. Using pering knife, trim strips so they hang over rim by 1 inch. Tuck strips under rim of bottom crust; press to seal. Crimp with a fork all around the edge. If choosing not to create lattice, simply fold crust in half and place over pie. Trim, press to seal and crimp as described.
  4. Using a pastry brush, lightly brush lattice/ crust with egg wash.
  5. Place pie on a rimmed baking sheet. Bake until filling is bubbling rapidly all over, 60 to 70 minutes (tent with aluminum foil when crust starts to brown, about 40 minutes). Though original recipe calls for above baking time I found that pie was done in about 50-55 minutes. Please use times as approximate and gauge it according to your oven.
  6. Transfer pie to a wire rack, and let cool to room temperature, at least 3 hours.

Like fruit pies? Check out my other sugar free pie recipes for Peach, Apple & Blueberry