 I love that one night a year I can make pancakes for dinner! Shrove Tuesday or Pancake Day is the Tuesday before Ash Wednesday when Lent begins in the Christian faith.
Beginning in the middle ages, it was the last day for celebration and feasting before the period of fasting required during the lenten season. Food items like meat, milk, eggs and fats were restricted during this time; so to keep these foods from being wasted people would have big feasts on Shrove Tuesday in order to consume these items and prevent them from being wasted (as they would not keep over the next 40 days).
 The English were the first to make pancakes on this Tuesday as it was an easy way to use these ingredients before Ash Wednesday began. In France, consumption of these fats or fatty foods on this day coined the phrase “Fat Tuesday” or Mardi Gras.
I always find these things fascinating and share them with my kids. My oldest often asks why we have Pancake Tuesday and though I know the traditional reason I had no idea of it’s origin.
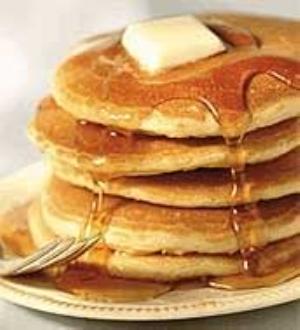
And though we may not always observe all the traditions of the Christian faith we certainly enjoy and don’t mind observing this one! Usually I make the traditional plain pancakes and add some fruit on top, but with all our dietary changes and my hunt for new recipes, I have added to my repertoire of ‘kinds’ of pancakes.
So today if you are on the hunt for a little variety in your pancakes, give one of these recipes a try (and if you are not making pancakes for dinner then try them some other time, they are all delicious!) You’ll love ‘em and so will your kids. They are all sugar and dairy free and the last one is gluten free as well.
Pumpkin Pancakes from Williams-Sonoma Kitchen
1 1/2 c. flour (I used half whole wheat and half white)
1/4 c. date sugar
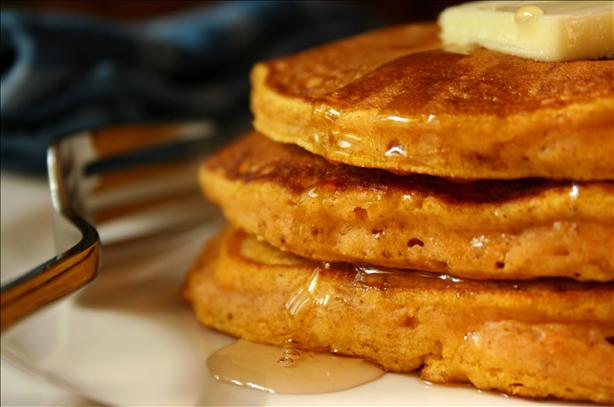
Pumpkin Pancakes
3/4 tsp. baking powder
1/2 tsp. baking soda
1/2 tsp. salt
2 tsp. cinnamon
1/2 tsp. ginger
1/4 tsp. ground allspice
4 eggs, separated
3/4 c. canned unsweetened pumpkin
1 1/2 c. rice milk (I use a brand called Ryza as it has the least amount of additives and no sugar or you can make your own) or almond milk
4 tbsp. Earth Balance, melted
1 tsp. vanilla extract
Maple syrup for serving
In a large bowl whisk together flour, sugar, baking powder, baking soda, salt, cinnamon, ginger and allspice. Set aside.
In another bowl, beat the egg whites until medium peaks form. Set aside.
In another bowl, whisk together the egg yolks, pumpkin puree, rice milk, Earth Balance and vanilla until well combined. Whisk the pumpkin mixture into the flour mixture just until the batter is smooth and no lumps of flour remain. Fold in egg whites in 2 additions.
Heat griddle over medium heat until a few drops of water flicked onto the surface skitter across it. Lightly grease the griddle.
Pour 1/4 c. pancake batter onto griddle. Cook until bubbles form on top and the batter is set, 3 to 4 minutes. Flip the pancakes over. Cook until golden brown on the other side, about 3 minutes more. Keep warm until all pancakes are cooked.
Oatmeal Peanut Butter Banana Pancakes from purecanadamaple.com
1/3 cup whole wheat flour
1/3 cup all purpose flour
1 teaspoon baking soda
½ teaspoon salt
2 cups rice milk or almond milk
2/3 cup old fashioned oats, not instant
2 overripe bananas, mashed with a fork to a fine pulp
2 egg whites, whipped to stiff peaks
2 teaspoons canola oil or non-stick pan spray
Gobs of crunchy or creamy peanut butter
Pure maple syrup
In a mixing bowl, combine both flours, baking soda and salt. Set aside. In a non-reactive mixing bowl, combine milk, oats and bananas. Fold in dry ingredients. Fold in egg whites and mix until just combined.
Heat one teaspoon of oil in a 12-inch non-stick skilled over medium high heat. Drop batter by the scant ¼ cup full into pan and cook, turning once until lightly browned. Hold pancakes warm on a platter until you’ve got them all cooked.
Spread a teaspoon or so of peanut butter on each pancake and then the Pièce de résistance of course…a generous drizzle of maple syrup.
Makes 15 pancakes.
Pancakes
This recipe is sugar free, dairy free, gluten free and is yummy! Courtesy of Ryza rice milk.
1 egg
1 cup Original or Vanilla Ryza
2 tbsp oil
1 3/4 cups brown rice flour
3 tbsp tapioca starch
2 tsp baking powder
1 tsp cinnamon
1/2 tsp baking soda
Beat egg until frothy. Add Ryza and oil; beat until well blended. In another bowl mix brown rice flour and the remaining dry ingredients. Make a well in the center of the dry ingredients and add the liquids. Stir until well blended. Do not over stir. Batter will be slightly thin. Lightly grease a frying pan. Pour small circles and fry pancakes until golden. Serve with pure maple syrup.
You can also try apple cinnamon pancakes or if you prefer a simple plain pancake try this recipe.
What is your favorite pancake recipe? Share in the comments below.