Gorilla Bones

On the Easter weekend we went to the zoo. It was crazy busy as it was their Easter Eggtravaganza. I had never seen it so busy, there was a line of cars to get into the parking lot and then another line to get into the zoo. We had been to this event before but I have never seen so many people as there was that day.

It is a great event with lots of value added activities for the kids, like a blow up maze, Easter pictures and pot your own plant; as well as the usual interactive exhibits and touch tables.

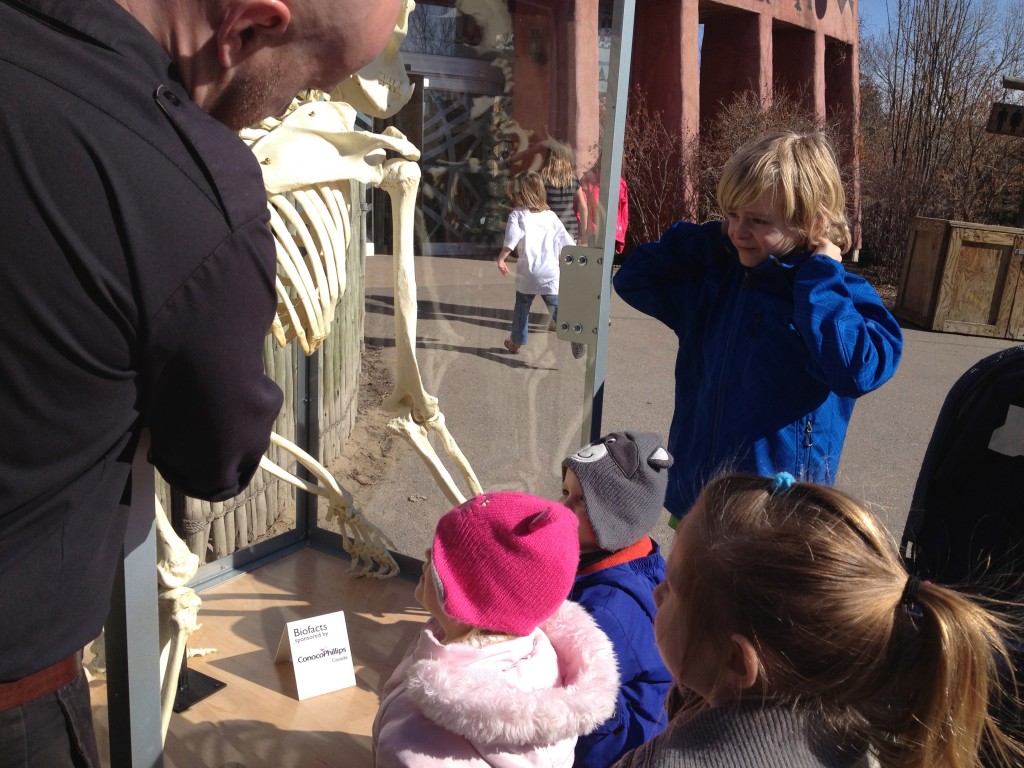
Outside the gorilla enclosure there was one of the zoo staff with this skeleton of an adult gorilla. It was really neat, the kids got to touch it and check it out, do some exploring. The zoo staff explained different parts of the skeleton to them as they were at each part.

The kids really enjoyed it. I think it is of such value for children to be able to touch and feel things in their learning, which is one of the reasons I love the zoo!

Checking out the gorilla skeleton


Dying Easter Eggs with Children

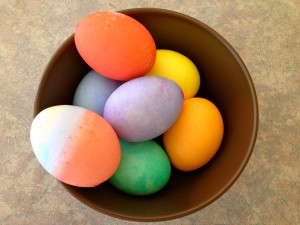
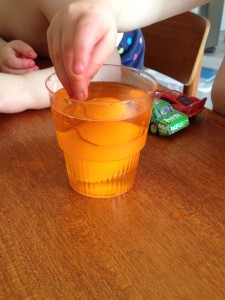
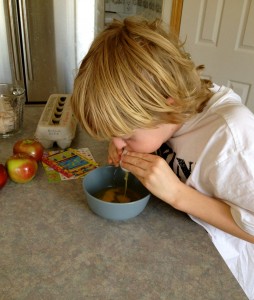
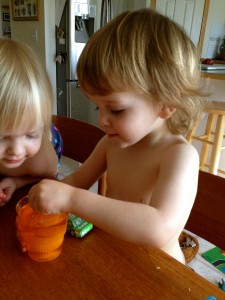
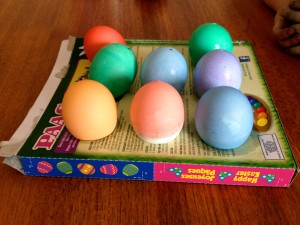
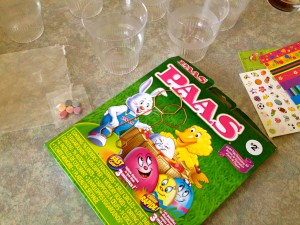
As a kid I always enjoyed dying Easter Eggs at Easter. I loved watching the eggs as they transformed from white to red or whatever color we had chosen. Experimenting with different colors and patterns, adding stickers or other decorations on our eggs. Dying Easter eggs with children can be lots of fun and this was a tradition I wanted to continue with mine. This year the kids and I dyed eggs for the first time. Yes this was the first time even for Matthew, although he is already 9 years old. I baulked when I realized this and felt that I had let him down as a mother. I feel it is my duty to do these kinds of things with my kids and to realize that Matthew was already 9 and had never done it, I was appalled! This was going to be quickly remedied. I made sure that I picked a time when we had a large block of time, where we didn’t have to run anywhere or stop and get a meal prepared. Though dying Easter eggs with children is fairly simple I knew that I needed to be available to help, especially the twins. Plus I wanted to get in there and participate. What is the fun of doing these things with the kids if I can’t get in there and play myself?dying Easter eggs with children I had bought a dozen eggs for our project. When I got up in the morning I put them in a pot to boil right away, that way I knew they could boil and cool so when we were ready to dye them they would be cool enough to do so. I kept out 4 eggs as I planned to blow these ones out. The only thing I find with dying hard boiled eggs is that the eggs tend to get wasted. I know that some people dye them and then eat them the next day but I always found that we never did. I knew that the twins would need their eggs to be hard boiled so that they could handle them without breaking, but I figured that Matthew could handle a blown egg (which is simply an egg shell without the actual egg white and yolk inside it). The thing I like about blowing the egg out of the shell is that you can then use the eggs insides in something else and you can keep your decorated eggs longer. dying Easter eggs with childrenMatthew even helped me blow out the eggs. He watched me do the first one and decided he wanted to try. Turned out he did the other 3 all by himself. When I announced that it was time to dye the Easter Eggs Luke and Chloe ran into the kitchen and sat down waiting. They knew what was going on as I had already told them earlier in the week. Matthew and I had already mixed the dye ahead of time, as well as gotten the eggs ready. The challenge was we only had one holder/ stick to dip the eggs into the dye and 3 kids. At first they all wanted to do it but when I explained that we only had one stick and that we needed to take turns, we managed to work it out. In fact, by the end we were dropping our eggs into the cup without the stick and only using it when they were ready to fish them out of the dye. I will be saving the stick for next year so that when we buy another kit we will have 2. dying Easter eggs with childrenThey each got to dye four eggs the color of their choice and then we left them to dry. We intended to come back to them when they were dry to add stickers or sequins, etc. but we never did. But it really doesn’t matter, they had a great time and were very proud of their eggs as they showed everyone who came in the door that day their eggs.

Tips for dying Easter Eggs with Children (best for children ages 3 & up)

  1. Have the eggs ready beforehand -whether you are going to hard boil them (best for young children so they can handle them without breaking) or blow them out
  2. Mix up the dye beforehand as well – I found small plastic disposable cups work well
  3. Put kids in old clothes – make sure that they are in clothes that it doesn’t matter if they get dye on. If the dye gets on clothing it will stain and is hard to get out. You can also put an apron on them or just get them to take off their shirt altogether (depends on their age and who they are dying eggs with)
  4. Have an adult available who can assist the kids
  5. Do one egg at a time, one color at a time – I had all the dye on the island in the kitchen and brought the color that Luke and Chloe chose to the table when they wanted it. With older children this may not be necessary.
  6. Let eggs dry completely – you may need to flip egg over so that the bottom dries
  7. Decorate with stickers, sequins, markers, etc. or leave as plain colorful Easter Egg
  8. Be patient and have fun!

dying Easter eggs with childrenMatthew really got into dying the eggs, getting creative using more than one color, partially coloring half and then doing another color. On one egg he even did 3 colors. We did a dozen eggs but had quite a bit of dye leftover so Matthew started dying and drying paper, creating a lattice design. It kept him busy for over an hour and he only stopped because he had his Ju Jitsu grading to attend.dying Easter eggs with children I had bought one of those kits that are cheap and abundant at Easter but there are lots of natural dyes that you can use, and may be preferable especially if you are going to eat them. Things like leftover coffee to make brown, tea, turmeric (yellow), blueberry, chili powder and red cabbage (blue). I think we may try the natural dyes next year. Dying Easter eggs with children is easy and fun. You can keep it super simple or make it more fancy if you want. Either way the kids will love it and you will have fun getting in there too!

How to blow out an egg

  1. Gently poke a small hole on each end of the egg using a pin. Trick is to make hole big enough that you can get air through without breaking the egg.
  2. Hold egg over a bowl.
  3. Place mouth over hole on one end and blow. Egg will slid out the hole in the other end into the bowl.
  4. Keep blowing until entire egg is out.
  5. Gently wipe off egg.

Easter Crafts for Kids

I tend to get very excited about Springtime, especially Easter. The sense of rebirth in the air, the warmth of the sun on my face, the flowers beginning to peek through. The kids get excited and start asking to play outside more, enjoying the warmer weather and all that comes with it – the mud, the grass and the rubber boots. It truly is a time of year when things re-emerge and come out of the darkness, the long ‘hibernation’ of winter.

With Easter of course there is the excitement of the Easter Bunny and all the other cute springtime animals, such as chicks and lambs. The hunt for eggs and Easter Baskets and the goodies that they find.

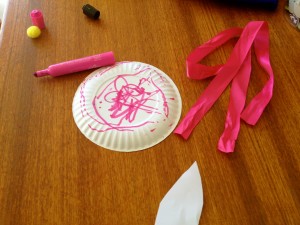
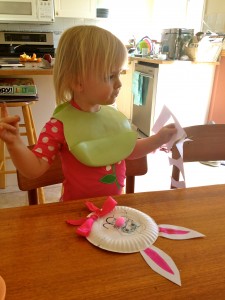
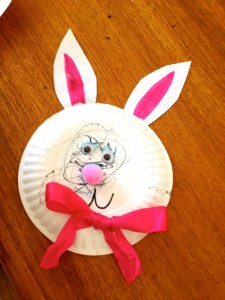
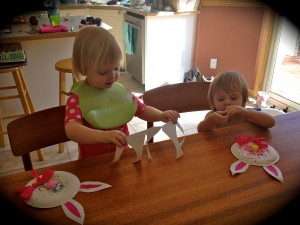
I often get the kids ‘into’ the holiday by doing some crafts around that holiday. I find it fun because I like to search out and try new crafts with them, and they love it, well because they just love crafts! Yesterday we made paperplate bunnies, which were easy and simple for them.

It’s neat to watch Luke and Chloe do their crafts as you can really notice the differences in how they do things. Chloe is definitely more of a follow the rules and the pattern when it comes to crafts and Luke is more of take the concept and get creative with it kind. He takes things more out of the box and expands upon the idea – which I just let him do, as I believe that is all part of learning and growing, and enhances his creativity.

Paperplate Bunny

What you will need:

  • small paperplate
  • white paper
  • googley eyes
  • small pom poms
  • ribbon
  • black and pink markers
  • glue
  • scissors
Trace bunny ears on piece of white paper. Cut them out and set aside. Take one small paperplate and glue on googley eyes and pom pom for nose. Using black marker draw in the mouth. Using pink marker color inside of bunny ears a little. Glue ears to paperplate at the top. Tie ribbon into a bow and glue on bottom of paper plate. Let glue dry completely.

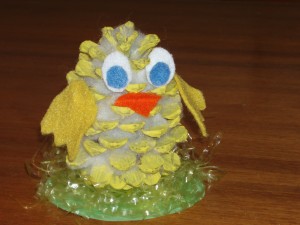
Fluffy Pinecone Chick

This adorable little chick is completed in steps, but is well worth the waiting time in between. We made this a couple of years ago with Matthew and he loved it, in fact he kept it in his room for a long time before it made it’s way out of the house. Children 3 years and up can easily complete this craft with parent help.

What you will need:

  • large fat pinecone
  • pencil
  • yellow paint and paintbrush
  • fiberfill (cotton batting)
  • felt scraps in white, blue, orange, yellow
  • green construction paper
  • Easter grass
  • glue
  • scissors

Paint the pinecone yellow and let it dry. Once dry, wrap the pinecone in thin layer of fiberfill. Use pencil to poke the fluff between the scales of the pinecone. From the felt scraps cut out wings, a beak and eyes and glue them onto the body. Cut a 10cm circle out of the green construction paper and glue the Easter grass on top. Then glue the pinecone chick onto the middle of the grass.

Stained Glass Egg

What list of Easter Crafts is complete without an Easter Egg! This super easy craft is great for little ones as the tearing of the tissue paper will utilize their little hand muscles and strengthen their hand eye coordination.

What you will need:

  • colored tissue paper
  • construction paper
  • scissors
  • hole punch
  • ribbon
Trace a large egg on a piece of white construction paper. Cut out egg. Tear different colors of tissue paper into small pieces. Glue the tissue paper onto the construction paper egg. Let glue dry. When dry punch a hole in top of egg, lace ribbon through and tie at top to make a loop for hanging.
No matter which craft you choose the kids will have a great time and some great decorations for Easter. Splashes of color for spring and lots of fun while doing it.
Now my kids are asking to color Easter Eggs – yes the whole dye the eggs – which my 9 year old has never done -oh dear I have neglected my duty as a mother. That should be an interesting experience…


Leprechaun’s, Shamrocks and More – St. Patrick’s Day Crafts for Kids


Chloe and Luke making their Shamrock Man

St. Patrick’s Day is one of those fun unique holidays that you can really get into if you choose to. I’ve always loved the concept of green beer, (as an adult of course), shamrocks and leprechaun’s and pots of gold. And it is the one day that you can never get too sick of the color green!

I always find holidays like this so much more fun when you can celebrate with kids, whether it be your own, nieces, nephews or children you work with. As usual there is a plethora of St. Patrick’s Day crafts that are fun and colorful to make surrounding this holiday.

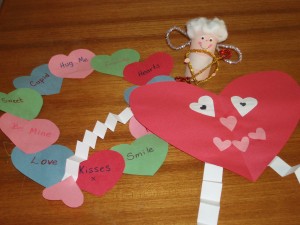
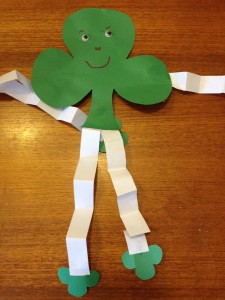
I had planned to make a couple of these crafts with the kids only to find when I went to our craft supplies that we were missing a few things. No matter, tomorrow a trip to the dollar store will remedy that. We were able to make Shamrock Men, which is one of my favorite crafts due to the accordion arms and legs (I have done a similar heart man for Valentine’s Day).
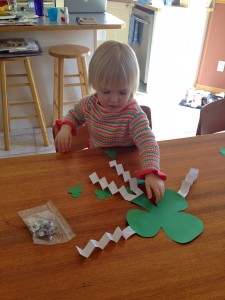
Luke and Chloe enjoy making crafts and as soon as I announced that we were making one they ran into the kitchen and sat down at the table. I had precut the shamrocks and strips of paper but I let them do all the folding and glueing and Chloe even drew a face on her shamrock’s by herself. Chloe was very into it, while Luke though interested got easily distracted with trains and playdoh, but he did finish it.

Both Luke and Chloe squealed with delight when they were done and started making their shamrocks dance and sing. It was pretty cute to watch. Tomorrow I would like to make the pot of gold which will probably end in a lot of glitter everywhere, but that’s ok we can all sparkle for a while.

I love the make your own Blarney Stone idea as well (below,) but we needed to gather a few supplies to do that one and could easily get away with making it after St. Patrick’s Day. I myself, have been to Blarney to kiss the Blarney Stone, set high up in the castle of Blarney; and it is quite a unique experience. I am not going to spoil it by telling you what happens as I think half the fun is experiencing it for yourself, but let’s just say it was not what I expected! Needless to say if you have the chance go and do it, it’s worth it. In the meantime you and your little ones can enjoy your own little Blarney Stone at home.

I imagine the kids will love creating their own and will be kissing them in no time (reminds me of kissing frogs for some reason – ha ha).

St. Patrick’s Day Crafts

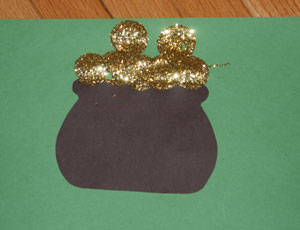
Pot of Gold

black and green construction paper
white glue

gold glitter

scissors

paper plate

something small and round to use as stamper to make gold coins

Draw and cut out pot on black construction paper. Glue the pot onto a piece of green construction paper, centering it and leaving enough room at the top to make the ‘gold coins’.

Pour glue on paper plate, dip stamper into glue and press it onto paper above pot. Pour gold glitter on paper until glue is completely covered. Gently tap the back of paper to remove any excess gold glitter. Tip – tap it onto another paper plate or piece of paper so you can use excess glitter for future crafts. 

St. Patrick’s Day Shamrock Man

green construction paper
white paper

googley eyes

glue

scissors

black marker

Draw a large shamrock on green construction paper and cut it out. Draw 4 small shamrocks on green construction paper and cut them out (these will be for hands and feet).

Cut 4 strips of white paper about 1 inch wide. Fold the strips back and forth like an accordion. Glue 2 strips either side of large shamrock for arms, glue the other 2 at the bottom for legs.

Glue small shamrocks on the ends of each strip for hands and feet. Glue googley eyes on large shamrock and draw in mouth with black marker.

Blarney Stone

Blarney Castle, Ireland

smooth clean river rock

brush

green paint

glue

markers

glitter, sequins, jewels, bits of yarn

Make sure rock is clean and dry. Paint it green. Let dry.

Once paint is dry decorate with glitter, sequins, etc. When glue is dry from decorating draw on face using markers.
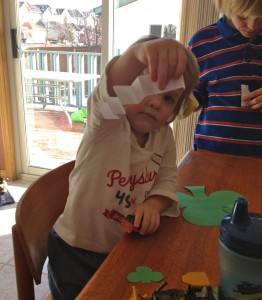
Luke folding his accordion arms

Voila! Your own kissable Blarney Stone.


Deals of the Week: New deals every week, online only!

Wintery Fun in Kananaskis

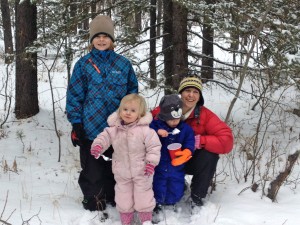
Today the kids and I spent the afternoon in Kananaskis, having been invited by our neighbors to join them for quading, a campfire, food and fun. It was a wonderful afternoon with certainly no shortage of food, laughs and friendship.

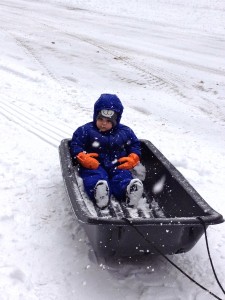
The kids got a chance to go out on the Razor, Matthew usually riding in the front passenger seat and Luke and Chloe being pulled along in the toboggan on the back. Luke, being the trooper that he is, was the first to try it out.  Hopping into the toboggan with no worries, totally trusting that he would be safe and wanting to find out what it was all about. Chloe being less sure refused the first time, but was then upset when Luke set off without her.

Luke on his toboggan ride

Riding with the neighbor Mr. Koop, Luke simply enjoyed the ride, taking it all in. As they were riding Mr. Koop would ask Luke if he was having fun and Luke would just nod. He would later ask if he wanted to ride some more and Luke would nod again. That’s my boy, he just sits and observes, but it doesn’t mean that he is not having a good time, he is just quietly enjoying it.

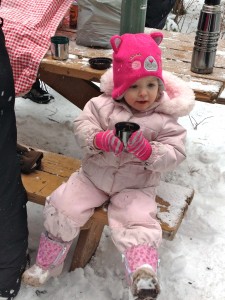
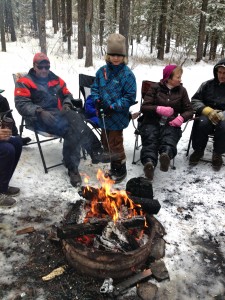
While others in our group took their turns on the Razor/ toboggan we cozied up around a campfire in the trees, having hot chocolate, brownies and roasting hot dogs. Everyone brought something and shared, there was plenty to go around. Now for us it’s a bit challenging to share foods with our requirements of no dairy and no sugar. But I was prepared and  brought our own hot chocolate, made with almond milk and sweetened with maple syrup, a little mesquite and lucuma powder; as well as cinnamon salted caramel brownies. This recipe, (sugar free, dairy free and gluten free), I discovered while shopping at Community Natural Foods earlier in the week. They are sooo good!

Chloe enjoying her hot chocolate

I managed to whip up a batch before we headed out so that the kids would have something to enjoy. Cause like I said sharing can be challenging, not for us to share with others, but for others to share with us. Everyone was fascinated by the brownies and many had a taste. Sheila commented that she would never know they had no sugar in them if I had not told her (and thought they were delicious).

Matthew was a bit frustrated by the amount of things that were there that he could not have, while the twins didn’t know the difference. But it challenged Matthew to branch out a little; he tried roasting grapes over the fire and seeing what it was like. He said they were not bad. It also demonstrated how much of our food has sugar in it – which I pointed out to Matthew. So many of our convenience foods and foods we choose to bring to gatherings contain sugar! Many of these things, like baked beans or chocolate cake I can make with natural alternatives, but they also take time and I am not always able to pull these things together if we get invited on short notice.

Roasting grapes

Overall though Matthew survived and though he felt a bit slighted and a little upset with me, he had a great afternoon. He got 3 rides on the Razor and even Chloe eventually got on. Chloe, Luke and I took a turn together in the toboggan and had a great time. We did flip over at one point and tumbled out, but we got back in and enjoyed the ride. Luke and Chloe screamed in delight and we returned to our site with rosy cheeks and covered in snow. (Now just so you know Conroy was driving very slowly with the little ones in the back but it was just the right speed for me and enjoyable and safe for the twins) Even though there were moments where Chloe was a bit concerned, if you asked her if she had fun, her eyes glowed and she nodded adamantly.

It was so great to get out for the afternoon and enjoy the winter snow. It’s amazing that we have hardly any snow in Calgary but to drive half an hour down the road into Kananaskis there is tons! It was a beautiful mild winter day with gently falling snowflakes that came off and on. We totally skipped Luke and Chloe’s afternoon nap to go and I left the house in a mess and came home to the same mess, but sometimes you have to do those things in order to enjoy life. I am a big believer in routine and rarely deter from it (in fact some people call me militant), but sometimes you need that change, that spontaneity.Yeah I had to clean up when I got home, and supper was a little late, but I was able to handle it all calmly and cooly just doing what I needed to do. And because I had that break and that socialization it did not bother me at all that I still have to clean up a little or stay up a little later (yes there are still dishes awaiting me in the sink).

We went out and connected with nature, fed our spirits and just had fun! Which my goodness sometimes we just need to do in life. Leave the laundry, dishes, cleaning and go play! Enjoy this life and the time we have on this planet cause we are only here for a short time, might as well make it excellent!

Plus we created some wonderful memories for the kids (the kind that will be “Remember when we fell out of the sleigh…”, connections with others and some great pictures. (it’s unlikely that the same can be said for the laundry) Now who can put a price on that?

What adventures did you have this weekend? Leave a comment and share below

Valentine’s Day Ideas for Kids

I love Valentine’s Day! I have no idea why really, I have yet to have the real romantic Valentine’s that I have dreamed of, but it is one of my favorite holidays.

I find the energy in the air is charged with hope and positive vibes and whether you have a sweetie or not, it is a great day.

I love doing things with the kids as they get so excited about it. I usually make a treat of some kind, whether it be chocolates, brownies or chocolate dream pie (yes there is a chocolate theme here) and I give them a little something, usually a homemade valentine, which might be as simple as a construction paper heart with a note on it.

I usually set up a little scavenger hunt for them as well, something simple but gives them chance to roam the house and explore, looking for things. They love it!

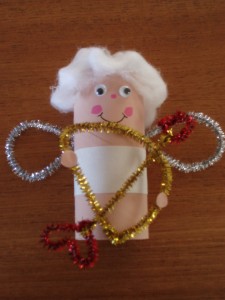
I also love the crafts as there are so many fun and easy things to make around this holiday. One of my favorites is the Toilet Paper Roll Cupid. He is very cute and fun to make. He is a little involved with a few steps that may not be suitable for younger children but they could certainly do it with some adult help.

Cardboard Cupid

I have always loved to the Stained Glass Hearts, where you use tissue and construction paper and put them up on your window. Easy, fun and full of love.

Years ago I was writing for a site call Suite 101 and created an article there which includes cupid as well as some other great crafts such as a Valentine Wreath, photo frame and another of my favorites – the Valentine Person! (I think I love that one because of his ‘accordian’ legs and arms). Go here for details on all these great crafts.

The thing I like about Valentine’s Day crafts is that you can pretty much do anything with hearts – from pictures to people to wreaths and even crystal hearts, which Matthew was making in his class at school, there is no end to the creative ideas and fun that the kids can have this Valentine’s Day!


Getting Grounded

Luke

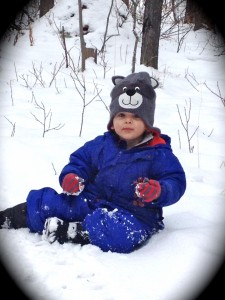
My son Luke loves being outside. When he gets up from a nap or we are coming home from being out he says, “Mommy I want to stay outside.” And as much as I can I say “Sure” and let him play. He’ll just putz around in the backyard, exploring, driving his trucks or digging (either snow or dirt depending on the weather). The other day he was out there for a long time filling up a bucket with snow and moving it, then filling it again, over and over.

Yesterday though when he asked to stay outside and I peeked out a few minutes later to check on him, he was lying in the dirt pile in our veggie garden, eyes closed and soaking up the sunshine. It was so cute, unfortunately I was too slow to get a picture! He looked so peaceful and content. He looked up when he heard me and I asked him if he was getting grounded; he said yes. I went back to what I was doing and then checked on him a bit later and he had gone back to lying on the ground once again.

I truly believe that he was getting grounded, lying there in the dirt (and a little bit of snow) reconnecting with the Earth. It is something that we all need to do on a daily basis. It helps keep us balanced and connected, peaceful. As children I think we naturally do this, we know what to do and when we need to do it. We also have no problems getting into the dirt or lying on the ground. We know we need to feel the warmth and comfort of Mother Earth’s embrace and root ourselves; but as adults we get busy, we tend to forget and we spend much less time outside. We lose that connection that is vital to our energy – then we feel unbalanced and unfocused and begin to wonder why!
For kids it comes I think they just get grounded naturally and do it easily because they are still so close to source and are ‘freer’ without the responsibilities of cooking, cleaning working and running a household. But as adults it is even more important for us to ensure that we are grounded and to teach our kids how to stay grounded as they grow up. The best way to ground yourself is to go outside, even if only for a few minutes, but sometimes we may not be able to do that right away. So what do you do when this may not be possible?
Here are some quick and easy tricks to getting and staying grounded even when you can’t get outside.

  1. Drink lots of water -staying hydrated keeps us in the flow and maintains our connection to the Earth
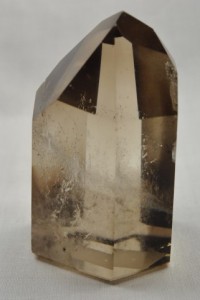
  2. Carry a grounding crystal – black tourmaline, smoky quartz, obsidian, hematite

    Smoky Quartz

  3. Spend a few minutes imagining your favorite place outside – close your eyes and visualize the ocean, waterfall, meadow full of flowers, whatever you like, just pick a place outside
  4. Wear red- red is the color of your first chakra, or root chakra and is related to grounding or rooting you to the Earth
  5. Take off your shoes – even if inside your bare feet touching the ground will ground you
  6. Get a plant, fish or something live for your office or home – bringing in live energy inside where you are working/ living will not only brighten the environment but the routines of caring for these things will ground you
  7. Eat root vegetables – vegetables that grow below the ground such as carrots, potatoes, turnips
  8. Organize a desk, drawer, etc.
  9. Go to bed early
  10. Nuture yourself – go for a massage, take a warm bath
Of course if you can get outside do so! Some of these activities will ground you quickly and make you feel great:
  1. Go for a short brisk walk at lunch
  2. Put your hands in the dirt
  3. Garden (you can also do this inside with a potted plant or start seeds)
  4. Lie down on the ground for a few minutes
  5. Roll down the hill (remember when you were a kid and you rolled down a grassy hill how much fun that was? I was always laughing and giggling by the time I got to the bottom)
Being grounded provides us a solid foundation and makes us feel safe. It establishes our energetic connection with Mother Earth and provides us with a feeling of being balanced. Take after your kids who just lay down in the dirt, even if only for a few minutes, it does wonders. It’s also a great way to play and connect with your children which is something we could all use more of in our lives as well!
How do you stay grounded?


Groundhog Day

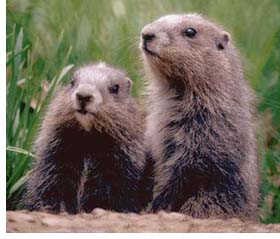
Groundhog Day is one of those holidays that although is only a one day event can be a wonderful celebration. Groundhog Day is when the groundhog emerges from his hollow after winter hibernation and predicts the arrival of spring. If the groundhog sees his shadow when he emerges he pops back into his hole and there will be six more weeks of winter. If he does not see his shadow then he remains out of his hole and means it will be an early spring.

There is a long tradition of celebration on this day from early morning festivals to see the groundhog emerge, with family and kids activities, parades, crafts and concerts. Some zoos have events as well that usually feature a presentation about the groundhog.

Bill Murray in Groundhog Day

The most famous groundhog is Punxsutawney Phil of Punxsutawney, Pennsylvania. (This is also where the 1993 film starring Bill Murray, Groundhog Day takes place. This is a wonderful and delightful film that is family friendly, if you haven’t already seen it, I would recommend it). But each town/ area has their own groundhog.

There are lots of things you can do with the kids on and around groundhog day too. There are crafts and activities, coloring pages and tongue twisters,  community events and of course the zoo!

Groundhog Day is a unique holiday that is recognized around the world. Why not take advantage of the day and check out what activities there are to go out and celebrate. (It’s a great opportunity for learning for the kids too – as well as a lot of fun).

What are you going to do for Groundhog Day this year?

Wintery Crafts

We all know that kids love crafts! and as a parent/ teacher it is fun to find things that are fun for them while teaching them developing skills. I love searching the internet to find different craft ideas. There are so many different things you can do with simple materials (many you already have around the house) and for little expense. I find that my kids just love making a craft, they are not picky about what it is they are making as long as they get to cut, glue and color; and they are so proud of what they made when they are done that they have to show everyone who comes in the door for the next few days.

Here are a few simple crafts that we have done recently that the kids really enjoyed. With the winter theme many of the crafts are based on snowmen, snowflakes, penguins, and mitts (or other winter wear). There are also some polar bears or other winter themed crafts to be found, but those are the most popular and you can find many variations on them that will meet the needs of any aged child.

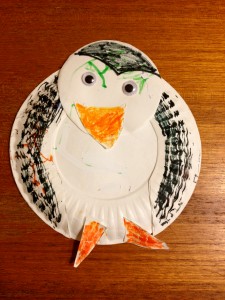
Paperplate Penguins (Luke and Chloe loved this one! They both worked diligently to create it and then proudly showed Daddy – they added a little extra color too)

small paperplates

googley eyes

orange and black markers

white paper

scissors

glue

On piece of white paper trace a small paper plate. On the tracing draw two half circles on the sides for wings and a small circle for the head. On the top third of the small circle draw half circle with a dip or point going down in the middle for the crown of the penguin. On the same sheet of paper, draw 3 triangles, one large one for the beak and two smaller ones for feet. (Depending on the age of the child they can draw these themselves, if not have an adult draw them) Child colors the triangles orange and the wings and crown on head black. Once they have completed coloring them they can cut them out.

Glue the wings onto the backside of the paperplate. Glue the head at the top of the plate and the feet at the bottom. Glue googley eyes on the head to make the face and the beak slightly beneath them in between the two eyes.

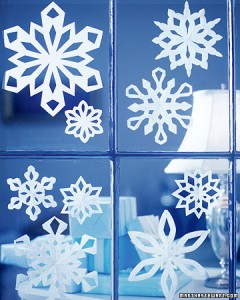
Cut Out Snowflakes (one of my favorites!)

white paper

scissors

Fold piece of white paper in half, then in half again and one more time (so that you have folded it 3 times in total). Using scissors cut designs into the paper, child may do this by cutting off a corner, making a half circle on an edge, etc. Child cuts as many ‘designs’ into the paper as they would like. Once they are done child unfolds the paper and they have a beautiful snowflake with various patterns and designs.

Doing this will create a square snowflake. If you wish to have a circular one trace a circle on the paper and cut it out before folding it. You can also do this with smaller pieces of paper (to make smaller snowflakes) and/or colored paper. Children can make more than one and hang on the window creating their own ‘snowstorm’.

Note: Depending on the age of the child an adult may need to assist with cutting the snowflake. This craft is best for children who have good motor control and can use scissors well on their own.

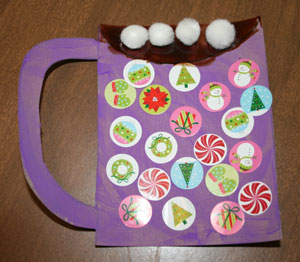
Hot Chocolate Mug (love this!)

lightweight cardboard (cereal box)

paint – brown and any other color

paint brushes

white pom poms small or mini marshmallows

stickers

Draw a picture of mug on cardboard. Cut it out. Paint cardboard mug with color of choice.  Let paint dry.

When the paint is dry the child can then decorate it with stickers. Draw a half moon at the top of the mug. Child paints in the half moon with brown paint and sticks on pom poms (for marshmallows). Let dry. Pom poms should stick onto wet paint without needing to use glue. If when it dries pom poms haven’t stuck then a little glue can be used to secure them.

Note: Colored construction paper can be used in lieu of the cardboard and painting the main part of the mug.

Crafts are not only fun they are great ways to enhance children’s developing motor skills and enable them to learn to grasp things with their fingers. It also feeds their creativity and imagination as well as a sense of pride when they are finished!

In my search for crafts I discovered this wonderful link with some fantastic and innovative ideas. Check it out for more great wintery craft ideas!


Tips for Creating Successful New Year’s Resolutions

New Year, new you right? It’s that time of year when many of us sit down and create resolutions, a list of things we’d like to achieve and create in the coming year. The fact is that statistics show that the majority of us ‘break’ our resolutions within the first month of the year. Not only do they advertise this it’s not really inspiring is it? So what’s the point?

I find in creating success around resolutions you have to take a different approach. The first one may be not to create them in January when the pressure’s on and everyone else is doing it. It’s stressful, everyone is comparing notes, asking what intentions you have set and why and then asking how you’re doing?

Second, we as human beings tend to set really large goals for ourselves. Breaking them down into small achievable goals will create success with ease and not make it so overwhelming.

So where do you start? You know you’d like to make some changes but how do you do that and be successful in doing it?

Here are some quick tips for creating successful New Year’s resolutions each year:

1.Don’t create them in January. When there is so much pressure to do so, instead just relax and take some time for yourself after the holiday rush. Taking that down time and the pressure off will ensure more success when you do set them up. Review the previous year and congratulate yourself on what you’ve done well. Then pick a time of year when it’s comfortable for you to create your goals. Maybe it’s February, might be Spring is the best time. YOU choose, don’t let society dictate.

2.Create goals instead of resolutions. Sometimes just changing what you are calling them is enough to make it stick. The ‘talk’ is that resolutions fail, but goals are usually quite successful.

3.Keep it simple. Create 1-3 goals and stick with those. Once you have achieved those or you are well on your way, add more if you like.

4.Break your goals down into small achievable steps. One of your goals may be to go to bed earlier – say 10 pm, right now you go at 11. Instead of jumping to 10 right away do it in 5 minute increments. 10:55 probably feels a lot more doable then going straight to 10. Do 10:55 for a few nights, when you’re feeling successful with that – back it up 5 more minutes and do that for a few nights. Doing this progressively in 5 minute increments until you reach your goal of 10 pm.

5.Write them down. The power of writing down your goals cannot be underestimated. It gives them more power and helps to make them real. You can also add in detail, which helps define and manifest your goal more quickly. Also your hands are a direct connection to your heart so it puts the power of love and intention behind them.

6.Take action. Pick 1 of your goals and take action towards it right away. One article I read recently suggested you use the 3 second rule. Once you have decided what you want, take an action step towards it. So if you decided you’d like to take that art class at the community center, get up and call to register.

It is also important to share your goals with someone who supports you. This will not only provide you with support but someone to encourage you if you hit a bump in the road and need a little ‘nudge’ to keep going.

There are other things too like keeping a journal or creating a vision board for your goals. These 2 activities are great to do with your kids, especially the vision board, as kids love cutting out pictures, gluing and drawing. Keep it simple for them and frame it in terms that they will understand. It could be as simple as what would you like to do this year (or where do you want to go?) and then get them to draw or create a picture/ vision board about it. It doesn’t matter if they say camping and you are already going, this helps them get in the mindset of creating, which they already do so well. If anything it supports what they can already do and helps them to maintain that ability.

Most important of all, whatever goals you set, have fun! All the best in 2020!

I encourage you to share here in the comments what some of your goals are, when you set them, and tools you used to achieve them. Sharing makes it real, and is a great way to gain support as well.


Shop Art Calendars at Calendars.com