Christmas Crafts for Kids

Over the past month the little ‘elves’ have been busy at our house making their Christmas crafts. Experimenting with googley eyes, glitter and cotton balls, they have created some wonderful wintery and Christmas crafts to add to the decor of our home.

Matthew’s Christmas Reindeer

Since Christmas is a holiday that most of us begin celebrating early in December (and for some even sooner in November -or the die hards right after Halloween :); it allows us lots of time to get ready and enjoy the season. Whether it be through games, activities, Christmas shopping and events or crafts, there is lots to do.

Luke and Chloe have really been enjoying making crafts this year and our nanny has created some wonderful crafts for them to make that use their developing skills and aid in their development of motor skills and creativity.

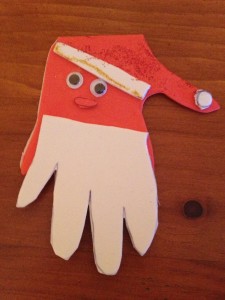
Chloe is very diligent and careful when she makes her crafts and though Luke is careful too, he tends to be a little ‘freer’ with his creations. One of the first crafts they made was a Santa Claus handprint, with googley eyes and sparkles that can be strung to hang on the tree as a Christmas ornament.

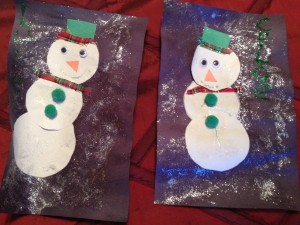
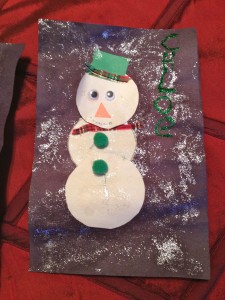
Another one was a snowman on a glittery snowy background complete with hat and scarf. They enjoyed them both and were very easy for them to do.

Santa Handprint Ornament

red foam sheet

white foam sheet

googley eyes

gold and red glitter glue

scissors

string

Trace child’s hand on red foam sheet and again on white foam sheet. Cut both pieces out (depending on the age of the child adult may need to cut out the handprints). Cut the white handprint in half and place on bottom half of red handprint to create beard. Cut out a white strip long enough to go across the top of the red hand between the thumb and the rest of the hand to make fur on hat. Cut out small circle for pom pom on hat and place at the end of the red thumb. Glue on googley eyes. Cut out small mouth out of red foam, Decorate with red and gold glitter glue. Put a string through the top of the red foam hand to  hang on tree.

Wintery Snowman

black, orange, green and white construction paper
silver glitter glue

pom poms

ribbon

glue

scissors

Cut one sheet of black construction paper in half. Cut 3 circles, the same size out of the white construction paper. Cut a small square out of the green construction paper (for hat). Glue the white circles sitting one on top of the other to build snowman on one of the halves of black construction paper. Glue on googley eyes on top circle to make face, add orange triangle from construction paper for nose. Use glitter glue to draw mouth. Use pieces of ribbon to make scarf for snowman and for brim on hat. Glue on. Use silver glitter glue on background of snowman (on black construction paper) to create ‘snow’. Add child’s name, if desired on right hand side of snowman.

Chloe gluing her bear puppet

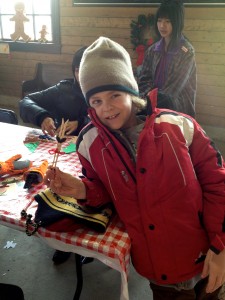
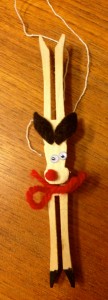
When we went to Heritage Park for their Once Upon a Christmas event they had some great crafts there too. Matthew made a clothespin reindeer and the twins each made a puppet out of an old Christmas card. This was a really simple idea where they traced a pattern onto an old Christmas card (they chose a bear), then we cut it out and glued it onto a popsicle stick. Not only is this a great use for old Christmas cards but Luke and Chloe loved it! They picked the card they wanted to use and after I helped with the cutting, they glued on the stick. Chloe got a little over zealous and decided to eat the glue, not sure why kids do that, I never did – but she finished her craft in the end.

There are a plethora of creative ideas out there for Christmas crafts for all ages such as paperplate snowmen, handprint wreaths and reindeer puppets. The ideas are endless and it is easy to create your own crafts as well. Here are some of my favorite links for more Christmas crafts and ideas.
Make your own snowglobe

Pipecleaner Snowflakes

Enchanted Learning

DLTK crafts

Enjoy and happy crafting as you enjoy this holiday season!


Shop our huge selection of folk art!  Free Shipping Available.

Christmas Carol Challenge – Week 2

It was an interesting week this week with our Christmas Carol Challenge. Unfortunately the week started off with one of Matthew’s fish dying. Poor kid was very upset and said he did not feel like singing. He had just gotten his fish tank in November and was slowly adding fish to his tank. He was up to 6 and Tuesday morning when he went to feed them before school he noticed that one was on the bottom of the tank on its side, unmoving. I heard sobbing from upstairs and ran to see what was wrong. He was lying on his bed, head in his pillow crying for the little fish that had died. It was so sad.

Of course fish die, but Matthew is a really sensitive young man who gets quite upset when any animal is hurt or killed (he had a caterpillar earlier in the Fall that didn’t make it and was quite upset then as well). I assured him that we would find out what happened and get him another fish. This did little to console him but there was not much else I could do. I encouraged him to get up and get going to school but he turned to me with tears in his eyes and said “How can I go to school when my fish has died?” My heart went out to him.

Santa Claus is Coming to Town

I took him to the bus anyway encouraging him to sing Santa Claus is Coming to Town with me, hoping that would lift his spirits a little. He did not join in but that’s ok, he needed to be where he was at and I hoped that at least my singing would make him feel better. Plus I love that song and know all the words!

I’m finding it quite fun to be out in the dark early morning singing at the top of my lungs. Except for this day, Matthew has been joining me as well. The odd time we run into someone else out there who smiles and waves as we go by, but usually we are out there alone ‘dancing’ our way to the bus.

Rudolph the Red Nosed Reindeer

This week we sang Joy to the World, Rudolph the Red Nosed Reindeer, I Saw Mommy Kissing Santa Claus, and Baby it’s Cold Outside (it was a lovely duet!).

Usually I ask Matthew the day before what song he would like to sing in the morning, so if we need to learn or print off words that we can do so. Matthew did comment on the way to the bus on Thursday that it was hard to read the words in the dark! (come on Winter Solstice, then it will start to get lighter in the mornings) I laughed as I knew this was why I had suggested that we learn the words prior to the morning of. Either way it’s all good and we are enjoying ourselves, laughing and singing in the bright morning air.

It’s hard to believe that this is the last week of school before Christmas and that our challenge is almost done. I think we’ll continue our daily singing up until Christmas as we have some long car rides to fill, plus it’s fun, and I want to see how many more carols we can come up with!

Joy to the World

Christmas at the Hive

On the weekend I took the kids out to the Chinook Honey Company in Okotoks. A local honey farm and winery, they were hosting a Christmas family event with lots of activities for everyone.

When we first got up in the morning and I checked the temperature I debated on whether to go. It was -15 C and I knew most of the activities would be outside; and though we would dress for it, I knew for the little ones it might be cold.

As we putzed around and got breakfast going I slowly started to pack snacks and lunch, having decided that we would go and check it out. Though it was cool, I knew there were some buildings there that we could go into if we got cold; and living in Calgary you really can’t let the weather stop you from doing things. If you did, you’d never go anywhere or do anything. Besides this was the last day the event was on and I thought it would be fun for the kids.

Matthew making beeswax snow candle

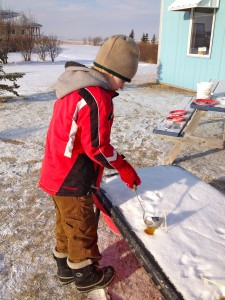
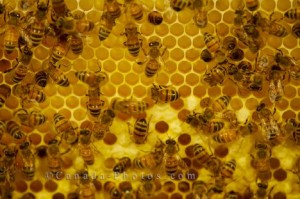
And it was! It turned out to be one of those sunny clear blue sky Alberta days with lots of fun to be had. They had a scavenger hunt, apiary tours, and pictures with Christmas Critters. The kids could make their own beeswax snow candle, go on sleigh rides and enter the coloring contest. There was also an observation area where you could check out the bees in their hive, we even spotted the Queen.

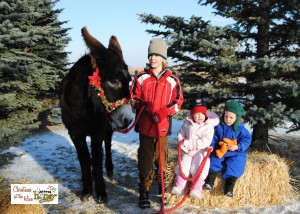
Luke really enjoyed standing there and watching the bees. He just stood in front of the glass, head tilted up, watching. Chloe loved the animals, they had a horse and two donkeys that you could have your picture taken with. It took us a few tries getting the animals, and the kids all looking in the same direction, but we finally got a nice shot of everyone. Chloe and Luke insisted that they got to hold the rope of the donkey, just like Matthew did and Chloe cried when the donkey had to go back to his pen after the picture (cause she wanted to pet him some more).

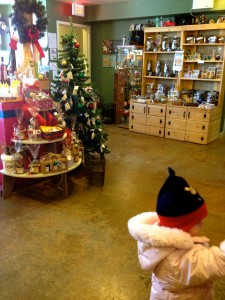
They have a full store out there as well full of various honey products, such as beeswax candles, honey sticks, chocolates and the winery. It was decorated beautifully for Christmas, a rustic sort of look. The staff were extremely friendly as well and it’s a great environment to hang out.

They had a big fire pit outside to hang out and have hot chocolate and snacks and they even had carollers out there at one point. We did the apiary tour, which was interesting as the ‘King Bee’ Art, explained and showed us how they set up the ‘hives’ for the bees and how they extracted honey from them. It was fascinating, and all the kids were very attentive.

We learned many things such as how the bees ‘make’ their queen, how long she lives (4-5 years), what the role of the workerbees and drones are. He also told us how Albert Einstein once said that once the honey bee poplulation of the world was zero that we would have 4-5 years left to live; and that the honey bee populations of the world are dwindling and are down by 30%. Farmers are now working hard to keep healthy bee populations as they are so important to our ecosystem.

It is also highly beneficial for us to consume local honey made by local bees, as local honey provides us with immunity builders to environmental conditions in our area. So buying local is not just beneficial to the local economy but good for our health as well!

All in all it was a great day at the honey farm, we learned a lot, we played and we even left with a treasures, beeswax candles and some wonderful memories!


How to make Raw Organic Chocolates

About 8 years ago I took a class at The Light Cellar, here in Calgary, on how to make Raw Organic Chocolate. No sugar, no dairy and all natural ingredients. I was thrilled to find this course as I had been looking for an alternative so that we could enjoy chocolates at Christmas, Easter (and whenever else we wanted some!) without the refined sugars.

I had taken a chocolate making class before, bought the kit, came home and never made chocolates again. This time was different. The difference was you actually make your chocolate from scratch, from natural ingredients and it is very easy (the other class you made your chocolates from premade chocolate bars or pieces that you melted and molded into your own chocolates. I found this process finicky and the pieces were presweetened; so you could not choose your own sweetener).

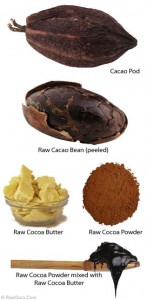
Chocolate actually comes from a cacao nut, which is made into various forms, such as cacao powder, paste, butter, etc. Making the chocolate is super simple, using four basic ingredients and only takes a few minutes. All you need is cacao powder or paste, cacao butter, some kind of sweetener (honey, agave nectar, pure maple syrup, etc.), and vanilla.

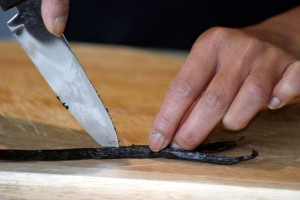
The first step is to melt the cacao butter in a bowl – use the double bowl method with the butter in the top bowl set over a bowl of boiling water (boil water put it into bowl and set on counter; then set your smaller bowl with cacao butter on top)- be very careful not to get any water into the top bowl as it will ruin your chocolate! Once the butter is melted add the vanilla bean and let it infuse (with a knife slice vanilla bean down the middle and scrape out the seeds with a spoon – put into cacao butter). Sift your cacao powder in another bowl and add to taste, then add sweetener of choice. Voila! you now have a nice chocolate sauce which you can leave as is, pour into a pan refrigerate or freeze, or use as a base and add other ingredients.

The instructor did not give us exact amounts of ingredients to make our chocolate. He would provide a starting point and then encouraged us to taste it; to make it how we wanted. He recommended we start with a 1:1 ratio, mix it and go from there. More cacao powder made it a darker, richer chocolate, more sweetener made it sweeter – adjusting it according to our palette and preferences, so we had to taste it as we went along! He also encouraged us to use natural sweeteners and ingredients. For instance, we were using vanilla beans for our vanilla -actually cutting them open and scrapping out the inside. He said we could use vanilla extract but encouraged us to use pure extract if we did, not artificial.

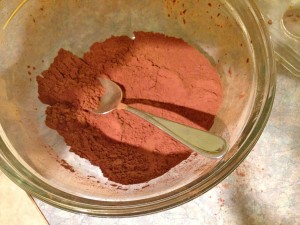
Cacao powder

He described using these pure ingredients as “upgrading” – making it more natural, tastier and better for you. He also told us how we can add other natural ingredients to our chocolates that not only taste good but are high in nutrients, minerals and vitamins,  making it a superfood. Ingredients like goji berries, nuts and seeds, coconut and algae and essential oils. Maca root powder, honey and mesquite powder. He even recommended in one recipe that we try a little cayenne. It was actually really good!

As for the cost, the ingredients to make your chocolate is quite reasonable. The instructor said that in the time it takes for us to go and buy chocolate at the store, we can make it at home faster with fresh ingredients for about $1.50 to $2 per 50 g – which is comparable to what you would pay at the store.

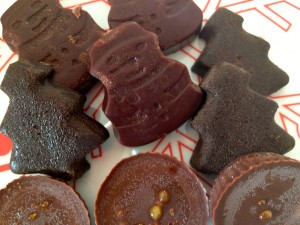
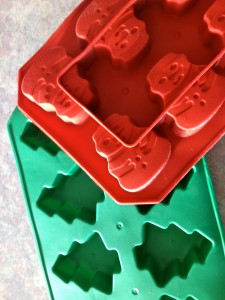
Shaped ice cube trays work great as chocolate molds

I also love the fact that I can add all these “superfood” ingredients to my chocolates so that chocolate really is good for me and the kids. So when they ask if they can have some chocolate, I can say “yes” without feeling guilty or worrying if they are having too much.

It’s also so much fun to make (I’ve already made 3 dozen caramel cups and orange ginger snowmen for Christmas) and easy to do with the kids. You can get different kinds of molds to make different shapes for your chocolates. Experiment and have fun!
In one of my previous posts I described various natural sweeteners that you can use not only in your everyday cooking and baking but for your chocolates as well. Check out that post for more details.

In an upcoming post I will share more about what you can add to your chocolates.

For your information The Light Cellar sells ingredients to make chocolate in bulk and is very well priced. I buy all my ingredients there and usually come out of the store with a big box of items! I find it hard to get out of there with only one or two things.

You can also find many of these products online – Amazon.ca as well as Superfoods.com will carry these products at reasonable prices.

Christmas Carol Challenge -Week 1

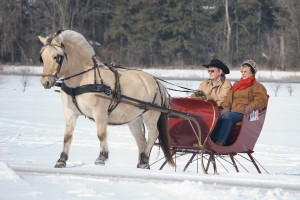
Matthew and I kicked off the week yesterday morning with our first Christmas Carol. We started with good old traditional Jingle Bells, one that we know and love and belt out at the top of our lungs in the early morning light. Well I did, Matthew told me that he only knew the chorus, as when I was doing “dashing through the snow…” he wasn’t singing and when I asked him why this is what he told me. I was surprised actually. So deciding that I would have to teach him the beginning, I kept singing and he joined in with me on the chorus.

We both went off to have wonderful days, happy and smiling. (I also believe we had great days due to the planetary alignment of Saturn, Venus and Mercury with Earth and aligning perfectly with the Pyramids of Giza in Egypt – very good energetically)

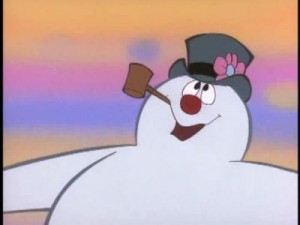
This morning we had a bit of a rough start to our singing as I suggested we sing Frosty the Snowman, and Matthew informed me that that was the Christmas song he despised the most. (again surprised by this) I asked him if he had another suggestion but he couldn’t come up with one that he knew the words to. So we sang Frosty, and though he joined in a little bit, I sang most of it by myself. I also realized that I didn’t know all the words or the right order for Frosty the Snowman! Which I thought was terrible so came right home to ‘study’ them so I could get it right.

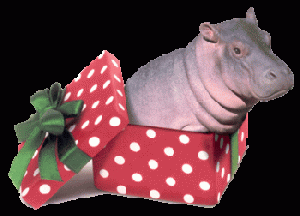
Before Matthew boarded the bus we did decide on our carol for tomorrow which is I Want a Hippopotamus for Christmas, which we have to relearn the words for. Because though we did it last year and I know more of the words than I did before, I still don’t know them all.

Hopefully tomorrow will go well as that song is so much fun! and Matthew will willingly sing along with me. I think if we could get the twins involved somehow it would be even more fun and Matthew might be more willing to participate; cause yes this year I am having trouble getting Matthew to sing with me. He also informed me this morning that he does not like singing in public – which I sort of knew, but I told him only the houses, the snow and the wind would hear us, so it wasn’t really public. He’s 9 though so it’s his age and I think he just needs the right motivator, like a fun song!

So stay posted… and don’t forget to join us in our challenge and post the songs you sing in the comments section. Below are the words for the songs we have sung so far!

Jingle Bells

Dashing through the snow

In a one horse open sleigh

O’er the fields we go

Laughing all the way

Bells on bob tails ring

Making spirits bright

What fun it is to laugh and sing

A sleighing song tonight

Oh, jingle bells, jingle bells

Jingle all the way

Oh, what fun it is to ride

In a one horse open sleigh

Jingle bells, jingle bells

Jingle all the way

Oh, what fun it is to ride

In a one horse open sleigh

A day or two ago

I thought I’d take a ride

And soon Miss Fanny Bright

Was seated by my side

The horse was lean and lank

Misfortune seemed his lot

We got into a drifted bank

And then we got upsot

Oh, jingle bells, jingle bells

Jingle all the way

Oh, what fun it is to ride

In a one horse open sleigh

Jingle bells, jingle bells

Jingle all the way

Oh, what fun it is to ride

In a one horse open sleigh yeah

Jingle bells, jingle bells

Jingle all the way

Oh, what fun it is to ride

In a one horse open sleigh

Jingle bells, jingle bells

Jingle all the way

Oh, what fun it is to ride
In a one horse open sleigh

Frosty the Snowman

Frosty the Snowman

Was a jolly happy soul

With a corncob pipe and a button nose

And two eyes made out of coal

Frosty the Snowman

Is a fairytale they say

He was made of snow

But the children know

How he came to life one day

There must have been some magic

In that old silk hat they found

For when they placed it on his head

He began to dance around

Frosty the Snowman

Was alive as he could be

And the children say

He could laugh and play

Just the same as you and me

Frosty the Snowman

Knew the sun was hot that day

So he said let’s run

And we’ll have some fun

Now before I melt away

Down to the village

With a broomstick in his hand

Running here and there all around the square

Saying catch me if you can

He led them down the streets of town

Right to the traffic cop

And he only paused a moment when

He heard him holler stop

Frosty the Snowman

Had to hurry on his way

But he waved goodbye

Saying don’t you cry

I’ll be back again some day

Thumpety thump thump

Thumpety thump thump

Look at Frosty go

Thumpety thump thump

Over the hills of snow

I Want a Hippopotamus for Christmas

I want a hippopotamus for Christmas

Only a hippopotamus will do,

Don’t want a doll, no dinky Tinker Toy

I want a hippopotamus to play with and enjoy

I want a hippopotamus for Christmas

I don’t think Santa Claus will mind, do you?

He won’t have to use our dirty chimney flue

Just bring him through the front door,

that’s the easy thing to do

I can see me now on Christmas morning,

creeping down the stairs

Oh what joy and what surprise

when I open up my eyes

to see a hippo hero standing there

I want a hippopotamus for Christmas

Only a hippopotamus will do

No crocodiles, no rhinoceroses

I only like hippopotamuses

And hippopotamuses like me too

Mom says the hippo would eat me up, but then

Teacher says hippo is a vegetarian

There’s lots of room for him in our two-car garage

I’d feed him there and wash him there and give him his massage

I can see me now on Christmas morning,

creeping down the stairs

Oh what joy and what surprise

when I open up my eyes

to see a hippo hero standing there

I want a hippopotamus for Christmas

Only a hippoptatmus will do

No crocodiles or rhinoceroseses

I only like hippopotamuses

And hippopotamuses like me too!

Christmas Carol Challenge

Last year Matthew and I decided to see if we could sing a different Christmas Carol each day on our walk to the school bus. I was finding that instead of the morning walk being a pleasant and happy time I would use it to discuss issues and then the poor kid would often get on the bus upset or mad, and I didn’t feel so good myself.

So when December came I decided to make things more fun and told Matthew that each day we would choose a Christmas carol and sing it as we walked to the bus from December first until school was out, around the 20th. The challenge was that we could not repeat the same Christmas carol.

Jingle Bells

This may seem like an easy task but once we got past Jingle Bells, Joy to the World and Santa Claus is Coming to Town we had to start racking our brains for new tunes. Either that or we had to look up the words to the carols as we could only sing the first few lines.

It is amazing how many Christmas carols there are out there and how few we actually know. So it became a study, as we would look up a Christmas carol print out and learn the words for our trip the next morning. It turned out to be a lot of fun. We were both happy and smiling by the time we got to the bus stop and it was a great way to start the day. We were feeding our spirits and playing together. It was great for our relationship and ourselves. Singing is a great way to feed your spirit and open your heart, not only at Christmas time but year round! Now we know lots of Christmas carols with all the words, some new, some old.

Santa Claus is Coming to Town

It was so fun that when I recently told Matthew that we would do it again this year, his eyes lit up and he smiled. I think this year we will make more of a plan in advance, choosing our carols earlier and learning the words if we have to (as many mornings last year we were holding song sheets in our hands and trying to sing and walk at the same time. It was also tough to read the words as this time of year in Calgary it is still dark when we head for the bus).

Some of my favorites are All I Want for Christmas Are My Two Front Teeth, I Want a Hippopotamus for Christmas and Matthew’s –Do You Hear What I Hear. I am looking forward to seeing what we come up with this year and how many new carols we will learn.

I can save the “talks” for another time, a time when it is more appropriate to do so and he is not heading off somewhere after.

So here’s my challenge to you. I am inviting you to join us in our challenge. You may not have a walk to the bus each day with the kids but find a time, the same time each day, where you can sing a Christmas Carol, from December 1-24, a different one each day, and see what you can come up with. You’ll find that it is lots of fun, a great way to connect with the kids and get into the holiday spirit. You’ll also learn a lot too!

Then come back and post the songs that you sang in the comment section and share with everyone how much fun you’re having! I’m interested to hear about your experience and perhaps learn some new songs from you. I’ll post our songs as well and we’ll see how many different Christmas carols we can come up with.

Enjoy! Have fun!

I'm dreaming of a White Christmas...

Once Upon a Christmas

One of the things that I love about Christmas is all the activities and events that surround the holiday. There are craft fairs, carol sings, Christmas parties and many community events that you can choose to participate in to celebrate the season. There is something for everyone, depending on what you like to do.

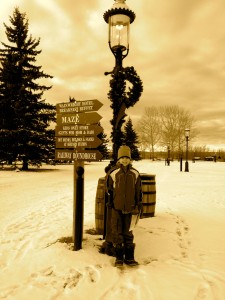
One of my favorite events is Heritage Park’s Once Upon a Christmas, that runs every weekend starting late November for the 4 weeks prior to Christmas. This is a wonderful family event that includes all kinds of activities for kids and adults alike. They offer kids crafts, visits with Santa, carolers, plays, wagon rides, mazes and a ‘Kids Only’ Store where parents are not allowed to enter with their children. This year they added firepits placed throughout the park, which are great places to cozy up and have a chat and warm up by the fire.

There is so much to do there that it is easy to spend the day. The challenge is that most of it is outside so you have to be to dress for the weather and be prepared to be outside. So for me I always choose a mild weekend to go with the kids. It is much more enjoyable for everyone and we can stay longer and enjoy what the park has to offer.

As this turned out to be a mild weekend, I decided to pack up the kids Sunday morning and head out. Though it was a bit of a challenge to get us all out the door (and I would have prefered to have left half an hour earlier than we did), we made it there with a packed lunch, hot chocolate and gingerbread cookies, dressed and ready to go.

Luke and Chloe love Heritage Park so I had no trouble convincing them to go, in fact they chatted about it the day before hoping to see the “choo choo train”, which only runs in the summertime, but I told them we would ‘check’. Matthew enjoys the park as well and though he had mixed feelings about going easily went out the door.

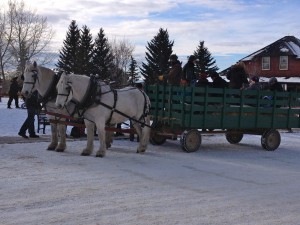
I always hit the wagon rides first, as the line for that tends to get long as the day goes on. Plus Chloe loves horseys, so was looking forward to it. Chloe was beaming and smiling and pointing things out, while Luke was just taking it all in.

Matthew's Christmas Reindeer

We ventured to the kids crafts where Matthew made a clothespin reindeer and Luke and Chloe made little puppets out of old Christmas cards and popsicle sticks. This area is really well set up, as there is a selection of craft ‘kits’ that the kids can choose from to make their craft and there are lots of volunteers on hand to help the kids out. For the younger children they have coloring sheets and the puppets as options.

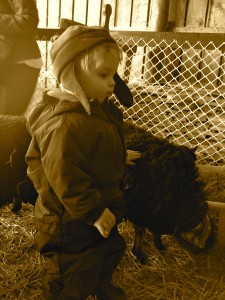
Matthew really wanted to hit the Kids Only Store as he went for the first time last year and really enjoyed the freedom of shopping on his own and spending some money 🙂 We also saw Santa and went to the petting zoo.

Luke petting the sheep

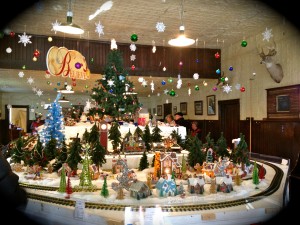
The highlight for me though was definitely the Christmas Model Railway, housed in the pool hall. It is one of those as soon as you walk in you go “Wow”; as it really is a Christmas wonderland. There are at least 3 or 4 trains going around this beautiful Christmas scene, villages and houses, lights and trees. I love it because I have always loved trains, and the magical Christmas scenes. I have no idea why I love trains so much, but I think they are cool, especially the model railways that go around and around all by themselves. Which is interesting cause that’s all it does is go around and around- but I could watch it for hours. The railway was really well done; on loan from some private collectors, it was a beautiful site.

The Christmas Railway

We chowed down on peanut butter sandwiches and carrot sticks on a bench outside Gunn’s Dairy Barn and enjoyed homemade hot chocolate, made with fresh almond milk (very easy to make your own), cacao, and spices, as well as homemade gingerbread cookies (sugar and dairy free of course). It was a bright sunny day with clear blue skies, a perfect wintery day, with the air of Christmas all around.

After walking and exploring we headed home, tired but satiated and satisfied with our Christmas adventures. Who knows where we’ll go next?

Activities and Projects for Remembrance Day

Remembrance Day is something that we celebrate every year, remembering and recognizing the veterans who fought and died in the wars to enable us to enjoy the freedoms that we have today.

Growing up, Remembrance Day was just another day off school to me. Yes we would do the crafts or projects in school leading up to the day and we usually had a Remembrance Day assembly of some kind where we had a veteran come in and talk to us about his/ her experiences. Honestly, it meant nothing to me, I was a kid, and though they were teaching me and telling me about I didn’t understand.

Over the past couple of years due to the involvement with my own children and the Leader in Training program that I volunteer with at the YMCA, I have learned and discovered the depth of what Remembrance Day really is and what are some of the things that we can do to celebrate and recognize it.

Each year we have been doing a Peace Project with the Leaders in Training. Last year we had the kids write postcards to those who were serving overseas, thanking them for their service. This year we shared the story of Sadako, a young Japanese girl who was only 2 years old when the atomic bomb was dropped on Hiroshima, and had them make paper cranes to fill up a jar that we then displayed on the counter at Member Services. We also had a wonderful guest speaker, Brent Harris who works for Veterans Affairs, come in and do a scavenger hunt with the kids all through the YMCA. It was a great way for the youth to learn about the wars and the impacts and importance of Remembrance Day.

There are many other projects that can be done as well. Crocheting hats and scarfs for veterans, donating to the Veteran’s Food Bank. There is something for everyone to help with or contribute too.

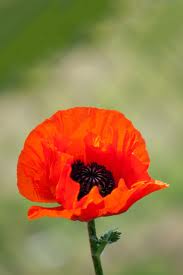
I think that it is important for us all to do something, even if it is as simple as wearing a poppy or doing a craft with the kids. The kids may not get it or understand it when they are younger but they will know and recognize that something of importance is going on, and it may take them, like me, until they are adults to really understand and appreciate Remembrance Day, but we can still teach them about it and do things in and around this day. And the more we do the more impact it will have on future generations.

So take the family this Remembrance Day and participate in a community event or create a project at home. At the very least have everyone wear a poppy and show that you remember and are thankful for your freedom in this beautiful country we live in.

Spooky Halloween Crafts for Kids

Getting into Halloween just wouldn’t be complete without a few spooky crafts for the kids to make. Besides the sweets and treats it is just as much fun to dress up, decorate and get the kids to add their crafts to the decor!

We put up pumpkin lights, ghosts and skeletons in the yard. I also have some Party Lite candle holders like a haunted house, jack and jill-o-lanterns. They are totally cute! We even have one of those ‘dancing’ stuffed toys that sings the Monster Mash. Luke and Chloe really like the haunted house and want to play with it. I made the mistake of letting them look at it the first day it was out. Though they were very gentle, there was a lot of crying when I put it back on the shelf.

We’ve had lots of fun though this week with Halloween crafts. Easy to make for little ones they add some spooky fun to our Halloween decor.

Bat Wreath (prominently displayed on our front door)

This craft is super easy and adds a nice flare to your front door. Bat WreathYou’ll need ring of cardboard, black construction paper, scissors, glue, small piece of wool.
Trace a small plate and a large plate onto a piece of old cardboard. Cereal boxes work great.

Cut strips of construction paper (about 1 1/2 inches by 4 inches), glue the strips into rolls, like making a paper chain. Glue the rolls of construction paper onto the wreath. If you like you can use other Halloween colors, like orange, purple, green if you don’t want to use all black.

Fold a piece of black construction paper in half and cut out half a bat shape (this will make the wings symmetrical). Use white pencil to draw on face.

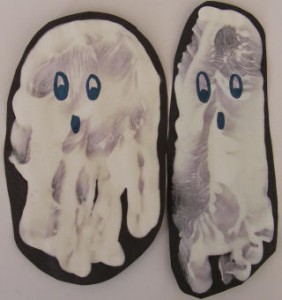
Handprint and Footprint Ghosts

This craft is a great way to capture some memories of your little ones at Halloween. Put the date on it and you have a great hand and foot memory from one of their first Halloweens. 

You’ll need black paper, white paint and a black pen.

Dip child’s hand in white pain and place it on the black paper, fingers together to make a print. Do the same thing with their foot.

Let the paint dry and draw on some ghostly faces with the black marker. Cut out the ghosts leaving a thin rim of black around the edge. If you’d like to hang them up punch a hole in the top, or use them as unique invitations to a party.

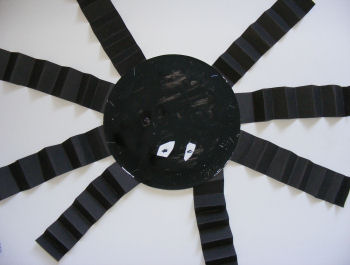
Paper Plate Spider

You’ll need 2 sheets black paper, paper plate, black paint, white paper, black pen, glue.

Paint the plate black and let dry.

Fold each sheet of paper in half lengthways; then in half again. Cut along the folds so that you end up with 8 strips. Pleat the strips like an accordian.

Glue or staple the strips of paper to the plate to form your spider’s legs.

Cut two circles from white paper as eyes. Draw on the pupils and stick to the spider.

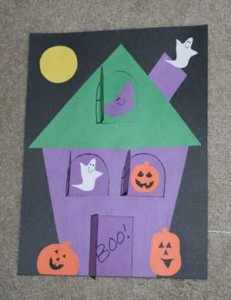
Lift Flap Haunted House

You’ll need construction paper (purple, orange, green, black and yellow), glue stick, scissors, utility knife (for use by adults only).

Draw a house on colored construction paper. Draw a large triangle on green to make the roof, draw a large rectangle on purple for the house and a small rectangle to make the chimney. Cut out pieces.

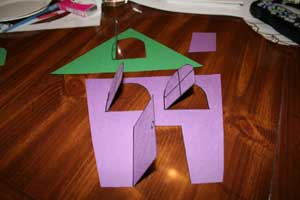
With a black marker draw a window on the roof, 2 windows and a door on the house. Have an adult cut using the utility knife, around the windows and doors leaving one side attached so that they will open.

Glue a scrap piece of paper to the back of the house and roof, using the same colors – do not glue the windows/door shut. Glue the house to a piece of black construction paper.

Using the other colors of construction paper make pumpkins, ghosts and bats to put in the windows. Glue them in and around your haunted house.

Lift the flaps to discover what’s inside!

There are so many creative things out there you can do for Halloween. Whatever craft you decide on the kids will love creating them and will enjoy another aspect of this spooky holiday!

Gratitude Activities for Kids

In yesterday’s post I talked about how being grateful for what we have in our lives increases the good that comes to us; and how important it is for us to teach gratitude to our children.

We are all very good at teaching them to say please and thank you but I believe that there is more to it. A deeper meaning that we can convey; so this morning I set out in search of activities that you can do with kids to teach them not only to be grateful but the value of being grateful. Kids love hands on stuff, games and activities. Not only do these things help them develop their motor skills, but it a great way for them to learn and helps the concept you are teaching stick. And presented in a variety of ways makes it fun for them and for you.

Gratitude Journal

I already mentioned creating a gratitude journal which works for both adults and children. But what I discovered today is to make it more interesting to the kids you can do a number of things. Let them decorate their journal either the cover or the first inside page. This allows them to be creative and to make it their own. For younger children, get them a binder or duotang to decorate. Then instead of writing what they are grateful for they can draw pictures and put them in their binder.

Gratitude Activities

The Best thing about..

Divide the kids into 2 teams. Pick a team to go first. Read a list of things or people, like Grandma or trees, and each person on the team has to say one good thing about that person or thing within 3 seconds. If everyone is successful then the team gets a point. If they are not then the other team gets a chance to answer about the same person or thing.

I Love

For each item kids have 3 seconds to complete the phrase “The thing I love about _____ is ______.” Use things like, dogs, birds, Mom, my brother, where I live, etc. Create your own list. You could have the kids create the list with you beforehand and then play the game.

Thank you Circle

Have all the children sit in a circle. Toss a bean bag to one of the children. They stand and list one of the things they are grateful for, then they toss the bean bag to someone else and they stand up and say what they are grateful for. Do this until everyone in the circle has had a chance to speak.

Gratitude Jar

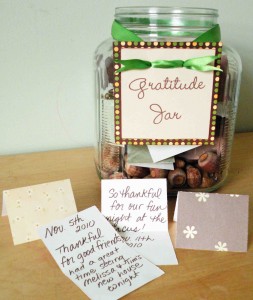
Have children decorate the jar using buttons, ribbon, glitter, etc. Have little slips of paper prepared and each day have the children write down one thing they are grateful for and put it in the jar. Parents can help with writing for younger children. Set a deadline, such as one month later or a special event like Christmas. On that day have everyone sit down and read together all the things that everyone is grateful for from the jar.

Thank You Notes and Letters

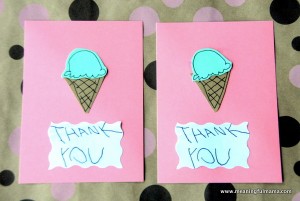
Some may say that thank you notes are passe, but there is something to be said when someone takes the time to send you a card or a letter saying thank you. Encourage your kids to write thank you notes, not just for gifts they have received but for something they are grateful that someone did for them in the last 24 hours. Like “Thanks Mom for making my lunch”. This is important as it teaches children to not just be thankful for material things but for acts of service from others. And it teaches them to be grateful for all the little things in their lives as well, which in turn will create more good things for them.

Children can make their own thank you cards, there are a variety of simple ideas that they can do, either drawing, coloring or with glitter and glue. When writing the card encourage the child to explain how the person made them thankful. Then send the card to the recipient.

Older children may choose to write a letter, which may include a little more detail and description of the event. They can also add pictures or decorate it if they like.

Gratitude Crafts

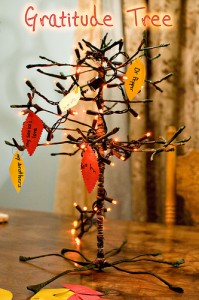
There are many simple crafts that children can do to express gratitude. There is the Leaf Garland, where children write or draw what they are grateful for on a leaf and then hang it up. A similar concept is a thank you sunflower where they use the petals to write on. You can also do a gratitude tree or chain.

These crafts are simple, easy and colorful. With most of them only requiring some construction paper and a marker.

Gratitude Books

A really great way to teach children about being grateful is through books. Most children love to sit and listen to a story; so it is easy to pick books that incorporate this theme.

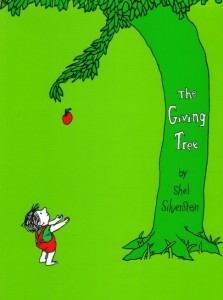
One of my favorites is The Giving Tree by Shel Silverstein. It is about a tree that gives and gives and gives to a little boy until the tree has nothing left but a stump, but even then has something to give.

Bear Says Thanks by Karma Wilson

Bear has come up with the perfect way to say thanks—a nice big dinner! When Bear decides to throw a feast, his friends show up one by one with different platters of delicious food to share. The playful text and charming illustrations bring to life this celebration of family and friendship. Children will love discovering the special gift Bear has to share.

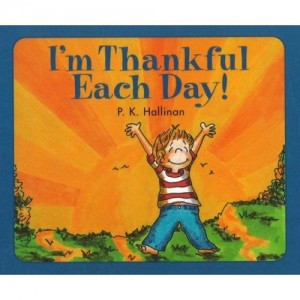
I’m Thankful for Each Day by P. K. Hallinan

This story combines a child’s delight in the physical world and his thankfulness to God for the pleasure of each day – for summer days, autumn’s orange pumpkin haze, for the breezes, for peace, and for life itself.

Teaching children to be grateful is easy and fun. Being grateful is a wonderful thing, it lightens your mood and brings many wonders into your life. Regardless of your age, gratitude improves the quality of life by focusing on what you have. Counting your blessings is easy to do each day and is easily shared with children. Teaching them to be grateful at a young age will create a life long perspective of gratitude. If we teach them to be grateful not only will they be happier in their lives but they will help create a beautiful world where we will all experience the peace and happiness we desire.