St. Patrick’s Day Shamrock Smoothie

shamrock smoothie

I remember growing up waiting for those delicious shamrock shakes that you could get at McDonald’s only around St. Patrick’s Day. I loved those things! They were so yummy! Smooth and creamy. And I also love just about anything mint so they were a hands down winner for me.

What I didn’t know then (and honestly as a kid probably did not really care) was how bad these things were for you. Full of sugar and all kinds of additives I don’t really want in my body, health wise they were not the best choice. But I never forgot them, and I still got excited every year when they announced that the Shamrock Shake was now available at McDonald’s for a limited time – though I did not go to get one.

Little did I know that there was actually a healthy alternative I could not only enjoy without guilt but that I could easily make at home! Full of healthy fats and delicious greens this healthy version of a shamrock shake was just as creamy and delicious, if not better.

shamrock smoothieI made this discovery quite by accident a couple of years ago when I was looking for something else on the internet; and I came across the concept of a Shamrock Smoothie. When they boasted that they tasted just like the shakes that you got at McDonald’s they had my attention. So I took a peek, and I experimented a little, tweeking the recipe to suit my needs and tastes. Adding in a little of this and taking out a little of that and then voila! I had created my own version of the perfect Shamrock Smoothie, which was now good for me and I enjoy every St. Patrick’s Day (See more info at modernechild.com).

I love that this recipe combines avocado which not only makes it rich and creamy but provides healthy fats with coconut milk and mint, two more of my favorite flavors. This thing is so thick and delicious it is the perfect healthy snack that doesn’t taste so healthy for St. Paddy’s Day 🙂

I also love the addition of peppermint essential oil in this recipe as I am now reaping all the benefits of peppermint essential oil in my already yummy healthy drink. I have to say to that the dollop of coconut cream on top, though optional, really is a must to make this smoothie just a little bit fancier without much effort. Oh and don’t forget the sprig of mint either!

So give this recipe a try this St. Patrick’s Day and enjoy your own Shamrock Shake guilt free. And if you share it with the kids, it’s a great way to sneak in some avocados and greens in a way that they’ll gobble it up and ask for more!

St. Paddy’s Day Shamrock Smoothie

1 banana

shamrock smoothie1/4 of an avocado

1/2 c. full fat coconut milk

1-2 drops peppermint essential oil

1/4tsp. vanilla

1 handful of spinach

dollop of coconut cream – optional

Put all ingredients except coconut cream in the blender and blend on high until smooth. Pour into glass and top with dollop of coconut cream. Add a spring of mint if desired and enjoy!

Serves 1


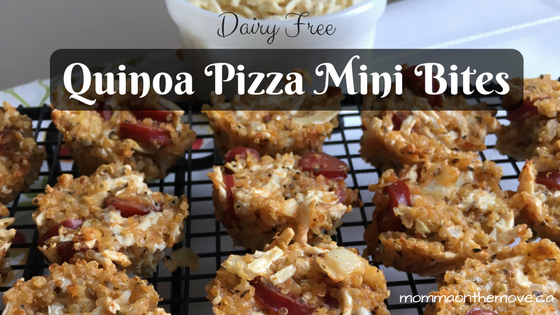
Quinoa Pizza Mini Bites – Dairy & Gluten Free

pizza mini bitesDefinitely my favorite mini bite recipe so far are these Quinoa Pizza Mini Bites. At first when I looked at the recipe I thought having quinoa in it was weird and probably not very tasty, but it turned out to be delicious!

The quinoa gives it a nice texture and does not make you feel that heaviness in your belly that pastry does. And it doesn’t take away or overtake the other flavors in the bite, it enhances and allows them to stand out.

pizza mini bitesQuinoa, considered a plant food, is also super good for you. It is one of the most protein rich foods we can eat, as well as high in fiber, iron, magnesium and many other vitamins and minerals. It is also gluten free which is great for those who are looking for or in need of that option; and even contains antioxidants. On it’s own, quinoa is quite plain but is a fantastic healthy addition in salads, baked goods, warm breakfast cereals and more!

These pizza mini bites really do taste like pizza and with the quinoa in them they are super healthy. I was amazed at how good they were and how much they actually tasted like pizza. And like pizza you can add in your favorite pizza ingredients. I used small pieces of pepperoni but you could easily substitute ham, add peppers, chopped up mushrooms, etc.

They are also fantastic for kids – they can easily help make them and they are a nice healthy option to put in their lunches or even for a snack. Yes you have to put in 3 or 4 but that’s ok this recipe makes a lot! They are even a great appetizer or snack for your next gathering or party.

Quinoa Pizza Mini Bites

2 cups cooked quinoa*

2 large eggspizza mini bites

1 cup chopped onion

1 cup Daiya shredded mozzarella

2 tsp minced garlic

1/2 cup fresh basil, chopped

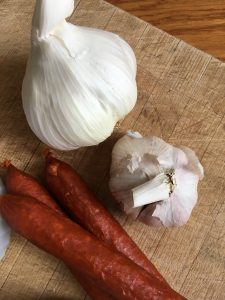
1 cup chopped pepperoni sticks (3-4 sticks)

1/2 tsp seasoning salt

1 tsp paprika

1 tsp dried crushed oregano

pizza or tomato sauce for dipping

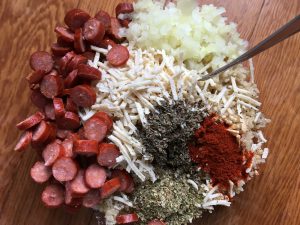
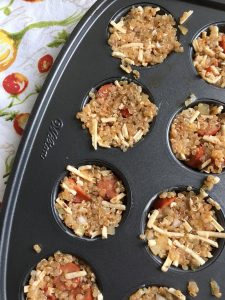
Mix together all ingredients, except pizza sauce, in a medium mixing bowl. Using a tablespoon, scoop the mixture into a well greased mini muffin tin, filling each cup to the top. Press down gently to compact.

Bake at 350F for 15-20 minutes. Remove from oven and let cool slightly (about 5 minutes). Gently remove bites from muffin tin and serve immediately.

These are also very good cold. So if you’re putting them into kids lunches or your own, there’s no need to heat them if not able to do so.

Makes approximately 40 bitespizza mini bites

*How to Cook Quinoa

1 cup quinoa

2 cups water

Thoroughly rinse quinoa in a colander (make sure the holes are small enough that the quinoa does not go through). Once rinsed place in a small pot with water.

Uncovered bring to a boil, then cover and lower heat to low. Cook for 15 minutes. Let quinoa cool slightly then fluff with a fork and either serve or use in desired recipe.

What are some of your favorite quinoa recipes? Share in the comments below

Miss last week’s mini bite recipe? Check out Dairy Free Macaroni Mini Bites

Mini Bites that Delight – Macaroni Bites

mini bitesI love mini bites! You know those cute little bite size foods that you pop into your mouth in one bite and are often bursting with flavor? How do they get all those ingredients into that tiny little compact dish anyway?

I had often wondered why people would want to take the time to make these itsy bitsy bites, other than the fact that they are cute and look pretty (and may possibly even impress your guests when you’re hosting a party). Making them looked like a lot of work and that I thought I would need to eat at least 5 or 6 to feel full.

Then I discovered how fun they were and came to the understanding that they are meant to be served as appetizers, which you are not supposed to fill up on anyway, and not full meals. They are also great for kids, especially ones who have smaller appetites as they can have one or two and feel full without having any waste – instead of having a bigger portion and not eating it all. It is also a great way to introduce new foods to kids as you are giving it to them in a fun way and again with the smaller portion size, if they do not like it the waste is minimized.

mini bitesAnd there are so many different mini bite recipes to try you’ll never run out of ideas. You can come up with almost any combination and likely be successful. So I’ve been on the lookout this month for mini bite recipes to try. Looking for combinations that I knew would work and then considering how I might create one on my own.

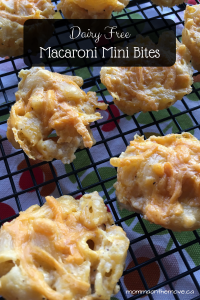
This week I started with macaroni bites, which are one of the more popular and common mini bite recipes out there, and usually a hit with kids. I loved this recipe as it has a super cheesy sauce and is simple to make. Also easy to make dairy free, these delicious bites will have you easily gobbling two or three!

Macaroni Mini BitesDairy Free (can be made gluten free if you use brown rice or other gluten free pasta)

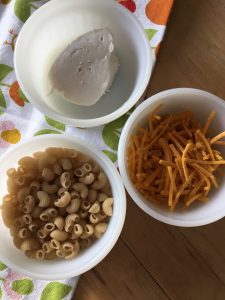
1 c. elbow macaroni

2 tbsp. Earth Balance Vegan Spread

2 tbsp. flour

1 1/2 c. almond milk (or non dairy milk of choice)

mini bites2 c. Daiya cheddar shreds

1/4 c. vegan cream cheese

1/2 tsp. sea salt

1/4 tsp. pepper

1 egg beaten

Optional additions: bacon, cayenne, paprika

Grease well your mini muffin tin (like really well. This is the one downside of mini bites is those muffin tins, they stick and are hard to clean. Greasing it well does help but sometimes you have to scoop around them very carefully to get them out. If you can find mini cupcake liners you could use those and it would make getting them out and clean up a little easier. This may not work though if you want a certain look without the papers on them).

Cook pasta according to package directions, rinse and set aside. In a medium size pan whisk the vegan spread and flour together until melted and smooth.

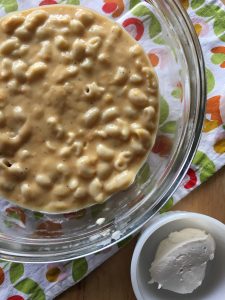
Slowly add non dairy milk and bring to a simmer. Once simmering, add 1 1/2 c. of the cheese, vegan cream cheese, salt and pepper. Stir until smooth and creamy. Remove from heat.

mini bitesIn a large mixing bowl carefully stir pasta, cheese sauce and well beaten egg until pasta is evenly coated and mixed in.

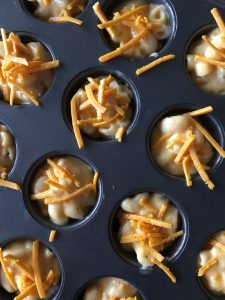
Using a teaspoon, spoon mac and cheese into prepared mini muffin tin, topping each with a small bit of cheese.

Bake bites at 400F for 15 minutes or until golden brown. Remove from oven and allow to cool 5 minutes, then gently remove bites from tin.

The first time I made these I made the original plain recipe but I felt that they were missing something. So I would highly recommend adding in real bacon bits, or a dash of cayenne or paprika to add a little zest.

These are also a fun and easy recipe to make with kids. They can easily help with mixing it all together and scooping the pasta into the muffin tins. Kids love to help and research shows that if they help make it they are more apt to eat it!

Don’t miss next week’s recipe Quinoa Pizza Mini Bites.

What is your favorite mini bite recipe? Share in the comments below.

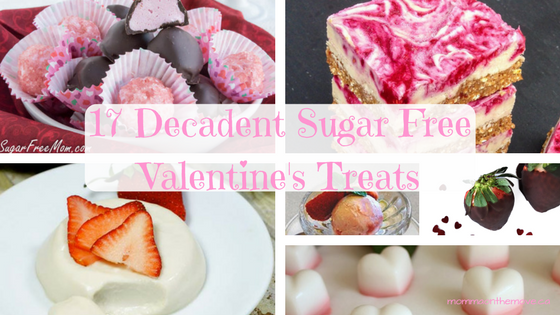
17 Decadent Sugar Free Valentine’s Treats

sugar free valentines treats

Sugar free Valentines treats sound like an anomaly. A dream perhaps that one can indulge and enjoy the decadence of the day and not feel guilty later. Valentine’s Day is another one of those holidays where sweet indulgences abound. Even though it is only one day, it is hard to resist all the sugary treats, especially the chocolate. You may find yourself often saying no thank you when you really just want to bite into that chocolatey something!

Valentine’s Day does not have to be that way! It is possible to indulge with sweet treats (chocolate and otherwise) that are not only sugar free but actually good for you.

When we went sugar free at our house there were two things I was not going to compromise. One was tasty food, if we were eliminating sugar then the food still had to taste delicious! not bland or like cardboard. The second, was that we were still going to celebrate and enjoy the holidays (including the food) – from Christmas to Easter – and no one was going to be denied yummy treats or feel like they always had to say no thank you.


Shop Family Organizers at Calendars.com Today!

So for each holiday I have either transformed our favorite recipes or sought out new ones – which is fun because I like to experiment, and compiled a list. The problem is, I usually want to make them all but realize that that is just unrealistic. So I pick a few favorites and try a few new ones. (It’s so hard to choose!) Thanks to all the wonderful bloggers out there (and some of my own recipes) I have a fantastic list of sugar free valentine’s treats and indulgences. Easy to make and enjoy guilt free!

Sugar Free Valentine’s Treats

At Valentine’s the popular treats seem to include either chocolate or raspberries, which is not such a bad thing, but I also like a little variety, so there’s a nice mix of sweet treats that would easily fit into the Valentine’s theme. Whether you’re treating your love, your kids, your friends or just for yourself it’ll be hard to choose which one to make first!

sugar free valentines treats

Photo credit: Brenda Bennett Sugar Free Mom

Raspberry Cheesecake Truffles

sugar free valentines treats

Photo credit: Brenda Bennett Sugar Free Mom

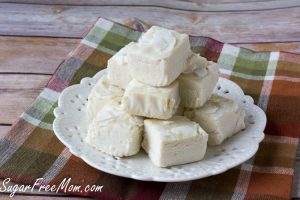
White Chocolate Coconut Fudge

sugar free valentines treats

Chocolate Dream Pie

sugar free valentines treats

Strawberries and Cream Gummies

sugar free valentines treats

Beetroot Red Velvet Cheesecake

sugar free valentines treats

Chocolate Cherry Tart

sugar free valentines treats

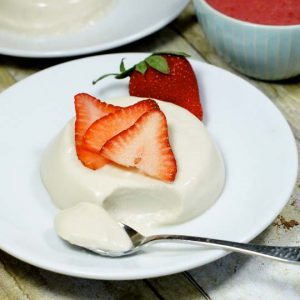
Coconut Panna Cotta

sugar free valentines treats

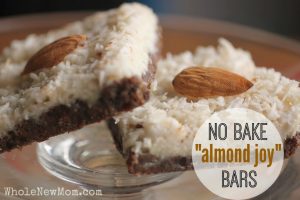
Almond Joy Bars

sugar free valentines treats

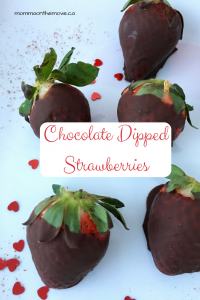
Chocolate Dipped Strawberries

sugar free valentines treats

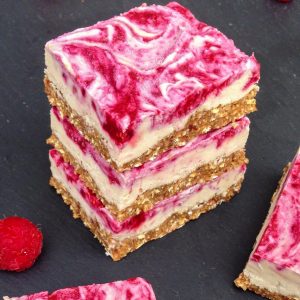
Vegan Raspberry Cheesecake Bars

sugar free valentines treats

Strawberry Ice Cream

sugar free valentines treats

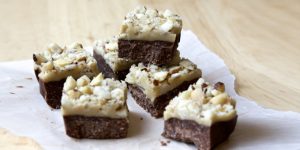
Caramel Nut Slice

sugar free valentines treats

Raw Chocolate Raspberry Cheesecake

sugar free valentines treats

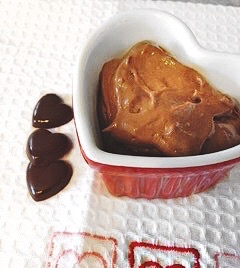
Chocolate Pudding

sugar free valentines treats

Homemade Chocolates

sugar free valentines treats

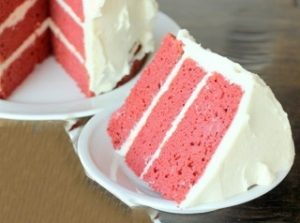
Red Velvet Cake

sugar free valentines treats

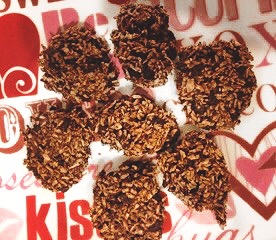
Chocolate Macaroons

Hard to choose isn’t it? Which one are you going to try first?

Thanks to all who contributed to this post! Brenda of Sugar Free Mom, Krissy of Pretty Wee Things, Megan of Detoxinista, Adrienne of Whole New Mom, Jess of Choosing Chia, Sara of I Quit Sugar and Maria of Maria Mind Body Health.


valentines day

How to Make Chocolate Dipped Strawberries (with homemade chocolate)

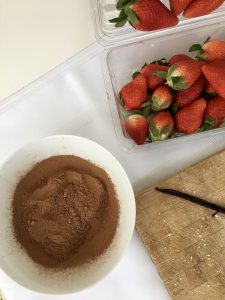
chocolate dipped strawberriesChocolate dipped strawberries are one of those simple decadent treats that are easy to make and delicious. Often paired with champagne and Valentine’s Day they always give me the feeling of richness and luxury.

Imagine… the red juicy strawberry dipped into firm dark chocolate. As you bite into it, the taste sensation bursts in your mouth with the sweetness of the fruit and the richness of dark chocolate. There is just something about that combination.

chocolate dipped strawberriesEven though chocolate dipped strawberries have this air of luxury and decadence they are actually very easy to make and you can usually make a batch in about 15 minutes. They are also very healthy for you! As strawberries are high in Vitamin C, potassium, folate, fiber and antioxidants, while dark chocolate is high in maganese, iron and copper. And if you make your own chocolate as well, like I do, you can control the amount and type of sugar that goes into it as well! (I always use natural sweeteners, with honey being my top choice).

I often wonder if they’re so good for us why I don’t make them more often? Perhaps it is because they have this air of luxury (in my mind) and I really consider them a treat. (And why don’t we treat ourselves more often? – that is a whole other conversation)

So let’s get to it!

How to Make Chocolate Dipped Strawberries at Home (with homemade dark chocolate)

  1. Line a cookie sheet with parchment paper and set aside.
  2. Rinse and pat dry the strawberries. Two tips here – one is to make sure you have fresh firm strawberries, second is to make sure that your strawberries are very very dry after you have rinsed them. If there is any water or moisture on them then the chocolate won’t stick.
  3. chocolate dipped strawberriesPrepare your homemade dark chocolate. I use this very simple method to make my chocolate. No stove involved just a kettle, boiling water and two bowls. It is important to be very careful when making the chocolate that you do not get any water in it as it will change the mixture and your chocolate wont’t turn out. As I said I love using honey as my sweetener but in this case I would use pure maple syrup or liquid stevia, as sometimes the honey does not mix as well and will separate when it sets.
  4. Dip your strawberry into chocolate. Grab strawberry by the green leafy top and dip into the chocolate. Turn and twist your strawberry to get the coverage you want on all sides. Gently place your dipped strawberry on your parchment paper lined cookie sheet and dip the next strawberry.
  5. Once you have dipped all your strawberries place the cookie sheet into the fridge. This helps your chocolate set faster.
  6. If desired, you can dip your strawberries in the chocolate a second time for a thicker covering, better coverage or just more chocolate! You do need to wait until the first layer is set and firm before dipping the second time.
  7. Set back into the fridge until chocolate is set.
  8. Serve and enjoy!

**if you want to get really fancy you can make a batch of white chocolate and drizzle it over the dark chocolate. You would have to let it set again and wait a little longer but it looks great aesthetically, which is great to impress guests if you’re having a party or event.chocolate dipped strawberries


A Plethora of Apples – Yummy Apple Recipes for Your Fall Harvest

apple recipes

Each Fall we end up with an abundance of fresh apples. Whether it be from our own tree or given to us by the grandparents we usually have large buckets of them. As a result over the years I have created and tested many different apple recipes to make use of all these delicious apples. Of course we make the traditional apple crumble and pie, but as yummy as that is, we do like a little variety. And I do like to experiment.

The kids love just coming home and grabbing a fresh apple from the bucket to enjoy. In fact they eat so many apples that you would think that we might actually make a dent in them. Unfortunately this is not the case – so baking it is! (and other creative uses)

I found and/ or developed a number of dairy free, sugar free and even some gluten free recipes that use apples. Giving us lots to choose from and enjoying whatever suits us on any particular day. I am still on the hunt though for a recipe that uses a large quantity of apples at once, as many of these recipes use maybe 4 apples at once. That’s a super long process of getting through our bucket! Even when I double the recipe.

If you have a plethora of apples this Fall or are just looking for some yummy apple recipes – here’s what I’ve discovered and tested so far:

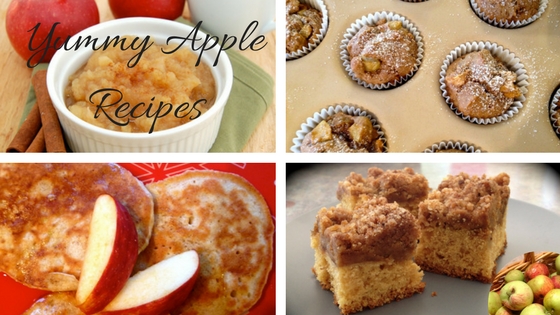
Yummy Apple Recipes

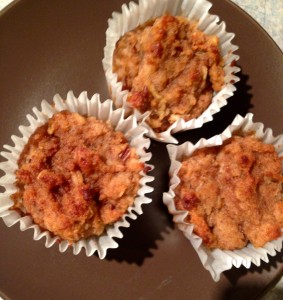
Muffins:

Cakes:

Crumble:

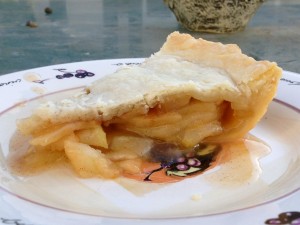
Pie:

Pancakes:

Smoothies:

Snacks:

  • Apples & Peanut Butter (simply slice your apple and dip in peanut butter)
  • Apples & Caramel Dip (don’t be deceived this is a sugar free healthy dip)

I have yet to try an apple cookie – but it’s on the list! and when I am getting towards the bottom of the bucket I usually start to make apple juice with our juicer, or even apple sauce (just boil the apples til soft, drain and puree in blender, add a little cinnamon and voila!).

What are some of your favorite apple recipes? Share in the comments below

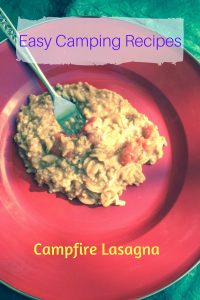
Camping Recipes – Campfire Lasagna

camping recipesI love camping! There’s just something about packing up your stuff and living with only what you’ve got for a while (either all packed into the car or the camper). It often makes me wonder why we have so much stuff in our houses when we can live happily with so little when camping? I love being outside all the time, not concerned about dishes or cooking as I’m outside; and the kids love it to to. We never run out of things to do, places to see or explore.

Camping is very freeing. Though there’s still a rough routine I find there’s no strict timelines, the kids play or ride their bikes, go to the playground or we happily all sit around the campfire watching the flames spark and pop and adding our wood as needed. Everyone’s always engaged in something, even if we are just sitting there.

camping recipesOne thing I have found with camping is that the food always tastes good. Maybe it’s just our ravenous appetites from being outside and active all day but whatever’s on the menu always tastes delicious. That being said we have our favorite camping recipes that we tend to make on a regular basis as I find that they are not only quick but satisfying (and usually contain a lot of meat – though we are not big meat eaters at home). This season though I was feeling that we were having a lot of the same old and though I enjoy our meals when we’re camping, I was looking to add a little variety and eager to try out some new recipes. What else we could create enjoy and add to the favorites (creating a little more variety in the menu)?

So as usual I went searching and found some great recipes which I am going to feature here over the next few weeks. From campfire dinners to desserts, there are some great things to choose from.camping recipes

The first one I found happened to be a recipe I’d had for years in a recipe book from my mother, but had never actually made, in fact I don’t know if she has ever made it. I loved that it was a one pot deal, throwing everything in the pot and just waiting for it to cook. This was the essence of easy and I hoped taste.

We tried it out earlier this summer when we went on our camping trip to Vegreville to see the Giant Ukrainian Easter Egg – which is definitely a site to see and worth the stop, if you are ever in Northern Alberta. And it was quite delicious! It was a great mix of flavors and a nice variety in a pasta dish, as opposed to the regular spaghetti and tomato sauce we typically had (not that there’s anything wrong with spaghetti!) This offered something yummy and different and got our ‘meat requirement’ in. Ha ha

This recipe can be made on the stove or over the fire and is literally ready in 30 minutes!

Campfire Lasagna

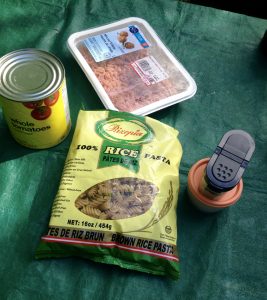
1 lb. ground chicken (or turkey or beef)camping recipes

1 tsp. oregano

2 c. spiral macaroni (we use brown rice pasta, gluten free)

1 pkg. onion soup mix *

1 – 796 ml can tomatoes

2 c. water

1/3 c. non-dairy parmesan cheese

1 c. Daiya mozzarella

In a large pot, brown meat. Add onion soup mix, oregano, tomatoes and water. Bring to a boil and stir in macaroni. Cook uncovered, until macaroni is tender. Stir in parmesan cheese and mozzarella.

I often make my own spice mixes as well as I like to avoid the MSG and other preservatives they put into the pre-mixed ones in the store, so I did create my own ‘onion soup mix’ which turned out to be quite flavorful and definitely did the trick for the desired taste.

*Homemade Onion Soup Mixcamping recipes

2 1/2 tbsp. dried minced onion

1 tsp. onion powder

1/8 tsp. salt

1/8 tsp. pepper

2 tbsp. homemade chicken boullion mix (or beef boullion if prefered)

Mix all spices together.

This recipe was such a hit that Luke asked for the leftovers the next day for lunch. That’s a really good sign.

Do you have a favorite dinner camping recipe? Share it in the comments below so we can try it out.

2 Fabulous Watermelon Salad Recipes

watermelon salad

Watermelon is such a refreshing snack in the summertime. Full of vitamins and minerals, it can be more then just a cut and serve option.

For some reason I had always thought that watermelon was just that, cut, slice and serve, that you couldn’t really do anything else with it. I have no idea why I thought that, maybe it was just the ease of preparing a refreshing summer snack. But lately I started exploring a few other watermelon recipes (like a watermelon smoothie, oh my so yummy!).

I had always heard of a watermelon salad but kind of thought it was weird. I’d often see them at an event or a buffet and pass it by as it just didn’t appeal to me. Well I had no idea what I was missing!

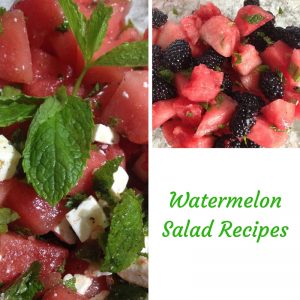
watermelon saladWhen I decided to explore watermelon recipes I knew that a watermelon salad was the first one to try! It turned out that I found two that are really good. Both are uniquely different and delicious, so I can’t really say that one is better than the other. It honestly depends on what flavors you are looking for in the moment. Both have the lovely addition of fresh lime juice, which is not only nice in the summer, but actually brings out the flavor and sweetness in the watermelon.

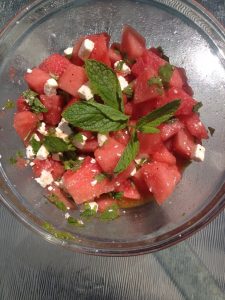
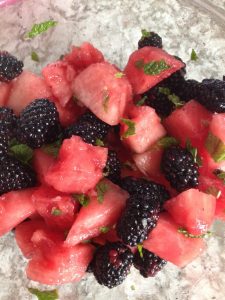
The first watermelon salad is the more common recipe with feta cheese and red onion (which honestly at first I thought it was totally weird to add feta and onion to watermelon), while the second is a nice crisp, refreshing fruit salad. Which I actually quite enjoyed, even though it called for blackberries. In general I do not like blackberries and usually buy them for the kids and skip them myself. But since it was in the salad I decided to try it. I actually found the blackberries to be quite lovely, they added a really unique flavor to it, and I enjoyed quite a bit.

Both watermelon salads were a hit with the kids! They gobbled them up and asked for more (I think they were quite enjoying my experimentation with these recipes). And I have to say myself, a watermelon salad is a very nice change in how watermelon is served (and it does not take long to prepare – I am all about ease, especially in the summertime!)

Both salads are best when made just prior to serving. When the watermelon sits for too long it tends to get limp and soggy. Make one hour or less before ready to eat.

Watermelon Salad

4 c. watermelonwatermelon salad

1/4 red onion, finely sliced

2 tbsp. fresh chopped mint leaves

1c. feta cheese, crumbled

1/4 c. olive oil

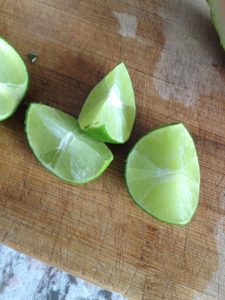
3/4 of lime, juiced or 2-3 drops Lime essential oil

1/4 tsp. pepper & a shake

Cut rind from the watermelon and cut into 1 inch chunks. Place watermelon into medium size bowl. Chop mint. Combine olive oil, lime juice and pepper to create dressing.

Pour dressing and chopped mint over watermelon. Toss gently to coat.

Pour crumbled feta over salad and stir gently to combine. Enjoy!

Serves 4

Watermelon Blackberry Saladwatermelon salad

3 c. cubed watermelon

1 1/2 c. blackberries

2 tbsp. fresh finely chopped mint

Juice of one lime or 2-3 drops of Lime essential oil

Cut the rind off the watermelon and cut into one inch chunks. Place watermelon into medium bowl. Chop mint and add to bowl. Add blackberries. Squeeze fresh lime juice over the fruit. Gently toss to combine and serve.

Serves 4

Have a fantastic watermelon salad recipe? Share in the comments below

A Refreshing Twist on Watermelon – The Watermelon Smoothie

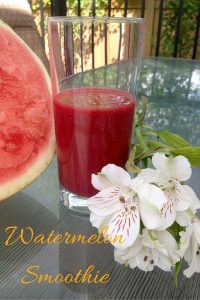
Watermelon SmoothieThe other day my youngest son said he had an idea to make a watermelon smoothie. We love watermelon especially in the summer! It is such a nice refreshing snack. For us, we usually just slice it and eat it, I had never really thought of doing anything else with it. Sure I had heard of people putting watermelon into salads or other recipes but I had never thought of putting it into a smoothie. It just seemed odd to me.

But really, why not? You can put basically anything into a smoothie and with the right combination, can be absolutely delicious! And we love smoothies at our house and enjoy trying different combinations. In fact, I have been experimenting this year with creating my own smoothie recipes. It’s fun figuring out what goes well together and what might not. When I create a really good one, I get very excited. Like when I created this yummy green smoothie in the spring with grapefruit, orange and dandelion greens- yum!

The other thing I didn’t realize is that watermelon is actually chalk full of vitamins and minerals like Vitamin A, potassium and magnesium to name a few. Plus it has many health benefits benefiting cardiovascular health, anti-flammatory and antioxidant support. Here I thought it was just water and that you didn’t get much else out of it. Even better!

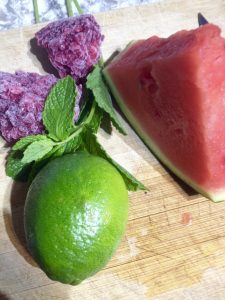
So I set out on a hunt for watermelon smoothie recipes to see what was out there. There are many that are a combination of watermelon and strawberries (which seemed quite popular), some with almond milk, even some with coconut water (which I am going to have to try that one). But the one that I was drawn to the most was this combination with raspberries, fresh lime and mint. All favorite ingredients of mine. I love mint and am really into lime lately. I also liked that it was described as ‘the most refreshing smoothie, ever‘. It quickly made me think of hot summer days when you’re looking for something a little more than just a glass of water. I could see myself, sitting on the deck, smoothie in hand, relaxing and enjoying the hot summer sun…

When I whipped it up this afternoon I was not disappointed! It was fabulous. I could not believe how delicious it was and even though it was not super hot that day, I could see how enjoyable it would be on a hot summer day. Not to mention I love the rich red color and how sweet and fresh it tastes. I can’t wait to make it for the kids who were away for the weekend, especially my son, to not only thank him for the fabulous idea, but to see how much they enjoy it as well.

Watermelon Smoothiewatermelon smoothie

1 c. watermelon

1/2 c. frozen raspberries

fresh lime juice (squeeze 1/4 of a lime) or 1 drop lime essential oil*

2 sprigs of fresh mint

Put all ingredients into blender. Mix until well combined and is smooth. Pour into glass and enjoy!

*note: if you’r using lime essential oil ensure that it is safe to ingest as all brands of essential oils are not created equal and not all are safe to take internally

Serves 1
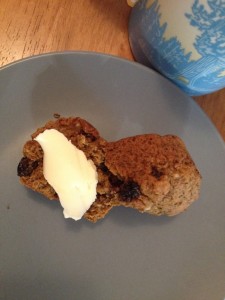
Gluten Free Bran Muffins with Raisins & Hemps Seeds

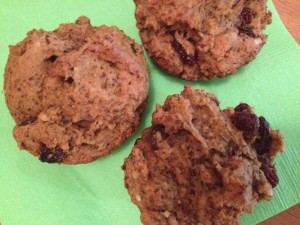
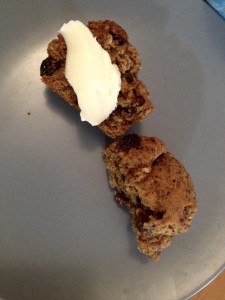
gluten free bran muffinsI have always been a fan of muffins. They are a great grab and go snack that will fill your tummy and give you some good nutrition. They are also a fantastic make ahead and freeze for later option as well – something you can quickly grab out of the freezer to add to lunches, road trips or just a quick snack.

I have been dabbling more and more with gluten free recipes as I have noticed that my body does not seem to tolerate it like it used to. Often feeling tired after bread, muffins or anything wheat based, I have been slowly expanding and experimenting with my recipes. I was a little worried about changing my muffins though, as I had found many gluten free muffins to taste grainy or gritty and certainly not to my liking. But I knew that they couldn’t all be that way and that if it was the difference between energy boost and energy drain then I had to give it a whirl. So I started experimenting…

I am a big fan of bran muffins and have been since I was little. I know most people don’t care for bran muffins, more like a love it or hate it relationship, but for whatever reason I really enjoyed them. And it wasn’t just because of the benefits of bran! They were yummy. So it was only natural that one of the first muffin recipes I converted would be a bran one.

I found the original gluten free bran muffins recipe online and loved the addition of hemp seeds for the added nutrition. I also liked that I could create my own gluten free flour as all brands are not created equal, and this way I could choose what went into my mix. A quick modification for the sugar and the dairy I had the perfect recipe, which my boyfriend at the time, loved and he was not a gluten free guy. In fact to this day they are still his favorite muffin that I make.

The kids love them to, though they tend to like banana more, but they will eat them without complaint and I love the hemp seeds and flax added in there.

Gluten Free Bran Muffins with Raisins & Hemp Seeds

1/2 c. ground flax seedgluten free bran muffins

1/2 c. rice bran

1 c. almond milk (unsweetened coconut milk or other non dairy milk of choice)

1/3 c. olive oil

1 large egg

2/3 c. coconut sugar

1/2 tsp. vanilla

1 c. all-purpose gluten-free flour (*easy to make your own gluten free flour mix)

1 tsp. xanthan gum

1 tsp. baking sodagluten free bran muffins

1 tsp. baking powder
1/2 tsp. sea salt

2 tbsp. hemp seeds

1/2 c. raisins (I like lots of raisins so I add another 1/4 c. but you don’t have to)

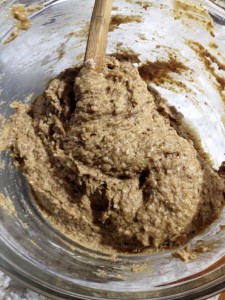
In a medium bowl mix together flax seed, rice bran and almond milk. Let sit for 10 minutes while you get everything else ready.

Next, in a large bowl combine gluten free flour, xanthan gum, baking soda, baking powder, sea salt and hemp seeds.

In a different medium bowl, beat together the oil, egg, coconut sugar and vanilla. Add the ingredients from the first medium bowl (almond milk/ flax seed mixture) to the egg mixture and stir well.

Stir the almond milk mixture into the dry ingredients until just blended. Fold in the raisins.

Spoon batter by the teaspoon into greased muffin tin or line with cupcake liners. Bake at 375 F for 15-20 minutes or until toothpick comes out clean. Let cool 5 minutes then remove muffins from muffin tin to allow cool completely.

Store in an airtight container or freeze for easy quick grab and go healthy snacks.

* I found this combination for your own gluten free flour mix online. I make a batch and store in an airtight container so it’s on hand when I need it.

Gluten Free Flour Mix

4 c. superfine brown rice flour

1 1/3 c. potato starch (not flour, they are different)

2/3 c. tapioca starchgluten free bran muffins