Butternut Squash Soup

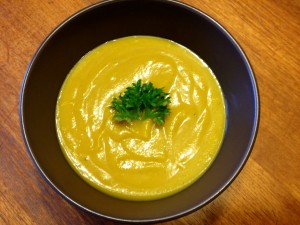
IMG_2432A couple of weeks ago I was visiting my sister in Vancouver, having a little me time and also there to attend my friend Stuart’s 40th Surprise Birthday; she made this fabulous Butternut Squash soup. Now I have not been a huge fan of squash in the past but this soup was really yummy!

I had found that the texture of squash was not always to my liking, it felt kind of grainy on my teeth so I avoided squash in general. But lately I have been finding many recipes with squash that I and the kids have quite enjoyed. Like Spaghetti Squash with chicken and pears from Clean Eating Magazine, Acorn Squash with harvest rice stuffing and now this soup!

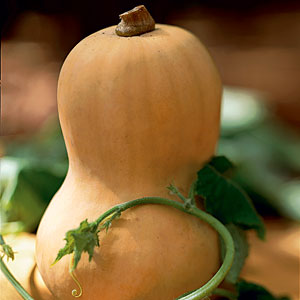
Butternut Squash

Butternut Squash

It is a dairy free, sugar free and gluten free soup, of which I think I had 3 bowls for dinner that night and then another 2 for lunch the next day!

I found the flavors delicious with coconut milk and cinnamon. The original recipe calls for 2 butternut squash but that day my sister used acorn and butternut squash and it was very tasty.

I was so excited about this soup when I returned home I went straight to the store to buy what I needed. Unfortunately, as life would have it, I did not make it until the other day as I could not get all the ingredients I needed, and then of course there was time and real life to get back to – you know 3 kids, running a household…

I made it with the 2 different squashes which I think just adds lovely flavor and served it to the twins for lunch. Both of them gobbled it up, asking for a second bowl, while I scarfed, I mean enjoyed, my own soup.

It is super easy to make as well and easily frozen if you don’t wish to eat it constantly for a week.

Butternut Squash Soup

2 medium butternut squash, or 1 butternut and 1 acorn

1 pink lady or royal gala appleIMG_2458
1 medium onion

1/4 c. Earth Balance vegan spread

900 ml chicken broth

1 c. coconut milk

1/2 tsp. dried sage

generous pinches of cinnamon and salt

1 tbsp. maple syrup (optional)

Chop and peel squash; cut in half and seed, then chop into small pieces. Chop onion and apple.

In a large saucepan over medium heat, melt Earth Balance, add onion and apple and saute until onion is soft. Add broth, squash, and coconut milk. Bring to boil and simmer for 20-25 minutes.

For the last 5 minutes add sage, cinnamon and salt. Squash should be very tender when done.

Use immersion hand blender in pot to blend until smooth or ladle soup into blender and whip on high until pureed. Pour back into pot and reheat if necessary. Serve.

You may add optional garnishes such as maple syrup drizzled on top, vegan sour cream, slivers of apple or dried sage.

Soup will keep well refrigerated for 5 days or in the freezer for up to 3 months.

All Things Pumpkin

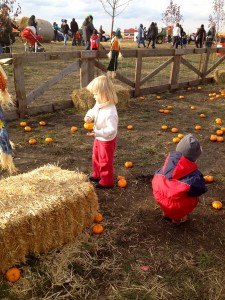
IMG_2217In the month of October there seems to be a lot of pumpkin about. From Thanksgiving feasts that include delicious pies and cheesecakes to Fall festivals and trips to the pumpkin patch, even right up until Halloween when we are carving pumpkins for the kids and all our trick or treaters.

I love pumpkins. I not only love the taste, but I love the bright orange color they are, the unique shapes and sizes and all the different things that you can do with pumpkin, from eating and recipes to decorating and crafts.

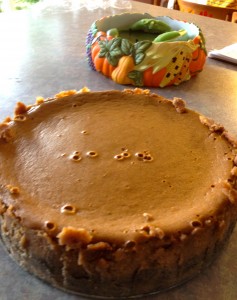
I do have to say that I tend to lean towards the pumpkin food items the most, as I really do enjoy those. And lately I have been finding all kinds of pumpkin delights that I have tried or am about to try such as pumpkin pancakes, muffins, latte, fudge, cheesecake, ice cream and of course pie. I even discovered a recipe for a Pumpkin Gooey Butter Cake, which though I have to make a few dietary adjustments I can’t wait to get it into my oven and more importantly in my tummy!IMG_2173

The pumpkin pancakes I discovered a few years ago when I bought Halloween pancake molds that came with the recipe (those are so fun!). The pumpkin spice latte is a slow cooker recipe I discovered last year and made for the first time last week for my open house. The fudge I have yet to try but believe me I am all over this and it won’t be long! And I have always loved pumpkin muffins, though I have been dappling in some new recipes. I always enjoy variation and who knows you might be missing out on something even better if you don’t at least try it!

I am not sure what it is I love about pumpkin dishes so much, but I am sure that it also has to do with the allure and smell of all those delicious spices that go in it; like ginger, cinnamon and cloves. Mmmm… just the thought of it makes me feel all warm and fuzzy inside.

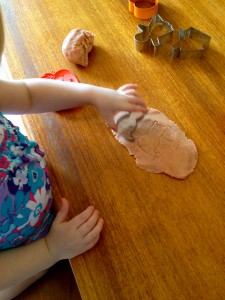
pumpkin-spice-latte-white-chocolateMy greatest (and most fun) pumpkin discovery this Fall was actually not a food item. Which is ok, I was just super surprised at whoever came up with this as it is so simple, yet so ingenious. It is Pumpkin Play Doh! I thought this was fabulous! My kids loves playdoh and what a fun way to tie in a theme, those spices we love and play and create at the same time.

I found the recipe on another blog While He Was Napping. She makes her playdoh on the stove top which I am sure works well, but I have my own playdoh recipe I decided to use and adjust instead (as it is just a mix everything together, I like to avoid extra pots and pans). All I needed to do was add my pumpkin pie spice and color it orange. Presto! Pumpkin Playdoh.

IMG_2305The twins loved it! Thought it was the most fabulous thing ever, yeah it was playdoh but it was new and it was pumpkin! Even Matthew and his friend smelled it and said it smelled really good. Plus I played it up a little, got out the Halloween cookie cutters for them to use and sat down and played with them for a while. Chloe loved making pumpkin hair for the Fuzzy Cuts Barber Shop we have. Luke just rolled it and created as he usually does. Fun was had by all.

I’m wondering now what other ‘flavours’ of playdoh I can make, perhaps mint or chocolate. It could be done, I’ll have to experiment… In the meantime enjoy the pumpkin…

Pumpkin Playdoh

Mix together in a medium bowl:

2 c. flour

4 tsp. cream of tartar

1 c. salt

2-3 tsp. pumpkin pie spice (amount depends on how strong you would like the scent) or 2-3 drops On Guard essential oil

Add in:

1 1/2 c. boiling water

2 tbsp. oil

Mix together. Knead well. Add in orange food coloring. Knead again until well mixed. Store in ziploc bags.

*For ordinary playdoh simply omit the pumpkin pie spice and add whatever color of food coloring you want. Batch is fairly large – so can easily be divided to make a few different colors or scents.


Natural Remedies for Colds and Flu

natural remedies

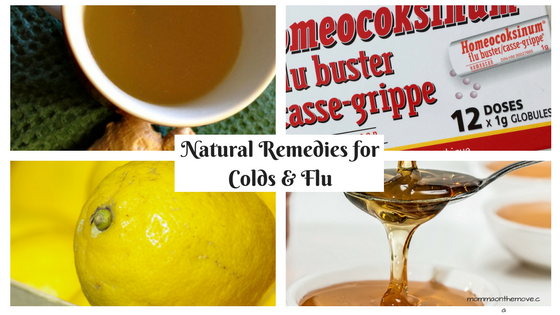
One of the things that I have decided to do in our house is reduce the amount of over the counter and unnatural remedies for colds and flu. The more I read about some of these remedies and what’s in them, the more I feel that there are better more natural ways to combat the flu season and naturally boost our immune systems.

I have become more conscious of what we put in our bodies and what it does to us. Some of these over the counter remedies, though they may provide relief actually suppress our immune systems and it then takes us longer to return to health. In my journey to find more natural ways to heal our bodies and even prevent us from getting sick I have discovered a number of natural remedies and preventions that work.

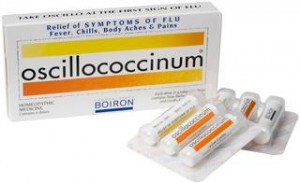
Oscillococcinum – I believe in prevention first and foremost so one of the things I do before about 6-8 weeks prior to flu season is give the kids and I a homeopathic protocol using oscillococcinum or ‘flu buster’. This was suggested by our homeopathic doctor; we take half a tube (1/4 tube for the little ones under 6) once a week for six weeks. This helps the body’s immune system to ‘boost up’ and prepares it for the cold/ flu season that is coming.  As a result we usually don’t get colds/ flu at all and if we do it is a very mild and short case. And if we do get it, then we take a whole tube to kick it out!

Ginger tea – drinking ginger tea on a regular basis is also a great form of prevention but works well if you do get a cold/ flu. It is easy to make using fresh ginger root and water. As soon as I start to feel a cold coming on I make a batch of tea right away. Ginger tea is also great for nausea.

Honey and cinnamon – are great combinations for a number of diseases and ailments. Different proportions target different ailments. For colds it is 1 tbsp. honey to 1/4 tsp. of cinnamon

Homeopathic remedies – the great thing about homeopathic remedies is that they work with your body to help boost your immune system as well as heal the ailment. It not only relieves your symptoms but helps your body to move through it faster. There are a number of homeopathic remedies to aid colds and flu. Oscillococcinum, as mentionned above, is great for prevention as well as when you have it. Aconite is great when you first start feeling the cold coming on, take it right away, as well as other homeopathic remedies. Homeopathic remedies work best when you can match your symptoms to the remedy so it is best to either consult with your homeopathic doctor or have a book on remedies for self diagnosis. The great thing about homeopathy is if you choose the wrong remedy it will not cause you any harm, it simply won’t help you get better and you’ll have to try a different homeopathic remedy.

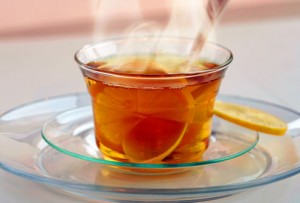
Rum, honey, cinnamon, lemon in hot tea – this is an amazing remedy. Recently I had a cold that just would not go away and continued to get worse and worse each day instead of better. All I wanted to do was crawl into my bed and pull the covers over my head, but my aunt who was visiting at the time suggested and made this remedy for me. It cleared my head like that! and though I still had a bit of a cough, I felt like I could function and enjoy life again 🙂 You can use any kind of hot tea that you like and then add the rest into the drink.

Essential Oils – there are a number of essential oils that support our immune system. Oils such as Frankincense and Copaiba support a number of our body systems including immunity. doTERRA’s On Guard essential oil blend is our go to for supporting immunity. It is a blend of Wild Orange, Clove Bud, Cinnamon, Eucalyptus, and Rosemary. It can used preventatively by applying topically on the bottoms of the feet or taking one drop internally daily. Diffuse when you feel something coming on, as it not only protects you but everyone in the household.

Vitamin C, D, & B12 – boost these vitamins during cold and flu season. They all help boost your body’s immune system and vitamin B12 helps you to cope with stress.

Sleep – sleep is one of the best healers and immune boosters. Get adequate sleep on a regular basis for prevention but when you feel your cold coming on make sure you get to bed early and get lots of rest.

No Sugar – sugar weakens the immune system very quickly, so if you have sugar in your diet, avoiding and eliminating it when you are sick will help strengthen your immune system and recover faster.

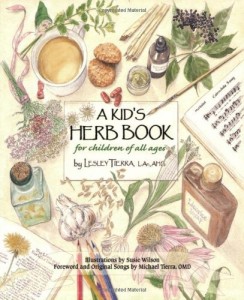
Garlic Lemon and Honey Syrup – this remedy comes from a book called A Kids Book of Herbs, is very easy to make and kicks your cold super fast!

Eat more of these foods – ginger, garlic, onions, licorice root, honey – these all strengthen the immune system and support healing.

A lot of these remedies you can use apply on a regular basis in your diet/ day to help prevent the colds and flu from even coming on, but they all work great if you or your family do get sick. I believe too that one remedy will work better for one person than another so to find the one that works best for you. I also believe that anything we do to help our body naturally boost our immune systems is not only going to be better for us in the long run but will also help prevent us from getting as sick or sick at all in the future. Many of these remedies too are ones that kids will easily take without fuss, and is easy to incorporate into their diets and routines.

Do you have a favorite natural remedy that works? Comment and share below.


Chocolate Additions

In my last post, I shared the basic recipe for making raw organic chocolate. Very easy to do, it is a healthy and delicious way to enjoy chocolate without the guilt!

Now here is the fun part! Once you have the basic chocolate made you can add all kinds of things to your chocolates that not only make them delicious, but also add vitamins and nutrients that are good for you! You can ‘soup up’ your chocolates and no one will even know what’s in there.

I make peppermint Christmas trees and add E3 Live to them, which is a form of algae, very high in protein and minerals. It darkens your chocolates but does not alter the taste, no one would ever know it’s in there. And Matthew loves them and as a result asks me to make them all the time!

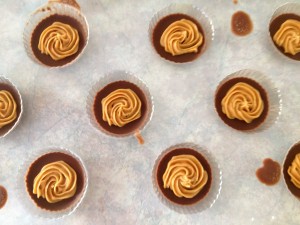
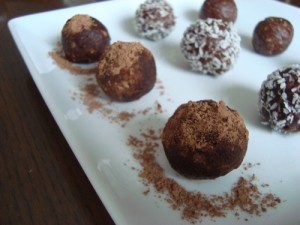
chocolate additionsMatthew even helps me make chocolates; as it is very easy for kids to do. He loves to experiment so we have made a variety of kinds of chocolate. We make our base chocolate, which is a combination of cacao butter, cacao powder, vanilla bean and sweetener of choice, (see my previous posts for the basics on how to make it and natural sweeteners), then we add different ingredients depending on the kind of chocolate and flavor we want. We make peanut butter cups, caramel cups, orange ginger and peppermint; and this is only what we have done so far – there are many ingredients that can be added to your chocolates to achieve the flavors that you want.

When adding ingredients to chocolate this can be done in a few ways – mix it in, usually with essential oils or powders, you can pour the ingredients on top of the chocolate, after you have poured it onto a cookie sheet, for instance with nuts and seeds, berries, coconut or you can make/ use a filling. The ingredients you add depend on what type of chocolate you want and personal preferences. Here are some ingredients to try.

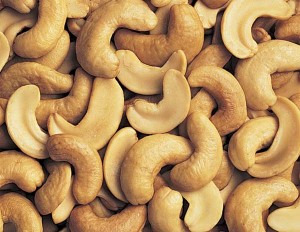
Nuts such as almonds, brazil nuts, cashews.

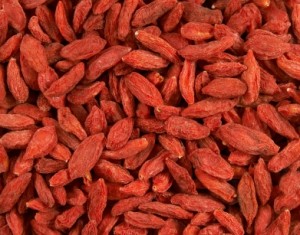
Goji berries

Seeds such as hemp seeds, sesame, sunflower or pumpkin.

Berries such as goji, incan or mulberry.

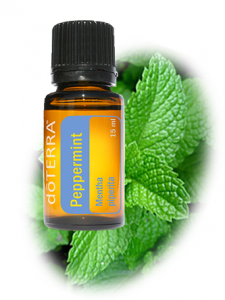
High quality essential oils such as peppermint, wild orange, cinnamon bark, etc. to flavor your chocolate. Use only a few drops and use the highest quality oils you can – they are better for you and could alter your chocolate if they are not.

Spices, such as ginger, cayenne, cinnamon, allspice.

Algae such as E3 Live, Spirulena or Chlorella. All are very high in protein, minerals and a variety of vitamins.

You can create combinations using ingredients that are high in vitamin C like coconut nectar and spirulena, or a high content of magnesium and calcium using ingredients such as mesquite and carob powder with any algae.

Some people even add medicinal mushrooms to their chocolates, which might sound distasteful, but the neat thing is is you can’t taste it, so would have no idea that it is in there if no one told you. We have recently discovered banana flakes as an addition to our chocolate making. They are quite yummy on their own and are delicious in chocolate.

The amounts you add will depend on the size of your batch of chocolate, how strong a taste you want and also depends on the herb/ spice that is being added (some are stronger than others). A good rule of thumb is to start with half a teaspoon, taste it, and then decide if you want to add more. The great thing about making your own chocolate is that there is lots of taste testing to get it just the way you want it!

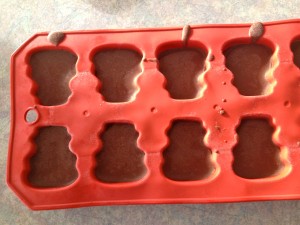
Once you have what you want you can set your chocolates in a number of ways. I buy silicon ice cube trays in a various shapes and fill those up to set. (tip – you don’t have to fill these all the way up as your chocolates can be quite thick if you do, but you want to fill them up enough so they are not too thin and break when you pop them out of the molds). There are lots of shapes to choose from; squares to hearts and around the holidays stores usually carry fun shapes related to that holiday. I have snowmen, trees and Halloween pumpkins. You can also use any of the candy molds that stores like Michael’s sell, this is where I found the mold to make peanut butter cups, they also have a variety of themes and shapes.

Of course you do not have to set your chocolate in shapes, you can just pour it onto a cookie sheet, let it set, then break it into pieces. You can also make clusters simply by mixing everything together and then dropping them by the teaspoon onto a cookie sheet lined with parchment paper.

For chocolates with fillings, make or find your filling (I use unsweetened peanut butter for my peanut butter cups and make the caramel filling using dates, vanilla, mesquite and lucuma powder), pour some chocolate let it set for a few minutes til firm, then drop or spread the filling over the chocolate, then add more chocolate on top and let set completely.

There are lots of things you can add when making chocolate. Many different flavors and combinations, depending on what you want and what you like. It is also fun to experiment with different combinations, flavors and shapes and it is easy to get the kids involved – they’ll love it. So get in there and try stuff out, worse case scenario is it does not turn out the way you want it and you might have to eat it yourself!

Fall Activities for Kids

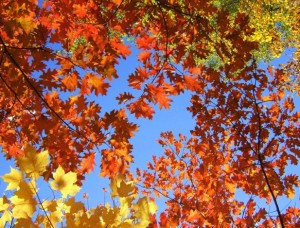
Fall is my favorite time of year. The vibrant colors, the leaves changing on the trees. I often find a sense of renewal and excitement in the fall. Change and new beginnings, an expectation of things to come. Now I know that spring is typically the time for renewal and new things but for some reason this applies more to me in the Fall. There is just something about the energy, the way the warm sun glints through the trees, the crisp cool mornings, and the cozy afternoons. It’s magical, inviting and I look forward to it every year.

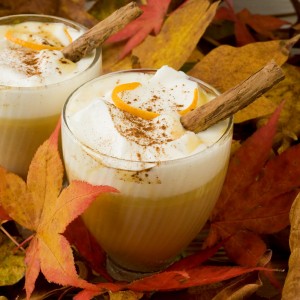
Pumpkin Spice Latte

I also enjoy all the activities that you can do in the Fall with the kids, the Fall recipes like warms hearty stews, specialty coffees like Pumpkin Spice Lattes, the bonfires, the festivals. It creates a warmth, a coziness and welcoming feeling that I love. It’s the time of year that I start to light more candles and fill my house with scents of pumpkin, cinnamon and cloves. It’s also a great time of year to be outside enjoying the warm sunny autumn afternoons.

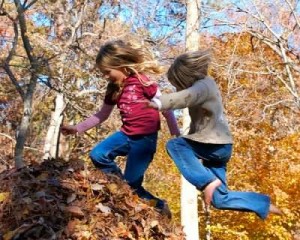
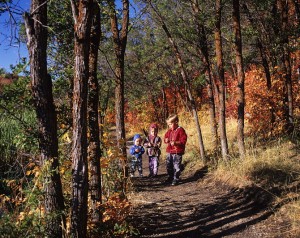
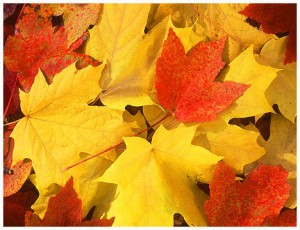
One of my favorite things to do in Fall is to just go for a walk, letting the kids explore and play in the leaves. The leaves are the best part of Fall. Whether we are kicking them up and dancing with them as they blow in the wind or gathering them for crafts and decorations for later. And I still love jumping in them! When I was growing up my sisters and I would love raking up the leaves, piling them high and jumping in them. Now as a parent and adult I love to jump in the leaves with my kids.

Taking the kids out for a walk is a great opportunity for them to not only have some fun but to teach them to learn about and appreciate their natural environment. There are lots of simple activities you can do while you’re out with very little equipment. If you bring a few items with you such as a magnifying glass, some paper, crayons, pencils and a cloth bag, this will get you started.

Many of these activities will engage kids of all ages. Here are some of my favorites:

Tree & Leaf Rubbings

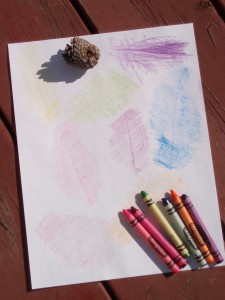
Leaf Rubbings

Have the children pick a tree, then take a piece of paper and a crayon. Put the paper up against the bark of the tree and then gently rub over the paper with their crayon. Younger children may need assistance holding their paper. Once they are finished they can leave the tree rubbing on it’s own or then add to it and make it part of another picture. They can also do leaf rubbings with leaves they have found on the ground, but will need a flat surface to do the rubbing. If there is nothing close by then take the leaves home and they  can do the leaf rubbings there.

More Leaf Fun…

Have the kids gather a variety of leaves, different shapes, sizes and colors. (Please note to get the children to take the leaves off the ground not off the trees!) The kids will love gathering them and it is an easy way for them to explore and teach them about the different kinds of trees. Take a moment to help them figure out which leaves belong to which trees. If you aren’t familiar with which trees are which, you can get a tree identification book from the library. With young children only talk about one or two, with older more.

With their gathered leaves they can also make a bouquet to put in a vase and use as a centerpiece on your table, or cut a circle out of cardboard and glue the leaves on to make a  leaf wreath.

They can trace their leaves on construction paper using different colors, cut them out then decorate their room or a part of the house. Also using construction paper they could make their own Autumn tree by cutting out a trunk and glueing the leaves on the branches or creating leaf people out of their leaves. Younger children may need help with cutting.

Find a Tree

This is an environmental game that I do with all ages of children, from my 2 year old twins to the Leaders in Training who are 12-14. You can adjust it accordingly depending on the age of the children but the premise is the same. In partners, one is blindfolded and the other leads their partner to a tree. While blindfolded they explore the tree using their other senses. Touch, smell, etc. Once they feel that they have explored the tree thoroughly then the partner takes them back to where they started, removes the blindfold. The blindfolded partner then goes and sees if they can find their tree. With younger children use a small area with only a few trees to choose from with older you can use a larger area to make it more challlenging.

Fall Festivals

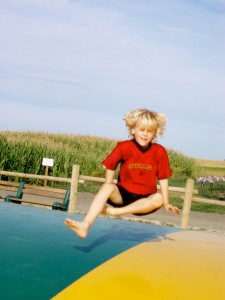
On the Jumping Pillow at the Calgary Corn Maze

Many communities Fall Festival celebrations, from pumpkin patches to hayrides, corn mazes and barbeques. We have a variety here in Calgary, from the Calgary Corn Maze, where they have a petting zoo, jumping pillow and corn cannons; to events at Heritage Park such as the Harvest Sale and Railway Days. Check out your local community events to find something that speaks to you.

Other Crafts and Activities

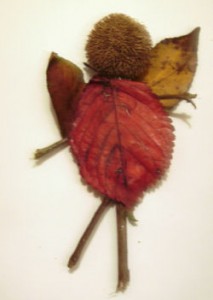
Twig Fairy

There are so many materials in the natural environment, especially in the Fall, to create all kinds of wonderful crafts and activities. When gathering materials for crafts please encourage the children to take things from the ground (whether it be leaves, pine cones, etc.) and not from the live trees and plants as this could damage or kill them. There are great crafts such as twig fairies, autumn looms (to display all the natural treasures they find), word searches and coloring pages. Just GoogleFall Activities and Crafts’ and all kinds of great websites will come up. Some of my favorite sites are Enchanted Learning and Family Fun.

Fall is a beautiful season, so get out and explore it, let the kids fill a bag of goodies (natural items) and then come home and see what you can do with them. Encourage the kids to create their own crafts and games from what they have found. It is a wonderful time to be creative and use their imagination and they’ll be learning about the natural world and all she has to offer at the same time!