The Taronga Zoo

IMG_0119One of the many things I love about Australia is the range of unique animals that exist in this country. Because of their isolation from the rest of the world for so long, this allowed these unique species to develop and exist. From the koala to the platypus, more than 80% of these animals, plants, reptiles and frogs are found only in Australia.

With that, no trip to Australia would be complete without a trip to at least one of the zoos or wildlife parks, to catch a glimpse and sometimes a cuddle, with some of these amazing animals. Of course, I would much prefer to see some of these animals in the wild (I say some because honestly I am perfectly fine seeing the crocodiles and the snakes behind glass, thank you). But it is a extremely cool experience to see a koala, kangaroo or echidna in their natural environment.

Platypus

Platypus

Unfortunately, these experiences can be rare, depending on where you are traveling and how long you are spending in Australia. Therefore I always recommend at least one zoo experience of some kind so you can have an opportunity to see these unique critters.

While in Sydney, we chose to experience the Taronga Zoo, which is a natural bush area on the harbour’s north shore. It is easy to get to from Circular Quay, with a short (and beautiful) ferry ride to the zoo’s entrance. You can purchase a combo ferry and zoo entrance ticket at the terminal which does provides great savings, as opposed to purchasing them separately. Also with the pre-purchased pass you can take the cable car up to the top from the ferry terminal, which gives you a birds eye view as you zoom overtop of the zoo to the main entrance.

Fort Denison

Fort Denison

The kids were all very excited to get to the zoo, as we had been promising them we would ‘go and see the animals’ since about 10 that morning, but it had taken us until almost 2 pm to get ourselves organized, fed and down to the ferry terminal. We bought our ferry zoo combo pass and boarded the ferry for the north shore. It was a beautiful day, so we sat up top where we could catch the views of the harbour as we sailed.

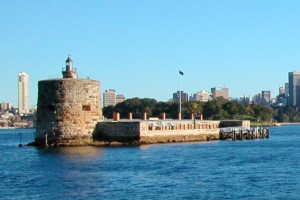
This was an unique experience for me, as the last time I was in Sydney, we did not go on the water, so I got to see a different view of Sydney. Chloe and Luke asked many questions as we sailed along, wondering what this was and that was. We sailed past Mrs. Macquarie’s Chair, which we had been to earlier that morning; and Fort Denison, another of Sydney’s historic landmarks.
IMG_0121Once at the Taronga Zoo ferry terminal we made our way to the cable car. There were also options to take a bus to the top main entrance or a short walk. The cable car was super cool, much like a gondola for us, the car would slow down as we got on and had a seat inside, before we were whisked away over the tree tops. It was great way to see the layout of the zoo and where things were. We could see how the zoo had taken great care to create spacious enclosures for all the animals simulating their natural habitats. Luke screamed in delight as he spotted the elephants, asking to go see them when we got on the ground. We also caught the giraffes and orangatans to from this view.
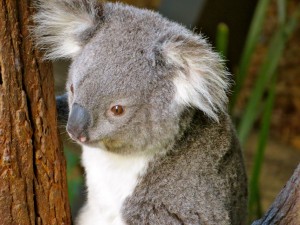
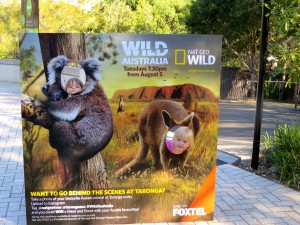
IMG_0134The zoo itself has an extensive collection of Australian animals. As we passed through the entrance we received a free map to help us plan our route. Unfortunately we only had 2 hours to tour this extensive zoo (I would recommend a full day so you can see the entire zoo at leisure and take advantage of the shows and keeper talks as well), so we had to choose our route carefully. Our first priority were the koalas and we were not disappointed. Cuddled up in the trees, we got fantastic views and photos. Commonly called koala bears, koalas are actually not bears and are part of the marsupial family (animals that have young in their pouches). They are not related to bears at all!

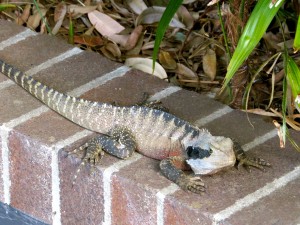
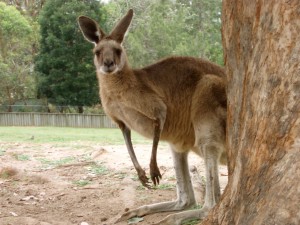
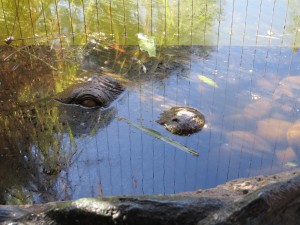
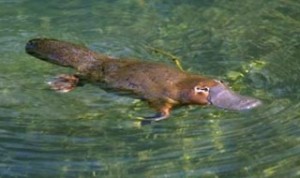
Satisfied we moved on to the rest of the zoo. We saw crocodiles, snakes, lions, tigers, elephants, giraffes, kangaroos, emus, wombats and even a goanna outside on his own. We looked diligently for the platypus in his enclosure, but to no avail (these animals are nocturnal so are hard to catch a glimpse of during the day).

Goanna

Goanna

We managed to cover about 2/3 of the zoo in the time that we had but had to leave because the zoo was closing! We didn’t even get a chance to go into the gift shop 🙁

The other advantage of going to the Taronga Zoo is the stunning views of the Sydney Harbour from atop the hill. Even though we would have liked to have stayed a little longer and finished the zoo, we enjoyed our time there.

The highlights were definitely the koalas, the views, and the ferry ride to get there. There are other wildlife parks in the greater Sydney area, such as the Featherdale Wildlife Park and the Koala Park Sanctuary, which offer opportunities to hand feed some of their animals or experience encounters where you can be face to face! These parks though are located about 30 minutes outside the city.IMG_3383

We cuddled up on the ferry, tired yet satisfied with our afternoon at the zoo, each of us pondering what we liked best, and what our next Australian adventure might be…

 

Sugar Free Apple Crunch Muffins

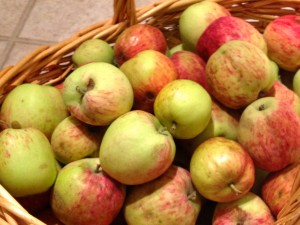
IMG_0565Last week I was telling you about my discovery of apple butter and how delicious it is; and that I was going to explore making my own. With the amount of apples that we have been reaping off our tree I thought that this would be a quick and easy way to use them up. I have been looking at a large bowl full of apples for a week now and knew I had another crisper drawer full in the fridge. Some of them were starting to go soft and I knew that the time was now or never to use these babies up, or they would go to waste.

So last night I Googled an apple butter recipe, and finding one that I Iiked, went to work. This is when I realized that the recipe called for 9 quarts of applesauce. 9 quarts! I quickly converted this to cups and discovered it meant 36 cups of applesauce. Now I have a lot of apples but honestly I didn’t have enough to make 36 cups.

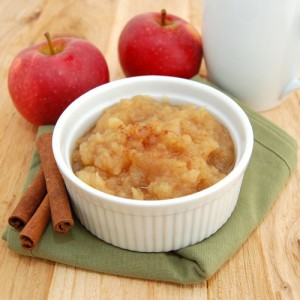
apple-butter-13b_thumbI knew I needed to use up these apples, and though pies and crumbles are yummy and being gobbled up, they were not using up the amount of apples I needed to fast enough. I had to do something with these apples fast or I was going to have a nice pile of brown mush for the compost. I decided to make applesauce regardless as it would use up the rest of the apples quickly. The twins love eating applesauce at breakfast, sometimes sprinkled with cinnamon and I had an apple muffin recipe in mind that required applesauce I was hoping to make.

So I did. I cored and cut them and put them in a pot to cook. Now I make applesauce all the time, but in my recent search for an apple butter recipe I discovered that there was a better way to make applesauce then what I had been doing previously.

baked-applesauceI used to cut and core the apples and put them in a pot, cover them with water and boil them til soft. Then I would drain the water and puree them in the blender. I found that though this was good, the applesauce tended to be a little watery. On this website it suggested a slightly different way. First of all they said to use only an inch of water in the bottom of your pot, as apples are 99% water and they will cook down making their own juices as they cook and soften. The second thing they recommended was that you mush the apples through a sieve, this way you get a nice thick, yet smooth applesauce. This was the method I tried.

I used only an inch of water and let them cook and soften. Then I drained whatever water was left, which wasn’t much, and strained and mushed it through a colander, leaving the peels (which I had left on) on top in the sieve and a nice thick applesauce in the container underneath. I was really impressed with how this turned out and will use this method to make applesauce going forward.

Luke and Chloe really like it too as they gobbled it up at breakfast asking for second and third helpings. I had to hide the rest in order to have enough left to make my muffins.

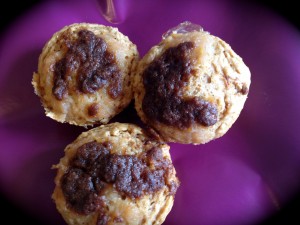
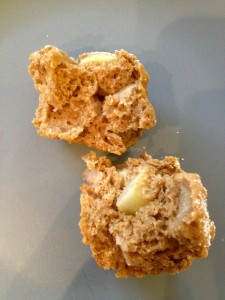
IMG_4146The recipe I had in mind using applesauce was for Apple Crunch muffins; one that my sister made in her home ec class in junior high. It became a favorite in our house, I think because of the yummy sweet topping, and one that was made often. I have since modified it to meet our dairy free and sugar free needs, but find it just as yummy and delicious. In fact I do not notice a difference between the original and the sugar free version.

When the muffins came out of the oven this morning, everyone was quickly asking for a taste. No one was disappointed when they took that first bite and enjoyed the sweet topping, yummy moist applesauce and fresh warm muffin. I really did find that the homemade applesauce did make them taste that much better. But isn’t that always the case with homemade? 🙂

So if you can, when you make these muffins I would recommend homemade applesauce if you have it. If not you can buy an unsweetened natural organic applesauce at Superstore, or your local natural food store.

Now I hope that this is finally the end of our apples (I don’t see anymore on the tree, but you never know…) So there will be no mad rush to use them up or create new recipes. Well… until next year that is…
Enjoy these delicious muffins and maybe double the batch, as they won’t last long. Ours certainly did not!

Apple Crunch Muffins

Topping:

3/4 c. coconut sugarIMG_4134

1/3 c. all purpose flour

2 tbsp. Earth Balance vegan spread

Muffin:

1 c. all purpose flour

1/2 c. whole wheat flour

4 tbsp. coconut sugar

1 tbsp. baking powder

1/2 tsp. sea salt

1/2 tsp. cinnamon

1 egg

3/4 c. almond milk

3 tbsp. olive oil

4 tbsp. applesauce

Make topping by mixing coconut sugar, flour and Earth Balance; set aside. In a medium bowl, mix flour, coconut sugar, baking powder, salt and cinnamon. In a separate bowl, mix together egg, almond milk and olive oil. Add to dry ingredients and stir until combined.

Drop cupcake liners into muffin tin, or grease tin with Earth Balance. Fill each 2/3 full, then top with applesauce and topping.

Bake at 375 F for approximately 20 minutes. When toothpick comes out clean muffins are done. Place on a cooling rack, let cool 5 minutes in pan. After 5 minutes, remove muffins from tin and let completely cool. Muffins can be stored in an airtight container.

Makes 12 muffins

What are some yummy recipes you have that use applesauce? Share them in the comments below.

Off to the Land Down Under – Sydney Harbour Highlights

IMG_3713I love Australia! Ever since I was a little girl I have been fascinated with the Land Down Under. Koalas, the Opera House, and the Harbour Bridge, all icons of this beautiful country. I really wanted to go there and explore, see if all the magic and mystery of this country I had built up, was real. Was it all that it was cracked up to be?

I wanted to go so badly that even though I was deathly afraid of snakes, of which the top 20 most poisonous exist in Australia, and greatly concerned about crocodiles; these things did not deter me – I was going. And now I have had the great privilege of going twice to this fabulous country. Truly unique in all it’s flora and fauna, animal species and human species too 🙂

The first time we went was back in 2007, when my oldest son was 4. We traveled for 3 months and explored a good part of the country. I actually never thought that I would go back. Then when my sister announced that she was going with her family to live there for a year, I knew that I could not pass up this second opportunity. Now with 2 more children, I made my plans to go. Would we travel to places we had been before? or would we see some of the places I had missed and wanted to go to? So I promptly turned to my Fodor’s Australia book, taking the newest version out of the library. (This is something I highly recommend wherever you travel, get a book on the area before you go and do some research on what there is to see and do. Always find the newest version as it will have the most up to date information on prices, etc. and it will save you a lot of time when you’re there; as well as give you a good framework or route for your travels.)

IMG_0134Though we were only going for 3 and a half weeks this time, we decided to do a bit of both. Enjoying the places I had been before, remembering and doing new things in those areas.  Places felt familiar and comfortable, which got me excited and nostalgic at the same time.

This is how I felt when we first arrived in Sydney, our first stop on our Aussie adventure. It was neat to recognize areas and see how they may have changed, to feel oriented in a place I hadn’t been for 7 years, and to then expand upon what I knew, as well as explore new places and with new people.

Sydney and Red Centre 078One of the unique things about our stay in Sydney this time around was that we stayed with an old friend of mine that I had met in the UK back when I was fresh out of university. Not only did we get to catch up, but staying with a local is always a rich experience as they are able to give you insight into Sydney life that you might not find otherwise. Dana was not only able to make recommendations on what to see and do, especially with the kids, but also able to orient us as to where we were and how to get to various places, whether it be the Sydney Harbour or the local Coles (grocery store) down the road.

Sydney and Red Centre 075There is so much to do in Sydney, from a plethora of museums (lots of great museums for kids, such as the Powerhouse Museum and Australian National Maritime Museum) and beaches, to walks, parks (love the Chinese Garden of Friendship) and significant monuments.

Our first day there, was a beautiful winter day. The sun was shining, bright blue sky and about 20 degrees. Yes cold for Australians, but pleasant shorts weather for us. I was already loving Australia in winter. 🙂 We had decided that day we were going to take the kids to the Taronga Zoo, after a short walk down exploring the Sydney Harbour and waterfront where we had to catch the ferry at Circular Quay. According to Dana it was only about a 20 minute walk away.

It was a beautiful walk. Straight down from her place led us past Harry’s Cafe, famous for their meat pies (and a place I wanted to go to since my last visit), to the waterfront paths, which wound along the water past Mrs. Macquarie’s chair and the Botanical Gardens, before reaching the Sydney Opera House and Circular Quay.

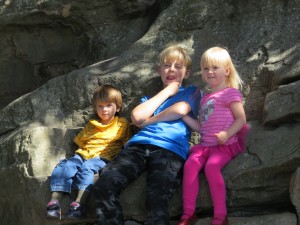
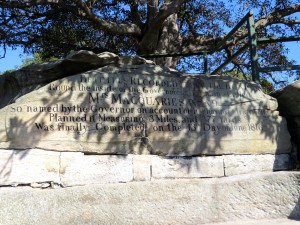
IMG_0101Mrs. Macquarie’s Chair is one of my favorite places along the waterfront and was one of our first stops on our walk. Having been here before I knew that this was a place I wanted to stop and enjoy again. Mrs Macquarie’s Chair, otherwise known as Lady Macquarie’s Chair, provides one of the best viewpoints in Sydney. The historic chair was carved out of a rock ledge for Governor Lachlan Macquarie’s wife, Elizabeth, as she was known to visit the area and sit enjoying the panoramic views of the harbour. It is neat for kids as they get to sit in this gigantic ‘chair’ or climb it, as the little ones tended more to do. As adults, we took all the photos we could and enjoyed the views in between ensuring the kids did not climb too high or fall down. Somehow we all got an experience and created our memories. For me, I was reflecting on my time there before and creating new ones (in amongst ‘be carefuls’ and ‘climb over there’)

For Luke and Chloe, they were just excited to be there and Matthew well he was doing his best to ponder the meaning of life, while trying to remember being there before.

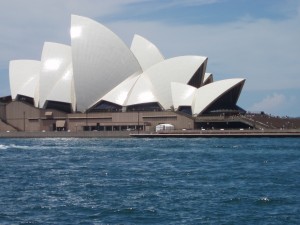
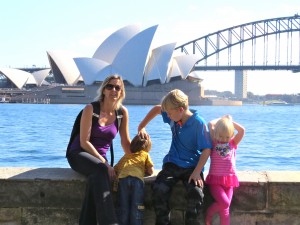
IMG_0107As we continued on our way and rounded Mrs. Macquarie’s Point, (directly east of the Opera House on the eastern edge of the Botanical Gardens), we were rewarded with the best and most famous view in Sydney, the Opera House and Harbour Bridge behind.

Also one of my favorites, and something I would not miss, no matter how short my time in Sydney. The Opera House with its ‘billowing sails’ and the Harbour Bridge behind is a beautiful majestic sight that amazes me and gives me goose bumps each time I see it. Personally I could have stopped there, or at least meandered down to the cafes by the Opera House and spent the rest of the afternoon there on the harbour. Enjoying a latte or a glass of wine, just soaking up the atmosphere. But we had promised the kids some animals, koalas and kangaroos to be specific (and honestly they would not sit leisurely while we enjoyed wine and lattes), so after a yummy lunch of fish and chips (which at this point during the trip was a novel idea – more on that later), we grabbed the ferry to the Taronga Zoo. Which that was an adventure in itself!Aussie Highlights 056

Tune in next week for our discoveries and advenures at the Taronga Zoo

Strawberry Rhubarb Muffins

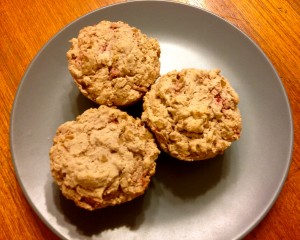
IMG_4129I think I have finally rubbed off on my mother. All these years of me changing my eating (dairy free, sugar free and sometimes though now more often gluten free) and hanging out at her house. She was always very accommodating and ensured the meals met our needs.

But now she has gone off on her own! and is giving me all kinds of new recipes to try. It kick started when she and my Dad did a cleanse this past summer. Mum discovered some fabulous and tasty new recipes that they have now made part of their regular diet. So when they were here visiting recently Mum made a couple of her new favorite gluten free muffin recipes – pumpkin and a fruit one. I say a fruit one because we had yet to decide what kind of fruit it would be. This recipe (below) Mum uses as a base but has experimented using different fruit and nut combinations, like peach pecan, nectarine almond, etc.

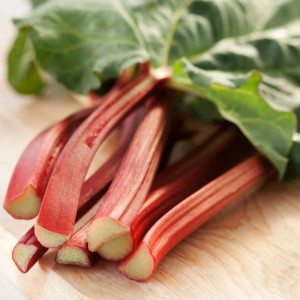
strawberriespictureThe day she was making the muffins at our place, my daughter Chloe, suggested Mum use strawberries and rhubarb. We just happened to have some rhubarb in the the freezer left over from earlier in the summer when I made a sugar free strawberry rhubarb pie for the first time, and Mum bought some strawberries. Voila! We were set.

Mum was a little unsure how they would turn out but was willing to try the combination. For me, knowing how much I enjoy strawberry rhubarb pie had no doubt that it would be fabulous!

And of course, they were. Fresh and warm out of the oven, all the adults got to try them first, as the kids were all in bed (yay for us!). They were delicious! Moist, tasty and full of flavor. My Mum thought they could use a little more fruit but she prefers lots of fruit in her muffin. I thought it was fine, just our personal preferences.

What I also really like about this recipe is there are no eggs, you use chia seeds as the replacement and I think that is fabulous! Not only do you eliminate the eggs, but now you are adding a superfood. Fantastic!

So whether you are gluten free or not these are an excellent muffin. Give them a try and comment below, letting me know what you think.

Gluten Free Strawberry Rhubarb Muffins

2 c. brown rice flourRhubarb-timperley-early1-300x300

1/2 c. arrowroot powder

1/2 tsp. baking soda

2 tsp. baking powder

1 tsp. cinnamon

1/4 tsp. salt

2 tbsp. chia seeds

3/4 c. warm water

1 c. strawberries

1 c. rhubarb

1/3 c. coconut oil, melted

1/3 c. coconut sugar

1-2 tsp. vanilla

1/2 c. walnuts

In a large bowl combine brown rice flour, arrowroot powder, baking soda, baking powder, cinnamon and salt.

In another medium sized bowl, whisk together chia seeds and water. Mix in strawberries and rhubarb, coconut oil, coconut sugar and vanilla.

Pour wet ingredients over dry and gently mix. Do not over mix. Fold in walnuts.

Line muffin tin with paper liners or grease tin with coconut oil. Spoon batter into each cup. Bake at 350F for about 20-25 minutes.

Enjoy!

Makes 12-15 moist delicious muffins

For the Love of Fall… and a peek of what’s to come

IMG_3169

Camping in Drumheller

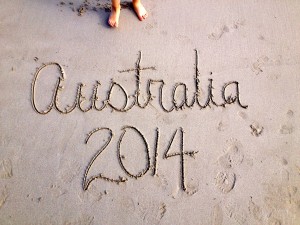
It’s that time of year again, back to school, back to routines and also time to try new things.   We had a fantastic summer full of camping trips, days at the lake and all kinds of other adventures. You may have noticed I was suspiciously absent during the month of August. This is because I packed up the kids and went to Australia for 3 and a half weeks! My sister is there for a year with her family as her husband is on a teacher exchange.

I couldn’t resist the opportunity, as Australia is a place I absolutely love! And even though I have been before there is so much to see and do, it was time to go again. Plus this time we included a week in New Zealand, which I had not been to before.

IMG_0110

Sydney Harbour, Australia

As a result I have tons of things to share with you and lots of blog posts to write about where to go and what to see in that area of the world. So this Fall I will include a weekly feature about some fabulous place in Australia or New Zealand. Giving you the scoop on how it works for families and children and what recommendations we have.

Also this Fall I will continue with sharing fabulous recipes that I have found and tried, that are sugar and dairy free, and sometimes gluten free. There seems to be an endless stream of yummy recipes out there! and I have a big bag (literally) full of them to try. For instance this morning I made Apple Cinnamon muffins again, which I tried last year and we really enjoyed. This year I tried something a little different, using leftover almond mash from making almond milk. They were so moist and yummy… Of course I promptly shared them with my neighbor and friends this morning over coffee as we sat outside amongst the beautiful fall leaves.

IMG_2135

Apple Cake Muffin

These are the posts I will guarantee in amongst all the joys, trials and insights of having 3 children, whether it be tips on how to get them out the door in the morning or programs and crafts that I would recommend. And sometimes whatever moves me, whether it be a good book I’ve enjoyed or a moment I need to share. This is the joy of blogging!

Right now I am up to my ears in apples, like last year, we have reaped an abundant crop from our tree and are enjoying apple everything. I have made more crumbles than I can count, as well as pie, muffins, smoothies (ever tried an apple pie smoothie? Yum!), juice, etc. Though I have recently discovered apple butter – OMG! delicious and might try making that.

Fall is also my most favorite time of year! and I get super excited and motivated at this time of the year. Seasonally it is a time of ending, getting ready for a period of ‘rest’, but I see it as a time of new beginnings with all kinds of things that I want to try, or the kids want to try. Plus I love the warm golden sunny days, and the crisp Fall evenings. Gorgeous.

IMG_4087With that, I will leave you with the promise of what’s to come, and thoughts of what you’re favorite things about Fall are, or famous apple recipes you love. May you enjoy all that the season has to bring and more.

What are your favorite things/ activities in Fall? Have any good apple recipes? I’d love to try them. Please post in the comments below.

The Perfect Dill Pickle – How to Make your Own

IMG_1871My mother has always made the best dill pickles! Ever since I was little I remember having homemade pickles. I remember going out to the valley in the summertime and picking mountains of cucumbers and how Mom always said I was a ‘good picker’ (which meant I would get in there and pick well and for hours until we were done).

I always enjoyed going up to the farmer at the end of our day and weighing the cukes to see how many pounds we had picked. Then we would head home and Mum would get to work pickling the cukes for the yummy pickles that were to come.

IMG_1917She made jars and jars of them. At least 80-100 each time, as we would go through a jar of pickles a week in our family. The kitchen was set up industriously, or it seemed so, while my Mum completed all the steps for making pickles. We often had sandwiches or leftovers for dinner during this time as Mum did not want to stop to make dinner! But we didn’t mind and it was what we expected at that time of year.

When I first moved away I asked my Mum to make me pickles and send them to me. I had become a pickle snob and I would only eat my Mum’s homemade. I would refuse to buy the ones in the store! She lovingly did this for a while, but when my parents moved to the Okanagan, it was then the perfect time for her to teach me the art of making the perfect dill pickle.

IMG_1867When the pickling cukes were ready she called and I packed up the family and went out to BC to make pickles. The first time I did it I don’t think I was paying that close attention – (ha ha sorry Mum), but I think I was just so excited to be making my own that the information on what I was doing didn’t stick. Last summer, when we were out of pickles and I headed to BC once more, was the time that it stuck on what to do.

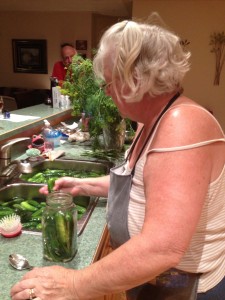
I remember commenting to my mother how many steps there were and I didn’t realize that there were so many. Now I more fully understand why she was in the kitchen for days doing the cucumbers.

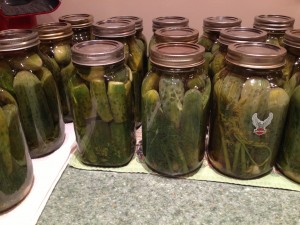
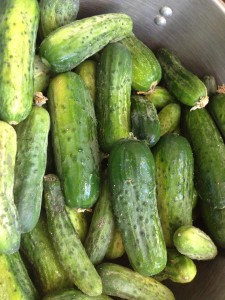
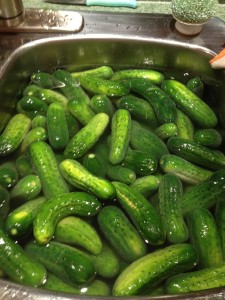
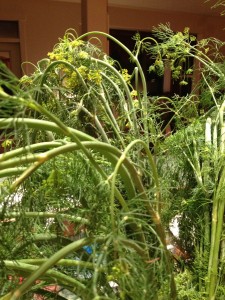
I had bought 40 lbs of cucumbers, which usually works out to about 40 jars of pickles; and some fresh dill from a local farm in Kelowna. With everything ready to go we set to work. We had soaked the cucumbers during the day so by the evening after supper we were ready to go.

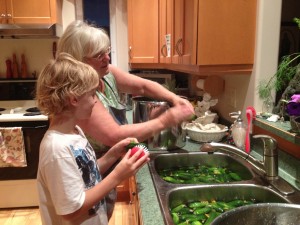
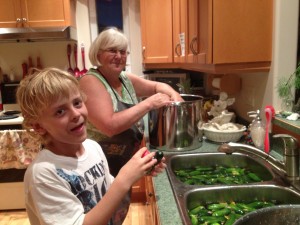
Matthew assisted with the cleaning and scrubbing of the cucumbers as that night he was given the option of going to bed or scrubbing cucumbers. He chose the cukes! which I thought was a hilarious way to avoid going to sleep but enjoyed his company and appreciated his help nonetheless.

IMG_1913We moved through all the steps and in only a few hours had finished all the jars and were ready to put our feet up and relax. Now the traditional dill pickle recipe does call for a tablespoon of brown sugar, which due to living sugar free I had to make a decision. I decided to leave it as I loved these pickles so much. But what I did do was an experiment. I made a number of jars using coconut sugar in place of the brown sugar, then I marked those jars so I would be able to tell which ones were which. I have yet to open a jar in which we used the coconut sugar, but I am very interested to see how they taste. I am hoping of course that it works, then we can also make our dill pickles sugar free and just as delicious! Of course, once we open them and give them a taste I will definitely share the result!

In the meantime, here is the traditional recipe for fabulous homemade dill pickles. One of the things I really enjoy about making them is doing it together with my Mum (and Matthew when he’s wanting to help). Not only does it make the job go by faster but it is a great bonding experience, where we can chat and connect, while completing the task at hand.

The only downside is we have to wait a few months before we can eat them! as they are not instantly ready. But trust me, it is worth the wait – and you to will become a dill pickle snob 🙂

Dill Pickles  

freshly picked cucumbers in a variety of sizes (choose the size of pickles you like but it is also nice to have some small ones to fit the ‘holes’ in the jars)  1 lb cucumbers yields approx one quart jar

fresh dillIMG_1869

pickling salt

brown sugar (coconut sugar)

pickling vinegar

fresh garlic

water

1 quart jars

Prepare the Cucumbers:

IMG_1916Soak freshly picked cucumbers in ice water overnight or at least, six hours. (This aids in removing the prickles off the cucumber as well as cleansing them).   Add more ice, at least once, as water begins to cool.  Scrub each cucumber with a vegetable brush, and return to cold water.

Wash and sterilize the jars:

Wash jars in hot soapy water and rinse well.  Then add a bit of water, just to cover the bottom, in each jar.  Place the jars on the rack in the oven, heated to 200 F.  This will sterilze them and make them hot, which is what you want because you will be pouring hot brine into them.  Option:  jars can also be heated in the microwave, again bit of water in the bottom of each jar and heat on high for 2-3 minutes; time varies depending on the number of jars you do at one time.

Sterilize and heat lids:

Place the lids and tops of the jars in a pot filled with water to cover them and heat to the boiling point.  Turn down heat, but keep them hot to pack the jars.

Prepare the Brine:

water

pickling vinegar

For each 4 cups of water, add 3/4 cups of pickling vinegar. The total amount  you make will depend on how many jars of pickles you are making. Using a large dutch oven pot you can make a triple batch, and then more as needed.

Mix water and pickling vinegar together and bring to a boil.  Keep hot until ready to pour into packed jars.

Pack the Jars:

IMG_1915

Fresh Dill

Put about 3 medium size pieces of garlic in bottom of jar. Add fresh dill, approx 2-3 “sprays” including the stalk.  Bend and arrange to fit in jar. Pack cucumbers in jar, quite tightly, using smaller cucumbers to fill the top space.  Add 1 tbsp of pickling salt and 1 tbsp of brown sugar or coconut sugar on top of packed cucumbers.  Pour hot brine over everything in jar to just below the rim of jar.

Seal the Jars:

Wipe the top of the jar with a cloth to make sure there are no particles of anything to interfere with the seal.  Place hot lid on top.  Add screw top.  Press down on lid as you are turning the screw top to seal.  Tighten securely.

Cool and Store:

Let stand, away from drafts until jar cools completely.  Label and store in cool, dark place.  It will be approx eight weeks minimum before pickles will be ready to eat.  Best if left for 3-4 months.

Bonding 40 feet in the Trees

Bonding with my oldest son is a bit of a challenge these days. He’s 11 and into all kinds of things that are not a huge interest to me. I’m 41 and his Mom, so there are not a lot of things that I like that are of interest to him. We do have some common ground of course, we both love board games, especially Settlers of Catan, so you will often find us in the evenings battling it out for the longest road and the most settlements.

Sometimes it’s a timing thing to, I’m making supper, or having to tend to his younger brother and sister. So when we had the opportunity to go to Sky Trek in Revelstoke, British Columbia to do the high ropes course; I jumped all over it.

P7290215We had been to the Enchanted Forest next door earlier that morning with my Mom and the twins, which we thoroughly enjoyed. But Matthew and I were both kind of eyeing the course through the trees. I had always wanted to go there since they opened and though Matthew had had the opportunity when he was about 5 to do the kids course, he wanted to get up high in the trees. So when Matthew asked about the course I said well let’s go check it out.

His eyes lit up, he was so excited with just the prospect of ‘maybe’ going. We discovered that the course took 1-3 hours to complete and though reasonably priced we wondered what Gran and the twins would do for that long.

My Mom graciously offered to watch the twins while we went and did the course. So after a quick lunch, off we went! I grabbed my closed toed shoes from the car, which I was glad I had thrown in that morning, as there are no open toed or flip flops allowed. Though I wish I had also had the foresight to put in socks, which would have been much more comfortable.

Matthew and I were both excited and almost ran up to the clerk to get going. First of course we had to fill out waivers, then pay, then meet our guide to get geared up and ready to go.

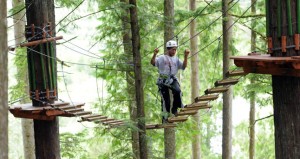
online-skytrek-02The course consists of 4 components, each one getting higher and more difficult as you go. Training is first, where your guide gives you a demonstration of the elements and obstacles, what equipment to use and how to keep yourself strapped in and safe. We all had helmets, harnesses and carabiners. We had 2 that we needed to clip in and each had to be done in a certain way in a certain order. He showed us how to use our zipline attachment as well as telling us only 3 people to a platform and to remember to call clear after we completed an element – which was the cue for the next person to go.

Then there’s the green, blue and black courses, each one getting higher and more difficult as you go. So by the time you hit the black course you are 40 feet in the air and challenged!

Matthew went first and I was following along behind him. At points when we were waiting for others in front of us we would chat or connect, discussing the last element or what was coming up; continually moving higher and higher. I found the first 3 parts comfortable and easy to navigate, but by the time I hit the black I was not only tired but a little freaked out. Some of the elements were pretty tricky and they definitely pushed my comfort zone.

The very last leg of the black course you could choose to do the double black diamond or stay on the single. The double black offering shorter lengths, more rests, but more challenging (lots of swinging obstacles), while the single black was one long haul across a rope net, which was more tiring but a lot easier to do.

Matthew, the trooper, chose the double black. In fact in his mind there was no question as to whether he would do it or not. I applauded him, but said I was going to stick to the single. Matthew did very well, I was so proud of him. The last leg on the double black he was there legs spread apart between two triangle elements, and ‘resting’. I could tell he was tired, but he was almost there and he was determined. It was one of many moments that I was proud of him or maybe got a little teary eyed watching him and how he confidently navigated the course, though at times I knew he was a little freaked out like I was.

We completed the course with one final zip line to the bottom and high fived each other on the ground. We were surprised to discover that it had indeed taken us 3 hours to complete the course. No wonder we were tired!  And thirsty! as you can’t take water or any extra stuff up there with you. In fact I asked a lady on the ground if she would take a few photos of us and send them to me (unfortunately I don’t have them yet), as though there were times when I could have taken a really nice picture or two, there was no way I would have been able to carry the camera!

Some people may argue that because it was an individual activity that it was not really a bonding experience. But I would disagree. We connected and shared an experience where we both pushed our limits and can now share and discuss this experience. I also have etched in my mind some of those great ‘shots’ of him in the trees which will last forever in my mind.

I enjoy experiences like that with my kids and hope I get to have all kinds with each one of them. And I hope that they enjoy them to and that they will stand out in their minds as some of the best experiences they had, even though it was with Mom.

The Enchanted Forest

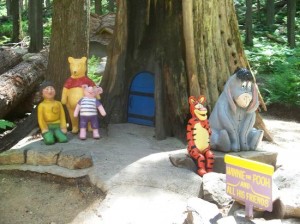
Winnie the Pooh and Friends

Winnie the Pooh and Friends

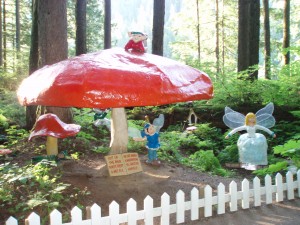
One of the most magical places on earth is The Enchanted Forest. Found along the TransCanada highway between Revelstoke and Sicamous, this beautiful old growth forest is like a child’s dream.

No matter how many times I there I always enjoy it. The beauty and energy of the old growth forest is calming and peaceful. With the delightful storybook and nursery rhyme characters in amongst the trees it truly makes for a magical and wonderful experience.

enchanted-forestIt is a must stop for our family and every time we drive by on the way to Oliver, BC the kids are asking if we can stop there. This summer was the first time for Luke and Chloe. Being 4 years old this was the perfect age for their first experience.

Once you enter your first stop is the Enchanted Castle where the resident wizard welcomes you. You can clamp yourself in the gallows (or any misbehaving children) or explore the dungeons below. Word of caution: the dungeons I find to be dark and scary and definitely not for small children.

Tea for Two

Tea for Two

You can climb the stairs to the tower and enjoy being ‘King of the Castle’, before you continue along the path through the forest. The path then takes you around the forest with stops along the way to play and enjoy the fairytale characters. There is everything from the Three Little Pigs, Snow White, and Winnie the Pooh, to Hansel and Gretel, Old Mother Hubbard and the Cow that Jumped over the Moon.

The forest also hosts the biggest Tree house in British Columbia, with 3 levels and a gorgeous view at the top.

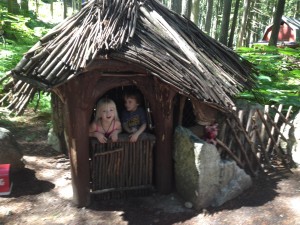
The Three Little Pigs House of Sticks

The Three Little Pigs House of Sticks

There is also a Nature Trail which takes you back further onto the property with opportunities to see beaver dams, row boats and explore other nature items.

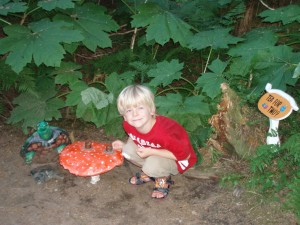
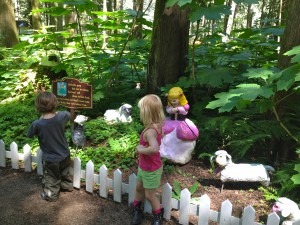
Luke and Chloe dashed and explored everything. Checking out the houses, which are just the right size for 4 year olds, going down the slide at the Old Lady in the Shoe’s house and enjoying the cage at the witches house (Hansel and Gretel). At the end of the trail there is a duck pond where you can buy duck food for 25 cents to feed the ducks.

IMG_3270

Little Bo-Peep

You can easily spend a couple of hours in there and not feel rushed. The great thing is once you’ve paid your admission you can return to the forest throughout the day if you choose to. We went through it twice and they wanted to go a third!

Even my oldest who is almost 11, and has gone many times, still enjoys exploring here. Whether you are exploring the Revelstoke area or just passing through, the Enchanted Forest is a must see for all ages, children and adults alike.P7290227

Camping Desserts – Cinnamon Apple

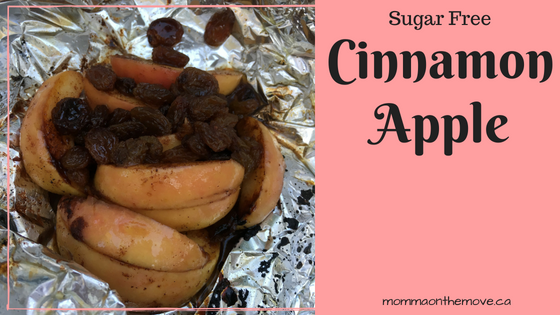
sugar free cinnamon apple

I love the variety of neat camping recipes there are. Especially ones that you can do over the fire that are yummy, sweet and delicious. Usually done over hot coals and in tin foil it makes for even less dishes and a delicious treat or meal.

Our family camping trips always involved TFD’s, or Tin Foil Dinners, which my father usually requested that we have at least twice. But I often enjoyed the dessert options, like s’mores, banana boats and cinnamon apples. Cinnamon apples have always been my favorite, as the brown sugar would melt and make a nice sticky syrup over the apples and raisins, so much that I would often lick the tin foil to make sure I did not miss one drop! Until recently, these camping desserts were something that I had to forgo – until I figured out how to do it sugar and dairy free.

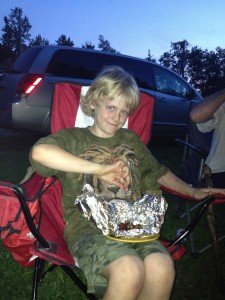
Matthew enjoying his Cinnamon Apple

Matthew enjoying his Cinnamon Apple

As with any recipe I am ‘transforming’, my goal is to figure out how to make so that it is the same as the original, or only a slight difference in taste. My Mum was actually the one who figured this one out. A couple of summers ago she bought coconut sugar and tried it out with the cinnamon apple. It worked perfectly! (Coconut sugar is an excellent natural substitute for brown sugar. It melts just like brown sugar and gives you the syrupy juice.)

I have also figured out how to do banana boats sugar free, also very good, but have yet to try it out on the campfire. (Will post it once I do! )I believe though that it will turn out just as yummy.

Cinnamon apples are easy to make sugar free without compromising the taste! Worth a try on your next camping trip this summer.

Sugar Free Cinnamon Apple

1 apple

cinnamon

coconut sugar

raisins

spoon of Earth Balance vegan buttery spread

heavy duty tin foil

Tear off a large square of heavy duty tin foil. With the shiny side up do the following:

Using Earth Balance, butter middle of tin foil, spreading evenly around. A spoonful is good but if you like you can use more. Slice and core apple, put apple on top of buttered area spreading out slices so they are not on top of each other. Best to slice apples thinly as opposed to in chunks as they soften and cook more quickly. Sprinkle with cinnamon to taste, add raisins. Sprinkle a couple of spoonfuls of coconut sugar over apple mixture. The more coconut sugar you use the more juice you will create. You may add a few dollops of Earth Balance on top also to create more juices.IMG_3357

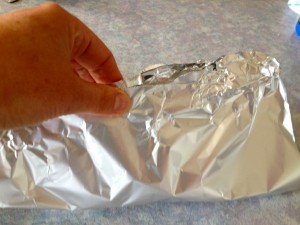
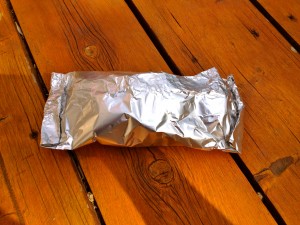
Close foil by matching the edges and folding it down until it is tight.IMG_3361

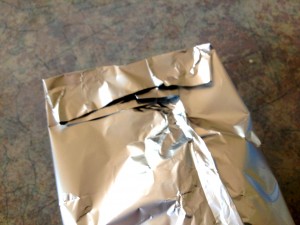
Then fold over and close each side.IMG_3362

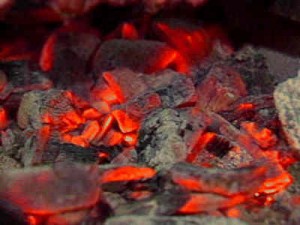
Place foil packet on top of hot coals. Important – ensure that there is no flame amongst your coals otherwise it will burn. Let cook for 5 minutes, then flip over using tongs. You’ll hear the apple sizzling. Check after a few more minutes. Apple should be soft and coconut sugar and butter melted. If it’s not ready wrap it back up and put it back onto the coals and cook for a few more minutes.Bed-Of-Hot-Coals

Once ready unwrap and enjoy! Caution Cinnamon Apple will be very hot. If giving it to small children unwrap and let it cool some before they enjoy.

Strawberry Rhubarb Pie

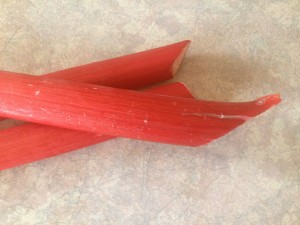
IMG_3349The other day one of my neighbors offered me some fresh rhubarb from her garden. I am not a big fan of rhubarb (and don’t really know a lot about what to do with it) but I do really enjoy strawberry rhubarb pie (and I love making things with ingredients fresh from the garden). Years ago I had found a recipe and tried it. So when Matthew came in and said the neighbor asked if we wanted some I said yes! right away.

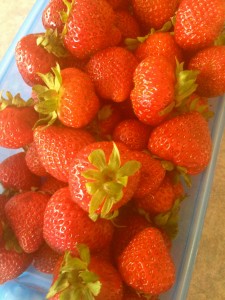
IMG_3330Rhubarb is a tart fruit that on its own is not to my liking but combined with strawberries I find the whole thing delicious. Now those years ago when I first made this pie it was the traditional white sugar filled filling, so this was my first attempt making it sugar free. I was a little nervous because it called for mixing the flour and sugar together but thought that would not work well with the agave nectar (what I chose to substitute for the sugar) being a liquid.

What I decided to do was to mix the flour and salt together and then once everything was in the pie shell to then pour the agave over top, letting it fill in the holes, as well as being on top.

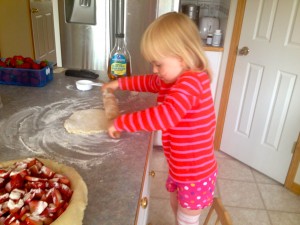
IMG_3335The kids of course love pie, so it didn’t matter to them what kind of pie I was making, just that we were having pie after supper. Chloe actually helped me make the pie and enjoyed assisting in rolling out the pie crust. She also watched me cut the fruit and asked many questions along the way as to why I was doing this or that.

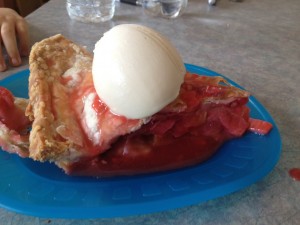
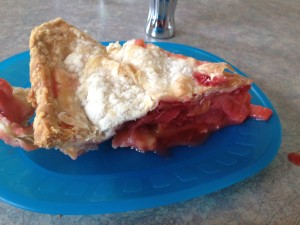
Once the pie was in the oven, everyone settled down. But as soon as it came out after supper I barely had time to let it cool before everyone was asking for a piece. I would have prefered to let it cool much more to allow for the filling to set but they weren’t having any of it. So I cut pieces for everyone and topped it with ice cream.

Oh. my. God. It was delicious! In fact it was even better than the sugar version I had made before. The kids licked and practically ate the plates it was on. And then promptly asked for more!

I feel that anything made fresh and with fresh garden grown ingredients is going to turn out quite well. But this was beyond my expectations, it was sooo good. With just the right combination of sweet.

Strawberry Rhubarb Pie

2-9 inch pie crusts (one for top and bottom)IMG_3331

2/3 c. agave nectar

¼ c. flour

¼ tsp. salt

3 c. chopped rhubarb

3 c. sliced strawberries

Mix flour and salt together, put 1/3 of mixture on the bottom of the pie crust. Add fruit in pie shell, leave slight mound in the center, and pour remaining dry ingredients on top. Pour agave nectar over top of fruit and dry ingredients. Cover with top crust. Pinch edges together to seal. Cut small slits in top of crust.

Bake at 425 F for 10 minutes, then reduce heat to 350 F and bake for 40-50 minutes. Let pie cool for at least 15 minutes before serving to allow the juices to cool and set.IMG_3345