Kids Healthy Cooking – Healthy Sweet Treats

IMG_6963As human beings one of our biggest vices is all things sweet. The same goes for our kids as well, they prefer bananas over carrots, the cookie over the banana and so on. But what if we could create healthy sweet treats for kids that they would not only love and meet their need for sweet, but would provide them with a nutritional impact full of vitamins, minerals and other nutrients?

When we decided to go sugar free at our house I got a lot of looks from other people and questions about how can I deny them all the yummy things that are part of a regular kids life, like cupcakes, chocolates and cookies. The truth is they have never been denied, they still enjoy all those things at our house and more. The difference is not in the taste which is just as yummy if not more so than the ‘original’ – but in what they are made of. We have simply switched to natural sweeteners and added in foods that are super high in nutrients. And honestly they not only gobble them up but request them.

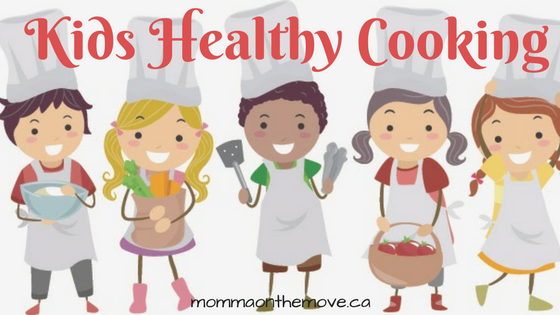
It is easy to make the switch at your house too. Just start slowly adding in one or two recipes and go from there. Make it easy. Plus if you get the kids involved in making these healthy sweet treats your chances of them eating them goes up simply because they have helped.

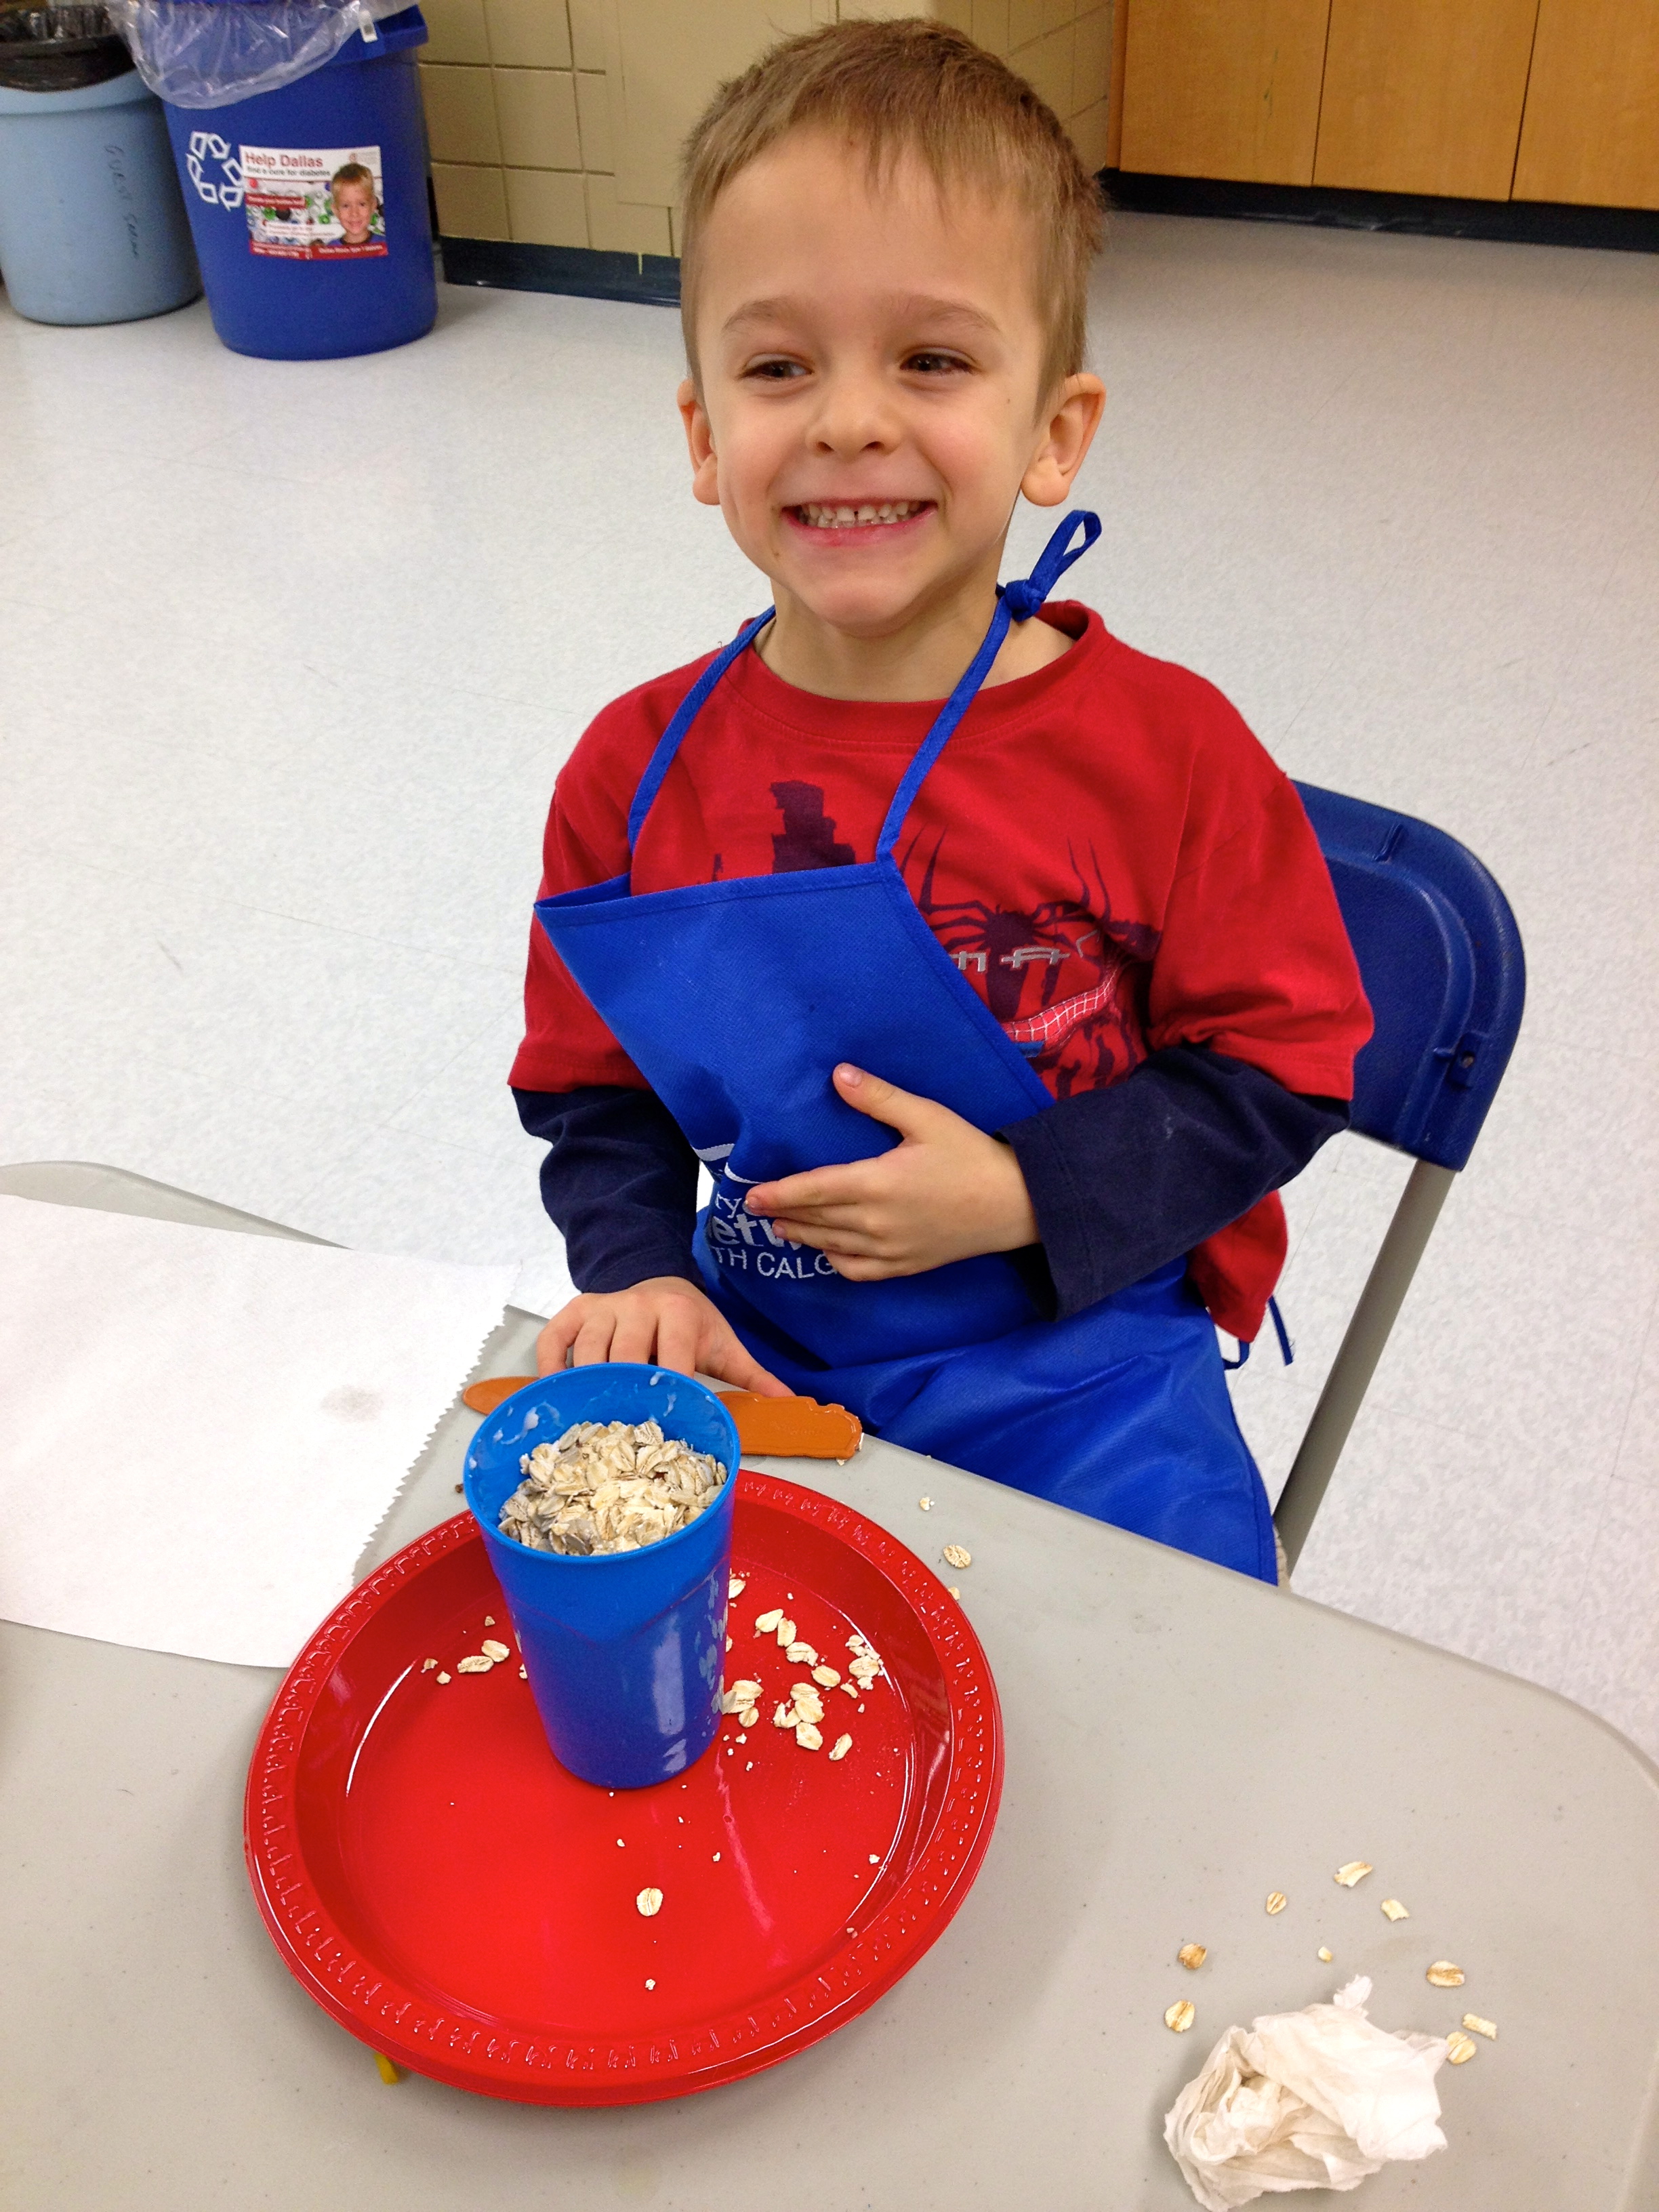
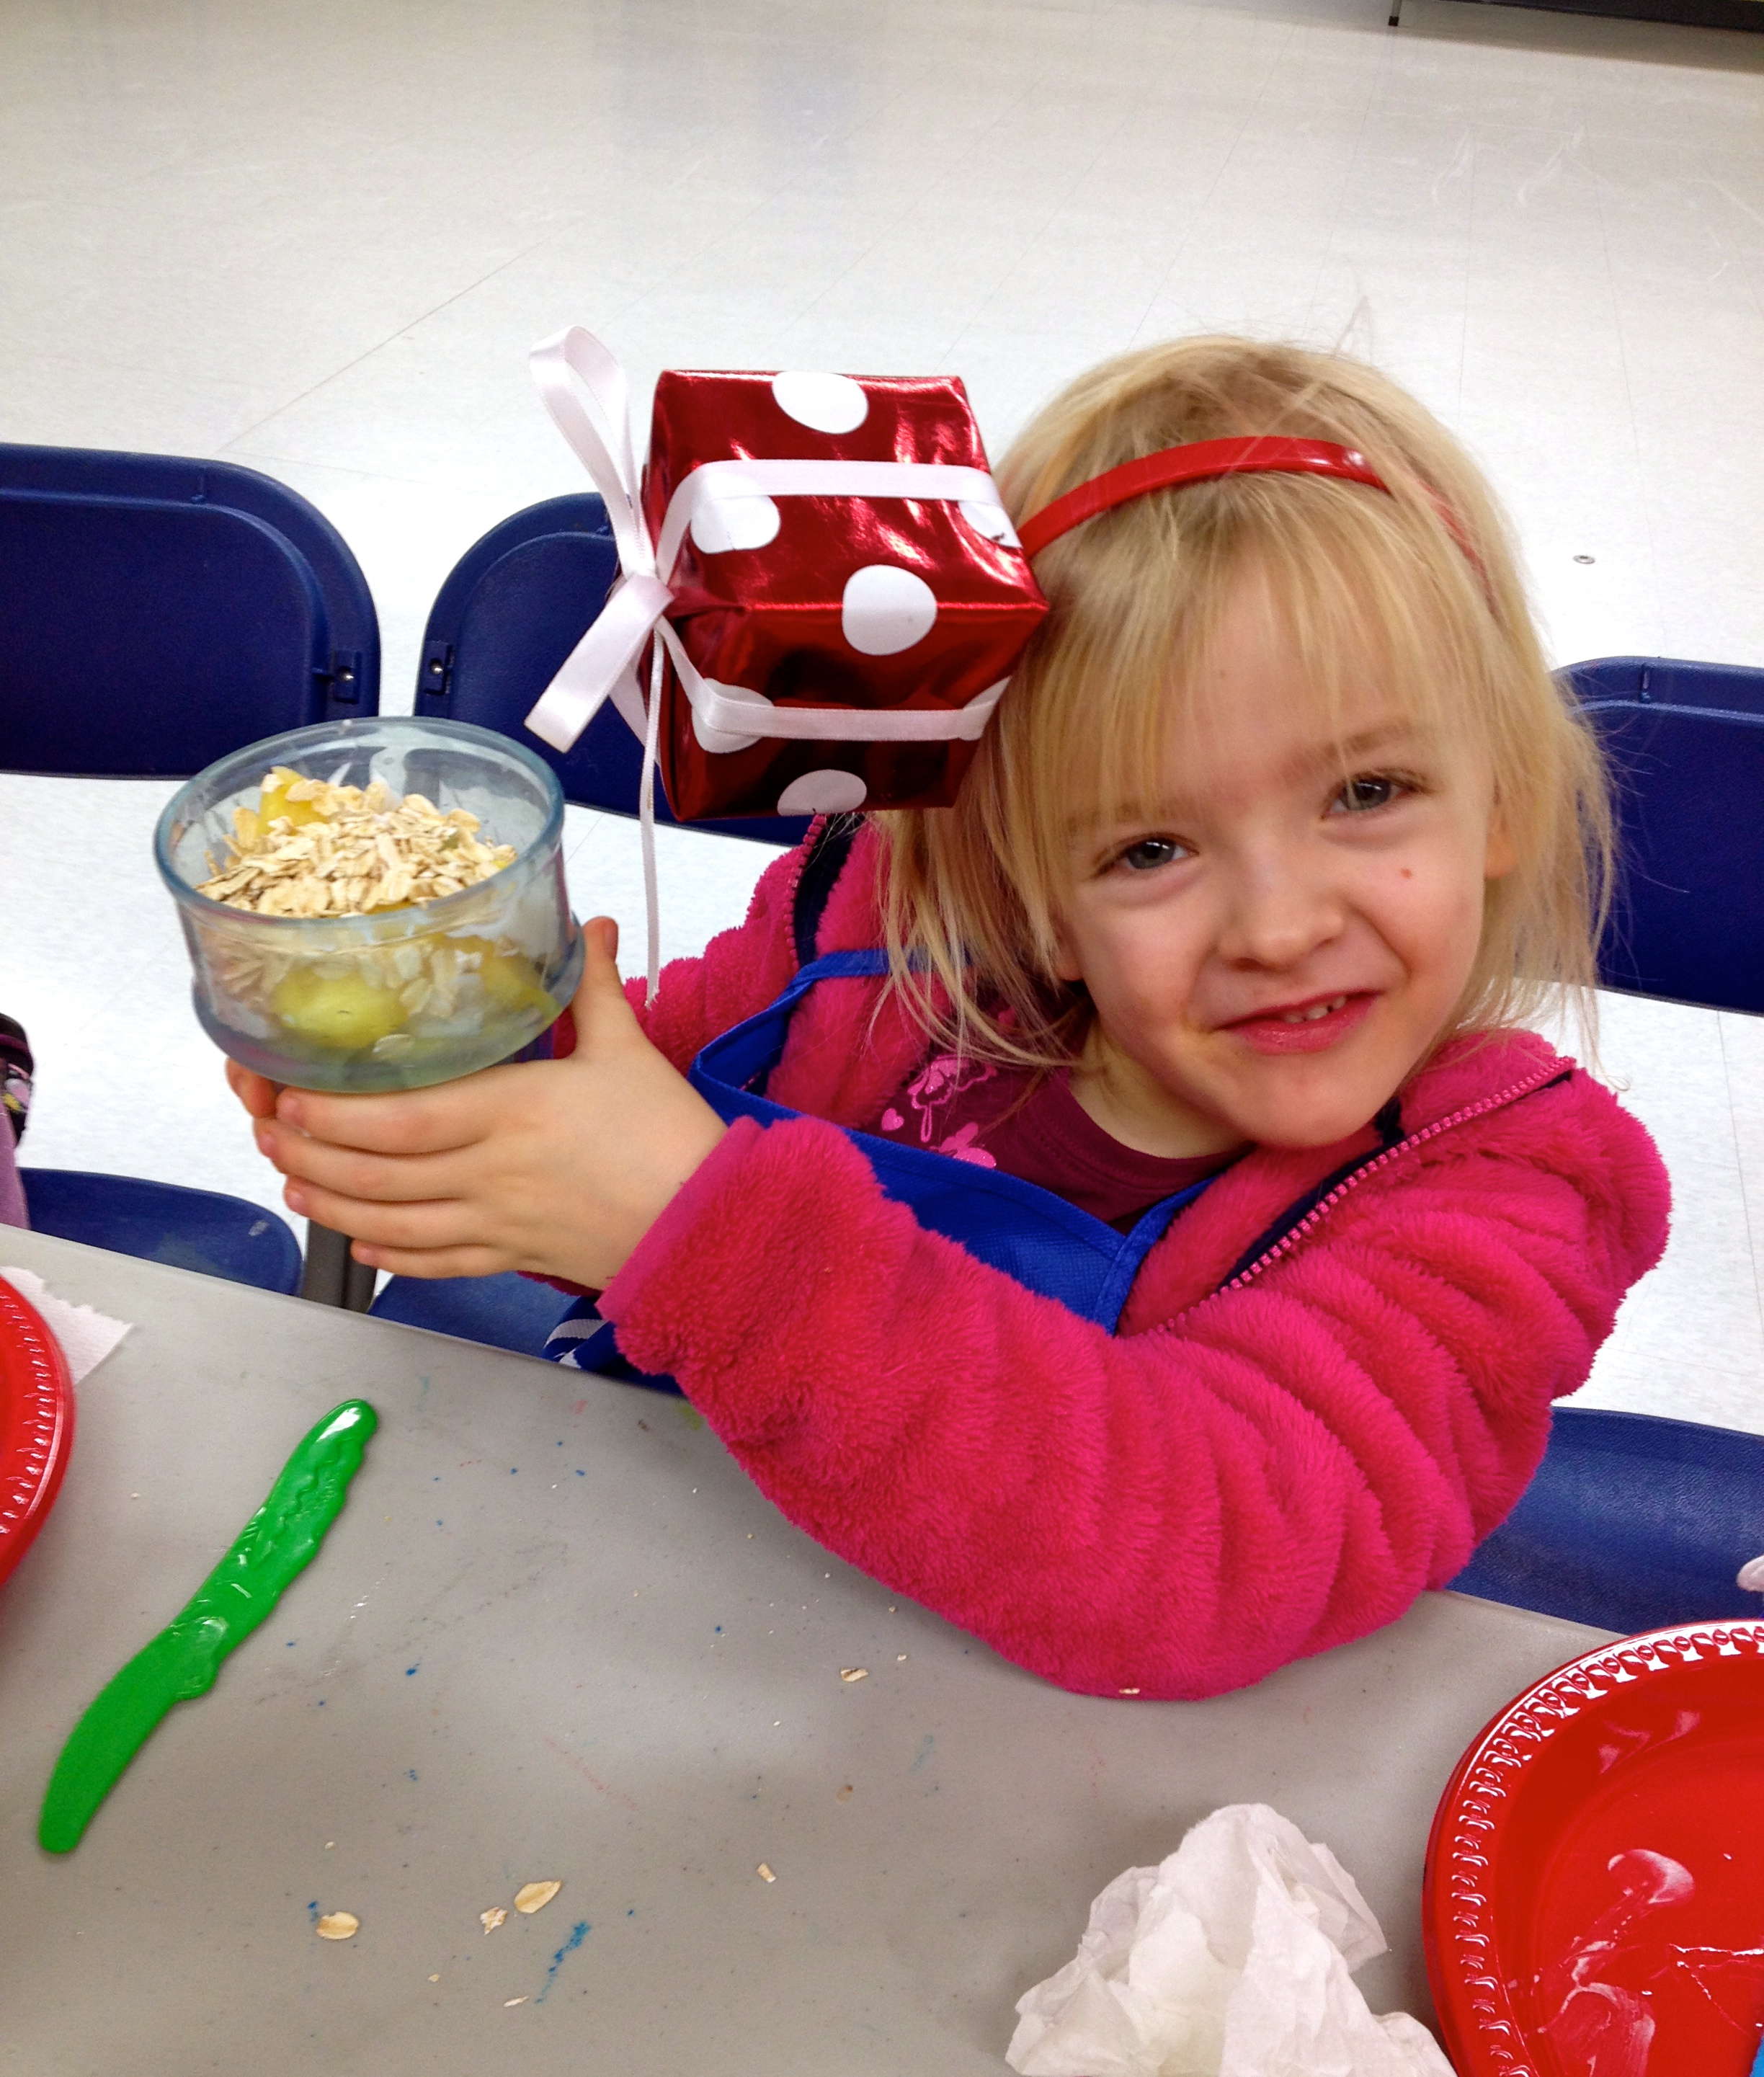
Also starting with ingredients and foods that they like is key to success when getting kids to eat and try new things. If you pick something they like, they are already interested and will be more open. This is why just before Valentine’s Day in our Mini Chefs class I chose two healthy sweet treat recipes for kids that were chocolate. You should have seen the kids eyes get big and how excited they got when I told them what we were making that day was chocolate (same thing happened when we made the chocolate banana smoothie a few weeks ago).

They were all so excited to try it when it was ready to eat, even though they had watched some ‘weird’ ingredients go in like avocado and chia seeds. Chocolate overruled it all.

Raw Chocolate Pudding

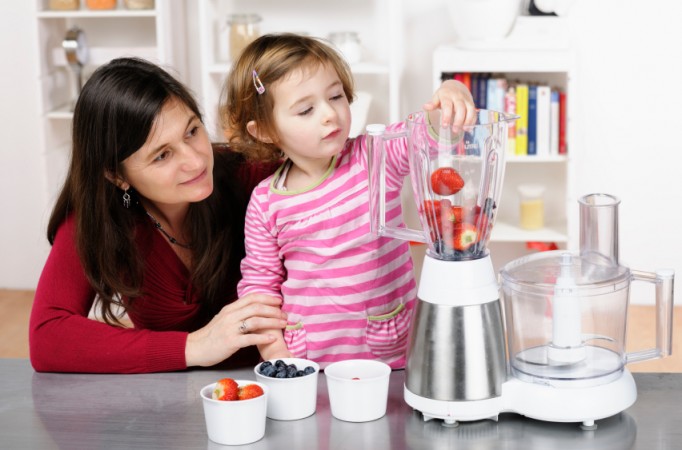
The thing I love about this recipe is the fact that you simply put all the ingredients in the blender and mix. In just minutes you have a smooth, fluffy and delicious chocolate pudding.

2 ripe bananas, peeled and slicedhealthy sweet treats for kids

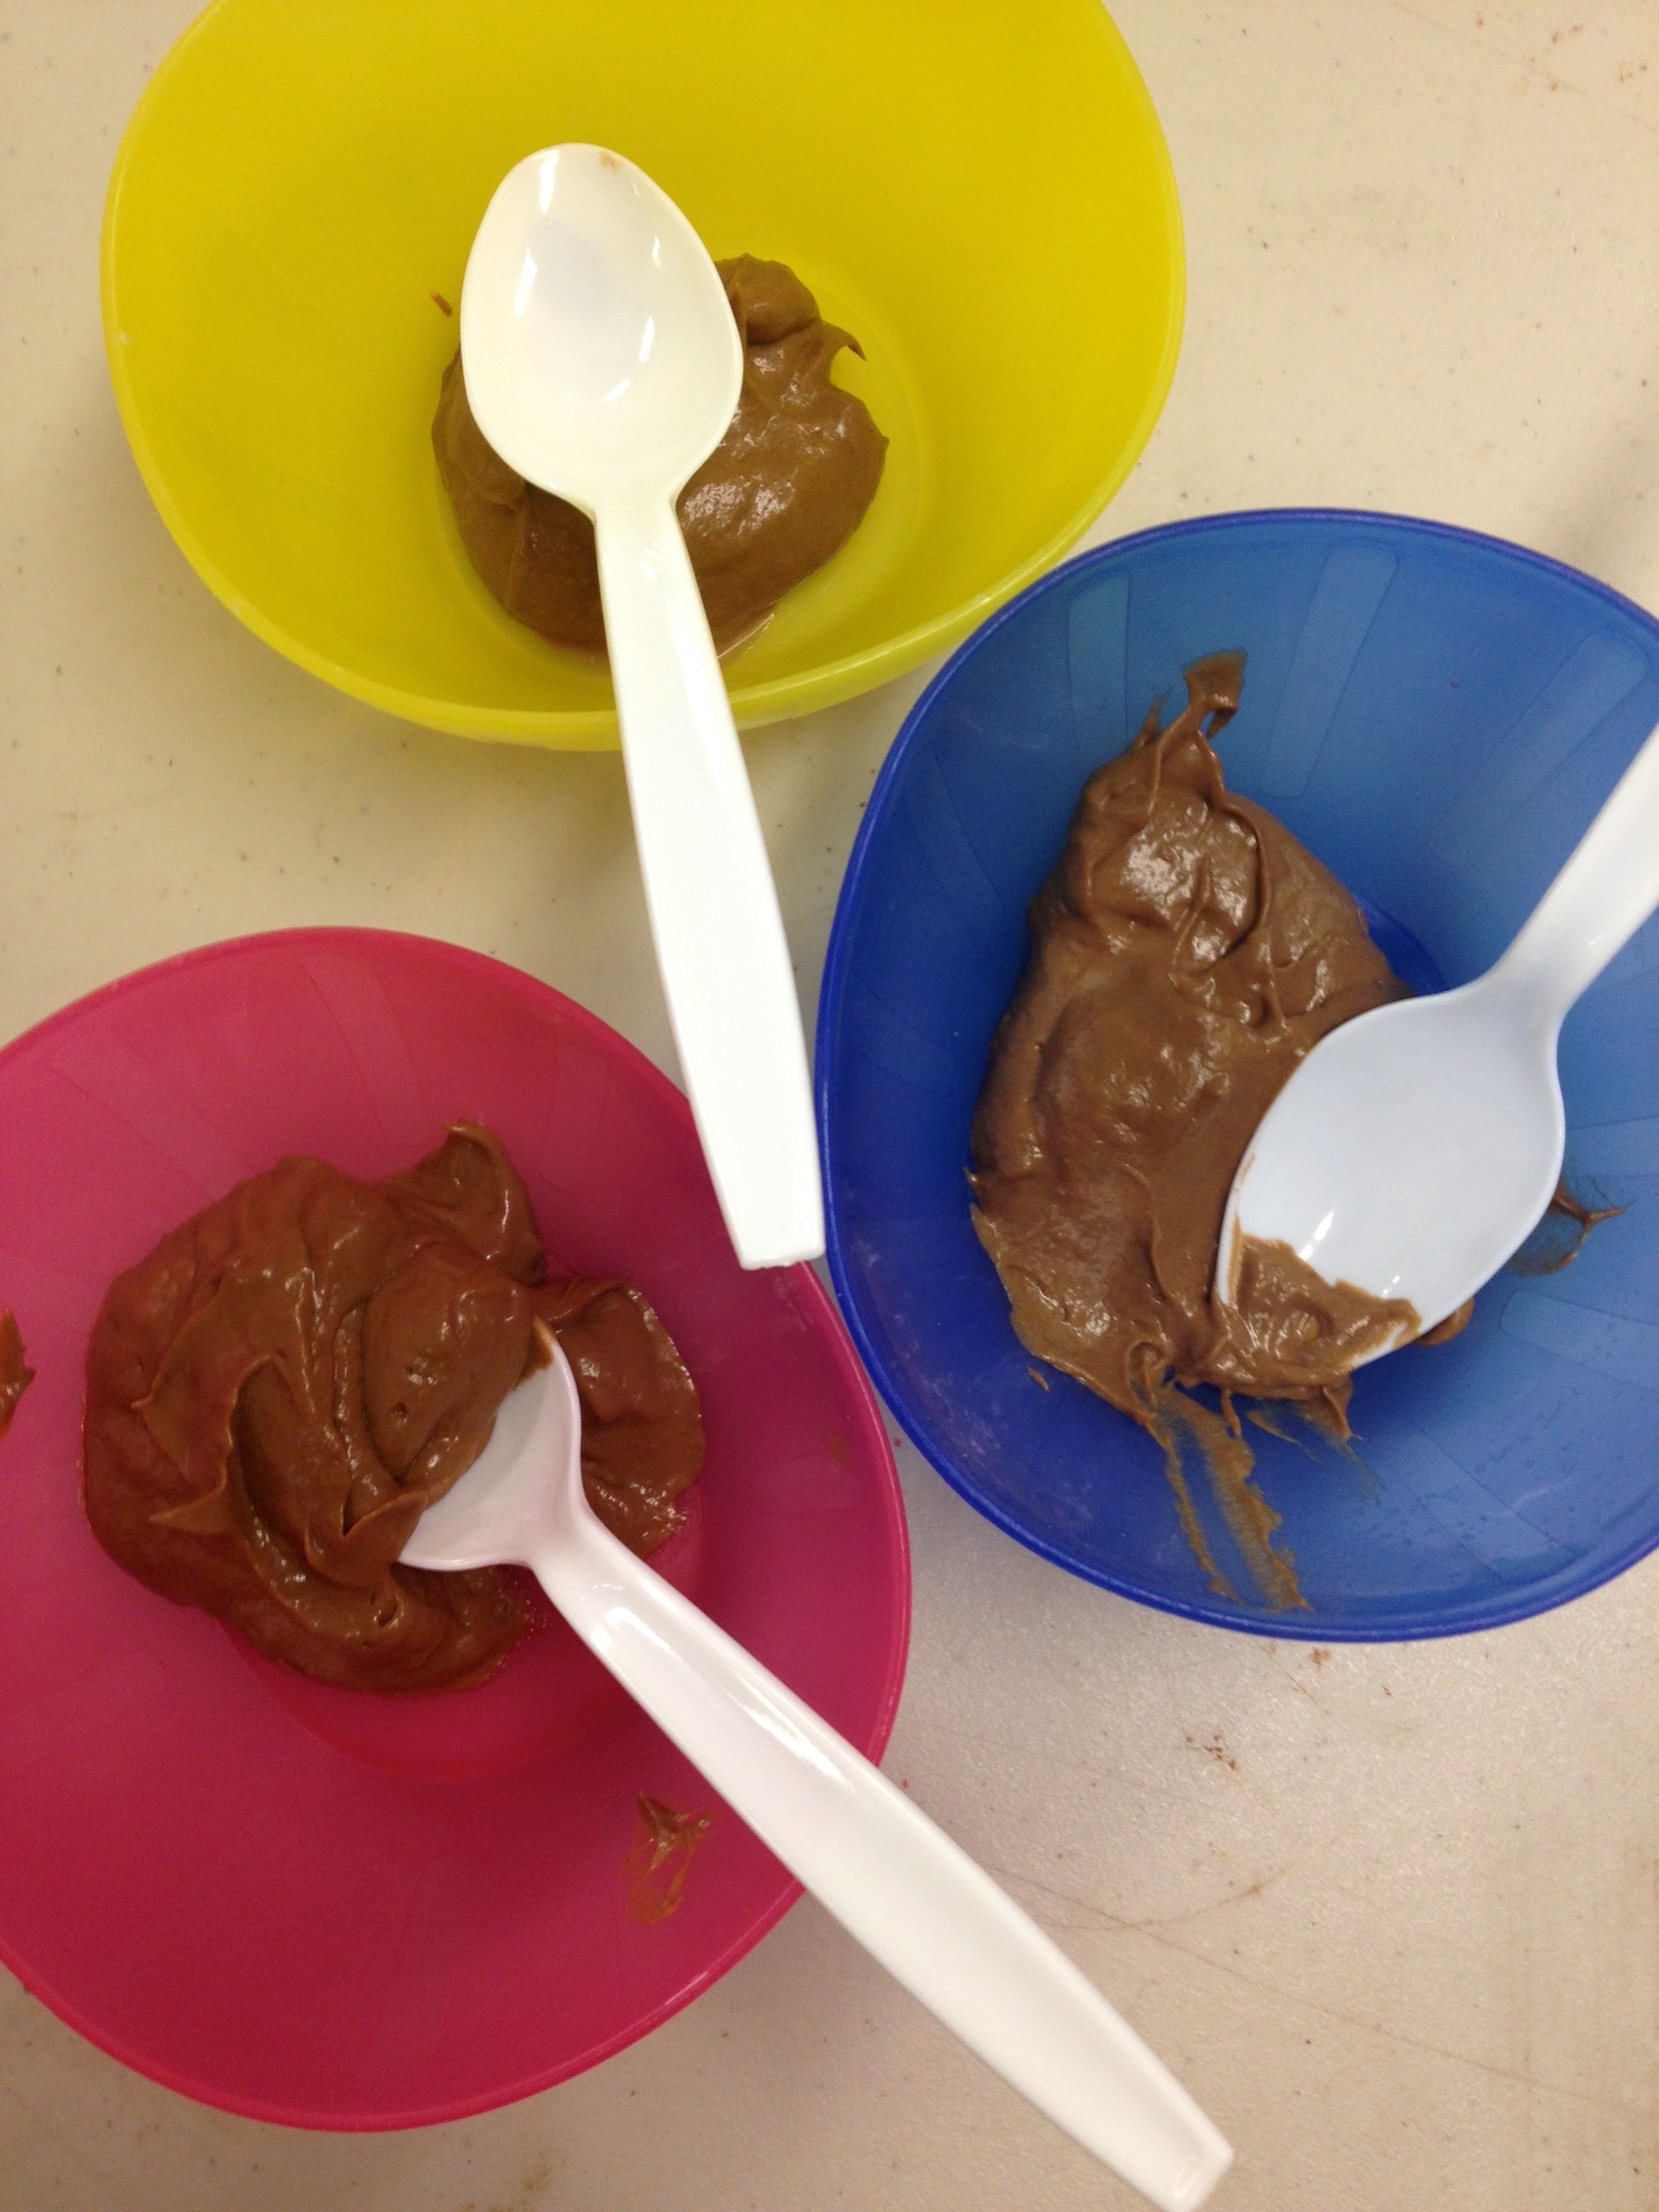
1 avocado, pitted and peeled

2 tbsp. raw cacao powder (this is different than cocao powder)

1 tsp. agave nectar

Put all ingredients in blender in the order listed. Start on low, slowly turn speed up to high. Blend for 30 seconds on high or until desired consistency is reached. *it’s sweet as is, but if you’d like to increase sweetness add more agave nectar to taste – agave is twice as sweet as sugar so use small amounts and taste before adding more 

Avocados are fantastic additions to recipes. Not only are they mild in taste, they are high in vitamins and minerals such as Vitamin K, B5, B6, C and E as well as Omega 3’s. They offer a lot of health benefits like improved mood, reduced stress, good eye health and more. They are also a great food that actually curbs sugar cravings! Because they are high in healthy fats they slow digestion and prevent the body’s blood sugar from spiking after eating. It is also true that when we crave sugar it is often because we are missing certain nutrients and adding a healthy fat will curb this craving as the body becomes satisfied.

No Bake Chocolate Macaroons

1 bananahealthy sweet treats for kids

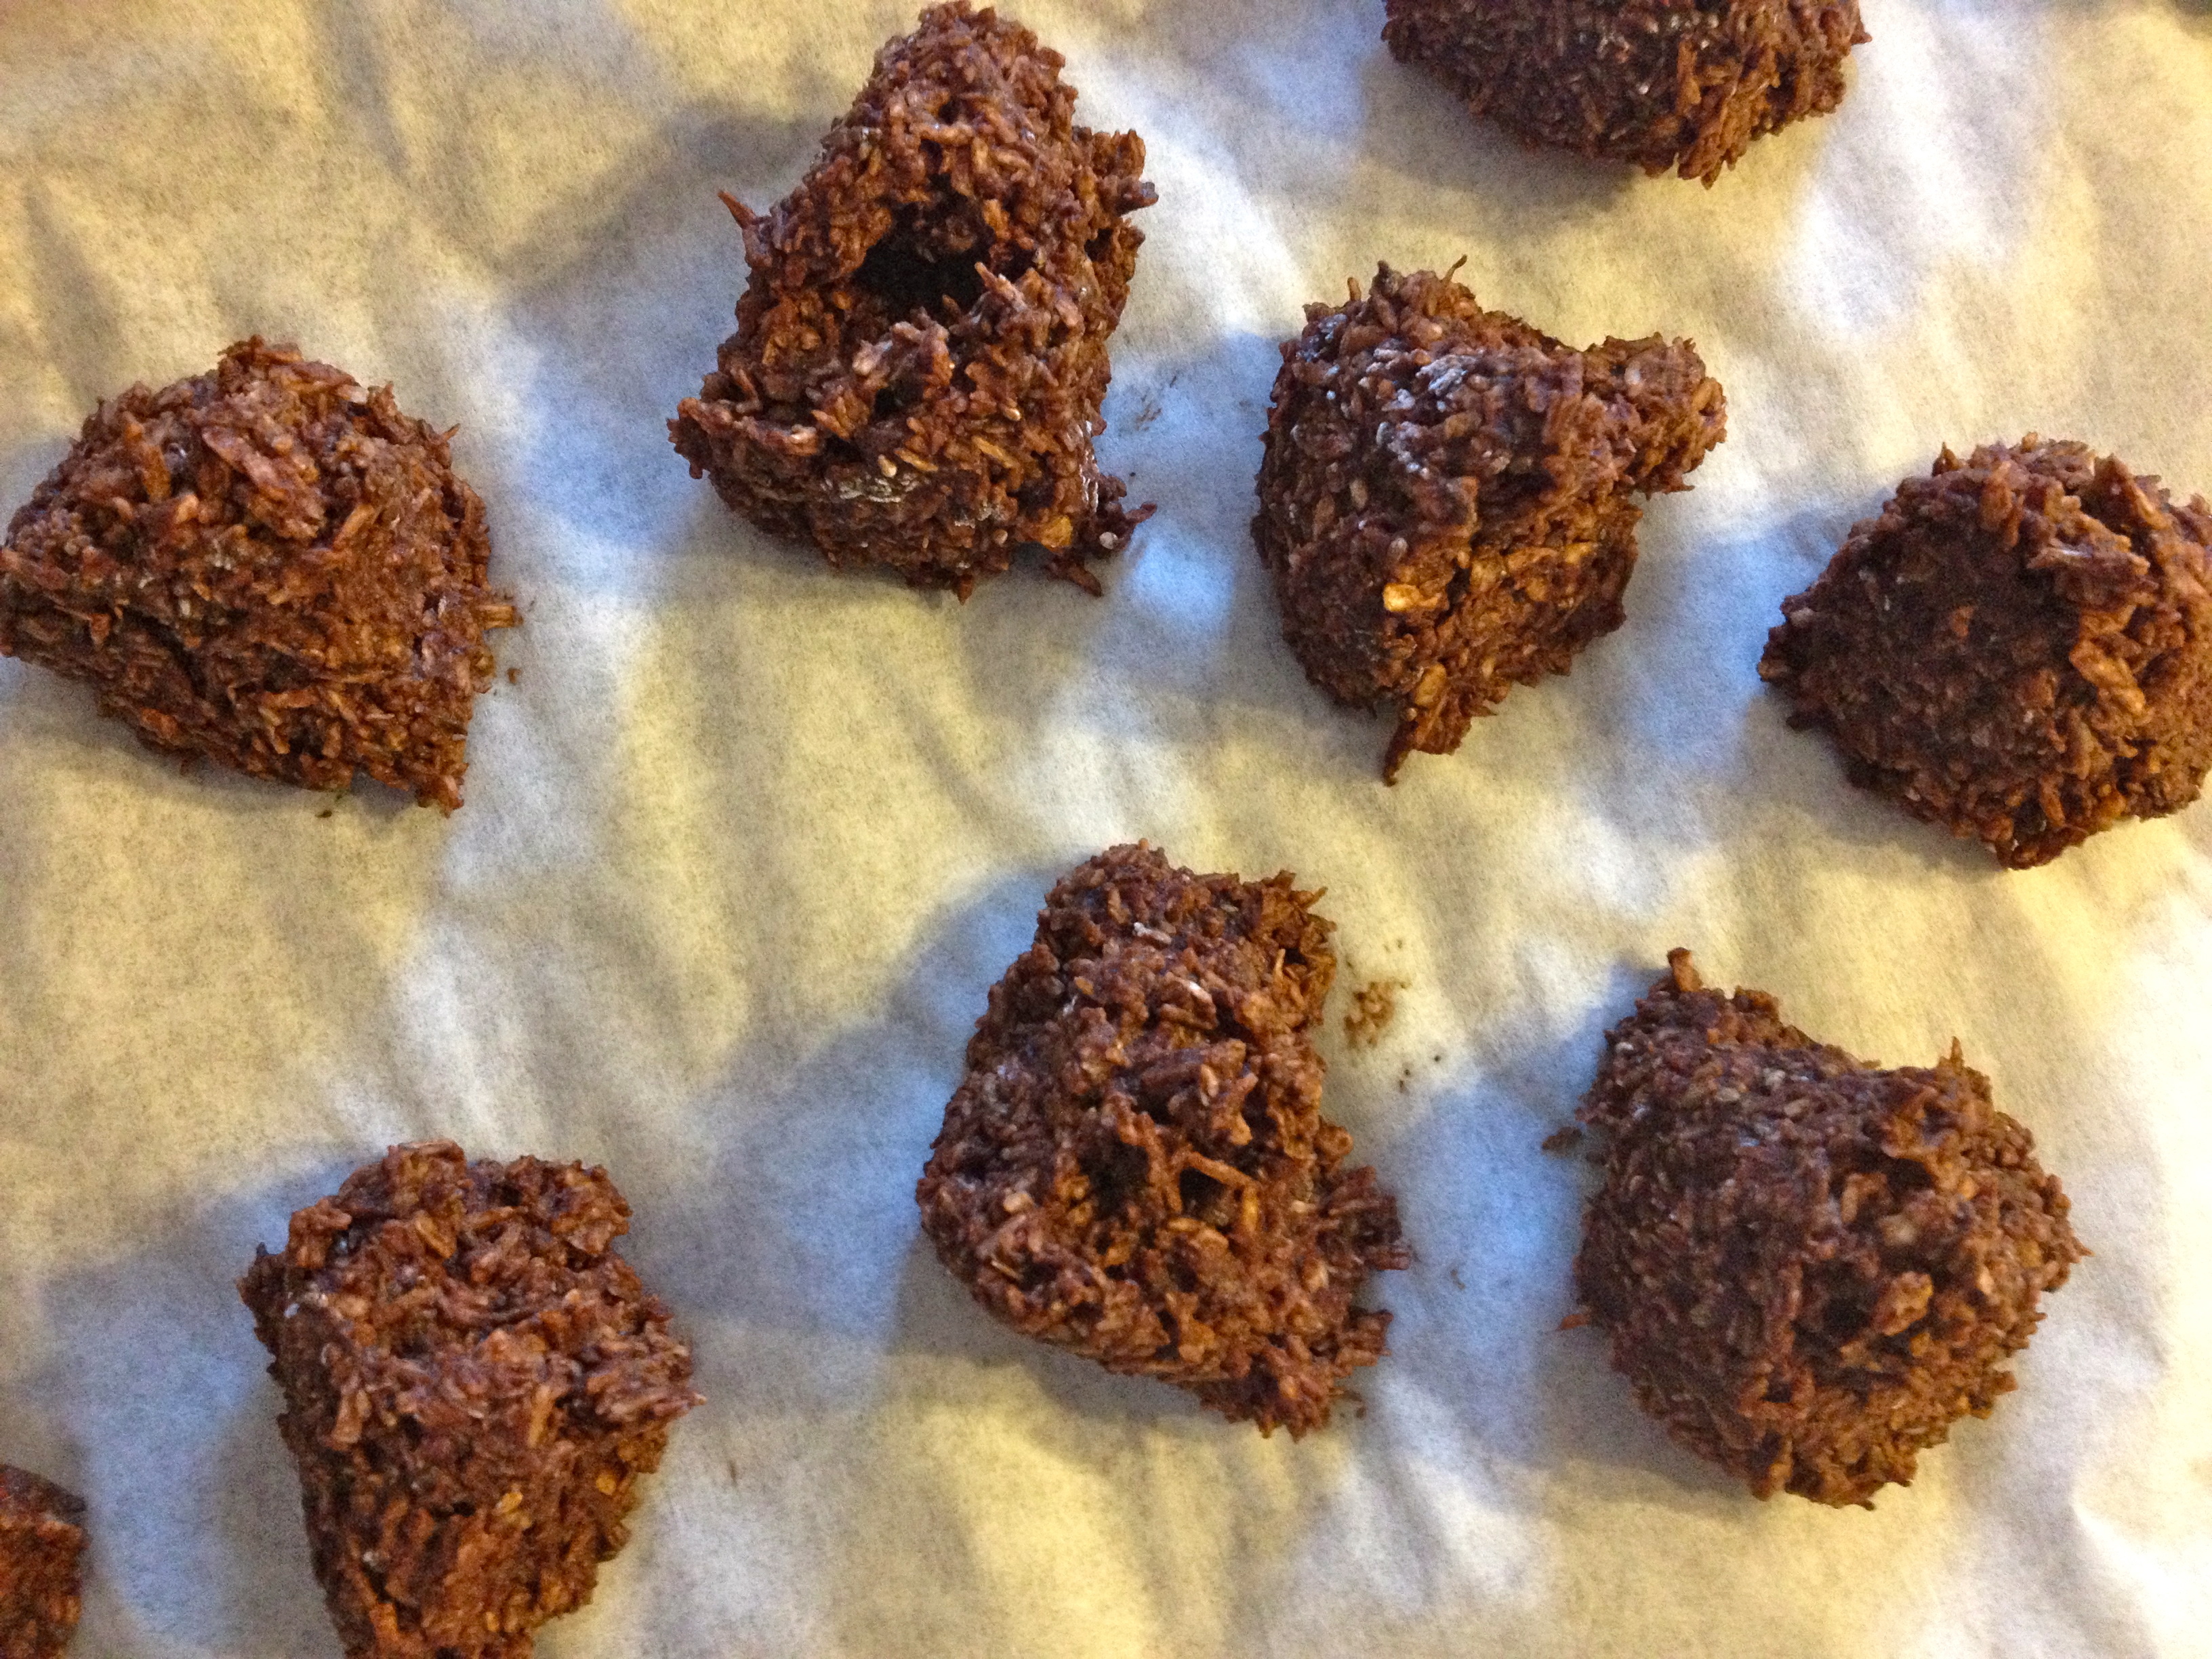
¼ c. coconut oil, melted

¼ c. pure maple syrup

½ tsp. vanilla or 2-3 drops madagascar vanilla essential oil

6 tbsp. cacao powder

1.5 c. unsweetened coconut

1 tbsp. chia seeds

small pinch sea salt

In a medium size bowl mash banana well until there are no clumps. Stir in melted coconut oil, maple syrup and vanilla. Sift cacao powder and stir into banana mixture. Stir in chia seeds, coconut and salt.

Line baking sheet with parchment paper. Drop a teaspoon at a time onto parchment paper. Put in freezer for 20 minutes or until firm. Store in freezer until ready to enjoy.

Makes approx 15 macaroons

Chia seeds are not only high in dietary fibre and protein as well as many other vitamins, they make you feel full as well as being an ingredient that stabilizes blood sugar. Cacao powder is rich in vitamins and nutrients such as iron, antioxidants and high in B Vitamins. Cacao does differ from cocoa as though they come from the same plant the difference is in how they are processed and the amount of nutrients that are left in it. Cacao is also considered a superfood while cocoa is not.healthy sweet treats for kids

So have fun, enjoy! not only will the kids love these healthy sweet treats you may find that you love them to (I have a hard time eating only one chocolate macaroon at a time…) They are quick easy and so yummy you and your kids will forget that they are actually good for you.

Next week pancakes with super cool faces!

Kids Healthy Cooking – How to Make Tacos

how to make tacos with kidsTacos are one of those great foods that are an quick easy dinner solution that you can easily incorporate many food groups (including vegetables) and taste delicious. They are also a fabulous way to get the kids involved in helping make dinner as there is lots of scooping and use of their hands. You may think it will create a big mess, but here are some easy ways how to make tacos with the kids and be successful!

How to Make Tacos with Kids

1. Prep in advance – Chop, grate, cut the ingredients you are using in advance and put them into separate bowls that the kids can easily scoop or grab things out of. Place a spoon with each item so they don’t mix them.

2. Provide a variety of ingredients – in Mini Chefs we used just lettuce and tomato and cheese, but you could include avocado, cucumber, spinach…basically any vegetable. Providing variety will not only makes the kids curious but it will also encourage them to try a little, especially when they are making their own.

3. Use some kind of dip or spread – sour cream, Veganaise or mayonaise, guacamole, salsa all add a little flavor and variety to their taco. It also makes it less dry and provides nice texture and easier on the palate.

4. Demo what it looks like – make one and show them what you would typically put in it, everything from sour cream to tomatoes and cheese. Let them know that if they choose not to put an ingredient in that’s ok. The example will not only show them what can go in it but might encourage them to put some of those ingredients in themselves.

5. Let them make their own – give them the tortilla or taco shell and show them all the options, then let them decide which ingredients they want to put in and how much. (Remind them that they need to close up the tortilla so not to put too much in). When they make their own they are more likely to eat it.

how to make tacos with kidsWhen I did this with my Mini Chefs class I had everything ready in advance and this made it very smooth when making them. The only thing we prepped together was to cook the ground chicken, which I did and they watched. They all really like watching what is happening as their curiosity makes them interested and that is the best way to get them engaged.

Many of them tried different ingredients, creating their own with various amounts of the things they liked. We used soft tortillas, which I find easier with kids because you can roll them up and have less stuff falling out! but you can use hard taco shells if you prefer. I did have to remind them that though they could put in what they liked, not to put too much in as we needed to roll it up and have it all fit.

Rolling them up was the fun part. I showed them how to do it and then helped each child coaching them through rolling it up themselves, which each of them did quite successfully. Once we had it rolled up then we chowed down and enjoyed our tasty creations.

I even had the next week a Mom share with me that her son had made tacos for supper one night after this particular class, which I was so pleased to hear. She said he insisted on clearing up which he never does and he is now also eating lettuce, which he never ate lettuce. Wrapping it up and presenting it in a different way is one of the many reasons why this has occurred. Plus he (and the other children) were allowed choice in what they could put in and weren’t told that they had to use this ingredient or that one.

I feel that this class has been our most successful class so far and that learning how to make tacos has taken the children’s learning in the kitchen to the next level. It really is a simple nutrition packed meal which can easily be modified if you want it dairy free, vegetarian or packed with protein (add kidney beans or chick peas). There are a large variety of different taco recipes and combinations to try, but I would recommend starting with a basic recipe to get the kids into it, and then expand upon it from there.

Tacos

Ingredients:

1 pkg. ground chicken (or any choice of ground meat)how to make tacos

1 tbsp. taco seasoning (recipe below)

tomatoes, chopped

lettuce, chopped

Daiya cheddar cheese, shredded (or regular cheddar if desired)

Vegan sour cream – I love Earth Island (or regular sour cream)

tortillas

Brown ground chicken in frying pan. Add 1 tbsp. of taco spice and mix.  Lay out one tortilla flat on counter or plate, spread a spoonful of sour cream on tortilla, add spoonful of chicken, tomato, lettuce and cheese. Fold tortilla over once, tuck in ends by folding over on each side, then roll the rest of the tortilla to end.

Taco Seasoning

(this is an easy seasoning that can be made at home with spices you likely already have in your cupboard. Pre-make it and skip the processed package stuff from the store)

Ingredients

1 tablespoon chili powderhow to make tacos

1/4 teaspoon garlic powder

1/4 teaspoon onion powder

1/4 teaspoon crushed red pepper flakes

1/4 teaspoon dried oregano

1/2 teaspoon paprika

1 1/2 teaspoons ground cumin

1 teaspoon sea salt

1 teaspoon black pepper

Mix all ingredients together. Store in an airtight container.

Do you have a favorite taco recipe that your kids love? Share it below

Coming up next…some chocolate delights, macaroons and chocolate pudding!

Don’t miss our other kids healthy cooking recipes such as yogurt parfaits, tuna melts and kids smoothies

Valentine’s Day Crafts for Kids

valentine's day crafts

Valentine’s Day is a great holiday to get creative with kids. There are endless crafts ideas with very little materials or preparation needed. Kids will love these easy, simple Valentine’s Day crafts from hearts to cupid!

All you need are things that are red, pink and white, some hearts and a little imagination! Children of all ages can make these easy crafts. Of course, parent supervision is recommended when doing any crafts, besides it is a great opportunity for you to be creative and use your imagination too. My two favorites are the Valentine Person (I love any craft with accordion folding arms and legs) and the Cardboard Tube Cupid (I just think he is super cute!)

Depending on the age of the children you may want to do some prep in advance, pre-cutting shapes or strips depending on the craft you are making. During the craft you may have to assist gluing and folding depending on the ability of the child; but some 3 years olds do very well with these activities with little or no help. The key is to let the child do as much as they can themselves not only because it is their craft but to help them learn certain skills and achieve success. This will also instill a sense of pride in their finished Valentine’s Day craft.

Valentine Heart Wreath

This very pretty, easy craft can be done with children of all ages. Younger children may need assistance with cutting.

What is needed:Valentine's Day crafts

  • different colors of construction paper
  • scissors
  • glue stick
  • markers/pencil crayons
  • cereal box

Trace a circle, about the size of a dinner plate onto the cardboard from the cereal box and cut it out. Trace a smaller circle about the size of a small plate inside the first circle and cut out the middle. Cut hearts that are approximately the same size out of construction paper, using a variety of colors. Note: smaller hearts will take longer to cover the wreath than larger ones.

Write different valentine words on each of the hearts like love, hugs, kisses, best friend, etc. Then glue the hearts around the cardboard ring until the circle has been covered.

Valentine Person

This is great for children 3 years and up. Younger children may need assistance with cutting out hearts, or have the hearts ready for them. Very easy craft that is lots of fun. Kids love the accordion arms!

What is needed:Valentine's Day crafts

  • red and pink construction paper
  • white paper
  • glue
  • scissors
  • markers

Cut one large heart out of red construction paper, this will be the body. Then cut 4 medium sized hearts out of pink for the hands and feet. Cut one small pink heart for the person’s nose. Put pink hearts aside.

Cut 4 long strips of white paper, these will make the arms and legs. “Accordion fold” the strips then glue them onto the red heart, one on each side for arms and 2 on the bottom (where the point is) for legs. Glue on one pink heart at the end of each strip for the hands and feet.

Glue small pink heart in middle of red heart for the nose. For the eyes children can cut out 2 more hearts and glue them on; they can glue on google eyes; or they can draw eyes on using markers. Similar options can be used for the mouth of either cutting out small hearts or gluing them on to form the mouth or draw it on.

Valentine Photo Frame

Great for kids 4 and up. Younger children may use only 1 or 2 colors if desired. Recommended that parent use the acrylic sealer when younger children are doing this craft.

What is needed:

  • small wooden unpainted photo frame
  • acrylic paint
  • paint brushes
  • craft jewels, buttons or stickers
  • acrylic sealer
  • white glue

Paint frame in 4 different colors, a different color on each side. Allow the paint to dry, then spray the frame with the acrylic sealer and allow to dry.

Once the sealer is dry select whatever decorations desired and glue them onto the frame. Some craft jewels may not require gluing as they have a self adhesive backing that can be peeled off and stuck onto the frame.

Add a picture of the child in the frame once dry and there is a wonderful gift for Mum, Dad, or that someone special.

Cardboard Tube Cupid

This craft is best done with children 7 years and up. It has many steps but is easy to do and very cute!

What is needed:Valentine's Day crafts

  • cardboard tube (toilet paper roll is perfect)
  • acrylic paint – peach, pink, white, black
  • paint brush
  • 1″ strip white construction paper
  • 1 gold (pipe cleaner) chenille stem
  • 1 red chenille stem
  • 1 silver chenille stem
  • 2 cotton balls
  • small piece peach felt
  • pencil
  • white glue
  • scissors

Paint cardboard tube with peach paint; let dry. Bend 2/3 of gold chenille stem into a letter “D”. Twist ends to secure and cut remaining long piece of chenille off. Remaining piece will be used to make arrow.

Bend end of red chenille into a small triangle; this will be the point of the arrow. Twist ends and trim long end off. Take remaining red chenille and bend into a red heart; this will be the back end of the arrow. Twist to secure and trim off excess. Take the remaining piece of gold chenille, twist one end onto the arrowhead and one end onto heart. Lay the bow on the table and glue the arrow across the front of it.

Cut the silver chenille stem in half to make wings. Bend both halves into tear drop shapes and twist ends to secure.

About an inch up from bottom of cardboard tube, apply some glue. Glue the 1″ wide strip of white construction paper around the tube and trim any extra. This is cupid’s diaper.

Stand the tube on end, diaper toward the bottom. Poke a hole on each side of tube with a pencil for the wings. Insert twisted ends of silver chenille wings into the holes.

Unroll the two cotton balls. Place some glue on the ends of both and attach to top of cardboard tube for hair.

Lay tube down on its side, wings sticking out to the left and right. Glue bow and arrow to the front of tube. Allow to dry completely. Cut two small circles from flesh-colored felt and glue to the front of the bow as the hands. In place of the felt, paint a piece of white paper peach and then cut out hands.

For cupid’s face, use a cotton swab or a roughed up paintbrush to dab some pink paint on for cheeks. Use the handle end of a paintbrush to dot on two white eyes. Let dry. When white is dry, dot on black. Two google eyes may be used instead of painting on eyes.

Valentine’s Day Crafts for All Ages

Valentine’s Day crafts are fun and enjoyable. One will find that there are many ideas and levels of crafts available, from very easy to a little more involved. Kids of all ages enjoy working with their hands and getting creative. Valentine’s is a great way to teach them about love and giving in a fun, interactive and creative way!

For more ideas on Valentine’s Day crafts check out Kaboose and Enchanted Learning.

Kids Healthy Cooking – How to get your Kids Eating Vegetables

get kids eating vegetablesIt is amazing how many kids do not like vegetables. Or if they do, they like only one, like carrots, or cucumbers, but otherwise that’s it. I know many parents experience this struggle of expanding their children’s vegetable palate. That’s why getting creative to get kids eating vegetables is key.

In our Mini Chefs class last week we created vegetable flowers. This is a great way to get kids eating vegetables – it is fun, offers them diverse food colors and creates a pattern, which are all proven ways to get them eating. The ‘flower’ was a combination of celery, radish, carrot, cucumber, spinach, and grape tomato (lots of colors).

veggie flowerWhen we were creating our vegetable flowers, many of the kids told me right away which vegetables they did not like. Though I acknowledged it, I encouraged them to make the flower anyway and then they could eat the parts they did like and leave the rest (not forcing the kids to eat what they don’t like, but acknowledging and encouraging is another way to get kids eating vegetables, and a variety). I praised and encouraged them as they were creating, telling them how much I liked the ‘grass’ they had made or the ‘petals’ on the flower. When we were done, all the ‘flowers’ were unique. Similar to the example but with their own creative flare!

Then of course we ate them and some of the kids not only ate the parts they liked but branched out and tried something new. I had to laugh when I watched two girls each try a spinach leaf and heard them exclaim “oh this is so yummy!”

This is why cooking with your kids is such a great benefit! It gets them involved, creative and gives them opportunities to try something new. Making food fun, will encourage them to try it out and maybe, hopefully expand their palates. It also is an opportunity to teach them about nutrition and why we need balance in what we eat.

IMG_6922Also that day we made Tuna Melts, which is one of my favorites! It is a simple quick recipe and great to do with kids. All you need is bread, tuna, Veganaise (or your favorite mayonaise) and cheddar cheese. This recipe is a great one for kids to practice stirring and spreading (the tuna). Parents of course should do the opening of the can, cutting and using the oven as these tasks need to be closely supervised with small children.

Again we had a few kids who said they didn’t like tuna, but I encouraged them to at least try it. For some kids, it could simply be the Veganaise (mayo) that they don’t actually like. I remember when I was little I did not care for mayonaise at all. It wasn’t until I was much older that I actually liked it. If you think this may be the case, you can either change your mayo choice (not all mayos are created equal) or you could leave it out and not mix it in your tuna – though this would leave the tuna a little dry the melted cheese on top could help with this. Experiment, let your child taste the items separately to determine what part they don’t care for and then adjust from there.

Cooking with kids is always an adventure and getting kids to eat vegetables just makes it that much more interesting! But recognizing and praising them for what they do and trying new things definitely puts them on a path to enjoying their food and exploring new recipes!

Tuna Meltstuna melt with Daiya cheddar

Ingredients:

Slices of bread

1 can of tuna

Veganaise (or choose your favorite mayonaise)

Slices of Daiya cheddar (or regular cheddar)

Mix tuna with Veganaise. Start with one to two spoonfuls of Veganaise and mix. Add more if needed to taste, you do not want the tuna to be dry, but you don’t want it sopping wet. Spread tuna on slice of bread. Place cheddar slices on top of tuna.

Place on a cookie sheet in oven on broil. When cheese has melted it is ready to eat! this only takes one or two minutes so make sure you keep an eye on it. Take out of oven and let cool slightly, then eat and enjoy!

Vegetable Flower

Ingredients:IMG_6930

Cucumber slices

Celery

1 grape or cherry tomato

1 radish

2 spinach leaves

8 baby carrots

Wash all vegetables. Slice cucumbers, radish and 2 pieces of celery (one big and one small) to make stems of flowers. On a plate place 2 pieces of celery. At the top of the big piece arrange cucumber slices into a flower shape. At the top of the small piece of celery arrange the radish to make petals of flower. Place grape or cherry tomato in middle of the cucumbers to form center of big flower. Place two pieces of spinach on either side of big piece of celery to make leaves. Line the bottom of flowers with baby carrots to create ground/ grass. Take a picture of your creation! Enjoy plain or with your favorite dip.IMG_6925

Missed last week’s kids healthy eating recipe? Click for Yogurt Parfaits and more great tips on cooking with kids

Looking for more creative fun ideas to get kids eating vegetables? Check out these great ideas 

Next week Kids Smoothies – 3 delicious recipes, one with chocolate! how can you go wrong?

Kids Healthy Cooking – Tips and Tricks for making it easy and fun!

kids healthy cooking

Cooking with kids can be a challenge. It’s messier, it’s slower, and often times can try your patience as a parent. Kids healthy cooking can be even more of a challenge with your little munchkins palates changing and developing, being sensitive to textures, smells and levels of salt and sweetness. One day they like a certain food and all of a sudden the next day they don’t? Even with these challenges, there are many benefits to getting little ones into the kitchen at a young age, benefits that will set a foundation for their eating and nutrition choices for life.  And these benefits will outweigh the extra time and patience you have to spend in the kitchen.

fruit2For little hands, time in the kitchen allows them to build basic skills, explore with their senses and create an adventurous palate! You can introduce healthy foods in a fun and unique way that will get them eating and enjoying it. Kids are also more likely to eat what they have made and it creates a foundation for them later in life – when they’re older in college and can actually cook. Not only that, but it creates a great opportunity for you and your child to spend some quality time together, learning and creating together, even having a little fun.

I recently started teaching a preschool class at the Trico Center called Mini Chefs and it is one of my favorite classes. You may think that cooking with a preschooler would be difficult, but when you choose recipes that are simple, easy and appropriate for their age, it is actually a lot of fun. I love how excited the kids are each week, curious about what we are making and what is in it.

IMG_6903One of the keys to making kids healthy cooking successful (especially with preschoolers) is to pick something with less than 5 ingredients and things that they can do themselves, like scooping, mixing, tearing (lettuce). Most kids at this age love to help and get very excited about mixing things, or scooping out the flour. Yes you may have a little more flour on the floor but encouraging them and letting them do it, will make them want to do it again.

For our first class we created Yogurt Parfaits, which is a very easy, hands on recipe with 3 basic ingredients and lots of scooping and sprinkling. They all wondered what a yogurt parfait was, as even my children had not made one of these before. What was in it? How did we make it? When were we going to make it? The when question was the best. They are so keen at this age to get started!

This is why it is very advantageous and less stressful for you to prepare things in advance so that the cooking process goes more smoothly. For the parfaits, I had the yogurt already in a bowl with a spoon for scooping, the fruit cut and the granola in a bowl ready for scooping as well. Parfait glasses were in a stack ready for me to hand out as well as the spoons. This made it easier for each child to do what they could themselves, once I explained how we made the parfaits.

It was so fun to watch each child create their parfait, scooping in their yogurt (some with fairly large scoops and some very small), choosing their fruit, then scooping in some yogurt again. Each parfait was creative and unique, and honestly it was not that messy. Some kids had lots of yogurt in theirs and less fruit, some had a lot of both, while others just wanted the granola off the top. Either way they all had fun and all tried it, it was a new taste adventure for many of them.

Now my kids ask for yogurt and fruit all the time now and it makes a very healthy snack!

Yogurt ParfaitIMG_6905

Ingredients:

Non-dairy vanilla yogurt  – such as coconut, almond or soy   *(can easily substitute dairy yogurts if desired)

Fruit – pick your favorite! Blueberries, strawberries, banana, honeydew

Granola (store bought or make your own – you can also substitute large oats if desired)

In a bowl or cup place desired amount of yogurt. Then place fruit of choice on top, layer with yogurt then another layer of fruit. One more layer of yogurt and top with granola. Enjoy!

And don’t forget, get the kids to help you clean up after as well. They are willing at this age and that way they learn that cooking whether creative, messy or fun, requires clean up at the end.IMG_6904

Next week… Tuna melts and Vegetable Flowers – who says vegetables can’t be fun!

Winter Inside and Out

winter activities

Often in winter it’s challenging to get active. Our bodies slow down, we just want to cozy up on the couch and watch movies. It can be a challenge in the cooler weather to not only get outside but to find fun and engaging winter activities. Both you and the kids start to experience cabin fever as you’ve done all the regular activities inside and out. Not only is everyone bouncing off the walls but you need some fresh ideas to enjoy the winter season. With Calgary winters often being long and chilly it is time to get creative!

For me I like to google it and see what’s out there for indoor and outdoor activities in the winter. Not only does it get my own creative juices flowing and I create activities of my own, I find some really cool ideas. These are just a few of winter activity ideas I recently found, but these are my favorites! So whether you’re inside or out, here are some unique indoor and outdoor activities for winter that will not only keep the kids occupied, but engage their imagination as well.

Outside

You’ve gone skiing, skating, tobogganing, and built many snowmen. There’s even a giant snowfort in your front yard that if it gets any bigger you will not be able to get to the front door. These outdoor activities will expand kids fun time outside and will definitely expand their horizons and create something new.

1-     A winter picnic. Pack sandwiches, cookies, and thermos of hot chocolate. Take a blanket and enjoy a picnic in our winter wonderland.

ice castles2-    Ice castles. Fill a variety of ice cream and yogurt containers with water; let them freeze overnight. Once they are frozen, take them out of the containers and build your castle. For a splash of color, put food coloring into the water before freezing.

3-    A scavenger hunt. Make a list of winter items, get the kids to help you with this beforehand, then go out and see how many you can find. A short list of 10 items is great, and learning about what there is in nature in winter.

4-    Snow mini-golf. Set up a mini golf course in your backyard using a variety of items from the house. Tramp down the snow to make paths, uneven surfaces and use things like hoola hoops, plastic rings, and balls to set up a course. Grab a putter and you’re ready to go.

animal track5-    Look for animal tracks. Winter is one of the best times to find tracks as the snow makes it easier to spot them. Go for a walk and bring a guide book to help the kids figure out what the track is (find one at the local library, find one online or purchase one like Animal Tracks of Alberta
on Amazon). As an option, bring your camera to take pictures of the tracks, so you can look at and identify them at home.


Inside

There are many indoor venues to go to in the winter to keep busy; the swimming pool, library, and local museum. At home it can be a bit more challenging, and after baking the 12th batch of cookies, and having multiple friends over, you need a little variety.

1-    Build a fort. Use couch cushions, blankets and cardboard boxes. Let the kids be creative as they build, let them knock it down a few times – and rebuild. Once completed they can enjoy playing in it. (Ensure it is safe and under adult supervision).

2-    Create a play. Have the kids write their own play, assign parts and do a performance. Kids can create the stage, costumes, props and present to friends and family.

IMG_69113-    Make an indoor snowman. This works great with a big group of kids; split them into 2 teams, give each team a roll of toilet paper. One team member is the model and the others wrap the model in tp to turn them into a snowman. Use construction paper to make the nose, eyes and other features.

4-    A puppet show. If you have puppets grab them, otherwise the kids can make their own. They can also make their own puppet theater and present to friends and family.

5-    Play hide and seek. Who says this is just an outdoor game? Set clear guidelines and boundaries about where to hide and let the game begin.

Do you have any great indoor or outdoor winter activities? Share your favorites below!

Light Up the Night – Magical Musical Christmas Light Displays

IMG_2549Lights sparkle and shine as they dance with the music. Delight in the twins eyes as they wait in anticipation, the music building, wondering what will come. Then, in a crescendo of light and music together the spectacle really begins. Movement and rhythm, flowing and moving as their eyes follow the dance. This wonderful light display one of many that light up Calgary this holiday season.

I’ve always enjoyed those videos on youTube with the houses all decorated for Christmas and the musical accompaniment that goes in time with the light display. I always thought how cool that would be to see some of those live instead of just online. Little did I know that in Calgary there are a number of houses that do have such a light display. When my friend told me this a couple of years ago I was quite excited! So one night we went out and did a tour. It was wonderful! We enjoyed the light display from the comfort of our car, tuning into the posted radio station, which plays the music in time with the lights.

People are quite creative, incorporating all kinds of things with usually about 4 or 5 different songs before the show repeats. This year I took the kids out to see the lights for the first time. We made an evening of it, bringing hot chocolate and snacks to enjoy while we watched the lights. Luke and Chloe loved it! Dancing and moving it in the van while watching in wonder. We stayed at each house until the full set had run and then moved on to the next one.

IMG_2544The neat thing is that there are tons of them in Calgary and you can view as many or as few as you like. The site Lighten Up Calgary lists and maps out the houses that have such displays and you simply go to the site and create your route. We visited 3 houses when we went out last week but that was just the right amount for Luke and Chloe. And I thought it was great that they knew their limit and knew when it was time to go home. I would’ve have gone to one more, but they had seen, enjoyed and were ‘full’.

They fell asleep on our way home, tummies full of hot chocolate, and dreaming of dancing lights. Next year I’m sure we’ll go out again, as it’s another great free family activity to enjoy over the holidays. Most of them play every night in December and up until New Year’s. Who knows maybe one year we’ll even create our own display and be on the route – apparently it’s as simple as buying a kit. How fun will that be!

Banff’s Santa Claus Parade

IMG_6729The main street is lined with people, children and adults alike. Lights all aglow, shops closed and waiting in anticipation for what’s to come. Snow glitters on the sidewalks and the majestic mountains surround us. It’s beautiful.

Excitement is in the air as children peek out from the crowd to look down the street to see if it’s begun. To see if Santa and his parade are coming. Waiting patiently, yet continually asking Mom and Dad if it’s time yet. This is Banff’s annual Santa Claus parade, held at night with the beauty and magic of Christmas lights all around.

IMG_6700We attended this beautiful event for the first time this year, and it is well worth the trip out to Banff. Currently run by Banff Lake Louise Tourism for the past 7 years, this event has been hosted by the Town of Banff for many years prior. The parade itself is actually the finale of a day filled with kid friendly and family activities such as face painting, balloon twisting, Christmas carols and a visit and photo with Santa down at the train station. There’s also horse drawn wagon rides, tasty treats and of if you’re up for it, a nice soak in the hot springs (which is available every day of the year but is always lovely).

I love touring Banff Avenue and spending time in the Christmas Shoppe. My youngest two, screaming in delight at the grand display of Christmas houses and towns. The ornaments are many, the options are delightful and there is no shortage of Christmas anywhere.

IMG_6723The parade itself is only half an hour long, which I feel is the perfect length for children, who remain engaged and excited the whole time. The floats were gorgeous, creative and unique all lit up as they moved down the street. From the Girl Guides to Sunshine Village there was an excellent representation of the town.

Of course I loved that it was at night. It just added to the atmosphere and excitement with all the floats magically lit up. Even my oldest son, who is 12 and I was unsure if he would like it, expressed that he did enjoy it and said it was “cool”, which meant we had success.

IMG_6677I think Santa Claus parades are such a fabulous idea and up until recently only knew of the big ones in Toronto and New York. I didn’t realize that many of the local towns in and around Calgary host their own Santa Claus Parades and they are quite well done! Parades are held in High River, Okotoks, Airdrie, and Cochrane (which if you still want to attend a Santa Claus Parade this season is this Saturday, December 12th). I think it’s a great way to celebrate the season and your community. And everyone has that little flare and does things a little differently, distinguishing themselves from the rest.

You can go to any of the town’s websites for details and pick the ones you want, or even do a tour! of Santa Parades – how fun would that be? We are already planning for Banff again next year, hoping to take full advantage of the day and all the activities they have to offer. We might even take the plunge and stay overnight!

IMG_6696It creates such great memories an event that I hope every family has the opportunity to enjoy.

Have you attended a Santa Claus parade this year? Share with us your memories and experience.

The Lions Festival of Lights – A Free Calgary Light Display

This weekend I attended the kickoff of the Lions Festival of Lights, a free drive by light display housed at Confederation Golf Course, and has been on in Calgary for 29 years.

IMG_6657Located along 14 St. NW, just south of 24 Ave., this light display has over 115,000 lights and is Calgary’s largest drive by display. Set up by over 3000 volunteer hours, this year the display is completely green with all LED lights.

Each year they kick off the event with family activities, concert and treats and this year was no exception. They were ice sculptures, Singing Santa and Mrs. Clause (who really got the crowd rocking) as well as free hot chocolate and cookies. I was having a great time enjoying the tunes and bee bopping with the crowd (Santa really was good and quite creative in his singing).

IMG_1355At 6 pm, the mayor of Calgary, Naheed Nenshi, threw the switch to officially open and light up the park for the 2015 season. And to top it off a beautiful display of fireworks lit up the sky for everyone to enjoy. People were then invited to stay and enjoy the lights and the park.

In my 17 years in Calgary, this was the first time I had ever gone to see this lights display. I had heard of it but never attended. And this was the first time that I was aware that they did any kind of official kickoff – and honestly I was impressed. Not only with the event itself but the reasons why the display existed.

IMG_6650The Lions Club does this display every year as a way of thanking Calgarians for all their support and generosity throughout the year. The Confederation Golf Course supports the display as part of their mandate is to provide other activities than golf for Calgarians, which is why they not only open up their grounds for the Christmas display but also for cross country skiing and sledding in the winter months. I think this is a fantastic way for everyone to give back to the community and benefit!

IMG_1348 - Version 2Even though this is largely a drive by display, it is just as enjoyable to park and take a walk through the park enjoying the lights in a more intimate way. The display really is quite phenomenal and the best part about it is it’s free! I find there are so many additional costs at this time of year that is it pleasant to be able to enjoy something at no cost.

So pack up the family, friends, significant others, even grab some hot chocolate and take a tour down to Confederation Golf Course and check out the Lions Festival of Lights! They are open nightly from 6 pm to midnight until January 8.