How to Create a Hot Chocolate Bar

hot chocolate barDecadent hot chocolate, topped with yummy whip cream, drizzled with chocolate…. something you usually only see at your local cafe or coffee shop.

But imagine creating this in your own home, or creating some other tasty combination. Chocolate orange, Lavender White, Peanut butter… oh so yum! This is the beauty of a hot chocolate bar – a simple but yummy idea that enables you to create these wonderful, delicious combinations to enhance your hot chocolate experience.

The basis of a hot chocolate bar is that you make a plain hot chocolate and then have a number of different toppings and combinations to choose from to add to your hot chocolate that make it… oh, just a little more. Good hot chocolate can certainly be enjoyed plain and definitely warms you all the way down to your toes, but these additions make it a little more lavish, make it a little more fun.
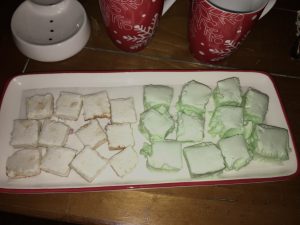
hot chocolate barIt is also super easy to set up. It does not take a lot of time or effort, the most effort you’ll have to make is to decide what yummy toppings you are going to use! I did this twice over the holidays, once for a ladies only night at my place and second as a fun treat for my kids and nieces while away over Christmas. Everyone loved it! It was super fun. We all had half cups at a time experimenting with different tastes and flavors. I had created a list of suggested combinations but of course you could pick and choose whatever you liked. Plus just looking at the spread set out was not only nice to look at but made you want to try them all!

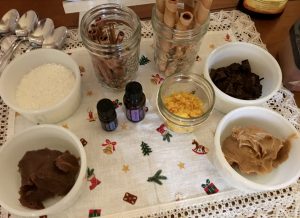
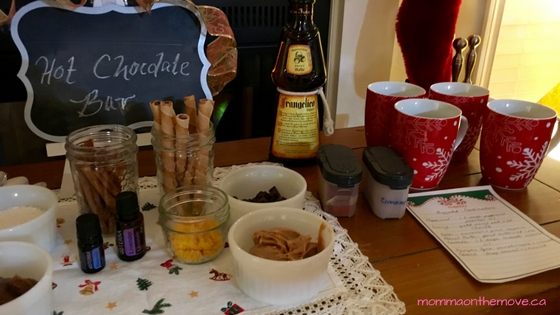
We had chocolate pieces, peanut butter, orange zest, hazelnut sticks, homemade marshmallows (mint and cinnamon), cinnamon sticks, coconut and some essentials oils like peppermint and lavender. We even had a little ‘adult’ version – a splash of Frangelico, if desired for those over 18.

How to Set Up Your Own Hot Chocolate Bar

Start out with your own base hot chocolate – you can either do this by the cup therefore creating and meeting people’s dietary needs, like dairy free, sugar free or use the just add water powder mix. Or you can make a big batch of your favorite hot chocolate in the slow cooker. I have done it both ways and both have their advantages.

Pick your toppings – there are so many to choose from!

  • chocolate chunks
  • orange zest
  • peppermint stickshot chocolate bar
  • 1-2 drops of peppermint extract or essential oil (if using essential oil you’ll need to use very little but depends on your brand. Also make sure the oil is ok for taking internally
  • coconut cream (for the dairy free) or whip cream
  • peanut butter – word to the wise if using this topping advise your guests that less is more with this one as too much pb makes it sink to the bottom and essentially gets wasted
  • shredded coconut
  • marshmallows
  • cinnamon sticks
  • hazelnut sticks
  • dash of cinnamon
  • cardamom
  • cayenne
  • lucuma
  • mesquite
  • or….

Add desired toppings and enjoy! Use suggested combinations or mix and match to make your own.

A hot chocolate bar literally takes about 5 minutes to set up. When I hosted the ladies it was the easiest and shortest prep I ever had to do for a party. And I loved how visually appealing it looked before everyone dug in.
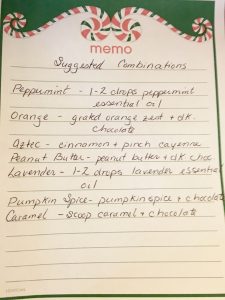
hot chocolate barThis is also something you can set up in your home on the counter somewhere and leave for a bit for people to enjoy. Of course you’d have to put some of the items into the fridge when not in use but for the most part many of them can stay out.

The thing I love about the hot chocolate bar is it can easily be sugar free dairy free and be very yummy and enjoyable. When my kids participated out of all the choices I set out there were only 1 or 2 that they had to avoid. The rest was far game. So it was easy for them to try different things, experiment and enjoy the full experience.

I also love the versatility of it. You can create one for parties, after tobogganning, weddings, birthdays, after skating – and because of the variety of toppings there’s something for everyone!

If you love hot chocolate then you’ll be super excited for the upcoming YYC Hot Chocolate Fest which I am proud to be a part of this year! Watch for more details to come!

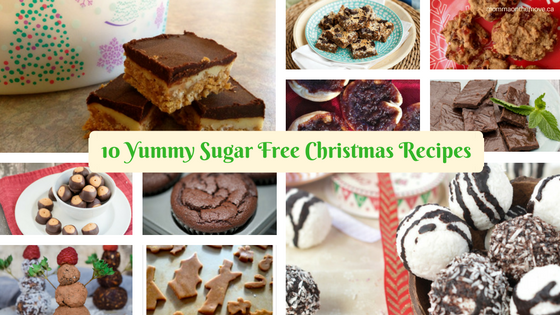
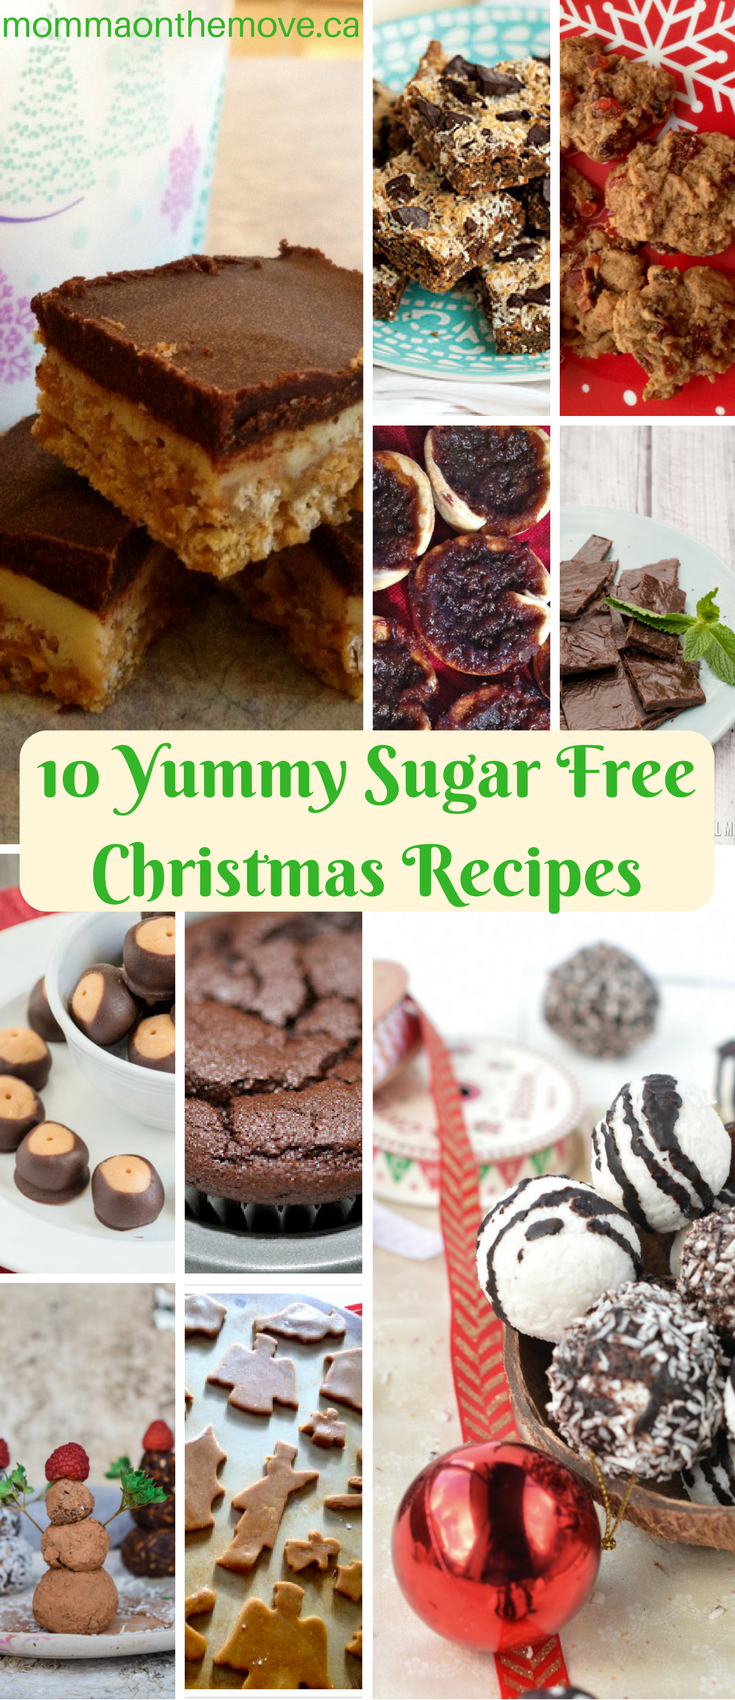
10 Yummy Sugar Free Christmas Recipes

sugar free christmas recipes

Christmas is that time of year when delicious treats and baking abound. Everywhere you go, there is something else to indulge in, something else that tempts you. You try to resist, but …

The good news is there’s no need to deny yourself. You can enjoy delicious sweet treats guilt free this Christmas by creating one (or more) of these yummy sugar free Christmas recipes. Super easy to make and all naturally sweetened they are actually healthy and good for you – so you can feel good about what you are eating and indulge guilt free.

sugar free Christmas recipes

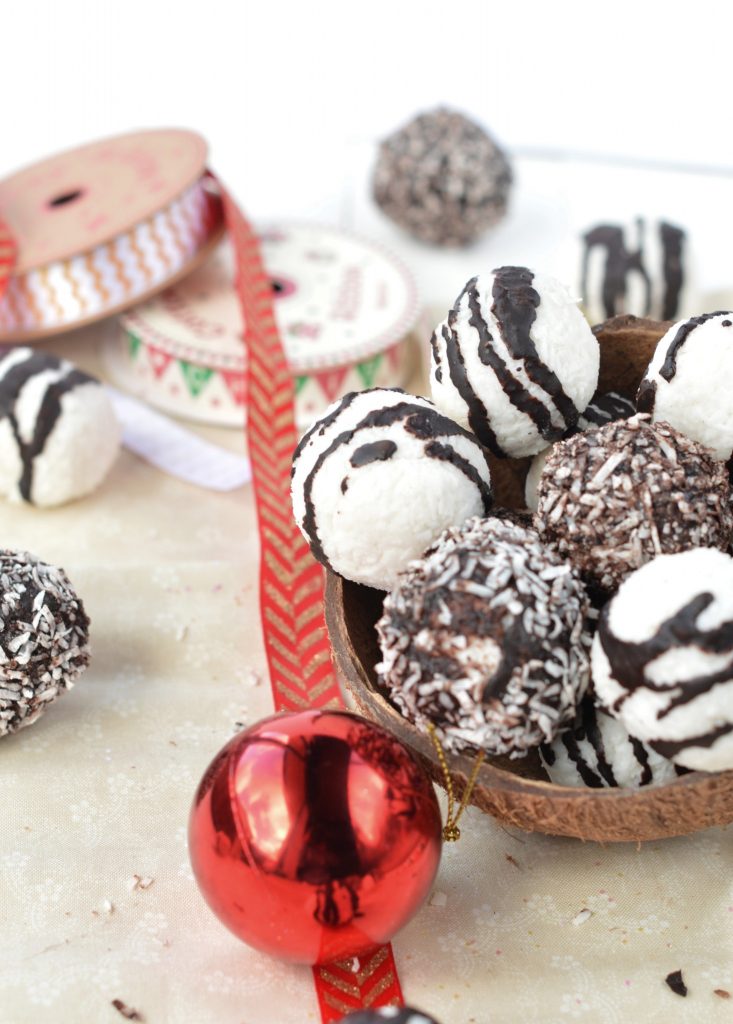
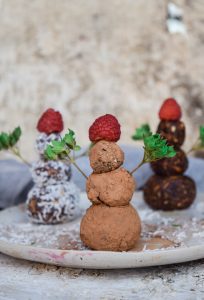
Coconut Balls – Healthy Christmas Truffles

sugar free Christmas recipes

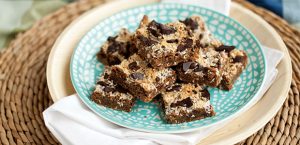
Peanutty Blondie Bars

sugar free Christmas recipes

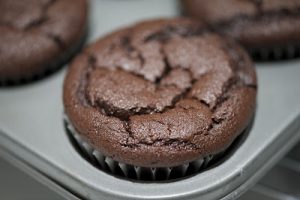
Chocolate Quinoa Cupcakes

sugar free Christmas recipes

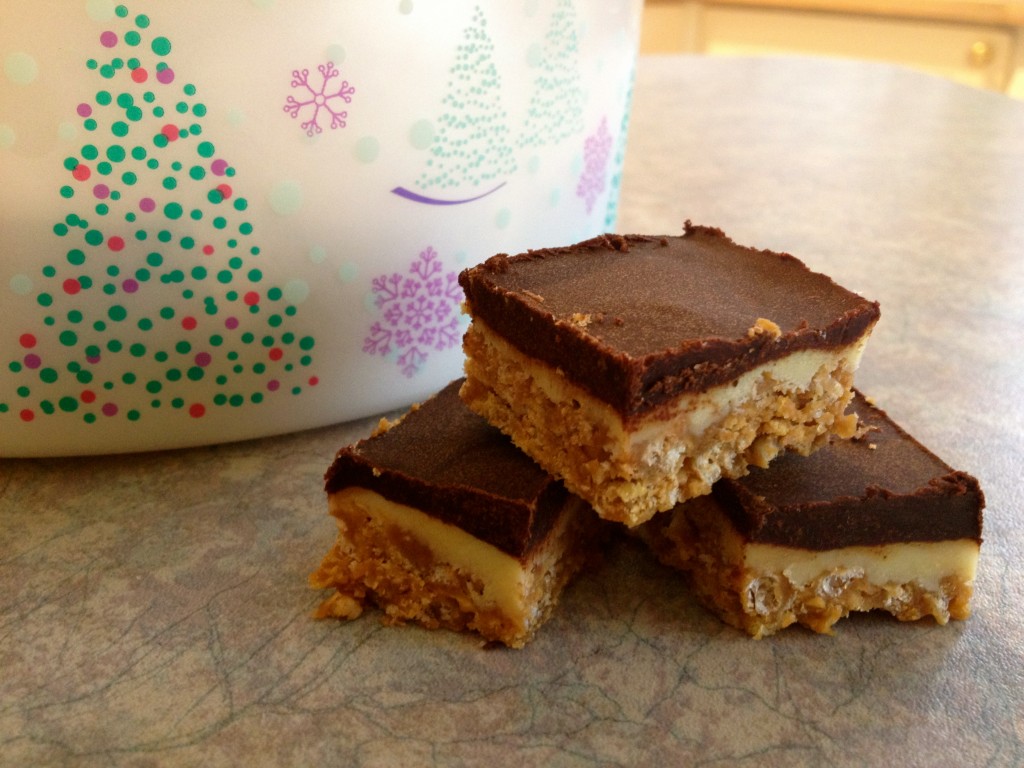
Chocolate Peanut Butter Cereal Squares

sugar free Christmas recipes

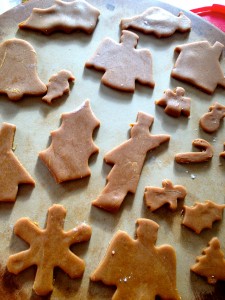
Gingerbread Cookies – A Traditional Cookie

sugar free Christmas recipes

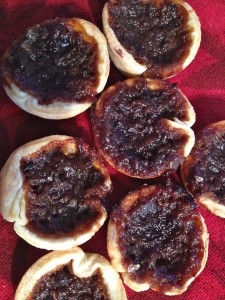
Classic Sweet Butter Tarts

sugar free Christmas recipes

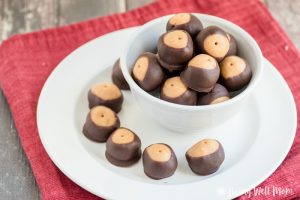
Best Paleo Buckeyes

sugar free Christmas recipes

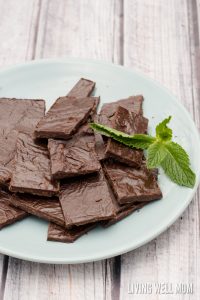
Easy Homemade Paleo Mint Dark Chocolate

sugar free Christmas recipes

Festive Gingerbread Protein Bites

sugar free Christmas recipes

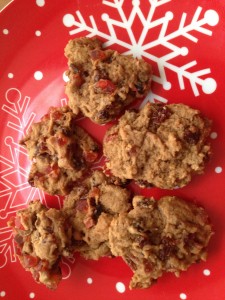
Hermit Cookies – A Soft Delectable Christmas Cookie

Do you have a favorite sugar free Christmas recipes? Share in the comments below.

10-yummy-sugar-free-christmas-recipes-pinterest

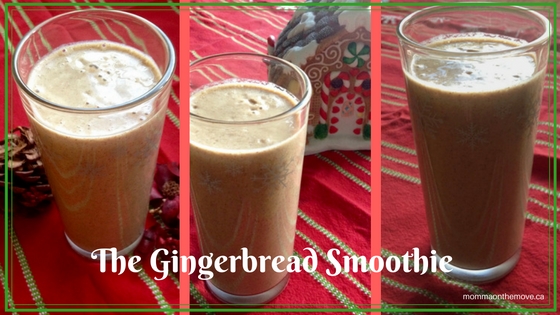
Gingerbread Smoothie – A Christmas Smoothie to Indulge In


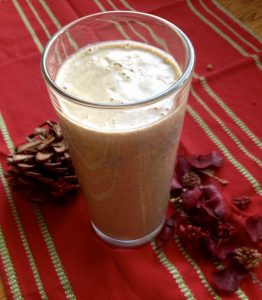
gingerbread smoothieI love gingerbread and thoroughly enjoy all the different possibilities during the Christmas season. Last year I discovered this yummy gingerbread smoothie!
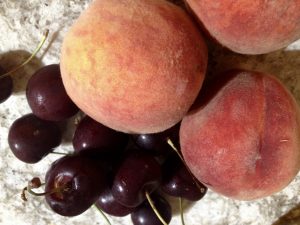
Last Christmas I had the unique opportunity and pleasure to spend it with my parents all by myself. No kids, no siblings, just me and Mom and Dad. It was a real treat to just spend time with them and not have to compete with everyone else. Because no offense I love and enjoy the company of all those other people but the visit becomes different.

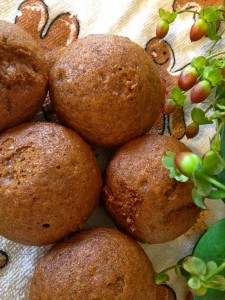
gingerbread muffinsDuring this relaxing and enjoyable time with them I decided to get creative and experiment with a few festive smoothies. Many of the favorite holiday flavors like orange cranberry, peppermint, gingerbread. Why not? I had the time and it was the holidays after all.

This is when I discovered this yummy gingerbread smoothie! I had already explored gingerbread waffles and gingerbread muffins and knew that a smoothie would be a wonderful addition to my compilation.
So as I do, I hopped on the net and researched some gingerbread smoothie recipes. I found a few that I liked and in the end ended up combining ideas and creating my own.

Gingerbread Smoothie

1 cup non-dairy milk (almond, coconut, etc.)

1-2 tbsp. barley malt

1/2 tsp. cinnamon

1/4 tsp. fresh gingergingerbread smoothie

1 tsp. vanilla

1 banana

1 tbsp. chia seeds

sprinkle of nutmeg

Place all ingredients except the barley malt into the blender. Blend until smooth. Now add the barley malt a little bit at a time. If you like the flavor add closer to 2 tbsp.; if you want it more sublte then just add 1. Blend well, pour into glass and enjoy.

Note: Make the smoothie and allow it to sit for about 30 minutes. This allows the flavors to infuse and gives you a much stronger flavor than if consumed right away.

Serves 1

The smoothie was a hit! My parents and I enjoyed it quite a bit and I love the fact that you have chia seeds in there. They have many health benefits such as high in nutrients such as fiber, protein, antioxidants and low in calories!

I did not drink mine quickly as I was multi tasking at the time doing a bunch of different things and this is how I discovered that if you let it sit the flavors become stronger. Because honestly at first sip I thought it was a bit weak in the gingerbread flavor area.

orange cranberry smoothie

Of course after the time at my parents I came home and made it for the kids. Also a hit with them as well – though their favorite was the Orange Cranberry Smoothie I had created.

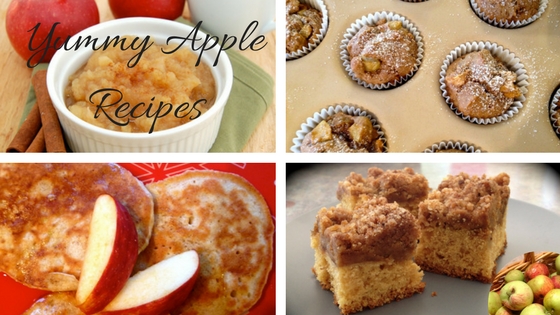
A Plethora of Apples – Yummy Apple Recipes for Your Fall Harvest

apple recipes

Each Fall we end up with an abundance of fresh apples. Whether it be from our own tree or given to us by the grandparents we usually have large buckets of them. As a result over the years I have created and tested many different apple recipes to make use of all these delicious apples. Of course we make the traditional apple crumble and pie, but as yummy as that is, we do like a little variety. And I do like to experiment.

The kids love just coming home and grabbing a fresh apple from the bucket to enjoy. In fact they eat so many apples that you would think that we might actually make a dent in them. Unfortunately this is not the case – so baking it is! (and other creative uses)

I found and/ or developed a number of dairy free, sugar free and even some gluten free recipes that use apples. Giving us lots to choose from and enjoying whatever suits us on any particular day. I am still on the hunt though for a recipe that uses a large quantity of apples at once, as many of these recipes use maybe 4 apples at once. That’s a super long process of getting through our bucket! Even when I double the recipe.

If you have a plethora of apples this Fall or are just looking for some yummy apple recipes – here’s what I’ve discovered and tested so far:

Yummy Apple Recipes

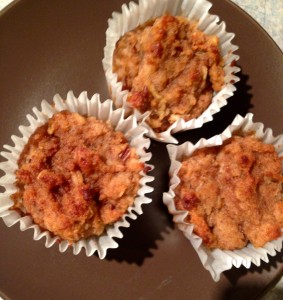
Muffins:

Cakes:

Crumble:

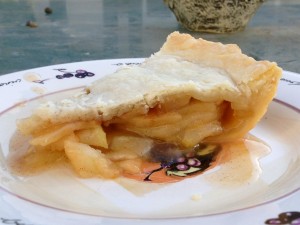
Pie:

Pancakes:

Smoothies:

Snacks:

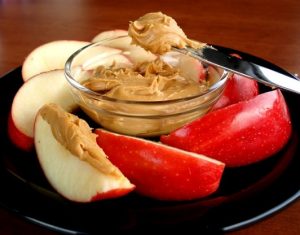
  • Apples & Peanut Butter (simply slice your apple and dip in peanut butter)
  • Apples & Caramel Dip (don’t be deceived this is a sugar free healthy dip)

I have yet to try an apple cookie – but it’s on the list! and when I am getting towards the bottom of the bucket I usually start to make apple juice with our juicer, or even apple sauce (just boil the apples til soft, drain and puree in blender, add a little cinnamon and voila!).

What are some of your favorite apple recipes? Share in the comments below

Easy Afterschool Snacks

easy afterschool snacks

It’s that time of day when the kids arrive home from school ravenous and hungry, ready to eat anything in sight! They are poking their heads in the fridge, looking for an easy afterschool snack. Eyeing things hopefully on the counter, hoping to grab a quick bite to fill their tummies. You’d like them to have something healthy and with sustenance what do you do?

Afterschool is one of those key times when kids need something nutritious and healthy, but not something that will fill them up so much they won’t eat their supper. You also want a combination of options that they can just grab and go or something that they can easily make themselves, so you don’t always have to pause what you’re doing and make it.

I love that my daughter will come home and grab her own yogurt, simply asking me for a bowl (and if I just move those into a bottom cupboard I wouldn’t even have to do that) and she scoops it up herself. This allows me to continue either working or making supper without having to stop and get her a snack.

The best afterschool snacks are ones that provide essential nutrients and that energy boost – so snacks that include protein, healthy fats and are rich in vitamins are important. Even a little of sweet or salty to please the palate.

Easy Afterschool Snacks

Some of the snack recipes and suggestions below are make ahead, but once made go into the fridge or freezer ready for the kids to help themselves. They are also easy recipes that you can make with the kids (so they can help), or depending on their age, may even be able to make it themselves.

Peanut Butter & Apples

easy afterschool snacksMy kids came home one day asking for this. I have no idea where they got the idea but it makes a great snack. Gives you your protein and sweet. For an extra added boost add in raisins or pumpkin seeds.

apple, sliced

big dollop of unsweetened peanut butter

Put peanut butter into a small bowl. Slice apple. Dip apple slices into peanut butter and enjoy.

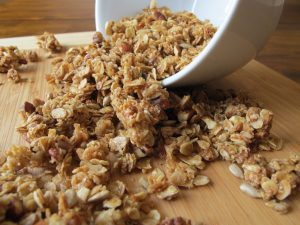
Granola

Pumpkin seeds are a great energy food. High in magnesium, zinc phosphorus and omega 3’s they are also a great source of protein. Honey, a natural sweetener, has a long history of fighting infections and being good for colds, to name a few.

1 tbsp. honeyeasy afterschool snacks

1 tbsp. Earth Balance Vegan Spread

1/2 c. large flake rolled oats

2 tbsp. pumpkin seeds

1/8 tsp. ground cinnamon

1 tbsp. coconut

In a small saucepan on medium heat, melt Earth Balance and cook with honey for 2 minutes. Add remaining ingredients and cook until golden. Let mixture cool for 5 minutes until dry. Break apart and enjoy.

Store in an airtight container to enjoy later.

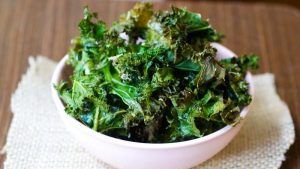
Kale Chips

Kale is a superfood that is high in fiber, iron, vitamins (such as A, C, K), filled with antioxidants and a great anti-inflammatory food. This is a basic kale chip recipe but you can play with the flavor by using different spices.

easy afterschool snacks1 bunch of kale, stem cut out and chopped

olive oil

sea salt

Place chopped kale into medium size bowl. Drizzle with olive oil and massage the oil onto the leaves, making sure they are well covered. Sprinkle with sea salt.

Place onto a large bar pan or cookie sheet. Bake at 250 F for 3-5 minutes. When kale is crisp take them out and let cool.

Keep an eye on your kale as it may not take long depending on your oven and they can easily burn. 

Other Delicious Easy Afterschool Snack Ideas

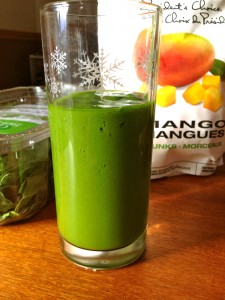
tropical green smoothieSmoothies – power pack with your favorite fruits and throw in chia seeds, hemp seeds or flax for protein and fiber. You can even add in some vegetables like carrots or a handful of spinach. The kids won’t even know it’s there.

Yogurt Parfaits – 3 simple ingredients (fruit, granola, yogurt) this fun snack is something the kids can easily make themselves.

Veggies & Dip – my kids love veggies, but when there is dip, they eat them even faster. What kid doesn’t like to dip stuff?

Raw Chocolate Pudding – made with avocado (a great healthy fat and high in vitamin E), this yummy chocolate pudding will fill the kids up and replenish their energy.

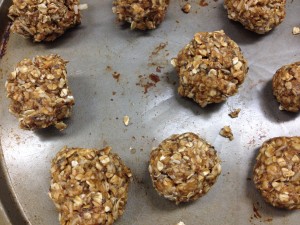
Energy Bites – a favorite at our house, this peanut butter and honey in a ball is a quick easy treat that is packed with all kinds of good stuff. It is also a great recipe to make ahead with the kids that they can just grab and go.

Fruit & Yogurt – simple easy and fun to make, choose your favorite fruit and top with yogurt. And if you’re looking for non dairy there are some great non dairy brands out there like Yoso Coconut Yogurt.

energy bitesCoconut Truffles – another great make ahead and super easy. This yummy healthy sweet treat is made with dates, coconut and chocolate all rolled into one.

Honey Roasted Nuts & Fruits – this yummy sweet treat is rich in vitamins, antioxidants, healthy fats and protein.

Strawberry Banana Ice Cream – no dairy added to this ice cream and super easy to make! Just pop frozen strawberries and bananas into the blender and voila.

Afterschool is a time when you want the kids to be able to help themselves to nutritious healthy snacks that will fuel them without ruining dinner. And it’s a great way to start giving them a little independence. Make it easy, make it fun and get them to help create!

It’s also a perfect time to introduce some new foods by incorporating foods that they like with new ones. Make it fun and encourage them to try it. You can foster a loving and supportive environment to try it in; and with them having making it themselves and gaining a little more independence, you’ll have even more success.

Camping Recipes – Campfire Nachos

campfire nachosOne thing about exploring new camping recipes this summer is that it has definitely expanded my horizons and opened up my thinking; as well as adding more variety to our camping menu! For instance I had never thought of making nachos while camping. It just never entered my mind. And really the question is why couldn’t you?

Campfire nachos adds great variety to the camping menu and is almost a treat. It is also a quick easy, healthy, and well balanced recipe (ok except maybe the chips), but it’s another one of those quick ‘one pot’ deals that I love while camping.

campfire nachosWe made it on one of those lazy and enjoyable camping days where we had floated down the river in the morning and were just hanging around the campsite in the afternoon. I had precooked the ground turkey that afternoon, knowing that we were having the nachos for supper and saving me that step when it came time to actually put them together.

Matthew made the fire as usual and I prepped dinner. The thing that I like about this recipe for campfire nachos is that you do not need a bed of coals to cook it. Simply a good fire and cook on top of the grill. It also does not take very long as you are literally heating through and melting the cheese. Saves your hungry campers drooling over it and constantly asking when it is ready!

I did mine in two batches due to the size of our grill, but I would recommend doing it in two batches regardless. Doing it this way makes it easier to move on and off the grill without spilling it and carrying it to the table.

Everyone gobbled it up of course and asked for seconds. The beauty of nachos as well is you can really put any ingredients you like on them. I’ve even heard of people putting on fruit or pickles! Whatever ingredients you choose you know they are going to be delicious.

Campfire Nachos

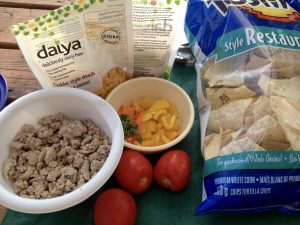
1 lb. ground turkey meat (may also use chicken, beef, pork)

1 – 500 g bag tortilla chipscampfire nachos

2-3 fresh tomatoes, chopped

1 pepper, chopped (choose your color green, red, yellow, orange or a mix)

green onion, chopped

1 pkg. Daiya cheddar cheese shreds

Earth Balance Vegan Spread for lightly greasing foil

1 container Earth Island Vegan sour cream for topping

heavy duty aluminum foil

Brown meat in a frying pan either on camping stove or over the fire (this step can be done in advance and stored earlier in the day if you wish).

Chop tomatoes, peppers, green onion and set aside. Tear off 2 large pieces of heavy duty aluminum foil (approx 22 x 12 inches) and place shiny side down on table. Lightly grease both pieces of foil with Earth Balance.

Make two batches by doing the same for each or you can make two different kinds if you like.

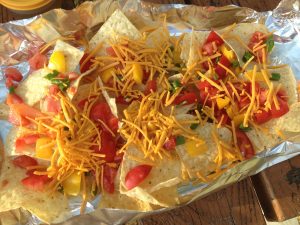
campfire nachosPlace tortilla chips in a single layer on top of the foil, then sprinkle turkey, tomatoes and pepper evenly over chips. Sprinkle cheese and then green onions on top.

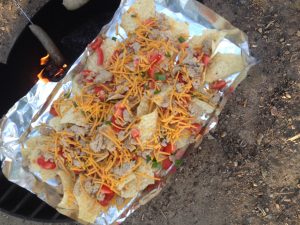
With a second piece of foil place shiny side in, lightly over top of nachos, tenting it so that it does not rest on top and stick to your toppings. The second piece of foil helps the cheese to melt faster and prevents any pieces of ash that may spark up from getting into your nachos. Place prepared nachos on top of grill on fire and cook, approximately 10-15 minutes. Check nachos periodically to make sure they do not burn. They may also be ready sooner depending on the heat of your fire.

Once done – heated through and cheese melted, remove from grill of fire using oven mitts and serve with sour cream. Enjoy!

Serves 4 

campfire nachos*a quick tip to help you transfer the nachos from table to fire is to use a wooden cutting board. I just slid them onto the board and took them over to the fire, then gently slid the nachos onto the grill. I did the same when taking them off, aligning the cutting board with the grill and then sliding them off using oven mitts onto the board. I recommend a wooden board because you can get it close to the fire even top the side of the grill without melting or damaging it.

Missed out on our other camping recipes this summer? Check out Campfire Lasagna, Potato Boats, Campfire Corn on the Cob, Cinnamon Apples, Banana Boats, and Pineapple Upsidedown Cake.

Camping Desserts – Campfire Pineapple Upsidedown Cake

campfire pineapple upsidedown cake

When I found this recipe for campfire pineapple upsidedown cake I was in heaven! Growing up pineapple upsidedown cake was always a treat in our house, my Oma being famous for making it.

My Dad absolutely loved it and every time my Oma came to visit she would make one for him (that and crumb cake, also delicious). So when I discovered this recipe we could make over the fire I knew that we had to try it. Plus I was excited to find a new camping dessert recipe, cause though I love banana boats and cinnamon apples I also like variety on the menu.

campfire pineapple upsidedown cakeWe made this recipe on our first camping trip this year on July long weekend. We actually made it in the afternoon on one of our days away, before we had supper. One of the things I find when camping is that because there is no schedule meals often run later than usual. Often we are not finishing supper til 7 or 8 and by that point not only am I full but I don’t feel like creating more food. So we decided – in the words of my father – that we would ‘eat dessert first’. Then worry about supper later.

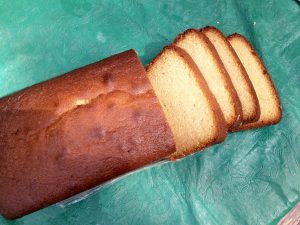
I had made the pound cake at home and brought it with us which was easy enough to do. You can also buy a pound cake if you prefer but I needed a sugar free version. Plus honestly, regardless of if I was looking for sugar free or not, I usually bake cake from scratch no matter what it is. I am not one to buy cake from the store in general.

I had also experimented with the pound cake recipe using honey for the first time as the sweetener. Oh my it turned out well. Nice and moist. Yum! We had a hard time not eating just the cake before we made the rest of our dessert.

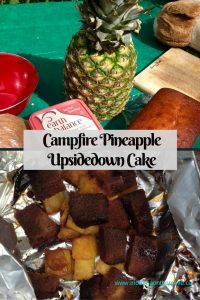
The recipe for campfire pineapple upsidedown cake is simple – pound cake, pineapple, coconut sugar (great natural alternative to brown sugar), Earth Balance and cinnamon and/or nutmeg. Baked in foil over the fire until the sugar melts and you get that nice googey syrupy liquid. You do need to be careful not to over cook it as it can burn, especially if you are doing it over the grate on the fire. Alternatively, you could burn your fire down to coals and bake it, but that would take longer!

Campfire Pineapple Upsidedown Cake (sugar free & dairy free)

pound cake, cut into chunks *recipe for pound cake belowcampfire pineapple upsidedown cake

fresh pineapple, cut into chunks

dash of cinnamon, nutmeg

coconut sugar

coconut cream for topping

1 healthy spoonful of Earth Balance Vegan Spread, plus a little bit to grease your foil so the dessert doesn’t stick

heavy duty tinfoil

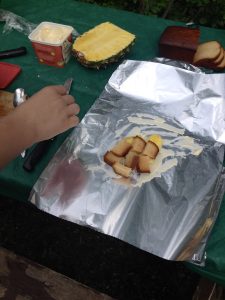
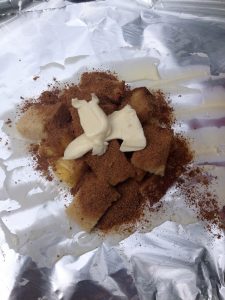
Tear off piece of heavy duty tinfoil (about 12×12″) and place on table (or flat surface). Use a small amount of Earth Balance and spread evenly over the foil. Slice and cut pineapple and place on foil. Slice pound cake and cut into squares about 1 inch thick and place on top of pineapple. Put a healthy spoonful of both Earth Balance and coconut sugar over pineapple and cake, sprinkle with cinnamon and/or nutmeg.

campfire pineapple upsidedown cakeClose up the foil by brining two ends together and folding over then rolling down til tight. Then fold over and roll on each end. This creates a nice tight packet that keeps everything in and is easy to open when done.

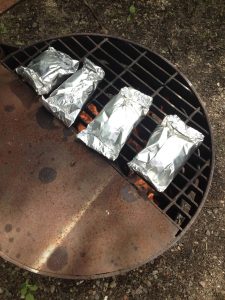
Place foil packet on the grill over fire. (Also works well by putting into coals of fire, but no flame or BBQ). Cook for about 5 minutes and then check it (takes a little longer on the BBQ). It is ready when the butter and brown sugar have melted and formed that yummy syrupy liquid over pineapple cake mixture. Put a dollop of coconut cream on top if desired. Enjoy! It will be hot so be careful.

We loved these. Everyone inhaled theirs and then wanted more. And I loved how simple it was. The kids could make and put together their own (so making it as little or as big as they wanted) and it didn’t take long to cook as you are basically just melting the Earth Balance and coconut sugar. Then voila! it is ready at any time of day, whether you choose to have it before supper or not.

This is the recipe for the pound cake I made. It was also quick and easy and I really liked using honey as the sweetener. Make sure you sift the flour as though it takes a few extra minutes to do so, it makes the cake lighter and fluffier.

Honey Pound Cake

1 c. Earth Balance vegan spread

1 1/2 c. flour, siftedcampfire pineapple upsidedown cake

1 c. honey

1 tsp. vanilla

5 eggs, lightly beaten

1/2 tsp. sea salt

Lightly grease a 4 1/2 by 8 1/2 inch loaf pan. In a large bowl beat Earth Balance and honey together until light and fluffy.

Add vanilla and then gradually add eggs, beating well. With mixer on low, add salt and the flour. Beat well to combine.

Transfer batter into loaf pan and bake at 350F for about 65 minutes, until toothpick inserted in center comes out clean. Let pan cool on wire rack for 1 hour. Remove cake from pan and let cool completely on rack before slicing.

Cake may be stored in plastic wrap at room temperature for up to 3 days or frozen for up to 3 weeks.


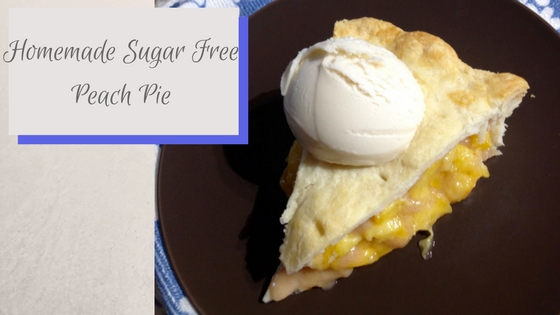
Homemade Sugar Free Peach Pie

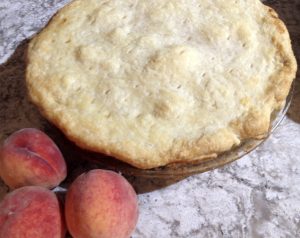
sugar free peach pie

Peaches are one of the wonderful fruits that are fresh and abundant in the summer months. Stock full of vitamins and minerals (like Vitamin E, K, A and lots of B’s), there’s nothing like biting into a fresh juicy peach on a summer’s day.

We often get our peaches fresh from the Okanagan fruit stands while out visiting Gran and Grandpa in BC, ok that is the only place we get our peaches. Once I’ve bitten into a fresh ripe Okanagan peach I just can’t bring myself to buy them in the store. They simply aren’t as good, not as juicy and not as flavorful. So once we’ve eaten them all I don’t get any more (unless I can go back to BC and get some).

Besides eating them fresh (my son sometimes eating 4-6 at a time!), I usually make peach jam, (which I love!), and make the odd crumble. It wasn’t until my neighbor went on one time about how much he loved peach pie that I even considered the possibility. I love making pies in the summer with all the fresh fruit, cherry pie being my favorite, but I had never made peach. So I set out to experiment.

sugar free peach pieWhen I originally found and made this peach pie recipe it was before we had eliminated refined sugars from our diet. So when I pulled up the recipe this summer (as my mother was asking that I share it with her) I had to make a few adjustments. I hadn’t realized that it still had white sugar in it.

I thought about using agave nectar, which I knew would work and is what I did originally when I transformed my cherry pie recipe, but I have heard a number of reports lately that agave is no better than refined white sugar. I had recently tried using honey in a pound cake recipe that turned out successfully so I decided to give honey a go for the peach pie.

As luck would have it, it turned out great, and everybody ate it up. With my oldest son even commenting that my pies are way better than Gran’s, as he inhaled his pie. My tip though is to make sure that you mix the honey in very well with the flour mixture so you don’t get any clumps of flour. The other option is to do the flour mixture without the honey, sprinkle it over the peaches, and then pour the honey over the peaches. It does produce a lot of juice regardless so I recommend a deep pie dish for sure.

Sugar Free Peach Pie

2 – 9″ pie crusts (store bought or homemade*)

1 egg beatensugar free peach pie

5c. sliced peaches, peeled and sliced

2 tbsp. lemon juice

½ c. flour

1 c. honey

½ tsp. cinnamon

1/4 tsp. nutmeg

1/4 tsp. salt

2 tbsp. butter

Brush some of the beaten egg on crust to keep from getting soggy. Place peaches in a bowl and sprinkle with some lemon juice, mix gently. In a separate bowl, mix flour, honey, spices and pour over peaches, mix gently. Pour into pie crust, dot with butter. Put on top crust fold edges under. Flute or seal by pressing with a fork dipped in egg. Brush egg over the top crust.

Bake at 450 F for 10 minutes, then reduce heat and bake for 30-35 minutes until crust is brown.

Enjoy! (And don’t forget the ice cream! We enjoy a delectable creamy non dairy vanilla ice cream by Rice Dream. It’s fantastic.)

* I make my own pie crust which turns out flaky and delicious every time simply by using Tenderflake and following their recipe on the box.

What’s your favorite kind of pie in the summer? Share in the comments below.

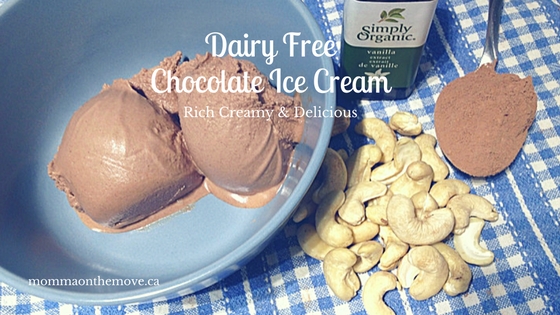
Rich Creamy Dairy Free Chocolate Ice Cream


dairy free chocolate ice cream

One of the most popular frozen sweet treats in the summer is most definitely ice cream. It’s great to be able to stop and enjoy an ice cream cone on a warm summer’s day. In fact I was drooling over them yesterday at the zoo, as everyone was walking around with a yummy soft serve ice cream.

When we went dairy free I was sad to miss out on all the wonderful ice cream flavors and the sweet yummy treat it provided. (I really missed ice cream and also cheese when I went dairy free, cause at the time there were not any really good dairy free alternatives). Not only was ice cream a great summer treat it used to be a staple at my house! When we were little we’d often anticipate ice cream after dinner, with my Dad being the worst contender.

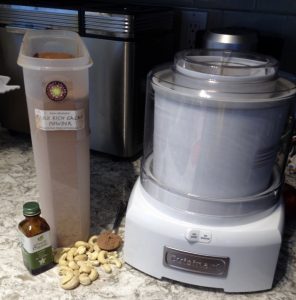
I knew there were ways though that I could still indulge in my ice cream fetish that were still yummy and delicious without all the dairy. My first step was to buy a ice cream maker. Though not a necessity to make ice cream, there is just something fun about watching your liquid concoction turn into yummy ice cream. I also tried out some of the non dairy ice creams on the market, which there are some good ones, such as Rice Dream and Coconut Bliss, but they are very expensive and making my own was a much cheaper alternative. Besides I could control what I put into my ice cream and could avoid all the preservatives present in store bought brands.

dairy free chocolate ice creamAnd honestly, making your own ice cream does not take long at all. It is basically the time to mix your ingredients in your blender and churn it in the ice cream maker (usually about 30 minutes tops). So if you time it right there really is no waiting at all (and even if there is, doesn’t that create anticipation and excitement therefore enjoying even more the result?)

Making ice cream is also fun and easy to do with the kids. My kids help mix everything up and also love watching it churn. So far we have tried a few dairy free ice cream recipes, such as Simple Vanilla and Strawberry Banana, but our favorite so far is Peanut Butter Ice Cream, oh so yummy!

But what I like about this dairy free chocolate ice cream is the fact that there is no milk in it whatsoever, not even non-dairy, and uses cashews instead to create the creamy texture, which really amps up the nutrition. Cashews are a great source of fibre and are packed with vitamins, minerals and antioxidants like copper, Vitamin E and magnesium. I love it when I get to enjoy a yummy sweet treat and it is super good for me and for the kids (nothing like sneaking in the good stuff right?).

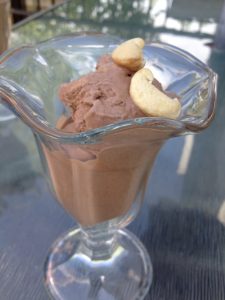
The other element that is important when I am trying out recipes is that they are sugar free, using natural sweeteners to sweeten if needed. So not only is this dairy free chocolate ice cream without dairy, it also has no refined sugars or sweeteners. And believe me taste is not compromised. This is a rich creamy chocolate ice cream that you will not believe is sugar or dairy free. You can serve it to you friends and they will be none the wiser.

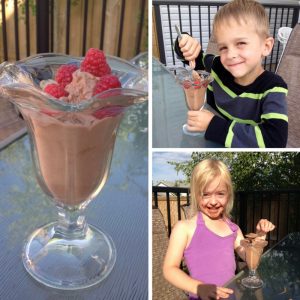
My kids of course, gobbled it up and asked for seconds. Chloe got chocolate all over her face and they both got a little creative adding raspberries that they’d freshly picked from our raspberry bush, which made it even more delicious.

You could also add in other ingredients to this chocolate ice cream, like coconut or chocolate pieces.

Dairy Free Chocolate Ice Cream

1 3/4 c. cashewsdairy free chocolate ice cream

1 3/4 c. water

1 c. pure maple syrup

2 tsp. vanilla

1/2 c. cacao powder

Combine all ingredients in a blender and mix well. Pour into an ice cream maker and freeze according to instructions.

I found that our ice cream maker brought it to a nice soft serve consistency, which is what I believe most ice cream makers do. You can serve as is or if you’d like to have a firmer consistency transfer contents from ice cream maker into freezable container and put in your freezer til firm.

*If you do not have an ice cream maker don’t despair! Once ingredients are combined pour into a freezeable container with lid and place in your freezer for 6-8 hours or overnight. The advantage of an ice cream maker is simply that your ice cream is ready a little bit faster.dairy free chocolate ice cream

Do you have a favorite non-dairy ice cream recipe? Share in the comments below.

Frozen Sweet Treats – Peach Slush

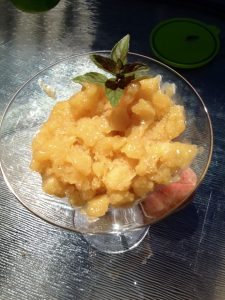
peach slushA highlight for many in the summer is slushy frozen drinks. Often times we would simply pop to the 7-11 and grab a slushy, but once I started paying more attention to what actually went into these slushies (can we say mountains of sugar and artificial flavors?) I was on the hunt for a slushy recipe that I could easily make at home (and without all the sugar!)

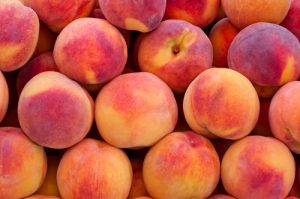
When I started browsing for ideas I came across this recipe for a peach slush; which it turned out I had already saved a while back in my recipes to try. It was also the perfect time to try it as we had just returned from the Okanagan with a mountain of fresh peaches.There is nothing like using your fresh fruit to make your delectable treats! It was a perfect fit. Peaches are also rich in vitamins such as Vitamin A, beta carotene and Vitamin C, as well as many minerals so super good for you!

At first I was a little hesitant to make it cause though it was a quick mix of ingredients in the blender, it was the 1 to 2 hours of waiting and stirring that deterred me a little bit. I kind of like instant! Plus I sometimes forget when I have to pay attention to things to stir every so often. But I found a way to make it work and honestly it was not that bad. Plus it makes a great easy, healthy, naturally sweetened frozen treat that you can make and enjoy at home.

The original recipe did not call for any sweetener but I found it needed just a little bit so I added in a teaspoon of honey. Depending on your level of desired sweetness will depend on whether you opt in to add it yourself. I can also see this recipe working well with other fruit such as strawberries, raspberries, maybe even watermelon.

Of course the kids enjoyed it. They are great little testers of Mom’s new recipes and help me adjust it when needed. Try it out and let me know what you think.

Peach Slush

2 fresh peaches, peeled and chopped

1/8 c. waterpeach slush

1 tsp. honey

1 tsp. fresh lime juice

Peel peaches by putting them in boiling water for 30 seconds. Chop peaches into chunks and put in a blender.

Add water, honey and lime juice. Blend until smooth consistency.

Pour into a 9×13 pan and freeze in freezer for one to two hours. Stir a few times so that it does not freeze into a solid block.

When ready stir and whip it up with a fork so it has a nice slushy consistency.

Serve immediately in a cold dish. Makes 2 small servings

Have a great slush recipe? Share in the comments below.