Summer Sippers – Easy Summer Drink Recipes with Essential Oils

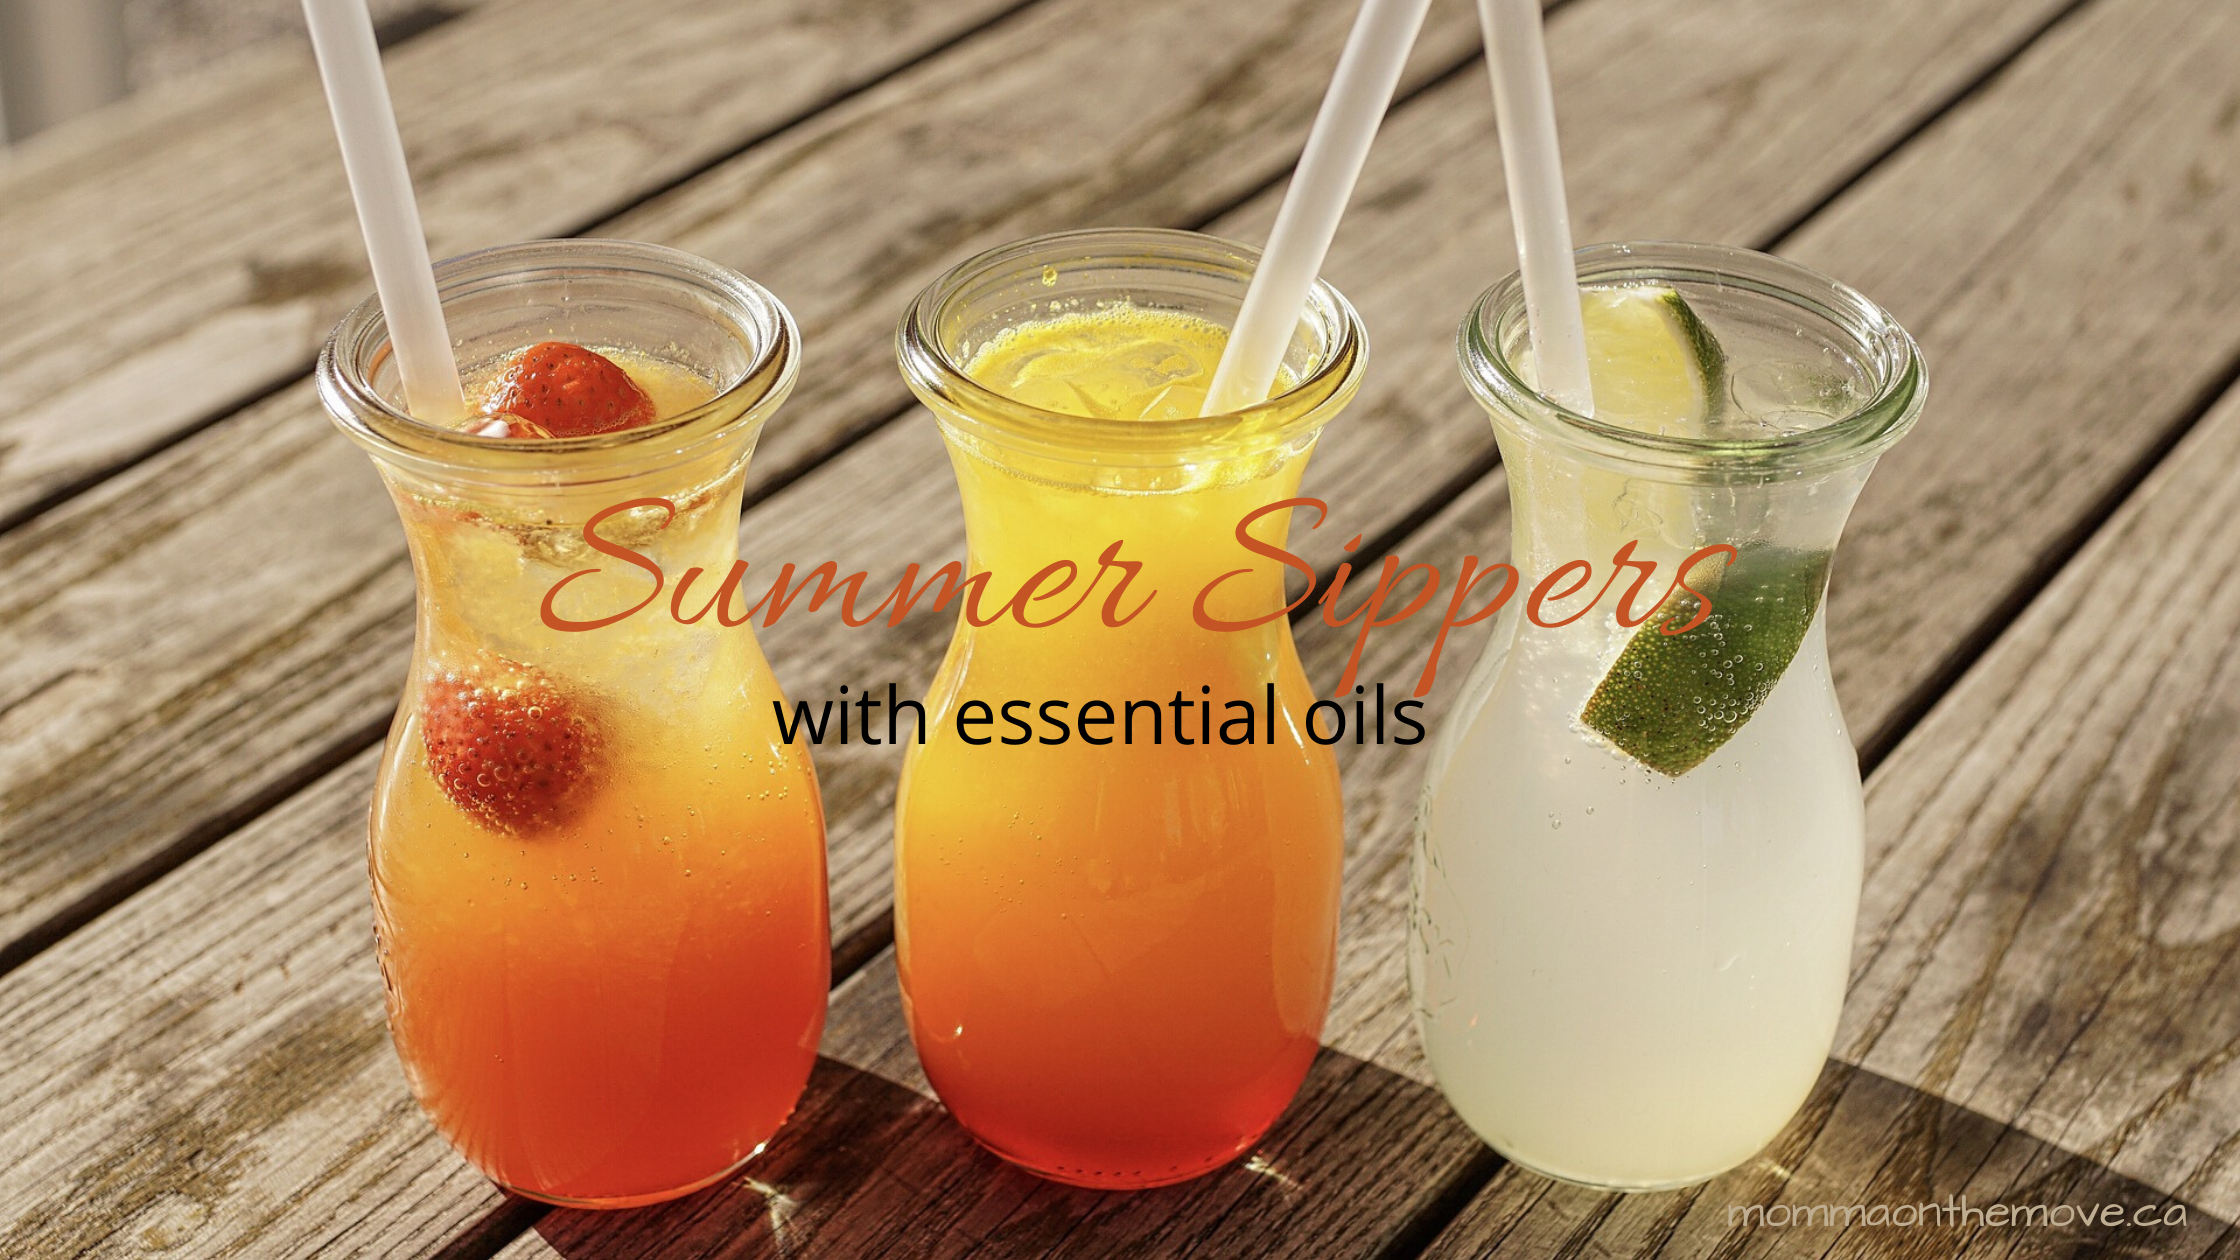
Summer is here! And you know what that means, fun fancy drinks on the patio on those hot summer days. Yum!

Don’t you love sitting out on the patio, socializing with friends and enjoying that yummy drink? But a few yummy drinks later and usually your sugar intake is good for the week!

I love incorporating some easy seasonal natural flavors combined with my essential oils and not only have I reduced the sugary intake, I now have more healthy options to enjoy on those summer days.

Which Oils Can I Use?

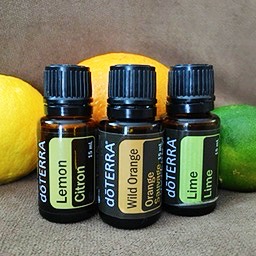
Citrus oils are a good bet in any summer drink. Lemon, Lime and Wild Orange all go very well in drinks and add that little extra punch to whatever your drinking. Plus they are great in a pinch when you don’t have those fresh lemons or limes on hand.

You can also use oils like Lavender, Basil or Celery Seed to create unique or spicier drinks for some of those classics (if you’re a Caesar fan Celery Seed here I come).

Whether you are creating your own or trying out a recipe, using your oils gives you great versatility and options to create those yummy refreshing summer drinks.

A Few Recipes to Try

Whether you are looking for just a summer refresher or something with a little more punch, all these recipes can either be made as mocktails or with a splash of your favorite spirit.

Lavender Lemonade

A twist on the classic lemonade, adding Lavender to this recipe gives it a softness and unique taste that’s pleasing to the palate.

Orange Martini

This yummy martini is lovely and creamy with the fresh orange juice and Wild Orange essential oil. Easy to make without the alcohol if you choose and just as delicious.

Classic Mojito

This virgin version of your classic mojito is so easy and refreshing.

Raspberry Limo-nade

Raspberries and lime are so good together. The lime really enhances the flavors of those already delicious berries. And I love that it’s naturally sweetened with honey (use local and get even more health benefits)

Of course the possibilities are endless! and you could basically take any of your favorite drinks and substitute essential oils in place of your fresh lemons, limes, mints etc. Why would you want to do that you ask?

Well one is convenience. Your essential oil is always on hand, you don’t have to worry about having the fresh stuff or having it go bad. It is also great for when you go camping, so hard to keep the fresh stuff from going bad!

Two, it saves money. When you buy that fresh basil for that drink and you either a) use it once and then the rest goes to mush in the fridge b) you have good intentions but then forget to use it all together and it goes to mush in the fridge. Plus your 15 ml bottle has 250 drops of oil in it, and when you use 2-3 drops per drink you can use it up to 83 times and works out to about 14 cents, which is less than what you would purchase fresh for.

Fresh is wonderful of course and adds so many things to your food and drinks, but your essential oils are great alternatives and so handy when it works!

Which Summer Sipper are you going to try first?


Save on Music, Books and DVDs at Indigo.ca

Sugar Free Whoopie Pies

sugar free whoopie pies

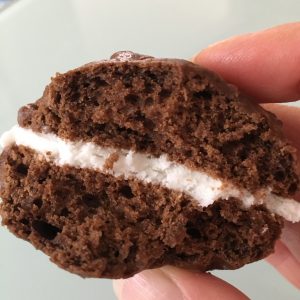
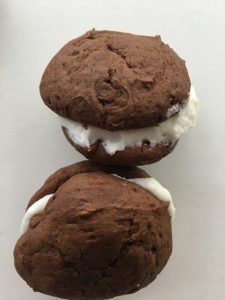
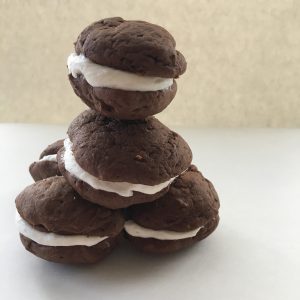
Moist soft chocolate cake type cookies with a massive amount of creamy white filling inside…. these are whoopie pies and OMG are they delicious! Absolutely Divine!

Growing up these were a special treat in my house and needless to say they didn’t last very long. I could easily pop 3 in a sitting and unless you doubled the recipe there were only about 16 in a batch, so really in a house of 5 that didn’t make for many in your tummy unless you were fast!

When we made the switch to a sugar free household, sadly whoopie pies were one recipe that I didn’t make anymore because I had no idea how to modify the recipe. Being new to the whole sugar free world and substitutions I was at a loss. So they were left unmade for years. Until this weekend….

My youngest son and I decided to take the plunge and modify the recipe to see if we could create these whoopie pies successfully. We debated between using honey or coconut sugar as the sweetener, and decided we’d try one and if it didn’t work out, we’d try the other one later. I am happy to report we got it right the first time and now I can share these delectable sugar free treats with you! (I would suggest just doubling the recipe right from the start, I mean really why deny yourself?)

Deals of the Week: New deals every week, online only!

Sugar Free Whoopie Pies

Cookie:

1/2 cup shorteningsugar free whoopie pies
1 cup coconut sugar
2 egg yolks
2 cups flour
1/2 tsp. baking soda
1 tsp. baking powder
1/2 tsp. sea salt
5 tbsp. cacao powder
1 cup almond milk (or non dairy milk of choice)
1/2 tsp. vanilla
1/4 tsp. almond extract

Cream shortening and coconut sugar. Add egg yolks and beat. Add cacao powder and salt, vanilla and almond extract. Stir in dry ingredients, alternately with milk. Let dough sit for 10-15 minutes.

Drop by teaspoon onto a cookie sheet. Bake at 350F for 10-12 minutes.

When done remove from cookie sheet and place on cooling rack to cool completely.

Filling:

2 egg whitessugar free whoopie pies
1/2 cup shortening
2 cups sugar free icing sugar*
1-2 tsp. of honey
1 tsp. vanilla
dash of salt
1 drop Peppermint essential oil (optional)**

Put all ingredients, except honey, into a bowl and mix together. Beat well and taste for sweetness. Add 1-2 teaspoons of honey to taste. Beat until light and fluffy.

**A mint filling would be delicious with these. If you’d like a mint filling, then add 1 drop of Peppermint essential oil. Measure 1 drop onto a spoon and stir into filling. Measuring onto a spoon helps prevent putting too much in! If you get two drops on your spoon instead of one then you can just wash your spoon and start again. If you measure it straight into the bowl and get too many drops then you’ll have too much mint and have to make your filling over again.

Put cookies together by taking 2 completely cooled cookies, add desired amount of filling on one side (and you can put a lot), then place the second cookie on top like a sandwich. Repeat this until you have all the cookies put together. Place in an air tight container and store in the fridge.

Note: The recipe makes a lot of filling so feel free to be generous with the amount of filling that you use for each cookie.

My kids loved these so much they are now requesting that their birthday cake simply be a giant Whoopie Pie! I’ve never done it in a big cake before but I think it can be done. I’ll keep you posted…

PS –  these also make awesome treats for Valentine’s Day! Satisfy that chocolate fest and treat those you love with these delectable treats. Maybe you could even make them heart shaped? Hmmm… I bet it could be done 🙂

sugar free whoopie pies

*Sugar Free Powdered Sugar (replacement for regular icing sugar)

1 cup nonfat powdered milk (for dairy free use powdered coconut milk)
1 cup cornstarch
2/3 cup Krisda Stevia for baking

Combine all the ingredients in a food processor or blender and whip until blended and powdered. Store in an airtight container.

This replacement can be used in any recipe calling for icing sugar.


Raw Organic White Chocolate

white chocolate

When I first learned how to make my own chocolate I never even considered that making white chocolate would also be an option. I was so excited about just making the regular chocolate that I didn’t even think about white.

It wasn’t until years later, when I was looking at making white chocolate macadamia nut cookies that I wondered if I could somehow create white chocolate? Of course it had to be possible, it existed, so someone somewhere would have had to have figured out how to do it.

So I poked around a little bit, did a little googling and had my answer within minutes. Of course when I read what needed to be done it made perfect sense. Why I had not thought of it myself, who knows. But you know how sometimes you need someone to point out the obvious to you….

The basic trick in making raw organic white chocolate was that you need to use another powder than cacao powder, that was white. You need to use the powder to thicken it and bring it all together, because otherwise you would literally just have the cacao butter, though the right color, on it’s own is kind of oily and tasteless, which kind of defeats the purpose.

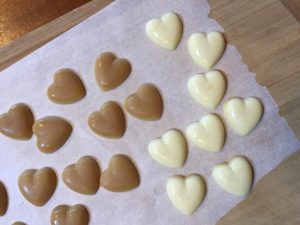
white chocolateThe magic answer is simply, milk powder. It is the right color and consistency and the good news is, ANY milk powder will do. If you want to keep your chocolate dairy free, there are non-dairy milk powders such as soy or coconut to make that work. It was so easy!

Another thing to keep in mind when creating white chocolate is using a fresh vanilla bean will no longer work, unless you want little black dots in your white chocolate. Even regular vanilla extract is brown in color, so to keep it purely white, use clear vanilla extract instead.

Otherwise go to it! If you have already tried the regular raw organic chocolate recipe you’ll be able to white with ease. And if you are new to chocolate making, it really is easy, so you’ll be a pro in no time!

Raw Organic White Chocolate

3/4 – 1 cup cacao butter

2-6 tbsp Soy milk powder or Coconut milk powder (just a caution if choosing soy milk powder, it is not pure white and has a slight tan tinge to it, so if you want it more of a caramel color perfect! but if you want white then I would choose coconut milk powder instead)

1-2 drops of clear vanilla extract (use a pipette if using vanilla extract as you only need a tiny bit, adding too much can ruin your chocolate)

2 tsp. to start Natural Sweetener of choice (again consider color I find clear stevia drops are best or even white stevia powder – honey and pure maple syrup will make your white chocolate more tan or caramel)

  1. In a medium metal bowl add boiling water about halfway up the bowl. *a metal bowl is best as it retains the heat well but can get hot to the touch Place second smaller metal bowl on top of large bowl so that it sits on top of the rim of the first bowl.
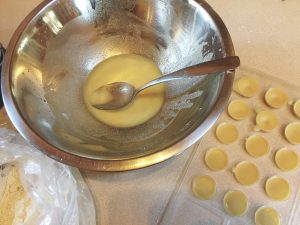
  2. Put desired amount of cacao butter into top bowl. Cacao butter will start to melt.
  3. While cacao butter is melting, add clear vanilla extract. Drop 1-2 drops at the most into cacao butter and stir.
  4. Once cacao butter is completely melted add 2-4 tablespoons of coconut milk powder. Taste for desired level of chocolatey-ness. If you’d like it richer add more milk powder.
  5. Once satisfied with amount of coconut milk powder add natural sweetener of choice. Start with 10 drops of clear stevia drops. (You may choose another sweetener but be aware that if you choose something like pure maple syrup this may darken your white chocolate, if so start with 3 teaspoons to sweeten). Taste, if desired level of sweetness has not been reached, add 2-5 drops of stevia and taste again (1-2 teaspoons if using another natural sweetener). Once level of desired sweetness has been reached you have your base chocolate.
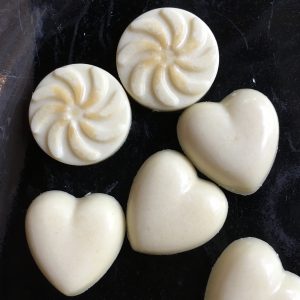
  6. For plain white chocolate, spoon your white chocolate into molds and let set in freezer or fridge.
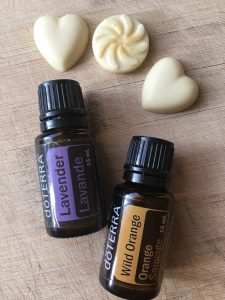
  7. white chocolateIf desired, before setting add additional ingredients such as nuts, dried fruit, coconut, essential oils such as Wild Orange, Peppermint, Lavender, etc. Ensure that the essential oils you are using are safe to ingest, as not all essential oil brands are created equal and many have synthetics and fillers in them that you definitely don’t want in your body! Also if oils are naturally colored they may change the color of your chocolate slightly (like Wild Orange). Pour white chocolate onto a cookie sheet or into a pan to let set for bulky additions, like fruit and nuts. If using essential oils you can pour into molds to set if desired.
  8. Put pan or molds into the freezer for about 5 minutes. Check to see if firm. If firm you can pop them out of your molds or break it up from the pan. If not leave in the freezer for a few more minutes and check again. Chocolate is best set in freezer (and ready faster!) but may also be set in fridge.

More Tips for Making White Chocolate

*Be very careful not to get any water into your chocolate as it will not work if you do. If your second bowl sits nicely on top, this should not be an issue as you do not need to lift the second bowl off the one with the water in it until you are done making your chocolate.

**you could use a vanilla bean in this recipe if you wanted, but because it is white chocolate you will see small black dots in the chocolate. If you would prefer solid white stick with the clear vanilla extract.

***when adding essential oils to your chocolate, measure 1 drop onto a teaspoon and stir it into your chocolate. This way if 2 or 3 drops come out instead, it’s on your spoon and not in the chocolate with the flavor way too strong!

****when popping out the chocolate from your molds, use a cutting board on parchment paper or plate. Popping them out directly onto the counter not only makes it hard to pick up, but it also may start to melt as often times the counter is warm.

*****You could also make the chocolate with fillings such as caramel, nuts or other desired filling, in the middle. For this you simply put a bit of chocolate in the bottom of your mold, let it set then add your filling and top up the mold with chocolate and let set completely. If you wanted to get really fancy, make a batch of regular chocolate as well and make layers – have them be white and dark. White chocolate is also great to use for Chocolate Dipped Strawberries! In fact, I discovered a cute Halloween treat this year that are strawberry ghosts. What a great idea! Fun and healthy.

sugar free valentines treats

Making white chocolate opens up a whole new world of possibility and is just as fun as making regular chocolate. And now you can get even more creative with it! Who knows maybe next you can make swirls!

Boost Your Immunity Naturally with On Guard

I have been a journey for awhile now to reduce the amount of chemicals and toxins in our lives. It seems that so many products we use these days, whether they be food to cleaners and even medicines we are using to alleviate or prevent being ill, contain things we do not really want in our body.

As a society we have moved into using a lot of synthetic and chemical laden products which not only inhibit our health but can often be the cause of illness. So I have looked to more natural ways to reduce the toxins and chemicals and support a healthy immune system naturally.

I have tried a number of different things over the years such as homeopathic remedies, using tea and honey and a few more. And though they have been helpful to some point, nothing has compared to the use of OnGuard essential oil blend from doTERRA. Whenever I feel something coming on or notice that the kids are, I start diffusing it immediately, or I will take an On Guard beadlet – and whatever was percolating does not develop or worsen. In fact, it disappears fairly quickly and we move on. And I feel good in knowing that we did it naturally.

On Guard essential oil blend is a powerful blend comprised of Wild Orange, Clove Bud, Cinnamon, Eucalyptus, and Rosemary. It supports healthy immune function, contains cleansing properties and is a must have in any family’s home to help prevent and alleviate feeling ill. Especially during cold and flu season! It is super easy to use.

Top Ways to Use On Guard Essential Oil

Preventative Uses:

  1. Place one drop on the bottom of your feet each day.on guard essential oil
  2. Or take 2-3 drops daily in a veggie capsule.
  3. Diffuse in your home on a regular basis – add 2-3 drops in your diffuser.
  4. Make an On Guard spray and use to clean counter tops, door handles, etc. (10-15 drops in a 2 oz. spray bottle and fill with distilled water).
  5. Use in recipes such as smoothies, pancakes, your pumpkin pie, chocolate or other dishes that suit this blend. A yummy snack is to soak sliced apples in water and add a few drops of On Guard.
  6. Combine a few drops of On Guard with aloe vera and water to create a natural hand sanitizer.

If you feel something coming on try:

  1. Taking 1-2 On Guard beadlets (these are great for kids) or an On Guard Soft Gel.
  2. Diffuse, diffuse, diffuse! (especially at bedtime so it can work while your body is at rest)
  3. Use your On Guard more frequently – so if you were using it preventatively once a day, try twice a day until your symptoms have gone.

Other Uses & Benefits:

On Guard doesn’t just support and boost your immune system it also supports:

  1. healthy circulation
  2. protects against environmental threats
  3. is uplifting and energizing
  4. support’s the body’s natural antioxidant defenses
  5. can be used as a non toxic cleaner
  6. can purify the air in your home

On Guard really is a blend that our home cannot go without! Ever since we have started using this in our home, we are rarely sick and on the odd occasion that we do notice something coming on, it is nipped in the bud very quickly and does not develop further. It is definitely our go to during cold and flu season, as well as throughout the year for immune support.

The last thing I love love love about doTERRA On Guard is that it not only comes in essential oil form but has a whole On Guard product line to support all the different areas of your home – like toothpaste, mouthwash, cleaner concentrate, foaming hand soap, throat drops and much more! Click here to see the full range of On Guard products.

If you love natural products and you’re interested in bringing On Guard into your home contact me and I’ll help get you started.


Shop Calendars.com for Great Deals!

Hiking with Kids – The Fenland Trail

fenland trail

My son’s first hiking experience was the Fenland Trail in Banff at the age of 2. I had decided that I wanted to get Matthew out there, knowing that starting early with kids was the key to getting them to know and enjoy things. When introduced at a young age, it becomes natural and what they know.

fenland trailThere is also value in getting kids outdoors and nurturing their innate curiosity about nature and their connection with the environment. The Fenland Trail, which is just on the outskirts of the Banff town site, was the perfect introduction to hiking as it is a short 2 km self interpretive loop trail, that is mostly flat. There is a self guided pamphlet available at the trailhead that highlights 8 markers along the loop that teach you about the lifecycle of the montane forest. Not only does this help keep kids engaged as they are often looking ahead for the next post, but it teaches them about nature and about the environment of the trail that they are on.

fenland trailPlus the trail itself is beautiful. It winds through a white spruce forest along the eastern edge of the Vermillion Lakes marshland; and part of the trail also runs along the Echo & Forty Mile Creek. And I don’t know about you but I always love a trail that has some kind of water along the hike. It just adds something to it listening to the trickling water as you’re hiking along.

There is also the opportunity to view wildlife on this trail, as you may catch a glimpse of a muskrat or busy beaver in the creek. Elk and deer in the open fields and a plethora of songbirds chirping in the background, such as the black capped chickadee and gray jay.

fenland trailI love this trail for young kids and toddlers because even though it is about a 30- 40 minute hike, you can go at a nice leisurely pace, allowing the kids to stop and pause along the way, exploring and checking things out. Playing by the creek or sitting at one of the benches along the trail for a break or a snack. You don’t have to rush, you can take an hour or more if you want. I think the first time we went it took us 2 hours! but that was fine, Matthew finished the hike having enjoyed it and feeling successful (and yes he still had energy to burn).

fenland trailOne thing that you do need to keep in mind is because it is close to both the creek and the marshlands the mosquitoes can be abundant. So make sure you take your bug spray or natural bug repellent, so you can enjoy the trail without swatting at the bugs! (If you do get bitten you can use Lavender and Peppermint essential oils on the bites to reduce the inflammation and itchiness).

There are many benefits of taking your kids out hiking and the Fenland Trail is an excellent place to start! Once you have captured their desire to hike more and nurtured their curiosity, it will be easy to move on to longer hikes with maybe even a little bit of elevation gain.

As you do progress the kids on their hikes, remember to keep these tips in mind when hiking with kids and most of all have a good time!

fenland trail

Cool fact: Fenland refers to a wetland that is nourished by nutrient-wet groundwater

Check out other great Alberta hiking trails for kids, like the Alder Trail near Bragg Creek.

Tips for Hiking with Kids

hiking with kids

Hiking is one of my favorite past times, especially in the summer. It takes you to areas in nature that you would not be able to explore otherwise.

This is one of the many reasons I love sharing this experience with my children, as not only is it important to expose children to these kinds of experiences at a young age, it is another way to nurture their natural curiousity and love of the outdoors.

Hiking with children can be a very rewarding and enjoyable experience, if you plan your hike well and ensure you have what is needed than your experience will be successful overall, and the kids will want to go again (Now this does not totally prevent melt downs or life mishaps but it greatly reduces them).

Tips for Hiking with Kids

Getting Started

When taking kids on a hike there are a few things to consider:

hiking with kidsPick a hike that is suitable for the child and their hiking level – so if this is their first hike ever you do not want to take them on a 10 km hike regardless of their age. You also need to consider their age. Children who are young, like 2 or 3 could probably manage a short hike of a kilometer or two with breaks and things to look at along the way. While a child who is 8 might be able to do 5 km. You also want to consider the child, how active they are and how much walking they do in a regular day.

Pick a hike that they can finish successfully. Which means they can get to the end without feeling tired or grumpy, with some energy left over, and they would like to go further. This will also help eliminate breakdowns, you having to drag them to the end or a refusal to go on another hike. For example, if you think they can do 5 km, start with 3km so that they feel successful when they are done and work up to 5 km for the next hike.

What to Bring:

Water – make sure you bring at least a full water bottle per person, more if it’s a hot day. Hydration is key to keeping energy up and fatigue down. It also helps moderate mood.

Food – bring kid friendly high energy snacks and lunch (depending on the length of your hike). When children are fed and feeling full they are happy. This also keeps their energy up.

Clothing – even if it is a hot sunny day always pack rain coat and rain pants, an extra sweater, long pants and a few extra layers. The weather can change quickly, especially if you are hiking in the mountains, and when kids are cold and wet they are not happy, and neither are you!

hiking with kidsProper footwear – now you don’t have to run out and buy the kids fancy hiking boots, especially when you are just starting out, but ensure that the kids have good sturdy footwear – so sneakers, not sandals, and socks in their runners (this helps wick away moisture and prevent blisters). You want something with a good tread and closed toes. As you go hiking more often and start doing more challenging or longer trails, then would be a good time to look at a hiking shoe that is more sturdy and supports and protects the ankle.

Backpack – it is very important that each child have their own backpack and carry their own stuff. Depending on their age this could be as simple as a backpack and their light jacket inside or their lunch (and you carry the rest). If you start teaching them from the beginning that when you hike you all have your own backpack and carry your own gear, they will just accept that that’s how it works. Then as they grow, they can start carrying more in their packs, until they are carrying all their gear. It is also important that the backpack fits them properly, so snug and close to the back, not the straps hanging loose and the pack dragging at their bum. If their pack is not comfortable that is not going to make for a happy experience.

Sunscreen – another element in protecting the skin and avoiding heat exhaustion is using sunscreen. Burning the skin can dehydrate you faster and zap your energy. It is also very uncomfortable and can make anyone grumpy. Use a sunscreen with an SPF of at least 60 for children. You can also use an after sun spray or natural cooling mist to help keep the skin cool.

Bug Spray – protect the skin from mosquitoes and more with an effective bug repellent. No one enjoys being eaten alive or feeling red and itchy after bugs! And children seem to be especially yummy for some reason. Spray all uncovered areas prior to going on your hike and reapply as needed. If you’d prefer a natural repellent instead of those chemical mixes try out this DIY recipe using essential oils.

First Aid Kit – be prepared for bumps and bruises, small cuts and scrapes by carrying a first aid kit. Include things like bands aids, tea tree essential oil (for cleansing), lavender for soothing, mole skin for preventing blisters, correct x for bumps and bruises, tweezers, safety pins, etc.

On the Hike:

essential oils for hikersSet realistic expectations – like mentioned above pick a hike that the kids can complete successfully and enjoy. Don’t push for that big long hike, uphill the first time out.

Start early – kids are freshest in the morning (as are you) so take advantage of that and hit the trail early in the day as opposed to the afternoon, even if it is a short hike that you’ll be done by noon.

Take regular breaks – even though you may be able to go for longer periods, allow breaks for the kids. Encourage them to take a sip of water on the breaks, and at some, not all, maybe a snack. Now don’t dilly dally and stop every 5 minutes or you’ll never get to the end, but allow them time to stop a moment and let their body rest periodically. Remember they are getting used to it!

Allow time to explore – Kids naturally love to explore so allow some time for that on your hike. This could be in the form of an activity you do with them or simply stopping and looking around an area for a few minutes. It is important to be mindful though about staying on the trail as well as staying safe. Teaching them good trail etiquette is part of the experience so set boundaries and guidelines for their exploration.

hiking with kidsTeach them about plants and flowers – there is a lot along the hiking trail that kids wouldn’t normally see in the city. Learn about a few plants and flowers and show them those along the way. Take a guide book as well for both yourself and the kids to look at if they wish. Tell them what they are by the proper name, encourage them not to pick them (and share with them why – that if you pick them in some instances it kills the plant altogether, and no one else can enjoy them). Only point out 2 or 3 on a hike (unless they ask about a specific one), that way it’s unique and fun for them, plus they may be more apt to remember what you told them. It’s ok if they don’t remember the name when you ask them later, they may the next time.

Benefits of Hiking with Kids

Hiking with kids provides many benefits not only for them but for yourself as well. It’s a great opportunity to enjoy some time technology free and to bond with your child. You’ll connect with them in a way that you can’t at home cause there are too many distractions. I’ve had some wonderful conversations with my kids while hiking that I would not have at home.

It gets them out in nature. The benefits of being out in nature for children (and adults too) are numerous; such as boosts your energy and immune system, elevates mood, reduces stress and improves physical health. It is also important for us as human beings to simply connect with nature.

It nurtures their natural curiosity. Children are born with a natural curiosity to figure out how the world works. Nurturing their curiosity, fosters their desire to learn and helps them to become life long learners.

It creates positive memories. I was pleasantly surprised when recently my oldest son rhymed off all the hikes we’ve been on and what the highlights were of each (he’s now 14). He even remembered some things that I had not. We have great pictures, great stories and lots of smiles. And he’ll still go hiking with me, which at almost 15 and finding it challenging to find things to do together, I totally love and appreciate.

Keeping these tips in mind and some pre-planning will help create a very positive hiking experience for kids, as well as for you! It will create wonderful memories and an activity that you can continue to do together as they get older.

hiking with kids

Stay tuned for some of our favorite hikes for kids in Alberta that will be featured over the next few weeks…starting with the Fenland Trail
Create Success in the Classroom – Essential Oils for Back to School

essential oils for back to school

Create success in the classroom with these essential oils for back to school.

It’s that time of year again back to school and fall routine. Personally I love the summer schedule, the lazy days, warm summer sunshine and the freedom of being able to just play. Go anywhere at anytime and not have to worry about ‘the schedule’.

For some kids back to school can be quite challenging. They have a hard time sitting for longer periods of time, focusing on what’s going on or simply becoming overwhelmed by all the action and energies that are going on in the classroom. This can make things uncomfortable and definitely not fun for a child who feels this way.

child-830988_1920 pixabayI have always felt that children are uniquely different and that they each have their skills and talents and learn in different ways. No one child will learn the exact same way as another, which is why our school systems have changed in so many ways over the years. I still feel the system has a ways to go to reach all children, but it’s great to see some progress and specialty programs that can meet more children’s learning styles and needs.

That being said I think a majority of schools still teach to the average child, which is a small percentage of children in the class, while the rest fall above or below the line for various reasons. Little Johnny can’t focus so he misses out or gets in trouble a lot because he’s always fidgeting and moving. It’s not that he doesn’t want to, his body just needs a little support in doing so – and there’s nothing wrong with that.

In comes essential oils, an easy, simple and effective way to help support children (and adults too) at school and in their daily lives.

Keys to Success at School

essential oils for back to schoolIn order for children to have success at school they need to have a strong foundation which consists of these 5 elements

  • Good diet, nutrition and exercise
  • Proper rest (so they have enough energy for the day’s activities)
  • Boosted (strong) immunity
  • Emotional support
  • Mental clarity and focus

These key elements prep a child (and adult – we need this stuff too) to be able to function at their optimal level throughout the day. If even one of these is out of whack, it can affect their ability to focus, process or manage themselves emotionally.

How Essential Oils Can Help at School

Essential oils are great tools to add to a child’s wellness routine to not only assist and support them in these elements but to maintain a healthy balance. There are a number of oils that can support these. Here’s a quick overview of some of these oils to get you started.

Focus & Concentration

essential oils for back to schoolWe all know how hard it is to get things done and done well when we can’t focus! Try these when you can’t focus or need to.

In Tune – is a focus blend that helps enhance and sustain focus. This works wonders with my son who often needs support in this area. Roll this oil on the back of the neck or the bottoms of the feet. I have been using the InTune blend quite a bit this week myself, as I have been having trouble getting myself focused after my relaxed summer vacation! And it has been working like a charm. I feel like I’m on fire and have accomplished so much this week.

Rosemary – helps maintain concentration and supports memory. Apply topically under nose and across forehead.

Immunity Boost

essential oils for back to schoolOnGuard – this blend is my top go to when boosting immunity. It supports healthy immune function, respiratory and circulation, support’s body’s natural antioxidant and is energizing and uplifting. You can diffuse it, add it to a spray bottle with water for a natural hand sanitizer or spray on your counters to clean and sanitize surfaces.

Ginger – commonly known for it’s aid in reducing nausea, ginger also has strong antioxidant properties, inhibiting the growth of bacteria and stimulates blood circulation (which means more oxygen is getting to your tissues to help remove toxins and viruses).

Calm & Balance

We all know how difficult it can be when we are riled up, anxious, overwhelmed or upset. Who can concentrate, focus or even function when our bodies are in that state? Essential oils can cross the blood brain barrier and therefore act quickly in providing the needed support; supporting the child in moving back into balance quickly and easily. Feeling better in their bodies and able to manage what is happening around them and do what they need to do, whether it be at home or school.

Balance – is one of my favorite blends which we use frequently at our house. This blend calms and balances emotions, reduces stress and anxiety. It also has a lovely scent which I could sniff all day!

Frankincense – is known as the King of Oils, is a grounding oil and supports emotional balance.

Healthy Digestion

digestzen-15mlStarting with a healthy breakfast in the morning is only part of the equation. Ensuring our bodies are digesting properly and absorbing the nutrients we need is key. This is why using essential oils to support digestion can be of great benefit.

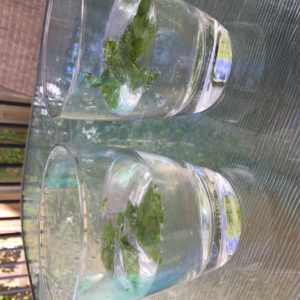
Lemon – we start with a glass of lemon water in the mornings – 1-2 drops of lemon essential oil mixed in a glass of water, which flushes the system, hydrates the body, boosts immunity as well as improving digestion. The advantage of using the essential oil over fresh lemon is it does not cause deterioration of the enamel on our teeth or damage the gums.

DigestZen – is a wonderful companion to aid in the digestion of food, soothe occasional upset stomachs, and reduce uncomfortable gas and bloating. When my daughter has a sore tummy we apply this topically on her stomach and she feels more comfortable within minutes. 

Restful Night’s Sleep

essential oils for back to schoolWe all know a good night’s sleep is key for anyone to function well during the day. Lack of quality sleep can affect mood, focus, concentration, memory, weakened immunity and overall health. Diffusing calming oils overnight can help balance and process days events as well as support a restful night’s sleep.

Breathe/ Easy Air – is a wonderful one for sleep as it supports the respiratory system and opens up the airways therefore allowing more oxygen to enter the body and creating a more restful sleep. Often can reduce or eliminate snoring as well.

Lavender – a common one used for sleep as it promotes calming and relaxation. One thing to note with lavender is for some children and highly sensitive people lavender can have the opposite effect and instead of calming it can energize. Experiment with this one to gauge what the effects are and perhaps choose a citrus oil instead.

The beauty of essential oils is that there’s not just one oil with the support you’re looking for. Many of the oils share similar properties, so if the one you choose to try first doesn’t work for you, then there is another one to try!

Give some of these combinations a try and let me know how it worked out, either with yourself or the kids.

Interested in what other oils could support focus, immunity, sleep, etc.? Would you like to give some a try? For the month of September I am offering Back to School Essential Oil Kits to support these different elements. Check them out here.
Back to School EO Kits (1)

DIY Mother’s Day Gifts with Essential Oils

diy essential oil gifts

Pamper Mom this Mother’s Day with these easy DIY Essential Oil gifts. These gifts will not only relax and pamper her but she’ll appreciate the love that was put into them when they were made specially by you.

Mother’s Day is another holiday where we can go a little crazy with the spending and the gifts (average spending in Canada is about $100) because we want to show Mom how much we love and appreciate her. Of course as we Mom’s deserve it! We do a lot and we work hard. But if you’re looking for a loving gift for Mom that shows you appreciate her and that’s easy and affordable then try one of these DIY Essential Oil gifts that she’s sure to love!

Not only are these gifts a great way to pamper Mom and tell her that you love her, the essential oils in them provide many benefits that will support her physical and emotional health, naturally.

DIY Essential Oil Gifts for Mom

Gardener Hand Soap

If Mom loves to putz in the garden then this is the perfect gift for her. This easy-to-make Gardener’s Hand Soap exfoliates, cleanses, and moisturizes all in one use! Clary Sage is an oil that has relaxing and soothing properties that help with rejuvenation and calming of the skin. While Melaleuca known for its purifying qualities, is also good for cleansing the skin and promoting healthy immune function.

diy essential oil gifts

Lavender Myrrh Cuticle Cream

A homemade cuticle cream is a great way to bring moisture and health back to your nails. Add a little extra to your gift for Mom and help her apply it with a mini hand massage! This cream can also be used on your hands, lips, or anywhere you have dry spots. If you choose Lavender to add in be ready for calming and relaxing benefits, if you choose Myrrh it’s soothing to the skin and promotes emotional balance and well being.

diy essential oil gifts

Essential Oil Body Wash

Help Mom wake up her senses in the morning or calm them down at night with a scented body wash. Using essential oils can provide valuable nourishment to your skin, if it contains the right ingredients. For an energizing body wash choose oils such as Peppermint, Grapefruit or Lime. For a calming body wash choose Lavender, Bergamot or Roman Chamomile.

diy essential oil gifts

Ginger Lime Brown Sugar Scrub

Mom can exfoliate and soften her skin with this easy to make body scrub. The Ginger essential oil creates a balanced, grounded and feeling of empowerment, as well as supporting healthy joint function. While Lime purifies the skin and positively effects mood.

diy essential oil gifts

Strawberry Lime Sugar Scrub

If Mom likes to smell like dessert than this is the body scrub for her. Super easy to make and with all the uplifting benefits of Lime essential oil.

diy essential oil gifts

Essential Neck Wrap

Help Mom relax and soothe sore muscles with this easy to make neck wrap. When used with essential oils, they can provide additional relief and benefits. Incredibly easy and affordable, just add in your favorite essential oil.

diy essential oil gifts

Fizzy Bath Bombs

Bath bombs are a fun gift as they add excitement to your senses and a little entertain as you watch it fizz as it dissolves in the water. Add your favorite essential oil to invigorate – like Wild Orange and Spearmint or relax like my favorite Lavender, Cedarwood or Frankincense.

diy essential oil gifts

Lavender Bath Salts

These bath salts may be the easiest of our do it yourself gifts for Mom. Simply take 2 cups of Epsom salts and add 10-15 drops of Lavender essential oil – mixing them together in a glass jar or bowl. If you want to get fancy add some dried lavender pieces (I’ve seen them at the Bulk Barn) for a little added color. Store in an airtight container, wrap a bow around it and give it to Mom! Have her add it to her bath to soothe the skin and relaxation.

diy essential oil gifts

Lime & Mint Foot Soak

This easy to make foot soak will energize, uplift and refresh. Let Mom soak her feet and take it easy for a bit. Maybe even bring her a nice glass of wine or coffee to sip while she soaks.

diy essential oil gifts

Orange Creamsicle Lip Balm

No list of pampering for Mom would be complete without a moisturizing lip balm. A common must have this natural lip balm is full of health benefits and yummy flavor! The fresh, sweet scent of Wild Orange is energizing and provides immune support.

diy essential oil gifts

No matter what gift you choose to make for Mom this Mother’s Day, she’ll definitely know that you love and appreciate her! Whether you make one or two I’d recommend you make enough for yourself to either join in with her or enjoy yourself later, might as well. I know for myself that I love the scents of essential oils and when I’m working with one of my favorites I can’t get enough! Plus it’s a great excuse to go take some me time later – can’t waste what I’ve made. May you enjoy your day as a Mother or spending time with yours in some way. Happy Mother’s Day!

Interested in learning more about essential oils or have a question? Drop me a line I’d love to chat with you.


Treat Mom & Enter to Win!


How to Celebrate Valentine’s Day as a Single (and Love It!)

celebrate valentines day as a single

Valentine’s Day… ugh… as a single this may not be a holiday that you readily look forward to. Yes you can get into the chocolate (especially when it goes on sale the day after Valentine’s) but honestly a day full of romance and love might make you just want to gag.

Honestly though, Valentine’s Day is a day about love – all kinds of love. Yes romantic love seems to be very much in your face – thanks to all the marketing out there – but love comes in many forms. Love for friends, family, kids, pets and you. Yes YOU.

Self love is the most important thing because that is where love begins. When we love and take care of ourselves we are then able to give and receive love from others. This is not a narcissistic or selfish act, it is simply an act of self care and kindness. Loving ourselves first helps us remember where our power is and helps us to set healthy boundaries with others.

So as a single instead of getting bogged down about not being in a relationship, embrace this day of love and use it to celebrate, love and treat yourself. Create the day to make it all about celebrating and loving you!

13 Ways to Celebrate Valentine’s Day as a Single

  1. celebrate valentines day as a singlego for a manicure or pedicure – manicures and pedicures are about more than just the polish. They provide skin care, exfoliation, relaxation, increased blood flow.
  2. go for coffee – head out to your favorite coffee spot and enjoy your favorite coffee. Around Valentine’s Day many coffee spots offer some kind of yummy decadent Valentine themed drink (like Starbucks has molten chocolate). Take your favorite book and enjoy a little me time.
  3. take a warm relaxing bath – I don’t know about you but this is truly a treat for me. I often think about having a nice warm bath but often find life gets in the way and it becomes last on my list. On Valentine’s make it a priority. Add in some epsom salts, a few drops of lavender essential oil and your favorite drink (perhaps a glass of wine or hot chocolate) and sink into it.
  4. go to a movie – you may have some hesitations about going to a movie by yourself, but I actually love it and it has a lot of advantages. How much talking do you do in the movie anyway? I also find it quite freeing when no one will go with me to Bridget Jones Baby and I don’t have to wait for or find anyone to go with me.
  5. celebrate valentines day as a singledo something you love (but don’t normally do) – what is that one thing that you absolutely love doing and don’t often get to? Today is the day to make it happen. So set it up and go for it.
  6. write a list of all your passions – often we get busy with life and forget what we’re really passionate about. Take some time today to write down all the things you’re passionate about. Then stick them on the mirror to remind you!
  7. buy yourself flowers – you don’t always need to wait for someone else to give them to you, (and can get depressing when you do). Go ahead and pick your favorite and bring them home. Sonia Choquette, renowned author and spiritual teacher, often says that buying flowers for yourself is good for the soul. I also find it quite empowering! and love how it brightens up and brings life and beauty into my home.
  8. make (or buy) yourself some chocolate – treat yourself to this yummy treat you can easily make at home and do it on Valentine’s Day – ( if you’re buying them – don’t do it the the day after when it goes on sale! (though you can do that too). If you’re not a chocolate fan make yourself another decadent Valentine’s treat and indulge a little.
  9. hang out with a friend or loved one – whether it be a neighbor, friend, co-worker, etc. invite them for lunch, go grab a coffee or a walk. Spending time together will benefit both of you.
  10. sugar free valentines treatsgive a valentine’s card to a non romantic friend – giving to others can make you feel good and bring a smile to someone else’s day. Give a valentine to a friend, neighbor, co-worker or maybe someone you don’t know, like the elderly lady you see everyday at the bus stop or the barista who makes your coffee.
  11. give yourself a Valentine – this may sound a little silly but actually has great benefits. Write yourself a note/ valentine not only saying Happy Valentine’s Day but list all things that you love and appreciate about yourself. Then put it in the middle of the kitchen table for you to open up first thing. This may sound a little silly but we often forget or don’t recognize the things in ourselves that are really great! This will not only make you feel good but is a great reminder of why you are fantastic.
  12. try something new – you know that thing you’ve always wanted to try but didn’t have the time or kept putting it off. Today’s the day to make it happen! Participate if you can today. If that’s not possible take action and sign up, register or inquire to get the ball rolling.
  13. buy yourself some sexy underwear – whether you are a man or a woman you deserve underwear that makes you feel good about yourself. Make it fun and get some Valentine panties or boxers and wear them on Valentine’s just for you.

When you’re single Valentine’s Day does not have to be a day of depression and drudgery. It is a great opportunity to take some time to celebrate and look after you! Treat and indulge in yourself and remember how great you are. It’ll give you a whole new outlook on the day!

These are only a few ideas that you could incorporate on Vday to celebrate you. What other ideas would you add?


How to Create a Hot Chocolate Bar

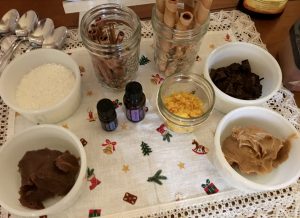
hot chocolate barDecadent hot chocolate, topped with yummy whip cream, drizzled with chocolate…. something you usually only see at your local cafe or coffee shop.

But imagine creating this in your own home, or creating some other tasty combination. Chocolate orange, Lavender White, Peanut butter… oh so yum! This is the beauty of a hot chocolate bar – a simple but yummy idea that enables you to create these wonderful, delicious combinations to enhance your hot chocolate experience.

The basis of a hot chocolate bar is that you make a plain hot chocolate and then have a number of different toppings and combinations to choose from to add to your hot chocolate that make it… oh, just a little more. Good hot chocolate can certainly be enjoyed plain and definitely warms you all the way down to your toes, but these additions make it a little more lavish, make it a little more fun.

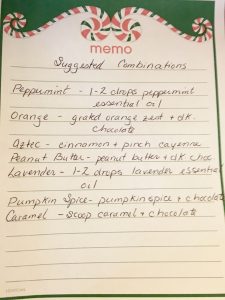
hot chocolate barIt is also super easy to set up. It does not take a lot of time or effort, the most effort you’ll have to make is to decide what yummy toppings you are going to use! I did this twice over the holidays, once for a ladies only night at my place and second as a fun treat for my kids and nieces while away over Christmas. Everyone loved it! It was super fun. We all had half cups at a time experimenting with different tastes and flavors. I had created a list of suggested combinations but of course you could pick and choose whatever you liked. Plus just looking at the spread set out was not only nice to look at but made you want to try them all!

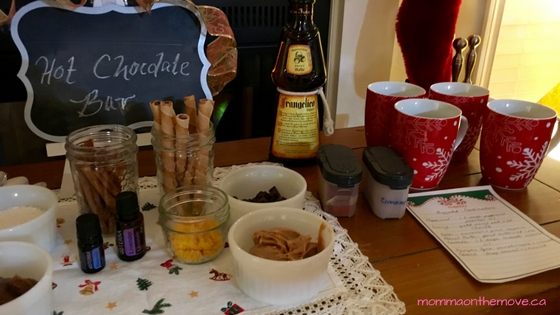
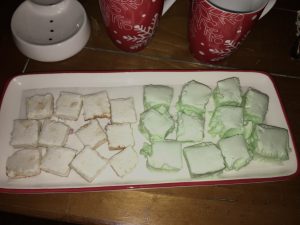
We had chocolate pieces, peanut butter, orange zest, hazelnut sticks, homemade marshmallows (mint and cinnamon), cinnamon sticks, coconut and some essentials oils like peppermint and lavender. We even had a little ‘adult’ version – a splash of Frangelico, if desired for those over 18.

How to Set Up Your Own Hot Chocolate Bar

Start out with your own base hot chocolate – you can either do this by the cup therefore creating and meeting people’s dietary needs, like dairy free, sugar free or use the just add water powder mix. Or you can make a big batch of your favorite hot chocolate in the slow cooker. I have done it both ways and both have their advantages.

Pick your toppings – there are so many to choose from!

  • chocolate chunks
  • orange zest
  • peppermint stickshot chocolate bar
  • 1-2 drops of peppermint extract or essential oil (if using essential oil you’ll need to use very little but depends on your brand. Also make sure the oil is ok for taking internally
  • coconut cream (for the dairy free) or whip cream
  • peanut butter – word to the wise if using this topping advise your guests that less is more with this one as too much pb makes it sink to the bottom and essentially gets wasted
  • shredded coconut
  • marshmallows
  • cinnamon sticks
  • hazelnut sticks
  • dash of cinnamon
  • cardamom
  • cayenne
  • lucuma
  • mesquite
  • or….

Add desired toppings and enjoy! Use suggested combinations or mix and match to make your own.

A hot chocolate bar literally takes about 5 minutes to set up. When I hosted the ladies it was the easiest and shortest prep I ever had to do for a party. And I loved how visually appealing it looked before everyone dug in.

hot chocolate barThis is also something you can set up in your home on the counter somewhere and leave for a bit for people to enjoy. Of course you’d have to put some of the items into the fridge when not in use but for the most part many of them can stay out.

The thing I love about the hot chocolate bar is it can easily be sugar free dairy free and be very yummy and enjoyable. When my kids participated out of all the choices I set out there were only 1 or 2 that they had to avoid. The rest was far game. So it was easy for them to try different things, experiment and enjoy the full experience.

I also love the versatility of it. You can create one for parties, after tobogganning, weddings, birthdays, after skating – and because of the variety of toppings there’s something for everyone!

If you love hot chocolate then you’ll be super excited for the upcoming YYC Hot Chocolate Fest which I am proud to be a part of this year! Watch for more details to come!