Kids Healthy Cooking – Tips and Tricks for making it easy and fun!

kids healthy cooking

Cooking with kids can be a challenge. It’s messier, it’s slower, and often times can try your patience as a parent. Kids healthy cooking can be even more of a challenge with your little munchkins palates changing and developing, being sensitive to textures, smells and levels of salt and sweetness. One day they like a certain food and all of a sudden the next day they don’t? Even with these challenges, there are many benefits to getting little ones into the kitchen at a young age, benefits that will set a foundation for their eating and nutrition choices for life.  And these benefits will outweigh the extra time and patience you have to spend in the kitchen.
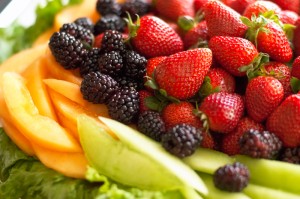
fruit2For little hands, time in the kitchen allows them to build basic skills, explore with their senses and create an adventurous palate! You can introduce healthy foods in a fun and unique way that will get them eating and enjoying it. Kids are also more likely to eat what they have made and it creates a foundation for them later in life – when they’re older in college and can actually cook. Not only that, but it creates a great opportunity for you and your child to spend some quality time together, learning and creating together, even having a little fun.

I recently started teaching a preschool class at the Trico Center called Mini Chefs and it is one of my favorite classes. You may think that cooking with a preschooler would be difficult, but when you choose recipes that are simple, easy and appropriate for their age, it is actually a lot of fun. I love how excited the kids are each week, curious about what we are making and what is in it.
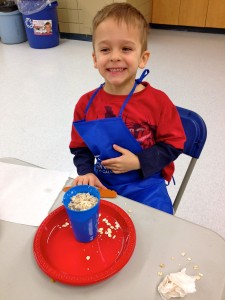
IMG_6903One of the keys to making kids healthy cooking successful (especially with preschoolers) is to pick something with less than 5 ingredients and things that they can do themselves, like scooping, mixing, tearing (lettuce). Most kids at this age love to help and get very excited about mixing things, or scooping out the flour. Yes you may have a little more flour on the floor but encouraging them and letting them do it, will make them want to do it again.

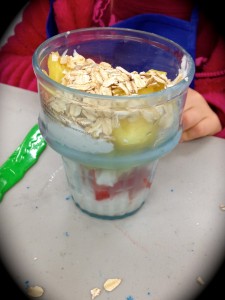
For our first class we created Yogurt Parfaits, which is a very easy, hands on recipe with 3 basic ingredients and lots of scooping and sprinkling. They all wondered what a yogurt parfait was, as even my children had not made one of these before. What was in it? How did we make it? When were we going to make it? The when question was the best. They are so keen at this age to get started!

This is why it is very advantageous and less stressful for you to prepare things in advance so that the cooking process goes more smoothly. For the parfaits, I had the yogurt already in a bowl with a spoon for scooping, the fruit cut and the granola in a bowl ready for scooping as well. Parfait glasses were in a stack ready for me to hand out as well as the spoons. This made it easier for each child to do what they could themselves, once I explained how we made the parfaits.

It was so fun to watch each child create their parfait, scooping in their yogurt (some with fairly large scoops and some very small), choosing their fruit, then scooping in some yogurt again. Each parfait was creative and unique, and honestly it was not that messy. Some kids had lots of yogurt in theirs and less fruit, some had a lot of both, while others just wanted the granola off the top. Either way they all had fun and all tried it, it was a new taste adventure for many of them.

Now my kids ask for yogurt and fruit all the time now and it makes a very healthy snack!

Yogurt ParfaitIMG_6905

Ingredients:

Non-dairy vanilla yogurt  – such as coconut, almond or soy   *(can easily substitute dairy yogurts if desired)

Fruit – pick your favorite! Blueberries, strawberries, banana, honeydew

Granola (store bought or make your own – you can also substitute large oats if desired)

In a bowl or cup place desired amount of yogurt. Then place fruit of choice on top, layer with yogurt then another layer of fruit. One more layer of yogurt and top with granola. Enjoy!

And don’t forget, get the kids to help you clean up after as well. They are willing at this age and that way they learn that cooking whether creative, messy or fun, requires clean up at the end.IMG_6904

Next week… Tuna melts and Vegetable Flowers – who says vegetables can’t be fun!

Winter Inside and Out

winter activities

Often in winter it’s challenging to get active. Our bodies slow down, we just want to cozy up on the couch and watch movies. It can be a challenge in the cooler weather to not only get outside but to find fun and engaging winter activities. Both you and the kids start to experience cabin fever as you’ve done all the regular activities inside and out. Not only is everyone bouncing off the walls but you need some fresh ideas to enjoy the winter season. With Calgary winters often being long and chilly it is time to get creative!

For me I like to google it and see what’s out there for indoor and outdoor activities in the winter. Not only does it get my own creative juices flowing and I create activities of my own, I find some really cool ideas. These are just a few of winter activity ideas I recently found, but these are my favorites! So whether you’re inside or out, here are some unique indoor and outdoor activities for winter that will not only keep the kids occupied, but engage their imagination as well.

Outside

You’ve gone skiing, skating, tobogganing, and built many snowmen. There’s even a giant snowfort in your front yard that if it gets any bigger you will not be able to get to the front door. These outdoor activities will expand kids fun time outside and will definitely expand their horizons and create something new.

1-     A winter picnic. Pack sandwiches, cookies, and thermos of hot chocolate. Take a blanket and enjoy a picnic in our winter wonderland.

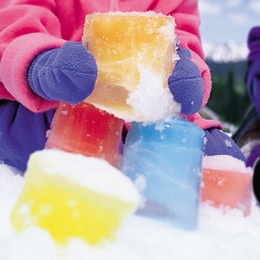
ice castles2-    Ice castles. Fill a variety of ice cream and yogurt containers with water; let them freeze overnight. Once they are frozen, take them out of the containers and build your castle. For a splash of color, put food coloring into the water before freezing.

3-    A scavenger hunt. Make a list of winter items, get the kids to help you with this beforehand, then go out and see how many you can find. A short list of 10 items is great, and learning about what there is in nature in winter.

4-    Snow mini-golf. Set up a mini golf course in your backyard using a variety of items from the house. Tramp down the snow to make paths, uneven surfaces and use things like hoola hoops, plastic rings, and balls to set up a course. Grab a putter and you’re ready to go.

animal track5-    Look for animal tracks. Winter is one of the best times to find tracks as the snow makes it easier to spot them. Go for a walk and bring a guide book to help the kids figure out what the track is (find one at the local library, find one online or purchase one like Animal Tracks of Alberta
on Amazon). As an option, bring your camera to take pictures of the tracks, so you can look at and identify them at home.


Inside

There are many indoor venues to go to in the winter to keep busy; the swimming pool, library, and local museum. At home it can be a bit more challenging, and after baking the 12th batch of cookies, and having multiple friends over, you need a little variety.

1-    Build a fort. Use couch cushions, blankets and cardboard boxes. Let the kids be creative as they build, let them knock it down a few times – and rebuild. Once completed they can enjoy playing in it. (Ensure it is safe and under adult supervision).

2-    Create a play. Have the kids write their own play, assign parts and do a performance. Kids can create the stage, costumes, props and present to friends and family.

IMG_69113-    Make an indoor snowman. This works great with a big group of kids; split them into 2 teams, give each team a roll of toilet paper. One team member is the model and the others wrap the model in tp to turn them into a snowman. Use construction paper to make the nose, eyes and other features.

4-    A puppet show. If you have puppets grab them, otherwise the kids can make their own. They can also make their own puppet theater and present to friends and family.

5-    Play hide and seek. Who says this is just an outdoor game? Set clear guidelines and boundaries about where to hide and let the game begin.

Do you have any great indoor or outdoor winter activities? Share your favorites below!

Orange Cranberry Smoothie

IMG_6830I woke up Christmas morning this year feeling very excited! I felt like a kid all over again, the magic and anticipation of Santa and Christmas morning were very present. I didn’t sleep much, and by 5 am I was literally ready to get up and open presents. I seriously considered going and getting my parents up ‘for old times sake’ like when we were kids and getting up at 3 being told to go back to bed, then 4 then 5 and finally my parents would give up about 6.

I had the pleasure of sharing Christmas this year with both my parents and only me. No kids, no siblings, no in laws, just us, which is a rare and special occasion. It is not often that such an opportunity occurs and I felt that this in itself was a gift. Christmas Eve we watched a movie and my Mum and I sat up late talking and sipping gingerbread martinis. At midnight we toasted and wished each other Merry Christmas. We peeked outside, and experienced a calm beautiful evening. The snow gently falling and a peacefulness in the air, truly a unique energy that was not present earlier that day (or on Christmas morning when I popped outside either). It really was like in the movies, that magical energy, and presence there.

IMG_4491One of the things I love to do over the holidays is experiment with different festive recipes and on Christmas Eve I had already been thinking about trying a Cranberry smoothie of some kind Christmas morning. I googled a number of recipes and found some good ones, though undecided which one to try.

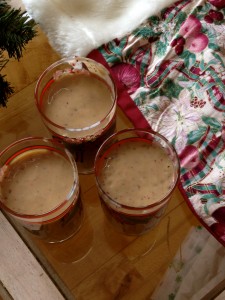
When I woke in the morning (or should I say finally got up around 8) I bounced out of the spare room wishing a Merry Christmas! Mum was at the sink, Dad dressing in red and I was moving towards the tree. Quickly with coffees or waters in hand we began a lovely ritual of opening gifts and sharing. After gifts Mum went to the kitchen to make brunch – a fabulous Impossible Quiche with Daiya smoked gouda, spinach and mushrooms and I proceeded to make the smoothies. I had decided to take the elements of some of the recipes I found that I liked and combine them, adding some of my own ingredients and creating my own. The result was fantastic! A smooth creamy, flavorful smoothie that we all socked back quickly, expressing how much we enjoyed it. I loved the added greens myself, which darkens the pink looking smoothie slightly but gets those greens in there without even tasting it! The added benefit is that cranberries themselves are considered a super food and are high in vitamin C, E, fiber as well as providing benefits such as improved immune system, antioxidant and decreased blood pressure.

When I arrived home after Christmas I made it again for the kids and they all loved it! Matthew who hasn’t been drinking many smoothies these days, tasted it said ‘Oh that’s good’ and drank the rest quickly. Chloe asks me every day since she tried it for one and has expressed that it’s her new favorite. Even my ex husband tried it the other day and said it was good (this is a big thing btw, as he is not really a smoothie guy and particular about tastes). I was quite pleased with the results and I think I drove my parents a little crazy that first day I made it when I kept saying throughout the day how good it was and how impressed with myself for creating it. Well it was good!

So if you’ve got a festive theme going over the holidays or simply want to try out a great new smoothie recipe, give this one a go! If you find it a little tart for your tastes just add more stevia when making it. Then come back here and comment telling me how you like it!

Orange Cranberry Smoothie

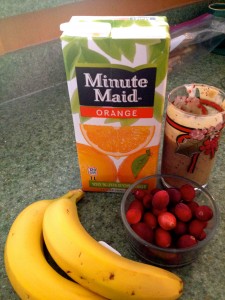
2 bananasIMG_6831

1 cup frozen cranberries

1 cup unsweetened almond-cashew yogurt

1 tsp. vanilla

1 cup orange juice or 2 fresh oranges peeled with 1/2 -1 cup water

1/2 of 1 g packet of stevia

handful of spinach* (optional)

Put all ingredients in blender. Blend until smooth. Garnish with slice of orange and a few cranberries if desired. Pour into 8 oz glasses and serve.

*if you would like a bright pink smoothie do not add spinach as it will darken it. I love tossing in that bit of green as it is a great way to get those greens in a quick and easy way. And you don’t even notice it’s there!

Serves 3 (makes 3 – 8 oz servings)

Light Up the Night – Magical Musical Christmas Light Displays

IMG_2549Lights sparkle and shine as they dance with the music. Delight in the twins eyes as they wait in anticipation, the music building, wondering what will come. Then, in a crescendo of light and music together the spectacle really begins. Movement and rhythm, flowing and moving as their eyes follow the dance. This wonderful light display one of many that light up Calgary this holiday season.

I’ve always enjoyed those videos on youTube with the houses all decorated for Christmas and the musical accompaniment that goes in time with the light display. I always thought how cool that would be to see some of those live instead of just online. Little did I know that in Calgary there are a number of houses that do have such a light display. When my friend told me this a couple of years ago I was quite excited! So one night we went out and did a tour. It was wonderful! We enjoyed the light display from the comfort of our car, tuning into the posted radio station, which plays the music in time with the lights.

People are quite creative, incorporating all kinds of things with usually about 4 or 5 different songs before the show repeats. This year I took the kids out to see the lights for the first time. We made an evening of it, bringing hot chocolate and snacks to enjoy while we watched the lights. Luke and Chloe loved it! Dancing and moving it in the van while watching in wonder. We stayed at each house until the full set had run and then moved on to the next one.

IMG_2544The neat thing is that there are tons of them in Calgary and you can view as many or as few as you like. The site Lighten Up Calgary lists and maps out the houses that have such displays and you simply go to the site and create your route. We visited 3 houses when we went out last week but that was just the right amount for Luke and Chloe. And I thought it was great that they knew their limit and knew when it was time to go home. I would’ve have gone to one more, but they had seen, enjoyed and were ‘full’.

They fell asleep on our way home, tummies full of hot chocolate, and dreaming of dancing lights. Next year I’m sure we’ll go out again, as it’s another great free family activity to enjoy over the holidays. Most of them play every night in December and up until New Year’s. Who knows maybe one year we’ll even create our own display and be on the route – apparently it’s as simple as buying a kit. How fun will that be!

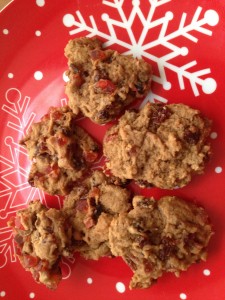
Sugar Free Hermit Cookies – a delectable soft Christmas Cookie

sugar free hermit cookies
When I was growing  up one of the things I loved about Christmas time was all the delectable baking my Mum would make. She’d spend weeks making all kinds of recipes, putting them in containers and freezing them for the season. She’d make things like Isch Tarlets, Venetians and Neopolitans. The names alone sounded exotic and there was more!  We often found ourselves with a plethora of leftover baking come January and well, I happily ate threw it.


Of course we had the more common Christmas baking such as whipped shortbread with cherries on top and gingerbread, but I always loved the unique ones. In fact my favorite Christmas cookie was always Hermit cookies. A spicy, soft fruit drop cookie made with a little dash of coffee. The flavors in this cookie are divine, as they mellow with age and become even more delicious as the days pass. The good news was that my sisters and Dad didn’t care for them, only Mum and me, so I basically got the entire batch to myself!


When I ventured out on my own I would make these for my family, hoping that no one else would like them. As luck would have it my husband did not, but turned out that my son did. So I shared, reluctantly.
sugar free Christmas recipesWhen we went dairy and sugar free back in 2010, I didn’t make these cookies for a while as I could never get around the mixed fruit that goes into the cookie. Mixed fruit is deep in a thick sugary syrup, and though I tried to find alternatives or even make my own fruit mix, I could not find a way around it. Update: I found a mixed fruit mix at the Bulk Barn that has no sugar in it! Hooray!
So this year I gave in. I really wanted these cookies! And I bought a container of mixed fruit to make these cookies. I modified the rest of the recipe for sugar free hermit cookies and resigned myself to the fact that if I wanted them I had to let this one thing go…for now. Update: last year I found a sugar free mixed fruit at the Bulk Barn! I was so happy and now I can make these completely sugar free)


I was so excited! As I was baking them I remembered all the unique flavors I love and the delectable cookie that would result at the end. I knew that my oldest would gobble them up, but these were new to the twins, so we would see if they liked them. The smells wafted through the kitchen and I couldn’t wait to try one!


Of course, they were excellent. Turning out perfectly. I was very pleased. And it turns out that Luke and Chloe do like them (taking after their mother), so I guess I have to share a little more 🙂


Sugar Free Hermit Cookies
1 3/4 c. flour
1/2 tsp baking soda
1/4 tsp saltIMG_6775
1/2 tsp cinnamon or 1 drop Cinnamon Bark essential oil*
1/4 tsp nutmeg
1/8 tsp cloves or 1-2 drops Clove Bud essential oil
1/2 c. shortening
1 egg
1/4 c. cold coffee
1 – 250 g container mixed fruit (you can find a sugar free version if desired)
1 c. golden raisins
1 c. walnuts (I usually omit these because I don’t care for nuts in my cookies but original recipe calls for them)


Sift flour, baking soda, salt, cinnamon, nutmeg, cloves onto wax paper. Beat shortening, coconut sugar, egg and coffee together until fluffy and light. Stir in flour mixture, blending well. Add mixed fruit and raisins (and nuts if using), mix well. Drop by teaspoon onto a cookie sheet and bake at 375F for approximately 12 minutes or until lightly browned.


Let cool on wire racks. Once cool store in airtight container. Flavors will mellow and voila you have a soft, fruity delicious cookie! Makes 3 dozen.
*Please note that if using essential oils in this recipe to ensure that your essential oil brand is safe to take internally. Not all essential oil brands are created equally and some use synthetic fillers and chemicals in their processing of the oil or added to the oil itself. Due to no governing regulations on producing essential oils a company can say they are 100% or Organic. Due your due diligence and research the brand you are using to ensure your safe usage.


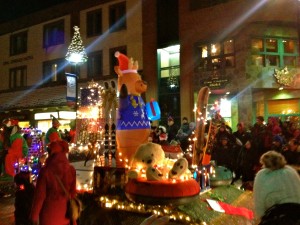
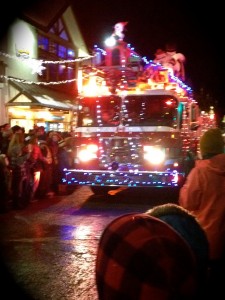
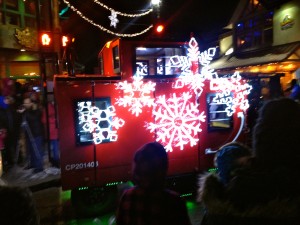
Banff’s Santa Claus Parade

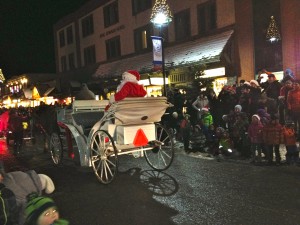
IMG_6729The main street is lined with people, children and adults alike. Lights all aglow, shops closed and waiting in anticipation for what’s to come. Snow glitters on the sidewalks and the majestic mountains surround us. It’s beautiful.

Excitement is in the air as children peek out from the crowd to look down the street to see if it’s begun. To see if Santa and his parade are coming. Waiting patiently, yet continually asking Mom and Dad if it’s time yet. This is Banff’s annual Santa Claus parade, held at night with the beauty and magic of Christmas lights all around.

IMG_6700We attended this beautiful event for the first time this year, and it is well worth the trip out to Banff. Currently run by Banff Lake Louise Tourism for the past 7 years, this event has been hosted by the Town of Banff for many years prior. The parade itself is actually the finale of a day filled with kid friendly and family activities such as face painting, balloon twisting, Christmas carols and a visit and photo with Santa down at the train station. There’s also horse drawn wagon rides, tasty treats and of if you’re up for it, a nice soak in the hot springs (which is available every day of the year but is always lovely).

I love touring Banff Avenue and spending time in the Christmas Shoppe. My youngest two, screaming in delight at the grand display of Christmas houses and towns. The ornaments are many, the options are delightful and there is no shortage of Christmas anywhere.

IMG_6723The parade itself is only half an hour long, which I feel is the perfect length for children, who remain engaged and excited the whole time. The floats were gorgeous, creative and unique all lit up as they moved down the street. From the Girl Guides to Sunshine Village there was an excellent representation of the town.

Of course I loved that it was at night. It just added to the atmosphere and excitement with all the floats magically lit up. Even my oldest son, who is 12 and I was unsure if he would like it, expressed that he did enjoy it and said it was “cool”, which meant we had success.

IMG_6677I think Santa Claus parades are such a fabulous idea and up until recently only knew of the big ones in Toronto and New York. I didn’t realize that many of the local towns in and around Calgary host their own Santa Claus Parades and they are quite well done! Parades are held in High River, Okotoks, Airdrie, and Cochrane (which if you still want to attend a Santa Claus Parade this season is this Saturday, December 12th). I think it’s a great way to celebrate the season and your community. And everyone has that little flare and does things a little differently, distinguishing themselves from the rest.

You can go to any of the town’s websites for details and pick the ones you want, or even do a tour! of Santa Parades – how fun would that be? We are already planning for Banff again next year, hoping to take full advantage of the day and all the activities they have to offer. We might even take the plunge and stay overnight!

IMG_6696It creates such great memories an event that I hope every family has the opportunity to enjoy.

Have you attended a Santa Claus parade this year? Share with us your memories and experience.

The Lions Festival of Lights – A Free Calgary Light Display

This weekend I attended the kickoff of the Lions Festival of Lights, a free drive by light display housed at Confederation Golf Course, and has been on in Calgary for 29 years.

IMG_6657Located along 14 St. NW, just south of 24 Ave., this light display has over 115,000 lights and is Calgary’s largest drive by display. Set up by over 3000 volunteer hours, this year the display is completely green with all LED lights.

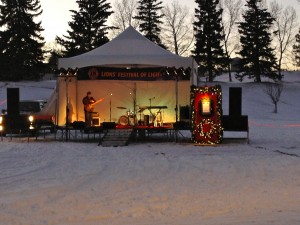
Each year they kick off the event with family activities, concert and treats and this year was no exception. They were ice sculptures, Singing Santa and Mrs. Clause (who really got the crowd rocking) as well as free hot chocolate and cookies. I was having a great time enjoying the tunes and bee bopping with the crowd (Santa really was good and quite creative in his singing).

IMG_1355At 6 pm, the mayor of Calgary, Naheed Nenshi, threw the switch to officially open and light up the park for the 2015 season. And to top it off a beautiful display of fireworks lit up the sky for everyone to enjoy. People were then invited to stay and enjoy the lights and the park.

In my 17 years in Calgary, this was the first time I had ever gone to see this lights display. I had heard of it but never attended. And this was the first time that I was aware that they did any kind of official kickoff – and honestly I was impressed. Not only with the event itself but the reasons why the display existed.

IMG_6650The Lions Club does this display every year as a way of thanking Calgarians for all their support and generosity throughout the year. The Confederation Golf Course supports the display as part of their mandate is to provide other activities than golf for Calgarians, which is why they not only open up their grounds for the Christmas display but also for cross country skiing and sledding in the winter months. I think this is a fantastic way for everyone to give back to the community and benefit!

IMG_1348 - Version 2Even though this is largely a drive by display, it is just as enjoyable to park and take a walk through the park enjoying the lights in a more intimate way. The display really is quite phenomenal and the best part about it is it’s free! I find there are so many additional costs at this time of year that is it pleasant to be able to enjoy something at no cost.

So pack up the family, friends, significant others, even grab some hot chocolate and take a tour down to Confederation Golf Course and check out the Lions Festival of Lights! They are open nightly from 6 pm to midnight until January 8.

Sweet Butter Tarts

IMG_6483I received a little inspiration the other day from my sister. She was making pies and butter tarts asking for advice and how to’s as it had been a while since she had made them. Of course I helped her and gave her lots of tips.

She sent me photos of her and the girls (my nieces) creations and it made me a little jealous. I love butter tarts, they are definitely one of my favorites and I hadn’t had one in years! They are so sweet and delectable, nice flaky pastry and yummy sugary sweetness as it melts in your mouth.

Why though hadn’t I made these in so long? I mean pastry challenges aside (I never enjoyed rolling them out and cutting small circles, found it finicky), there was really no reason why I could not make these things. Yes we have chosen to eliminate dairy and sugar from our diets but why had I not adjusted this recipe? I hadn’t even looked at the recipe to see if it could be!

IMG_6471With mouth watering I decided to least attempt it. I mean what was the worst that could happen, I’d end up with a batch that didn’t taste so good and might have to put in the garbage? But if it meant I might be successful and enjoy butter tarts once again 🙂

So I pulled out the recipe and took a peek. I balked at myself for having left this for so long. This transformation was going to be super easy! It was a simple substitution of Earth Balance, coconut sugar and coconut milk and voila! it was done.

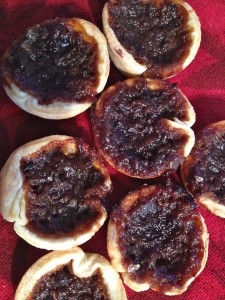
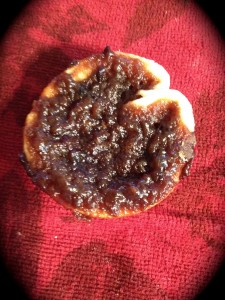
I waited in anticipation as they baked, hoping that I was right and they would turn out. Once they were out I did my best to let them cool at least a little, before I tasted one. Omg! it was absolutely delicious and honestly I could not tell the difference between this one and  the original recipe. Perfect!

I then shared the butter tarts with the kids who loved them and gobbled them up, quickly asking for more. Of course I love these so much I could easily gobble two or three at once, but I resisted, knowing perhaps I could have one for breakfast tomorrow…

And now I am going to share them with you. This is a dairy free sugar free butter tart recipe that you can enjoy without the guilt and really will not notice the difference or compromise on taste.

Butter Tarts

1/3 c. Earth Balance Vegan Spread, meltedIMG_6485

1 c. coconut sugar

2 tbsp. coconut milk (full fat canned coconut milk is best)

1 egg, beaten

1 tsp. vanilla

1/2 c. currants

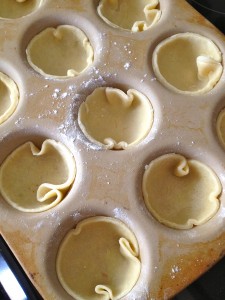
Make pastry as per directions. (I use Tenderflake and follow their recipe on the back) Roll out pastry to desired thickness (usually between 1/4 to 1/8 inch depending on preference) and cut into 4″ circles. Place pastry circles in prepared muffin tin. (*If tin is not non stick I would highly recommend greasing each opening lightly with Earth Balance. There is nothing more annoying then being unable to get your tart out of the pan without it breaking!)

Combine all filling ingredients in a medium bowl. Fill each pastry circle about 2/3 full. Do not over fill as filling bubbles up when baking and can overflow. Bake at 450F for 8 minutes, then reduce oven temperature to 350F and bake until pastry is lightly browned, no longer than 5 more minutes. Remove from oven and let cool.

*Tip – if you’re filling did overflow while baking it is a good idea to gently run a knife around the edge of the tart before it completely cools. This prevents the filling from hardening and sticking, making it difficult to get the tarts out of the pan once completely cooled.

Makes 12 medium sized tarts

Enjoy! (Now I’m going to make some more… writing this post has definitely started my mouth watering)

A Biscuit by any other Name

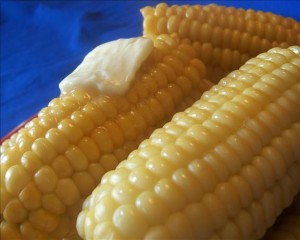
IMG_5950One of my favorite meals, especially in the summer, is corn on the cob with biscuits. I have no idea why I enjoy this combination so much or even where I came up with it, but it must have seemed like a good combination at one time and it seems to have stuck.

The kids get so excited when they see me mixing up the biscuit dough, literally jumping up and down. They always help me husk the corn, loving pulling off the green to reveal the sweet corn inside. (We do this outside on the deck, then we can make a big mess and it doesn’t matter as much)

I usually make the biscuits from a Bisquick mix, using their recipe on the box for drop biscuits, substituting my almond milk and dropping the biscuits by the teaspoon to bake. But the other day when I was grocery shopping and went to pick up Bisquick I looked at the package, actually reading the ingredients in the mix (I am not sure why I have never done this before). In reading the ingredients I realized that it contained sugar, something I have been diligently avoiding and eliminated from our diet. Why oh why had I been continuing to use the Bisquick and not paying attention? This did not seem like me at all. Perplexed by my own idiosyncrasies, I decided not to purchase the Bisquick and put it back on the shelf.

I then remembered that when we were in Australia last summer visiting my sister that she had made these delicious biscuits one night from scratch and had given me the recipe. I knew that regardless of what the ingredients were I could modify it accordingly if needed. I was a little unsure though of where this recipe might be…

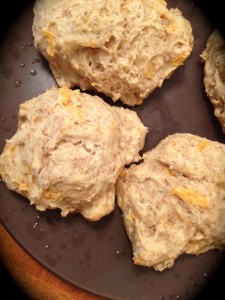
picQm6KFZLuckily it was easier to find than I thought, with hardly any adjustments needed. I was off to town and ready to make biscuits! They turned out very well, golden brown, fluffy and delicious! We all gobbled them up, eating them fresh from the oven, slathered with butter.

The recipe makes a good amount of biscuits, boasting 16 good size biscuits on average. I also like the options for this recipe, being able to add in things like cheese or ham if you want to, or simply making a plain biscuit. I also love the slight hint of cayenne that goes into this recipe, as it gives it just that subtle flavor and kick. I have yet to make this recipe and actually roll out the dough. I am lazy, and usually making dinner quickly, and I think they turn out just as nicely. Plus I say why create more work for yourself rolling them out when dropping them by the tablespoon works quite well! No one is going to pass on eating them because of it.

Now though my kids usually associate biscuits with corn on the cob, you can easily serve these with other yummy meals, such as chilis, stews, or whatever meal you want to add biscuits to! They are quick, easy and are a delicious recipe to make from scratch.

Homemade Biscuits

1 cup all purpose flourUS-Shreds-Cheddar

1 cup whole wheat flour

2 tsp baking powder

1 tsp baking soda

1/4 tsp salt

1/8 tsp cayenne pepper

1/2 cup shredded cheese (I use Daiya vegan cheddar)

3 tbsp Earth balance vegan spread

1 cup almond milk

1 tsp honey

Combine flours, baking powder, soda, salt and pepper.  Stir in cheese. Cut in Earth balance until mixture resembles coarse crumbs.

Combine milk and honey. Add to dry ingredients. Use a fork and stir to form a soft dough.  Turn dough out onto lightly floured surface. Form a ball and roll out to 1/2 ” -3/4″ thick. Cut into 2 inch rounds. Or if you don’t want to roll the dough, drop by the tablespoon onto a baking sheet.IMG_5948

Bake at 425 F for 12 minutes or until golden brown.

*other additions – may add bits of chopped ham, bacon, onion

Makes approximately 16 biscuits

A Day at the Ranch

IMG_5957One of the things I love about summer is all the cool places that you can go and explore! With most of them being right in your own backyard. I find there are so many locally either within the city or a short jaunt away that there is never a loss for things to do or check out!

The Bar U Ranch is one of those neat little places that we have visited recently. Just a short drive outside of Calgary (95 km on the 22, just past Longview, AB); a National Historic Site and part of the Parks Canada system, this ranch boasts 37 historic buildings set in the rolling foothills of the mountains and commemorating the history of ranching in Canada.

IMG_5959This living history ranch hosts daily activities such as calf roping, wagon rides and round up camp, as well as educational programs, group tours and special events.

On Canada Day, they host a special event where admission is free, with a number of bonus activities to the day (such as face painting, rope making, homemade ice cream and cowboy coffee). This was the day we decided to go and check it out. I had been to the ranch only once before, years ago before the kids were born. At that time I remember the ranch being a large piece of property with pretty sparse buildings and feeling it was not very exciting at the time, but I when I read it now had 37 buildings I was quite excited to go and check it out.

IMG_5953

In the cookhouse

We arrived at the beautiful visitors center that hosts a reception area, rangeland exhibit, theatre, restaurant and gift shop. This is also where you pay your admission to go down and explore the ranch. Though on Canada Day admission was free, rates to enter the ranch are quite reasonable with adults $8 and children under 6 are free. I also believe that if you have a National Parks pass that you can gain admission to national historic sites for free upon presentation.

IMG_5973

Calf roping

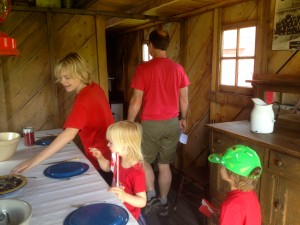
You can either grab the wagon ride down to the ranch or enjoy a short walk downhill to the site. You are met immediately at the bottom of the hill with buildings to explore, such as the bunk and cookhouses. The kids loved the hands on, being able to actually look at and touch things, getting into the bunk and seeing what it was like.

I was impressed with the fact that you could enter all the buildings and that staff were on hand to answer any questions you had or add to your experience. There were also a plethora of interpretative signs, for added information for those of us who like to read (that would be me!) and learn a bit more!

One of the fascinating things we learned was that the Bar U was well known for its excellence in breeding Percheron horses, a draft horse originally from France. These magnificent creatures are well muscled, intelligent horses and willing to work.

IMG_6043

Rope making

Luke’s favorite was a story of George Lane, the foreman of the Bar U Ranch, and one of the Big Four, who founded the Calgary Stampede. There is a sculpture of George Lane on his horse with wolves attacking him to the right of the visitors center when you arrive. Fascinated Luke asked me to read the sign to tell him the story. I told him the modified, but fairly detailed 5 year old version, and latching onto it, asked me to tell it to him again and again, until he got it right. The story was George was on his way back from Calgary one night, after visiting his wife who had just delivered their first child. He came upon wolves taking down a cow and went charging in. The wolves starving, due to the extinction of the buffalo (as the government allowed the hunting of the buffalo to extinction), had turned to hunting the cows for food and so the battle of man and nature began.

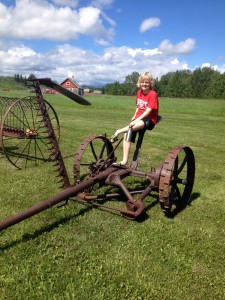
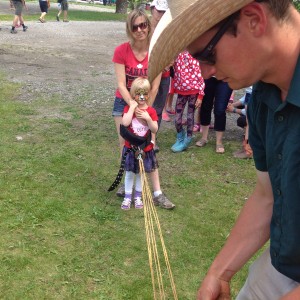
There are lots of old tractors and equipment to view, barns and even a sod house. The kids can enjoy calf roping, which they caught onto quite quickly and other hands on activities. This is the thing I liked the most, the amount of hands on the kids could do and experience. Not only did it keep them engaged and interested but allowed everyone to try something new and find the thing that they enjoyed or were good at the most.

We spent a good 3 or 4 hours there and comfortably saw it all, without feeling rushed or anyone getting bored. We also lucked out and had beautiful weather that day, but rain or shine, the Ranch is open from May to September each year and is definitely worth the trip!