Wapta Falls

wapta falls hike

On the weekend that Matthew and I did the Burgess Shale hike (read more in earlier post) we also did a few shorter hikes the following day. We did this for a few reasons, one was that Matthew was up bouncing around and had some energy to burn (yes after 22 km the previous day, he was neither tired, nor sore) and I also felt it was a good idea to move a little and do a short hike so we wouldn’t stiffen up. Not that Matthew would.

Plus I love going and exploring. We’re often driving through Yoho National Park on our way to somewhere else and don’t make any stops to check things out. So as I’m driving through I mentally make a list of places/ hikes I would like to go and see for the time that we do stop and stay awhile.

Spiderweb in a Tree

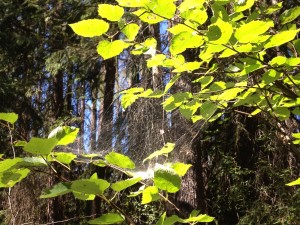
Wapta Falls is an easy 5 km return hike in Yoho National Park in British Columbia, along a treed path to a beautiful waterfall at the end. Though fairly flat, the trail ends in a slight incline to get to the falls but is a great trail for beginner hikers and for kids. There are lots of things to explore and discover along the way; we found a beautiful spider web between the branches of a tree and an interesting bump on another tree.  Of course there is the anticipation of the falls at the end, which as you are hiking along the path, can hear before you actually see it. Drawing you, beckoning you.

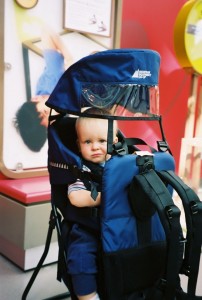
MEC Happy Trails Baby Carrier

Though the trail is suitable for children, it is not suitable for strollers. There are bumps and tree roots along the way that make it quite difficult to navigate a stroller on it. If the children are not walking on their own then I would recommend one of those backpack carriers for small children. There are many different styles and brands out there, we have one from Mountain Equipment Coop we really like, as well as one from Baby Trend.

Matthew practically ran down the trail and we had to ask him a few times to slow down, or pause to take a break. The rush of the waterfall was drawing him in and he was getting excited!

There are 3 spots where you can look at the falls. It is a bit deceiving when you first come to the falls as it looks like that is where the trail ends. There is a fenced area overlooking the falls with a bench to sit and relax. A lot of people assume that this is where the trail ends but if you continue down the trail, you can go off to the left for a different view or continue all the way to the bottom.

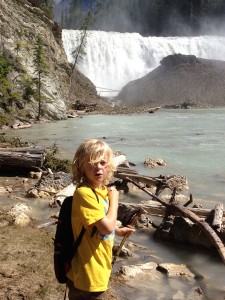
Matthew at the bottom of Wapta Falls

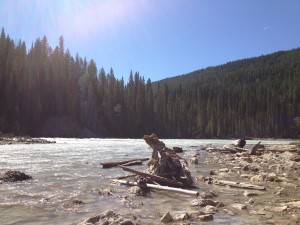
If you go all the way to the bottom, the trail ends by coming out onto a beach along the river at the bottom of the falls. It is a great place to sit and just be, soaking up the beauty and absorbing yourself in this calm, peaceful environment. The kids will love playing in the sand or throwing rocks into the water, or you can even move down along the shore a little ways and continue to explore. It’s a lovely spot to sit and have a snack or enjoy your lunch as you gaze at the waterfalls.

After spending some time at the falls we hiked out, Matthew again running – oh to have the energy of a child, and enjoyed some nice relaxing quiet time back at the campsite. Well I did, Matthew on the other hand was busy as usual, chopping wood.


The Easiest Birthday Cake Ever!

Darth Vader

When I was growing up my Mom would always make a shape cake for our birthday. My sisters and I loved it. We would pick the character we wanted and my Mom would turn it into a cake. We had everything from Strawberry Shortcake and Cinderella to Robin Hood and Darth Vader. It was amazing!

She would get my Dad to draw the picture for her to the size of the cake she wanted and then she would create the cake. We loved them so much that at 16 she had to ‘cut us off’; because even though they are super fun and look great when completed, they are a lot of work. My Mum was done.

Chloe’s 1st Birthday

But my sisters and I decided that we still wanted a shape cake for our birthdays, so we agreed to make each others (because we believe it is just wrong for you to have to make your own birthday cake).

This enthusiasm for shape cakes carried over when I had my kids and though my mother warned me not to start making shape cakes when they were small, I did anyway. Matthew’s first cake was a duck and Luke and Chloe’s teddy bears.

Matthew’s 5th Birthday

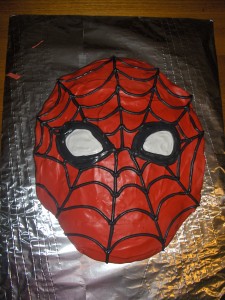
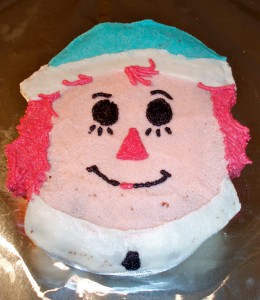
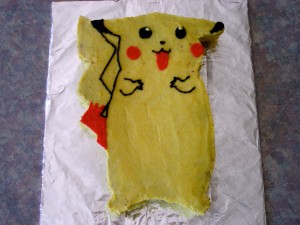
I’ve done everything from Spiderman and Pokemon to Raggedy Ann and Andy. I usually do the same thing my Mom did, let the kids choose what they want and then draw the pattern and make the cake. But sometimes I luck out and find a book with a pattern in it, or can get a pre-shaped cake pan – this makes it a lot easier. I enjoy making the cakes. I am so proud of myself when it is done and receive many compliments on my finished product. Even with our change to a sugar and dairy free household I am still able to do this for the kids.

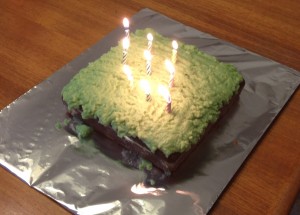
This month Matthew celebrated his 9th birthday and he asked for a Grass Block cake, from the game Minecraft that he plays on the computer. This had to be the easiest cake I have ever made. I literally baked a chocolate square cake and put green icing on top. In fact, I was finishing the cake 20 minutes before his birthday party was about to start. And he was totally happy with it. Though I love doing the shape cakes for the kids, it was really nice to have something simple this year.

Grass Block from Minecraft

The cake was a hit! Yummy, moist and delicious. We had it with ice cream of course; we now buy Rice Dream for our ice cream, or make it ourselves in the ice cream maker (these are great dairy and sugar free alternatives for our ice cream fetishes).

Who says you have to feel denied all the things you are used to eating by eliminating sugar and dairy? And the kids who attended, they had no idea that it was sugar free, it was cake, it tasted good, so they ate it.

Raggedy Andy on Luke’s 2nd Birthday

It really is easy to get around having sugar and/ or dairy and still enjoy all the ‘treats’ that we our used to in our lives. Here is the recipe for the chocolate cake and the icing that I used. Though I did use green food coloring to color the icing (and they say that food coloring for kids is not good really either – that’s a whole other post 🙂 There is a brand of food coloring out there now that is made from the pigment of fruits and vegetables, so if you are looking for an alternative you can purchase it at a health food store. I have seen it here in Calgary at Community Natural Foods and Planet Organic. Whatever you choose, enjoy the cake recipe and icing too!


Chocolate Cake

1-1/2 cups all-purpose flour

3 tablespoons unsweetened cacao powder

2 teaspoons baking powder

1/2 c. honey

2 teaspoons vanilla

½ c. almond milk (or non dairy milk of choice)

½ c. Earth Balance, melted (vegan spread)

2 eggs

Preheat oven to 350 deg F (180 deg C). Grease a 9 inch (23 cm) cake tin. Mix flour, cocoa powder, baking powder, honey and vanilla in a bowl. Melt Earth Balance at low heat and add to the dry ingredients. Also add milk and eggs. Mix everything together until smooth, either by hand or by using an electric mixer at slow speed.

Transfer to bake tin and bake at 350 degrees until a wooden pick inserted in center comes out clean, approximately 35 to 45 minutes.

*recipe can easily be doubled to make a 9×13 cake or divided evenly into cupcake tins to make chocolate cupcakes

Pokemon

Coconut Buttercream Frosting

In a mixing bowl add:

1/4 cup + 2 tbsp coconut butter (Note: Coconut butter is NOT the same thing as coconut oil).

3/4 cup coconut cream**

1/2 cup + 1 tbsp honey

1.5 tsp vanilla

1/4 cup + 2 tbsp coconut flour, sifted

1/4 cup + 2 tbsp arrowroot powder

Optional: You can substitute Earth Balance soy-free Buttery Spread for some or all of the coconut cream. Add extra sifted coconut flour to thicken if necessary. Likewise, add extra coconut cream or Earth Balance to soften if necessary.

Mix with handheld mixer. You can easily add a drop of food coloring to this icing if you wish to create colored icing.

Makes enough icing for 12 cupcakes.

PS – Looking for a sugar free chocolate icing recipe? Try this one


canada reads

Time to Clear My Head – Go for a Run

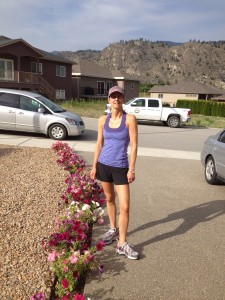
I really enjoy running. I never used to, I used to think it was chore, hard, pushing through and keeping it in my routine only to add variety to my exercise.

I have run all my life, though not always enjoyed it. I ran when I was little, likely because my Dad and Mum did. We would go out running together or to the indoor track, it was more of a family time for me than exercise, but I was 10.

It wasn’t until I got older, around university that I started to feel running was a chore. I would do it, as it was an easy way to exercise, but I did it begrudgingly. Until recently, for some reason all of a sudden I really enjoy running and do so now 2 or 3 times a week.

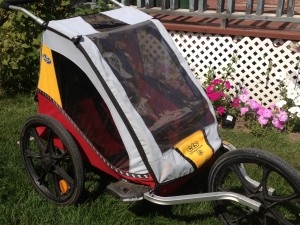
Chariot stroller

I think it is the convenience of just getting up and going out the door that started me running again and there are many benefits. Other than the health benefits, such as stress relief and disease prevention; I find running is a great way to get out and have some time for myself. I can do it at any time of day, anywhere and all I need is a pair of running shoes and shorts. I even take the kids with me, as I have a Chariot running stroller. Even when Matthew is at home he comes along, either riding his bike or scooter (I have suggested he run with me but he hasn’t bit yet).

You might think that running with the kids is not really a break for me, but it truly is. They are all occupied and safe, quiet, and all I have to do is push the stroller along and get lost in my own thoughts as I do my route around the neighborhood. In fact, when I first started running again I liked having the stroller to push as it provided great balance for my arms.
I love the feel of the wind on my face as I cruise along, the steady rhythm, feet pounding the pavement. I am aware of my surroundings yet lost in my own thoughts, able to process things and work things out. It’s a great way to clear my mind and let the ideas flow. When I am stuck or feel bogged down, a run clears it all away and then I can focus again. Sure getting outside and a change of scene always help too, but there is just something about the movement of running that is quite satisfying.

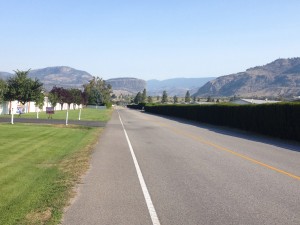
Along the road Oliver, BC

While we were away on vacation last week I actually got a treat and got to run by myself, not once, but 3 times. Though I do find going with the kids is still a form of time for me, going without was even more so! In Oliver, BCwhere we were visiting my parents, I would get up and go first thing in the morning to beat the heat, because if you waited it got very hot. It was a great way to start the day, sunny blue skies, surrounded by the mountains. Morning greetings exchanged with all the seniors who were out for their morning walks as well, feeling elated and free. Just a few moments for myself, enjoying the sunshine and reveling in the beauty that surrounds me. How nice would it be to start each day like this?

Though I have not taken any running classes or programs, there are a variety of them out there that cater to all levels from beginner to advanced. Places like The Running Room and local running clubs offer programs and workshops. Clubs often provide other benefits like discounts or special prices for members, social activities and running clinics.
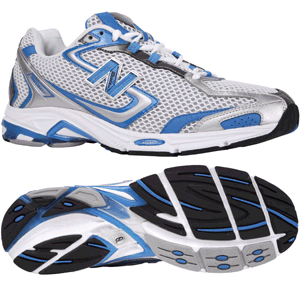
I would also highly recommend that if you are going to run that you invest in a good pair of running shoes. Go to a specialty shop like The Running Room, where there are staff who are knowledgable and can help fit you properly. I found that when I bought running shoes, it really made a difference in how I felt about running. It became a much more pleasant experience because I was properly supported and cushioned.

Running is not for everyone, but it certainly is convenient. And like I said I did not always love it. But now it meets my needs, provides some time for me, rounds out my work out routine (I also go to the gym 3 times a week) and provides some variety in my exercise, as that is important as well.

So if you’re up for it, give running a try. It’s easy, it’s fun and it’ll provide you some great benefits, if only the opportunity to get outside for a little while and clear your head!


Bananas, Bananas and More Bananas

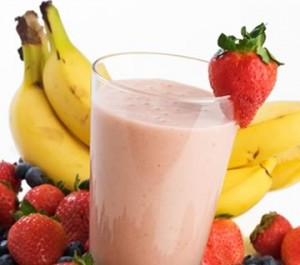
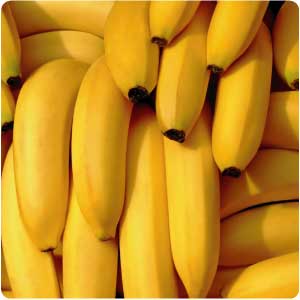
We go through a lot of bananas at our house. We basically use them in smoothies and general eating but we make a lot of smoothies. In the morning, I make 2 smoothies for myself, a green smoothie of some sort and a fruit one for later in the day. Then I make a peanut butter smoothie for Matthew and the babies usually have a banana each for breakfast. These all include bananas so by the time breakfast is over we have had at least 5 or 6. Then in the afternoon I will make more smoothies for the kids, a green smoothie of some kind, or more like a chocolate smoothie with greens in it. Believe me this is a great way to get greens into the kids! I find the twins especially are more apt to drink their green smoothie than eat the vegetables off of their plate. But I digress, we go through a lot of bananas. We are out at least twice a week buying 12-15 so that we have enough for a few days but not too many that they go brown before we eat them.

Bananas are a great source of potassium, vitamins C and B6, as well as a source of iron. As a result they help increase strength and reduce stress and is an instant source of energy. This makes them a great nutritious snack and natural sweetener (often you can use banana to sweeten muffins or cakes instead of using sugar). Plus they are a great ‘grab and go’ snack.

Though we eat a lot of bananas sometimes we do find that they go brown before we eat them all, and personally once a banana is too soft or ripe I cannot eat it. I don’t like the texture, it’s too mushy. So as a result I use them in recipes, like banana bread and banana muffins. And when I have too many brown bananas I toss them in the freezer to use later.

I have always loved banana bread, it is one of my favorite treats and I recently found an excellent sugar free recipe in the Clean Eating magazine. It uses flax seed and flax oil as well as other tasty ingredients. It is dairy free too; so I tried it out. It was the best banana bread that I have ever tasted! It was so moist and delicious, it melts in your mouth.

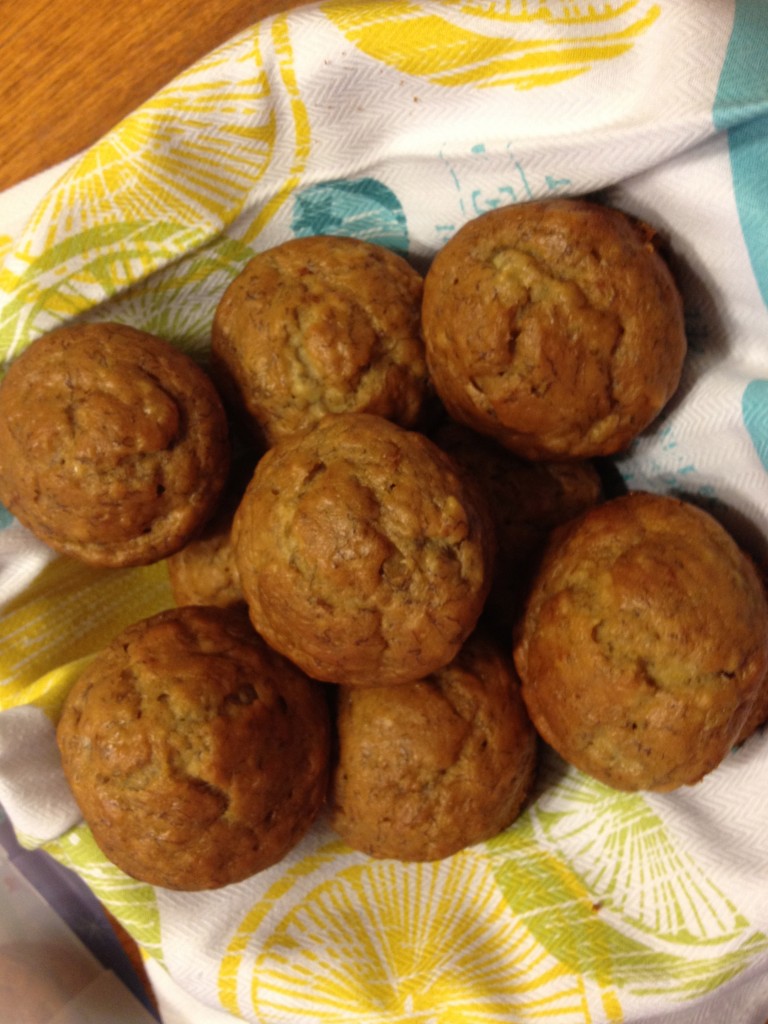
I also really enjoy banana muffins as they taste just like banana bread, and have a great recipe from my mother. I have been able to adjust the recipe to meet our new dietary requirements of no sugar or dairy and they taste delicious. The first time I made them I used date sugar as the sugar replacement and though they were very good, they were even better when I tried the  recipe using agave nectar instead. Mhmmm, they turned out so moist and fluffy! They turned out so well that I made them again within a week, not because I had leftover bananas that I needed to use, but because they were such a hit.

So I am sharing with you the banana muffin recipe with agave nectar (the banana bread recipe will come soon). Give it a whirl and try not to eat them all in one sitting! This sugar and dairy free recipe is sure to please everyone in the family!


Banana Muffins

1 1/2 c. flour

1/2 c. agave nectar

1 tsp. baking powder

1 tsp. baking soda

1/2 tsp. salt

3 large bananas

1 egg

1/3 c. melted Earth Balance

Mash bananas. Add agave nectar and slightly beaten egg. Then add melted Earth Balance. Mix in dry ingredients and mix but do not beat.

Bake at 375 F for 20 minutes.

Makes 12 muffins

The Burgess Shale – Walcott Quarry

For the past 2 summers I have taken Matthew for a mother and son camping trip. It is a great opportunity to spend some one on one time with him doing something we both love. We try and change it up each year, choosing different sites to camp at and different things to do. This past weekend, Matthew and I went to Yoho National Park in the Canadian Rockies. We did the Burgess Shale Hike to Walcott Quarry, a 22 km guided hike up through the mountains, to view the famous fossils.

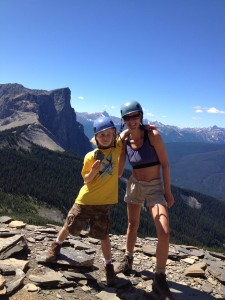
Matthew and I at Walcott Quarry

A World Heritage Site, the Burgess Shale is considered the world’s most important fossil site that preserves one of the world’s first complex marine ecosystems. It has also been shown that 95% of the world’s species have evolved from these fossils; the origin of all life.

Discovered by Charles Walcott in 1909, this is the world’s most significant fossil discovery because of their age (500 million years old), diversity and the incredible detail of the preservation of the fossils. It is truly a wonder to be discovered and enjoyed.

This fascinating find attracts researchers from all over the world, as well as hikers. As a protected site, the only way to access the site is on one of the guided hikes provided through Yoho National Park or the Geoscience Foundation in Field, BC. This is to preserve and protect the site from misuse and vandalism and continue to utilize it for research.

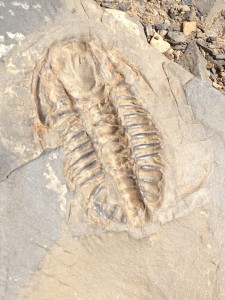
A Trilobite

You can choose one of 2 hikes, the Mount Stephen Fossil Bed or Walcott Quarry. Both hikes can be challenging and it is best to go to the National Park website to determine which hike is most suitable for you. Though Mount Stephen is shorter in distance it is strenuous and steep, while Walcott Quarry is longer in distance, it is less steep.

I have wanted to go on this hike for many years, every time I drove through Field I thought maybe this year I will go. One of the reasons I had not gone yet was that I did not have anyone that was interested in going with me. And though I do many things by myself, this was something I wished to share with a friend or family member.

I was very pleased and excited when I suggested to Matthew that we go. He seemed keen and interested and though the 22 km hike was more than he had hiked before (he had done up to 14 km), he was willing to do it.

We choose the Walcott hike because it was a less strenuous and difficult hike, as well as the fact that there are a variety of fossils found at this site, such as trilobites, marrella, anomlocaris; compared to Mount Stephen, which is mainly trilobites. We felt that even though the distance was longer that this hike overall would be a more satisfying and exciting experience.

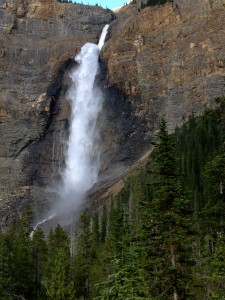
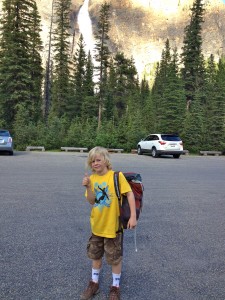
Takakkaw Falls

After waking up at 6 am and a quick breakfast, we met at the trailhead at Takakkaw Falls at 7:15 ready to start our day. It was going to be a beautiful day, the sun was shining and there was not a cloud in the sky. We met our Parks Canada Guide Kristi and fellow hikers and after going through a few ligistics we were off!

Matthew was the youngest in the group and I could tell that some of our fellow hikers were a little shocked/ concerned that he was coming along. I admit I was a little nervous for him but I knew in my heart that he could do it. He is a strong resilient kid and we had already hiked many trails and terrains over the last year. Though he might be tired at the end of the day, I knew he would do it.

Learning about the fossils

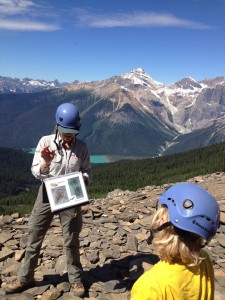
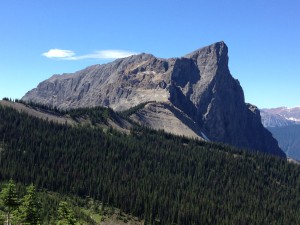
By 1 pm we were up at the fossil site with a stunning mountain view of Mount Burgess and overlooking Emerald Lake. We got to spend a full hour here, exploring and discovering fossils. It was amazing!

Mount Burgess

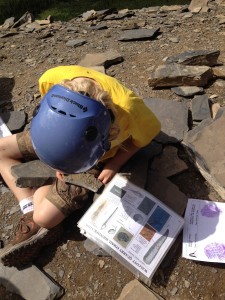
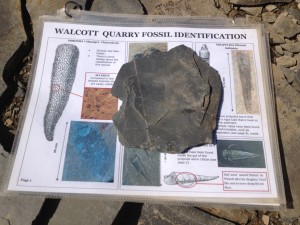
We had to wear helmets to protect ourselves from possible rock fall overhead and were literally standing on the slope of a mountain. Our guide provided us with fact sheets to help us identify what we found, as well as little eye magnifying pieces to get a better, or sharpened look at the fossils. We were also able to do fossil rubbings, with good old fashioned paper and crayon. It was awesome and so fascinating!

Matthew studying a trilobite

Matthew loved it. He loves that kind of sciency stuff and gadgets to check it all out with. And he was pretty excited and proud of himself for completing the hike as well. Yes he was very tired by the time we got back to the parking lot, but he did it, and he did it without whining or complaining. He’s an amazing kid! And once we fed him dinner and got back to the campsite, he was up running around and zooming off on his bike. Where does he find the energy?

Of course the next day I was a little sore and stiff, not my 8 year old. Bouncing around ready for another day. So I took him on another hike 🙂

The Burgess Shale is a fascinating hike and once in a lifetime experience; even if you are not a science geek, the fossils are fascinating to see and the scenery alone is worth the hike. It is also very cool to see and be a part of these fossils and to understand that we evolved from these guys. To see them preserved is something I can’t really describe, it’s one of those things that you’ve got to do to understand the awe and wonder of it.

I did it! 22 km and still alive! It was awesome!

Note: This hike is not suitable for young children, even if taken in a baby carrier. 8 years old and up is what is recommended on the website and not many 8 year olds actually do it. Please ensure that your child has hiked distance before and has the stamina, determination and interest in doing it. This is not only for their safety but for the safety of everyone on the hike as well.

Fact sheets and fossils

Want to know more about the Burgess Shale? Check out these great websites for more information

www.pc.gc.ca/burgessshale

www.burgess-shale.rom.on.ca

www.tyrrellmuseum.com/exhibits/burgess_shale.htm

Homemade Jam Sugar Free and Just as Delicious!

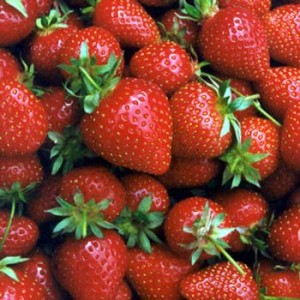
For years now I have been making my own jam, a tradition that I have learned and carried on from my mother. In the summer, we would go strawberry picking, bringing home flats of strawberries and Mum would make fresh jam.

Our kitchen would become a production center with flats of strawberries, jam jars, and other ingredients all laid out to make the jam making process easy and smooth. Mum would make jars and jars of it; because as a family of 5 we ate a lot of jam.

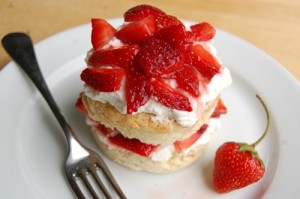
Many times we would have enough left over to make some great desserts too, like strawberry shortcake or strawberry rhubarb pie. Often too, Mum would simply freeze the berries for later.

Jam is very easy to make and with a few simple ingredients, a pot and your stove you can whip up a batch quite quickly and have fresh homemade jam. There are sugar free, reduced sugar and regular jam recipes, but regardless of your preference they are all delicious! The first time I made jam my husband looked at me weird and asked me why was I making jam when we could buy go some at the store. I smiled and said, “Just wait.” He did, and when he tasted it, his eyes got big and he promptly started eating it with a spoon!

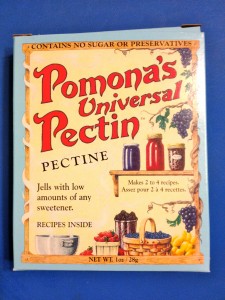
When we were first eliminating sugar at our house, I wondered what I would do about making jam, as the recipe I usually used had tons of sugar in it and there were no jams in the store without sugar. The regular Certo recipes use up to 8 cups of sugar per batch, so I had to find an alternative. Last year I discovered Pomona’s Universal Pectin, which is 100% pure citrus pectin and you can use honey or other sweeteners for your jam.

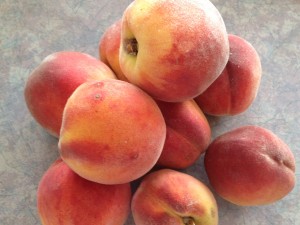
I was so pleased to have discovered this I made a batch of jam right away. It turned out beautifully and my family continues to gobble it up! We tend to go through a jar of jam a week. The favorite is peach jam, but I like variety, so I also make apricot, raspberry, strawberry, blueberry and cherry.

The thing that I really like about this pectin is that I can double or triple my batch. I found that with the Certo recipes doubling or tripling did not work well and therefore was having to do one batch at a time. Ugh! Though I enjoyed making it, the process was slow and as I am sure all parents can relate, we are happy when we can do things faster and still maintain quality!

With all the fresh summer fruit I tend to make a lot of jam; as I said we go through a lot. I usually buy cherries in the Okanagan when I am there visiting my parents, I also get fresh peaches as they have a peach tree. We have our own raspberry bush, and when the children have not picked it clean and eaten them all, I will make a batch.

There’s nothing like the taste of fresh homemade jam, it is so delicious that even I would eat it with a spoon!

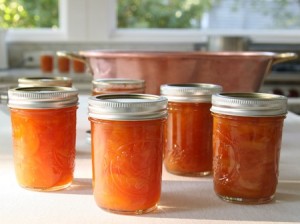
Making jam is very easy. Below is a recipe for Peach Jam (the favorite at our house) using Pomona’s Universal Pectin. Recipe can easily be doubled or tripled.

Other jam recipes are included inside both Certo and Pomona’s pectin boxes, and vary slightly depending on the kind of jam you are making. They also offer cooked and no cook jam freezer recipes.

Peach Jam

4 c. mashed peaches, peeled

1/4 c. lemon or lime juice

1 c. honey (you may use as little as 1/2 c. honey depending on how sweet you like it)

3 tsp. Pomona’s Universal Pectin

4 tsp. calcium water *

Jam jars with seals/lids and rings

Large pot to make jam in

Small pot to boil lids

Wash and rinse jars. Heat jars in 225 F oven for 10 minutes, keep warm until ready to use. Boil lids and rings in small pot. Turn down heat and let stand in hot water.

Prepare peaches by peeling, slicing and mashing to make 4 cups. Put fruit with lemon or lime juice in large pot. Add calcium water and stir.

Measure honey into a separate bowl. Add pectin powder; stir thoroughly.

Bring fruit to boil. Add pectin-honey mixture, stir vigorously about 1-2 minutes to dissolve pectin. Return pot to a boil and remove from heat.

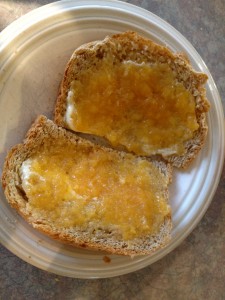
Peach Jam on toast

Fill jars to 1/4″ from top. Wipe rims clean, place lid/seal and screw ring on top. Screw on tightly. Put filled jars in boiling water to cover and boil for 10 min. Remove from water, let jars cool. Lids will ‘pop’ as they cool to seal and should be sucked down. Store in a cool place until ready to eat.

Makes 5 -250 ml jars.

*calcium water is 1/2 tsp. white calcium powder (provided in Pomona’s Universal Pectin box) and 1/2 c. water

Note: if you do not have time to complete your jam but have the fruit; you can measure and prepare your fruit and freeze it for later use. I have done this and it works well.

Happy Jamming!

Matthew enjoying a piece of toast with freshly made peach jam


How to Take Time for Yourself (even with the kids at home this Summer)

Summer is a busy time with the kids at home, activities and outings, camping, hiking, vacations and road trips. You are going from one place to the next getting in as much as you can in our short season. (Well I do, I like to pack it all in in about 8 weeks as I know we only have so much time to do all the things we love. And you have to take advantage of the warm and sunny days cause you never know when the rain is going to come and sock you in for a few days and the temperature drops)

The problem is still taking time for yourself with all this increased activity and time with the kids at home. We all know how important it is for Mom (or Dad) to take time for ourselves. A happy parent equals a happy family. We are better able to manage our day, handle challenges and stress and just enjoy life more!

So here are some tips and things that I do so that I get ‘my time’ throughout the day and am still present and ready for my children.

Get up half an hour early, before the kids do and do something for yourself. You might argue that you need your sleep but trust me this is worth it. Do whatever feeds your spirit, whether it be a quiet cup of coffee or tea, meditate, yoga, stretching, something that you enjoy and puts you in a peaceful, calm and happy mind state.

Have quiet time after lunch My little ones still nap so I get a 2 hour window in the afternoon to do what I want; but with my older son home from school that changes. I know you’re saying my kids don’t nap at all! What we have done is set up quiet time after lunch for 30 minutes. All the children go to their rooms at the same time and do a quiet activity such as reading, drawing, etc. The babies still nap so they go to sleep but this works well with Matthew; and I will continue to do it once the babies no longer nap. Then you have time to yourself to do something for you, without the kids, and is a nice break for everyone during the day.

Make a cup of tea, coffee, lemonade, etc. You notice that the kids are playing nicely, take that 5 or 10 minutes and sit down and enjoy your favorite drink. I often find that having just those few minutes is a great way to recharge.

Breathe I am sure you have heard this one before, a few deep breaths can do a world of wonders and I mean in through the nose and out through the mouth, filling up and expanding the stomach. You don’t need a block of time to do this, you can do it on the spot, kids or not for just a few minutes.

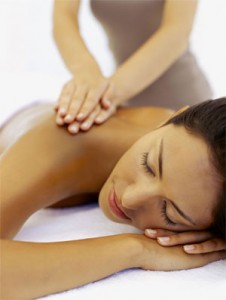
Set up some scheduled breaks Whether it be a playdate or you hire a babysitter, this provides the opportunity to take a break and do what you would like for a bit. Whether it be to go for coffee with a friend or by yourself, a massage, a little shopping. You can even take advantage of registering your child(ren) in a day camp program. This will not only provide a break for you but some variety for the kids.

I have found the key is purposely scheduling some time for you, while making sure that the kids are occupied and safe. If I do not schedule time during my day I find I get to the end of the day and am just exhausted. Once you have the time it is easy to find things to do! and  even short breaks can make a world of difference.

The important thing is to do things that truly feed your spirit and rejuvenate you, don’t use that time to do housework or prepare dinner! Things like going outside, even if just in the backyard if you can’t leave the house, go for a walk, a massage, coffee, read or even an uninterrupted phone conversation with a friend! You know what feeds you best, do it and everyone will be better off for it.


Summer Road Trips -Car Games for Kids

car games for kids

One of the many things I love about summer is road trips. The ability to hop in the car and take off and explore! The challenge can be what to do with the kids on the long car rides to your destination.

Some parents may just let their children play on their hand held devices or set up the DVD player, but I feel that it is important for children to learn to entertain themselves without those devices, as it is good for their brains and imaginations. And sometimes those electronic devices break down so it is great to have things to do that don’t require all kinds of fancy equipment.

When I was little we would often take along books on tape and listen to those in the car following along in the book. One of my fondest memories is when my sister Cathy and I read the Star Wars story to our youngest sister, Leslie, without the tape and doing all the sound effects for her. Doing Darth Vader was definitely the most fun!

I often find as well that playing these games creates some wonderful interaction and quality time with your kids in a fun and easy way. Everyone is laughing and playing and a little friendly competition doesn’t hurt either.

From my experience as a child and with my own children, here are some great car games and activities to do with your children in the car. They are simple, appropriate for all ages and require little or no equipment.

The Alphabet Game –Each person needs to go through the alphabet using letters on signs. Starting at A, the first person to reach Z wins. For example if a person sees the letter A on a sign they call “A in maximum” and then move on to the letter B. This can also be done with numbers starting at 1 going up to whatever number you choose.

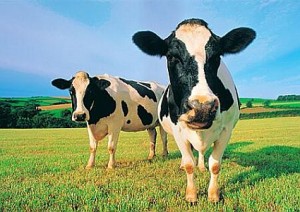
Counting Cows – Each person or team counts cows on the side of the road keeping a running tally. This can be quite challenging as you could pass a field that has lots of cows and since you are moving you have to count fast! If you pass a cemetery you lose all your cows and start at zero, but only if the other team calls, “your cows are buried!” This can be lots of fun as people try to create distractions so others miss cows or cemeteries.


Virtual Hide and Seek – Think of your house and pick a place to hide, imagine yourself there. This is fun as you can be any size and hide in some unique places. The other players ask questions to narrow down where you are. “Are you in the kitchen?”, “Are you in a cupboard?” etc. Kids have lots of fun “hiding” in places they normally couldn’t.

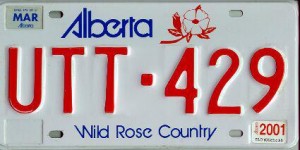
License Plates –There are a couple of games that you can play using license plates. One is to take the numbers on a license plate and see who can add them up correctly. Another is to “collect” license plates by trying to find one of each province and state. This game could last the whole trip or be played throughout the whole summer.


Word Game – Starting with the letter A, you go around and each person says a word starting with that letter. You keep going until no one can come up with a new word, then you move on to B, etc.

Going on a Picnic – This game is simple and has a trick to it that is fun for the kids to figure out. You start by saying “I’m going on a picnic and I am going to bring ….” then fill in the blank. You can bring whatever you want but you need to bring something that starts with the first letter of your name. For example, Susan can bring string, socks, skateboard, while Mary can bring marshmallows, milk, meatballs. Do not tell the ‘trick’ to the kids let them figure it out by continuing to model what you may bring.

I also find it handy to have read along stories, crayons and coloring books, an etch a sketch and magna doodle. There’s always songs to sing or listen to as well. I find that children are adaptable and easy to entertain as long as they know what to expect and have some resources/ variety available to them. Sometimes children just enjoy watching the world go by as you drive along, watching the trees whiz by and enjoying the landscape. That in itself has great value as well.

So next time you are heading down the road try out some of these games and find your favorites! Let me know too which ones you have enjoyed the most by commenting below.

Looking for more? These sites are really good resources momsminivan.com and activitiesforkids.com

Summer Treats – Sugar Free Cherry Pie

sugar free cherry pie

One of the things I love about summer is all the fresh fruit that is available. Cherries, peaches, strawberries, blueberries, etc. It’s abundantly available, and it’s fresh, sweet and luscious, a taste sensation when you put it in your mouth.

I feel lucky that my parents live in the Okanagan where fresh fruit is rapidly abundant. Fruit stands and u-picks line the sides of the roads where it is not a matter if there is fruit but where you would like to get it from.

I always tend to get a little over zealous and buy lots of fruit to bring home. I make jam, freeze, eat it straight or make various desserts like crumbles and pies.

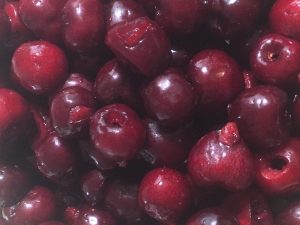
In fact last weekend when I was in the Okanagan I bought 20 lbs of cherries for $20. It was a steal of a deal! The only thing is when you buy that much fresh fruit you have to do something with it fairly quickly or your ‘steal of a deal’ ends up going rotten and moldy very quickly.

sugar free cherry pieSo there I was Tuesday night for 3 hours pitting and jamming cherries, trying to give some away to friends, and getting creative with what I was going to do with this fruit.

(I would highly recommend using a cherry pitter as this makes it much easier to pit cherries. It is also something the kids can do and help with – my son loves using the cherry pitter and I can easily enlist his help).

By the time I was done I was covered in cherry juice (and so was my kitchen), with a mound of cherry pits and stems in the sink and a huge mess to clean up. I never wanted to see another cherry again…

The benefit of all this was cherry pie. Cherry pie is one of my favorite pies, other than pumpkin and coconut cream, so when I was getting to the end of the cherries and still had a lot left I decided to treat myself.

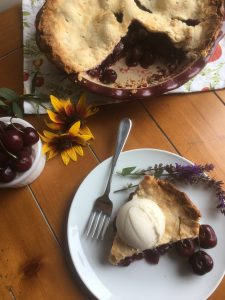
sugar free cherry pieAs you may know there is lots of sugar in pie, but as sugar and dairy free household, I have become adept enough to make the appropriate substitutions and still have a delicious experience (where it tastes just as good as one with sugar, if not better). My mouth was already watering at the thought of this pie, with ice cream on top.

I used Martha Stewart’s Sweet Cherry Pie recipe that I found on the internet and adapted it accordingly using honey instead of sugar. It turned out beautifully and everyone had 2 pieces! With ice cream of course!

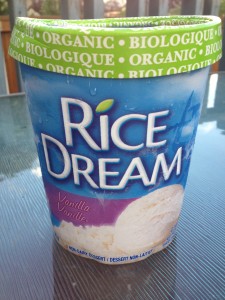
Vanilla Rice Dream

As for the ice cream, I have recently discovered Rice Dream, a lactose and gluten free ice cream available in stores. It is also sugar free, as it is sweetened with brown rice syrup and agave nectar. It is quite good, in fact it is so good I had way more ice cream than I actually did pie!

I make my own crust (and have been praised for how good it is) simply by following the recipe on the Tenderflake® box, which I use in my crust. It creates a beautiful light and flaky crust.

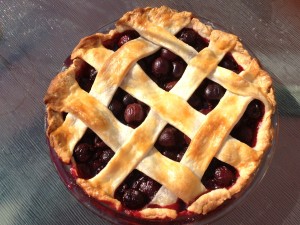
This pie recipe used a lattice top crust, which I don’t usually do but decided to try it out, and though I found it did look very pretty, I prefer a full crust on the top. A good crust is something we really enjoy at our house, so the more of it the better! Plus it’s really hard to cut once it’s baked (as in getting it out in a decent piece)!

Cherry Pie
  • 4 cups cherries
  • sugar free cherry pie1/4 cup honey
  • 2 -3 tablespoons arrowroot powder or cornstarch
  • 2 tablespoons fresh lemon juice
  • All-purpose flour, for rolling
  • 1 large egg yolk, beaten with 1 tablespoon water, for egg wash
  • 2-9 inch pie crusts (make your own or store bought)
  1. Preheat oven to 400 degrees. On a floured surface, roll out pie crust one to a 14-inch round. Fold dough in half and gently place in middle of a 9 inch pie plate. Once centered unfold dough so that it fits evenly in the plate (do not stretch dough). Using pering knife trim dough to a 1-inch overhand all around.
  2. In a large bowl, combine cherries, honey, arrowroot powder, and lemon juice; toss until cherries are well coated. Pour into prepared bottom crust.
  3. Roll out second crust to a 14-inch round. If creating lattice, cut into eight 1 1/2-inch-wide strips; discard the shortest two. Weave strips over filling to form a lattice. Using pering knife, trim strips so they hang over rim by 1 inch. Tuck strips under rim of bottom crust; press to seal. Crimp with a fork all around the edge. If choosing not to create lattice, simply fold crust in half and place over pie. Trim, press to seal and crimp as described.
  4. Using a pastry brush, lightly brush lattice/ crust with egg wash.
  5. Place pie on a rimmed baking sheet. Bake until filling is bubbling rapidly all over, 60 to 70 minutes (tent with aluminum foil when crust starts to brown, about 40 minutes). Though original recipe calls for above baking time I found that pie was done in about 50-55 minutes. Please use times as approximate and gauge it according to your oven.
  6. Transfer pie to a wire rack, and let cool to room temperature, at least 3 hours.

Like fruit pies? Check out my other sugar free pie recipes for Peach, Apple & Blueberry

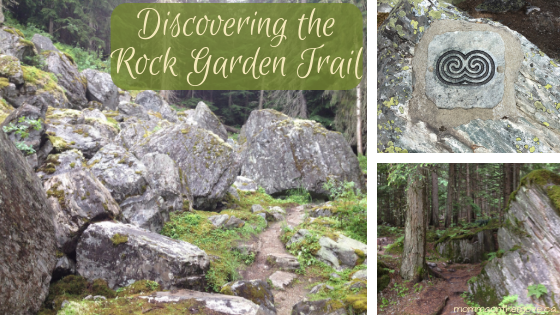
Discovering the Rockgarden Trail

rock garden trail

I’m always on the lookout for new trails to hike and explore with the kids. I love the outdoors and it is one of my greatest joys to share this passion and excitement with my children.

For years we have been driving up and down the #1 highway west on our way to visit family or on some kind of adventure. I love this drive, it is a beautiful, lush and full of places to discover and explore. Often though we are pushing through to our destination or have another ‘planned stop’ and don’t always have the opportunity to stop at the trails and sites that I would like to see.

There are 4 National Parks along this route, Banff, Yoho, Glacier and Mount Revelstoke. All are unique and beautiful in their own way with so much to do and explore.

Ever since Matthew was little I have wanted to go on the Rockgarden trail. It is a short 20 minute hike on the east side of the Rogers Pass, in Glacier National Park. We discovered it one time when we stopped for a bathroom break and pulled into the parking lot for the outhouse.

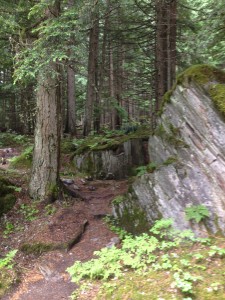
Entering the Rockgarden Trail

This trail though short is not meant for strollers or young children. If you have young children you will need a baby carrier to take them with you.  It is a steep, rocky trail with high drops in some places. It has rock stairs and winds through boulders and lush forest. It is considered a miniature landscape all it’s own, rich in lichens and mosses that are more than 2000 years old.

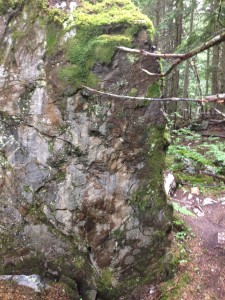
Lichens and Mosses

For one reason or another we have always passed it by, timing not working out with the kids, weather or the desire to push through and get to our destination. But this weekend we went! I was driving Matthew out to my parents for the week, and I had already decided before we left that this would be our planned stop. I was very excited that we were finally going! I kept my fingers crossed that the weather would be decent, as it was a little rainy.

When Matthew and I entered the trail we were in awe of what we saw. Piles of rocks/ boulders settled along the trail, part of the trail. It was truly entering a rock garden.

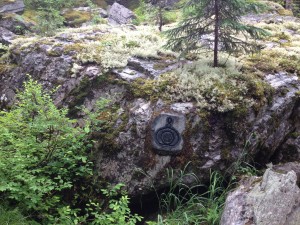
At the beginning of the trail be sure to pick up a brochure that describes different areas of the trail by matching the symbols in the brochure. This provides you with more insight into what is/ has happened in the area and you can appreciate the wonder and life of the area. It is also a great educational tool for the kids! When I was little I always loved reading the signs and learning more. My parents would read the signs to us and as we grew we would read them on our own. Sometimes we would even set up a scavenger hunt using the signs and information and that was fun too!

As we meandered and explored the rock garden we noticed the faces in the rocks and the energy of the forest. It is a magical place, one where you could sit and rest awhile before carrying on on your journey.

So next time you’re heading down the #1 and need a break, or a chance to stretch your legs, I would highly recommend this beautiful and magical place tucked within the Canadian Rockies. Stop a while and take a breath, enjoy and discover a place you may not have noticed before.

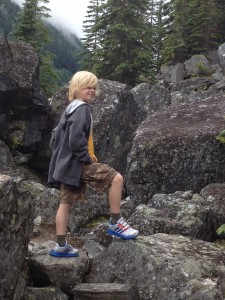
Matthew conquering the Rockgarden Trail

Check out some of these other wonderful hikes along the #1 highway on the East side of the Rogers Pass – Giant Cedars Boardwalk, Skunk Cabbage Trail, Hemlock Grove.