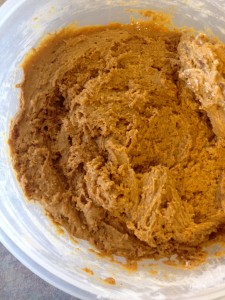
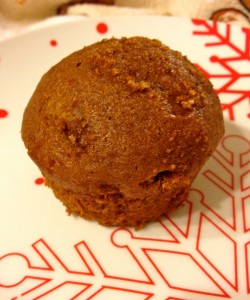
Dairy Free Delicious Homemade Cinnamon Buns

dairy free sugar free cinnamon buns

Sometimes it’s just a make cinnamon buns, coffee and movies kind of weekend.

I have been craving cinnamon buns for weeks. I have no idea why. I just wanted a big sticky gooey, yummy, sweet cinnamon bun. But I also wanted to respect my needs (and not feel awful after) so I wanted it dairy free and naturally sweetened. So I couldn’t just run out to the store and get one – I decided I was going to make some sugar free dairy free cinnamon buns.

Of course my biggest issue was time. When I am baking and/ or creating in the kitchen I like to have the time to do it. I don’t like to feel rushed or hurried, or that I have to get to the next thing. I just want to move from one step to the next at whatever pace I choose. Often enjoying a favorite movie in the background as I work.  I like to take my time, enjoy the experience and give myself space to do it. I also need to feel motivated or ‘in the mood’ as they say. I find if I don’t want to then I won’t enjoy doing it either and it certainly won’t turn out.

dairy free sugar free cinnamon bunsThis weekend the stars aligned and I had all these things in place, time, desire, all the ingredients (as sometimes that is a big barrier to lol). It was the kind of weekend that was just for me, doing what I wanted to do when I wanted to do it. A soulful weekend I like to call it. A time where I can do things that I love and fill up my soul. Sure I had work to do, and other tasks that certainly could have used my attention, but sometimes we really need to take a break, get away from work and I needed this more. I needed to rejuvenate and reconnect with myself and well baking and creating in the kitchen is one way that I like to do it.

Now you have to understand what kind of undertaking making cinnamon buns from scratch was for me. Growing up I had tried a number of different bread type recipes and could never get them to rise successfully. No matter what I tried or how I did it, I just had no success. You know when they say you should let it rise til it doubled in size? I was lucky if it rose even a little, if at all, and that was after hours of waiting. Failed after failed attempt, I watched others do it successfully, my aunt did it with ease, I think even my sister managed it once, but for me it just wasn’t happening. So to even attempt a cinnamon bun recipe where rising was involved was a big thing – I had absolutely no idea if they were even going to turn out as the light and fluffy cinnamon buns I desired, or if I would end up with rocks in the garbage once again.

I was also playing with ingredients – creating a recipe that was naturally sweetened and dairy free, I put some things in and took some out. I laughed as I was telling my girlfriend about it when I went to yoga, leaving the buns behind hoping they would rise and double in size by the time I got back. Because of all the tweeks I had made I really thought it would be a miracle if they worked.

To my delight, when I returned home from a lovely yoga and essential oils class, the cinnamon buns had in fact risen and doubled in size! I was so excited I took a picture and sent it to my girlfriend right away! (I have no idea if she was as excited as me to see this but I sent it anyways).

I giddily turned on and preheated the oven, preparing them to bake. I couldn’t wait to pull them out of the oven and taste them! hoping that my cinnamon buns had not only risen but that they tasted good too.

The good news is, they did. In fact, I have had a hard time not eating them all and am grudgingly sharing them with the kids. The beauty of it is the recipe is so easy the kids could make them themselves with a little supervision. And since they devoured theirs today afterschool they announced that they are very willing to do so!

Sugar Free Dairy Free Cinnamon Buns

Dough:

dairy free sugar free cinnamon buns2 1/2 – 3 c. flour

3 tbsp. honey

1 tsp. salt

2 1/4 tsp. quick rise yeast

1/2 c. water

1/4 c. unsweetened almond milk or choice of unsweetened non-dairy milk

3 tbsp. Earth Balance Vegan Spread

1 egg

Filling:


3 tbsp. softened Earth Balance Vegan Spread (this softens quite quickly so don’t leave it out too long as it will actually melt)

3-4 tbsp. cinnamon

1/4 – 1/2 c. coconut sugar

1/2 c. raisins (can add more if you really like raisins)

Mix 2 1/2 c. of flour, salt and yeast together. Create a hole in the middle of the dry mixture and add the honey to the hole, but do not mix. Set aside.
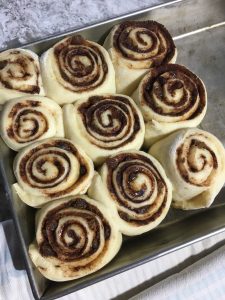
dairy free sugar free cinnamon bunsHeat the water, non-dairy milk, and Earth Balance on low heat on the stove. DO NOT bring the mixture to a boil, make sure everything has melted, mixed together and is hot but not boiling. If it boils the temperature of your mixture is too high and may not turn out. Add the liquid mixture to the dry ingredients by pouring liquid in the middle over the honey – this is so the honey will melt and dissolve into before mixing. Ensure that the honey has completely dissolved before beginning to mix.

Using a dough hook on the stand mixer, mix together on a low setting. If all the dry ingredients are not mixing as well you may stop the mixer and mix in the rest by hand, then put it back under the mixture to complete. If needed, add the rest of the flour a tablespoon at a time to form a smooth dough (I found that I did not need the extra flour but you may depending on where you live). Continue to mix for 5 minutes. Allow the dough to rest for 3-5 minutes.

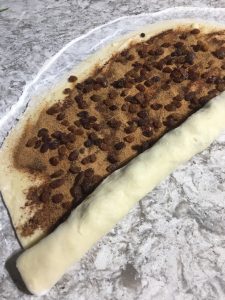
After you have allowed the dough to rest, use a rolling pin and roll out the dough into a rectangle shape about 1/8 inch thick. Spread the softened Earth Balance over the dough. Then sprinkle evenly with desired amount of cinnamon and coconut sugar. Sprinkle with raisins.

Beginning with the long end of the rectangle, tightly roll the dough so that you’re filing is on the inside. Cut the rolled dough into 10-12 even pieces. Place the pieces in a well greased 9×13 inch pan.

Place the rolls in a warm draft free place and cover lightly with a clean t-towel. Let rise til they are double in size.

Preheat oven to 350 F and bake for 25 minutes until golden brown. Remove from oven and cool.

Now we found these sweet enough and enjoyed them without icing and honestly they really don’t need it. But if you would like to ice your cinnamon buns you can certainly do so. I have this yummy dairy free sugar free cream cheese icing that is to die for! So I am definitely going to try that on these cinnamon buns the next time we make them. If I can find it that is… I can’t remember where I put it… I’m sure it’s in that ‘safe’ place. (Once I do find it I will share it with you here).

These cinnamon buns certainly did not disappoint, in fact I may have just enjoyed one slathered with Earth Balance on it once the kids were in bed… we must try out all options of course! I will definitely be making them again. Though I would like to try a gluten free version and see how that one will turn out…maybe I shouldn’t push it…


Goji berries

Healthy Oatmeal Raisin Cookies – Sugar Free Dairy Free

healthy oatmeal raisin cookies

There’s nothing like a warm cookie from the oven, soft and chewy as it melts in your mouth, it’s usually hard to have just one. For a while now I haven’t really been making a lot of cookies, partly because of time, but also because though delicious, cookies are not really that healthy. Full of sugars and flours, typically I would avoid them and make some other kind of sweet treat to satisfy.

But this Fall when the weather changed and it was time to feel all warm and cozy I really wanted a cookie. So i started exploring some of my favorite cookie recipes and experimenting with how I could adjust them to make them more healthy and still just as delicious!

And now you get to benefit from my experimenting and research! For the month of November I am going to be featuring various healthy cookie recipes for you to indulge in. Some of them will be my own creation, while others are from other fabulous healthy food bloggers that I have collaborated with. It’s going to be a month of treats and just in time for Christmas! Now you can contribute a healthy version that you’ll feel good about eating and sharing.

Today we’re starting with a classic Oatmeal Raisin recipe – as I have always loved these soft chewy cookies with raisins in them (in fact most cookies with raisins in them I thoroughly enjoy). The original recipe came off the quick oats package and had been sitting on my counter for months. With a little bit of tweeking I came up with this successful healthy oatmeal raisin cookie recipe, sugar free and delicious! (even taste tested by a close friend who loves oatmeal raisin cookies and gave it two thumbs up).

Healthy Oatmeal Raisin Cookies

1/2 c. Earth Balance vegan spread

healthy oatmeal raisin cookies3/4 c. coconut sugar

1/4 – 1/3 c. honey

2 eggs

1 tsp. vanilla

1 1/2 c. flour

1 tsp. baking soda

1 tsp. cinnamon or 1 drop Cinnamon Bark essential oil*

1/2 tsp. sea salt

1 1/2 – 2 c. uncooked rolled oats (quick or old fashioned)

1 c. raisins

healthy oatmeal raisin cookiesIn a large bowl combine the Earth Balance, coconut sugar and honey. Mix until creamy.

Add in eggs and vanilla. Add combined flour, baking soda, cinnamon, sea salt and mix well.

Add in the oats and raisins, I like to add these in by hand and stir, as I find the mixer can chop up the raisins which I don’t want. Stir well.

Drop dough by rounded teaspoons onto ungreased cookie sheets. Bake in 350F oven for 8-10 minutes or until golden brown.

Remove from oven, cool for 1 minute on cookie sheets then move to a wire rack and let cool completely.

Makes about 3 dozen cookies

*Please note that if using essential oils in this recipe to ensure that your essential oil brand is safe to take internally. Not all essential oil brands are created equally and some use synthetic fillers and chemicals in their processing of the oil or added to the oil itself. Due to no governing regulations on producing essential oils a company can say they are 100% or Organic. Due your due diligence and research the brand you are using to ensure your safe usage.

Next week indulge in Vegan Pumpkin Chocolate Chip Cookies, courtesy of The Sassy Life (I can’t wait for this one as I love pumpkin!!)


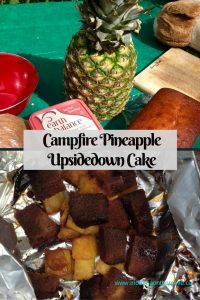
Camping Desserts – Campfire Pineapple Upsidedown Cake

campfire pineapple upsidedown cake

When I found this recipe for campfire pineapple upsidedown cake I was in heaven! Growing up pineapple upsidedown cake was always a treat in our house, my Oma being famous for making it.

My Dad absolutely loved it and every time my Oma came to visit she would make one for him (that and crumb cake, also delicious). So when I discovered this recipe we could make over the fire I knew that we had to try it. Plus I was excited to find a new camping dessert recipe, cause though I love banana boats and cinnamon apples I also like variety on the menu.

campfire pineapple upsidedown cakeWe made this recipe on our first camping trip this year on July long weekend. We actually made it in the afternoon on one of our days away, before we had supper. One of the things I find when camping is that because there is no schedule meals often run later than usual. Often we are not finishing supper til 7 or 8 and by that point not only am I full but I don’t feel like creating more food. So we decided – in the words of my father – that we would ‘eat dessert first’. Then worry about supper later.

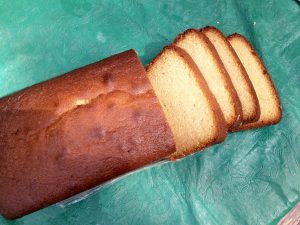
I had made the pound cake at home and brought it with us which was easy enough to do. You can also buy a pound cake if you prefer but I needed a sugar free version. Plus honestly, regardless of if I was looking for sugar free or not, I usually bake cake from scratch no matter what it is. I am not one to buy cake from the store in general.

I had also experimented with the pound cake recipe using honey for the first time as the sweetener. Oh my it turned out well. Nice and moist. Yum! We had a hard time not eating just the cake before we made the rest of our dessert.

The recipe for campfire pineapple upsidedown cake is simple – pound cake, pineapple, coconut sugar (great natural alternative to brown sugar), Earth Balance and cinnamon and/or nutmeg. Baked in foil over the fire until the sugar melts and you get that nice googey syrupy liquid. You do need to be careful not to over cook it as it can burn, especially if you are doing it over the grate on the fire. Alternatively, you could burn your fire down to coals and bake it, but that would take longer!

Campfire Pineapple Upsidedown Cake (sugar free & dairy free)

pound cake, cut into chunks *recipe for pound cake belowcampfire pineapple upsidedown cake

fresh pineapple, cut into chunks

dash of cinnamon, nutmeg

coconut sugar

coconut cream for topping

1 healthy spoonful of Earth Balance Vegan Spread, plus a little bit to grease your foil so the dessert doesn’t stick

heavy duty tinfoil

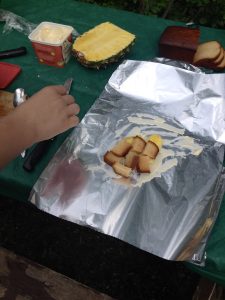
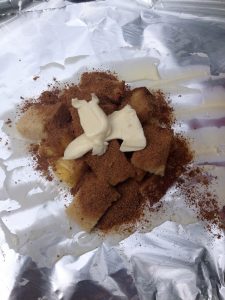
Tear off piece of heavy duty tinfoil (about 12×12″) and place on table (or flat surface). Use a small amount of Earth Balance and spread evenly over the foil. Slice and cut pineapple and place on foil. Slice pound cake and cut into squares about 1 inch thick and place on top of pineapple. Put a healthy spoonful of both Earth Balance and coconut sugar over pineapple and cake, sprinkle with cinnamon and/or nutmeg.

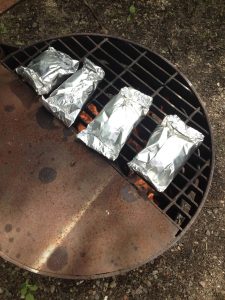
campfire pineapple upsidedown cakeClose up the foil by brining two ends together and folding over then rolling down til tight. Then fold over and roll on each end. This creates a nice tight packet that keeps everything in and is easy to open when done.

Place foil packet on the grill over fire. (Also works well by putting into coals of fire, but no flame or BBQ). Cook for about 5 minutes and then check it (takes a little longer on the BBQ). It is ready when the butter and brown sugar have melted and formed that yummy syrupy liquid over pineapple cake mixture. Put a dollop of coconut cream on top if desired. Enjoy! It will be hot so be careful.

We loved these. Everyone inhaled theirs and then wanted more. And I loved how simple it was. The kids could make and put together their own (so making it as little or as big as they wanted) and it didn’t take long to cook as you are basically just melting the Earth Balance and coconut sugar. Then voila! it is ready at any time of day, whether you choose to have it before supper or not.

This is the recipe for the pound cake I made. It was also quick and easy and I really liked using honey as the sweetener. Make sure you sift the flour as though it takes a few extra minutes to do so, it makes the cake lighter and fluffier.

Honey Pound Cake

1 c. Earth Balance vegan spread

1 1/2 c. flour, siftedcampfire pineapple upsidedown cake

1 c. honey

1 tsp. vanilla

5 eggs, lightly beaten

1/2 tsp. sea salt

Lightly grease a 4 1/2 by 8 1/2 inch loaf pan. In a large bowl beat Earth Balance and honey together until light and fluffy.

Add vanilla and then gradually add eggs, beating well. With mixer on low, add salt and the flour. Beat well to combine.

Transfer batter into loaf pan and bake at 350F for about 65 minutes, until toothpick inserted in center comes out clean. Let pan cool on wire rack for 1 hour. Remove cake from pan and let cool completely on rack before slicing.

Cake may be stored in plastic wrap at room temperature for up to 3 days or frozen for up to 3 weeks.


A Little Indulgence – Dairy Free Sugar Free Chocolate Icing

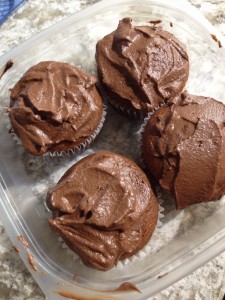
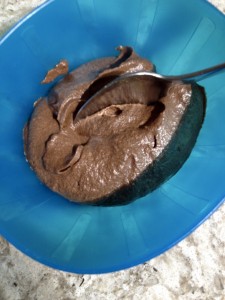
dairy free sugar free chocolate icingI have a secret to share with you. It’s one of those don’t tell my kids or I’ll never live it down kind of secrets. I have a bit of an addiction. You know that chocolate icing that I made to ice the cupcakes? Yeah there was some leftover…there’s not anymore…

When I found this recipe for dairy free sugar free chocolate icing I was in heaven. It’s super simple to make and totally delicious! One would never know that it was anything near the sugar free area, let alone no dairy. It is creamy, smooth and definitely chocolatey! It is so good I sometimes eat it with a spoon. Hence, why there are no longer any leftovers in my fridge. Once in a while, when I have that craving for sweet I just dip in and take a spoonful or two…ok sometimes three. I often think to myself I will just freeze the rest and then when I need icing I can just pull it out and use it without having to make a whole new batch (the recipe is quite big – even when I half it I have generous leftovers). But unless I pop it into the freezer right away, yeah, I eat it, in big heaping spoonfuls and hope that my kids don’t find out (because I don’t want them to do it to! I know hypocritical).dairy free sugar free chocolate icing

This simple recipe requires only 4 ingredients and your food processor or blender. I use cacao powder for that extra superfood boost – as cacao is high in magnesium, B vitamins, protein and fiber – but you may also cocao, though not as beneficial nutritionally. And I use this icing recipe for all kinds of things, not just cakes and cupcakes. We put it on ice cream, fruit and last summer we discovered that it is a great substitute for some of those good old camping recipes, like s’mores, or the new one we discovered at Scout camp – a combination of banana, nutella (we use the chocolate icing instead), butter and toasted on a bun – yum!

So regardless what you are going to use it for, whether it be a little indulgence eating it with a spoon, cake or a camping treat, enjoy this quick easy dairy free sugar free chocolate icing guilt free.

Dairy Free Sugar Free Chocolate Icing

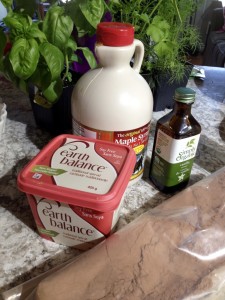
dairy free sugar free chocolate icing1 cup cacao powder

3/4 cup Earth Balance vegan spread

1 tsp vanilla

1 cup pure maple syrup (high in minerals such as maganese, zinc, potassium and no artificial ingredients compared to imitation syrups containing high fructose corn syrup, added and artificial ingredients, contain no minerals)

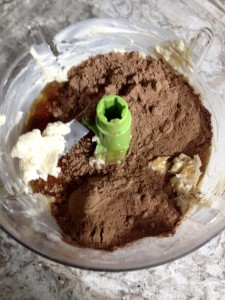
Process all ingredients in a food processor or blender until smooth and creamy.

Use immediately or may be stored in fridge for up to one week or frozen (unless you eat it all first).dairy free sugar free chocolate icing

Sweet Butter Tarts

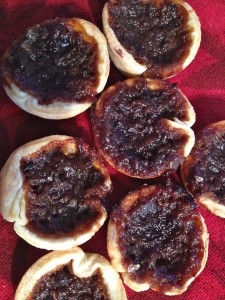
IMG_6483I received a little inspiration the other day from my sister. She was making pies and butter tarts asking for advice and how to’s as it had been a while since she had made them. Of course I helped her and gave her lots of tips.

She sent me photos of her and the girls (my nieces) creations and it made me a little jealous. I love butter tarts, they are definitely one of my favorites and I hadn’t had one in years! They are so sweet and delectable, nice flaky pastry and yummy sugary sweetness as it melts in your mouth.

Why though hadn’t I made these in so long? I mean pastry challenges aside (I never enjoyed rolling them out and cutting small circles, found it finicky), there was really no reason why I could not make these things. Yes we have chosen to eliminate dairy and sugar from our diets but why had I not adjusted this recipe? I hadn’t even looked at the recipe to see if it could be!

IMG_6471With mouth watering I decided to least attempt it. I mean what was the worst that could happen, I’d end up with a batch that didn’t taste so good and might have to put in the garbage? But if it meant I might be successful and enjoy butter tarts once again 🙂

So I pulled out the recipe and took a peek. I balked at myself for having left this for so long. This transformation was going to be super easy! It was a simple substitution of Earth Balance, coconut sugar and coconut milk and voila! it was done.

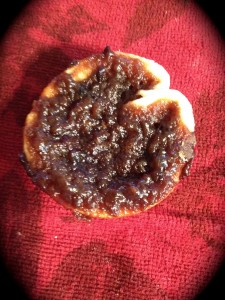
I waited in anticipation as they baked, hoping that I was right and they would turn out. Once they were out I did my best to let them cool at least a little, before I tasted one. Omg! it was absolutely delicious and honestly I could not tell the difference between this one and  the original recipe. Perfect!

I then shared the butter tarts with the kids who loved them and gobbled them up, quickly asking for more. Of course I love these so much I could easily gobble two or three at once, but I resisted, knowing perhaps I could have one for breakfast tomorrow…

And now I am going to share them with you. This is a dairy free sugar free butter tart recipe that you can enjoy without the guilt and really will not notice the difference or compromise on taste.

Butter Tarts

1/3 c. Earth Balance Vegan Spread, meltedIMG_6485

1 c. coconut sugar

2 tbsp. coconut milk (full fat canned coconut milk is best)

1 egg, beaten

1 tsp. vanilla

1/2 c. currants

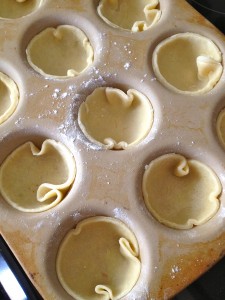
Make pastry as per directions. (I use Tenderflake and follow their recipe on the back) Roll out pastry to desired thickness (usually between 1/4 to 1/8 inch depending on preference) and cut into 4″ circles. Place pastry circles in prepared muffin tin. (*If tin is not non stick I would highly recommend greasing each opening lightly with Earth Balance. There is nothing more annoying then being unable to get your tart out of the pan without it breaking!)

Combine all filling ingredients in a medium bowl. Fill each pastry circle about 2/3 full. Do not over fill as filling bubbles up when baking and can overflow. Bake at 450F for 8 minutes, then reduce oven temperature to 350F and bake until pastry is lightly browned, no longer than 5 more minutes. Remove from oven and let cool.

*Tip – if you’re filling did overflow while baking it is a good idea to gently run a knife around the edge of the tart before it completely cools. This prevents the filling from hardening and sticking, making it difficult to get the tarts out of the pan once completely cooled.

Makes 12 medium sized tarts

Enjoy! (Now I’m going to make some more… writing this post has definitely started my mouth watering)

A Biscuit by any other Name

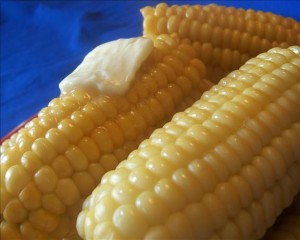
IMG_5950One of my favorite meals, especially in the summer, is corn on the cob with biscuits. I have no idea why I enjoy this combination so much or even where I came up with it, but it must have seemed like a good combination at one time and it seems to have stuck.

The kids get so excited when they see me mixing up the biscuit dough, literally jumping up and down. They always help me husk the corn, loving pulling off the green to reveal the sweet corn inside. (We do this outside on the deck, then we can make a big mess and it doesn’t matter as much)

I usually make the biscuits from a Bisquick mix, using their recipe on the box for drop biscuits, substituting my almond milk and dropping the biscuits by the teaspoon to bake. But the other day when I was grocery shopping and went to pick up Bisquick I looked at the package, actually reading the ingredients in the mix (I am not sure why I have never done this before). In reading the ingredients I realized that it contained sugar, something I have been diligently avoiding and eliminated from our diet. Why oh why had I been continuing to use the Bisquick and not paying attention? This did not seem like me at all. Perplexed by my own idiosyncrasies, I decided not to purchase the Bisquick and put it back on the shelf.

I then remembered that when we were in Australia last summer visiting my sister that she had made these delicious biscuits one night from scratch and had given me the recipe. I knew that regardless of what the ingredients were I could modify it accordingly if needed. I was a little unsure though of where this recipe might be…

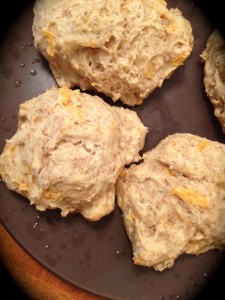
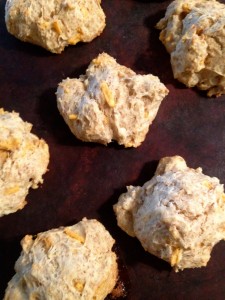
picQm6KFZLuckily it was easier to find than I thought, with hardly any adjustments needed. I was off to town and ready to make biscuits! They turned out very well, golden brown, fluffy and delicious! We all gobbled them up, eating them fresh from the oven, slathered with butter.

The recipe makes a good amount of biscuits, boasting 16 good size biscuits on average. I also like the options for this recipe, being able to add in things like cheese or ham if you want to, or simply making a plain biscuit. I also love the slight hint of cayenne that goes into this recipe, as it gives it just that subtle flavor and kick. I have yet to make this recipe and actually roll out the dough. I am lazy, and usually making dinner quickly, and I think they turn out just as nicely. Plus I say why create more work for yourself rolling them out when dropping them by the tablespoon works quite well! No one is going to pass on eating them because of it.

Now though my kids usually associate biscuits with corn on the cob, you can easily serve these with other yummy meals, such as chilis, stews, or whatever meal you want to add biscuits to! They are quick, easy and are a delicious recipe to make from scratch.

Homemade Biscuits

1 cup all purpose flourUS-Shreds-Cheddar

1 cup whole wheat flour

2 tsp baking powder

1 tsp baking soda

1/4 tsp salt

1/8 tsp cayenne pepper

1/2 cup shredded cheese (I use Daiya vegan cheddar)

3 tbsp Earth balance vegan spread

1 cup almond milk

1 tsp honey

Combine flours, baking powder, soda, salt and pepper.  Stir in cheese. Cut in Earth balance until mixture resembles coarse crumbs.

Combine milk and honey. Add to dry ingredients. Use a fork and stir to form a soft dough.  Turn dough out onto lightly floured surface. Form a ball and roll out to 1/2 ” -3/4″ thick. Cut into 2 inch rounds. Or if you don’t want to roll the dough, drop by the tablespoon onto a baking sheet.IMG_5948

Bake at 425 F for 12 minutes or until golden brown.

*other additions – may add bits of chopped ham, bacon, onion

Makes approximately 16 biscuits

Bacon in All Things

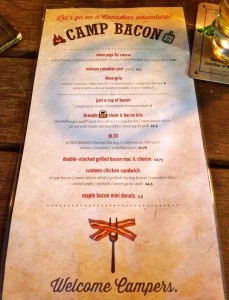
I love bacon. And so do my kids. They want everything with bacon. If I am making eggs they are asking if they are having it with bacon. Pancakes, waffles, etc. are we having bacon too? I am not sure if they inherently inherited this love of bacon from my younger sister who basically has bacon with everything!

IMG_3309In fact every time I see something with bacon I think of my sister and how much she loves it. I have noticed entire menus centered around bacon and would take pictures and send it to my sister, never really thinking much of it myself. I thought some of these combinations may be odd, but having never tried them I didn’t discount that it had possibilities.

A couple of weeks ago as I was listening to the radio in the car, I heard the morning show crew on KISS FM talking about things with bacon and how the one DJ put bacon on absolutely everything, including her brussel sprouts! I am not a fan of brussel sprouts, but I was intrigued when she mentioned bacon with her macaroni and cheese. Hmmm, I thought, that might actually be good.

Then later that week, while at Beerfest, I noticed that one of the food items being offered was macaroni and cheese with bacon. I was tempted to try some…

Instead I decided to come home and make my own macaroni and cheese with bacon, that way I could make a dairy free version and enjoy it much more (cause honestly once you go dairy free when you have even a trace of it it’s just not worth the symptoms afterwards and just feeling gross). So we finished up at Beerfest, no rush of course :), and then came home for dinner.

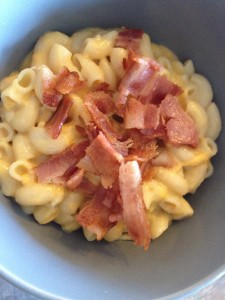
IMG_5261I made my mac and cheese like I usually do, using the Daiya cheddar cheese, almond milk and Earth Balance. I maybe added a little extra cheese and I felt this dish would be much better being a little cheesier. Then I cooked up the bacon, I usually use Mitchell’s, which is a brand that does not add sugar to their bacon when curing it. Most brands do unfortunately, but there are a few you can find, like Mitchell’s that do not have the added sugar. My mouth was watering as I was preparing everything, so excited to try this out.

Once everything was ready I crumbled up the bacon, served my mac and cheese and put the bacon on top. Then scooped up some and tasted it. Omg! was it ever good. The flavours worked so well together, the salty bacon giving it just the right taste sensation in my mouth. It was really hard not to overindulge on this dish.

The next week I made it for the kids, who of course gobbled it up! Now I understand how people can combine anything with bacon. There is just something about it that creates a flavour that your tastebuds will enjoy and be asking for more! I love too that I was able to make this in a way that meets my dietary choices of no dairy and no sugar, and still appreciate the combination.

Now I don’t know if I am going to be putting bacon with brussel sprouts anytime soon, maybe it will improve the taste? But I am definitely going to be more open about trying bacon with more things!

Do you have any dishes that you love adding bacon?


What Turkey, Christmas and Pizza have in common

turkey leftoversOne of the things I absolutely love about the big holidays, like Christmas and Thanksgiving, is the big delicious feasts we have. All the decadent recipes we enjoy, from classic to traditional, to the new one you always wanted to try. So yummy! My mouth is watering just sitting here thinking about it (or maybe that’s the quiche I currently have in the oven?)

And of course there’s all the leftovers, usually enough at our house that we are eating turkey for a week before we tire of it and freeze the rest. Sometimes we’ll just enjoy the turkey on its own with the gravy, potatoes and leftover veg, or we’ll make something new out of the turkey, creating a whole new fantastic dish to enjoy!

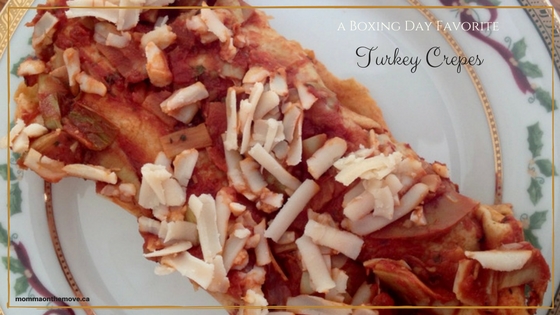
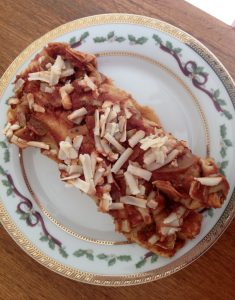
From hot turkey sandwiches to omelettes and casseroles, there are endless delicious turkey leftover recipes to create. My absolute favorite though is hands down, turkey crepes. My mother found this recipe years ago, when I was probably 11 or 12. She made them one Boxing Day. I remember asking Mum what was for supper and looking at her like she was crazy when she responded. I thought ‘oh yeah those will be delicious…gross.’

Boy was I surprised. The rule in our house was that you always tried something once and if you didn’t like it fair enough, but you couldn’t say you didn’t like it if you had never tried it before. Plus that was what was for supper, if I didn’t eat it, there was nothing else. So I tentatively took a bite. OMG! These things were fantastic, they tasted just like pizza, but were lighter and fluffier. My sisters and I gobbled them up and eagerly asked for more. They quickly became the family favorite and the traditional dish on Boxing Day.

Now I make them for Christmas Day, as we have simplified the meal (and by simplify I mean reduce the amount of prep) on Christmas Day to allow more family time, and less time in the kitchen cooking. I have also adjusted the recipe to meet our dairy free requirements and they are just as delicious! In fact we have had a few guests over on Christmas Day and they are none the wiser (and also gobbling them up, in fact D’Wayne’s nephew requested the leftovers this year). D’Wayne too is also salivating as I am wrapping them up and putting them into the oven.

It is a fairly simple recipe, with some of the cooking being done easily in advance. I usually make the crepes a few days ahead (or if I am really organized earlier and freeze them), and the filling and final touches the day of the meal. Everybody loves them.

So if you are in need of a new yummy recipe for all the leftover turkey you have (or just want to try something new) definitely give this recipe a try!

Turkey Crepes

16-20 8″ crepes (recipe below)turkey

3c. cubed turkey

1/4 c. Earth Balance vegan spread

2 onions finely chopped

1 c. sliced mushrooms

1 clove garlic, minced

2 – 5 oz jars artichoke hearts, drained and chopped

3 c. shredded Daiya mozzarella

1 – 28 oz. can tomato sauce

1 tsp. basil

1 tsp. oregano

salt and pepper

Crepes:

4 eggsturkey

3/4 c. water

1/2 c. almond milk

1 c. flour

1 tsp. salt

1/4 c. Earth Balance vegan spread

Crepes:

Beat eggs and stir in flour. Add water, almond milk and salt, mixing until smooth. Refrigerate for 1 hour to let flour absorb liquid (can be left in fridge overnight if desired). Just before making crepes, melt Earth Balance in pan; stir excess butter into crepe batter. Batter should be consistency of light cream. If batter seems a bit thick blend in more water to get it to the right consistency.

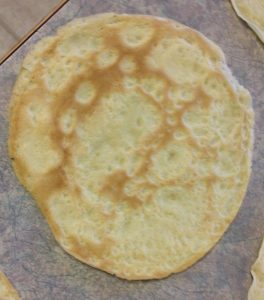
Pour 1/4 c. of batter into pan and swirl to form a circle. Cook crepe until lightly browned, turn and cook other side for 1 minute. Repeat with remaining crepes. Stack cooked crepes between layers of wax paper until ready to use. Crepes can be prepared up to 2 days ahead of time and kept wrapped in the fridge. Crepes may also be frozen for longer storage.

Makes 16- 20 crepes

Filling:

In a large skillet, melt Earth Balance over medium heat. Add onions and garlic and cook until tender.  Add mushrooms and continue cooking until softened, about 2-3 minutes. Stir in turkey and half the artichokes. Heat through, then remove from heat and stir in 1 cup of cheese. Season to taste with salt and pepper.

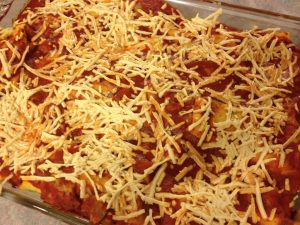
Place crepes on work surface with light colored sides up. Divide turkey mixture equally among crepes and roll up. Place crepes seam side down in a single layer in a greased 9×13 ovenproof dish.

In a medium size bowl, combine tomato sauce and remaining artichokes. Stir in basil and oregano and spoon over prepared crepes. Sprinkle with remaining cheese.

turkey

Bake at 350 F for 30-35 minutes until hot and bubbly.

Serves 8


Shop Family Organizers at Calendars.com Today!

Festive Ham and Dairy Free Scallop Potatoes

IMG_4425Years ago we were away over Christmas for the first time ever, well not including university years or when we went somewhere else to visit. This was the first time we were not somewhere spending Christmas with other family or friends. We were in Australia, part of our 3 month stint back in 2007, and the beginning of a love affair with the Aussies (cause as you know we’ve been back since to Australia and there’s talk of going again).

This was the first time that we as a family were in a place where they was no family or friends to visit or stay with. We had no traditions that we had to uphold (not that there is anything wrong with traditions, everyone calls me a very traditional gal. I love them and uphold many, but there are times to break from or form new traditions) and no particular place that we needed to be. We were in Tasmania, the only island state in Australia, staying in Launceston at a lovely place called the Penny Royal Apartments (which are refurbished historical buildings turned into apartment accommodations). It was a lovely place.

Bris Tas and Melbourne (244)

Penny Royal Apartments

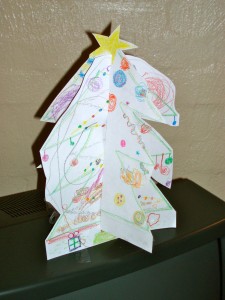
For Christmas, we kept it low key, enjoying a nice dinner on Christmas Eve and preparations for Santa Claus, with our paper tree and actual socks hung up for stockings. Christmas morning was even simpler with a present from Santa, some goodies in our stockings and a nice breakfast of french toast. Matthew was 4, and was super happy with his little Tonka trucks from Santa Claus and his few small gifts from us.

Bris Tas and Melbourne (246)We went to the beach for the day, we came back and went to a Christmas buffet at another local hotel. No one had to cook the big meal, no fuss, no muss, relaxing, easy. Simple. It was so nice because we got to spend time with each other, it was not about the toys and gifts, or the big Christmas dinner. There was no stress to have things perfect or a timeline to abide by. It was cool, it was authentic and was one of the best Christmases I have ever enjoyed.

Bris Tas and Melbourne (247)When we returned from Australia we decided to shift our focus, and make Christmas about the things we really want, which we had identified as being together, enjoying each other’s company, it didn’t matter what we were going to do. So we simplified things, we ordered pizza on Christmas Eve, and on Christmas Day we had turkey crepes (a fabulous dish made with leftover turkey, that is not only delicious but simple and can be made ahead of time, reducing time in the kitchen on Christmas Day). We still had a nice meal and used the nice dishes, we still exchanged gifts, but now no one was stuck in the kitchen all day making dinner. Which for was usually just us anyway and was all over in about 20 minutes. Now I make the big meal 2-3 weeks earlier, chop and freeze the turkey and toss the crepes together on Christmas day, takes maybe 30 minutes.

That being said I do love the spread at Christmas and I still love all the traditional items on the menu, like turkey and stuffing, ham and potatoes, with all the dressings. So I usually do a bigger meal a little bit before Christmas, when I have more time, less things competing for my time and can afford a day in the kitchen.

The beach Christmas Day 2007

The beach Christmas Day 2007

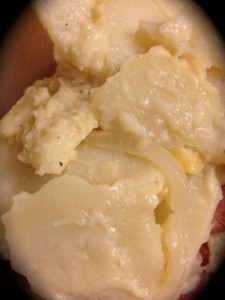
In fact just this past weekend I decided to make a ham and scallop potatoes, often a favorite on many Christmas dinner tables. I was so excited because this was the first time that I was making the scallop potatoes dairy free. I love scallop potatoes but for some reason since going dairy free I thought I couldn’t make them, that adjusting the recipe would be too complicated. I have no idea why I thought this, but for some reason the other day this ‘block’ lifted and I decided I could do it and what I would do. I knew exactly what I was going to do and what substitutes I was going to try.

Oh my goodness! The potatoes turned out so well. They were absolutely fabulous and I couldn’t believe that I had waited so long to adjust this recipe, or that I thought I couldn’t! It was really quite simple and easy (and in case you haven’t noticed I like simple and easy).

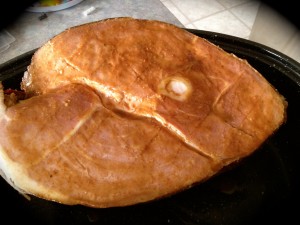
The ham was fabulous as well, I use my own mix to glaze and flavour the ham, though I have discovered that it is near impossible to find a ham that is not cured with sugar of some kind (at the moment anyway, I believe that will come). I ended up buying one from the local butcher, no hormones, no steriods, grain fed, but still cured in a brine that did contain a little bit of sugar, though the butcher assured me that it was much less than what you would find in the local grocery store. Rounded out with a nice green salad it was a fabulous meal and one that we all enjoyed. It was the first time the twins had scallop potatoes and though Luke rejected them because they looked different, once he tasted them, he gobbled them up.

So if you’re doing the Christmas spread this year and want to try a dairy free scallop potato recipe (you may have a lactose intolerant aunt who you can finally make a dish for) or have decided to keep it more simple (you could make the slow cooker version of these potatoes), enjoy yourselves, remember what is most important to you and make that your focus, when you do Christmas day will be perfect no matter what.

Glazed Ham

dry mustardIMG_4424

coconut sugar

water

In a small bowl, mix all ingredients together to make a smooth paste. Be careful not to add too much water as you do not want it runny. Amounts of mustard and coconut sugar depend on preference for sweetness and tart, as well as size of ham. Spread mixture over ham. Place in covered roaster and roast for 2 hours at 350F for a 3.5 kg ham (increase or decrease cooking time according to size).

Scallop Potatoes

4 tbsp. Earth Balance vegan spread

4 tbsp. flour

1 1/2 tsp. salt

1/8 tsp. pepper

2 c. coconut milk (I used So Delicious Unsweetened Coconut Milk Beverage, slightly thinner than regular coconut milk)

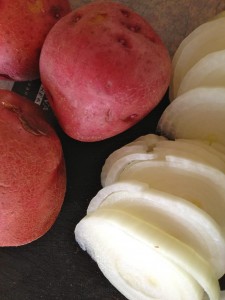
6 medium potatoes, peeled and thinly slicedIMG_4430

1 large onion, thinly sliced in rings

*optional 1/2 c. Daiya dairy free cheddar

In a medium saucepan melt Earth Balance. Whisk in flour, salt and pepper. Add coconut milk and stir. Bring mixture to a boil, stirring constantly until mixture thickens. Remove from heat. If adding cheese stir into sauce.

Layer half of prepared potatoes and onions in large (2.5 quart) casserole dish, alternating a layer of potatoes, a layer of onion. Pour half the sauce over potatoes and onion. Layer the rest of the potatoes and onions the same way, then pour the rest of the sauce over top.

Bake covered at 350 F for 50 minutes. Remove cover and bake 15 minutes more to brown slightly. Potatoes should be tender, sauce warm and bubbling.

Serves 6

Gingerbread Delights

IMG_4387You know I love flavors and that I tend to go a little crazy when I find one I love! Making everything possible out of it. Like pumpkin, I love pumpkin (and actually this fall inherited a lot of pumpkin) so was making muffins, pies, ice cream, etc. Experimenting with all different kinds of recipes.

My recent obsession is gingerbread. Always fabulous this time of year and something I really enjoy. I love ginger in general and am often making fresh ginger tea and drinking it daily. (Ginger also has a lot of health benefits, like aiding with colds and flu, as well as prevent and eliminating nausea).

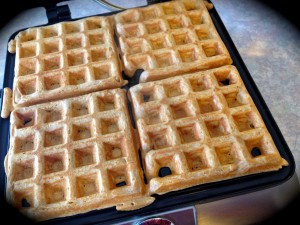
IMG_4334But I had never really thought you could do much more with gingerbread than cookies. I had tunnel vision and could not see out of the box. Cookies are the only thing right? Then last month I discovered a recipe for gingerbread waffles. Of course I knew right away that we had to try it. They were fabulous! and everyone gobbled them up. Which got me to thinking there must be other variations of gingerbread something out there. So I started looking – I had so far, cookies, waffles… what about muffins? Gingerbread muffins would surely be delicious.

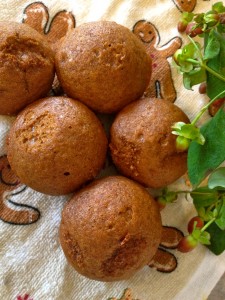
IMG_0750I did a quick Google search and a number of recipes popped up. I looked at a few, picked the one I liked the best and whipped them up yesterday! Ok I tried to whip them up, I had a bit of a baking travesty. I checked on my ingredients and thought I had everything I needed but as I went along I first discovered I was almost out of barley malt, then ginger, both I had just enough. Phew! Nope, didn’t have enough Earth Balance – shoot! So I mixed it all together and set it aside until after I could run to the store.

Once I had my final ingredient, I finished mixing them up and put them in the oven to bake. I was curious and of course so were the kids (they always want muffins!) They poofed up beautifully and smelled delicious. That lovely gingerbread smell wafting through the house afterschool…Yum!

They were finally done, and after waiting a few minutes for them to cool, we dove in. They were delicious, super moist with just a subtle gingerbread taste, not too overpowering. Now I prefer a little more of a gingerbread flavoring kick, so I am going to play with the spices in this recipe a little to amp up the flavor. Once I do that, I’ll report back to you 🙂 But since I have 36 muffins at the moment to enjoy I won’t be experimenting with that one for a little bit.

You can easily half the recipe if you want to, 36 muffins is a lot, or you can bake them all and freeze them for later (if you remember they are in the freezer, personally I often forget that they are there and end up baking new ones anyway).

I also think these muffins would be fabulous with some kind of icing, which I am also going to experiment with and get back to you. For some reason I am thinking a nice cream cheese option would work…

Now that you are drooling, anticipating that warm moist gingerbread muffin in your mouth, here is the recipe. Completely sugar free and dairy free, it will be a hit at your house too!

Gingerbread Muffins

3 eggsIMG_4385

1 c. barley malt

1 c. coconut sugar

3 1/2 c. flour

1 tbsp. baking soda

1 tbsp. ground cloves

1 tbsp. ginger

1 c. Earth Balance vegan spread

1 c. hot water

Combine all ingredients in a large bowl. Lightly grease muffin tins with Earth Balance. Spoon batter into muffin tin about 2/3 full.  Bake at 350 F for 20-25 minutes.

Makes 36 muffinsIMG_4392

What is your favorite gingerbread recipe?