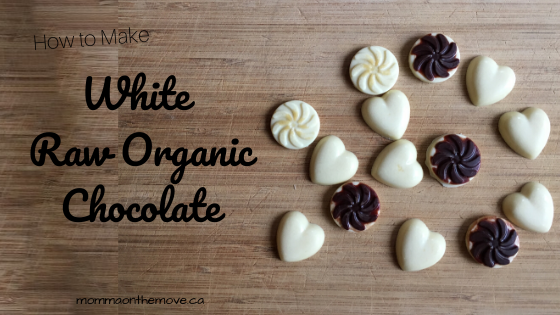
Raw Organic White Chocolate

white chocolate

When I first learned how to make my own chocolate I never even considered that making white chocolate would also be an option. I was so excited about just making the regular chocolate that I didn’t even think about white.

It wasn’t until years later, when I was looking at making white chocolate macadamia nut cookies that I wondered if I could somehow create white chocolate? Of course it had to be possible, it existed, so someone somewhere would have had to have figured out how to do it.

So I poked around a little bit, did a little googling and had my answer within minutes. Of course when I read what needed to be done it made perfect sense. Why I had not thought of it myself, who knows. But you know how sometimes you need someone to point out the obvious to you….

The basic trick in making raw organic white chocolate was that you need to use another powder than cacao powder, that was white. You need to use the powder to thicken it and bring it all together, because otherwise you would literally just have the cacao butter, though the right color, on it’s own is kind of oily and tasteless, which kind of defeats the purpose.
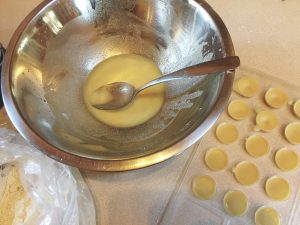
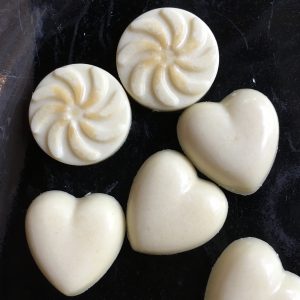
white chocolateThe magic answer is simply, milk powder. It is the right color and consistency and the good news is, ANY milk powder will do. If you want to keep your chocolate dairy free, there are non-dairy milk powders such as soy or coconut to make that work. It was so easy!

Another thing to keep in mind when creating white chocolate is using a fresh vanilla bean will no longer work, unless you want little black dots in your white chocolate. Even regular vanilla extract is brown in color, so to keep it purely white, use clear vanilla extract instead.

Otherwise go to it! If you have already tried the regular raw organic chocolate recipe you’ll be able to white with ease. And if you are new to chocolate making, it really is easy, so you’ll be a pro in no time!

Raw Organic White Chocolate

3/4 – 1 cup cacao butter

2-6 tbsp Soy milk powder or Coconut milk powder (just a caution if choosing soy milk powder, it is not pure white and has a slight tan tinge to it, so if you want it more of a caramel color perfect! but if you want white then I would choose coconut milk powder instead)

1-2 drops of clear vanilla extract (use a pipette if using vanilla extract as you only need a tiny bit, adding too much can ruin your chocolate)

2 tsp. to start Natural Sweetener of choice (again consider color I find clear stevia drops are best or even white stevia powder – honey and pure maple syrup will make your white chocolate more tan or caramel)

  1. In a medium metal bowl add boiling water about halfway up the bowl. *a metal bowl is best as it retains the heat well but can get hot to the touch Place second smaller metal bowl on top of large bowl so that it sits on top of the rim of the first bowl.
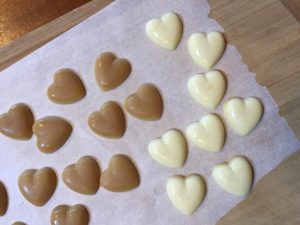
  2. Put desired amount of cacao butter into top bowl. Cacao butter will start to melt.
  3. While cacao butter is melting, add clear vanilla extract. Drop 1-2 drops at the most into cacao butter and stir.
  4. Once cacao butter is completely melted add 2-4 tablespoons of coconut milk powder. Taste for desired level of chocolatey-ness. If you’d like it richer add more milk powder.
  5. Once satisfied with amount of coconut milk powder add natural sweetener of choice. Start with 10 drops of clear stevia drops. (You may choose another sweetener but be aware that if you choose something like pure maple syrup this may darken your white chocolate, if so start with 3 teaspoons to sweeten). Taste, if desired level of sweetness has not been reached, add 2-5 drops of stevia and taste again (1-2 teaspoons if using another natural sweetener). Once level of desired sweetness has been reached you have your base chocolate.
  6. For plain white chocolate, spoon your white chocolate into molds and let set in freezer or fridge.
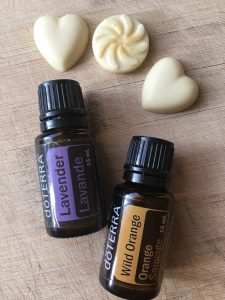
  7. white chocolateIf desired, before setting add additional ingredients such as nuts, dried fruit, coconut, essential oils such as Wild Orange, Peppermint, Lavender, etc. Ensure that the essential oils you are using are safe to ingest, as not all essential oil brands are created equal and many have synthetics and fillers in them that you definitely don’t want in your body! Also if oils are naturally colored they may change the color of your chocolate slightly (like Wild Orange). Pour white chocolate onto a cookie sheet or into a pan to let set for bulky additions, like fruit and nuts. If using essential oils you can pour into molds to set if desired.
  8. Put pan or molds into the freezer for about 5 minutes. Check to see if firm. If firm you can pop them out of your molds or break it up from the pan. If not leave in the freezer for a few more minutes and check again. Chocolate is best set in freezer (and ready faster!) but may also be set in fridge.

More Tips for Making White Chocolate

*Be very careful not to get any water into your chocolate as it will not work if you do. If your second bowl sits nicely on top, this should not be an issue as you do not need to lift the second bowl off the one with the water in it until you are done making your chocolate.

**you could use a vanilla bean in this recipe if you wanted, but because it is white chocolate you will see small black dots in the chocolate. If you would prefer solid white stick with the clear vanilla extract.

***when adding essential oils to your chocolate, measure 1 drop onto a teaspoon and stir it into your chocolate. This way if 2 or 3 drops come out instead, it’s on your spoon and not in the chocolate with the flavor way too strong!

****when popping out the chocolate from your molds, use a cutting board on parchment paper or plate. Popping them out directly onto the counter not only makes it hard to pick up, but it also may start to melt as often times the counter is warm.

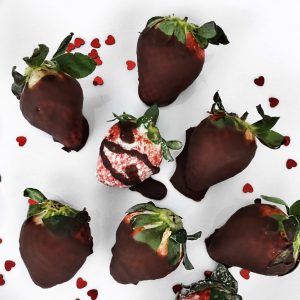
*****You could also make the chocolate with fillings such as caramel, nuts or other desired filling, in the middle. For this you simply put a bit of chocolate in the bottom of your mold, let it set then add your filling and top up the mold with chocolate and let set completely. If you wanted to get really fancy, make a batch of regular chocolate as well and make layers – have them be white and dark. White chocolate is also great to use for Chocolate Dipped Strawberries! In fact, I discovered a cute Halloween treat this year that are strawberry ghosts. What a great idea! Fun and healthy.

sugar free valentines treats

Making white chocolate opens up a whole new world of possibility and is just as fun as making regular chocolate. And now you can get even more creative with it! Who knows maybe next you can make swirls!

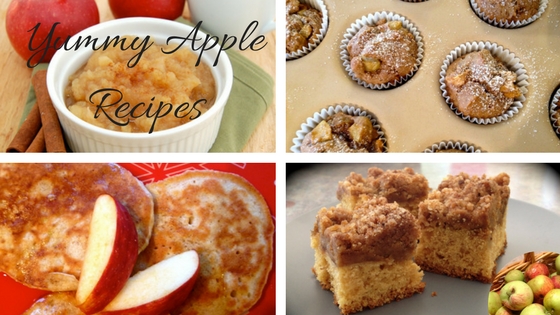
A Plethora of Apples – Yummy Apple Recipes for Your Fall Harvest

apple recipes

Each Fall we end up with an abundance of fresh apples. Whether it be from our own tree or given to us by the grandparents we usually have large buckets of them. As a result over the years I have created and tested many different apple recipes to make use of all these delicious apples. Of course we make the traditional apple crumble and pie, but as yummy as that is, we do like a little variety. And I do like to experiment.

The kids love just coming home and grabbing a fresh apple from the bucket to enjoy. In fact they eat so many apples that you would think that we might actually make a dent in them. Unfortunately this is not the case – so baking it is! (and other creative uses)

I found and/ or developed a number of dairy free, sugar free and even some gluten free recipes that use apples. Giving us lots to choose from and enjoying whatever suits us on any particular day. I am still on the hunt though for a recipe that uses a large quantity of apples at once, as many of these recipes use maybe 4 apples at once. That’s a super long process of getting through our bucket! Even when I double the recipe.

If you have a plethora of apples this Fall or are just looking for some yummy apple recipes – here’s what I’ve discovered and tested so far:

Yummy Apple Recipes

Muffins:

Cakes:

Crumble:

Pie:

Pancakes:

Smoothies:

Snacks:

  • Apples & Peanut Butter (simply slice your apple and dip in peanut butter)
  • Apples & Caramel Dip (don’t be deceived this is a sugar free healthy dip)

I have yet to try an apple cookie – but it’s on the list! and when I am getting towards the bottom of the bucket I usually start to make apple juice with our juicer, or even apple sauce (just boil the apples til soft, drain and puree in blender, add a little cinnamon and voila!).

What are some of your favorite apple recipes? Share in the comments below

Camping Recipes – Campfire Lasagna

camping recipesI love camping! There’s just something about packing up your stuff and living with only what you’ve got for a while (either all packed into the car or the camper). It often makes me wonder why we have so much stuff in our houses when we can live happily with so little when camping? I love being outside all the time, not concerned about dishes or cooking as I’m outside; and the kids love it to to. We never run out of things to do, places to see or explore.

Camping is very freeing. Though there’s still a rough routine I find there’s no strict timelines, the kids play or ride their bikes, go to the playground or we happily all sit around the campfire watching the flames spark and pop and adding our wood as needed. Everyone’s always engaged in something, even if we are just sitting there.

camping recipesOne thing I have found with camping is that the food always tastes good. Maybe it’s just our ravenous appetites from being outside and active all day but whatever’s on the menu always tastes delicious. That being said we have our favorite camping recipes that we tend to make on a regular basis as I find that they are not only quick but satisfying (and usually contain a lot of meat – though we are not big meat eaters at home). This season though I was feeling that we were having a lot of the same old and though I enjoy our meals when we’re camping, I was looking to add a little variety and eager to try out some new recipes. What else we could create enjoy and add to the favorites (creating a little more variety in the menu)?

So as usual I went searching and found some great recipes which I am going to feature here over the next few weeks. From campfire dinners to desserts, there are some great things to choose from.camping recipes

The first one I found happened to be a recipe I’d had for years in a recipe book from my mother, but had never actually made, in fact I don’t know if she has ever made it. I loved that it was a one pot deal, throwing everything in the pot and just waiting for it to cook. This was the essence of easy and I hoped taste.

We tried it out earlier this summer when we went on our camping trip to Vegreville to see the Giant Ukrainian Easter Egg – which is definitely a site to see and worth the stop, if you are ever in Northern Alberta. And it was quite delicious! It was a great mix of flavors and a nice variety in a pasta dish, as opposed to the regular spaghetti and tomato sauce we typically had (not that there’s anything wrong with spaghetti!) This offered something yummy and different and got our ‘meat requirement’ in. Ha ha

This recipe can be made on the stove or over the fire and is literally ready in 30 minutes!

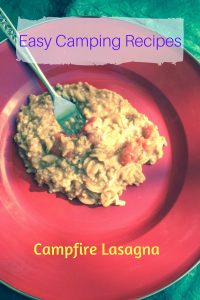
Campfire Lasagna

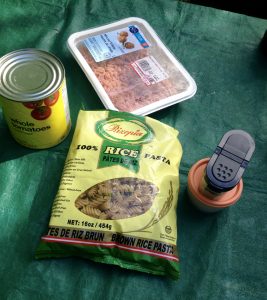
1 lb. ground chicken (or turkey or beef)camping recipes

1 tsp. oregano

2 c. spiral macaroni (we use brown rice pasta, gluten free)

1 pkg. onion soup mix *

1 – 796 ml can tomatoes

2 c. water

1/3 c. non-dairy parmesan cheese

1 c. Daiya mozzarella

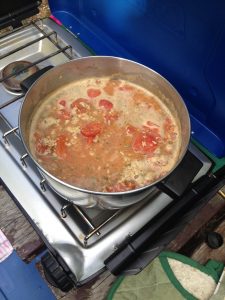
In a large pot, brown meat. Add onion soup mix, oregano, tomatoes and water. Bring to a boil and stir in macaroni. Cook uncovered, until macaroni is tender. Stir in parmesan cheese and mozzarella.

I often make my own spice mixes as well as I like to avoid the MSG and other preservatives they put into the pre-mixed ones in the store, so I did create my own ‘onion soup mix’ which turned out to be quite flavorful and definitely did the trick for the desired taste.

*Homemade Onion Soup Mixcamping recipes

2 1/2 tbsp. dried minced onion

1 tsp. onion powder

1/8 tsp. salt

1/8 tsp. pepper

2 tbsp. homemade chicken boullion mix (or beef boullion if prefered)

Mix all spices together.

This recipe was such a hit that Luke asked for the leftovers the next day for lunch. That’s a really good sign.

Do you have a favorite dinner camping recipe? Share it in the comments below so we can try it out.

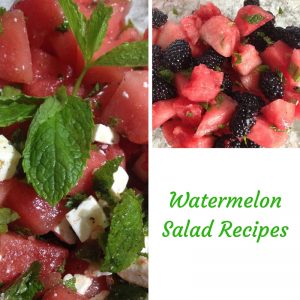
2 Fabulous Watermelon Salad Recipes

watermelon salad

Watermelon is such a refreshing snack in the summertime. Full of vitamins and minerals, it can be more then just a cut and serve option.

For some reason I had always thought that watermelon was just that, cut, slice and serve, that you couldn’t really do anything else with it. I have no idea why I thought that, maybe it was just the ease of preparing a refreshing summer snack. But lately I started exploring a few other watermelon recipes (like a watermelon smoothie, oh my so yummy!).

I had always heard of a watermelon salad but kind of thought it was weird. I’d often see them at an event or a buffet and pass it by as it just didn’t appeal to me. Well I had no idea what I was missing!

watermelon saladWhen I decided to explore watermelon recipes I knew that a watermelon salad was the first one to try! It turned out that I found two that are really good. Both are uniquely different and delicious, so I can’t really say that one is better than the other. It honestly depends on what flavors you are looking for in the moment. Both have the lovely addition of fresh lime juice, which is not only nice in the summer, but actually brings out the flavor and sweetness in the watermelon.

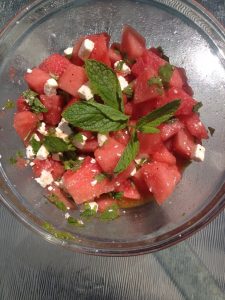
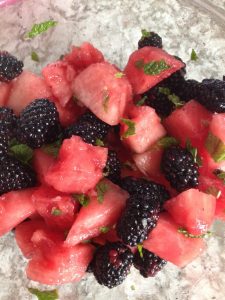
The first watermelon salad is the more common recipe with feta cheese and red onion (which honestly at first I thought it was totally weird to add feta and onion to watermelon), while the second is a nice crisp, refreshing fruit salad. Which I actually quite enjoyed, even though it called for blackberries. In general I do not like blackberries and usually buy them for the kids and skip them myself. But since it was in the salad I decided to try it. I actually found the blackberries to be quite lovely, they added a really unique flavor to it, and I enjoyed quite a bit.

Both watermelon salads were a hit with the kids! They gobbled them up and asked for more (I think they were quite enjoying my experimentation with these recipes). And I have to say myself, a watermelon salad is a very nice change in how watermelon is served (and it does not take long to prepare – I am all about ease, especially in the summertime!)

Both salads are best when made just prior to serving. When the watermelon sits for too long it tends to get limp and soggy. Make one hour or less before ready to eat.

Watermelon Salad

4 c. watermelonwatermelon salad

1/4 red onion, finely sliced

2 tbsp. fresh chopped mint leaves

1c. feta cheese, crumbled

1/4 c. olive oil

3/4 of lime, juiced or 2-3 drops Lime essential oil

1/4 tsp. pepper & a shake

Cut rind from the watermelon and cut into 1 inch chunks. Place watermelon into medium size bowl. Chop mint. Combine olive oil, lime juice and pepper to create dressing.

Pour dressing and chopped mint over watermelon. Toss gently to coat.

Pour crumbled feta over salad and stir gently to combine. Enjoy!

Serves 4

Watermelon Blackberry Saladwatermelon salad

3 c. cubed watermelon

1 1/2 c. blackberries

2 tbsp. fresh finely chopped mint

Juice of one lime or 2-3 drops of Lime essential oil

Cut the rind off the watermelon and cut into one inch chunks. Place watermelon into medium bowl. Chop mint and add to bowl. Add blackberries. Squeeze fresh lime juice over the fruit. Gently toss to combine and serve.

Serves 4

Have a fantastic watermelon salad recipe? Share in the comments below

A Little Indulgence – Dairy Free Sugar Free Chocolate Icing

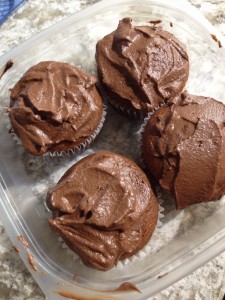
dairy free sugar free chocolate icingI have a secret to share with you. It’s one of those don’t tell my kids or I’ll never live it down kind of secrets. I have a bit of an addiction. You know that chocolate icing that I made to ice the cupcakes? Yeah there was some leftover…there’s not anymore…

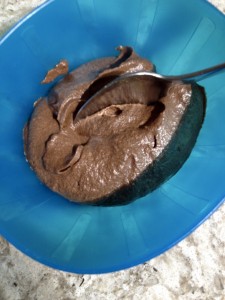
When I found this recipe for dairy free sugar free chocolate icing I was in heaven. It’s super simple to make and totally delicious! One would never know that it was anything near the sugar free area, let alone no dairy. It is creamy, smooth and definitely chocolatey! It is so good I sometimes eat it with a spoon. Hence, why there are no longer any leftovers in my fridge. Once in a while, when I have that craving for sweet I just dip in and take a spoonful or two…ok sometimes three. I often think to myself I will just freeze the rest and then when I need icing I can just pull it out and use it without having to make a whole new batch (the recipe is quite big – even when I half it I have generous leftovers). But unless I pop it into the freezer right away, yeah, I eat it, in big heaping spoonfuls and hope that my kids don’t find out (because I don’t want them to do it to! I know hypocritical).dairy free sugar free chocolate icing

This simple recipe requires only 4 ingredients and your food processor or blender. I use cacao powder for that extra superfood boost – as cacao is high in magnesium, B vitamins, protein and fiber – but you may also cocao, though not as beneficial nutritionally. And I use this icing recipe for all kinds of things, not just cakes and cupcakes. We put it on ice cream, fruit and last summer we discovered that it is a great substitute for some of those good old camping recipes, like s’mores, or the new one we discovered at Scout camp – a combination of banana, nutella (we use the chocolate icing instead), butter and toasted on a bun – yum!

So regardless what you are going to use it for, whether it be a little indulgence eating it with a spoon, cake or a camping treat, enjoy this quick easy dairy free sugar free chocolate icing guilt free.

Dairy Free Sugar Free Chocolate Icing

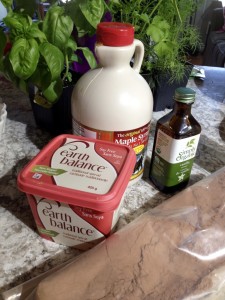
dairy free sugar free chocolate icing1 cup cacao powder

3/4 cup Earth Balance vegan spread

1 tsp vanilla

1 cup pure maple syrup (high in minerals such as maganese, zinc, potassium and no artificial ingredients compared to imitation syrups containing high fructose corn syrup, added and artificial ingredients, contain no minerals)

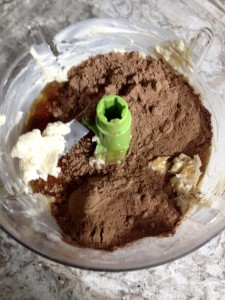
Process all ingredients in a food processor or blender until smooth and creamy.

Use immediately or may be stored in fridge for up to one week or frozen (unless you eat it all first).dairy free sugar free chocolate icing

Kids Healthy Cooking – Dairy Free Peanut Butter Ice Cream

sugar free dairy free peanut butter ice creamIce cream. One of the many favorite summer treats, wonderful on a hot summer day. But honestly, great anytime and popular with kids. Growing up in my house ice cream was a staple and often requested after dinner. So when we went dairy free, ice cream was definitely something I missed. But like any change (like when we went sugar free) it was just a matter of shifting gears and finding new recipes to meet our ice cream needs. This is when I discovered this sugar free dairy free peanut butter ice cream.

I had been promising the kids in my Mini Chefs class ice cream for a few classes and many of them kept asking when we were going to make it. In our last class of the session I thought I’d throw it in with our chocolate making, making it a bit of an extra treat. This sugar free dairy free peanut butter ice cream recipe is rich, creamy and delicious. No one would ever know that it did not contain dairy (and don’t worry if peanuts are a concern you can use WOW butter, an awesome substitute for peanut butter. Being in a peanut free facility this is what we used and no one noticed a difference in either look, taste or texture). In fact when we made it in class the kids did not question the ingredients at all. They just heard ‘ice cream’ and were ready to make it and eat it.

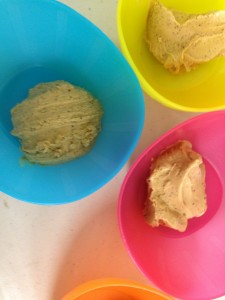
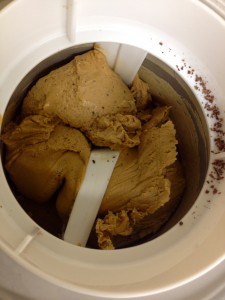
sugar free dairy free peanut butter ice creamThis sugar free dairy free peanut butter ice cream recipe is super easy to make with kids. Just put all the ingredients into a blender, blend and then pour into your ice cream maker. If you do not have an ice cream maker, you can take the mixture and put into a freezable container and put in the freezer until firm.

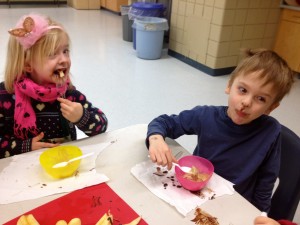
All the kids were bouncing off the walls, waiting for the ice cream to be ready. And when it was, they gobbled it up, most of them asking for some more. I was pleased to be able to finish off the class with something a little more special (and considered a treat), but also still healthy and good for them. By this point, none of them were questioning the ingredients that were going into things, and all of them were willing to try it. Which I think is the greatest success – a child who is willing to at least try it will open up their world of healthy foods and possibilities. Not only with foods, but in other areas of their life as well.

Peanut Butter Ice Cream

Ingredients:

1- 14 oz. can coconut milk, chilledsugar free dairy free peanut butter ice cream

¾ c. coconut sugar

½ c. natural peanut butter (or WOW butter if need peanut free option)

1 tsp. vanilla

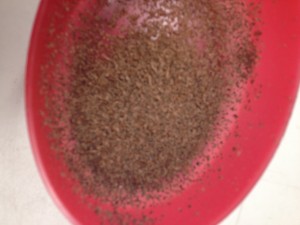
3 tbsp. dark chocolate shavings

Prepare your ice cream maker ahead of time by freezing the canister overnight. You’ll also need a good blender to whip the ice cream mixture.

Combine chilled coconut milk and coconut sugar in blender and whip until sugar is dissolved. Add in peanut butter and vanilla. Whip until mixture is creamy and frothy.

*If it’s hot in your kitchen and the mixture is warm-ish, chill mixture before adding to ice cream maker; it will freeze better is mixture is cold.

Set your freezing canister in place and turn on ice cream maker. Pour mixture into freezing canister. Add in shaved dark chocolate.

Churn until frozen. Depending on your ice cream maker this could take 10-15 minutes or up to 30 minutes.

Make roughly 3 cups. Serve in small single scoops as it is rich.

Original recipe from Gluten Free Goddess

healthy chocolateCooking with kids really can be easy and fun. I had a great time working with these kids, gently expanding their palates and horizons. I was pleased to see how everyone progressed and to hear from parents how what they did in class was being transferred to home. Whether it be a food they now liked, making supper, or helping with clean up.

My greatest joy was the success I had with the more particular eaters, one’s who said they did not like much of anything, but by the end of our classes were not only trying everything but loving what we were making. Those kids had come a long way and really grown. It just goes to show how cooking with kids,  and letting them make their own food not only encourages them to eat it, but also to start trying and experimenting with new things.

Kids Healthy Cooking – Healthy Chocolate with Natural Sweeteners

healthy chocolate

Kids and chocolate. They go together well. All the memories of chocolate covered faces, whether from ice cream or pudding or just a good old fashioned chocolate bar. Yes they say too much chocolate is not good for you, but honestly there is such a thing as healthy chocolate.

A lot of the trouble with chocolate is the amount of sugar in it, but chocolate without sugar and natural sweeteners instead, is a different story. Chocolate itself is rich in antioxidants and is actually very good for us. It is the sugar that is the problem.

healthy chocolateWhen I learned to make my own healthy chocolate, I was surprised at how quick and easy it was. It was so easy that I came home and made it with my oldest son, who at the time was only 6. Four simple ingredients gave us our base chocolate, and then we could create whatever we wanted. He loved it! and wanted to make more. Now my twins who are also 6, love making it as well. It is so easy to make with kids.

So when it came to our last class of Mini Chefs, making healthy chocolate was really a no brainer. I wanted a nice sweet, fun, but healthy treat, so this was perfect. In class, we made the plain chocolate and kept it in liquid form for fondue, dipping a variety of fruit into it; such as apples, oranges and bananas. All of the kids loved it! And yes ended up with chocolate faces 🙂

Raw Organic Chocolate

Ingredients:

3/4 – 1 cup Cacao butterhealthy chocolate

2 -6 tbsp. Cacao powder

1 vanilla bean or 1-2 drops vanilla extract (use a pipette if using vanilla extract as you only need a tiny bit, adding too much can ruin your chocolate)

2 tbsp. to start of pure maple syrup or honey

*amounts depend on how much chocolate you want to make

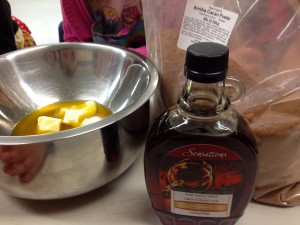
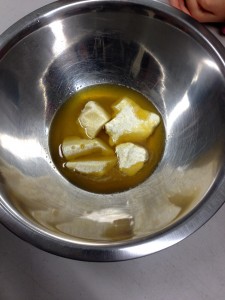
Boil water in kettle. Pour boiled water into a large metal bowl, place second smaller metal bowl on top of large bowl so that it sits on top. Place cacao butter into top bowl. Cacao butter will start to melt. While cacao butter is melting slice vanilla bean down the middle and scrape out the inside seeds with a spoon. Put seeds into melted cacao, it is ok if cacao butter is not completely melted yet. Stir.

*Be very careful not to get any water into your chocolate as it will not work if you do. If your second bowl sits nicely on top, this should not be an issue as you do not need to lift the second bowl off the one with the water in it until you are done making your chocolate. 

Sift cacao powder into a separate bowl. Once cacao butter is completely melted add 2-4 tablespoons of cacao powder. Taste for desired level of chocolatey-ness. If you’d like it richer add more cacao powder. Once satisfied with amount of cacao powder add natural sweetener of choice. Start with 3 teaspoons and mix. Taste, if desired level of sweetness has not been reached, add 1-2 more tablespoons and taste again. Once level of desired sweetness has been reached you have your base chocolate. This can now be kept liquid and used as a fondue, or can be poured into chocolate molds to form chocolates.

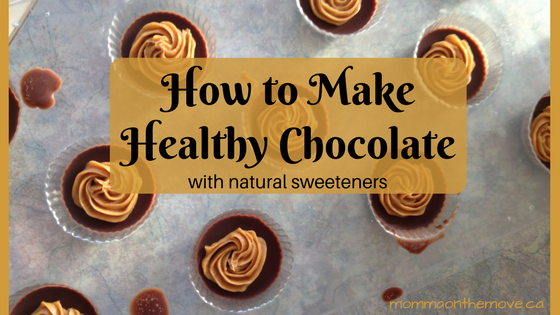
Another option at this point is to add additional ingredients such as nuts, dried fruit, coconut, essential oils (ensure that the essential oils you are using are safe to ingest), etc and pour onto a cookie sheet to let set. Or  make it with fillings such as peanut butter for peanut butter cups (as pictured above) or nuts in the middle or caramel. For this you simply put a bit of chocolate in the bottom of your mold, let it set then add your peanut butter (or other chosen filling) and top up the mold with chocolate and let set completely. Chocolate is best set in freezer but may also be set in fridge.healthy chocolate

I had also been promising the kids we would make ice cream for a number of classes and many of them kept asking when we were going to make it. Since it was the last class we did make peanut butter ice cream as well. Sugar free, dairy free and super easy to make with kids. Look for the peanut butter ice cream recipe in the next kids healthy cooking post.


Kids Healthy Cooking – Tips and Tricks for making it easy and fun!

kids healthy cooking

Cooking with kids can be a challenge. It’s messier, it’s slower, and often times can try your patience as a parent. Kids healthy cooking can be even more of a challenge with your little munchkins palates changing and developing, being sensitive to textures, smells and levels of salt and sweetness. One day they like a certain food and all of a sudden the next day they don’t? Even with these challenges, there are many benefits to getting little ones into the kitchen at a young age, benefits that will set a foundation for their eating and nutrition choices for life.  And these benefits will outweigh the extra time and patience you have to spend in the kitchen.

fruit2For little hands, time in the kitchen allows them to build basic skills, explore with their senses and create an adventurous palate! You can introduce healthy foods in a fun and unique way that will get them eating and enjoying it. Kids are also more likely to eat what they have made and it creates a foundation for them later in life – when they’re older in college and can actually cook. Not only that, but it creates a great opportunity for you and your child to spend some quality time together, learning and creating together, even having a little fun.

I recently started teaching a preschool class at the Trico Center called Mini Chefs and it is one of my favorite classes. You may think that cooking with a preschooler would be difficult, but when you choose recipes that are simple, easy and appropriate for their age, it is actually a lot of fun. I love how excited the kids are each week, curious about what we are making and what is in it.

IMG_6903One of the keys to making kids healthy cooking successful (especially with preschoolers) is to pick something with less than 5 ingredients and things that they can do themselves, like scooping, mixing, tearing (lettuce). Most kids at this age love to help and get very excited about mixing things, or scooping out the flour. Yes you may have a little more flour on the floor but encouraging them and letting them do it, will make them want to do it again.

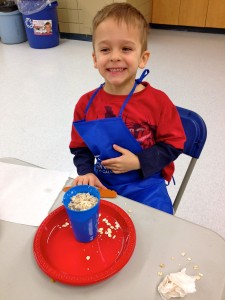
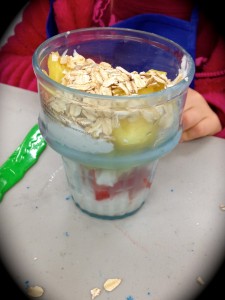
For our first class we created Yogurt Parfaits, which is a very easy, hands on recipe with 3 basic ingredients and lots of scooping and sprinkling. They all wondered what a yogurt parfait was, as even my children had not made one of these before. What was in it? How did we make it? When were we going to make it? The when question was the best. They are so keen at this age to get started!

This is why it is very advantageous and less stressful for you to prepare things in advance so that the cooking process goes more smoothly. For the parfaits, I had the yogurt already in a bowl with a spoon for scooping, the fruit cut and the granola in a bowl ready for scooping as well. Parfait glasses were in a stack ready for me to hand out as well as the spoons. This made it easier for each child to do what they could themselves, once I explained how we made the parfaits.

It was so fun to watch each child create their parfait, scooping in their yogurt (some with fairly large scoops and some very small), choosing their fruit, then scooping in some yogurt again. Each parfait was creative and unique, and honestly it was not that messy. Some kids had lots of yogurt in theirs and less fruit, some had a lot of both, while others just wanted the granola off the top. Either way they all had fun and all tried it, it was a new taste adventure for many of them.

Now my kids ask for yogurt and fruit all the time now and it makes a very healthy snack!

Yogurt ParfaitIMG_6905

Ingredients:

Non-dairy vanilla yogurt  – such as coconut, almond or soy   *(can easily substitute dairy yogurts if desired)

Fruit – pick your favorite! Blueberries, strawberries, banana, honeydew

Granola (store bought or make your own – you can also substitute large oats if desired)

In a bowl or cup place desired amount of yogurt. Then place fruit of choice on top, layer with yogurt then another layer of fruit. One more layer of yogurt and top with granola. Enjoy!

And don’t forget, get the kids to help you clean up after as well. They are willing at this age and that way they learn that cooking whether creative, messy or fun, requires clean up at the end.IMG_6904

Next week… Tuna melts and Vegetable Flowers – who says vegetables can’t be fun!

Orange Cranberry Smoothie

IMG_6830I woke up Christmas morning this year feeling very excited! I felt like a kid all over again, the magic and anticipation of Santa and Christmas morning were very present. I didn’t sleep much, and by 5 am I was literally ready to get up and open presents. I seriously considered going and getting my parents up ‘for old times sake’ like when we were kids and getting up at 3 being told to go back to bed, then 4 then 5 and finally my parents would give up about 6.

I had the pleasure of sharing Christmas this year with both my parents and only me. No kids, no siblings, no in laws, just us, which is a rare and special occasion. It is not often that such an opportunity occurs and I felt that this in itself was a gift. Christmas Eve we watched a movie and my Mum and I sat up late talking and sipping gingerbread martinis. At midnight we toasted and wished each other Merry Christmas. We peeked outside, and experienced a calm beautiful evening. The snow gently falling and a peacefulness in the air, truly a unique energy that was not present earlier that day (or on Christmas morning when I popped outside either). It really was like in the movies, that magical energy, and presence there.

IMG_4491One of the things I love to do over the holidays is experiment with different festive recipes and on Christmas Eve I had already been thinking about trying a Cranberry smoothie of some kind Christmas morning. I googled a number of recipes and found some good ones, though undecided which one to try.

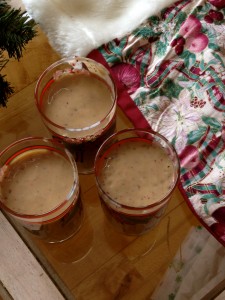
When I woke in the morning (or should I say finally got up around 8) I bounced out of the spare room wishing a Merry Christmas! Mum was at the sink, Dad dressing in red and I was moving towards the tree. Quickly with coffees or waters in hand we began a lovely ritual of opening gifts and sharing. After gifts Mum went to the kitchen to make brunch – a fabulous Impossible Quiche with Daiya smoked gouda, spinach and mushrooms and I proceeded to make the smoothies. I had decided to take the elements of some of the recipes I found that I liked and combine them, adding some of my own ingredients and creating my own. The result was fantastic! A smooth creamy, flavorful smoothie that we all socked back quickly, expressing how much we enjoyed it. I loved the added greens myself, which darkens the pink looking smoothie slightly but gets those greens in there without even tasting it! The added benefit is that cranberries themselves are considered a super food and are high in vitamin C, E, fiber as well as providing benefits such as improved immune system, antioxidant and decreased blood pressure.

When I arrived home after Christmas I made it again for the kids and they all loved it! Matthew who hasn’t been drinking many smoothies these days, tasted it said ‘Oh that’s good’ and drank the rest quickly. Chloe asks me every day since she tried it for one and has expressed that it’s her new favorite. Even my ex husband tried it the other day and said it was good (this is a big thing btw, as he is not really a smoothie guy and particular about tastes). I was quite pleased with the results and I think I drove my parents a little crazy that first day I made it when I kept saying throughout the day how good it was and how impressed with myself for creating it. Well it was good!

So if you’ve got a festive theme going over the holidays or simply want to try out a great new smoothie recipe, give this one a go! If you find it a little tart for your tastes just add more stevia when making it. Then come back here and comment telling me how you like it!

Orange Cranberry Smoothie

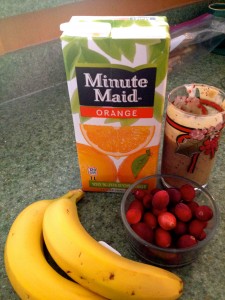
2 bananasIMG_6831

1 cup frozen cranberries

1 cup unsweetened almond-cashew yogurt

1 tsp. vanilla

1 cup orange juice or 2 fresh oranges peeled with 1/2 -1 cup water

1/2 of 1 g packet of stevia

handful of spinach* (optional)

Put all ingredients in blender. Blend until smooth. Garnish with slice of orange and a few cranberries if desired. Pour into 8 oz glasses and serve.

*if you would like a bright pink smoothie do not add spinach as it will darken it. I love tossing in that bit of green as it is a great way to get those greens in a quick and easy way. And you don’t even notice it’s there!

Serves 3 (makes 3 – 8 oz servings)

Bacon in All Things

I love bacon. And so do my kids. They want everything with bacon. If I am making eggs they are asking if they are having it with bacon. Pancakes, waffles, etc. are we having bacon too? I am not sure if they inherently inherited this love of bacon from my younger sister who basically has bacon with everything!

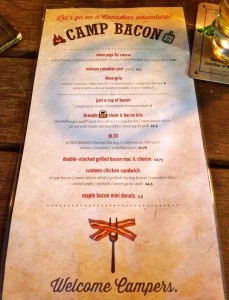
IMG_3309In fact every time I see something with bacon I think of my sister and how much she loves it. I have noticed entire menus centered around bacon and would take pictures and send it to my sister, never really thinking much of it myself. I thought some of these combinations may be odd, but having never tried them I didn’t discount that it had possibilities.

A couple of weeks ago as I was listening to the radio in the car, I heard the morning show crew on KISS FM talking about things with bacon and how the one DJ put bacon on absolutely everything, including her brussel sprouts! I am not a fan of brussel sprouts, but I was intrigued when she mentioned bacon with her macaroni and cheese. Hmmm, I thought, that might actually be good.

Then later that week, while at Beerfest, I noticed that one of the food items being offered was macaroni and cheese with bacon. I was tempted to try some…

Instead I decided to come home and make my own macaroni and cheese with bacon, that way I could make a dairy free version and enjoy it much more (cause honestly once you go dairy free when you have even a trace of it it’s just not worth the symptoms afterwards and just feeling gross). So we finished up at Beerfest, no rush of course :), and then came home for dinner.

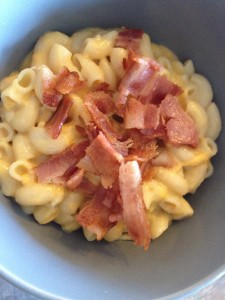
IMG_5261I made my mac and cheese like I usually do, using the Daiya cheddar cheese, almond milk and Earth Balance. I maybe added a little extra cheese and I felt this dish would be much better being a little cheesier. Then I cooked up the bacon, I usually use Mitchell’s, which is a brand that does not add sugar to their bacon when curing it. Most brands do unfortunately, but there are a few you can find, like Mitchell’s that do not have the added sugar. My mouth was watering as I was preparing everything, so excited to try this out.

Once everything was ready I crumbled up the bacon, served my mac and cheese and put the bacon on top. Then scooped up some and tasted it. Omg! was it ever good. The flavours worked so well together, the salty bacon giving it just the right taste sensation in my mouth. It was really hard not to overindulge on this dish.

The next week I made it for the kids, who of course gobbled it up! Now I understand how people can combine anything with bacon. There is just something about it that creates a flavour that your tastebuds will enjoy and be asking for more! I love too that I was able to make this in a way that meets my dietary choices of no dairy and no sugar, and still appreciate the combination.

Now I don’t know if I am going to be putting bacon with brussel sprouts anytime soon, maybe it will improve the taste? But I am definitely going to be more open about trying bacon with more things!

Do you have any dishes that you love adding bacon?