Gorilla Bones

On the Easter weekend we went to the zoo. It was crazy busy as it was their Easter Eggtravaganza. I had never seen it so busy, there was a line of cars to get into the parking lot and then another line to get into the zoo. We had been to this event before but I have never seen so many people as there was that day.

It is a great event with lots of value added activities for the kids, like a blow up maze, Easter pictures and pot your own plant; as well as the usual interactive exhibits and touch tables.

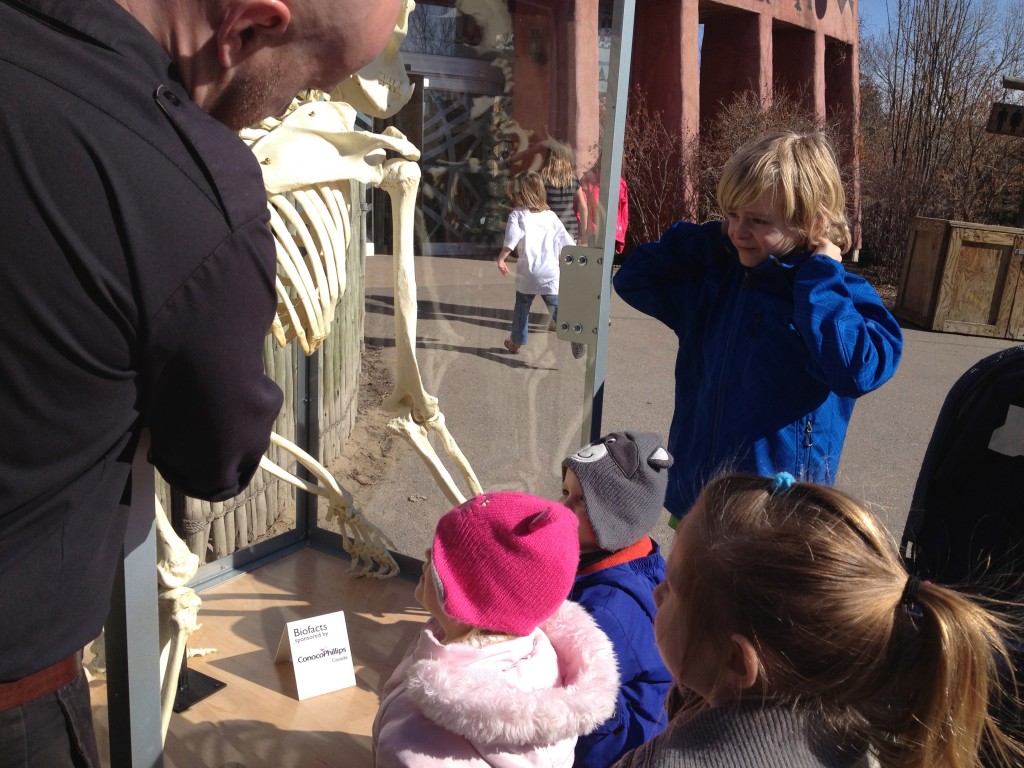
Outside the gorilla enclosure there was one of the zoo staff with this skeleton of an adult gorilla. It was really neat, the kids got to touch it and check it out, do some exploring. The zoo staff explained different parts of the skeleton to them as they were at each part.

The kids really enjoyed it. I think it is of such value for children to be able to touch and feel things in their learning, which is one of the reasons I love the zoo!

Checking out the gorilla skeleton


Dying Easter Eggs with Children

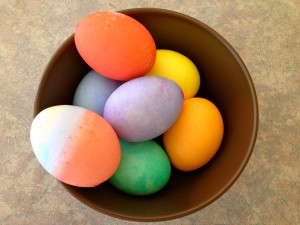
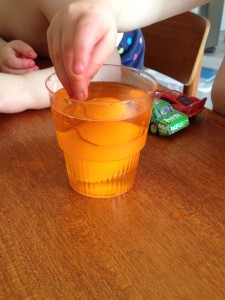
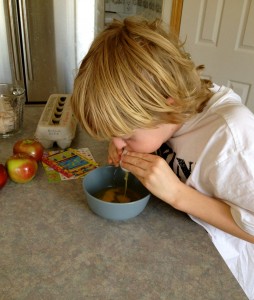
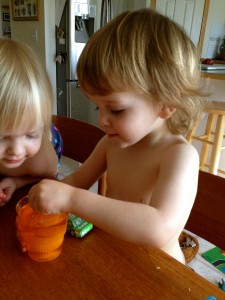
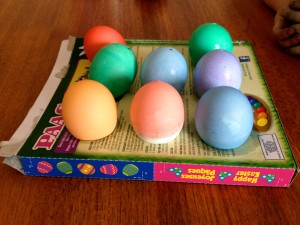
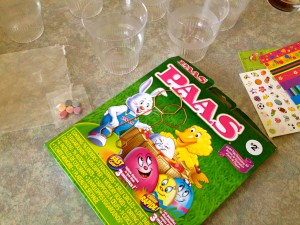
As a kid I always enjoyed dying Easter Eggs at Easter. I loved watching the eggs as they transformed from white to red or whatever color we had chosen. Experimenting with different colors and patterns, adding stickers or other decorations on our eggs. Dying Easter eggs with children can be lots of fun and this was a tradition I wanted to continue with mine. This year the kids and I dyed eggs for the first time. Yes this was the first time even for Matthew, although he is already 9 years old. I baulked when I realized this and felt that I had let him down as a mother. I feel it is my duty to do these kinds of things with my kids and to realize that Matthew was already 9 and had never done it, I was appalled! This was going to be quickly remedied. I made sure that I picked a time when we had a large block of time, where we didn’t have to run anywhere or stop and get a meal prepared. Though dying Easter eggs with children is fairly simple I knew that I needed to be available to help, especially the twins. Plus I wanted to get in there and participate. What is the fun of doing these things with the kids if I can’t get in there and play myself?dying Easter eggs with children I had bought a dozen eggs for our project. When I got up in the morning I put them in a pot to boil right away, that way I knew they could boil and cool so when we were ready to dye them they would be cool enough to do so. I kept out 4 eggs as I planned to blow these ones out. The only thing I find with dying hard boiled eggs is that the eggs tend to get wasted. I know that some people dye them and then eat them the next day but I always found that we never did. I knew that the twins would need their eggs to be hard boiled so that they could handle them without breaking, but I figured that Matthew could handle a blown egg (which is simply an egg shell without the actual egg white and yolk inside it). The thing I like about blowing the egg out of the shell is that you can then use the eggs insides in something else and you can keep your decorated eggs longer. dying Easter eggs with childrenMatthew even helped me blow out the eggs. He watched me do the first one and decided he wanted to try. Turned out he did the other 3 all by himself. When I announced that it was time to dye the Easter Eggs Luke and Chloe ran into the kitchen and sat down waiting. They knew what was going on as I had already told them earlier in the week. Matthew and I had already mixed the dye ahead of time, as well as gotten the eggs ready. The challenge was we only had one holder/ stick to dip the eggs into the dye and 3 kids. At first they all wanted to do it but when I explained that we only had one stick and that we needed to take turns, we managed to work it out. In fact, by the end we were dropping our eggs into the cup without the stick and only using it when they were ready to fish them out of the dye. I will be saving the stick for next year so that when we buy another kit we will have 2. dying Easter eggs with childrenThey each got to dye four eggs the color of their choice and then we left them to dry. We intended to come back to them when they were dry to add stickers or sequins, etc. but we never did. But it really doesn’t matter, they had a great time and were very proud of their eggs as they showed everyone who came in the door that day their eggs.

Tips for dying Easter Eggs with Children (best for children ages 3 & up)

  1. Have the eggs ready beforehand -whether you are going to hard boil them (best for young children so they can handle them without breaking) or blow them out
  2. Mix up the dye beforehand as well – I found small plastic disposable cups work well
  3. Put kids in old clothes – make sure that they are in clothes that it doesn’t matter if they get dye on. If the dye gets on clothing it will stain and is hard to get out. You can also put an apron on them or just get them to take off their shirt altogether (depends on their age and who they are dying eggs with)
  4. Have an adult available who can assist the kids
  5. Do one egg at a time, one color at a time – I had all the dye on the island in the kitchen and brought the color that Luke and Chloe chose to the table when they wanted it. With older children this may not be necessary.
  6. Let eggs dry completely – you may need to flip egg over so that the bottom dries
  7. Decorate with stickers, sequins, markers, etc. or leave as plain colorful Easter Egg
  8. Be patient and have fun!

dying Easter eggs with childrenMatthew really got into dying the eggs, getting creative using more than one color, partially coloring half and then doing another color. On one egg he even did 3 colors. We did a dozen eggs but had quite a bit of dye leftover so Matthew started dying and drying paper, creating a lattice design. It kept him busy for over an hour and he only stopped because he had his Ju Jitsu grading to attend.dying Easter eggs with children I had bought one of those kits that are cheap and abundant at Easter but there are lots of natural dyes that you can use, and may be preferable especially if you are going to eat them. Things like leftover coffee to make brown, tea, turmeric (yellow), blueberry, chili powder and red cabbage (blue). I think we may try the natural dyes next year. Dying Easter eggs with children is easy and fun. You can keep it super simple or make it more fancy if you want. Either way the kids will love it and you will have fun getting in there too!

How to blow out an egg

  1. Gently poke a small hole on each end of the egg using a pin. Trick is to make hole big enough that you can get air through without breaking the egg.
  2. Hold egg over a bowl.
  3. Place mouth over hole on one end and blow. Egg will slid out the hole in the other end into the bowl.
  4. Keep blowing until entire egg is out.
  5. Gently wipe off egg.

Yummy Dairy & Sugar Free Easter Brunch Recipes

easter brunch

Breakfast is definitely one of my favorite meals as there are so many yummy options! Pancakes, eggs, omelettes, waffles, crepes, fruit… I like brunch even better and often enjoy those big brunch spreads that you can find where there is everything from crepes and omelettes made to order to carved roast beef and a chocolate fountain (my mouth is salivating at the thought). The selection is fabulous and there is something for everyone.

When I was growing up we did a big Easter dinner with the ham and scallop potatoes, but when I started my own family we moved to doing an Easter Brunch. This allowed the kids to get up and hunt for baskets and then to enjoy a nice meal later in the morning, leaving dinner to be a simple affair with no one stuck in the kitchen for the day or doing the big clean up in the evening!

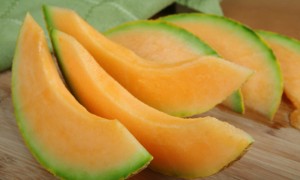
I have found this to be a great shift, especially because brunch incorporates many of my favorite foods! Depending on how many people we have for brunch depends on how many different dishes I make, but traditional standard fare seems to be a quiche (which I love), waffles (which I also love but the kids do as well, they are not fans of quiche) and some fruit, usually consisting of cantalope, fresh strawberries and whatever else is in season.

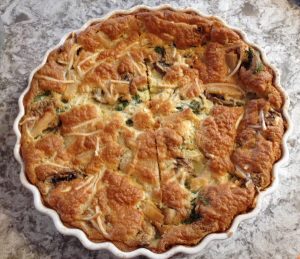
The best quiche recipe I have found is a recipe I got from my Mum. Many people tend to avoid making quiche because of the crust, but this recipe for Impossible Quiche, is one where the crust ‘makes itself’. It’s true, by putting all the ingredients into the blender, the Bisquik sinks to the bottom while it bakes and creates a nice light crust. Simple, easy and takes no time at all. Of course I do enjoy quiche with a nice traditional crust as well but this recipe is quite satisfying and like I said easy to make!

Impossible Quiche

1 c. grated vegan cheese (mozza or swiss)easter brunch

1/3 c. finely chopped onion

sliced mushrooms

spinach

1/2 c. Bisquik

1/4 tsp. salt

1/8 tsp. pepper

4 eggs

2 c. almond milk or dairy free milk of choice

Lightly grease 10″ pie plate or quiche dish. Sprinkle cheese, onion, mushrooms and spinach (or other desired toppings) evenly over the bottom of the plate. Place remaining ingredients in the blender and blend at high speed for 1 minute. Pour into dish.

Bake at 350 F for 50-55 minutes, or until golden brown and knife inserted in center comes out clean. Let stand.

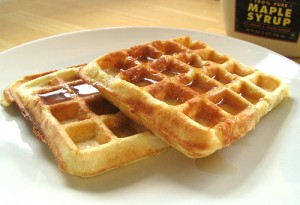
As I said, waffles are often part of our brunch spread and I have found some great recipes for plain, chocolate and orange waffles. The chocolate ones are to die for! While the plain ones are fantastic with maple syrup or adding some fruit and a little ice cream (Rice Dream is a yummy dairy and sugar free alternative to dairy ice cream if you’re looking for dairy free).

I am already looking forward to our Easter Brunch! and all the possible choices. Whatever you choose this year whether it be Easter brunch or Easter dinner, I hope you have a wonderful feast that you can share with family and friends! Happy Easter!


Grocery Shopping with Friends

Luke and Chloe love grocery shopping! (well they love shopping in general) They get very excited when I tell them that we are going grocery shopping today. They gobble up their breakfast and head to the door. They are great little shoppers. Very good at staying in the cart while I go around the store getting the groceries.

One of the first things we do when we get to the store is pick up some ‘guys’. I have found that this a great technique for keeping the kids entertained and happy while we are shopping. I have also noticed it makes a lot of other shoppers smile as they see Luke and Chloe playing with these stuffed animals, which are usually bigger than they are!

Superstore always has a large selection of stuffed animals that we go and they each get to pick out one to hold while we are in the store. Then we are done our shopping we go back to the area we picked them up and ‘put them back with their friends’ and go and pay for our groceries. It works great! They have come to know how it works so there is no crying or fussing, they give them a hug and a kiss, say bye and we’re on our way 🙂

Easter Crafts for Kids

I tend to get very excited about Springtime, especially Easter. The sense of rebirth in the air, the warmth of the sun on my face, the flowers beginning to peek through. The kids get excited and start asking to play outside more, enjoying the warmer weather and all that comes with it – the mud, the grass and the rubber boots. It truly is a time of year when things re-emerge and come out of the darkness, the long ‘hibernation’ of winter.

With Easter of course there is the excitement of the Easter Bunny and all the other cute springtime animals, such as chicks and lambs. The hunt for eggs and Easter Baskets and the goodies that they find.

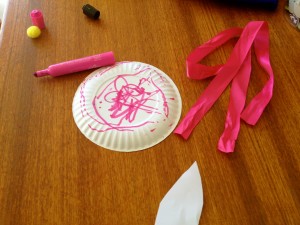
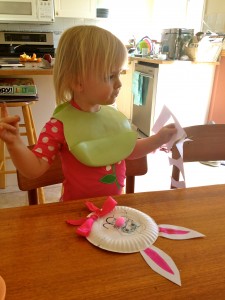
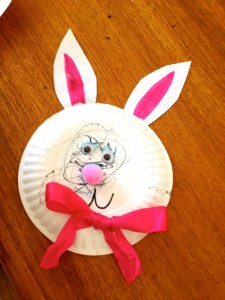
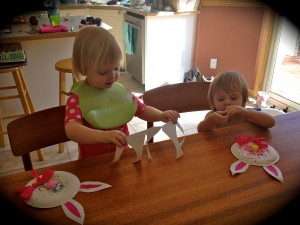
I often get the kids ‘into’ the holiday by doing some crafts around that holiday. I find it fun because I like to search out and try new crafts with them, and they love it, well because they just love crafts! Yesterday we made paperplate bunnies, which were easy and simple for them.

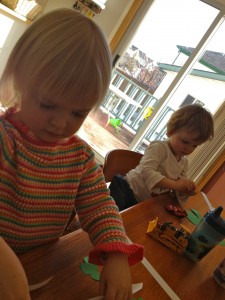
It’s neat to watch Luke and Chloe do their crafts as you can really notice the differences in how they do things. Chloe is definitely more of a follow the rules and the pattern when it comes to crafts and Luke is more of take the concept and get creative with it kind. He takes things more out of the box and expands upon the idea – which I just let him do, as I believe that is all part of learning and growing, and enhances his creativity.

Paperplate Bunny

What you will need:

  • small paperplate
  • white paper
  • googley eyes
  • small pom poms
  • ribbon
  • black and pink markers
  • glue
  • scissors
Trace bunny ears on piece of white paper. Cut them out and set aside. Take one small paperplate and glue on googley eyes and pom pom for nose. Using black marker draw in the mouth. Using pink marker color inside of bunny ears a little. Glue ears to paperplate at the top. Tie ribbon into a bow and glue on bottom of paper plate. Let glue dry completely.

Fluffy Pinecone Chick

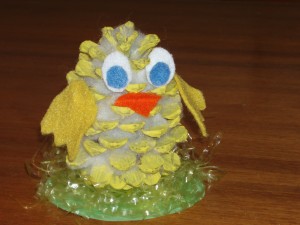
This adorable little chick is completed in steps, but is well worth the waiting time in between. We made this a couple of years ago with Matthew and he loved it, in fact he kept it in his room for a long time before it made it’s way out of the house. Children 3 years and up can easily complete this craft with parent help.

What you will need:

  • large fat pinecone
  • pencil
  • yellow paint and paintbrush
  • fiberfill (cotton batting)
  • felt scraps in white, blue, orange, yellow
  • green construction paper
  • Easter grass
  • glue
  • scissors

Paint the pinecone yellow and let it dry. Once dry, wrap the pinecone in thin layer of fiberfill. Use pencil to poke the fluff between the scales of the pinecone. From the felt scraps cut out wings, a beak and eyes and glue them onto the body. Cut a 10cm circle out of the green construction paper and glue the Easter grass on top. Then glue the pinecone chick onto the middle of the grass.

Stained Glass Egg

What list of Easter Crafts is complete without an Easter Egg! This super easy craft is great for little ones as the tearing of the tissue paper will utilize their little hand muscles and strengthen their hand eye coordination.

What you will need:

  • colored tissue paper
  • construction paper
  • scissors
  • hole punch
  • ribbon
Trace a large egg on a piece of white construction paper. Cut out egg. Tear different colors of tissue paper into small pieces. Glue the tissue paper onto the construction paper egg. Let glue dry. When dry punch a hole in top of egg, lace ribbon through and tie at top to make a loop for hanging.
No matter which craft you choose the kids will have a great time and some great decorations for Easter. Splashes of color for spring and lots of fun while doing it.
Now my kids are asking to color Easter Eggs – yes the whole dye the eggs – which my 9 year old has never done -oh dear I have neglected my duty as a mother. That should be an interesting experience…


What’s the Story Here?

A couple of weeks ago I had family visiting for my 40th birthday. It was a busy weekend with a full house and lots of late night revelry. This late night photo can tell you a story or two. I love how rich it is and how you could pick out anything and create a narrative about what’s happening. So many things to talk about…

Luke and Chloe’s First Trip to the Dentist (and tips how to make it a positive experience)

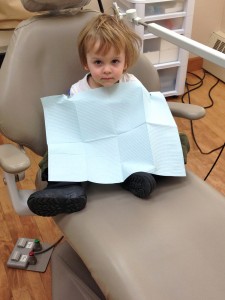
Luke in the dental chair

Last week Luke and Chloe had their first dental appointment.  They were quite excited (unlike most adults I know, including me) about going to the dentist, as they had gone many times before when Matthew or I had appointments – so they were familiar with what it was and what happened there.

We see Dr. Evans at Evans Dental Health, a holistic dentist, having switched over to his office a couple of years ago. Dr. Evans is a mercury and fluoride free office and believes that the health of your mouth and teeth are directly related to your overall health. So things like nutrition, supplements and detoxification are available/ discussed in this office.

The staff were great, smiling and friendly from the moment we arrived, the dental hygienists getting down to their level and interacting with them. Luke and Chloe are very go with the flow and fairly adaptable kids, but Luke still turned to me when the hygienist invited them to come with her, and asked me to come along. It’s nice to know as a parent that they still need you.

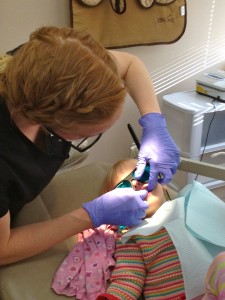
Chloe was the first to go and hopped up into the dental chair. The hygienist, Holly, explained everything to her as she went along, starting right from the bib that they got to use right down to the dental tools. She explained everything in a fun and engaging way for a child. Chloe was very interested in what she was saying and not only followed direction but already had her mouth open ready for Holly to look at her teeth.

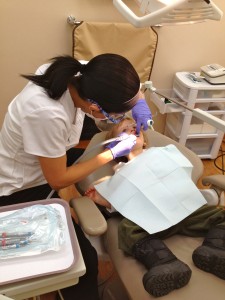
Luke went next door with his hygienist, Salena and had a very similar experience with her explaining things to him as she went and engaging him the whole time. Luke also opened his mouth and kept it open, looking like a little bird, waiting for her to check his teeth.

A child’s first visit to the dentist is a very short visit, with a couple of basic things happening. The appointment is simply to get the child comfortable with the experience and learning what to expect. They tell the kids what’s going on, explaining everything as they go, then they count how many teeth they have, give them a quick polish, if the child lets them, then the dentist comes and takes a peek. That’s it, fairly quick and definitely painless.

Most dentists recommend that your child start coming to the dentist as early as 1 year old or within 6 months of their first tooth coming in. When I asked our dentist they said at about 3 years old – which makes more sense to me. I think as a parent knowing the recommended guidelines, you can decide when is the best time to take your child.

At the end of the appointment both Luke and Chloe got little bags of goodies that contained a new Firefly toothbrush and some flossers. Luke got a whole container of dental floss, which unfortunately was completely unraveled by the time we got home. And they also got a trip to the ‘treasure chest’, which I loved going to when I was a kid and went to the dentist, it was the best part! They chose mini lip balms, which were also destroyed and well used by the time we got home. Chloe just kept putting it on her lips (and it also ended up all over her face). Luke just played with it after one application and I found it in pieces on the floor of the van.

Overall though they had a wonderful, positive experience and were very excited to tell Daddy what they did that day.

If it’s time for your child to take their first trip to the dentist here are some more tips to make their first experience a positive one:

  1. Pick a caring, friendly dentist that makes your child’s first visit a special ocassion
  2. If there is an opportunity, prior to your child’s first visit, let them observe a family member during an appointment. This will help them become familiar with what happens.
  3. Avoid instilling anxiety in the child just tell them they are going to the dentist and leave it at that.
  4. Select an appointment time that is best for the child, usually for young children first thing in the morning is best.
If you can create a first positive experience for your child it will make future trips to the dentist positive ones as well. Even as an adult I don’t enjoy going to the dentist, it’s because I have to hold my mouth open so long and the sound of the drill really gets to me. (If I didn’t have to hear that sound it might be ok) so the more you can do for your kids to make the dentist a positive experience the better. Both Luke and Chloe had a ‘good time’ and I know I will have no problem when it is time to go again.
Dr. Evans does a Candy Buy Back each year at Halloween, where he gives $1/ lb of candy to the kids. We go each year and I think it’s a fabulous idea. Go to his website to find out more.


Sugar Free White Cake Recipe

sugar free white cake

One of the first things I created when we went sugar free was a sugar free birthday cake, as I figured that this was one of the most important things in a child’s life that should not be without. Cake on your birthday is important! So I sought out various recipes and experimented a little.

My first attempt in creating a sugar free white cake was using agave nectar as the substitute for sugar. Though there are many other options for natural sweeteners this was the first one that I tried. I later learned though that agave nectar is considered to be just as bad as the refined stuff because of the way it’s processed. So my next step was to try honey, which is our preferred natural sweetener these days.

This vanilla cake recipe, using honey as the sweetener is very moist and I have used it many times. The kids love it and no one knows the difference when they eat it unless I tell them it’s sugar free. You can easily use this recipe for white cupcakes as well.

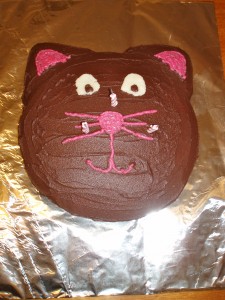
I used it this year for Chloe’s kitty cat birthday cake (for the twins birthdays I make a cake for each of them and I usually do one chocolate and one vanilla). With chocolate icing it was delicious as usual.

White (Vanilla) Cake Recipe

1/2c. honey

1/2 c. Earth Balance

2 eggs

2 tsp. vanilla

1 1/2 c. flour

1 3/4 tsp. baking powder

1/4 c. almond or rice milk

Preheat oven to 350 F. Grease and flour 9×9 inch pan.

In a medium bowl, cream honey and Earth Balance. Beat in eggs, one at a time, then stir in vanilla.

Combine flour and baking powder, add to the creamed mixture and mix well. Finally stir in the milk until batter is smooth. Pour or spoon batter into the prepared pan or into muffin tin for cupcakes.

Bake for 30 to 40 minutes in the preheated oven. For cupcakes, bake 20 to 25 minutes. Cake is done when it springs back to the touch.

Yield: 12 cupcakes or 9×9 inch pan

Leprechaun’s, Shamrocks and More – St. Patrick’s Day Crafts for Kids


Chloe and Luke making their Shamrock Man

St. Patrick’s Day is one of those fun unique holidays that you can really get into if you choose to. I’ve always loved the concept of green beer, (as an adult of course), shamrocks and leprechaun’s and pots of gold. And it is the one day that you can never get too sick of the color green!

I always find holidays like this so much more fun when you can celebrate with kids, whether it be your own, nieces, nephews or children you work with. As usual there is a plethora of St. Patrick’s Day crafts that are fun and colorful to make surrounding this holiday.

I had planned to make a couple of these crafts with the kids only to find when I went to our craft supplies that we were missing a few things. No matter, tomorrow a trip to the dollar store will remedy that. We were able to make Shamrock Men, which is one of my favorite crafts due to the accordion arms and legs (I have done a similar heart man for Valentine’s Day).
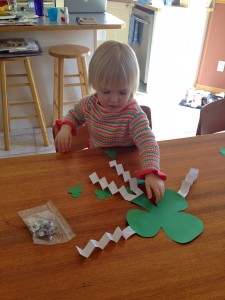
Luke and Chloe enjoy making crafts and as soon as I announced that we were making one they ran into the kitchen and sat down at the table. I had precut the shamrocks and strips of paper but I let them do all the folding and glueing and Chloe even drew a face on her shamrock’s by herself. Chloe was very into it, while Luke though interested got easily distracted with trains and playdoh, but he did finish it.

Both Luke and Chloe squealed with delight when they were done and started making their shamrocks dance and sing. It was pretty cute to watch. Tomorrow I would like to make the pot of gold which will probably end in a lot of glitter everywhere, but that’s ok we can all sparkle for a while.

I love the make your own Blarney Stone idea as well (below,) but we needed to gather a few supplies to do that one and could easily get away with making it after St. Patrick’s Day. I myself, have been to Blarney to kiss the Blarney Stone, set high up in the castle of Blarney; and it is quite a unique experience. I am not going to spoil it by telling you what happens as I think half the fun is experiencing it for yourself, but let’s just say it was not what I expected! Needless to say if you have the chance go and do it, it’s worth it. In the meantime you and your little ones can enjoy your own little Blarney Stone at home.

I imagine the kids will love creating their own and will be kissing them in no time (reminds me of kissing frogs for some reason – ha ha).

St. Patrick’s Day Crafts

Pot of Gold

black and green construction paper
white glue

gold glitter

scissors

paper plate

something small and round to use as stamper to make gold coins

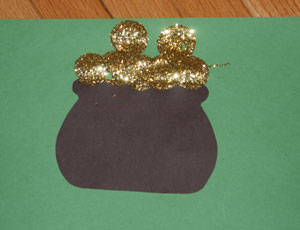
Draw and cut out pot on black construction paper. Glue the pot onto a piece of green construction paper, centering it and leaving enough room at the top to make the ‘gold coins’.

Pour glue on paper plate, dip stamper into glue and press it onto paper above pot. Pour gold glitter on paper until glue is completely covered. Gently tap the back of paper to remove any excess gold glitter. Tip – tap it onto another paper plate or piece of paper so you can use excess glitter for future crafts. 

St. Patrick’s Day Shamrock Man

green construction paper
white paper

googley eyes

glue

scissors

black marker

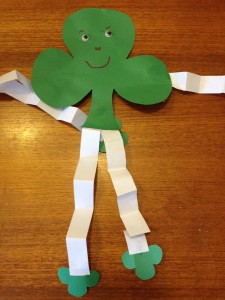
Draw a large shamrock on green construction paper and cut it out. Draw 4 small shamrocks on green construction paper and cut them out (these will be for hands and feet).

Cut 4 strips of white paper about 1 inch wide. Fold the strips back and forth like an accordion. Glue 2 strips either side of large shamrock for arms, glue the other 2 at the bottom for legs.

Glue small shamrocks on the ends of each strip for hands and feet. Glue googley eyes on large shamrock and draw in mouth with black marker.

Blarney Stone

Blarney Castle, Ireland

smooth clean river rock

brush

green paint

glue

markers

glitter, sequins, jewels, bits of yarn

Make sure rock is clean and dry. Paint it green. Let dry.

Once paint is dry decorate with glitter, sequins, etc. When glue is dry from decorating draw on face using markers.
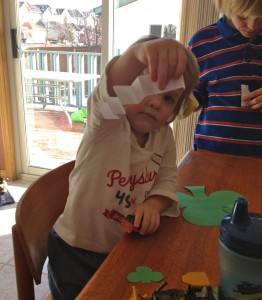
Luke folding his accordion arms

Voila! Your own kissable Blarney Stone.


Deals of the Week: New deals every week, online only!

A New Look for Pyjama Pants

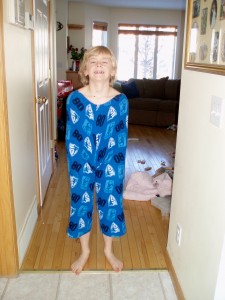
Matthew decided to get creative with his pyjama wear! (Wordless Wednesday)

Matthew is my effervescent, creative and active young man. He was playing around being his delightful self when he came into the kitchen like this. Arms tucked in and pants up high! I just about died laughing and my aunt thought it was so funny that we needed a picture. Oh what our children come up with!