Yummy Dairy & Sugar Free Easter Brunch Recipes

easter brunch

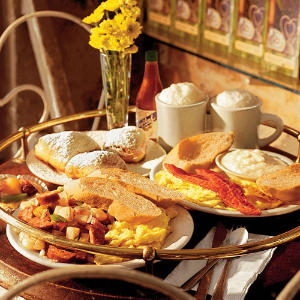
Breakfast is definitely one of my favorite meals as there are so many yummy options! Pancakes, eggs, omelettes, waffles, crepes, fruit… I like brunch even better and often enjoy those big brunch spreads that you can find where there is everything from crepes and omelettes made to order to carved roast beef and a chocolate fountain (my mouth is salivating at the thought). The selection is fabulous and there is something for everyone.

When I was growing up we did a big Easter dinner with the ham and scallop potatoes, but when I started my own family we moved to doing an Easter Brunch. This allowed the kids to get up and hunt for baskets and then to enjoy a nice meal later in the morning, leaving dinner to be a simple affair with no one stuck in the kitchen for the day or doing the big clean up in the evening!

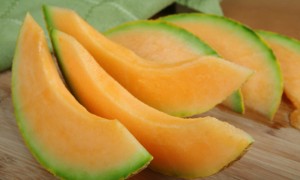
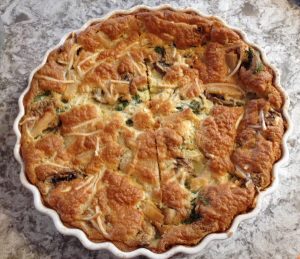
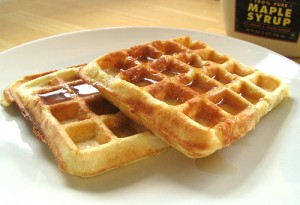
I have found this to be a great shift, especially because brunch incorporates many of my favorite foods! Depending on how many people we have for brunch depends on how many different dishes I make, but traditional standard fare seems to be a quiche (which I love), waffles (which I also love but the kids do as well, they are not fans of quiche) and some fruit, usually consisting of cantalope, fresh strawberries and whatever else is in season.

The best quiche recipe I have found is a recipe I got from my Mum. Many people tend to avoid making quiche because of the crust, but this recipe for Impossible Quiche, is one where the crust ‘makes itself’. It’s true, by putting all the ingredients into the blender, the Bisquik sinks to the bottom while it bakes and creates a nice light crust. Simple, easy and takes no time at all. Of course I do enjoy quiche with a nice traditional crust as well but this recipe is quite satisfying and like I said easy to make!

Impossible Quiche

1 c. grated vegan cheese (mozza or swiss)easter brunch

1/3 c. finely chopped onion

sliced mushrooms

spinach

1/2 c. Bisquik

1/4 tsp. salt

1/8 tsp. pepper

4 eggs

2 c. almond milk or dairy free milk of choice

Lightly grease 10″ pie plate or quiche dish. Sprinkle cheese, onion, mushrooms and spinach (or other desired toppings) evenly over the bottom of the plate. Place remaining ingredients in the blender and blend at high speed for 1 minute. Pour into dish.

Bake at 350 F for 50-55 minutes, or until golden brown and knife inserted in center comes out clean. Let stand.

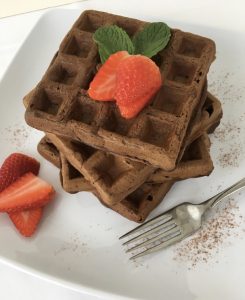
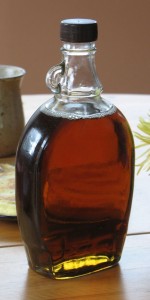
As I said, waffles are often part of our brunch spread and I have found some great recipes for plain, chocolate and orange waffles. The chocolate ones are to die for! While the plain ones are fantastic with maple syrup or adding some fruit and a little ice cream (Rice Dream is a yummy dairy and sugar free alternative to dairy ice cream if you’re looking for dairy free).

I am already looking forward to our Easter Brunch! and all the possible choices. Whatever you choose this year whether it be Easter brunch or Easter dinner, I hope you have a wonderful feast that you can share with family and friends! Happy Easter!


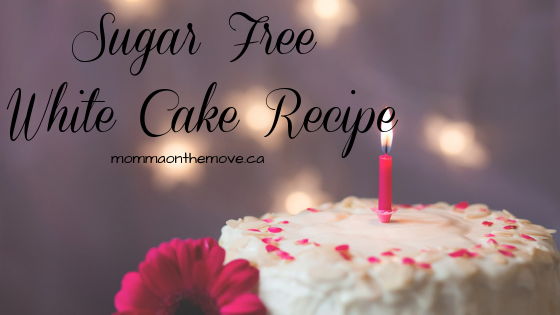
Sugar Free White Cake Recipe

sugar free white cake

One of the first things I created when we went sugar free was a sugar free birthday cake, as I figured that this was one of the most important things in a child’s life that should not be without. Cake on your birthday is important! So I sought out various recipes and experimented a little.

My first attempt in creating a sugar free white cake was using agave nectar as the substitute for sugar. Though there are many other options for natural sweeteners this was the first one that I tried. I later learned though that agave nectar is considered to be just as bad as the refined stuff because of the way it’s processed. So my next step was to try honey, which is our preferred natural sweetener these days.

This vanilla cake recipe, using honey as the sweetener is very moist and I have used it many times. The kids love it and no one knows the difference when they eat it unless I tell them it’s sugar free. You can easily use this recipe for white cupcakes as well.

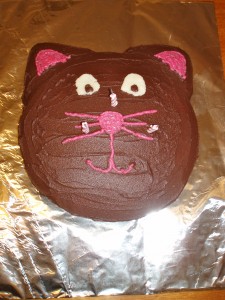
I used it this year for Chloe’s kitty cat birthday cake (for the twins birthdays I make a cake for each of them and I usually do one chocolate and one vanilla). With chocolate icing it was delicious as usual.

White (Vanilla) Cake Recipe

1/2c. honey

1/2 c. Earth Balance

2 eggs

2 tsp. vanilla

1 1/2 c. flour

1 3/4 tsp. baking powder

1/4 c. almond or rice milk

Preheat oven to 350 F. Grease and flour 9×9 inch pan.

In a medium bowl, cream honey and Earth Balance. Beat in eggs, one at a time, then stir in vanilla.

Combine flour and baking powder, add to the creamed mixture and mix well. Finally stir in the milk until batter is smooth. Pour or spoon batter into the prepared pan or into muffin tin for cupcakes.

Bake for 30 to 40 minutes in the preheated oven. For cupcakes, bake 20 to 25 minutes. Cake is done when it springs back to the touch.

Yield: 12 cupcakes or 9×9 inch pan

Holiday Delights Sugar and Dairy Free Egg Nog

One of the many things I love about Christmas is the fun holiday drinks you can have. Things like hot apple cider, Christmas Jones, Angels Delight and my favorite Egg Nog. It is a rich creamy drink that you can have virgin style or add a dash of rum if you like. Either way it is delicious, especially if you sprinkle a little nutmeg or cinnamon on top.

Only available at Christmas, as soon as it came out in the stores I would buy it – sometimes as early as October – to enjoy and savour my first cup. Matthew also really likes egg nog and was asking me to buy some for him as soon as he saw it in the store. Unfortunately egg nog has the two things our family doesn’t consume anymore, dairy and sugar; therefore I was in a bit of a quandary. Some things I could live without, I did not want egg nog to be one of them! So I went on a hunt for one that would meet our needs. There had to be one out there.
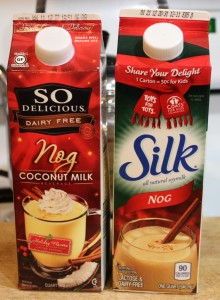
There are quite a few non-dairy options out there, Vita-soy makes a Holly Nog from soy milk, as does Earth Balance, Silk and So-Delicious (coconut milk) as well as nogs with almond milk. I even discovered a rice milk egg nog made by Rice Dream. But though these are all great dairy free options they are still sweetened with evaporated cane sugar, which we can’t have; we needed one with a natural sweetener.

Since I couldn’t find one in the stores,  I came home and hopped online to see what recipes I could find on the internet. (I love the internet it has opened up a whole new world for me and I often wonder how we ever got along without it). My preference was an egg nog made with almond milk so that is what I looked for; and I found 3 really good recipes that I have made and we all tried.
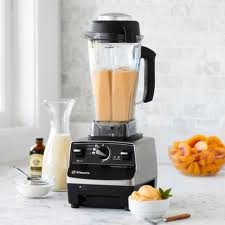
The first one I found on Incredible Smoothies, a website founded by Tracy Russell who eats a high raw vegan diet. She has all kinds of great smoothie recipes on her site. The recipe for egg nog, I really liked as it does not contain eggs, (which I was concerned about for the twins as egg nog usually contains raw eggs), and it was all made in the blender, sweetened with frozen bananas! It was fast, easy, simple and delicious!

The second recipe I found on Healthful Pursuit by Leanne Vogel, who shares recipes, travel, food and life experiences on her site. This recipe for egg nog contains egg yolks as well as coconut milk, but is cooked on the stove. At first I thought that this would not turn out so well as I thought “Warm egg nog? Really?” but it turned out to also be delicious! And the fact that it was cooked on the stove eliminated my concern about the twins having raw eggs, so they could have it too. It was also really good warm. Leanne says you can let it cool and enjoy it, but I found due to the coconut milk, it congealed in little chunks when it cooled, and though not bad you had small pieces of coconut milk in your egg nog. I have leftovers in the fridge that I will be heating up for sure when I enjoy it.

The last one I recently discovered this week, is completely vegan and is the new front runner for our favorite. Courtesy of SPUD (I love these guys but that’s a whole other post), a local & organic grocery delivery service, this egg nog recipe is creamy, delicious and super easy – just add all the ingredients to your blend and mix. Check out their recipe here.

The kids enjoyed both recipes too. Matthew’s favorite was the one from Incredible Smoothies, I really liked the one from Healthful Pursuit (I found it a little bit creamer and lighter) and the twins, well they liked both and didn’t seem to favor one or the other (they are so easy to please those two 🙂
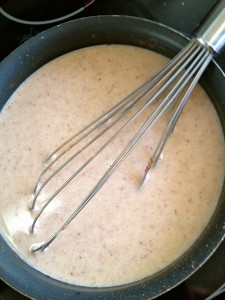
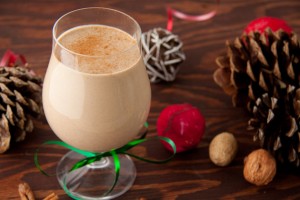
Dairy free egg nog with almond milk

The only downside with the stove top recipe is you end up with leftover egg whites and unless you have something to use them for they end up going to waste.

Either way we now have 3 delicious, dairy free, sugar free egg nog options, which even John tasted and said is “Way better than the store bought stuff.” And we can easily make them at home whenever we like, and as much as we like 🙂

So if you’re looking for a non dairy egg nog that you can make yourself or simply wish to try something new, these recipes are great (and they also happen to be gluten free as well). Once you’ve tried them come back and comment letting us know what your favorite is, or if you’ve found another egg nog recipe that you like and are willing to share!

Have fun and enjoy that glass of egg nog!

Raw Vegan Egg Nog with Almond Milk

1 1/4 c. plain almond milk (you can make your own almond milk, it’s super easy)

2 frozen bananas, peeled and sliced

1/4 tsp. nutmeg

1/4 tsp. cinnamon or 1 drop Cinnamon Bark essential oil

dash of clove or 1 toothpick dip* of Clove Bud essential oil

dash of sea salt

1 date (soaked for 10 minutes)

1/4 tsp. pure vanilla extract

Put all ingredients in a blender. Start on low speed and move up to high. Blend on high for 20-30 seconds until mixture is smooth. Serve with a sprinkle of cinnamon or nutmeg, if desired.

*a toothpick dip is used when you do not want a full drop of essential oil as it’s too much for the recipe. Simply dip a clean unused toothpick into the essential oil bottle and then dip the toothpick with essential oil into your mixture and swirl it around.

Almond Nog

4 egg yolks
2 1/4 c. unsweetened almond milk

1-400 ml can of coconut milk

1/4 c. coconut palm sugar

2 tsp. pure vanilla extract

1 tsp. ground nutmeg

1 tsp. cinnamon or 1 drop Cinnamon Bark essential oil

pinch all spice

Separate the eggs and place the egg yolks in a bowl. Set aside.

Combine the remaining ingredients in a medium saucepan on medium heat bringing mixture to a simmer. Once simmering reduce heat to low.

Slowly add 1/4 c. of the hot liquid to the egg yolks in a bowl, whisking continuously. Continue adding liquid to the egg yolks until you’ve added 1 cup, then transfer new mixture to saucepan. Turn heat back up to medium and simmer for 4 minutes, whisking continuously.

Remove from heat and serve immediately or put into a mason jar and refrigerate.

Sprinkle with a pinch of cinnamon or nutmeg, if desired.

*note recipes have been reposted with permission of the original authors


Shop Art Calendars at Calendars.com

Once Upon a Christmas

One of the things that I love about Christmas is all the activities and events that surround the holiday. There are craft fairs, carol sings, Christmas parties and many community events that you can choose to participate in to celebrate the season. There is something for everyone, depending on what you like to do.

One of my favorite events is Heritage Park’s Once Upon a Christmas, that runs every weekend starting late November for the 4 weeks prior to Christmas. This is a wonderful family event that includes all kinds of activities for kids and adults alike. They offer kids crafts, visits with Santa, carolers, plays, wagon rides, mazes and a ‘Kids Only’ Store where parents are not allowed to enter with their children. This year they added firepits placed throughout the park, which are great places to cozy up and have a chat and warm up by the fire.

There is so much to do there that it is easy to spend the day. The challenge is that most of it is outside so you have to be to dress for the weather and be prepared to be outside. So for me I always choose a mild weekend to go with the kids. It is much more enjoyable for everyone and we can stay longer and enjoy what the park has to offer.

As this turned out to be a mild weekend, I decided to pack up the kids Sunday morning and head out. Though it was a bit of a challenge to get us all out the door (and I would have prefered to have left half an hour earlier than we did), we made it there with a packed lunch, hot chocolate and gingerbread cookies, dressed and ready to go.

Luke and Chloe love Heritage Park so I had no trouble convincing them to go, in fact they chatted about it the day before hoping to see the “choo choo train”, which only runs in the summertime, but I told them we would ‘check’. Matthew enjoys the park as well and though he had mixed feelings about going easily went out the door.

I always hit the wagon rides first, as the line for that tends to get long as the day goes on. Plus Chloe loves horseys, so was looking forward to it. Chloe was beaming and smiling and pointing things out, while Luke was just taking it all in.

Matthew's Christmas Reindeer

We ventured to the kids crafts where Matthew made a clothespin reindeer and Luke and Chloe made little puppets out of old Christmas cards and popsicle sticks. This area is really well set up, as there is a selection of craft ‘kits’ that the kids can choose from to make their craft and there are lots of volunteers on hand to help the kids out. For the younger children they have coloring sheets and the puppets as options.

Matthew really wanted to hit the Kids Only Store as he went for the first time last year and really enjoyed the freedom of shopping on his own and spending some money 🙂 We also saw Santa and went to the petting zoo.

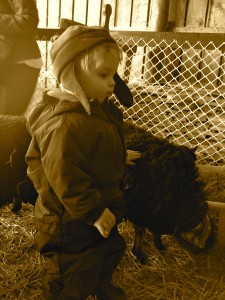
Luke petting the sheep

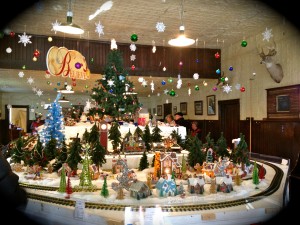
The highlight for me though was definitely the Christmas Model Railway, housed in the pool hall. It is one of those as soon as you walk in you go “Wow”; as it really is a Christmas wonderland. There are at least 3 or 4 trains going around this beautiful Christmas scene, villages and houses, lights and trees. I love it because I have always loved trains, and the magical Christmas scenes. I have no idea why I love trains so much, but I think they are cool, especially the model railways that go around and around all by themselves. Which is interesting cause that’s all it does is go around and around- but I could watch it for hours. The railway was really well done; on loan from some private collectors, it was a beautiful site.

The Christmas Railway

We chowed down on peanut butter sandwiches and carrot sticks on a bench outside Gunn’s Dairy Barn and enjoyed homemade hot chocolate, made with fresh almond milk (very easy to make your own), cacao, and spices, as well as homemade gingerbread cookies (sugar and dairy free of course). It was a bright sunny day with clear blue skies, a perfect wintery day, with the air of Christmas all around.

After walking and exploring we headed home, tired but satiated and satisfied with our Christmas adventures. Who knows where we’ll go next?

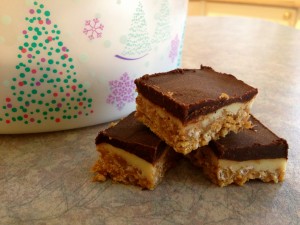
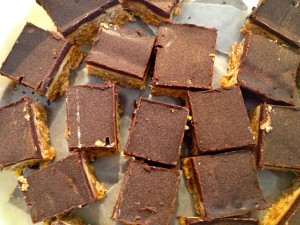
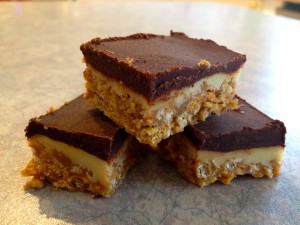
Chocolate Peanut Butter Cereal Squares

As promised I am sharing with you today the sugar and dairy free recipe for one of my all time favorite sweet treats. I have no idea where this recipe originally came from. It was one that my Mum made all the time when we were growing up and we all loved! It was very hard to have just one or two, as they were so good.

When we went sugar free at our house I thought that I would simply not make these anymore as they are so full of sugar and I had no idea what the possible substitutes could be. It seemed like a daunting task as many of the ingredients needed to be changed. But as I learned and adapted other recipes, discovering the various natural sugar substitutes out there I started to feel that I could easily adapt this recipe too. It might be a challenge and take a little time but I felt I could do it.

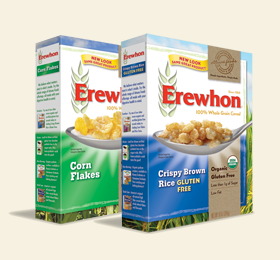
The first challenge was finding a brand of rice krispies and cornflakes that did not have any added sugar (because many cereals do). In my search I discovered Erewhon, a cereal company by Attune Foods that had both of the cereals I needed. Their brown rice krispies are sweetened with brown rice syrup, while their cornflakes have no added sugar at all.

Slowly slowly over the period of about a year I found what I was looking for and determined what alternatives could work in this recipe. And finally a few weeks ago I had everything I needed so I gave the new recipe a try. I am happy to report that they turned out great! and taste very similar to the original square. Taste tested by Matthew, he said that they did not taste different at all! And they must be good because he kept going to the fridge and scooping a few at a time.

Pleased with the results I shared the new recipe with my Mum and sisters – happy to have an alternative to our favorite treat. And today I am sharing the recipe with you. They are an easy no bake square and can be put together in less than 30 minutes. Make sure that you have your powdered sugar alternative ready and premixed as this can add to your time if you have to make this as well. The recipe for this is below.

My only tip is once they have set in the fridge, take them out and leave on the counter for a few minutes so they soften a little, this will make them easier to cut. I usually precut the whole pan and put them in a container in the freezer – the only downside is that they are too easy to grab and feast on! But great when you want to pull something out for company!

Chocolate Peanut Butter Cereal Squares

Bottom:

3/4 c. coconut nectar

1/2 c. coconut sugar

1 c. unsweetened peanut butter

1 1/2 c. crushed Erewhon Corn Flakes

1 c. Erewhon Brown Rice Krispies

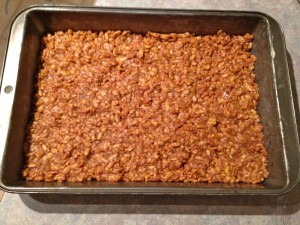
Heat the coconut nectar and coconut sugar until coconut sugar melts. Add peanut butter. Mix well. Then add corn flakes and rice krispies. Mix together well and press into greased 9×13″ pan.

Filling:

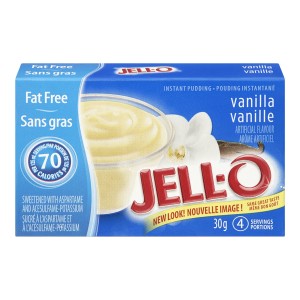
2 tbsp. fat free Jell-o vanilla instant pudding (this is not an ideal replacement due to the asparthame in it, but it is sugar free – I am on the lookout for a better substitute for this)

Rice or almond milk (approx. 2 tbsp.)

1/4 c. melted Earth Balance vegan spread

2 1/2 c. powered sugar replacement

Beat together well. Pour over bottom.

Top:

4 squares unsweetened chocolate, melted

1/2 c. Earth Balance vegan spread

Melt chocolate and Earth Balance in a small pot on the stove over medium heat. Stir frequently to ensure that chocolate does not burn. Lower heat if necessary. Mix together. Once completely melted spread on top and refrigerate.

Sugar Free Powdered Sugar (replacement for regular icing sugar)

1 cup nonfat powdered milk (for dairy free use powdered coconut milk)

1 cup cornstarch

2/3 cup Krisda Stevia for baking

Combine all the ingredients in a food processor or blender and whip until blended and powdered. Store in an airtight container.

This replacement can be used in any recipe calling for icing sugar.

Yummy!


Breakfast Foods Comfort and Ease! Sugar Free Waffles

I love breakfast. It is my favorite meal of the day. I don’t know if it’s because I also love mornings that I love breakfast or if it is because there are so many yummy breakfast foods to choose from! Pancakes, eggs, bacon, oatmeal, waffles, cereal and toast! Oh and crepes, crepes are delicious, with all the different yummy fillings you can put inside. Yummy!

It’s no wonder that sometimes I like making ‘breakfast’ for supper. Not only is it easy and fast but it is a nice treat. I usually add in some fruit of some kind or maybe a veg depending what I am actually making, but you can never go wrong. The kids always gobble it up and get very excited when they hear that we are having pancakes or waffles for dinner. In fact Luke and Chloe start clapping, jumping and screaming in delight. (I do too actually, on the inside).

As with other foods that are our favorites I have had to adjust these recipes to a dairy and sugar free version, which is quite easy to do. By now I have got the substitutions for things down pat and am able to take any recipe and make the appropriate adjustments.

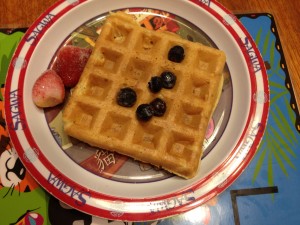
Last night we had waffles for supper. Waffles have always been one of my favorites, maybe because of the funky shape they come out in, maybe because it is another ‘bread’ type food and that is definitely one of my comfort foods. I like waffles because you can put so many things on them. You can put on the traditional butter and maple syrup or top it with fruit and ice cream or whip cream. I always find it fun as well to fill each little square with something. Yesterday I watched Luke do just that as he took blueberries and put one in each square of his waffle.

I have substituted date sugar in these recipes but have also used coconut sugar, which I tried with the plain waffles for the first time last night. Though they turned out lovely and tasted great, for some reason I enjoy the ones with date sugar better. Depending on your taste preferences you may choose to use one over the other as well.

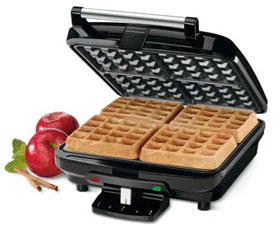
You do need a waffle iron to make waffles of course and my recommendation is to go with a non stick one. It is so easy to clean afterwards, you just wipe it down with hot soapy water. Sometimes I brush a little Earth Balance Vegan Spread over the plates before I make the first batch of waffles, but that’s it – after that they are stick free and easy clean up!

So whether you are having breakfast or supper, try out these waffle recipes and enjoy them guilt free!

Plain Waffles

1 ½ c. flour

1 3/4 tbsp. date sugar or 2 tbsp. coconut sugar, optional I have made this recipe not using any kind of sugar at all and they do not affect the taste or turnout of the waffle

1 tbsp. baking powder

½ tsp. salt

2 egg whites, room temperature

2 egg yolks

¼ c. Earth Balance vegan spread, melted

1 ½ c. rice or almond milk

Stir first 4 ingredients together in a bowl. Make a well. Beat egg whites until stiff. Using the same beaters, beat egg yolks in separate bowl. Add Earth Balance and milk, mix. Pour into well. Fold in beaten eggs whites. Cook in hot waffle iron until browned, using about 1/3 c. batter for each.

Makes 12 waffles

Chocolate Waffles (these are quite yummy! but the recipe is small. Definitely double it)

1 egg

3/4 c. rice or almond milkchocolate waffles

1 tbsp. cooking oil

1/2 tsp. vanilla

3/4 c. flour

1/4 c. cacao powder

3 tbsp. date sugar

1 tsp. baking powder

1/2 tsp. baking soda

1/4 tsp. salt

Beat egg in bowl. Add milk, cooking oil and vanilla. Beat in. Add next 6 ingredients, mix. Cook in hot waffle iron until crisp, using 1/3 c. batter for each.

Makes 6 waffles

Orange Dessert Waffles

1 c. flour 

1/4 c. date sugar

2 tsp. baking powder

1/2 tsp. salt

2 tbsp. Earth Balance, melted

2 egg yolks

2 egg whites, room temperature

1 c. orange juice

Measure first 4 ingredients into bowl. Stir together. Add butter, egg yolks and orange juice. Mix lightly. Beat egg whites together in a small bowl until stiff. Fold into batter. Cook in hot waffle iron until browned using 1/3 c. batter for each. Arrange waffles on plates, sift icing sugar over top if using.

Makes 10 waffles

All original recipes are from Company’s Coming Breakfast and Brunches. These recipes have been modified to a dairy free and sugar free recipe.

A Halloween Breakfast -Pumpkin Pancakes

pumpkin pancakes

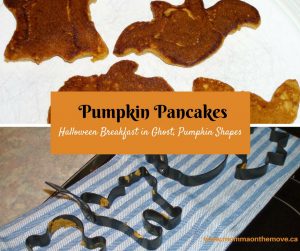
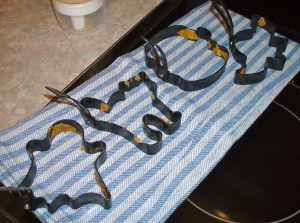
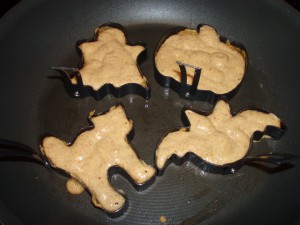
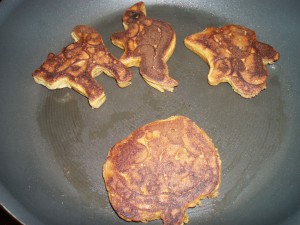
Last year I made Pumpkin pancakes Halloween morning for the kids.  I found these mini Halloween pancake molds at Williams Sonoma -in the shape of a cat, pumpkin, bat and ghost. It came with the pancake recipe so I thought I would try it out. It was so fun! It was a great way to start the day and to make it fun especially when meeting our no sugar requirement.

I am planning to make them again this year, except I will make them the night before and reheat them in the morning. Because Halloween falls on a school day, I would have to get up quite early to make them fresh and I am having a hard enough time getting up on school days as it is 🙂 It’s way too early for me.

Tips for Using Molds for Pumpkin Pancakes

When using the molds there are a few tips and tricks that I would recommend in order to make your pancake making experience successful.

First, is to buy a pancake pen. They are also available at Williams Sonoma and it is well worth the money spent. You fill the pen with batter on one end and then you squeeze it out of the tip on the other when you are ready. It has a cover on the “pen” end so you can stand it up with the batter at the end and ready to go. This is way easier and faster than spooning it into the molds.

Second, make sure that your griddle or pan is hot before you start and that you grease the pancake molds with a little bit of oil. They are non stick molds but you still need that extra grease to keep the batter from sticking, especially in the corners. And even with that I found that I had to gently push around the edges with a butter knife to get them to come out. And grease them EVERY time you put in a new batch of batter.

Third, don’t overfill the molds. If you use the recipe below they will puff up so only fill them about halfway. If you overfill them they will be hard to get out regardless if you grease them.

pumpkin pancakes

Fourthly, they do have little handles on them to help you take them out, but they become hot as they are metal like the rest of the mold – make sure you use a pot holder or oven mitt to handle them.

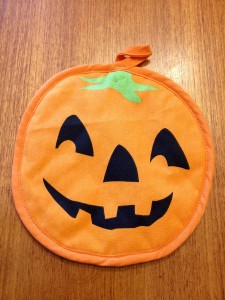
Interestingly last year I discovered I had no pot holders as I never found them to be useful and were just taking up space, so I gave them all away. Now I have found a reason to have at least one around, as using an oven mitt is too bulky and awkward to handle the molds. Fortunately I found a Halloween pumpkin pot holder on sale after Halloween last year, so I’ll put it to perfect use.

My last tip is be patient with yourself and give yourself enough time to make them; hence doing them the night before. I have to admit they are a bit finicky to make but once you get the first few under your belt you get the hang of it and it becomes easier. By the time I was done my batch I could get the pumpkin and the ghost shapes out without having to use my butterknife around the edges.

And oh they are delicious! The kids loved them. They found the shapes super fun and now ask for them each year.

So try something unique this Halloween for breakfast; even if you don’t have the molds the kids will still gobble them up. You could Hallloween -ish by simply make faces on them using pieces of fruit like sliced bananas, blueberries, strawberries, apples, etc.

I adjusted the original recipe to sugar and dairy free to meet our needs and is the recipe posted here.

Pumpkin Pancakes

1 1/2 c. flour (I used half whole wheat and half white)

1/4 c. date sugar

3/4 tsp. baking powder

1/2 tsp. baking soda

1/2 tsp. salt

2 tsp. cinnamon (or 1 drop Cinnamon Bark essential oil)

1/2 tsp. ginger (or 1 drop Ginger essential oil)

1/4 tsp. ground allspice (or 1 drop OnGuard essential oil)

4 eggs, separated

3/4 c. canned unsweetened pumpkin

1 1/2 c. almond milk or other preferred non dairy milk

4 tbsp. melted Earth Balance

1 tsp. vanilla extract

100% pure maple syrup (for serving)

In a large bowl whisk together flour, date sugar, baking powder, baking soda, salt, cinnamon, ginger and allspice. Set aside.

In another bowl, beat the egg whites until medium peaks form. Set aside.

In another bowl, whisk together the egg yolks, pumpkin puree, rice milk, Earth Balance and vanilla until well combined. Whisk the pumpkin mixture into the flour mixture just until the batter is smooth and no lumps of flour remain. Fold in egg whites in 2 additions.

Heat griddle over medium heat until a few drops of water flicked onto the surface skitter across it. Lightly grease the griddle and the inside surface of the mini pancake molds. Set the molds with handles up on the griddle and heat until hot.

Pour 1/4 c. pancake batter into each mold. If necessary use a butter knife of small spatula to spread the batter into the corners of the molds. Cook until bubbles form on top and the batter is set, 3 to 4 minutes. Remove molds, and flip the pancakes over. Cook until golden brown on the other side, about 3 minutes more. Keep warm until all pancakes are cooked. Makes between 24-32 pancakes.

*Please note that if using essential oils in this recipe to ensure that your essential oil brand is safe to take internally. Not all essential oil brands are created equally and some use synthetic fillers and chemicals in their processing of the oil or added to the oil itself. Due to no governing regulations on producing essential oils a company can say they are 100% or Organic. Due your due diligence and research the brand you are using to ensure your safe usage.

Enjoy! And Happy Halloweening!