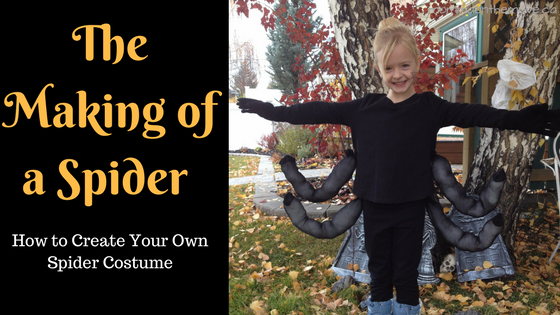
The Making of a Spider

spider costume

Halloween at our house is always a big event. As soon as October hits the kids are asking to decorate and even before that they are already talking about costumes and what they are going to be. In fact, there have been years when they have decided a whole year in advance what they wanted to be for next Halloween (and actually stuck with it).

Last year my daughter decided she wanted to be a spider. For me I prefer to buy our Halloween costumes if we can find what we need. As long as they are decent quality and not too expensive I find this the easiest and simplest. And there is quite the range and variety of costumes these days so this usually isn’t a problem. But in this case, I don’t know about you but I have never seen in a store a kids (or adult for that matter) spider costume – ever. So I knew that we had to make one.

Luckily, my very talented sister is in costume design and had already created a spider costume for herself years ago, so I didn’t have to start from scratch and I had a great guide to get the costume together. It did require a bit of work and gathering a few pieces, which can add up, but was fairly easy to put together.

How to Make a Spider Costume

This is a simple costume to put together. The most challenging part is doing the arms and legs and though not difficult requires some patience, especially if you’re not a sewer like myself!

Here’s what you need:

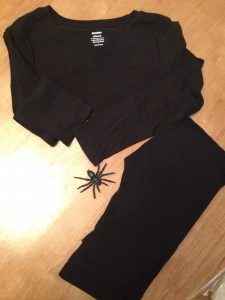
Long sleeved black shirtspider costume

Black leggings

2 pairs black panty hose or tights

Black gloves

Cotton batting

Black shoes or boots

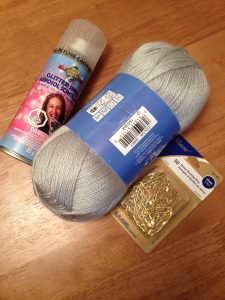
4-6 Safety pins

Needle

Clear plastic thread

Black thread

Glitter hairspray

Black eyeliner pencil or facepaint crayon

1. The first thing you need to do is make the arms/ legs. Because you already have 4 limbs you only need 4 more to make 8 for the spider. Take the black panty hose or tights out of the package and measure the desired length of the arm. Do this by holding having the person the costume is for hold out their arm vertically. Hold up the panty hose leg to the arm. Have the person gently hold the end of the toes to make this a little bit easier. Measure to the arm pit and then back up a little bit and make it shorter. You want the length of the hose to be slightly shorter than the arm because when you pin it on it needs to be able to move and not be bunched together. This will make more sense when we get to step 4 – but if the panty hose is as long as the arm it will get squished and could be uncomfortable (as well as it won’t look right).

spider costume2. Once you have determined the length of the hose you need cut it straight across. Use this first piece of panty hose as your example and measure them up to the other panty hose legs and cut to make the right length. This makes it easy to get them all the same length.

3. Stuff the panty hose with the cotton batting. Use enough to make it full and round but does not need to be overstuffed that it’s pulling on the hose. Once the hose is stuffed sew the end closed using the black thread. Repeat with the other 3 legs.

This next step is easiest if you can have the child put on the rest of the costume so you can pin and line up the arms.

4. Have the child put on the black long sleeved shirt and leggings. Using a safety pin, pin one of the stuffed legs onto the hip of the pants. Pin it with the sewed end on the hip. Do the same with the second leg on the other side.

5. Next, pin the third leg on the shirt about mid way up the torso. Do the same with the fourth one on the other side.

6. Take your clear thread and attach it to the end of one of the legs that is pinned to the hip (simply just knot the end of the thread and attach it securely to the end of the leg. Be careful not to bunch the leg on the end. I did a once through, little loop and knotted, very clean.
spider costume7. Take the thread and go up to the leg attached mid way up the torso and attach the two legs together with the thread. Leave enough length that the legs are separated, hang nicely and not bunched together. You want enough space between them for movement. Attach it securely. Then continue with the thread up to the child’s wrist.

8. Create a loop around the child’s wrist. Again leave enough length between the mid torso leg and the wrist so that the legs hang nicely, have enough room for movement and are not all bunched together. Have the child lift their arm vertically to measure this and to ensure you have the length you desire. Secure the loop with a slip knot, so that you can easily open and close the loop on their wrist and make it easy to take off. Whew! Now that you’ve done the one side mastered – do the same thing on the other side.

9. Once you have both sides attached with legs, unpin the bottom legs on the hips, unloop the thread on the wrists and slid it gently off the wrist. leave everything else attached! This makes it way easier when you’re putting it on for Halloween or a Halloween

barriemoderncleaners.com event. Gently slide the shirt over the child’s head and place it in a safe place (where it won’t get disturbed or played with) until needed for Halloween.

Putting It All Together On Halloween

The legs are the hardest part but once you have those pinned and ready the rest is a walk in the park.

10. Put the black leggings on first. Gently assist the child with putting on the black shirt. Pin the two bottom legs to the hips and slid the loops over the child’s wrists. Put on the gloves and tighten the loops as needed.

11. Do hair as desired in whatever style you choose, then spray with glitter hairspray.

12. With the black eyeliner pencil or facepaint crayon draw a spider web one of the child’s cheeks (this is not a must but just add that little extra to the costume.

13. Put on black boots or shoes and voila! you have your little spider all set to go!

spider costume


Tips for Taking Kids to the Calgary Stampede Parade with Ease

calgary stampede parade

Kicking off “The Greatest Outdoor Show on Earth”, the Calgary Stampede Parade is a world famous parade that showcases floats, bands, riders, cultural entries and much more. Led by the World Champion Stampede Show Band this two hour parade is not one you want to miss and is an important part of the Stampede experience.

Calgary Stampede ParadeWhen I first came to Calgary I was scared away from going to the Calgary Stampede Parade (attended by up to 400,000 people each year) by my boyfriend at the time. He told me horror stories about how you had to get up at 5 in the morning to go downtown and claim your spot so you had a decent place to view the parade – which started at 9. The whole idea of going down that early and waiting around for the parade for hours just did not appeal to me, no matter how much I loved parades, so I never went.

And I definitely could not imagine getting up that early and doing that with kids! So it’s ironic that it wasn’t until I had kids that I started going to the Stampede Parade. My oldest was 8 the first time we went, and the twins were 2. I really wanted to go and I was tired of waiting around for someone to come with me and being scared by the prospect of not being able to find a spot to sit.
The Magic Formula

Calgary Stampede ParadeA few years earlier my sister had been in town and had gone to the parade with her girlfriend who lived here in Calgary. Her girlfriend had discovered a ‘secret formula’ that allowed her to go down to the parade at a reasonable time and still get a decent spot to sit and view the parade – with her kids and without fighting the crowds; so I took a chance and tried her method to take my kids to the parade without having to go down for 5 am (which honestly is ridiculous). Sure you can purchase bleacher seats and show up whenever you want but these tend to be expensive and few, as 80% of the route is free seating.

It worked beautifully. Not only did we get super spots, right on the curb to view the parade, we only had to wait for an hour or so before the parade came our way (and there is pre parade entertainment starting at 7:30 am) – so it was super easy to keep the kids entertained and engaged until the parade started. Honestly it was fantastic, the kids loved the parade and I was so glad that I had taken a chance and went.

Now we attend the parade every year using this technique that well, yes I am going to share with you, as well as these 6 other tips to make your Calgary Stampede Parade experience with kids not only memorable but easy and fun for all.

7 Easy Tips for Taking Kids to the Calgary Stampede Parade

Pack a Healthy Lunch & Snacks – a well fed kid is a happy kid and you are a happy parent. I always pack lots of snacks and a lunch for everyone so that nobody gets cranky from being hungry. Yes there are places downtown where you can purchase food, but the pickings may not be the most healthy and lines will be long. If you bring your own not only can you choose foods that you want your kids to eat (and they enjoy) but they can eat when they’re hungry and you don’t have to go chasing after food or make them wait.

Calgary Stampede ParadeBring Folding Chairs – you may find these a bit challenging to carry with the kids but believe me it is worth it (and as they get older they can carry their own chairs). Watch the parade in comfort as sitting for two hours on the curb can make your butt pretty sore. The kids will likely be up and down from their chairs but that’s ok, still make sure everyone has their own as everyone will be more comfortable. They are also great space markers if you have to zip to the bathroom or run and grab something and don’t have another adult to leave behind to ‘guard the spot’.

Get into the Spirit of Stampede (and get the kids excited about it) – dress for it! Grab cowboy hats and boots, jeans and button down shirts and wear them to the parade. Kids gear is not that expensive or you can buy second hand. The kids will love dressing up and it’ll build their excitement and interest in what’s happening.

Bring Hats, Suncreen and Water – it can get very hot along the parade route and you are sitting there for at least two hours. Make sure you have full water bottles for everyone, hats (cowboy style of course) and sunscreen. Some places along the route provide some shade then turn into sun or vice versa so be prepared.

calgary stampede paradeDress in Layers (or at least bring a sweater and raincoat) – my mother always taught me to be prepared and that you never go out the door without your raincoat, even when the sun is shining brightly (we all know how fast Calgary weather can change). It also tends to be cooler in the morning as you are waiting and the parade starts and much warmer by the time the parade is over. If you bring a few layers it allows you to put on and take off as needed so that your body temperature is comfortable during the parade.

Pick Your Spot at the end of the Parade Route – this is what I do every year and we find a really good spot curbside for the kids. We drive down and park near the end of the route, getting down there by 9 in the morning, and we never have an issue getting a spot. Now this year they have thrown me for a bit of a loop because they have reversed the parade route – going backwards to what they usually do – so this throws a bit of a glitch into my plan, but the same concept will apply. We find our spot at the end wait maybe an hour for it to start (doesn’t that sound way better than 5 am) and the parade is finished on our end by noon.

Bring backpacks and/ or a wagon – you’re probably wondering how you’re going to carry all this stuff. When the kids were smaller I would bring a large backpack that I put everything in and a wagon for the chairs. As they got older though they would bring their own backpacks and carry their own chairs (seriously start them early and it will become second nature to them – when we went to Florida this year there were times I carried nothing because everyone could carry their own stuff, it was fantastic).

The parade really is a wonderful experience and can easily be enjoyed with kids and by parents with these easy tips (one tip for parents if you want coffee bring your own the line ups for this coveted beverage are crazy!)

Calgary Stampede Parade Combo

It is not one to be missed simply because you’re concerned about the crowd or getting a spot, these can be easily navigated. Really everyone is down there to have fun and enjoy the parade. So as long as everyone is mindful, patient and polite the Calgary Stampede Parade can be added to the memory books as a positive experience and one that is enjoyed year after year.

Calgary Stampede Parade

Have a tip you use when taking your kids to the parade? Share in the comments below.

Thinking of taking the kids down to Stampede grounds? Check out these tips to get the most out of your day, have fun and keep everybody happy.

How to Celebrate Valentine’s Day as a Single (and Love It!)

celebrate valentines day as a single

Valentine’s Day… ugh… as a single this may not be a holiday that you readily look forward to. Yes you can get into the chocolate (especially when it goes on sale the day after Valentine’s) but honestly a day full of romance and love might make you just want to gag.

Honestly though, Valentine’s Day is a day about love – all kinds of love. Yes romantic love seems to be very much in your face – thanks to all the marketing out there – but love comes in many forms. Love for friends, family, kids, pets and you. Yes YOU.

Self love is the most important thing because that is where love begins. When we love and take care of ourselves we are then able to give and receive love from others. This is not a narcissistic or selfish act, it is simply an act of self care and kindness. Loving ourselves first helps us remember where our power is and helps us to set healthy boundaries with others.

So as a single instead of getting bogged down about not being in a relationship, embrace this day of love and use it to celebrate, love and treat yourself. Create the day to make it all about celebrating and loving you!

13 Ways to Celebrate Valentine’s Day as a Single

  1. celebrate valentines day as a singlego for a manicure or pedicure – manicures and pedicures are about more than just the polish. They provide skin care, exfoliation, relaxation, increased blood flow.
  2. go for coffee – head out to your favorite coffee spot and enjoy your favorite coffee. Around Valentine’s Day many coffee spots offer some kind of yummy decadent Valentine themed drink (like Starbucks has molten chocolate). Take your favorite book and enjoy a little me time.
  3. take a warm relaxing bath – I don’t know about you but this is truly a treat for me. I often think about having a nice warm bath but often find life gets in the way and it becomes last on my list. On Valentine’s make it a priority. Add in some epsom salts, a few drops of lavender essential oil and your favorite drink (perhaps a glass of wine or hot chocolate) and sink into it.
  4. go to a movie – you may have some hesitations about going to a movie by yourself, but I actually love it and it has a lot of advantages. How much talking do you do in the movie anyway? I also find it quite freeing when no one will go with me to Bridget Jones Baby and I don’t have to wait for or find anyone to go with me.
  5. celebrate valentines day as a singledo something you love (but don’t normally do) – what is that one thing that you absolutely love doing and don’t often get to? Today is the day to make it happen. So set it up and go for it.
  6. write a list of all your passions – often we get busy with life and forget what we’re really passionate about. Take some time today to write down all the things you’re passionate about. Then stick them on the mirror to remind you!
  7. buy yourself flowers – you don’t always need to wait for someone else to give them to you, (and can get depressing when you do). Go ahead and pick your favorite and bring them home. Sonia Choquette, renowned author and spiritual teacher, often says that buying flowers for yourself is good for the soul. I also find it quite empowering! and love how it brightens up and brings life and beauty into my home.
  8. make (or buy) yourself some chocolate – treat yourself to this yummy treat you can easily make at home and do it on Valentine’s Day – ( if you’re buying them – don’t do it the the day after when it goes on sale! (though you can do that too). If you’re not a chocolate fan make yourself another decadent Valentine’s treat and indulge a little.
  9. hang out with a friend or loved one – whether it be a neighbor, friend, co-worker, etc. invite them for lunch, go grab a coffee or a walk. Spending time together will benefit both of you.
  10. sugar free valentines treatsgive a valentine’s card to a non romantic friend – giving to others can make you feel good and bring a smile to someone else’s day. Give a valentine to a friend, neighbor, co-worker or maybe someone you don’t know, like the elderly lady you see everyday at the bus stop or the barista who makes your coffee.
  11. give yourself a Valentine – this may sound a little silly but actually has great benefits. Write yourself a note/ valentine not only saying Happy Valentine’s Day but list all things that you love and appreciate about yourself. Then put it in the middle of the kitchen table for you to open up first thing. This may sound a little silly but we often forget or don’t recognize the things in ourselves that are really great! This will not only make you feel good but is a great reminder of why you are fantastic.
  12. try something new – you know that thing you’ve always wanted to try but didn’t have the time or kept putting it off. Today’s the day to make it happen! Participate if you can today. If that’s not possible take action and sign up, register or inquire to get the ball rolling.
  13. buy yourself some sexy underwear – whether you are a man or a woman you deserve underwear that makes you feel good about yourself. Make it fun and get some Valentine panties or boxers and wear them on Valentine’s just for you.

When you’re single Valentine’s Day does not have to be a day of depression and drudgery. It is a great opportunity to take some time to celebrate and look after you! Treat and indulge in yourself and remember how great you are. It’ll give you a whole new outlook on the day!

These are only a few ideas that you could incorporate on Vday to celebrate you. What other ideas would you add?


17 Decadent Sugar Free Valentine’s Treats

sugar free valentines treats

Sugar free Valentines treats sound like an anomaly. A dream perhaps that one can indulge and enjoy the decadence of the day and not feel guilty later. Valentine’s Day is another one of those holidays where sweet indulgences abound. Even though it is only one day, it is hard to resist all the sugary treats, especially the chocolate. You may find yourself often saying no thank you when you really just want to bite into that chocolatey something!

Valentine’s Day does not have to be that way! It is possible to indulge with sweet treats (chocolate and otherwise) that are not only sugar free but actually good for you.

When we went sugar free at our house there were two things I was not going to compromise. One was tasty food, if we were eliminating sugar then the food still had to taste delicious! not bland or like cardboard. The second, was that we were still going to celebrate and enjoy the holidays (including the food) – from Christmas to Easter – and no one was going to be denied yummy treats or feel like they always had to say no thank you.


Shop Family Organizers at Calendars.com Today!

So for each holiday I have either transformed our favorite recipes or sought out new ones – which is fun because I like to experiment, and compiled a list. The problem is, I usually want to make them all but realize that that is just unrealistic. So I pick a few favorites and try a few new ones. (It’s so hard to choose!) Thanks to all the wonderful bloggers out there (and some of my own recipes) I have a fantastic list of sugar free valentine’s treats and indulgences. Easy to make and enjoy guilt free!

Sugar Free Valentine’s Treats

At Valentine’s the popular treats seem to include either chocolate or raspberries, which is not such a bad thing, but I also like a little variety, so there’s a nice mix of sweet treats that would easily fit into the Valentine’s theme. Whether you’re treating your love, your kids, your friends or just for yourself it’ll be hard to choose which one to make first!

sugar free valentines treats

Photo credit: Brenda Bennett Sugar Free Mom

Raspberry Cheesecake Truffles

sugar free valentines treats

Photo credit: Brenda Bennett Sugar Free Mom

White Chocolate Coconut Fudge

sugar free valentines treats

Chocolate Dream Pie

sugar free valentines treats

Strawberries and Cream Gummies

sugar free valentines treats

Beetroot Red Velvet Cheesecake

sugar free valentines treats

Chocolate Cherry Tart

sugar free valentines treats

Coconut Panna Cotta

sugar free valentines treats

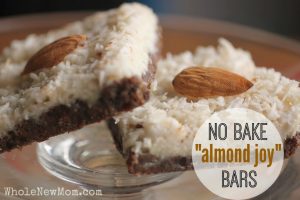
Almond Joy Bars

sugar free valentines treats

Chocolate Dipped Strawberries

sugar free valentines treats

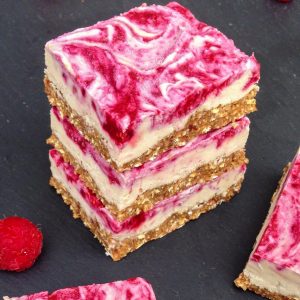
Vegan Raspberry Cheesecake Bars

sugar free valentines treats

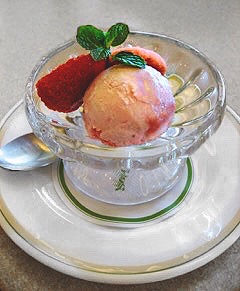
Strawberry Ice Cream

sugar free valentines treats

Caramel Nut Slice

sugar free valentines treats

Raw Chocolate Raspberry Cheesecake

sugar free valentines treats

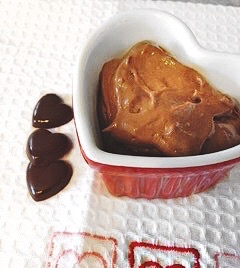
Chocolate Pudding

sugar free valentines treats

Homemade Chocolates

sugar free valentines treats

Red Velvet Cake

sugar free valentines treats

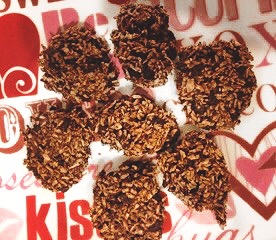
Chocolate Macaroons

Hard to choose isn’t it? Which one are you going to try first?

Thanks to all who contributed to this post! Brenda of Sugar Free Mom, Krissy of Pretty Wee Things, Megan of Detoxinista, Adrienne of Whole New Mom, Jess of Choosing Chia, Sara of I Quit Sugar and Maria of Maria Mind Body Health.


valentines day

How to Make Chocolate Dipped Strawberries (with homemade chocolate)

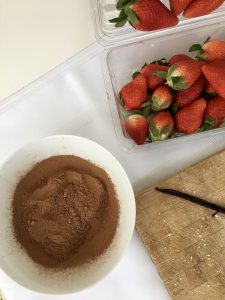
chocolate dipped strawberriesChocolate dipped strawberries are one of those simple decadent treats that are easy to make and delicious. Often paired with champagne and Valentine’s Day they always give me the feeling of richness and luxury.

Imagine… the red juicy strawberry dipped into firm dark chocolate. As you bite into it, the taste sensation bursts in your mouth with the sweetness of the fruit and the richness of dark chocolate. There is just something about that combination.

chocolate dipped strawberriesEven though chocolate dipped strawberries have this air of luxury and decadence they are actually very easy to make and you can usually make a batch in about 15 minutes. They are also very healthy for you! As strawberries are high in Vitamin C, potassium, folate, fiber and antioxidants, while dark chocolate is high in maganese, iron and copper. And if you make your own chocolate as well, like I do, you can control the amount and type of sugar that goes into it as well! (I always use natural sweeteners, with honey being my top choice).

I often wonder if they’re so good for us why I don’t make them more often? Perhaps it is because they have this air of luxury (in my mind) and I really consider them a treat. (And why don’t we treat ourselves more often? – that is a whole other conversation)

So let’s get to it!

How to Make Chocolate Dipped Strawberries at Home (with homemade dark chocolate)

  1. Line a cookie sheet with parchment paper and set aside.
  2. Rinse and pat dry the strawberries. Two tips here – one is to make sure you have fresh firm strawberries, second is to make sure that your strawberries are very very dry after you have rinsed them. If there is any water or moisture on them then the chocolate won’t stick.
  3. chocolate dipped strawberriesPrepare your homemade dark chocolate. I use this very simple method to make my chocolate. No stove involved just a kettle, boiling water and two bowls. It is important to be very careful when making the chocolate that you do not get any water in it as it will change the mixture and your chocolate wont’t turn out. As I said I love using honey as my sweetener but in this case I would use pure maple syrup or liquid stevia, as sometimes the honey does not mix as well and will separate when it sets.
  4. Dip your strawberry into chocolate. Grab strawberry by the green leafy top and dip into the chocolate. Turn and twist your strawberry to get the coverage you want on all sides. Gently place your dipped strawberry on your parchment paper lined cookie sheet and dip the next strawberry.
  5. Once you have dipped all your strawberries place the cookie sheet into the fridge. This helps your chocolate set faster.
  6. If desired, you can dip your strawberries in the chocolate a second time for a thicker covering, better coverage or just more chocolate! You do need to wait until the first layer is set and firm before dipping the second time.
  7. Set back into the fridge until chocolate is set.
  8. Serve and enjoy!

**if you want to get really fancy you can make a batch of white chocolate and drizzle it over the dark chocolate. You would have to let it set again and wait a little longer but it looks great aesthetically, which is great to impress guests if you’re having a party or event.chocolate dipped strawberries


How to Create a Hot Chocolate Bar

hot chocolate barDecadent hot chocolate, topped with yummy whip cream, drizzled with chocolate…. something you usually only see at your local cafe or coffee shop.

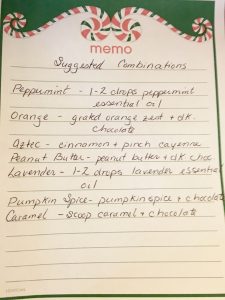
But imagine creating this in your own home, or creating some other tasty combination. Chocolate orange, Lavender White, Peanut butter… oh so yum! This is the beauty of a hot chocolate bar – a simple but yummy idea that enables you to create these wonderful, delicious combinations to enhance your hot chocolate experience.

The basis of a hot chocolate bar is that you make a plain hot chocolate and then have a number of different toppings and combinations to choose from to add to your hot chocolate that make it… oh, just a little more. Good hot chocolate can certainly be enjoyed plain and definitely warms you all the way down to your toes, but these additions make it a little more lavish, make it a little more fun.

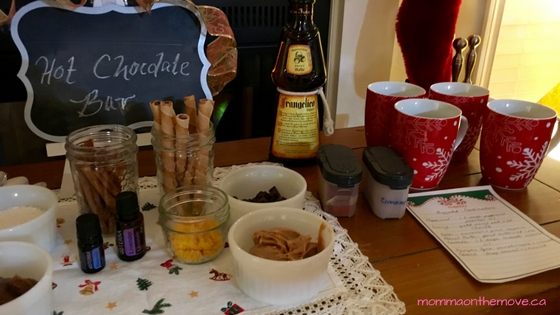
hot chocolate barIt is also super easy to set up. It does not take a lot of time or effort, the most effort you’ll have to make is to decide what yummy toppings you are going to use! I did this twice over the holidays, once for a ladies only night at my place and second as a fun treat for my kids and nieces while away over Christmas. Everyone loved it! It was super fun. We all had half cups at a time experimenting with different tastes and flavors. I had created a list of suggested combinations but of course you could pick and choose whatever you liked. Plus just looking at the spread set out was not only nice to look at but made you want to try them all!

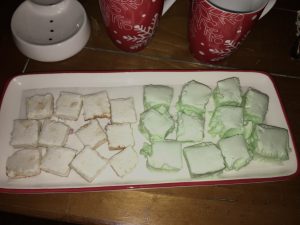
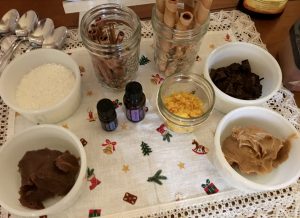
We had chocolate pieces, peanut butter, orange zest, hazelnut sticks, homemade marshmallows (mint and cinnamon), cinnamon sticks, coconut and some essentials oils like peppermint and lavender. We even had a little ‘adult’ version – a splash of Frangelico, if desired for those over 18.

How to Set Up Your Own Hot Chocolate Bar

Start out with your own base hot chocolate – you can either do this by the cup therefore creating and meeting people’s dietary needs, like dairy free, sugar free or use the just add water powder mix. Or you can make a big batch of your favorite hot chocolate in the slow cooker. I have done it both ways and both have their advantages.

Pick your toppings – there are so many to choose from!

  • chocolate chunks
  • orange zest
  • peppermint stickshot chocolate bar
  • 1-2 drops of peppermint extract or essential oil (if using essential oil you’ll need to use very little but depends on your brand. Also make sure the oil is ok for taking internally
  • coconut cream (for the dairy free) or whip cream
  • peanut butter – word to the wise if using this topping advise your guests that less is more with this one as too much pb makes it sink to the bottom and essentially gets wasted
  • shredded coconut
  • marshmallows
  • cinnamon sticks
  • hazelnut sticks
  • dash of cinnamon
  • cardamom
  • cayenne
  • lucuma
  • mesquite
  • or….

Add desired toppings and enjoy! Use suggested combinations or mix and match to make your own.

A hot chocolate bar literally takes about 5 minutes to set up. When I hosted the ladies it was the easiest and shortest prep I ever had to do for a party. And I loved how visually appealing it looked before everyone dug in.

hot chocolate barThis is also something you can set up in your home on the counter somewhere and leave for a bit for people to enjoy. Of course you’d have to put some of the items into the fridge when not in use but for the most part many of them can stay out.

The thing I love about the hot chocolate bar is it can easily be sugar free dairy free and be very yummy and enjoyable. When my kids participated out of all the choices I set out there were only 1 or 2 that they had to avoid. The rest was far game. So it was easy for them to try different things, experiment and enjoy the full experience.

I also love the versatility of it. You can create one for parties, after tobogganning, weddings, birthdays, after skating – and because of the variety of toppings there’s something for everyone!

If you love hot chocolate then you’ll be super excited for the upcoming YYC Hot Chocolate Fest which I am proud to be a part of this year! Watch for more details to come!

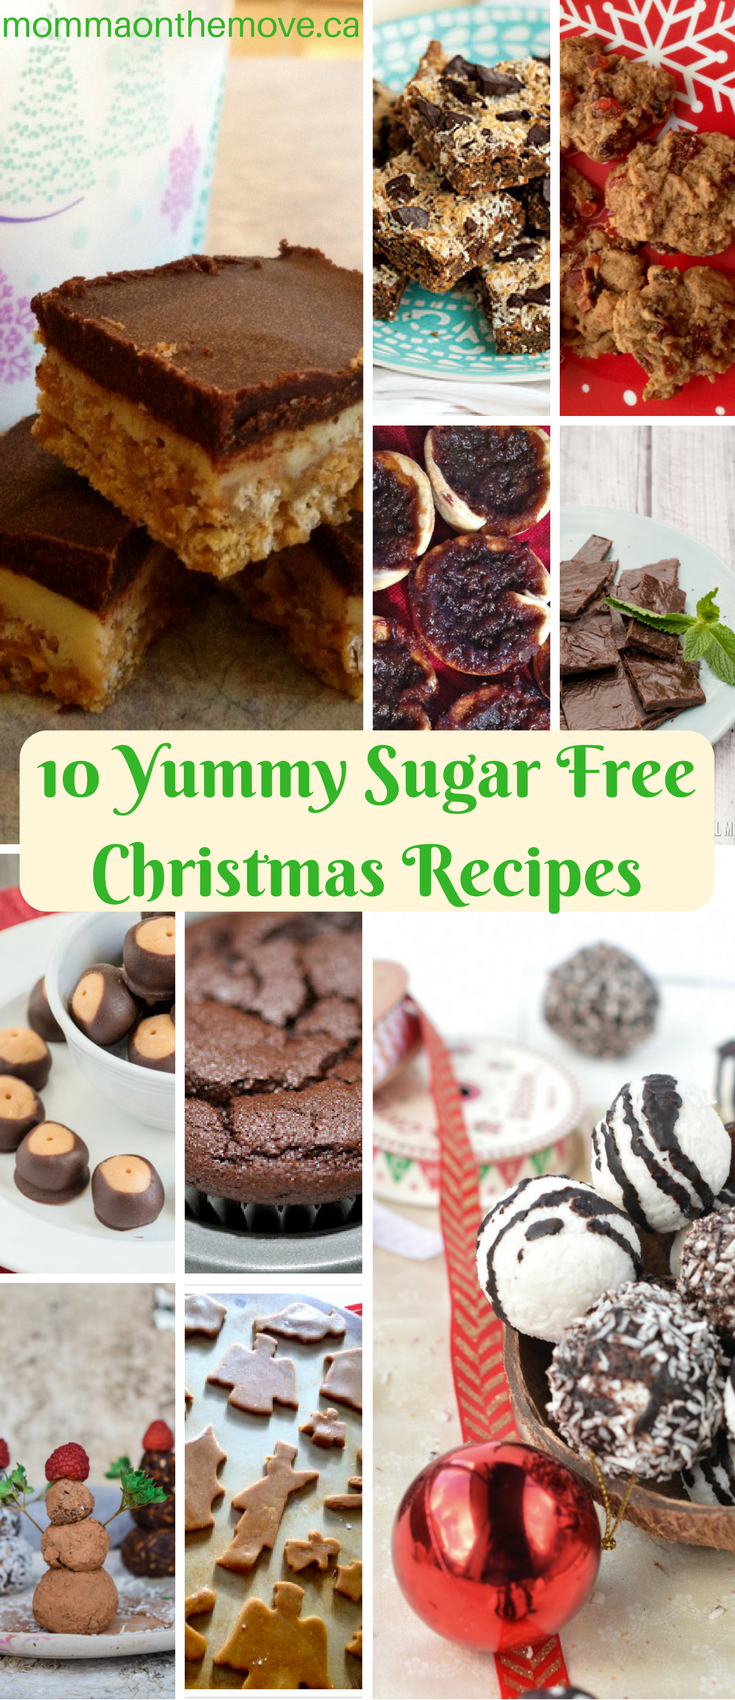
10 Yummy Sugar Free Christmas Recipes

sugar free christmas recipes

Christmas is that time of year when delicious treats and baking abound. Everywhere you go, there is something else to indulge in, something else that tempts you. You try to resist, but …

The good news is there’s no need to deny yourself. You can enjoy delicious sweet treats guilt free this Christmas by creating one (or more) of these yummy sugar free Christmas recipes. Super easy to make and all naturally sweetened they are actually healthy and good for you – so you can feel good about what you are eating and indulge guilt free.

sugar free Christmas recipes

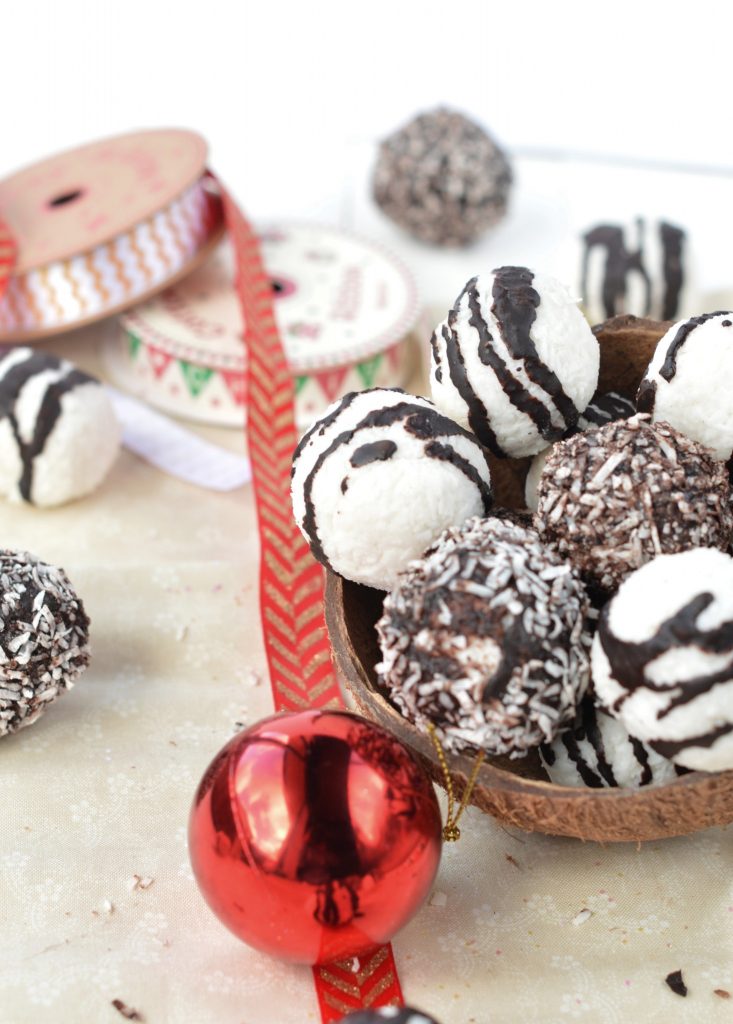
Coconut Balls – Healthy Christmas Truffles

sugar free Christmas recipes

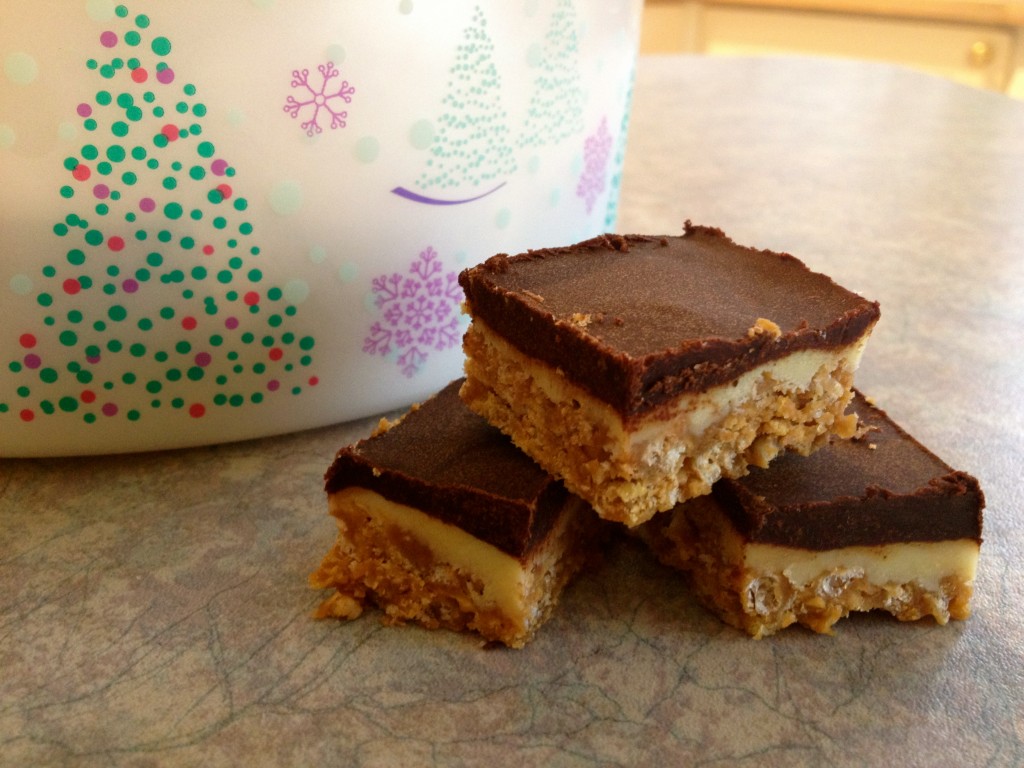
Peanutty Blondie Bars

sugar free Christmas recipes

Chocolate Quinoa Cupcakes

sugar free Christmas recipes

Chocolate Peanut Butter Cereal Squares

sugar free Christmas recipes

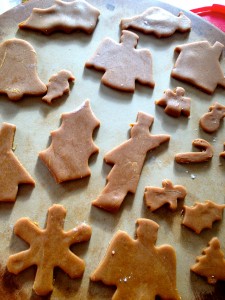
Gingerbread Cookies – A Traditional Cookie

sugar free Christmas recipes

Classic Sweet Butter Tarts

sugar free Christmas recipes

Best Paleo Buckeyes

sugar free Christmas recipes

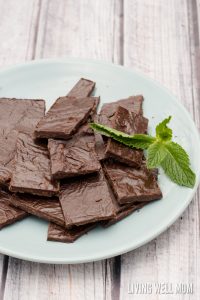
Easy Homemade Paleo Mint Dark Chocolate

sugar free Christmas recipes

Festive Gingerbread Protein Bites

sugar free Christmas recipes

Hermit Cookies – A Soft Delectable Christmas Cookie

Do you have a favorite sugar free Christmas recipes? Share in the comments below.

10-yummy-sugar-free-christmas-recipes-pinterest

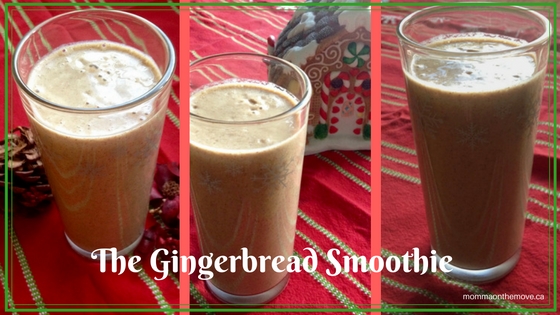
Gingerbread Smoothie – A Christmas Smoothie to Indulge In


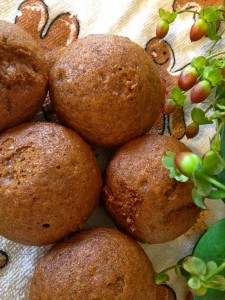
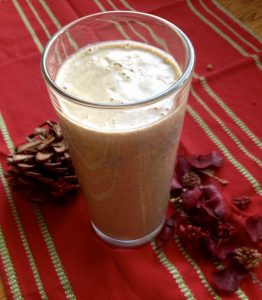
gingerbread smoothieI love gingerbread and thoroughly enjoy all the different possibilities during the Christmas season. Last year I discovered this yummy gingerbread smoothie!

Last Christmas I had the unique opportunity and pleasure to spend it with my parents all by myself. No kids, no siblings, just me and Mom and Dad. It was a real treat to just spend time with them and not have to compete with everyone else. Because no offense I love and enjoy the company of all those other people but the visit becomes different.

gingerbread muffinsDuring this relaxing and enjoyable time with them I decided to get creative and experiment with a few festive smoothies. Many of the favorite holiday flavors like orange cranberry, peppermint, gingerbread. Why not? I had the time and it was the holidays after all.

This is when I discovered this yummy gingerbread smoothie! I had already explored gingerbread waffles and gingerbread muffins and knew that a smoothie would be a wonderful addition to my compilation.

So as I do, I hopped on the net and researched some gingerbread smoothie recipes. I found a few that I liked and in the end ended up combining ideas and creating my own.

Gingerbread Smoothie

1 cup non-dairy milk (almond, coconut, etc.)

1-2 tbsp. barley malt

1/2 tsp. cinnamon

1/4 tsp. fresh gingergingerbread smoothie

1 tsp. vanilla

1 banana

1 tbsp. chia seeds

sprinkle of nutmeg

Place all ingredients except the barley malt into the blender. Blend until smooth. Now add the barley malt a little bit at a time. If you like the flavor add closer to 2 tbsp.; if you want it more sublte then just add 1. Blend well, pour into glass and enjoy.

Note: Make the smoothie and allow it to sit for about 30 minutes. This allows the flavors to infuse and gives you a much stronger flavor than if consumed right away.

Serves 1

The smoothie was a hit! My parents and I enjoyed it quite a bit and I love the fact that you have chia seeds in there. They have many health benefits such as high in nutrients such as fiber, protein, antioxidants and low in calories!

I did not drink mine quickly as I was multi tasking at the time doing a bunch of different things and this is how I discovered that if you let it sit the flavors become stronger. Because honestly at first sip I thought it was a bit weak in the gingerbread flavor area.

orange cranberry smoothie

Of course after the time at my parents I came home and made it for the kids. Also a hit with them as well – though their favorite was the Orange Cranberry Smoothie I had created.

Glorified Turkey – Quick Easy Turkey Leftovers

turkey leftoversOne of the many things I love about Thanksgiving is all the turkey leftovers! There are so many yummy recipes out there to use up my turkey. In fact, I usually buy a turkey that’s a little bit larger than we need just to make sure we have some leftover.

First of all I love just having leftover turkey, gravy and mashed potatoes for meals during the week. I also love turkey sandwiches, especially hot turkey sandwiches (smothered in gravy – yum!) Then there’s all the fabulous turkey recipes I have to use up the rest.

Our absolute favorite turkey leftover recipe is definitely Turkey Crepes, which we usually make a on Christmas Day in lieu of the big dinner. We decided to do this years ago when we experienced a super simple Christmas and re-examined what we really wanted at Christmas – what was the most important. Making a simple yet yummy meal frees me up in the kitchen and allows me to play and enjoy on Christmas Day. But I digress, we also love Glorified Turkey which is a quick easy turkey leftover recipe that’s ready in 30 minutes. Just add rice or mashed potatoes and your favorite veg and you have a fast healthy meal.

Glorified Turkey

Glorified Turkey is a creamy hearty meal that uses mushroom soup, onion and cheese and creates a delectable meal. I have created a dairy free version, which is super yummy, but you can easily substitute dairy in if you wish.

turkey leftovers2 c. cubed turkey

1/4 c. flour

1/4 c. Earth Balance Vegan Spread

2/3 c. almond milk (or non dairy milk of choice)

1 – 10 oz. can *mushroom soup

1 c. Daiya shredded cheddar

3/4 tsp. salt

1/8 tsp. pepper

1/2 grated onion

1 can or sliced fresh mushrooms

sprinkle of paprika

Coat turkey pieces with flour. Put coated turkey into medium sized casserole dish with melted Earth Balance and heat in 325 F oven while preparing the rest.turkey leftoves

In a medium bowl mix together almond milk, soup, cheese, salt and pepper.

Grate onion and slice mushrooms. Add onion and mushrooms to heated turkey and stir well. Pour liquid mixture over turkey and sprinkle with paprika.

Bake at 325 F for 30 minutes. Serve with rice or mashed potatoes and your favorite vegetable for a perfect meal.

Serves 4

*I usually make my own mushroom soup, which is dairy free and fabulous btw – 3 kinds of mushrooms, creamy and thick. I also love that the recipe has lima beans in it. But you certainly don’t have to. Canned soup works just as well depending on your own dietary needs.

The kids love this dish! In fact we had it the other night and Luke expressed how he “Loved this dish!” and asked for some more. He even hoped there was leftovers and was asking if he could have that for supper the next day.

You can also get a little creative with this dish by using a variety of cheeses – mix of dairy free mozza, cheddar and even gouda. If you enjoy mushrooms you can increase the amount to suit your desire. The thing I love about this recipe is that it is a totally different taste from the regular turkey dinner and leftovers and how quick it is to make!

Halloween Dinner Ideas – Monster Brains

halloween dinner ideasEach year for Halloween I love to dive into the food and all the creative ideas there are. There are so many fabulous ideas on how to create spooky, fun and healthy meals and snacks that I often have a hard time picking just one.

We usually have an entire day of Halloween meals and snacks, starting with pumpkin pancakes in the morning in fun Halloween shapes, then boo-nanas for snacks and something creative for supper. In the past I have made dinners such as monster face pizzas and hot dog mummies.

Last year I happened to be at my girlfriends house just before Halloween and she had this cooking show on tv that was highlighting some spooky Halloween dinner ideas. Of course they had lots of fun things going on but the one that stood out for me was the idea for Monster Brains. It is a super easy creative idea to make spaghetti and meatballs and give it a Halloween twist. I loved it! and decided right then that I was going to make it for Halloween dinner.

I was super excited as it was not only going to be fun but quick and easy to make. I am all about getting creative but sometimes I need creative to be fast!

Monster Brains

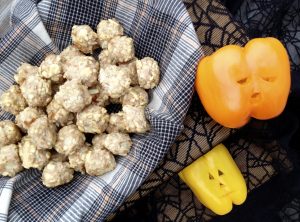
halloween dinner ideasred, yellow, orange peppers (number of peppers depends on how many people you’re serving as it is 1 per person)

cooked spaghetti

cooked meatballs

tomato sauce

Cut off the top of your pepper like you would when carving a pumpkin – around the top in a circle so you can take the lid off. Clean out the seeds.

Cut a face on the front of your pepper. Design it any way you like. You can go with fancy but that takes more time! I went with simple triangle eyes, nose and slit mouth.

Bake meatballs in oven (I make my own and premade these the day before and just reheated them). Cook spaghetti according to package directions. Rinse spaghetti with hot water in a colander. Fill each pepper with spaghetti and meatballs. Top with tomato sauce and place ‘lid’ of pepper on top. Have some of the spaghetti spilling out the sides for effect. Voila! one spooky monster brain supper!

halloween dinner ideas

My kids of course absolutely loved these and are already asking me if they can have that again for Halloween dinner this year. We may… or I may get creative and do something else!halloween dinner ideas