A Coffee Smoothie…yes!

warm capuccino-saidaonlineThere’s nothing like a good cup of coffee. That fragrant aroma wafting through the air, the warmth of your mug as you gently lift it up and breathe, pause, then take a sip. Ahhh…I love coffee. And lately I have been drinking a lot of it. Well a lot for me, comparatively to other people I really don’t drink much at all. I drink maybe a cup a day, and there are some days none at all, but for a girl who used to drink one cup of decaf maybe once a week, a full caffeinated brew every day is a lot!

It’s all those fantastic flavored coffees that have done me in, toasted coconut, cinnamon pastry. But they don’t come in decaf and it is the caffeine that sends me flying, high on energy and sometimes a little shaky, probably not so good for me. Yet when the german chocolate cake is calling…

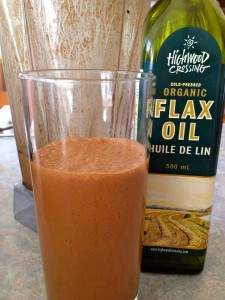
IMG_4721Luckily there’s a smoothie for that 🙂 Yes a way to still get my coffee fix, cause really I think what I am looking for is the flavor, and make it a more healthy choice and experience. It consists of all kinds of good things, like flax seed, cacao, honey and almond milk, with that little splash of coffee to finish it off.

It is quite yummy and satisfying. In fact, I made it for a friend of mine a couple of years ago, an avid coffee drinker and an avid smoothie avoider, and he loved it! He now enjoys them regularly. I also shared it with my mother this past weekend who is very much a smoothie drinker and loves her coffee, so it wasn’t really a hard sell, but she loved it and immediately asked for the recipe.

The recipe is quite simple, combining all the ingredients in the blender, mix and ready to serve. It can easily be made ahead and drunk later in the day, or right away, as I am sure you will not be able to wait.

Chocolate Mocha Smoothie

3/4 c. unsweetend almond milk

2 tbsp. cacao powder

1-2 oz. coffee (you can use decaf if you prefer, or any flavored coffee that you feel goes well with chocolate)

1 tbsp. flax seed oil

1 tbsp. vegan protein powder

1 tsp. honey

optional: 2 ice cubes (this thickens up your smoothie if prefered)

Put all ingredients into a Vitamix blender. Mix until smooth. Enjoy!

Valentine’s Day Martini

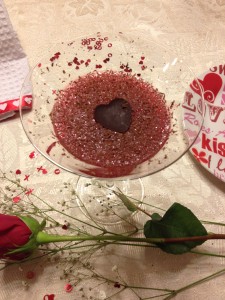
IMG_4677As some of you know, I am really into martinis these days. It started last fall when my love of pumpkin helped me to discover a recipe for a pumpkin martini. I wasn’t a huge fan of martinis at the time as I had found that most of them were kind of sour, or way too strong for my liking. But I had tried a few, my youngest sister being a fan of them, her favorite being the Cosmo.

The pumpkin martini was absolutely divine! It became my new favorite and as a result I decided to venture out and try some other martini combinations. I’ve enjoyed Lavender one, Gingerbread, and a Poison Apple to name a few.

And now every time we approach a holiday, I am on the hunt for a new one to try that fits with theme of that holiday. Valentine’s Day was no exception, so earlier this week I set out searching the internet for a fabulous ‘Valentine’s’ recipe to try. There were so many to choose from, many with a common theme of red and some kind of fruit, either raspberries or strawberries. Many I have earmarked and saved to my Pinterest board for taste testing at a later date.

The Raspberry Chocolate Kiss Martini was the one that caught my eye and won the privilege of being ‘tested’ for this Valentine’s. Originally created by chef Michael Schulson, I had a few adjustments to make but knew it could be done. First off I had to figure out how to make my own simple syrup, which is basically sugar and water. I had thought before that I could probably do this with agave nectar instead of sugar and create the same thing, but had yet to try it. Well now was the time and I am happy to say it worked very well.

One thing I puzzled over though in the original recipe was the chocolate part (or lack of in my opinion). The only thing that presented any chocolate at all was the cookie rim that went on the glass, not really what I would consider enough chocolate to merit chocolate in the title! So I experimented. I tried making the martini and sprinkling cacao nibs on top. Honestly that did not do much. Then I tried chocolate shavings sprinkled on top, that was better.

I experimented a little more, rimming the martini glass in chocolate icing, ahhhh…now we’re talking. I also tried dipping the rim in melted chocolate and then letting it cool and solidify before adding the martini mix. All, I found were very good solutions to the chocolate I felt was truly missing in this drink. Which is the best? That’s hard to say. I think you should perhaps try them out and then let me know which one you think is the best 🙂

This martini in general is fabulous, a very delicious fruity sweet drink. I do advise you to be careful though as the sweet easily masks the vodka in it and it goes down very smoothly!

So serve your sweet something a little different this Valentine’s, or baby just make one for yourself and enjoy!

Raspberry Chocolate Martini

*1/4 c. mint infused syrup

10 raspberries

2 oz. vodka

2 tbsp. cranberry juice

ice cubes

Chocolate options:

rim glass with chocolate icing or

dip rim of martini glass in melted chocolate, let cool or

sprinkle chocolate shavings on top of drink

Place raspberries in a martini shaker and shake till crushed. Add mint infused syrup, shake again. Now add vodka, cranberry juice and ice. Shake well until chilled. Pour into martini glass, sprinkle with chocolate shavings. Enjoy! If rimming glass with icing or melted chocolate do this step before pouring martini into glass


*Mint Infused Syrup

1/4 c. agave nectar

1 c. water

1 bunch mint

Place all ingredients in a small saucepan on stove over medium heat. Stir and heat until agave nectar has dissolved. Take off heat and let cool. Strain through a sieve, syrup is ready to use. May be kept in fridge in an air tight container up to 2 weeks.

And if you don’t have the ingredients to make the mint infused syrup, try adding 1 drop peppermint essential oil with 10-20 drops liquid stevia to sweeten.

Everything Chocolate

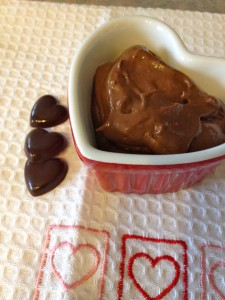
IMG_4653Rich dark chocolate melting in your mouth, delighting the palate as it brings your tastebuds to life and activates natural soothing in the brain, making us feel oh so good.

Chocolate dating back to the Aztecs and Romans, has long since been considered an aphrodisiac, a treat associated with love and romance. Women love it, men crave it. Not only is it a popular gift, but a popular treat as well.

It’s no wonder that during the week of Valentine’s Day, a holiday long associated with love and romance, 58 million pounds of chocolates are sold, being the third largest holiday in sales of this popular treat (Halloween being first with Easter as the second).

The good news is that chocolate is actually good for you, as it contains fat, produces natural opiates which soothe nerves and make us feel good, as well as natural chemicals that lower your risk of cancer and heart disease (sounding pretty good doesn’t it?) Chocolate provides even more health benefits when made with cacao instead of cocoa, both derived from the same bean but processed differently, creating a superfood (cacao) that is rich in vitamins and minerals (getting better and better all the time).

IMG_4647Chocolate is also one of those things that goes with and can be used in just about anything, creating a myriad of delights for the palate to enjoy, a sensation of pleasure and joy in our human experience.

Since I have discovered how to make my own chocolate at home, (ready in about 10 minutes this really is a quick simple and easy way to make chocolate), we have not only been able to enjoy more chocolate in our home, but also enjoy lots of great things around the holidays.

For instance, this Valentine’s Day, we will enjoy heart shaped chocolates, Chocolate Dream Pie, Chocolate Truffles and if the spirit moves me, I may even make Chocolate Cupcakes with chocolate icing of course (even better these recipes are sugar free and dairy free). I love doing it up around the holidays and seeing what kind of fun things I can create; and the kids look forward to it!

Making your own chocolate is very easy, all you need is cacao butter, cacao powder, vanilla and natural sweetener of your choice (such as honey, pure maple syrup, etc.) I have a detailed post on how to make chocolate, as well as one on possible additions or variations you could use to flavor or fill your yummy chocolates.

IMG_4655This chocolate mix is also great for making Chocolate Dipped Strawberries (simply dip fresh strawberries in warm melted chocolate before it sets) or using it for Chocolate Fondue.

Other chocolate delights I have discovered, whether it be for Valentine’s Day or other, are Chocolate Macaroons (could shape them into little hearts for Valentine’s), Chocolate Pudding (one with chia seeds, one simple chocolate), Chocolate Mousse, Chocolate Waffles, Hot Chocolate, Chocolate Smoothies and even Chocolate Marshmallows! And I love that they are all dairy free and naturally sweetened! On holidays, like Valentines, I often have a hard time picking only a few things to make 🙂

IMG_4658So now you know, you can live guilt free this Valentine’s Day and enjoy your chocolate; or you can venture out and make your own for yourself or to share with others (but you may not want to). Of course with anything, regardless of how good it is for you, everything in moderation (I know I just took all the fun out of it – but here’s the thing you can make MORE or try a new chocolate recipe, another version of chocolate).

So enjoy your chocolate with a great big smile this Valentine’s Day, and if no one gives you any, go get your own, it’s ok 🙂

*The majority of these recipes can be found on my blog or I have linked them to the appropriate site for you. Just click on the name and it will take you to the recipe. Enjoy!


Your Source for Superfoods Since 1995

Coconut Curry Chicken with Pineapple

IMG_3328I love barbequing! I love how it’s little dishes, less mess and usually very delicious! In fact, I enjoy barbequing so much that we usually bbq year round! Regardless if it is -30 or plus 30 C. (Thankfully it is not usually -30 C around here in the winter, but it is often below zero).

I know! You are probably thinking that this woman is crazy; but I’ve been out there in my winter boots flipping burgers or tending the steaks. Breath coming out in white whisps as it floats into the air. I never worry about the weather forecast or if it is ‘barbeque’ weather, as it is always barbeque weather for me!

It wasn’t until recently though that I actually learned to barbeque. Yes we were barbequing year round but it was my husband who was doing it. In fact I had never even made something as simple as the burgers! I would always mix the ground turkey or chicken and make the patties but never actually cooked them myself. I have no idea why I did this. Perhaps I thought it was the ‘mans job’, or perhaps it was just my way of diveying up the jobs, regardless up to a couple of years ago actually doing the cooking on the barbeque was a whole new thing to me.

Barbecue-gaz-1They say bbqing is an art and I would agree. Certain meats need lower temperatures and longer times, while others do better on a medium to high heat. I learned a little from my Dad and remembered what he said to do as I watched him barbeque over the years. And I did a little figuring it out myself. Overall I am a very good barbequer and I sometimes even take over that task when I am at my parents house!

The one thing about barbequing though, especially if you do it as often as I do, is variety. I believe there is more to barbequing than just burgers and steaks, so I like to explore other recipes are and what other things you can do. I have found that the barbeque has way more options for cooking on it then I originally thought, expanding my repertoire of dishes quite a bit. (Did you know you can do pizza on the barbeque? I did try it once, not so successfully mind you, but it can be done!)

A lot of barbeques these days come standard with rotisseries as well, which opens up a whole other path of options for you, such as roast chicken, roast or lamb. My mouth just waters at the thought of it….

One of my favorite recipes that I have discovered for the barbeque is Coconut Curry Chicken with grilled pineapple. Originally from Clean Eating Magazine, it is really easy, very moist and tastes delicious. It only takes a few minutes per side to cook and voila! dinner is ready. Just add rice and a nice salad (or other vegetable) and you have a complete delicious meal. The only trick is it does require a little bit of pre-planning as you need to marinate the chicken for a couple of hours before cooking it on the barbeque.

The kids love it and my oldest usually gobbles up two chicken breasts on his own (yes he may be a growing boy but he can also be a bit of a picky eater, he will not eat things he doesn’t like no matter how hungry he is). I find the pineapple slice on the top really makes it, the flavors going very well together.

So whether you feel like barbequing tonight or saving this recipe for warmer weather, you’ll want to give this tasty coconut curry chicken a try. Completely dairy free, sugar free and gluten free, it is a dish that will be enjoyed by all.

Coconut Curry Chicken with Pineapple

4 boneless chicken breastsIMG_3324

**1 1/2c. coconut curry marinade

1/2 c. unsweetened coconut

4 fresh pineapple rings

Place chicken in a large ziploc bag. Add coconut curry marinade and seal, squeezing out as much air as possible. Refrigerate for 2-6 hours.

In a non stick skillet, heat coconut on medium heat until lightly browned. Transfer to a plate to cool.

Turn BBQ on and heat to medium high. Lightly oil grate with olive oil (I find best is to brush on with heat resistant pastry brush). Remove chicken from marinade and pat dry with paper towel. Place chicken on grill and reduce heat to medium low (I find with chicken a little lower heat and a little longer time, keeps it moist and prevents it from drying out). Grill chicken until cooked through, about 3-5 minutes per side.

If you have room on your grill with the chicken place pineapple rings on and cook until lightly charred, about 2 minutes per side. If you don’t then you can do the pineapple at the end quickly once chicken is cooked.

To serve, sprinkle toasted coconut on chicken and one ring of pineapple on top of each  chicken breast.

Serves 4*

*I have found the marinade can easily accommodate 5 or 6 breasts and creates less waste

**Coconut Curry Marinade

2 c. coconut milk

2 tbsp. curry powder

2 tsp. sea salt

1 tsp. black pepper

In a medium bowl, whisk all ingredients together. Can be made ahead of time and stored in an airtight container in the fridge for a few days. Can be used on chicken, pork, seafood and vegetables.

It’s Green….eewww

IMG_4568Greens, greens, greens, one of the first things I hear when talking about diet is that we should eat more greens. There certainly is a variety to choose from like spinach, lettuce, kale, chard, dandelion, etc. all fall into this category. They are rich in fiber, vitamins (like vitamin C, K, E), minerals and have many disease fighting benefits.

But honestly, greens are not always that appetizing. Seriously, I can only eat so many salads, so many different ways and then my body is craving something else. A totally different texture and sweetness even. I don’t care how good for you they are, I get to a point when I cannot possible eat another leafy thing. (You’re with me aren’t you?) Salads can get boring even after you have come up with all different kinds of ways to spice them up! Whether it be nuts, dried fruit, salad dressing etc. You need a change!

So how do you get those oh so beneficial greens in on a daily basis? In fact vegetables in general sometimes I can find a challenge. They recommend 5 servings of veg a day and often I get to supper and may not have had even one.

What I have discovered is the magic of smoothies! They are a great way to get all kinds of things into your body in a quick, easy and yummy way. There are all kinds of great recipes and combinations out there that are absolutely delicious. And sometimes you may not even notice the ‘good stuff’ (like spinach) that’s in there because you can’t really taste it.

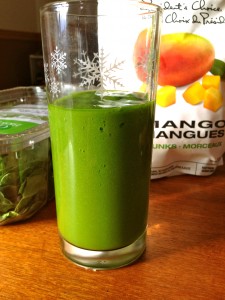
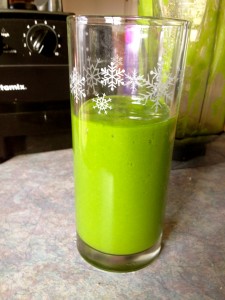
IMG_4309Every morning I make a delicious tasting green smoothie that includes a bunch of greens and some fruit to sweeten it up. That way first thing I am getting not only some vegetables, but some green vegetables right away! I make it religiously and even my kids love it and enjoy it as well, asking for some when I make it. (Score!) I miss it on the odd day that I do not make it, usually because I am out of some ingredient and haven’t gone to the store yet.

Now there are lots of variations on a green smoothie out there an honestly some of them are not very good. They look a gross colored green when mixed, they don’t taste that great, and though good for you I end up choking it down, trying not to bring it back up. Gross! Who wants to drink that! I don’t care how good it is for me.

IMG_4573I had tried one before that was cucumber, spinach, celery, parsley, lemon, banana and water. It was ok and I drank it, got the health benefits, but honestly it was not that tasty. And seriously if I am going to eat healthy then I want it to taste good to. I am not a believer in healthy having it taste like cardboard, or having to choke it down. Food is supposed to taste good, we are supposed to enjoy our food. It is one of pleasures of being on this planet and being human, food! So I did this first version for a while and then gave up, it just didn’t provide the taste I was looking for. So good for me or not, I ditched it. (Though for someone else this may be totally the kind of taste and smoothie you are looking for! To each his own right?)

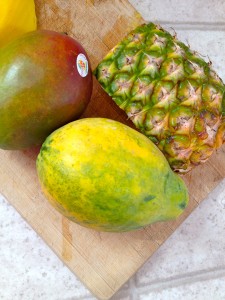
It was when I was in Hawaii a couple of years ago that I discovered my recent combination for a green smoothie. Spinach, mint, papaya and more this smoothie not only looked a lovely vibrant green it tasted absolutely delicious! I was sold. I wrote down the ingredients and came home to create my own. I played a little bit with the amounts, got it how I wanted and now everyday I enjoy this yummy, sweet, nice looking green delicious smoothie. I even have both my mother and sister (and sometimes even my Dad and that’s saying something because my Dad is not really a smoothie guy) enjoying this smoothie everyday. Once I shared it with them and they tasted it, they were hooked as well.

Now of course, I am going to share it with you, and I hope you love it! If you’re not a sweet kind of person it may not work for you but give it a go and see. Kids for sure will love it and it is such a fabulous easy way to get in those vegetables and fruits that we may not be getting in daily. Smoothies in general  have endless possibilities…. but that is another post.

Green Smoothie

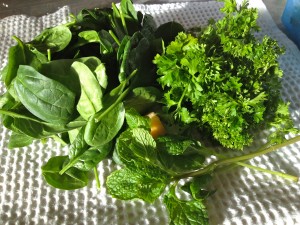
1 c. spinachIMG_4567

3-4 stems of parsley

1 sprig of mint

*1/2 c. papaya

1/2 c. pineapple

1/2 c. mango

1/2 -3/4 c. apple juice

Put all ingredients in Vitamix blender. Start on low moving up to high. Blend on high for 1 minute or until smooth. Enjoy!

*I usually use orange or yellow papaya as I like it better and find it sweeter; but you can also use red papaya

**vary the amounts of fruit to make it sweeter or less sweet to taste

Makes one glass of yummy green smoothie


To Drink Gingerbread

IMG_4491I know Christmas is over. And New Year’s is done too. And this is really something more suited to the Christmas season. But I couldn’t resist posting this martini I created over the holidays. Yes I created it!

I was on a gingerbread kick over Christmas, looking for different ways to enjoy this delectable Christmas flavor. I had already discovered and tested gingerbread waffles, gingerbread muffins and of course gingerbread cookies (classic). Earlier this Fall I was delving into the martini world, trying some Halloween ones, pumpkin one, and a few others. I thought there must be a gingerbread one I can make.

So I hopped on Pinterest, my new favorite go to for recipes and looked it up. I found a number of recipes but most of them had Baileys in it and I wanted to avoid the dairy. There were some that were almost but not quite. So I decided to experiment, I took parts that I liked from different recipes and combined and adjusted them, creating my own version of the gingerbread martini. Dairy free, not quite sugar free, there’s just a teensy bit in it, I tried to get it completely sugar free but couldn’t quite do it (maybe down the road I’ll figure it out get it completely sugar free). Though honestly you would never know, this is a very sweet martini and extremely delicious.

Once I got all the components right and tried it, I phoned my Mum to share. She immediately wanted the recipe and went to try it herself. 20 minutes later she phoned back with one word, “Yum”.

Now I realize it is not the Christmas season when gingerbread is most popular but I could not sit on this delectable recipe for an entire year! Besides isn’t gingerbread good any time of year? Valentine’s? or Christmas in July.

Give it a try. If you like gingerbread you’ll love this. Enjoy!IMG_4493

Gingerbread Martini

1 1/2 ounces (3 tbsp.) vodka

1 ounce (2 tbsp.) gingerbread syrup*

1/2 ounce (1 tbsp.) Creme de cacao

1/2 ounce (1 tbsp.) unsweetened coconut milk (I used Silk unsweetened coconut milk)

Put all ingredients in a martini shaker filled with ice. Shake to mix. Pour into martini glass. May adorn glass with mini gingerbread cookie if desired.

*Gingerbread Syrup

IMG_4497

Gingerbread Syrup

1/2 c. water

1/2 c. coconut sugar

4 tbsp. barley malt

1 tsp. ground ginger or 1-2 drops Ginger essential oil

1/2 tsp. ground cinnamon or 1-2 drops Cinnamon Bark essential oil

In a small saucepan, mix together water, coconut sugar, barley malt, ginger and cinnamon (If using essential oils for your spices do not add these here). Heat over medium heat, stirring frequently, until sugar dissolves. Remove from heat. If using essential oils, stir these in now. Measure your drops in a teaspoon (just in case you get one too many!) and stir in. Taste to ensure you have the amount of spice you’d like – add another drop if desired. Let syrup cool before using in drink. May be stored in an airtight container in the fridge for up to 2 weeks.


To Dip or not to Dip?

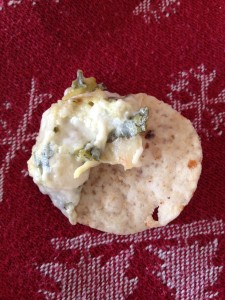
IMG_4481There’s nothing like a good dip at a party! Something warm, cheesy and delectable to dip that cracker or tortilla chip in. Yum! Of course there are lots of other yummy dips that are served cool and aren’t as heavy or dense as the cheesy ones. In fact I have discovered some great ones over the past few months, usually from sampling at Community Natural Foods, our local natural food store, such as a sweet carrot dip and spinach dip.

I think dips make great snacks, not only are they good at parties but they are also great for that late night munching, especially if you are looking for something a little more healthy. Things like hummus, black bean dip and the above veggie dips are very tasty and satisfying. Though I have to say sometimes I just want a nice creamy, cheesy warm dip, full of flavor and taste!

That’s why when I discovered this yummy dip back in the spring I was in heaven. I was hosting a Pampered Chef party and this was the recipe I chose to try. The original recipe was so full of dairy but I knew I could substitute and it would turn out fantastic. And I was right, it was fantastic!

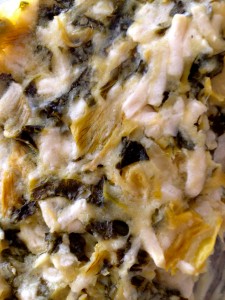
images-36I was so pleased that I now had a yummy dairy free creamy cheese warm dip to make (I know that’s a mouthful). It is a super simple recipe, done all in your microwave (though I am not a huge fan of making it in the microwave I have yet to figure out how to get around that). It takes no time at all to make. It’s a great dip for parties, snacking or New Year’s Eve gatherings, made with ingredients that you’ll likely have around at home (unless this is your first recipe that’s dairy free than maybe not, but trust me the dairy free version is worth it and provides lots of health benefits. Plus it has Kale, that’s a superfood)

Kale and Artichoke Dip

1 – 12oz jar artichokes, drained

1 – 8 oz can sliced water chestnuts

2 c. Daiya mozzarella cheese, shredded

1/4 c. grated vegan parmesan cheese (I use Go Veggie Soy Parmesan)

1/2 c. veganaiseIMG_4479

1/2 c. vegan sour cream

2 cloves, garlic

3 c. fresh kale leaves, stems removed and torn into pieces

baked pita chips, triscuit crackers or cut up vegetables for dipping

Place artichokes and water chestnuts in a manual food processor. Process until coarsley chopped and place in a microwave safe glass or ceramic covered dish (8×8 square or round).

Add mozzarella, parmesan, veganaise and sour cream. Mince garlic and add to baker, or use garlic press.

Microwave on High for 2 minutes until cheeses begin to melt. Remove from microwave and mix with spatula until well blended.

Place kale in food processor and process until finely chopped. Add kale to cheese mixture and stir in well. Put covered dish back in microwave and cook on High for 2-3 minutes. Stirring halfway through, until hot and bubbly.

Serve immediately with chips or veggies. Serves 30

What Turkey, Christmas and Pizza have in common

turkey leftoversOne of the things I absolutely love about the big holidays, like Christmas and Thanksgiving, is the big delicious feasts we have. All the decadent recipes we enjoy, from classic to traditional, to the new one you always wanted to try. So yummy! My mouth is watering just sitting here thinking about it (or maybe that’s the quiche I currently have in the oven?)

And of course there’s all the leftovers, usually enough at our house that we are eating turkey for a week before we tire of it and freeze the rest. Sometimes we’ll just enjoy the turkey on its own with the gravy, potatoes and leftover veg, or we’ll make something new out of the turkey, creating a whole new fantastic dish to enjoy!

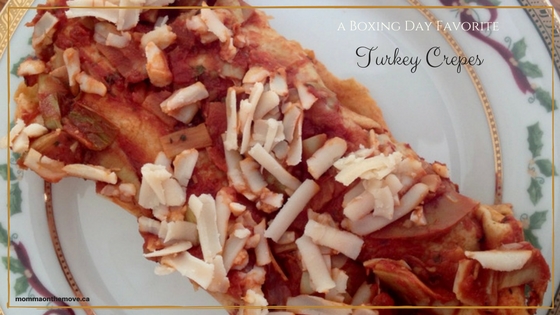
From hot turkey sandwiches to omelettes and casseroles, there are endless delicious turkey leftover recipes to create. My absolute favorite though is hands down, turkey crepes. My mother found this recipe years ago, when I was probably 11 or 12. She made them one Boxing Day. I remember asking Mum what was for supper and looking at her like she was crazy when she responded. I thought ‘oh yeah those will be delicious…gross.’

Boy was I surprised. The rule in our house was that you always tried something once and if you didn’t like it fair enough, but you couldn’t say you didn’t like it if you had never tried it before. Plus that was what was for supper, if I didn’t eat it, there was nothing else. So I tentatively took a bite. OMG! These things were fantastic, they tasted just like pizza, but were lighter and fluffier. My sisters and I gobbled them up and eagerly asked for more. They quickly became the family favorite and the traditional dish on Boxing Day.

Now I make them for Christmas Day, as we have simplified the meal (and by simplify I mean reduce the amount of prep) on Christmas Day to allow more family time, and less time in the kitchen cooking. I have also adjusted the recipe to meet our dairy free requirements and they are just as delicious! In fact we have had a few guests over on Christmas Day and they are none the wiser (and also gobbling them up, in fact D’Wayne’s nephew requested the leftovers this year). D’Wayne too is also salivating as I am wrapping them up and putting them into the oven.

It is a fairly simple recipe, with some of the cooking being done easily in advance. I usually make the crepes a few days ahead (or if I am really organized earlier and freeze them), and the filling and final touches the day of the meal. Everybody loves them.

So if you are in need of a new yummy recipe for all the leftover turkey you have (or just want to try something new) definitely give this recipe a try!

Turkey Crepes

16-20 8″ crepes (recipe below)turkey

3c. cubed turkey

1/4 c. Earth Balance vegan spread

2 onions finely chopped

1 c. sliced mushrooms

1 clove garlic, minced

2 – 5 oz jars artichoke hearts, drained and chopped

3 c. shredded Daiya mozzarella

1 – 28 oz. can tomato sauce

1 tsp. basil

1 tsp. oregano

salt and pepper

Crepes:

4 eggsturkey

3/4 c. water

1/2 c. almond milk

1 c. flour

1 tsp. salt

1/4 c. Earth Balance vegan spread

Crepes:

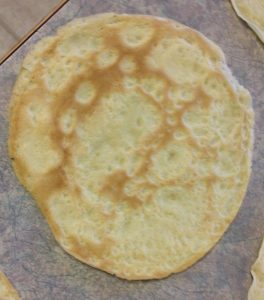
Beat eggs and stir in flour. Add water, almond milk and salt, mixing until smooth. Refrigerate for 1 hour to let flour absorb liquid (can be left in fridge overnight if desired). Just before making crepes, melt Earth Balance in pan; stir excess butter into crepe batter. Batter should be consistency of light cream. If batter seems a bit thick blend in more water to get it to the right consistency.

Pour 1/4 c. of batter into pan and swirl to form a circle. Cook crepe until lightly browned, turn and cook other side for 1 minute. Repeat with remaining crepes. Stack cooked crepes between layers of wax paper until ready to use. Crepes can be prepared up to 2 days ahead of time and kept wrapped in the fridge. Crepes may also be frozen for longer storage.

Makes 16- 20 crepes

Filling:

In a large skillet, melt Earth Balance over medium heat. Add onions and garlic and cook until tender.  Add mushrooms and continue cooking until softened, about 2-3 minutes. Stir in turkey and half the artichokes. Heat through, then remove from heat and stir in 1 cup of cheese. Season to taste with salt and pepper.

Place crepes on work surface with light colored sides up. Divide turkey mixture equally among crepes and roll up. Place crepes seam side down in a single layer in a greased 9×13 ovenproof dish.

In a medium size bowl, combine tomato sauce and remaining artichokes. Stir in basil and oregano and spoon over prepared crepes. Sprinkle with remaining cheese.

turkey

Bake at 350 F for 30-35 minutes until hot and bubbly.

Serves 8


Shop Family Organizers at Calendars.com Today!

Festive Ham and Dairy Free Scallop Potatoes

IMG_4425Years ago we were away over Christmas for the first time ever, well not including university years or when we went somewhere else to visit. This was the first time we were not somewhere spending Christmas with other family or friends. We were in Australia, part of our 3 month stint back in 2007, and the beginning of a love affair with the Aussies (cause as you know we’ve been back since to Australia and there’s talk of going again).

This was the first time that we as a family were in a place where they was no family or friends to visit or stay with. We had no traditions that we had to uphold (not that there is anything wrong with traditions, everyone calls me a very traditional gal. I love them and uphold many, but there are times to break from or form new traditions) and no particular place that we needed to be. We were in Tasmania, the only island state in Australia, staying in Launceston at a lovely place called the Penny Royal Apartments (which are refurbished historical buildings turned into apartment accommodations). It was a lovely place.

Bris Tas and Melbourne (244)

Penny Royal Apartments

For Christmas, we kept it low key, enjoying a nice dinner on Christmas Eve and preparations for Santa Claus, with our paper tree and actual socks hung up for stockings. Christmas morning was even simpler with a present from Santa, some goodies in our stockings and a nice breakfast of french toast. Matthew was 4, and was super happy with his little Tonka trucks from Santa Claus and his few small gifts from us.

Bris Tas and Melbourne (246)We went to the beach for the day, we came back and went to a Christmas buffet at another local hotel. No one had to cook the big meal, no fuss, no muss, relaxing, easy. Simple. It was so nice because we got to spend time with each other, it was not about the toys and gifts, or the big Christmas dinner. There was no stress to have things perfect or a timeline to abide by. It was cool, it was authentic and was one of the best Christmases I have ever enjoyed.

Bris Tas and Melbourne (247)When we returned from Australia we decided to shift our focus, and make Christmas about the things we really want, which we had identified as being together, enjoying each other’s company, it didn’t matter what we were going to do. So we simplified things, we ordered pizza on Christmas Eve, and on Christmas Day we had turkey crepes (a fabulous dish made with leftover turkey, that is not only delicious but simple and can be made ahead of time, reducing time in the kitchen on Christmas Day). We still had a nice meal and used the nice dishes, we still exchanged gifts, but now no one was stuck in the kitchen all day making dinner. Which for was usually just us anyway and was all over in about 20 minutes. Now I make the big meal 2-3 weeks earlier, chop and freeze the turkey and toss the crepes together on Christmas day, takes maybe 30 minutes.

That being said I do love the spread at Christmas and I still love all the traditional items on the menu, like turkey and stuffing, ham and potatoes, with all the dressings. So I usually do a bigger meal a little bit before Christmas, when I have more time, less things competing for my time and can afford a day in the kitchen.

The beach Christmas Day 2007

The beach Christmas Day 2007

In fact just this past weekend I decided to make a ham and scallop potatoes, often a favorite on many Christmas dinner tables. I was so excited because this was the first time that I was making the scallop potatoes dairy free. I love scallop potatoes but for some reason since going dairy free I thought I couldn’t make them, that adjusting the recipe would be too complicated. I have no idea why I thought this, but for some reason the other day this ‘block’ lifted and I decided I could do it and what I would do. I knew exactly what I was going to do and what substitutes I was going to try.

Oh my goodness! The potatoes turned out so well. They were absolutely fabulous and I couldn’t believe that I had waited so long to adjust this recipe, or that I thought I couldn’t! It was really quite simple and easy (and in case you haven’t noticed I like simple and easy).

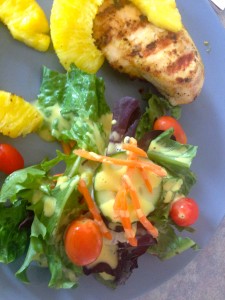
The ham was fabulous as well, I use my own mix to glaze and flavour the ham, though I have discovered that it is near impossible to find a ham that is not cured with sugar of some kind (at the moment anyway, I believe that will come). I ended up buying one from the local butcher, no hormones, no steriods, grain fed, but still cured in a brine that did contain a little bit of sugar, though the butcher assured me that it was much less than what you would find in the local grocery store. Rounded out with a nice green salad it was a fabulous meal and one that we all enjoyed. It was the first time the twins had scallop potatoes and though Luke rejected them because they looked different, once he tasted them, he gobbled them up.

So if you’re doing the Christmas spread this year and want to try a dairy free scallop potato recipe (you may have a lactose intolerant aunt who you can finally make a dish for) or have decided to keep it more simple (you could make the slow cooker version of these potatoes), enjoy yourselves, remember what is most important to you and make that your focus, when you do Christmas day will be perfect no matter what.

Glazed Ham

dry mustardIMG_4424

coconut sugar

water

In a small bowl, mix all ingredients together to make a smooth paste. Be careful not to add too much water as you do not want it runny. Amounts of mustard and coconut sugar depend on preference for sweetness and tart, as well as size of ham. Spread mixture over ham. Place in covered roaster and roast for 2 hours at 350F for a 3.5 kg ham (increase or decrease cooking time according to size).

Scallop Potatoes

4 tbsp. Earth Balance vegan spread

4 tbsp. flour

1 1/2 tsp. salt

1/8 tsp. pepper

2 c. coconut milk (I used So Delicious Unsweetened Coconut Milk Beverage, slightly thinner than regular coconut milk)

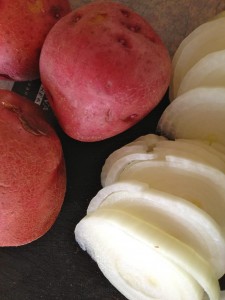
6 medium potatoes, peeled and thinly slicedIMG_4430
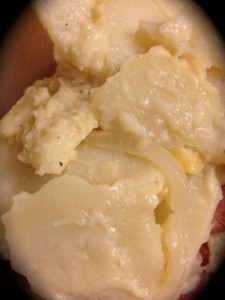
1 large onion, thinly sliced in rings

*optional 1/2 c. Daiya dairy free cheddar

In a medium saucepan melt Earth Balance. Whisk in flour, salt and pepper. Add coconut milk and stir. Bring mixture to a boil, stirring constantly until mixture thickens. Remove from heat. If adding cheese stir into sauce.

Layer half of prepared potatoes and onions in large (2.5 quart) casserole dish, alternating a layer of potatoes, a layer of onion. Pour half the sauce over potatoes and onion. Layer the rest of the potatoes and onions the same way, then pour the rest of the sauce over top.

Bake covered at 350 F for 50 minutes. Remove cover and bake 15 minutes more to brown slightly. Potatoes should be tender, sauce warm and bubbling.

Serves 6

How to Make Ginger Tea from Scratch

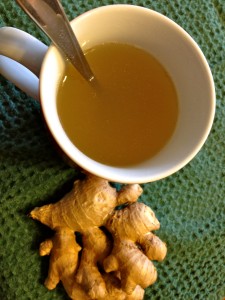
IMG_4420Years ago when I was seeing an acupuncturist, she gave me a recipe for ginger tea. At the time I was experiencing some nausea and she said that ginger tea was a great remedy. Little did I know just how beneficial ginger tea was! Not only does it combat nausea and vomiting, it has a meerad of other health benefits that are fantastic!

Ginger itself is high in vitamin C, magnesium and many other minerals. Which makes it great for battling colds and flu. I was surprised that ginger would have such a high vitamin C content myself, maybe because it is brown, who knows, but it’s definitely beneficial!

Other benefits include reduced inflammation, menstrual discomfort, and stress. Increases blood circulation, fertility, improves digestion and strengthens immunity. It also is a really yummy tea that is great to enjoy on a cold winter day. The flavors and smells are delightful, and for me, I like a drink that has an extra little kick, as it can get quite spicy the longer it sits. During the fall and winter months, I often have a cup of ginger tea on the go.

The tea itself is easy to make. Simply boil 4 cups of water in a medium size pot. Peel and slice a 2-3 inch piece of ginger. Once the water is boiling put the ginger pieces in the pot, cover and let simmer for 20 minutes. That’s it! It’ll keep in the fridge for a good week and once you run out it is easy to make some more!

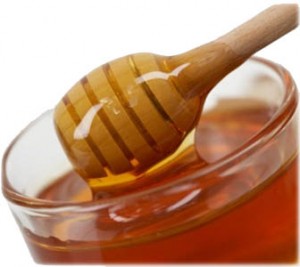
honeyMy kids find it a bit spicy, as it does have a bit of a kick, and the longer it sits the more spicy it gets, but they love it and often ask for a cup. I enjoy it with a teaspoon of honey (also with many health benefits) to sweeten it up. It also is a great tea to use when making a hot tottie, (honey, cinnamon, rum and tea), tastes really good.

Quick, simple, easy and probably something you have in your house on a fairly regular basis.

Ginger Tea

4 c. water

2-3 inch piece fresh ginger, peeled and sliced

In a medium pot, bring 4 cups of water to a boil. Peel and slice ginger, when water comes to a boil place ginger pieces in pot and cover. Reduce heat and simmer for 20 minutes.

Makes 4 cups

**Don’t have fresh ginger? You can use Ginger essential oil! Just put 1 drop of Ginger essential oil in your mug and add hot water. Voila! You’re all set.


Save on Music, Books and DVDs at Indigo.ca