New Year, New You

set new years intentionsIt’s that time of year again. The time of year when many people make New Year’s Resolutions. The sad thing is many of us do not keep them much past the first 2 weeks of the year.

I have written and read many an article on why this is, too much pressure, not being ready, or you don’t really want to do it but feel you have to join the crowds in this New Year’s Ritual.

I have not created New Year’s Resolutions for many years. But I do have a ritual that I do at this time of year to set New Years intentions and start out positively. Like many people I feel new year, time for new stuff to come into my life. Let’s leave the old stuff behind! I also feel inspired – but I don’t inundate myself with all these have to’s, resolutions or goals. I keep my ears and eyes open and participate in what calls to me. Whether it be some of the many online seminars at this time of year or decide on a task/ project of my own. For instance, right now I feel like I want information, I want to grow and expand spiritually. In fact I am craving it, so I am seeking it out avidly. And I am enjoying it. There is no specific goal or end result in mind, so no pressure. I’ll just do it until I feel satisfied and then I’ll move on.

I believe though that setting an intention for the year is a good thing, and I have done this through the ritual I mentioned above and am going to share with you here. I have done this for many years and find it to be quite effective and cleansing. It is a way of releasing and leaving the old stuff in the last year that you do not want anymore and entering the new year creating space for new things to come into your life, whatever they may be.

It is a fairly simple exercise that I do on New Year’s Eve. And this year I had the pleasure of sharing this experience with my loved ones, which I felt was a real treat.

Set Your New Year’s Intentions

set new years intentions

On New Year’s Eve, take a piece of paper and write down all the things that you want to let go of, no longer serve you, release or wish to leave behind in the old year. Write them out by hand, do not type them out.

After you have completed your list burn the paper at midnight on New Year’s Eve, with the intention of releasing it all. Holding the intention is important. We did this outside at my parents firepit, placing our papers in one at a time and saying whatever came to mind as we did so. For example “I release these items and leave them in the old year”. It was lovely. Then we stood a few minutes in silence and when we were ready went back inside.

Then take a new piece of paper and write down all the things you want to create and manifest in 2017. Be specific and write out in as much detail as possible; using present statements such as I am, I have, etc. This is very important because if you simply say I want the Universe will say that’s great you want it and that may be about all you’ll get. It is also important to understand that your new list is not necessarily the opposite of what you left in 2016, as they may be quite different. They may be a springboard for setting your new intentions but it is important that they remain separate. You do not create your new list solely based on the old one. This will create a block in your manifestation.

Once you have completed your list just tuck it away and keep it somewhere where you can look at it later on. Yes, you are literally writing it down and then pretty much forgetting about it. There will be a time when you will go back to it but for now, leave it to rest. Of course you can leave the list and add to it over the next couple of days if you think of something you wish to add.

I felt a definite shift in my energy and outlook once we completed this. I felt lighter for one and had a more positive outlook on what was to come.set new years intentions

Though this is very effective on New Year’s Eve you can certainly do this on New Year’s Day or early in the New Year if you did not have the opportunity to on New Year’s Eve.

So in the next couple of days take a piece of paper and start writing! (The first full moon of the year is January 1 & 2nd and is a Super Moon, as well as another full moon on January 31 – which is another great time for releasing and a to do this activity)


Shop Family Organizers at Calendars.com Today!

The Importance of Taking Time for Yourself

8 Ways to Take Time for YourselfTaking time for ourselves is one of the most vital things we can do to thrive in this life, apart from food and water of course. Yet so many of us don’t do it for one reason or another.

I have written about this before but have been talking to so many people lately, especially women and mothers, who are dying for some time for themselves. They say they don’t have time in between caring for their children, taking care of the house and many of us are working too. But is we don’t do it we end up feeling lost, invisible, our sense of self worth can go down and we are just plain unhappy. Now I am not saying that men and fathers don’t need time for them as well, I am just noticing that women are seriously lacking it! And it is not just women with families that are depleted. We are naturally givers so women with boyfriends, friends, co-workers, etc. are also lacking this.

taking time for yourselfI know, many of us feel guilty when we take a little time for ourselves or feel like the house will come falling down. Well here’s a newsflash for you ladies, your household and your children will go on without you, whether you are there or not. And if you are a few minutes late, or get held up, nothing bad will happen. Everyone will survive. So don’t feel guilty, enjoy your time because you and your family are going to be so much better for it when you do return.

I know it is challenging to do this at times. I get every second weekend to myself when the kids go to their Dad’s, but sometimes I feel like I am just dying by the time Friday night comes. I love my children, but I have felt pulled in so many different directions and attended to so many needs I am just depleted.

The key is to take time every day for you. It doesn’t have to be long or fancy but time just for you. And be strict about it. If you’re taking it at a time when other family members are up and may be looking for your attention, tell them you are going to do X and to not disturb you. And just do it.

“But I am so busy! I don’t have time to add one more thing.”Just take 5 minutes for you each day. Start by making a list of things you love to do – go for coffee, take a walk, chat with a friend, write, take a bubble bath, etc. Write down everything you can think of and then start doing these things one a day. If reading is a love, take 5 minutes before you shut off the light at night and read. Or write down 3 things that you are grateful for before you go to sleep – this is time for you, time that you reflect.

Sometimes I put on a webinar to listen to while I am doing something else. I consider this time for me. Even I may be making dinner or cleaning I am still doing something that I enjoy and will benefit from. And I have added no extra time or thing to do in my day.

As you do more and more each day and it becomes a habit, you will start to find another 5 minutes somewhere else in your day to do something for you. And then another 5 and another, and eventually you will find that taking time for you is doable and you love it! You’ll feel happier, more confident, sexier and more alive!

Taking 5 minutes here and there throughout the day will sustain you and keep you balanced. It will get you through until a time when you can take a longer period of time for yourself, like a retreat weekend or a spa getaway. It will keep you from feeling completely depleted and dying for some me time. For me, if I get a chance to write during my day, this feeds my soul and I am exhilarated. I then find I can tackle anything that comes along. It doesn’t matter if I finished what I was writing or not, it is just a matter of doing something that I love!

It is not hard to do. You just have to start. Cause like I said I just see so many of us women dying, disappearing and yearning for something for them. And we need to take it! Not only is it good for us and our self confidence but it improves our relationships. We are happier so so is everyone else. You know the saying when “Mamma Bear is unhappy no one is happy”. It’s true.

So go start by making your list of all the things that you love and take 5 minutes for yourself today! and everyday after this.

Looking for some ideas or inspiration? Here are some things that I love to do and can do in a short time

  1. read a good book
  2. go for a walk
  3. take an epsom salt bath (add your favorite essential oils)
  4. write/ journal
  5. enjoy a cup of coffee
  6. listen to a webinar
  7. garden
  8. meditate

For more ideas check out my other posts on taking time for you

5 Minutes for Mom

How to take time for yourself


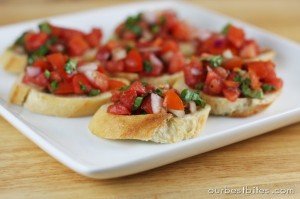
Sun Dried Tomato & Goat Cheese Bruschetta

I love appetizers! They are small bite size morsels full of flavour and delight! You can sample many different ones without feeling full, guilty or like you’re overindulging. And there are so many good, delectable recipes out there, I’m never at a loss for variety or a recipe to choose.

IMG_0799

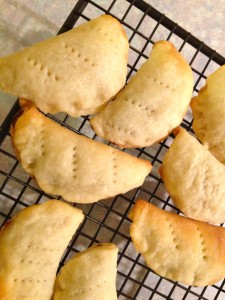
Mushroom Turnovers

Of course I have my favorites, like Mushroom Turnovers and good old fashioned meatballs in a sweet and sour sauce, but like with everything else in food I like to branch out and try new things. A couple of years ago I found this recipe in a magazine at the gym. It looked good so I copied the recipe and tried it. It was an instant hit with everyone! Matthew, my spouse and dinner guests. So much so that my dinner guests asked for the recipe.

I loved it too and made it often over the next few months, sharing it with different guests or enjoying it ourselves. Then I went for a while without making it, until recently when I hosted a wine and cheese with friends and decided to pull it out and dust it off.

Tragedy struck though when I realized I could not find the recipe! A little while back I was organizing recipes and putting them onto my computer. When I did, I would throw away the paper copy. I thought I had done this with this recipe but I hadn’t. What I had done was post it on my first blog which I could no longer access, and then thrown it away, thinking that I would be able to access it forever. I was wrong and completely saddened that I no longer had this recipe.

But you know what they say, nothing on the internet is ever lost if you know where or how to look. It took a bit of figuring and looking but I found it. I was overjoyed to have it once again. I quickly copied it onto my computer and now keep it safe and sound in my files.

cold-platter1It also inspired me to have appetizers at my Christmas party this year. I will make some of my own and asked guests to please bring one to share. It’s a great way to discover more great appetizers and share some of my favorites with friends.

So if you’re an appetizer lover and looking for something new, I highly recommend the Sun Dried Tomato and Goat Cheese Bruschetta. Sugar and dairy free, you won’t be disappointed.

And for all fellow appetizer lovers 5 Minutes for Mom is hosting a Twitter party tonight at 8 pm Eastern where everyone will share their favorite go to holiday recipes. Go here for details.

Sun Dried Tomato & Goat Cheese Bruschetta

1/3 c. sun-dried tomatoes, coarsley sliced

1/3 c. roasted peppers (bottled), patted dry and coarsely diced

1/3 c. artichokes (canned or bottled in water)bruchetta 1

1 large garlic clove, finely minced

6 medium leaves fresh basil, thinly sliced

2 tsp. extra virgin olive oil

1/2 tsp. balsamic vinegar

Pinch ground pepper

12 thick, sturdy crackers or slices of whole wheat baguette

1/3 c. goat cheese

1/4 tsp. salt

In a medium bowl, gently fold together sun-dried tomatoes, roasted peppers, artichokes, garlic, basil, olive oil balsamic vinegar and ground pepper. Spread each cracker or baguette slice evenly with goat cheese. Top with vegetable mixture. Sprinkle bruschetta with grains of salt, if desired.

Makes 12 pieces

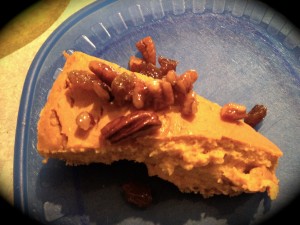
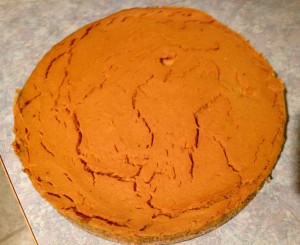
Sweet Potato Pecan Pie

IMG_2489One of the many things I have always enjoyed about the holidays is all the treats and goodies that come with the season. Yummy cookies and squares, family favorites and traditions that I grew up with.

Slowly I have been adjusting these favorites, such as Chocolate Peanut Butter Cereal Squares, Candy Cane cookies and Isch Tartlets, to name a few, to a sugar and dairy free version for us to enjoy. But I love it when  I find a new recipe that I think fits the ‘holiday bill’, that requires no adjusting. This was the case with the Sweet Potato Pecan Pie which I found in Clean Eating magazine. The picture alone looked scrumptious so I knew I had to try it!

I have to admit I did make some adjustments to the original recipe, not because it was not fine as it was, but because I decided to make some different choices. For instance it called for olive oil in the crust and though I am sure it would have turned out fine, the thought of it made my stomach roll, so I used coconut oil instead.

The pie was a hit with everyone, all the kids loved it and my Mum, as she was visiting (though she loves sweet potatoes so it wasn’t a hard sell). Of course it is super good for you too!

Sweet Potato Pecan Pie

2 sweet potatoes, peeled and choppedIMG_2487

1 ¼ c. rolled oats

¾ c. pecan halves

1/3 c. almond flour

¾ c. coconut sugar

2 tbsp. plus 2 tsp. coconut oil

1 ½ tsp. pumpkin pie spice

1/8 tsp. plus ¼ tsp. sea salt

1 cup organic firm silken tofu

1 tsp. pure vanilla extract

½ c. unsweetened golden raisins

2 tbsp. pure maple syrup

Place potatoes in medium saucepan and add enough water to cover. Bring to boil and cook until potatoes are tender, 12-15 minutes. Drain potatoes and transfer to a food processor. Puree until smooth. Transfer to fridge and chill completely about 30 minutes.

Prepare crust by putting rolled oats and ¼ c. of pecans into food processor. Puree until in a fine powder. Add almond flour, ¼ c. coconut sugar, 2 tbsp. coconut oil, ½ tsp. pumpkin pie spice, 1/8 tsp. sea salt. Pulse until combined. Gently press mixture evenly into the bottom of a non stick 9 inch spring form pan. Place pan in oven and bake for 18-120 minutes or until crust is golden brown. Remove from oven and let crust cool completely.

Pecan topping

Pecan topping

Prepare filling by pureeing tofu, remaining ½ c. coconut sugar, vanilla, remaining 1 tsp. pumpkin pie spice and remaining ¼ tsp. salt until smooth.

Add chilled potato puree and pulse until just combined and smooth. Pour into cooled pie crust and smooth top with spatula. Bake for 40-45 minutes, until filling is just firm in the center, light golden on top and cracks begin to form in the center of the filling. Remove from oven and let cool completely, about 2 hours.

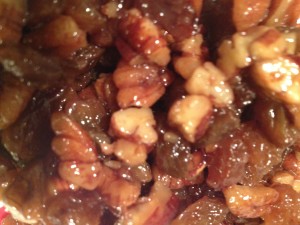
While pie cools, prepare pecan topping.  In a small saucepan on high, heat remaining ½ c. pecans, raisins, maple syrup, 2 tsp. coconut oil and 2 tbsp. water until simmering. Reduce heat to medium and simmer stirring frequently, for about 5 minutes, until no liquid remains in pan. Transfer mixture to bowl and let cool completely.

To serve run a sharp paring knife around the outside of pie to loosen from sides. Remove sides from spring form pan. Sprinkle pecan topping over top of pie and slice.

Serves 10

Butternut Squash Soup

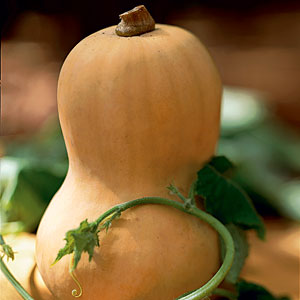
IMG_2432A couple of weeks ago I was visiting my sister in Vancouver, having a little me time and also there to attend my friend Stuart’s 40th Surprise Birthday; she made this fabulous Butternut Squash soup. Now I have not been a huge fan of squash in the past but this soup was really yummy!

I had found that the texture of squash was not always to my liking, it felt kind of grainy on my teeth so I avoided squash in general. But lately I have been finding many recipes with squash that I and the kids have quite enjoyed. Like Spaghetti Squash with chicken and pears from Clean Eating Magazine, Acorn Squash with harvest rice stuffing and now this soup!

Butternut Squash

Butternut Squash

It is a dairy free, sugar free and gluten free soup, of which I think I had 3 bowls for dinner that night and then another 2 for lunch the next day!

I found the flavors delicious with coconut milk and cinnamon. The original recipe calls for 2 butternut squash but that day my sister used acorn and butternut squash and it was very tasty.

I was so excited about this soup when I returned home I went straight to the store to buy what I needed. Unfortunately, as life would have it, I did not make it until the other day as I could not get all the ingredients I needed, and then of course there was time and real life to get back to – you know 3 kids, running a household…

I made it with the 2 different squashes which I think just adds lovely flavor and served it to the twins for lunch. Both of them gobbled it up, asking for a second bowl, while I scarfed, I mean enjoyed, my own soup.

It is super easy to make as well and easily frozen if you don’t wish to eat it constantly for a week.

Butternut Squash Soup

2 medium butternut squash, or 1 butternut and 1 acorn

1 pink lady or royal gala appleIMG_2458

1 medium onion

1/4 c. Earth Balance vegan spread

900 ml chicken broth

1 c. coconut milk

1/2 tsp. dried sage

generous pinches of cinnamon and salt

1 tbsp. maple syrup (optional)

Chop and peel squash; cut in half and seed, then chop into small pieces. Chop onion and apple.

In a large saucepan over medium heat, melt Earth Balance, add onion and apple and saute until onion is soft. Add broth, squash, and coconut milk. Bring to boil and simmer for 20-25 minutes.

For the last 5 minutes add sage, cinnamon and salt. Squash should be very tender when done.

Use immersion hand blender in pot to blend until smooth or ladle soup into blender and whip on high until pureed. Pour back into pot and reheat if necessary. Serve.

You may add optional garnishes such as maple syrup drizzled on top, vegan sour cream, slivers of apple or dried sage.

Soup will keep well refrigerated for 5 days or in the freezer for up to 3 months.

Homemade Marshmallows

Well it’s official! I can now make anything without sugar in it. When we went sugar free we really struggled at first, having to avoid things that we loved and enjoyed. But it was just going to take time to figure out how to make these things like cakes, cookies, chocolate, etc. without the sugar in it. What were the substitutes? How did you do it? It was a huge learning curve.

I assured Matthew, my oldest son that I would figure it out. Cause one of the things I did not want to happen in going sugar free was for him to feel denied. That he could still have the yummy treats that his friends did, with the difference being healthier, better for you.

Slowly I began to build my reperatoire, cookies, cakes, muffins those were easy. Bread, new sweet treat recipes, chocolate…we were getting there. Matthew was pretty happy too, except for one last thing, marshmallows. There was no substitute in the store to buy and I had no idea what to do to make them.

He reminded me of this when we went camping this summer, mentioning that it would be nice to roast marshmallows… “I know” I said and assured him that I was on a mission; as marshmallows were the only thing that I could not make sugar free but I knew there had to be a way.

A little while back I found this recipe for homemade marshmallows on Facebook and just about died! This was the ‘missing link’ that I was looking for. The recipe I needed, and it was totally healthy! Sweetened with honey and very easy to make.

So yesterday was the big day. I tried it out and Wow they were stupendeous! They look and taste like an original marshmallow and I don’t care how many my kids eat!

Unfortunately the marshmallows had to sit to set, but I let the kids lick the beaters. As you can see Luke and Chloe were thoroughly enjoying it! Attacking the beater with vigor. Matthew has attested that they taste just like regular marshmallows and just in time for our Halloween campfire tomorrow night.

We are also set for camping next summer! S’mores, rice krispie squares and other marshmallow treats here we come!

IMG_2354

A couple quick tips when making this marshmallow recipe:

When letting it sit to set don’t worry about covering it. I made this mistake and ended up losing some because it stuck to the cover. Oops! lesson learned.

When storing them make sure you line the bottom of your container with parchment paper, and layer it with paper in between. Again, they’ll stick and they’ll peel right off the parchment paper. Don’t forget to put one on the top before you put on the lid!

The mixture starts to set quite quickly so have your pan ready to go, and as soon as the soft peaks form, pour it right into the pan. Don’t worry about the beaters you can take care of those later 🙂

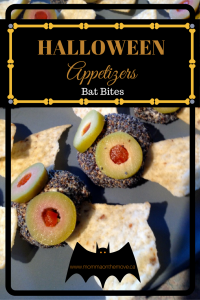
Spooky Halloween Appetizers – Bat Bites

halloween appetizersOne of the things that I have enjoyed about Halloween over the past few years is the unique fun recipes that I have discovered. Now when I say unique and fun I mean ways of taking healthy food and making it into something Halloween themed.

I know I could have been doing this years ago, but since eliminating sugar and going to a sugar free Halloween, my focus has shifted to seeking these things out. I wanted to take the focus off the sugar fest at Halloween and show the kids the other fun aspect of things, like the decorating, festivities and food.

As a result I have made things like Boo-nanas and Apple Bites, which are banana ghosts and ghoulish looking smiles with teeth. I have found veggie platters made into skeletons and this year Bat Bites!

healthy halloween snacks

Apple Bites

These I think are by far the most fun yet. They are made from goat cheese, cream cheese and pesto (of which I have all non dairy substitutions for) and they are not only easy to make but look super cool. These treats are likely more for the adult crowd as some kids may not like the tastes and texture of them.

The trick was when do I make them? Luckily I had planned a wine and cheese for my neighbors and friends very close to Halloween, so I was able to try them out. Of course they were a hit! People loved them, not only how they looked but how they tasted as well.

So if you’d like to get a little creative this Halloween with your eats definitely give these a try! And there are all kinds of ideas out there. Hop on the net and Google it to find a variety of ideas to fit every taste bud.

Bat Bites

4 oz. vegan cream cheese

8 oz. soft mild goat cheese

1/4 c. pesto

2 tbsp. coarsely ground pepper

2 tbsp.poppy seeds

8 pitted olives, sliced

32 triangular corn chips (I just used Tostitos and broke them into smaller triangles)

Mix together cream cheese, goat cheese and pesto. Chill for 40 minutes.

Shape mixture into 16 2 inch balls, about 1 heaping tsp. each. Mix pepper and poppy seeds together in a bowl. Roll balls in poppy seed mixture to cover. Press olives into ball for eyes and insert chips on either side for wings.

healthy halloween snacks

Boo-nanas

Happy Halloween!


Save on Music, Books and DVDs at Indigo.ca

A Few Apple Muffins

Apple Cinnamon Muffins

For those of you who caught up with me last week, you’ll be pleased to know that I am still plugging away at using up the apples from my apple tree. Which is really good for you because I am finding and testing some great apple recipes which I then share. Plus my kids and D’Wayne are thoroughly enjoying being the taste testers, as are some of my neighbors.

Like I said there is a serious amount of baking at my house right now. There is not a day that goes by that I am not whipping up something in the kitchen and I am getting good at doing it quickly. Yesterday morning I whipped up some apple muffins between breakfast and heading out to my friends for coffee at 10 am.

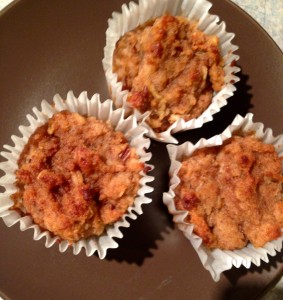
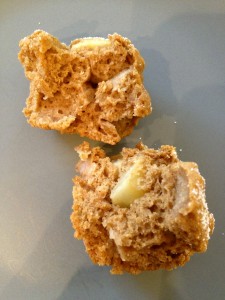
Yesterday’s Apple Cinnamon muffin was a gluten, dairy and sugar free muffin, sweetened with maple syrup with coconut oil and flax seed meal. I am finding that I really like those recipes with that little extra kick of nutrition in there. You just mix it in and can’t even taste it.

I found this recipe on another blog site called the The Simple Veganista who shares raw and vegan recipes – who actually found it originally on the blog The Vanilla Bean. And I have to say these muffins are very good! In fact my oldest son Matthew’s response when he came home afterschool was “Damn these are good!” with his face all lit up with excitement.

They are super moist and very tasty. The only downside to this recipe is that one batch does not make enough – only 9 muffins! I did stretch it to 12 but got some very small muffins out of it.

Apple Cake Muffin

Last week I tried the Gluten Free Goddess’s Apple Cake muffin recipe, which we also enjoyed as this muffin has chunks of apple in it which I really liked. Many of the recipes I found called for grated apple and though this was good I wanted to really taste and notice the apple, so I liked the chunks. Her recipes still call for refined sugar so a quick substitution of coconut sugar and I was able to whip these babies up! It even called for powdered sugar sprinkled on top once they were done baking and I was able to substitute for this as well! See recipe below.

I love muffins that have a little sprinkle of something on top, and both these muffin recipes do -the first being a coconut sugar and cinnamon mixture. Yum! There is just something fun about sprinkling something on top 🙂

The only thing I find with the Gluten Free Goddess is many of her muffin recipes are the same base with slight changes in them to make them apple, blueberry or whatever kind of muffin it is. Though I do admire her, as all her recipes are original, tried and true; I like a little more variety in my muffins, which is why I search out other recipes to try. Regardless I do have to say even though her base is the same, I have never gone wrong with one of her recipes. They are always delicious!

Either way I would recommend either recipe if you are looking for a gluten free apple muffin, though the Apple Cinnamon one is the favorite at our house (I used coconut milk for our non-dairy milk, though you can use rice or almond milk if you prefer).

I still have a huge basket full of apples and am not sure what to do with them next as I am really looking for something that will use them up in large amounts! If you have any apple recipes to share please post them in the comments for everyone to try, especially me.

In the meantime go whip up one of these and then sit down for a few minutes and enjoy, savor, maybe grab a cup of coffee, while the kids play quietly….ha ha oh I’m dreaming again!

Regardless enjoy!

Sugar Free Powdered Sugar (replacement for regular icing sugar)

1 cup nonfat dry milk (for dairy free use powdered coconut milk)

1 cup cornstarch

2/3 cup Krisda Stevia for baking

Combine all the ingredients in a food processor or blender and whip until blended and powdered. Store in an airtight container.

This replacement can be used in any recipe calling for icing sugar.

The Skunk Cabbage Trail

skunk cabbage trail

Often times on road trips I look for a nice little place to stop along the way. I feel that the journey along the way can be just as much fun as the destination. In fact we often find/ discover little treasures or places to explore that we might not otherwise.

The road between Calgary and Oliver is full of these little places. Many a time I have driven thru making a mental list of all the places I would like to stop. Completing this list often takes a while as there are so many, and we typically only make one stop (or it would take forever for us to get to Oliver). We also tend to stop at some places more than once because they are favorites. (I have been to the Enchanted Forest so many times now I have lost count! but I do love it there)

It was about that time to stop, stretch our legs, and take a break. Something I like to make sure we do at least once during a long drive and we were coming up on the Skunk Cabbage trail.

Nestled in Mount Revelstoke National Park this is a short, quaint little boardwalk trail. I was starting to feel tired and Luke and Chloe who had been sitting so well for the whole trip, needed to get out and move a bit.

When I told them that we were going to stop and go for a walk on the Skunk Cabbage trail they got very excited and chatted about it excitedly until we got there. I had been on this trail before with my oldest son Matthew when he was about 3 years old and this was one of my favorite trails. Luke and Chloe had never been and I knew that it was a short 1.2 loop they could easily handle.

This loop is a valley bottom wetland – one of the rarest environments found in the Columbia Wetlands and is full of Skunk Cabbage (hence the name), a plant that is found in wetland areas and has a beautiful yellow flower in the spring. It is called Skunk Cabbage because of the distinctive ‘skunky’ odor it emits.

We set off along the trail, crossing a wooden bridge over a rushing creek. Luke and Chloe stopped to check out the sight leaning through the rail, saying “Mommy look water!”. We could have stayed there watching the water for awhile, going no further and Luke and Chloe would have been totally satisfied. But me, being a typical mother wanted to move on as I not only wanted to walk the trail but was concerned about them falling over the railing into the water – ha ha.

On the other side of the bridge we entered into a cool old growth forest making our way to the beginning of the boardwalk itself. Interpretive signs highlighting the rich diversity of the plants and animals found in this area were spaced out along the loop. We would stop at each sign and I would ask Luke and Chloe if they wanted me to read it to them and they always said yes. So we learned about the bird migration project they were doing, that black bears like to eat Skunk Cabbage and other plants and animals such as Devils’ Club and frogs.

It was a hot afternoon and I was glad that it was only a short walk. The kids had their water cups with them while I had left mine in the car. We took our time, stopped to rest and enjoyed the trail. Luke kept asking where the skunks were, as that is what he thought we were going to see. I explained to him that it was a skunk plant and not an actual skunk. I kept pointing out the plants along the trail. Chloe caught on quickly and started to point out the plants as well. Luke was still asking about the skunks by the time we got back to the car but enjoyed his walk none the less.

I always enjoy doing little walks like that with my kids and this trail was the perfect size for what we needed that day. There are other short walks along that stretch of highway like the Giant Cedars and the Rock Garden trail, which are fairly easy and just the right size for a little breather (and a bit of an education too!)

Though we did this walk in the summer, you could still easily do it in the Fall and if you have the chance I would definitely recommend it in the spring; as that is when the Skunk Cabbage flowers and it is a very cool sight to see – these huge plants with big yellow flowers in the middle.

The Magic of Chia Seeds

Chia seeds

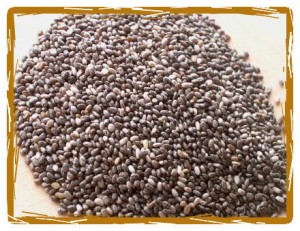
Recently I have discovered a lot of recipes with chia seeds in them. I haven’t been purposely looking for them, the recipes I have been picking up lately (such as Chocolate Macaroons) just happen to have them in it. The nice thing about this, I discovered, is that chia seeds are considered another superfood with multiple health benefits. They stabilize blood sugar, reduce cravings for sweets, improve mental focus, are a high quality protein, improve cardiovascular health and many more.

When I first heard about chia seeds I actually wasn’t sure what to do with them and thought they were funny things, these tiny seeds that look like poppy seeds. I knew they had great health benefits but what was the use if I could not use them? Then I found this recipe for chia seed pudding, which I have to admit when I first looked at it thought “Eww! seeds in my pudding”. But since I am into expanding my repertoire of sugar free and dairy free treats I thought I would try it.

I decided to make it for the first time when I was in BC this summer visiting my parents. My Mum is into these things as well and I always like a willing crowd to be my guinea pigs. The first thing I loved about this recipe is that it takes no time at all to make; less than 5 minutes. You literally whisk together the ingredients in a bowl and let it sit. That’s it. I didn’t even divide it amongst individual glasses like it suggested, I just left it in the bowl I made it in. (I also found that though this recipe says serves 4 but you can easily serve 6 and everyone has a decent sized portion).

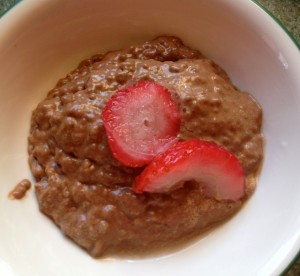
chia seed pudding

Raspberry Chia Seed Pudding

The second thing I really liked is that when you let the chia seeds sit for a bit they actually expand (size and weight), so it gives the pudding some texture, similar to tapioca. Which is another health benefit, as this ‘gelling action’ when the seed is exposed to water gives you a full feeling for hours – which is great for maintaining a healthy weight. (I also think it’s fascinating 🙂

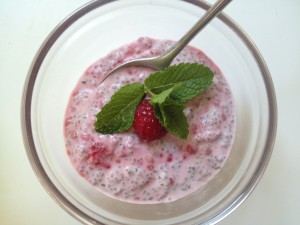
The pudding was a hit with my parents and the kids. Enough that I have made it again recently and will do so again. I have also discovered a recipe for a Raspberry Chia Seed Pudding, which I have yet to try, but imagine will be just as good.

Chocolate Chia Seed Pudding

chia seed pudding

Chocolate Chia Seed Pudding

1 1/2 c. coconut milk

4 tbsp. maple syrup or honey

2 tbsp. cacao powder

1 tbsp. vanilla extract

1/3 c. chia seeds

**top with berries or coconut cream if desired

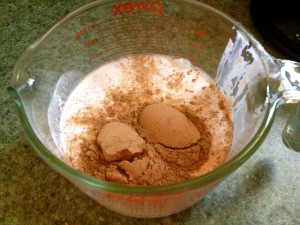
Whisk coconut milk, maple syrup or honey, cacao powder and vanilla until smooth. Stir in chia seeds. May divide evenly between 4 glasses or leave in bowl. Let sit at room temperature for 2 hours and serve.

Serves 4 **(You can easily serve 6 with this recipe and have decent sized portions if desired)