The Magic of Chia Seeds

Chia seeds

Recently I have discovered a lot of recipes with chia seeds in them. I haven’t been purposely looking for them, the recipes I have been picking up lately (such as Chocolate Macaroons) just happen to have them in it. The nice thing about this, I discovered, is that chia seeds are considered another superfood with multiple health benefits. They stabilize blood sugar, reduce cravings for sweets, improve mental focus, are a high quality protein, improve cardiovascular health and many more.

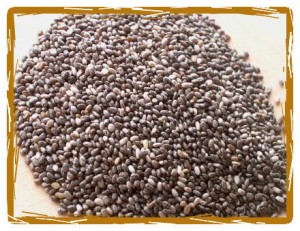
When I first heard about chia seeds I actually wasn’t sure what to do with them and thought they were funny things, these tiny seeds that look like poppy seeds. I knew they had great health benefits but what was the use if I could not use them? Then I found this recipe for chia seed pudding, which I have to admit when I first looked at it thought “Eww! seeds in my pudding”. But since I am into expanding my repertoire of sugar free and dairy free treats I thought I would try it.

I decided to make it for the first time when I was in BC this summer visiting my parents. My Mum is into these things as well and I always like a willing crowd to be my guinea pigs. The first thing I loved about this recipe is that it takes no time at all to make; less than 5 minutes. You literally whisk together the ingredients in a bowl and let it sit. That’s it. I didn’t even divide it amongst individual glasses like it suggested, I just left it in the bowl I made it in. (I also found that though this recipe says serves 4 but you can easily serve 6 and everyone has a decent sized portion).

chia seed pudding

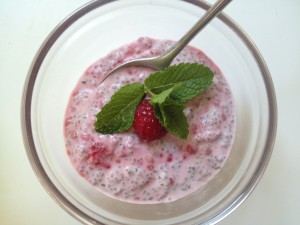
Raspberry Chia Seed Pudding

The second thing I really liked is that when you let the chia seeds sit for a bit they actually expand (size and weight), so it gives the pudding some texture, similar to tapioca. Which is another health benefit, as this ‘gelling action’ when the seed is exposed to water gives you a full feeling for hours – which is great for maintaining a healthy weight. (I also think it’s fascinating 🙂

The pudding was a hit with my parents and the kids. Enough that I have made it again recently and will do so again. I have also discovered a recipe for a Raspberry Chia Seed Pudding, which I have yet to try, but imagine will be just as good.

Chocolate Chia Seed Pudding

chia seed pudding

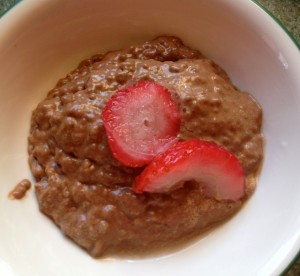
Chocolate Chia Seed Pudding

1 1/2 c. coconut milk

4 tbsp. maple syrup or honey

2 tbsp. cacao powder

1 tbsp. vanilla extract

1/3 c. chia seeds

**top with berries or coconut cream if desired

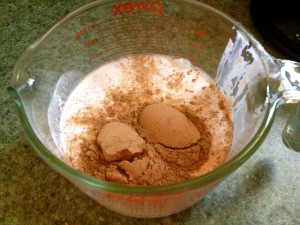
Whisk coconut milk, maple syrup or honey, cacao powder and vanilla until smooth. Stir in chia seeds. May divide evenly between 4 glasses or leave in bowl. Let sit at room temperature for 2 hours and serve.

Serves 4 **(You can easily serve 6 with this recipe and have decent sized portions if desired)


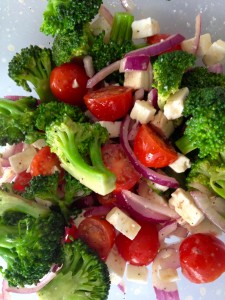
Crunchy Broccoli and Feta Salad

One of the things I love about summer (I know it’s not quite summer yet, but it’s on my mind), is all the comings and goings, the possibilities and options of places to go and see and explore. There is so much to do that you can easily be gone all day everyday if you chose to.

I love taking the kids out whether it be to the zoo, Heritage Park or checking out a new park in the city. One of the challenges and things I really don’t enjoy so much, is packing lunch for the day. Snacks are easy enough but I find that peanut butter sandwiches are only exciting for so long and then we need something new. I also like things that are ready to grab and go so packing lunch takes no time at all. I also like variety; so salads, things with vegetables and different flavours and textures. Makes the trip more enjoyable cause you’re looking forward to lunch, and life more exciting!

So I usually prepare ahead of time and freeze, muffins and cookies to take or other meals that are easy to make ahead and just grab the day of. That’s why I was very excited when I discovered this broccoli salad recipe. It’s fresh, crisp, has a zippy flavour and is lovely on a summer day. Plus I love feta cheese! and though I am dairy free, I discovered that goat feta is ok for me as it is not considered dairy as it does not come from a cow. (And if it makes a difference to you make sure you check the label when you are buying it – I had no idea that you could have cow feta until someone pointed it out to me, I just assumed they were all goat). Which I say thank God to that! Cause I love feta!

Crunchy Broccoli and Feta Salad

1 bunch broccoli

2 tbsp olive oil

2 tbsp wine vinegar

2 tsp dijon mustard

1 clove garlic, minced

1/4 tsp. each sea salt and pepper

1 cup crumbled feta cheese (I use goat feta as it is considered a non-dairy because it does not come from a cow)

1 cup grape or cherry tomatoes, halved

1/2 c. red onion, very thinly sliced

Cut broccoli into florets. Peel and cut stems into 1/4″ thick slices.

Pour enough water into saucepan to come 1″ up side and bring to a boil. Place broccoli in steamer basket in saucepan; cover and steam until bright green but still crisp – about 1 minute. (Do not overcook! I have made the mistake a couple of times of leaving it too long and ended up with mushy broccoli and it does not taste so good in the salad. One minute is really all you need). Drain water.

In a large bowl, whisk together oil, vinegar, mustard, garlic, salt and pepper. Add broccoli, feta, tomatoes and onion. Toss to coat.

Can be made a head and refrigerated.

Banana Muffins, Coconuts and Play Doh

Yesterday was a blissful day at home. Monday, it was snowy, we didn’t have to go anywhere or do anything. It was lovely.

I had just had a fabulous weekend to myself “sans kids”, enjoying some great social time an amazing day at work and some time for me. By Sunday night I was singing!

It nicely carried over to Monday morning, so when they day started with the twins crying for one reason or the other from the time they got up, it really didn’t phase me. I just got them what they needed and carried on. I didn’t “buy in” to the drama and by the time breakfast was over they were both content and playing on their own. And I mean separately on their own, which is unusual as they are usually playing (or fighting) together. Chloe was content in the kitchen organizing markers into plastic cups, pretending to do the dishes in our Fisher Price sink, Luke was in the living room builiding a train track with his Thomas the Wooden Railway. Both totally content and happy to be where they were.

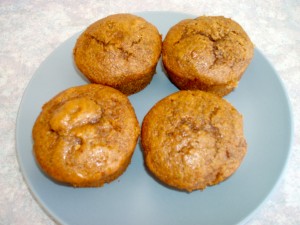
Gluten Free Banana Muffins

I was happy to putz around in the kitchen, cleaning up from breakfast, enjoying my green smoothie and experimenting with new recipes. I had even put dinner into the slow cooker and was basically ‘free’ for the day (ha ha). I had decided to bake, intending to try out a gluten free banana muffin recipe as well as making ginger cookies.

We are not completely gluten free at our house but I have been experimenting a little. I have found that though we are now sugar and dairy free that after eating a homemade muffin I become immediately tired. Deducing that the only thing left was gluten I decided to try out a gluten free muffin recipe. So I made some gluten free pumpkin muffins, had one and did not feel tired. Ah ha I was onto something here.

I buy rice pasta as much as possible and don’t consume a lot of bread. I have found that a little gluten is ok but have to be careful if I have too much. I would say that I am likely sensitive to it as opposed to intolerant. I have a sneaky suspicion though that my youngest son is intolerant to gluten. Just from various things that I have observed when he has it.

Vanilla Bean Cake

Besides everyone benefits; as when I do things like that I do them across the board. I am not making 4 different meals  and I find that we all feel better overall. So I have slowly started to gather a number of gluten free recipes such as Vanilla Bean Cake, Chocolate Dream Pie, Pumpkin muffins, Blueberry muffins and the Banana muffins I tried yesterday.

A fantastic website for gluten free recipes is Karina Allrich’s Gluten Free Goddess. All of her recipes are her own, tried and true. Many of them are dairy free as well but not necessarily sugar free, but I am familiar enough with what to do I simply make the sugar substitution and we are off to the races! This was the Banana muffin recipe I used yesterday and it was delicious. Moist and yummy! The kids loved them. In fact Luke and Chloe were hanging over the counter while I was making the batter, liking the bowl and waiting for them to bake.

I used coconut sugar in place of the brown sugar and boy were they yummy! I did not have any chocolate to add in or her other suggestions but it did not make a difference (and I might do that next time).

All in all it turned out well, even surviving Chloe putting Playdoh in her nose, and having to pause the baking to tend to that. (Yes seriously she did, and she screamed for 10 minutes, reminded me of the time my sister put a tiny doll shoe up her nose – what is it with children and putting small items where they shouldn’t be?)

So if you’re venturing into the world of gluten free try out some of these recipes. Many of them are dairy and sugar free too, yet you wouldn’t know it. (I have a friend who is salivating over the Chocolate Dream Pie and patiently waiting for me to make some so he can have a piece). I have found that there are enough resources and options out there these days to easily live gluten free, etc. without having to sacrifice taste or the treats that we love. True it is a bit of an adjustment but once you get your head around it, it is easy. And I have found that more and more people are going these routes for one reason or another.

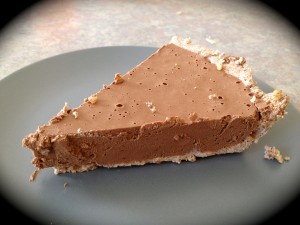
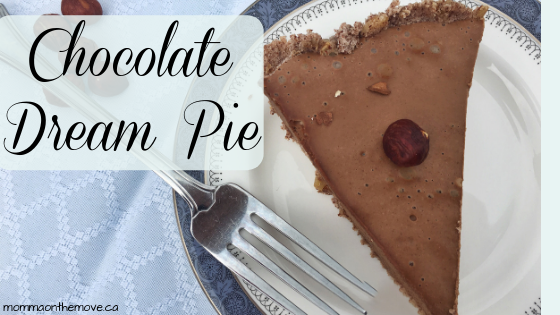
Chocolate Dream Pie

If you have found any great gluten free recipes please share them by commenting below. I love to try new things and I am sure other people will benefit as well!

Wintery Fun in Kananaskis

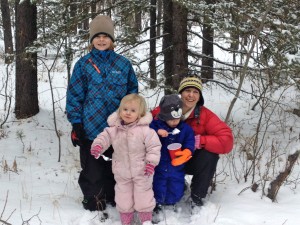
Today the kids and I spent the afternoon in Kananaskis, having been invited by our neighbors to join them for quading, a campfire, food and fun. It was a wonderful afternoon with certainly no shortage of food, laughs and friendship.

The kids got a chance to go out on the Razor, Matthew usually riding in the front passenger seat and Luke and Chloe being pulled along in the toboggan on the back. Luke, being the trooper that he is, was the first to try it out.  Hopping into the toboggan with no worries, totally trusting that he would be safe and wanting to find out what it was all about. Chloe being less sure refused the first time, but was then upset when Luke set off without her.

Luke on his toboggan ride

Riding with the neighbor Mr. Koop, Luke simply enjoyed the ride, taking it all in. As they were riding Mr. Koop would ask Luke if he was having fun and Luke would just nod. He would later ask if he wanted to ride some more and Luke would nod again. That’s my boy, he just sits and observes, but it doesn’t mean that he is not having a good time, he is just quietly enjoying it.

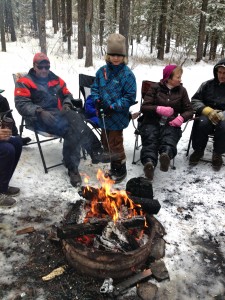
While others in our group took their turns on the Razor/ toboggan we cozied up around a campfire in the trees, having hot chocolate, brownies and roasting hot dogs. Everyone brought something and shared, there was plenty to go around. Now for us it’s a bit challenging to share foods with our requirements of no dairy and no sugar. But I was prepared and  brought our own hot chocolate, made with almond milk and sweetened with maple syrup, a little mesquite and lucuma powder; as well as cinnamon salted caramel brownies. This recipe, (sugar free, dairy free and gluten free), I discovered while shopping at Community Natural Foods earlier in the week. They are sooo good!

Chloe enjoying her hot chocolate

I managed to whip up a batch before we headed out so that the kids would have something to enjoy. Cause like I said sharing can be challenging, not for us to share with others, but for others to share with us. Everyone was fascinated by the brownies and many had a taste. Sheila commented that she would never know they had no sugar in them if I had not told her (and thought they were delicious).

Matthew was a bit frustrated by the amount of things that were there that he could not have, while the twins didn’t know the difference. But it challenged Matthew to branch out a little; he tried roasting grapes over the fire and seeing what it was like. He said they were not bad. It also demonstrated how much of our food has sugar in it – which I pointed out to Matthew. So many of our convenience foods and foods we choose to bring to gatherings contain sugar! Many of these things, like baked beans or chocolate cake I can make with natural alternatives, but they also take time and I am not always able to pull these things together if we get invited on short notice.

Roasting grapes

Overall though Matthew survived and though he felt a bit slighted and a little upset with me, he had a great afternoon. He got 3 rides on the Razor and even Chloe eventually got on. Chloe, Luke and I took a turn together in the toboggan and had a great time. We did flip over at one point and tumbled out, but we got back in and enjoyed the ride. Luke and Chloe screamed in delight and we returned to our site with rosy cheeks and covered in snow. (Now just so you know Conroy was driving very slowly with the little ones in the back but it was just the right speed for me and enjoyable and safe for the twins) Even though there were moments where Chloe was a bit concerned, if you asked her if she had fun, her eyes glowed and she nodded adamantly.

It was so great to get out for the afternoon and enjoy the winter snow. It’s amazing that we have hardly any snow in Calgary but to drive half an hour down the road into Kananaskis there is tons! It was a beautiful mild winter day with gently falling snowflakes that came off and on. We totally skipped Luke and Chloe’s afternoon nap to go and I left the house in a mess and came home to the same mess, but sometimes you have to do those things in order to enjoy life. I am a big believer in routine and rarely deter from it (in fact some people call me militant), but sometimes you need that change, that spontaneity.Yeah I had to clean up when I got home, and supper was a little late, but I was able to handle it all calmly and cooly just doing what I needed to do. And because I had that break and that socialization it did not bother me at all that I still have to clean up a little or stay up a little later (yes there are still dishes awaiting me in the sink).

We went out and connected with nature, fed our spirits and just had fun! Which my goodness sometimes we just need to do in life. Leave the laundry, dishes, cleaning and go play! Enjoy this life and the time we have on this planet cause we are only here for a short time, might as well make it excellent!

Plus we created some wonderful memories for the kids (the kind that will be “Remember when we fell out of the sleigh…”, connections with others and some great pictures. (it’s unlikely that the same can be said for the laundry) Now who can put a price on that?

What adventures did you have this weekend? Leave a comment and share below

Chocolate Dream Pie

chocolate raw dessert

Each year on Valentine’s Day I make some kind of dessert or special treat for me and the kids. It adds a little something extra to the day and something to look forward to. Usually something chocolate, I like to experiment with new recipes and new ways of doing things. Last year I made chocolate covered strawberries, dipping them in my own homemade chocolate, the year before chocolate cupcakes.

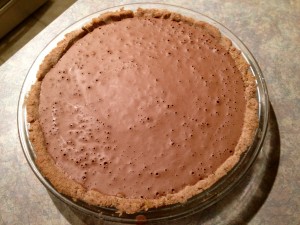
This year I made one of our new favorites Chocolate Dream Pie. This no bake, sugar free, dairy free, gluten free dessert is to die for! Made all in the blender it is delicious (and guilt free). There are a few unique ingredients, which might turn you off at first, but trust me you will not be disappointed.

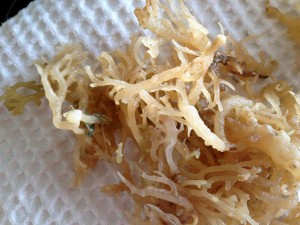
Irish Moss

For instance, irish moss, which is a kind of seaweed gathered on the coast of Prince Edward Island, helps congeal and set your pie. Only a pinch is needed and depending on where you live, may be hard to find. But once you know what you are looking for you can track it down, even if you order it online. I was able to find it here locally in Calgary at the Light Cellar.

My kids love it, of course. Matthew’s eyes get big and he starts to salivate. Luke and Chloe who had their first piece, and when done, promptly asked for a second piece. I also shared it with my girlfriend today who not only asked me for the recipe, but regretted sharing it with her son (who also loved it) because she wanted more for herself 🙂

Quick and easy to make, this recipe won’t disappoint.

Chocolate Dream Pie

Crust

1 c. hazelnut mash (from making nut milk)

1 c. walnuts

3-4 tbsp. agave nectar (I like to use Ojio as it is a higher quality agave)

1/4 tsp. vanilla

Filling

3/4 oz. irish moss (soak a small pinch of irish moss in water overnight, rinse well and use in recipe)

1 1/2 c. hazelnut milk

1/4 c. agave nectar

1/4 pitted dates

1/3 c. cacao powder

1/2 tsp. vanilla powder

pinch sea salt

1 rounded tsp. non-GMO lecithin

3/4 c. coconut oil

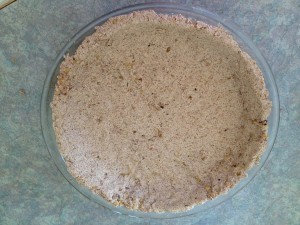
For crust: Make the *nut milk and use the leftover mash for making the crust. Put all the ingredients into the Vitamix in order listed. Select variable 8. Quickly turn machine on and off, scraping the sides of the container with a spatula between pulses, until a damp meal is formed.

Grease a 9 inch pie plate lightly with coconut oil. Press the crust into the pie plate.

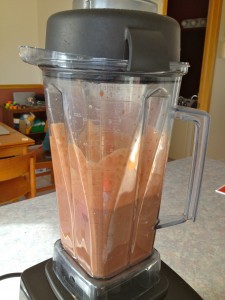
For filling: Place all ingredients in Vitamix in order listed. Select varaible 1. Turn Vitamix on slowly and increase speed to 10, then to high. Blend 30-40 seconds or until desired consistency is reached.

Pour into prepared crust. Place in fridge until set (about 1 hour).

*Hazelnut milk

Place 1 cup of hazelnuts, soaked overnight and drained, with 3 cups of water in Vitamix. Selecting variable 1, turn machine on slowly increasing speed to 10 and then to high. Blend for 30 seconds.

Over top of a medium size bowl, pour contents form Vitamix into nut bag. Strain through nut bag. Use milk and mash for recipe. Store leftover milk in fridge.


A Teaspoon of Sugar – the Effects of Sugar on our Body

It’s been almost 2 years since we eliminated sugar from our home and about as long that I have been blogging about it, sharing recipes, and talking about alternatives. What I realized the other day is I have not shared the background, the proven effects, scientific research and studies that sugar has on our bodies and why it is so bad for us. I feel that it is important to not only share what we did it but the why behind it (otherwise I just feel like someone up on their soapbox telling you it’s bad and not telling you why).

It’s one thing to think that it is a good idea to take it out but if you are like me, it also helps to have the research to back up your decision from the experts and medical professionals. Because unfortunately we live in a world where a lot of people won’t believe or validate what you are saying/ doing without it. Plus I also believe it is important to be educated about what you are doing in order to make informed choices.

I read an article the other day by Carol Galanty, Natural Foods Chef, titled “Are you a Sugar Addict” where she talks about sugar being an addiction as well as the effects it has on both our physical and emotional bodies. It has been proven that things such as weight gain, mood swings and premature aging are all effects of consuming sugar and that is just the tip of the iceberg.

In my further exploration of refined sugar and it’s effects, I discovered studies conducted in London and Yale University proving these effects and more. The London study was with children who exhibited ADHD symptoms, where they disguised foods that had sugar in them as ‘natural’. The goal of the study was to learn whether how a food looked made a difference in how our bodies processed it. They observed that regardless of how it was presented that all the children exhibited hyperactivity immediately after consuming the sugary foods.

We have all seen examples of this in our lives. In classrooms, where kids are calm and functioning rationally, then they have a class party, which usually includes treats and the kids go haywire soon after; no longer able to focus or listen well. I have observed this with my LIT group when we have a celebration with sugary snacks, the energy level goes up tenfold as well as the chatter and inability to focus. At Halloween we decided to have a no sugar party and the event went quite differently, we did not send wired kids home to parents and the evening was much calmer and more ‘even’ for everyone (and I would even venture to say much more pleasant).

In the University of Yale study they measured children’s adrenaline levels before and after consuming sugar. The amount of adrenaline after consuming sugar was 10 times higher then before! Adrenaline being the chemical in our body that moves us into fight or flight mode – a state where we act on instinct and survival – if it is 10 times higher then no wonder children are difficult to deal with after consuming sugar as they are on heightened defense! It puts them into a state where they cannot rationally respond or make good choices. They also found that after consuming sugar children were irritable, anxious and had difficulty concentrating.

Other university studies have also found links between sugar consumption, aggressiveness and antisocial behaviour.

Now you might say well I eat sugar all the time and I don’t notice these things or my kids seem ok. Do you notice those times of day when you feel sluggish or tired for no apparent reason? Do you ever feel irritable for no reason? Those are the down swings, coming off the sugar high. Now food does affect each of us differently, so one person might be more sensitive or reactive than another. As a result, symptoms may appear to be more extreme in one person than another, and for some they may say they do not really notice.

You also need to keep in mind that we (as a society) are eating sugar all the time, it is in our bread, our concentrated orange juice, various canned goods like tomato sauce, salad dressings, ketchup, not to mention the cakes, muffins, donuts and cookies. Our bodies adjust, get used to it, but it still doesn’t mean that it is not affecting us or harming our bodies.

As an experiment go without sugar for a day, just one day and notice how you feel. Notice your energy levels, your moods, etc. If you don’t notice much the first day, try 2, then 3. By day 3 you will begin to notice changes in your body (whether it be mood swings, irritability or headaches to name a few). With our son Matthew, his moods became calmer, more consistent and stable, and his sleep drastically improved. Some of these changes we noticed right away and some took longer; with his sleep it was almost 3 weeks before we really noticed the difference.

This was due to the fact that Matthew was going through withdrawal and his body needed to readjust. What I think many of fail to realize is that sugar is highly addictive (which our family doctor avidly confirmed this morning), it is like a drug, one as addictive and as harmful as cocaine. Therefore when we reduce or eliminate sugar intake our bodies go through and experience symptoms of withdrawal. These symptoms include anxiety, restlessness, depression, irritability, headaches, poor concentration, headaches and insomnia (which in children often gets diagnosed as ADD or ADHD). So there is going to be a period where one may experience and go through these symptoms until the substance is completely out of the body’s system.

These facts alone are enough for me to stay the course with our decision to eliminate sugar. We have found lots of healthy and natural alternatives to still enjoy our sweet treats. And I believe in eliminating it completely not just reducing it. It’s like to the drug addict who says well I’ll only have a little bit. Really are you free of it’s effects and/ or the harm it has on your body?

Imagine if the whole world moved towards eliminating sugar how do you think that would look? Our classrooms would be calmer with children more engaged and focused, our moods more stable, our level of peace more present and consistent. So why are we not doing it, because it is what we are used to, there is a huge industry out there, and we are all addicted to it and addictions are not always the easiest to break.

I believe we can get there and are moving towards it. Years ago people who chose gluten free or dairy free did not have a lot of options nor was it well accepted in the ‘outside’ world, such as restuarants and schools. But now there are many restuarants who offer gluten free menus and dairy free options. So it’ll come, in baby steps. It takes people to educate, be informed and live that lifestyle and it’ll become more accepted in this world.


Holiday Delights Sugar and Dairy Free Egg Nog

One of the many things I love about Christmas is the fun holiday drinks you can have. Things like hot apple cider, Christmas Jones, Angels Delight and my favorite Egg Nog. It is a rich creamy drink that you can have virgin style or add a dash of rum if you like. Either way it is delicious, especially if you sprinkle a little nutmeg or cinnamon on top.

Only available at Christmas, as soon as it came out in the stores I would buy it – sometimes as early as October – to enjoy and savour my first cup. Matthew also really likes egg nog and was asking me to buy some for him as soon as he saw it in the store. Unfortunately egg nog has the two things our family doesn’t consume anymore, dairy and sugar; therefore I was in a bit of a quandary. Some things I could live without, I did not want egg nog to be one of them! So I went on a hunt for one that would meet our needs. There had to be one out there.
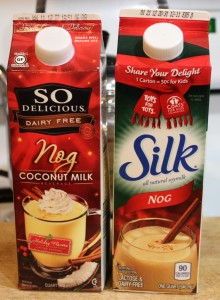
There are quite a few non-dairy options out there, Vita-soy makes a Holly Nog from soy milk, as does Earth Balance, Silk and So-Delicious (coconut milk) as well as nogs with almond milk. I even discovered a rice milk egg nog made by Rice Dream. But though these are all great dairy free options they are still sweetened with evaporated cane sugar, which we can’t have; we needed one with a natural sweetener.

Since I couldn’t find one in the stores,  I came home and hopped online to see what recipes I could find on the internet. (I love the internet it has opened up a whole new world for me and I often wonder how we ever got along without it). My preference was an egg nog made with almond milk so that is what I looked for; and I found 3 really good recipes that I have made and we all tried.
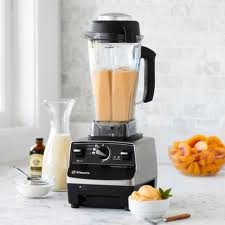
The first one I found on Incredible Smoothies, a website founded by Tracy Russell who eats a high raw vegan diet. She has all kinds of great smoothie recipes on her site. The recipe for egg nog, I really liked as it does not contain eggs, (which I was concerned about for the twins as egg nog usually contains raw eggs), and it was all made in the blender, sweetened with frozen bananas! It was fast, easy, simple and delicious!

The second recipe I found on Healthful Pursuit by Leanne Vogel, who shares recipes, travel, food and life experiences on her site. This recipe for egg nog contains egg yolks as well as coconut milk, but is cooked on the stove. At first I thought that this would not turn out so well as I thought “Warm egg nog? Really?” but it turned out to also be delicious! And the fact that it was cooked on the stove eliminated my concern about the twins having raw eggs, so they could have it too. It was also really good warm. Leanne says you can let it cool and enjoy it, but I found due to the coconut milk, it congealed in little chunks when it cooled, and though not bad you had small pieces of coconut milk in your egg nog. I have leftovers in the fridge that I will be heating up for sure when I enjoy it.

The last one I recently discovered this week, is completely vegan and is the new front runner for our favorite. Courtesy of SPUD (I love these guys but that’s a whole other post), a local & organic grocery delivery service, this egg nog recipe is creamy, delicious and super easy – just add all the ingredients to your blend and mix. Check out their recipe here.

The kids enjoyed both recipes too. Matthew’s favorite was the one from Incredible Smoothies, I really liked the one from Healthful Pursuit (I found it a little bit creamer and lighter) and the twins, well they liked both and didn’t seem to favor one or the other (they are so easy to please those two 🙂
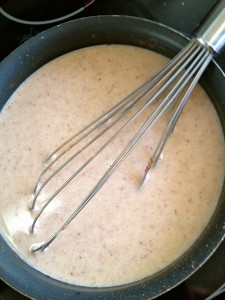
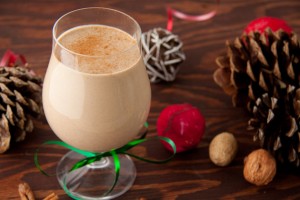
Dairy free egg nog with almond milk

The only downside with the stove top recipe is you end up with leftover egg whites and unless you have something to use them for they end up going to waste.

Either way we now have 3 delicious, dairy free, sugar free egg nog options, which even John tasted and said is “Way better than the store bought stuff.” And we can easily make them at home whenever we like, and as much as we like 🙂

So if you’re looking for a non dairy egg nog that you can make yourself or simply wish to try something new, these recipes are great (and they also happen to be gluten free as well). Once you’ve tried them come back and comment letting us know what your favorite is, or if you’ve found another egg nog recipe that you like and are willing to share!

Have fun and enjoy that glass of egg nog!

Raw Vegan Egg Nog with Almond Milk

1 1/4 c. plain almond milk (you can make your own almond milk, it’s super easy)

2 frozen bananas, peeled and sliced

1/4 tsp. nutmeg

1/4 tsp. cinnamon or 1 drop Cinnamon Bark essential oil

dash of clove or 1 toothpick dip* of Clove Bud essential oil

dash of sea salt

1 date (soaked for 10 minutes)

1/4 tsp. pure vanilla extract

Put all ingredients in a blender. Start on low speed and move up to high. Blend on high for 20-30 seconds until mixture is smooth. Serve with a sprinkle of cinnamon or nutmeg, if desired.

*a toothpick dip is used when you do not want a full drop of essential oil as it’s too much for the recipe. Simply dip a clean unused toothpick into the essential oil bottle and then dip the toothpick with essential oil into your mixture and swirl it around.

Almond Nog

4 egg yolks
2 1/4 c. unsweetened almond milk

1-400 ml can of coconut milk

1/4 c. coconut palm sugar

2 tsp. pure vanilla extract

1 tsp. ground nutmeg

1 tsp. cinnamon or 1 drop Cinnamon Bark essential oil

pinch all spice

Separate the eggs and place the egg yolks in a bowl. Set aside.

Combine the remaining ingredients in a medium saucepan on medium heat bringing mixture to a simmer. Once simmering reduce heat to low.

Slowly add 1/4 c. of the hot liquid to the egg yolks in a bowl, whisking continuously. Continue adding liquid to the egg yolks until you’ve added 1 cup, then transfer new mixture to saucepan. Turn heat back up to medium and simmer for 4 minutes, whisking continuously.

Remove from heat and serve immediately or put into a mason jar and refrigerate.

Sprinkle with a pinch of cinnamon or nutmeg, if desired.

*note recipes have been reposted with permission of the original authors


Shop Art Calendars at Calendars.com

Vanilla Bean Cake- a.k.a.Guilt Free Cake

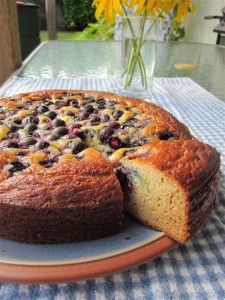
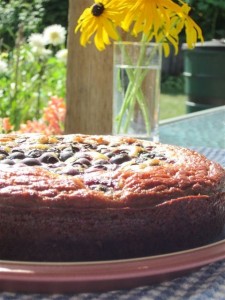
Vanilla Bean Cake

When I tell people that we have completely eliminated sugar at our house I get a variety of responses – from “Good for you!” to shock and amazement “How did you do that?” I even have some people who swear they can’t live without their sugar fix, which I think is cute actually.

We originally made this choice due to Matthew’s needs but I feel that it has benefited us all. In fact, through my sugar free journey I have slowly been able to ‘convert’ some of my other family members. Not that I am on a mission to convert anyone, it is all personal choice and it is not for me or anyone else to get preachy and tell people what to do. But I do like talking about it and sharing what I have learned with others, and if it benefits them, then I am happy to have helped.

My family became interested in what I was doing as they were watching the changes I was making and how I was doing it. They became curious, so some of them decided to try it themselves, choosing to do so for different reasons. My mother has done quite a bit without sugar, now making bread, cookies, cakes, etc. She is also very accommodating when we come to visit and makes sure that she has food and meals for us that meet the no sugar requirement. Bless her!

I also have influenced my aunt and one of my sisters, so much so that they are coming to me for recipes and tips. They are learning themselves too how to adjust a recipe that they already have to meet their needs.

Once Upon a Time

My sister Cathy, currently of Vancouver, BC and part of the costume team for Once Upon a Time (I love that show!) came to me looking for a recipe for vanilla bean cake. I had come across this when working with Nina Manolson of Healthy Yummy Kids and Smokin’ Hot Mom. Cathy had tried a vanilla bean cake before without much success so was looking for a new recipe.

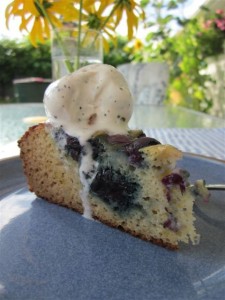
She tried the recipe I gave her as is but found that for her personal tastes it was a bit dry and needed a little something to spruce it up. So she adjusted and revised the recipe and now makes this moist delicious cake! Which I can vouch is true, as I got to have a piece this summer. She usually tops it with vanilla bean ice cream, but it is very good without.

It was so good that I asked her to send me her revised recipe to post on my blog and share with you folks. So here it is, enjoy! And it is a very healthy cake, dairy free, sugar free, gluten free and full of fibre, so go ahead have 2 pieces!

Vanilla Bean Cake

2 cups cooked white beans

Coconut Oil

6 eggs

3/4 tsp. liquid stevia

1 tsp. pure vanilla extract

1/3 c. honey

1/4 c. coconut oil, liquified

1/3 c. coconut flour, sifted

1/2 tsp. sea salt

1 tsp. baking soda

1.5 tsp. baking powder

1 fresh lemon

In a blender or food processor add white beans, rinsed and at room temperature (this is so they don’t cook the eggs or congeal the coconut oil), eggs, stevia, vanilla and honey. Puree well.

Then add to blender coconut oil, coconut flour, sea salt, baking powder and baking soda and puree well.

Transfer mixture from blender to a bowl. Add the zest of one lemon.  Fold in by hand.

Squeeze all the juice of the lemon into a cup and add 1 pkg.  (1 g) of stevia sweetner.  Stir and set aside until after the cake is out of the oven.

Pour mixture into a spring form pan, or a well greased 9” cake pan. Sprinkle fresh or frozen blueberries on the top.

Bake at 325 F for 55 minutes.  Check if it’s done by inserting a knife in the centre, if it comes out clean, it’s done.  Otherwise bake for  5-10 additional minutes, checking often so it doesn’t over bake.

Once cake is removed from the oven, let stand for 10 minutes.  Then, while still warm, pour lemon juice mixture over top of cake.

It is delicious warm and plain, or add a scoop of frozen dessert such as Organic Rice Dream Frozen Dessert.

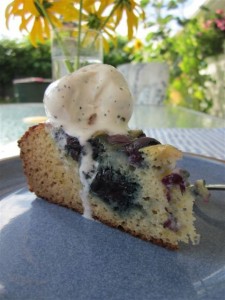
Vanilla Bean Cake topped with yummy ice cream

Next week I will have my first guest blogger, Nina Manolson of Healthy Yummy Kids. She is a certified holistic health coach who believes and educates women and families how to live and eat well in a world that doesn’t. She has many tips and recipes on how to eat and live sugar free as well, so if you wish to continue your sugar free learning don’t miss her post next week!

Homemade Macaroni and Cheese Dairy Free…What?

Macaroni & Cheese is definitely a kid favorite. One that many of us remember having as a ‘treat’ growing up. We would get so excited when Mom announced that she was making mac & cheese for lunch! I would gobble it down asking for another serving, sometimes overindulging myself as it was sooo good. Yes we were having the Kraft Dinner in a box, full of processed goodies with likely no nutrition at all. But we loved it!

When I became a Mom and was more conscious of what we were eating I began to make my own macaroni and cheese from scratch. It is pretty easy to do. Just cook the macaroni and then add milk, cheese and butter to make the sauce. But then we went to dairy free. Hmmm…I know you are probably sitting there scratching your head wondering, how the heck can you have macaroni and cheese without any dairy. “Impossible!” you say, but I tell you it is not.

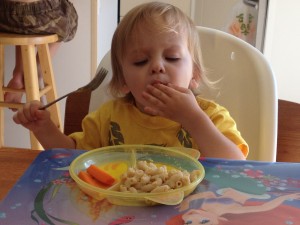
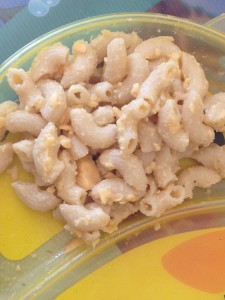
Chloe loves mac & cheese!

When we decided to move to a dairy and sugar free household, due to alleriges and personal choice, one of the things that I wanted to ensure was that I could still provide all the things that we liked to eat without having to feel like we were giving things up or the kids feeling like they couldn’t have what all the other kids were having.

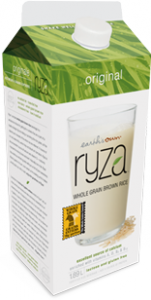
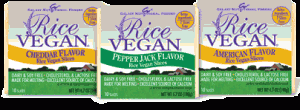
I found that with so many good dairy alternatives on the market now that making macaroni & cheese without dairy was actually very easy. I simply substitute Earth Balance, a vegan buttery spread for the butter, use Ryza rice milk for the milk and Vegan Rice Cheddar made by Galaxy Nutritional Foods, for the cheese. Now I have to admit that the vegan rice cheddar is not the same as regular cheese and though it works well in cooking it is not something that I would cut a slice of and put on a cracker.

Matthew enjoying his mac & cheese

Regardless, the dairy free version is a hit at our house, Matthew loves it and eats it up usually a bowl or 2 and the babies have at least 2-3 helpings themselves. When making it for the kids I usually put in 3 cups of macaroni keeping everything else the same. The recipe says it serves 6 but with my kids it is ‘serves 3’.

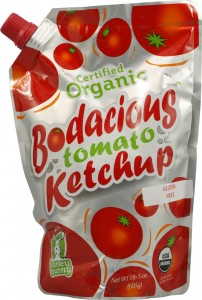
Matthew is the only one who would know the difference between the dairy and non-dairy version and if you were to ask him now he likely wouldn’t remember. He would just say that what we make is good. He likes to add a little bit of salt and pepper, as well as ketchup (we have a brand of ketchup that is sweetened with honey called Bodacious Ketchup) on his macaroni. I was never a fan of ketchup on macaroni, or eggs for that matter. I always looked at other kids weird when I was at their house and they added ketchup. I thought it was gross, but to each his own.

Whatever condiments you may like to add to your mac & cheese you’ll find this recipe to be a great hit at your house. The original recipe comes from Company’s Coming Pasta, but I have posted the dairy free version we make at home here. One other adjustment that I have made is I use brown rice pasta now too. This makes it a nice gluten free option as well. So make, eat, enjoy! It is super healthy for you. And really with mac & cheese how can you go wrong?

Dairy Free Macaroni and Cheese

2 c. elbow macaroni

1/2 c. rice milk

1/4 c. Earth Balance

1 tsp. onion salt

1/8 tsp. pepper (white is best)

2 c. grated Rice Vegan Cheddar

Cook macaroni in a large pot of boiling water until tender but firm, about 5 to 7 minutes. Drain macaroni, rinse in hot water and return to pot. Add remaining ingredients. Heat slowly, stirring to melt cheese.

Serves 6

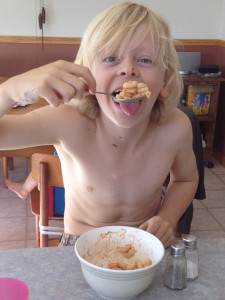
Luke gobbling it up!

Summer Treats – Sugar Free Cherry Pie

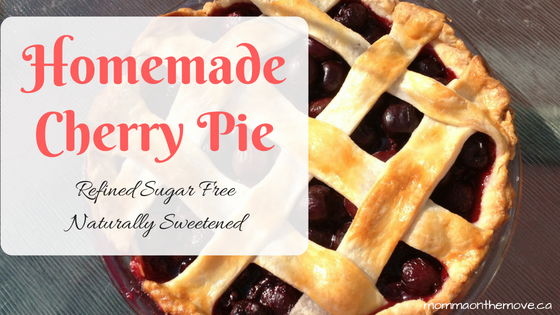
sugar free cherry pie

One of the things I love about summer is all the fresh fruit that is available. Cherries, peaches, strawberries, blueberries, etc. It’s abundantly available, and it’s fresh, sweet and luscious, a taste sensation when you put it in your mouth.

I feel lucky that my parents live in the Okanagan where fresh fruit is rapidly abundant. Fruit stands and u-picks line the sides of the roads where it is not a matter if there is fruit but where you would like to get it from.

I always tend to get a little over zealous and buy lots of fruit to bring home. I make jam, freeze, eat it straight or make various desserts like crumbles and pies.

In fact last weekend when I was in the Okanagan I bought 20 lbs of cherries for $20. It was a steal of a deal! The only thing is when you buy that much fresh fruit you have to do something with it fairly quickly or your ‘steal of a deal’ ends up going rotten and moldy very quickly.

sugar free cherry pieSo there I was Tuesday night for 3 hours pitting and jamming cherries, trying to give some away to friends, and getting creative with what I was going to do with this fruit.

(I would highly recommend using a cherry pitter as this makes it much easier to pit cherries. It is also something the kids can do and help with – my son loves using the cherry pitter and I can easily enlist his help).
By the time I was done I was covered in cherry juice (and so was my kitchen), with a mound of cherry pits and stems in the sink and a huge mess to clean up. I never wanted to see another cherry again…
The benefit of all this was cherry pie. Cherry pie is one of my favorite pies, other than pumpkin and coconut cream, so when I was getting to the end of the cherries and still had a lot left I decided to treat myself.

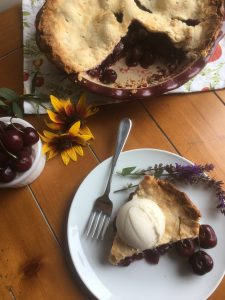
sugar free cherry pieAs you may know there is lots of sugar in pie, but as sugar and dairy free household, I have become adept enough to make the appropriate substitutions and still have a delicious experience (where it tastes just as good as one with sugar, if not better). My mouth was already watering at the thought of this pie, with ice cream on top.

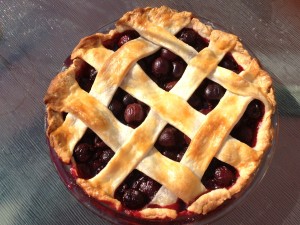
I used Martha Stewart’s Sweet Cherry Pie recipe that I found on the internet and adapted it accordingly using honey instead of sugar. It turned out beautifully and everyone had 2 pieces! With ice cream of course!

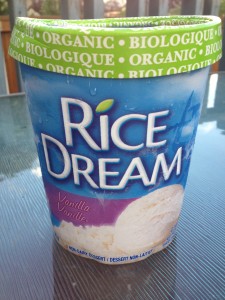
Vanilla Rice Dream

As for the ice cream, I have recently discovered Rice Dream, a lactose and gluten free ice cream available in stores. It is also sugar free, as it is sweetened with brown rice syrup and agave nectar. It is quite good, in fact it is so good I had way more ice cream than I actually did pie!

I make my own crust (and have been praised for how good it is) simply by following the recipe on the TenderflakeÂŽ box, which I use in my crust. It creates a beautiful light and flaky crust.

This pie recipe used a lattice top crust, which I don’t usually do but decided to try it out, and though I found it did look very pretty, I prefer a full crust on the top. A good crust is something we really enjoy at our house, so the more of it the better! Plus it’s really hard to cut once it’s baked (as in getting it out in a decent piece)!

Cherry Pie
  • 4 cups cherries
  • sugar free cherry pie1/4 cup honey
  • 2 -3 tablespoons arrowroot powder or cornstarch
  • 2 tablespoons fresh lemon juice
  • All-purpose flour, for rolling
  • 1 large egg yolk, beaten with 1 tablespoon water, for egg wash
  • 2-9 inch pie crusts (make your own or store bought)
  1. Preheat oven to 400 degrees. On a floured surface, roll out pie crust one to a 14-inch round. Fold dough in half and gently place in middle of a 9 inch pie plate. Once centered unfold dough so that it fits evenly in the plate (do not stretch dough). Using pering knife trim dough to a 1-inch overhand all around.
  2. In a large bowl, combine cherries, honey, arrowroot powder, and lemon juice; toss until cherries are well coated. Pour into prepared bottom crust.
  3. Roll out second crust to a 14-inch round. If creating lattice, cut into eight 1 1/2-inch-wide strips; discard the shortest two. Weave strips over filling to form a lattice. Using pering knife, trim strips so they hang over rim by 1 inch. Tuck strips under rim of bottom crust; press to seal. Crimp with a fork all around the edge. If choosing not to create lattice, simply fold crust in half and place over pie. Trim, press to seal and crimp as described.
  4. Using a pastry brush, lightly brush lattice/ crust with egg wash.
  5. Place pie on a rimmed baking sheet. Bake until filling is bubbling rapidly all over, 60 to 70 minutes (tent with aluminum foil when crust starts to brown, about 40 minutes). Though original recipe calls for above baking time I found that pie was done in about 50-55 minutes. Please use times as approximate and gauge it according to your oven.
  6. Transfer pie to a wire rack, and let cool to room temperature, at least 3 hours.

Like fruit pies? Check out my other sugar free pie recipes for Peach, Apple & Blueberry