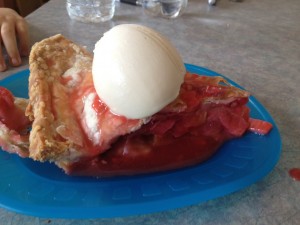
Strawberry Rhubarb Pie

IMG_3349The other day one of my neighbors offered me some fresh rhubarb from her garden. I am not a big fan of rhubarb (and don’t really know a lot about what to do with it) but I do really enjoy strawberry rhubarb pie (and I love making things with ingredients fresh from the garden). Years ago I had found a recipe and tried it. So when Matthew came in and said the neighbor asked if we wanted some I said yes! right away.
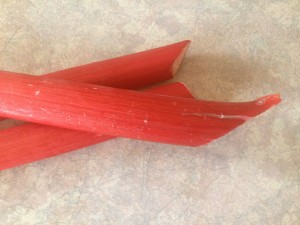
IMG_3330Rhubarb is a tart fruit that on its own is not to my liking but combined with strawberries I find the whole thing delicious. Now those years ago when I first made this pie it was the traditional white sugar filled filling, so this was my first attempt making it sugar free. I was a little nervous because it called for mixing the flour and sugar together but thought that would not work well with the agave nectar (what I chose to substitute for the sugar) being a liquid.

What I decided to do was to mix the flour and salt together and then once everything was in the pie shell to then pour the agave over top, letting it fill in the holes, as well as being on top.
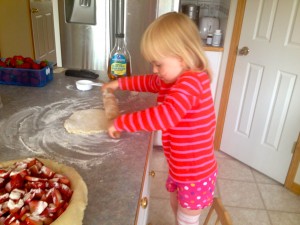
IMG_3335The kids of course love pie, so it didn’t matter to them what kind of pie I was making, just that we were having pie after supper. Chloe actually helped me make the pie and enjoyed assisting in rolling out the pie crust. She also watched me cut the fruit and asked many questions along the way as to why I was doing this or that.

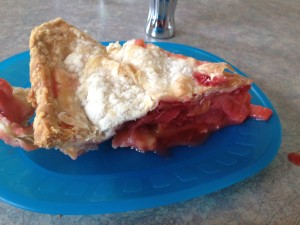
Once the pie was in the oven, everyone settled down. But as soon as it came out after supper I barely had time to let it cool before everyone was asking for a piece. I would have prefered to let it cool much more to allow for the filling to set but they weren’t having any of it. So I cut pieces for everyone and topped it with ice cream.

Oh. my. God. It was delicious! In fact it was even better than the sugar version I had made before. The kids licked and practically ate the plates it was on. And then promptly asked for more!

I feel that anything made fresh and with fresh garden grown ingredients is going to turn out quite well. But this was beyond my expectations, it was sooo good. With just the right combination of sweet.

Strawberry Rhubarb Pie

2-9 inch pie crusts (one for top and bottom)IMG_3331
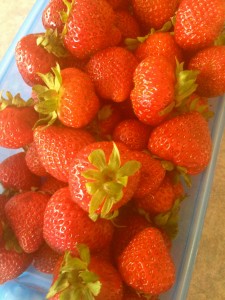
2/3 c. agave nectar

¼ c. flour

¼ tsp. salt

3 c. chopped rhubarb

3 c. sliced strawberries

Mix flour and salt together, put 1/3 of mixture on the bottom of the pie crust. Add fruit in pie shell, leave slight mound in the center, and pour remaining dry ingredients on top. Pour agave nectar over top of fruit and dry ingredients. Cover with top crust. Pinch edges together to seal. Cut small slits in top of crust.

Bake at 425 F for 10 minutes, then reduce heat to 350 F and bake for 40-50 minutes. Let pie cool for at least 15 minutes before serving to allow the juices to cool and set.IMG_3345
The Ease of Pallet Gardening

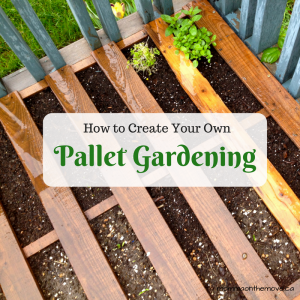
Pallet Gardening

More and more people are going back to growing their own gardens. With the move to eating more organically, and taking care of our planet, many are reconnecting to the Earth. Nurturing and growing flowers, fruits and vegetables is increasing. From community to container gardening people are making the most of what they have to produce organic sustainable gardens.

For many though the challenge is space. With the newer houses and smaller yards – to put in a decent garden would take up a good part or all the yard space! Not to mention people who are in apartments or condos, where do you put it?

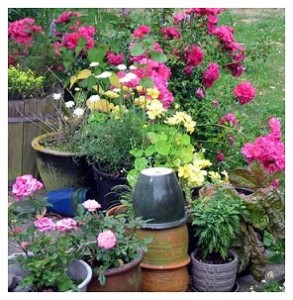
containergardenonstepsWith container gardening being one solution, the newest discovery is pallet gardening, using an old pallet to grow plants or vegetables in. When I first learned about this last year I thought this was a really great idea. It allowed me to put the pallet wherever I wanted, so it did not take up space on my grass, I could expand my garden and grow more! and it was using materials that were easy to find and inexpensive. I could also move it around if I wanted to, though a bit heavy it’s great to have that option.

To make your own pallet garden you need:

  • an old pallet
  • landscape fabric
  • stapler
  • dirt
  • whatever you would like to plant

When you are looking for a pallet, you want one that is in good condition, not rotting, nails sticking out or broken boards. (And if you are growing vegetables in it you should opt for one that is heat treat as opposed to fumigated).

Measure out landscape fabric so that it covers the back and up the sides. Do this twice, as using a double layer will make it more durable and stronger. Once you have the fabric to size, put both pieces on top of one another and staple along the bottom, doing one corner, then pulling it taught and securing the opposite corner, etc. until all corners are secured. Then go along the bottom edge of the rest of the pallet. Pull the fabric taught and staple the sides.

Flip the pallet over and fill it with dirt. I would recommend a bag of dirt from your local garden center as it will contain more nutrients than the soil from your garden/ yard. Soils like organic potting soil or triple mix are excellent choices.

Plant your plants in rows between the slats of your pallet. You can start from seed or plant plants that have already been started inside or purchased. Water pallet well.

Stacking pallets

Stacking pallets

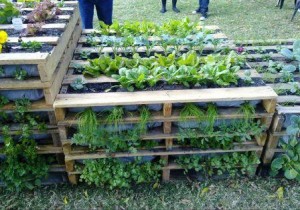
Now comes the fun part. If you have planted plants that are already started you can wait a few days until the roots are established then you can move your pallet. You can set it upright against a wall or fence. You could also plant another pallet and stack pallets on top of each other. This takes a bit of planning to ensure that everything is getting enough sun, but it is a great space saver and create a huge garden in a small space.

If you have planted from seed, you will have to wait longer if you wish to stack or put the pallet upright, as things need to be established before doing this.

Remember to water your pallet regularly as they tend to dry out much quicker than your regular garden.

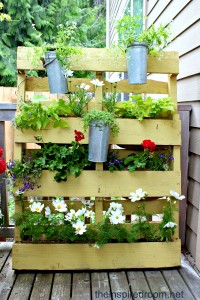
plants-in-a-palletThe great thing about pallet gardening is that you can get really creative with it. You can create eye catching designs for vegetable, herb and flower gardens in just about any space! Morning Chores has a fabulous resource with 43 different ideas for all kinds of pallet gardens. There is no end to what you can with your pallet!

I also think this is a great way to garden with kids, as they can get really creative. Not only are they able to help you with planting but could also decorate the pallet by painting or suggesting ideas on what to create.

It is also easy and accessible for them. Both Luke and Chloe helped me plant our pallet this year and enjoyed picking the seeds to put in. We usually plant vegetables in our pallet as we love to eat the fresh veggies from the garden. This year we have green and yellow beans, spinach, two kinds of lettuce, and a variety of herbs. Some we started from seed and some were all ready small plants we had purchased.

It sits on our deck which gets lots of sun, but is a great place for the kids to ‘watch’ what is happening as we go by it everyday on our way out to the car. So far our beans have started to come up as well as the spinach. Looking forward to seeing what the harvest brings this year 🙂

Sugar the Good, the Bad and Why it’s important to know the difference

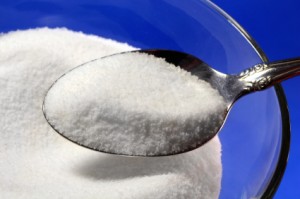
teaspoon_of_sugar_photoThere have been an increasing number of articles recently on sugar; the astounding amounts we consume to the effects it has our body. From National Geographic to MacLean’s magazine they produce astounding stats about sugar. As a result this has spring boarded various responses from the public either agreeing with these articles or disputing them.

Recently I read a blog post on todaysparent.com that stated that ‘fear mongering‘ does not teach our children how to eat healthy and that labeling sugar bad or good was not a good thing. I agree with this blogger in part but I also disagree with her as well.

It is important to distinguish between the different types of sugar. Sugar in natural forms, such as fruit and honey, are good for us and we do need it to assist our body’s functions (as Jen Pinarski states). It is the refined sugars, the ones that are processed from their original forms and remove things such as fiber or other beneficial ingredients that are the concern. Things like white sugar, molasses and corn syrups to name a few.

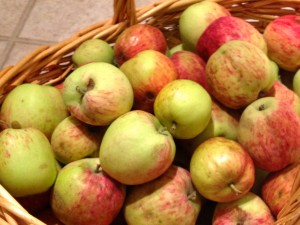
Fruit has natural sugar that our bodies metabolize and use positively

Fruit has natural sugar that our bodies metabolize and use positively

It is also the amount of these sugars that we are consuming in our daily lives, as 80% of our foods do have some form of processed sugar added to it. This is what creates the astounding amounts that we consume on a daily basis. Yes some of it is choice and yes many people can read labels but many people don’t. They assume that because it is tomato sauce it is good for them and there is no problem, but many brands add processed sugar.

I agree that we need to educate our children about the pros and cons of sugar, and teach them the differences between natural and processed sugars. But how does a kid get that processed sugars are addictive, suppress our immune systems, and create mood swings? They don’t. We have been sugar free in our home for almost 3 years now and I still struggle with my oldest son understanding why we do this. There are days he’s cool with it and there are days that he’s not; and in our case he is one of these people who is highly affected by sugar and it wreaks havoc on our lives when he consumes it). I am trying to teach him that he is a leader for others and that he is sick less or for not as long (to name a few benefits). It’s over his head, he doesn’t care. He wants the coffee crisp that the kid beside him is having, because its prepackaged and ‘everyone else’ has one. Never mind that I can offer him an alternative that is pretty much the same but made with whole ingredients and natural sweeteners.

food_labelsIt is the parents/ adults we need to educate first, teach them how to make healthy choices for their families and how to teach their children to do so as well. I have always felt the best way to teach children is to model, they are so impressionable and often do and say what they’ve seen rather than what we have said. Not that saying informing to is not effective, we need to do that as well, but our actions truly speak the loudest. So parents need to read labels, switch out soft drinks for healthier choices, etc. and do it happily. The kids will start to do it as well. My son often will pick up something and read a label before he asks for it, he knows what to look for and the twins do as well, though they cannot read yet, they are doing the action and know why 🙂

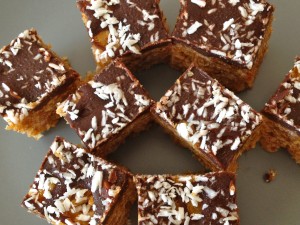
Almond Butter Rice Krispie Treats

Almond Butter Rice Krispie Treats

It’s the titles of these articles that are the problem. Though they catch people’s attention and are quite factual, the titles such as “death”, “anti-sugar”, “fear mongering” are the things that turn me off and send me looking for another source. But no matter how it is titled, the bottom line is processed sugars are bad, there’s no two buts about it. If it was invented today it would not be approved for consumption. It is an addictive substance that has many negative effects on our body. This does not take the joy out of eating but allows us the opportunity to get creative and find sweet healthy alternatives (with natural sweeteners). I can make quite the variety of treats that taste yummy and one would not know the difference if it was sweetened with processed or natural sugar.

It also provides us all with the opportunity to learn more about our foods and where they come from, how they affect our bodies. I believe the government and schools have to start somewhere and I fully support them removing pop and candy machines from their buildings. Perhaps their message is a bit skewed in how they’re communicating it, but they can work on that. The next step is to offer healthy choices in lieu of, as well as teaching children why a is better than b.

Taste of Nature – a Fabulous Sugar Dairy & Gluten Free Snack in a Package

Today I am very excited to be doing my first official product review!

When we decided to go sugar free in our home, it meant making a lot of things that we normally purchased and enjoyed, from scratch. Bread, salad dressings, treats, and granola bars were some of the items that contain refined sugars, which was one of the ingredients we were avoiding. I spent hours in the kitchen creating and trying new recipes, finding things that worked and we liked. And though I was happy to be making this healthy change for my family, I was not loving being in the kitchen for most of my day. My oldest son, was also struggling with wanting the prepackaged stuff that everyone else had even though what I was providing was indeed tastier and better for him.

IMG_2951Each time I went to the grocery store I would look in the organic/ health food section to see what ‘packaged’ products they had come up with. Yes you could find all kinds but they usually contained ingredients that we couldn’t have, like dairy, refined sugar and on some occasions gluten. I could find a dairy free product but it had gluten, or sugar free but it had dairy and nowhere could I find one that met all 3 (and tasted good, we have tried some that looked promising but they did not taste good at all).

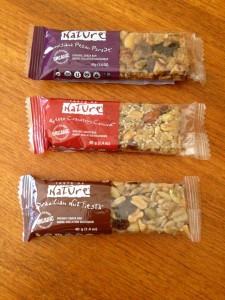
So last week when doing my regular shopping trip I was very pleased to discover these fruit and nut bars by Taste of Nature! A Canadian company, these organic snack bars are delicious and come in a variety of flavors such as Canadian Maple Forest, Quebec Cranberry Carnival and California Almond Valley. Each flavor is a different mix of nuts, seeds and fruit, such as raisins, almonds, sesame seeds to exotic ingredients like dried cherries, pomegranite and cashews.

I immediately bought a couple and brought them home to try. We didn’t even make it out of the parking lot and the twins were asking to have one. So we sampled and shared the Brazilian Nut Fiesta. Wow! These bars were good! Sweetened with agave nectar and brown rice syrup these bars contain no artificial flavors or additives, have no dairy and no gluten! They are also certified organic, vegan, and kosher! We had hit the mother load!

I was so excited to have found these that I immediately came home and checked out their website. I was thrilled to see that they offered many more flavors such as Niagara Apple Country, Nova Scotia Blueberry Fields and Persian Pomegranite Garden. This is where I also learned this company aims to produce zero carbon footprint, uses green business practices and that providing quality products and caring for our environment are very important to them.

IMG_2955I was sold! This was a great company and one that met all our dietary needs. Woohoo! I could now spend a little less time in the kitchen 🙂

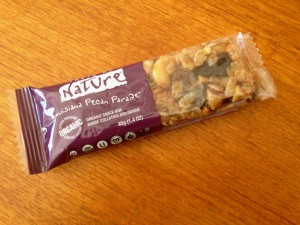
Over the course of the next week we tried a few more flavors, Canadian Maple Forest, Quebec Cranberry Carnival and Louisianna Pecan Parade (one of their newest flavors and my favorite as it has cashews and dried cherries in it!) Their other new flavor is Polynesian Coconut Breeze, which I am very excited to try as I love coconut as well!

Of course the twins have enjoyed all the flavors and my oldest son’s favorite is also the Louisianna Pecan Parade.

I am so pleased to see Canadian companies being innovative and creating products that are meeting the growing demands and changes of a healthier population and recognizing that there is a need and market out there. And the variety that this company provides is fabulous!

The other thing I was pleased with was the price for this product. At less than $2 per bar I thought this was quite reasonable considering the quality and variety of ingredients. We will definitely be purchasing more of these great bars and adding them to our healthy snacks!

I’d like to thank Taste of Nature who provided a variety of their fabulous bars for us to try. Thank you! They are delicious!

Broccoli Cheese Soup

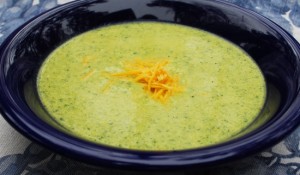
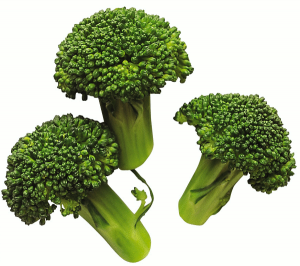
broccoli-soup-bryons-lrgI wanted to post a recipe today for something sweet, especially for all you party goers who are joining me from the UBP; but I finally perfected my Broccoli Cheese Soup recipe and had to share – now both dairy free, gluten free and delicious!

For the past while, I have been just making a straight creamy broccoli soup, which was ok, but I missed the cheese. And the kids, who use to gobble it up, were kind of taking it or leaving it when I made it. In fact I wasn’t eating it at all (ha ha)!

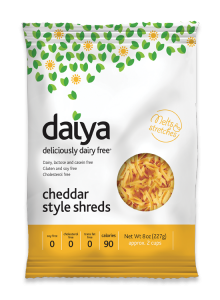
So earlier this week when I was making it for lunch I decided to experiment. First I decided to use brown rice flour instead of regular white flour, as I am trying to make more things gluten free in our house (plus I have noticed that I feel tired after some things with gluten). Then I decided that I was going to throw in some of this fabulous non-dairy cheddar cheese that I discovered by Daiya foods. See one of the things I really do miss about not having dairy is cheese. And though there are lots of choices out there now for non dairy cheeses, I just couldn’t find one that I liked. They either didn’t melt well, or taste good and they definitely weren’t tasty enough to put on a cracker (yuk!). But recently I discovered this vegan cheese made by Daiya, a Canadian company actually (Go Canada) based in Vancouver. It melts, it tastes good and everyone gobbles it up! I think it is very close to tasting like dairy cheese and they make it in all kinds of flavours! They even sell it in slices so, guess what? We are now having grill cheese once again, which honestly used to be a staple for lunch.US-Shreds-Cheddar

Anyway I tossed a handful of the Daiya grated cheddar into the blender and mixed it all up.  It was fantastic! Luke gobbled it up, I ate it and will eat it again (this is a good sign). And it tasted really cheesy, like you would expect a nice cheesy soup to taste. I think this means I can go back to making my Cheesy Potato soup now….

The recipe for this soup is really easy and doesn’t take any time at all to make. Give it a try! You won’t be disappointed.

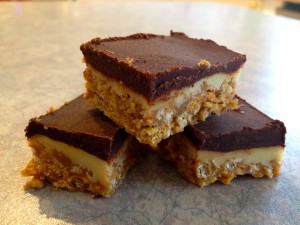
And for those of you who are looking for a little sweet treat, check out Chocolate Peanut Butter Cereal Squares, Marshmallows, Chocolate Macaroons.

Do you have a favorite cheesy soup recipe? Please share it with us in the comments below.

Broccoli Cheese Soup

2 cups     fresh cut broccolibroccoli

1 cup      water

1 ¼ cup reserved juice, plus water if not enough juice left

1 cup      almond milk

1 tsp       chicken bouillon powder

¼ tsp     sea salt

1/8 tsp   pepper

2 tbsp    brown rice flour

1/3 cup   grated vegan cheddar cheese

Cook broccoli in water in covered saucepan until tender. Drain and reserve juice. Put broccoli in blender.

Add remaining 6 ingredients to blender. Process until smooth. Return to saucepan. Heat, stirring occasionally, until mixture boils and thickens. Makes 3 cups.

Serves 2-3

IMG_0753

Chocolate Peanut Butter Cereal Squares

Party! Party! Party!

scaled_photoWelcome! I am very excited to be joining the Ultimate Blog Party 2014 again this year! I think this is a great opportunity to get out there and connect with other bloggers while sharing the things that you love, including your own blog! Thank you to Janice and Susan of 5 Minutes for Mom for hosting this fabulous event.

If you are new to Momma on the Move I’d like to thank you for stopping by and for those of you who are returning welcome back. It is a pleasure to have you all here.

8095971047_2a93f46d0a_bMy name is Carmen and I have 3 beautiful children, 4 year old boy/ girl twins and an older son. I grew up on the East Coast and have a deep love for the ocean. I love the outdoors, travelling, exploring new places and to getting out there to enjoy and embrace life!

The kids keep me busy with the twins now in preschool and our decision to eat sugar and dairy free at our house. When not playing with or helping the kids, I am in the kitchen trying out or modifying recipes to meet our needs. I have even been dabbling in some gluten free recipes over the past year as well.

IMG_2646We made the decision to remove sugar, back when my Matthew, my oldest was in grade 2, due to behavorial and sleep challenges with him. It was amazing the difference it made! Shortly after we went dairy free as I discovered both myself and my daughter had an intolerance and the gluten well, when I discovered I was still feeling tired after eating a dairy free/ sugar free muffin, gluten was the only thing left!

I have always loved to write but started blogging because I felt that I could share more faster and reach a larger audience. I find that there are so many things to share and explore, as life is a story. Everywhere we go I am taking pictures and thinking about how I make this into an informative, yet interesting blog post for my readers. Everything from crafts and activities for kids, our adventures camping and in the outdoors, to the many sugar and dairy free recipes, I like to blog about it!

I also like to include tidbits about the importance of taking time for ourselves, gratitude and being ambassadors for our planet.

I like creating a community where we can share, interact and learn from each other. Plus it’s stretched me in the world of technology as well!

IMG_2106Now that you’re here, sit down grab a cup of coffee and take a look around. Let me know what your favorite posts are, what you’d like to see more of. Leave a comment sharing with me who you are and where I can find you so we can connect and get to know each other. I’m looking forward to visiting everyone’s sites and making new friends.

Here are some of my favorite posts:

Firewalking

Rainy Day Activities

All Things Pumpkin

Natural Sugar Substitutes

RAK your Brain

Firewalking

Firewalking


Grasshopper Popsicles

Enjoy! See you at the party!

Let’s stay connected! Here’s where you can find me

Facebook

Twitter

Pinterest

Google+

Fabulous Baked Beans

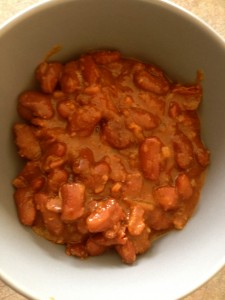
IMG_2839Growing up I always loved a can of baked beans. They reminded me of sitting around the campfire and enjoying them usually with hot dogs. But when we changed our diet canned baked beans was another thing that had to go! 🙁 Usually made with brown sugar and molasses (molasses being the worst culprit; which is 50% sucrose and is actually a by product of making refined white sugar, with the added chemicals) I had to forgo baked beans for awhile.

In fact, I never thought that I could make my own. Funny enough I thought they come in a can so how could I? Yet one day we went for supper at my neighbors house and he had made them from scratch. Thinking nothing of it, a little while later my mother said she wanted to make baked beans for the camping trip that she and my father were taking my oldest son Matthew on. I then remembered that my neighbor had made them and kindly asked for his recipe.

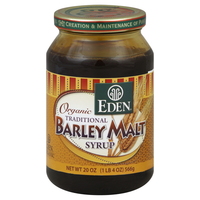
eden-foods-barley-malt-24412By this time I knew enough about different natural substitutes to make the necessary changes in ingredients. Barley Malt is often substituted for molasses and we had found a ketchup, that was not only organic but sweetened with honey. It was perfect!

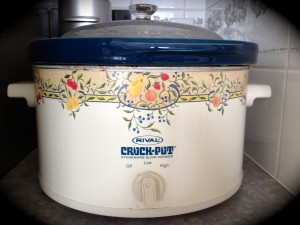
And of course I love using my slow cooker, putting something in in the morning and let it cook slowly all day, the sweet smells wafting through the house as it cooks. By the time they are ready to eat our mouths are watering in anticipation!

The recipe turned out beautifully and so delicious! I often make them myself when we go camping and just reheat when we get there. I even make them at home from time to time and they are always gobbled up! I have a friend who I introduced them to, who now says that he will never be able to go back to the canned ones. Which I guess is good and bad 🙂

True, this is not a recipe that you can whip up in 30 minutes, but it is totally worth the time it takes to make them. And really it only takes a little prep and preplanning.

IMG_2836Now the original recipe calls for only 1/3 pkg. of bacon but I use the whole thing. In fact I buy the cheapest and fattiest brand I can find, which is probably why mine are better than my Mum’s even though we are using the exact same recipe! (sorry Mum)

So whether you are looking for something around the campfire or warm comfort food at home these beans will not disappoint! Once you’ve tried this recipe please return and share your comments about how they turned out.

Baked Beans

2 cups red kidney beans (soaked overnight)

1 pkg. bacon

1 onion chopped

1/2 c. Honey Bunny Bodacious Ketchup

1/3 c. pure maple syrup

1/4 c. barley malt

1 tsp. dry mustard

Soak beans overnight in water. Use a large container and add in generous amounts of water as beans will soak up quite a bit of it. Cover with lid.

Boil gently soaked beans until soft. Put beans into crock pot. Mix the rest of the ingredients together in a bowl and pour over beans. Cover and put on low. Cook all day (for a minimum of 8 hours)

*if you prefer a sweeter recipe you can adjust maple syrup and barley malt to taste

A Few of my Favorite Muffins

8I have fond memories of muffins growing up. This may sound a little weird but I was a competitive swimmer for many years and that meant early morning practices before breakfast. My mother would often make muffins and after practice we’d have muffins and juice before being dropped off at school. As a result, my Mom tried all kinds of different muffin recipes, so that we could enjoy variety and not get bored with the same old banana muffins 3 times a week.

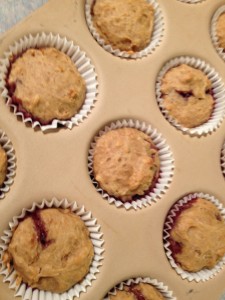
IMG_2690One of my favorite muffin recipes was one that was filled with jam. Though not quite as tasty as a jam filled donut, I loved these because of the ‘surprise in the middle’. I also found them to be quite tasty and very moist due to the yogurt that is in the recipe.

Of course when we moved to eating dairy free I had to forgo these muffins for a while. Until recently, when I discovered some of the non-dairy yogurts out there. Though most varieties are made from soy, you can find brands that are made using coconut or almond milk as well.

With this discovery, I was now able to recreate these delectable muffins! Of course I had to experiment a bit as I needed to substitute the sugar as well and although most natural sugars can be substituted one for one, I find that when you are also altering another ingredient sometimes the sweetness factor needs to be adjusted to.

This was the case with these muffins as though the kids gobbled them up the first time I made them, both my older son and I felt they could be a little sweeter. So the next time I made them I experimented a little adding a little more coconut sugar then the recipe called for. As I result, I did eventually find the perfect combination.

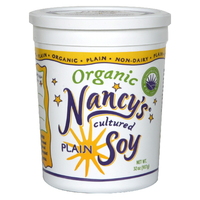
nancys-cultured-soy-plain-58308The yogurt I use is Nancy’s Organic Cultured Soy, plain. Though they offer many different flavors as well. It is a little thicker than dairy yogurt but definitely works. (Also works fabulously in the Cheesy Greens Macaroni dish that I make, which is soooo good!) I have yet to try a coconut milk yogurt but imagine that this would work out the same.

So if you’re up for a yummy nutritious treat with a surprise in the middle, give these muffins a try. And if you do use the coconut milk yogurt come back and comment and let others know how it worked out.

Jam Filled Muffins

1 1/2 c. flour

1/4 c. + 1/8 c. coconut sugar

2 tsp. baking powder

1/2 tsp. baking soda

1/2 tsp. salt

1/4 c. Earth Balance vegan spread

1 c. non dairy yogurt

1/4 c. almond milk (or favorite non-dairy milk)

1 egg

1/2 tsp. vanilla

Favorite sugar free jam

In a medium bowl blend dry ingredients. In a small saucepan melt Earth Balance. Take saucepan off heat and stir in yogurt, almond milk. Beat in egg and vanilla. Add liquid mixture to dry ingredients and stir until moistened.

*Line cupcake pan with liners or grease well. Spoon in half the batter. Place about 1 tsp. of jam in each muffin, then top with remaining batter.

Bake at 375 F for 15-20 minutes.

Makes 12 muffins.

*Note: I have found with these muffins if you have the cupcake liners that that is best due to the jam sometimes overflowing a bit.

Apple Cinnamon Pancakes

IMG_2805Yesterday many of us celebrated Pancake Tuesday. A tradition that began in the Middle Ages this day has grown and enjoyed by people around the world.

Enjoying pancakes for supper is one of my favorite things (in fact I love anything breakfast for supper, there are so many fabulous breakfast foods out there) but on Pancake Tuesday I like to spice it up a little and make a recipe that is more than just your regular plain pancake – though those are just as delicious!

There are so many kinds of pancakes to choose from. Some of our favorites are pumpkin and oatmeal banana. There are gluten free options, dairy free, coconut and fruit options. You name it, you can basically find it and make it.

Yesterday I decided to try out an apple cinnamon pancake recipe (at the suggestion of my mother who was here on the weekend). I didn’t have one so I quickly googled it and found a number of apple cinnamon recipes to choose from. My favorite was on dairygoodness.ca, where they suggested using maple syrup as the sweetener as well as a mix of flours.

Of course I had to make a couple of other quick substitutions to make it dairy free (as that is part of our diet as well) and went to work mixing up the dough. The most time consuming part was shredding the apples but otherwise is a quick and easy recipe to make.

It was a huge hit! Everyone loved them. They had just the right amount of apple, not overwhelming and with a little bit of syrup…Yum! They were fabulous. My modified dairy and sugar free version is below.

Apple Cinnamon Pancakes

1 1/2 c. all purpose flourIMG_2808

1 1/2 c. whole wheat flour

1 tbsp. baking powder

1 tsp. cinnamon

1/2 tsp. sea salt

3 eggs

2 1/2 c. almond milk

1/4 c. Earth Balance vegan spread, melted

2 tbsp. pure maple syrup

1 1/2 c. shredded apple

In a large bowl mix flours, baking powder, cinnamon and salt. In a separate bowl, mix eggs, almond milk, melted Earth Balance and maple syrup. Pour over dry ingredients and add apples. Stir gently until just combined – a few lumps may remain.

In a large non stick skillet, heat a small amount of butter. Scoop about 1/3 c. of batter per pancake into skillet. Cook approximately 2 minutes or until bubbles form in batter. Turn over and cook 1 to 2 minutes more until golden and fluffy. Repeat with remaining pancake batter.


Pancakes for Supper

Pancakes 1I love that one night a year I can make pancakes for dinner! Shrove Tuesday or Pancake Day is the Tuesday before Ash Wednesday when Lent begins in the Christian faith.

Beginning in the middle ages, it was the last day for celebration and feasting before the period of fasting required during the lenten season. Food items like meat, milk, eggs and fats were restricted during this time; so to keep these foods from being wasted people would have big feasts on Shrove Tuesday in order to consume these items and prevent them from being wasted (as they would not keep over the next 40 days).

mardi-gras-2The English were the first to make pancakes on this Tuesday as it was an easy way to use these ingredients before Ash Wednesday began. In France, consumption of these fats or fatty foods on this day coined the phrase “Fat Tuesday” or Mardi Gras.

I always find these things fascinating and share them with my kids. My oldest often asks why we have Pancake Tuesday and though I know the traditional reason I had no idea of it’s origin.

And though we may not always observe all the traditions of the Christian faith we certainly enjoy and don’t mind observing this one! Usually I make the traditional plain pancakes and add some fruit on top, but with all our dietary changes and my hunt for new recipes, I have added to my repertoire of ‘kinds’ of pancakes.

So today if you are on the hunt for a little variety in your pancakes, give one of these recipes a try (and if you are not making pancakes for dinner then try them some other time, they are all delicious!) You’ll love ‘em and so will your kids. They are all sugar and dairy free and the last one is gluten free as well.

Pumpkin Pancakes from Williams-Sonoma Kitchen

1 1/2 c. flour (I used half whole wheat and half white)

1/4 c. date sugar

pic3R054P

Pumpkin Pancakes

3/4 tsp. baking powder

1/2 tsp. baking soda

1/2 tsp. salt

2 tsp. cinnamon

1/2 tsp. ginger

1/4 tsp. ground allspice

4 eggs, separated

3/4 c. canned unsweetened pumpkin

1 1/2 c. rice milk (I use a brand called Ryza as it has the least amount of additives and no sugar or you can make your own) or almond milk

4 tbsp. Earth Balance, melted

1 tsp. vanilla extract

Maple syrup for serving

In a large bowl whisk together flour, sugar, baking powder, baking soda, salt, cinnamon, ginger and allspice. Set aside.

In another bowl, beat the egg whites until medium peaks form. Set aside.

In another bowl, whisk together the egg yolks, pumpkin puree, rice milk, Earth Balance and vanilla until well combined. Whisk the pumpkin mixture into the flour mixture just until the batter is smooth and no lumps of flour remain. Fold in egg whites in 2 additions.

Heat griddle over medium heat until a few drops of water flicked onto the surface skitter across it. Lightly grease the griddle.

Pour 1/4 c. pancake batter onto griddle. Cook until bubbles form on top and the batter is set, 3 to 4 minutes. Flip the pancakes over. Cook until golden brown on the other side, about 3 minutes more. Keep warm until all pancakes are cooked.

Oatmeal Peanut Butter Banana Pancakes from purecanadamaple.com

1/3 cup whole wheat flour

1/3 cup all purpose flour

1 teaspoon baking soda

½ teaspoon salt

2 cups rice milk or almond milk

2/3 cup old fashioned oats, not instant

2 overripe bananas, mashed with a fork to a fine pulp

2 egg whites, whipped to stiff peaks

2 teaspoons canola oil or non-stick pan spray

Gobs of crunchy or creamy peanut butter

Pure maple syrup

In a mixing bowl, combine both flours, baking soda and salt. Set aside. In a non-reactive mixing bowl, combine milk, oats and bananas. Fold in dry ingredients. Fold in egg whites and mix until just combined.

Heat one teaspoon of oil in a 12-inch non-stick skilled over medium high heat. Drop batter by the scant ¼ cup full into pan and cook, turning once until lightly browned. Hold pancakes warm on a platter until you’ve got them all cooked.

Spread a teaspoon or so of peanut butter on each pancake and then the Pièce de résistance of course…a generous drizzle of maple syrup.

Makes 15 pancakes.

Pancakes

This recipe is sugar free, dairy free, gluten free and is yummy! Courtesy of Ryza rice milk.

1 egg

1 cup Original or Vanilla Ryza

2 tbsp oil

1 3/4 cups brown rice flour

3 tbsp tapioca starch

2 tsp baking powder

1 tsp cinnamon

1/2 tsp baking soda

Beat egg until frothy. Add Ryza and oil; beat until well blended. In another bowl mix brown rice flour and the remaining dry ingredients. Make a well in the center of the dry ingredients and add the liquids. Stir until well blended. Do not over stir. Batter will be slightly thin. Lightly grease a frying pan. Pour small circles and fry pancakes until golden. Serve with pure maple syrup.

You can also try apple cinnamon pancakes or if you prefer a simple plain pancake try this recipe.

What is your favorite pancake recipe? Share in the comments below.