How to Make Chocolate Dipped Strawberries (with homemade chocolate)

chocolate dipped strawberriesChocolate dipped strawberries are one of those simple decadent treats that are easy to make and delicious. Often paired with champagne and Valentine’s Day they always give me the feeling of richness and luxury.

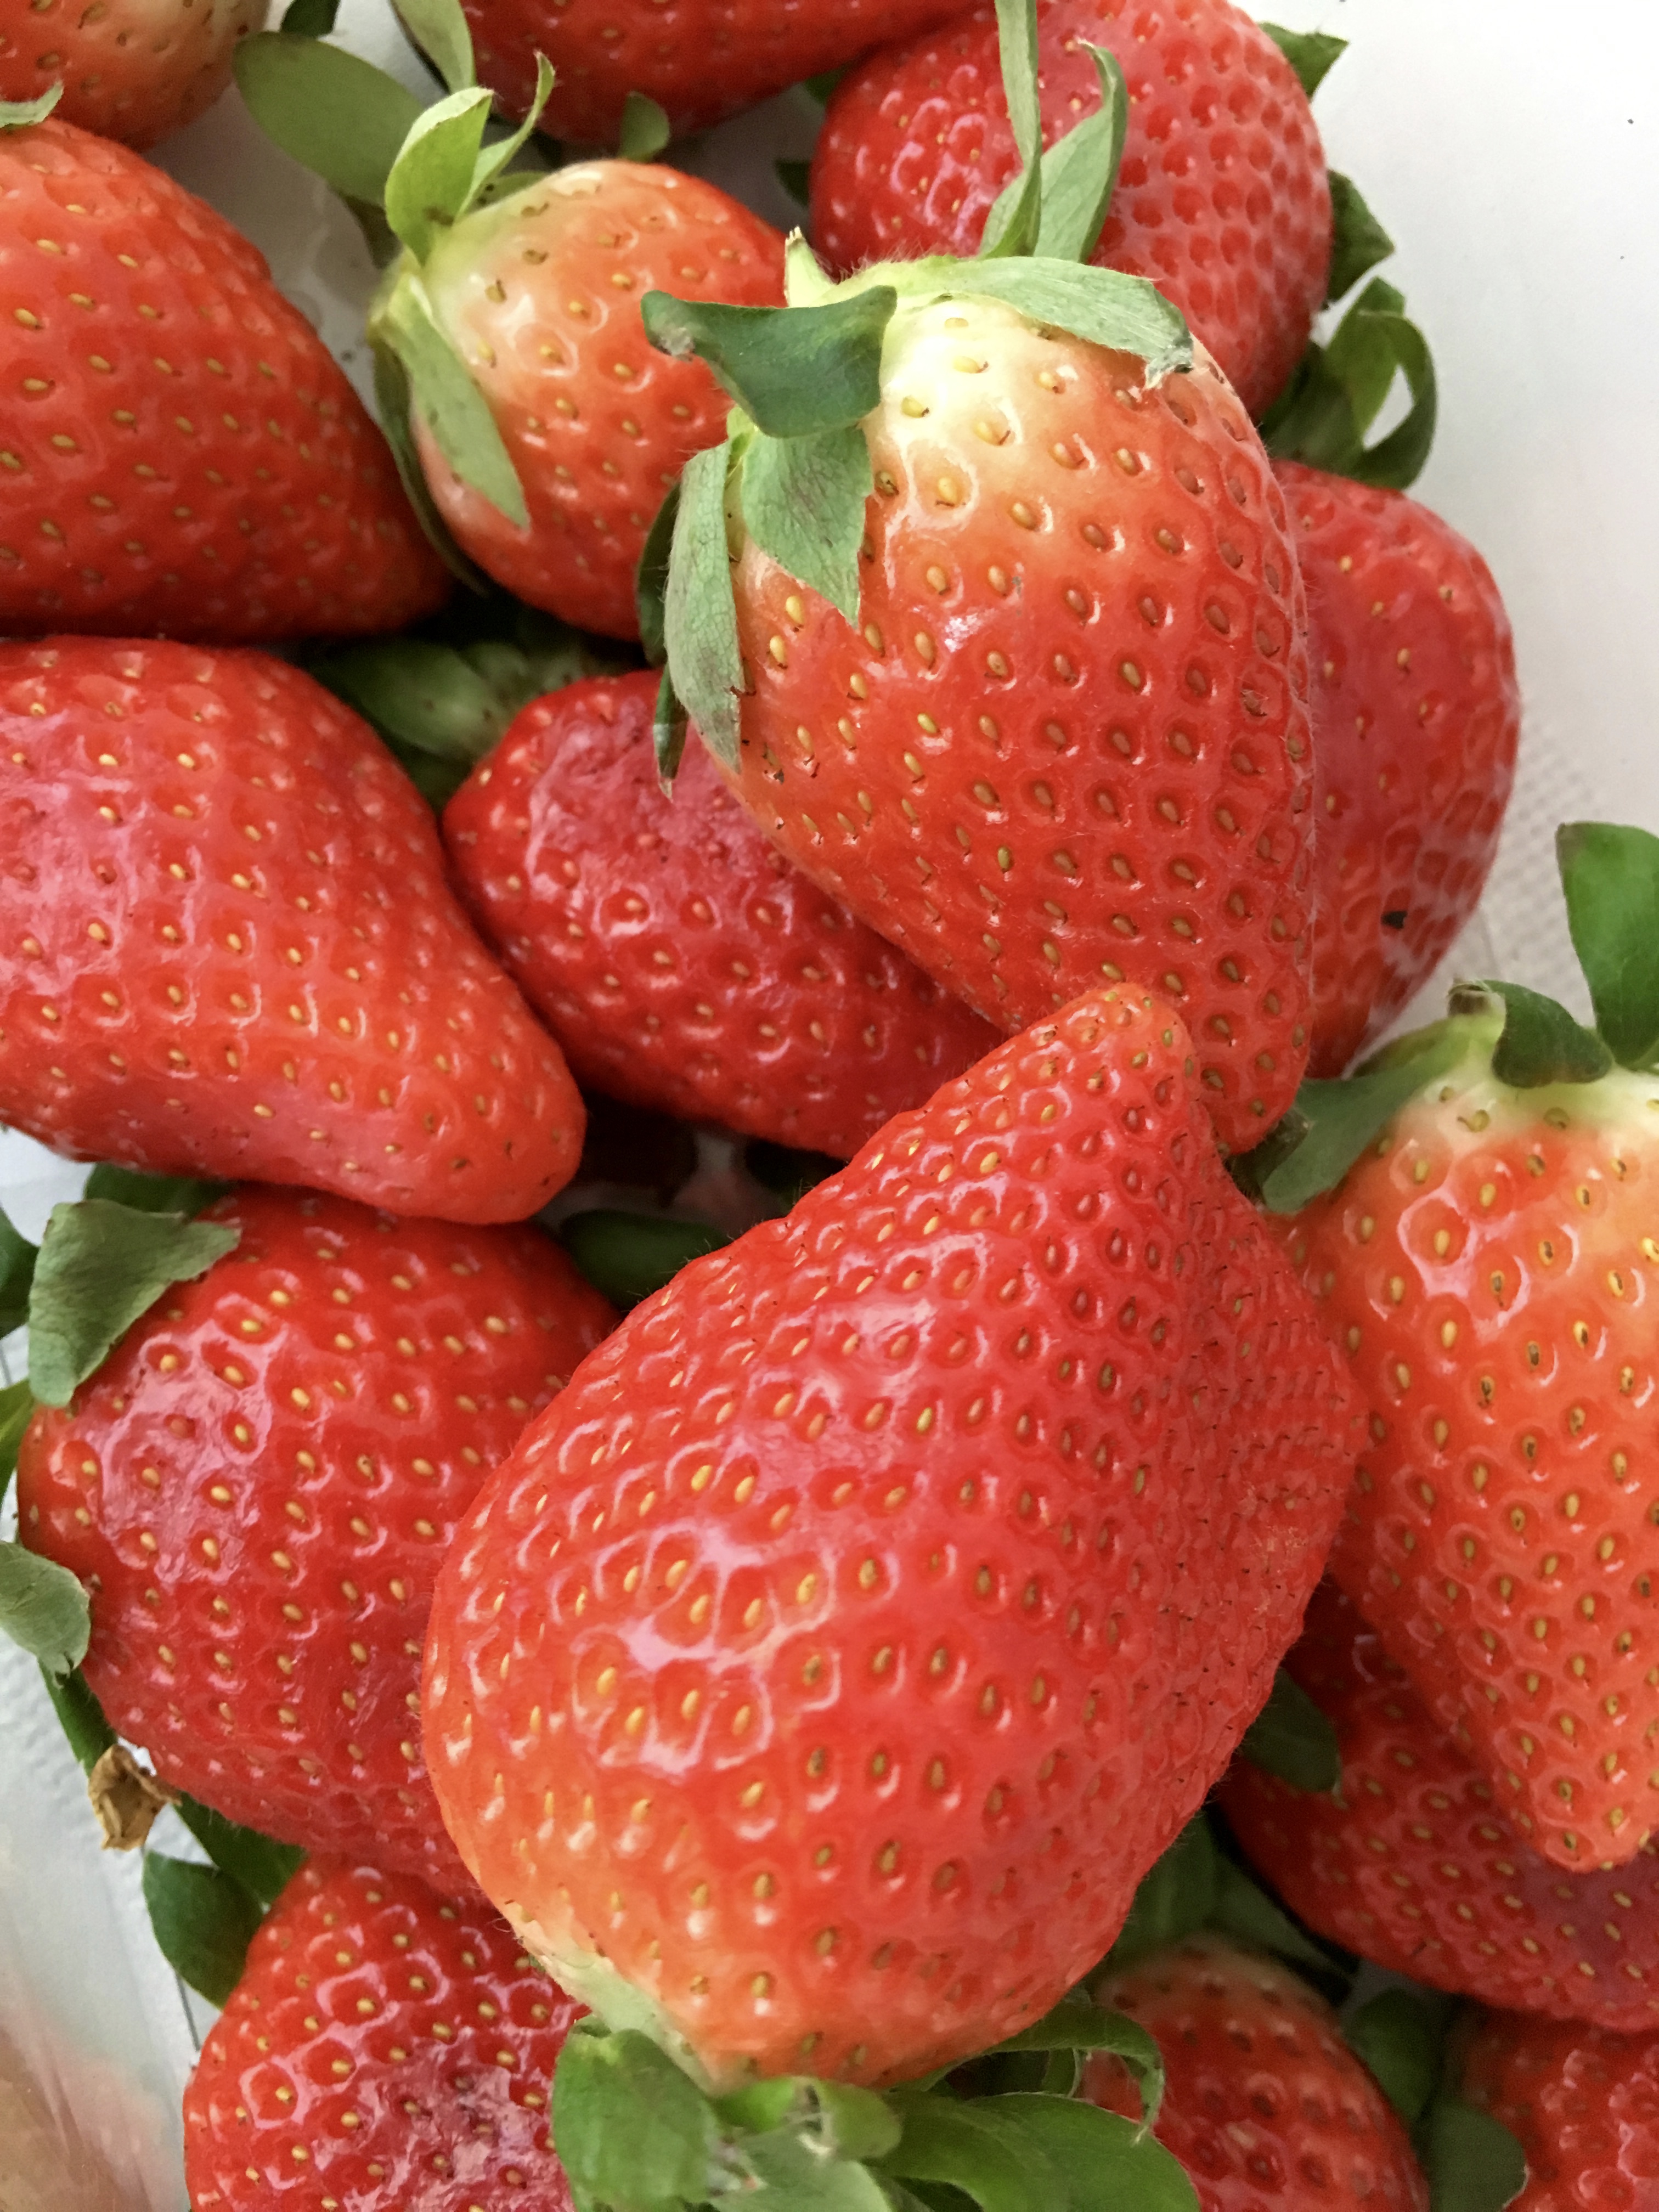
Imagine… the red juicy strawberry dipped into firm dark chocolate. As you bite into it, the taste sensation bursts in your mouth with the sweetness of the fruit and the richness of dark chocolate. There is just something about that combination.

chocolate dipped strawberriesEven though chocolate dipped strawberries have this air of luxury and decadence they are actually very easy to make and you can usually make a batch in about 15 minutes. They are also very healthy for you! As strawberries are high in Vitamin C, potassium, folate, fiber and antioxidants, while dark chocolate is high in maganese, iron and copper. And if you make your own chocolate as well, like I do, you can control the amount and type of sugar that goes into it as well! (I always use natural sweeteners, with honey being my top choice).

I often wonder if they’re so good for us why I don’t make them more often? Perhaps it is because they have this air of luxury (in my mind) and I really consider them a treat. (And why don’t we treat ourselves more often? – that is a whole other conversation)

So let’s get to it!

How to Make Chocolate Dipped Strawberries at Home (with homemade dark chocolate)

  1. Line a cookie sheet with parchment paper and set aside.
  2. Rinse and pat dry the strawberries. Two tips here – one is to make sure you have fresh firm strawberries, second is to make sure that your strawberries are very very dry after you have rinsed them. If there is any water or moisture on them then the chocolate won’t stick.
  3. chocolate dipped strawberries
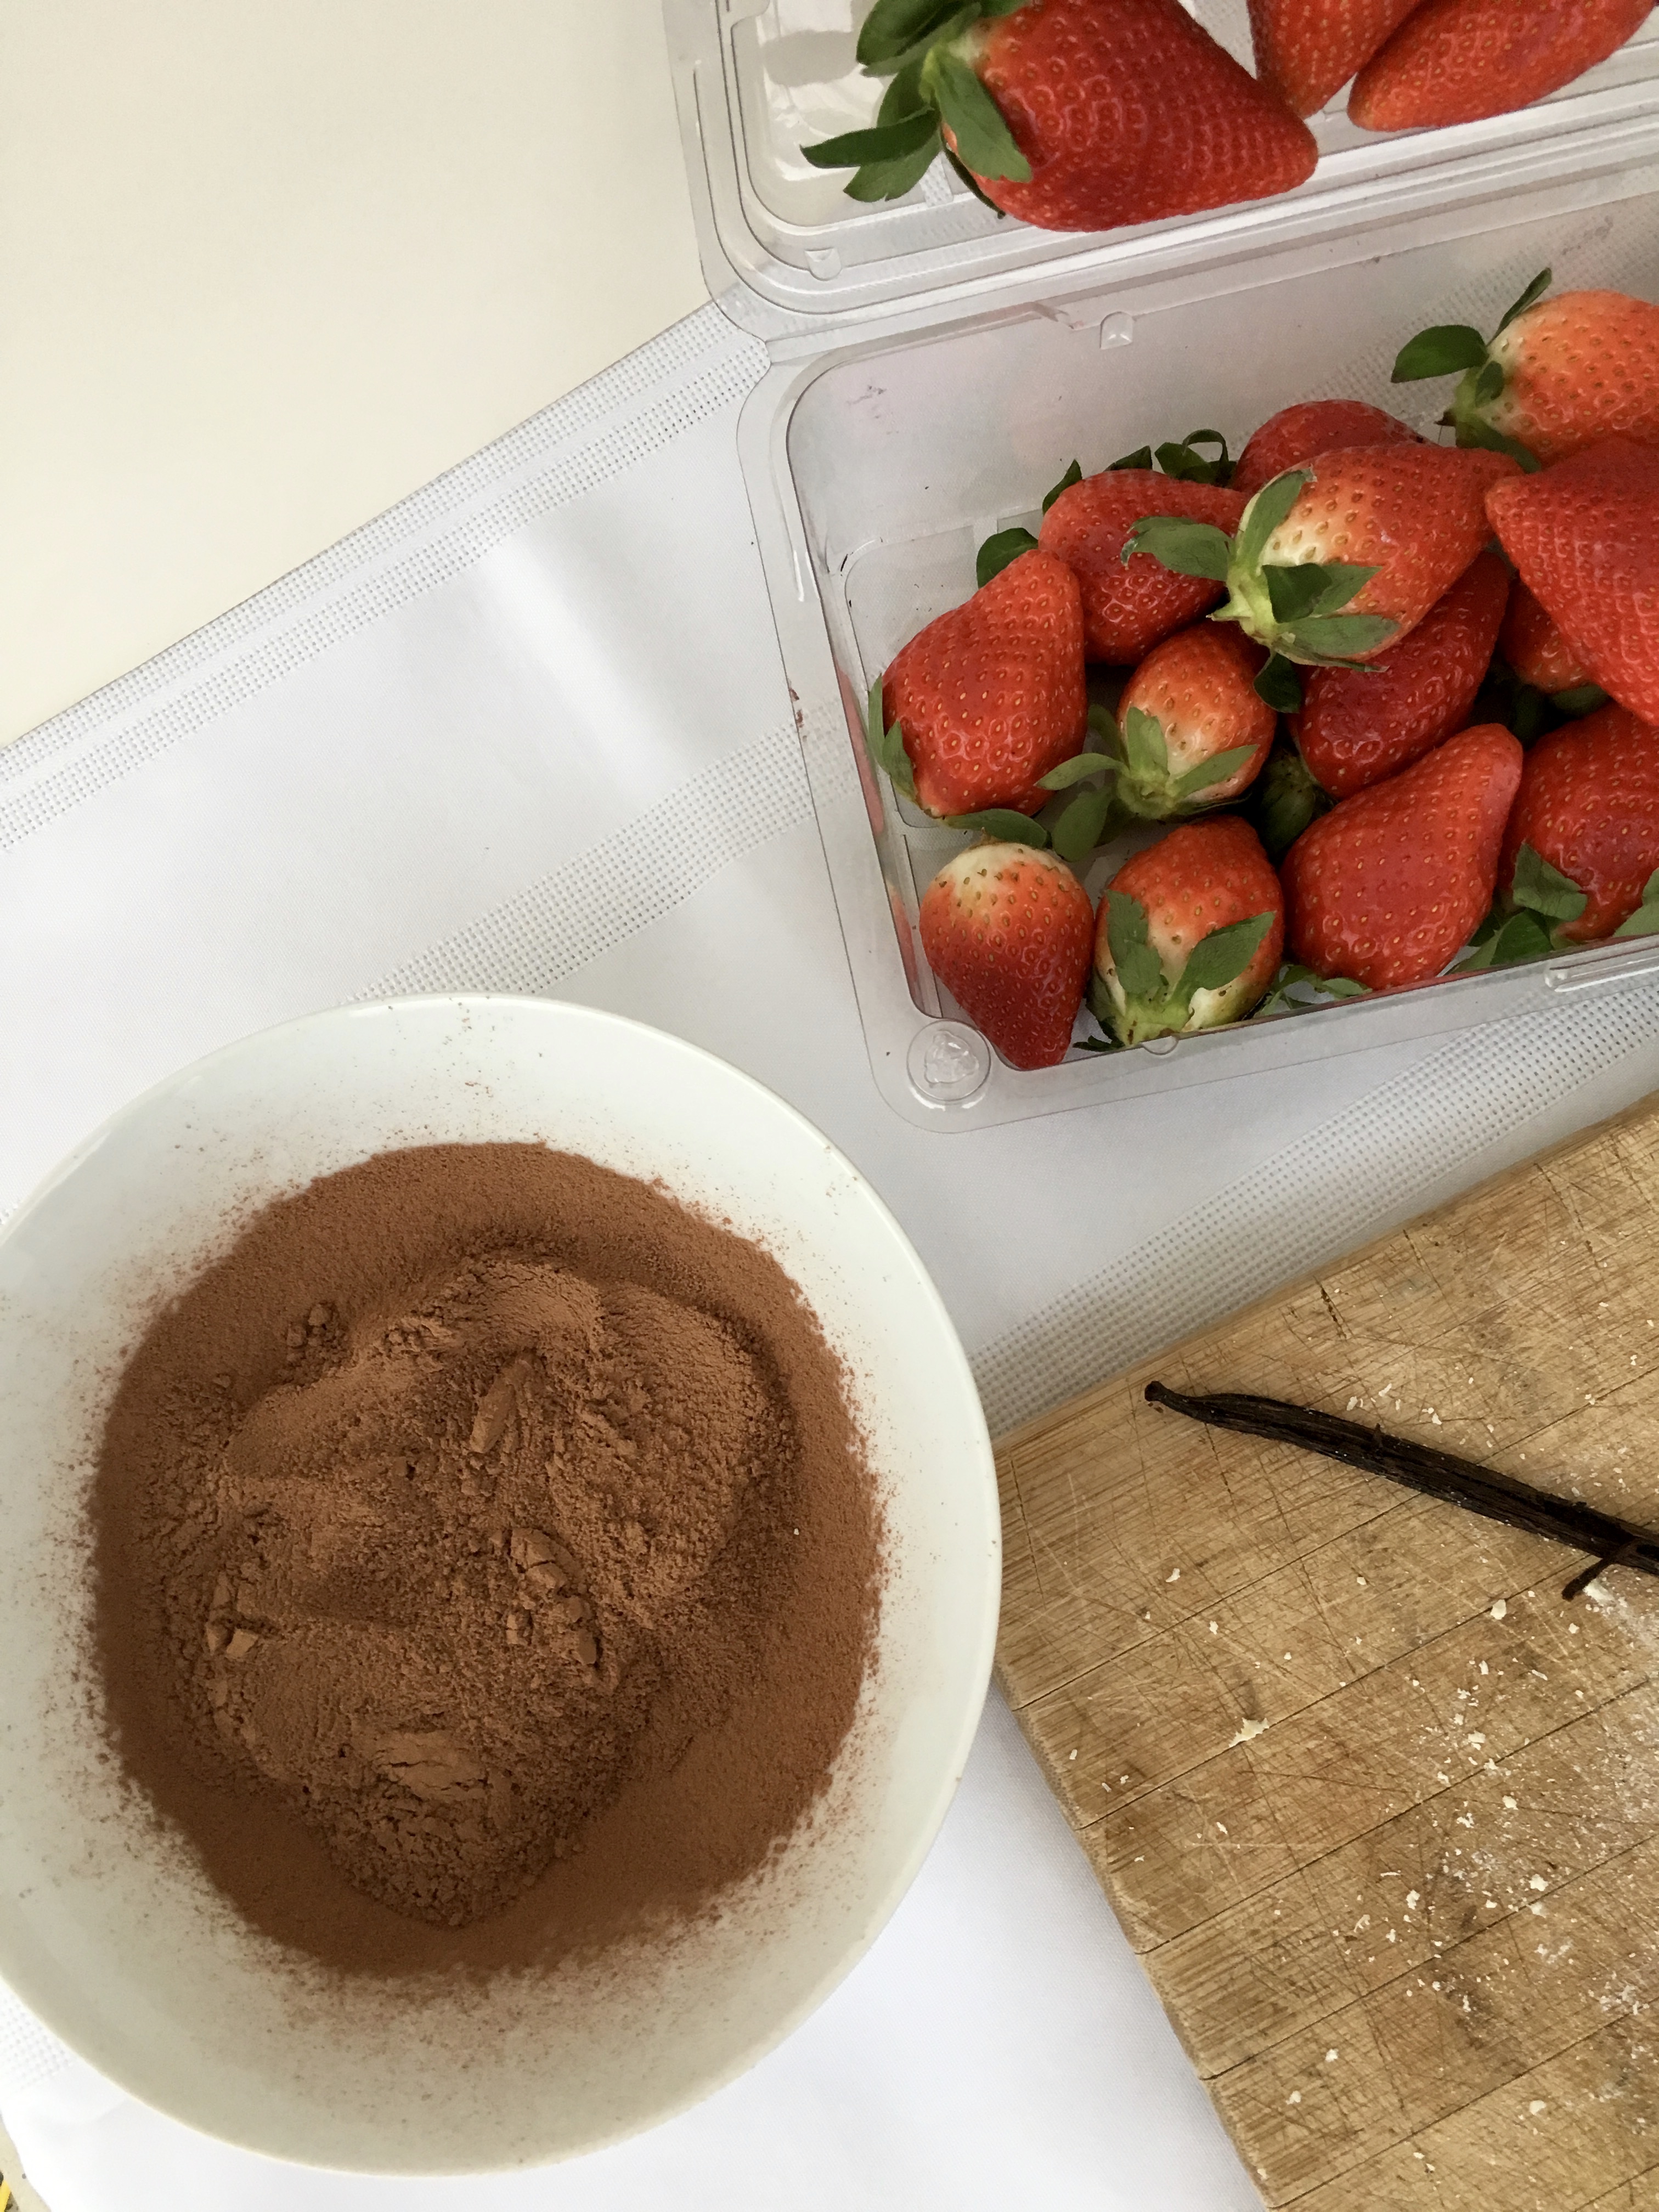
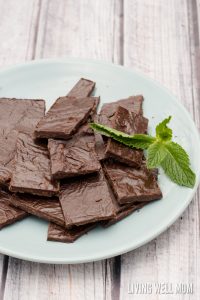
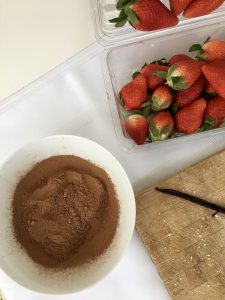
Prepare your homemade dark chocolate. I use this very simple method to make my chocolate. No stove involved just a kettle, boiling water and two bowls. It is important to be very careful when making the chocolate that you do not get any water in it as it will change the mixture and your chocolate wont’t turn out. As I said I love using honey as my sweetener but in this case I would use pure maple syrup or liquid stevia, as sometimes the honey does not mix as well and will separate when it sets.
  4. Dip your strawberry into chocolate. Grab strawberry by the green leafy top and dip into the chocolate. Turn and twist your strawberry to get the coverage you want on all sides. Gently place your dipped strawberry on your parchment paper lined cookie sheet and dip the next strawberry.
  5. Once you have dipped all your strawberries place the cookie sheet into the fridge. This helps your chocolate set faster.
  6. If desired, you can dip your strawberries in the chocolate a second time for a thicker covering, better coverage or just more chocolate! You do need to wait until the first layer is set and firm before dipping the second time.
  7. Set back into the fridge until chocolate is set.
  8. Serve and enjoy!

**if you want to get really fancy you can make a batch of white chocolate and drizzle it over the dark chocolate. You would have to let it set again and wait a little longer but it looks great aesthetically, which is great to impress guests if you’re having a party or event.
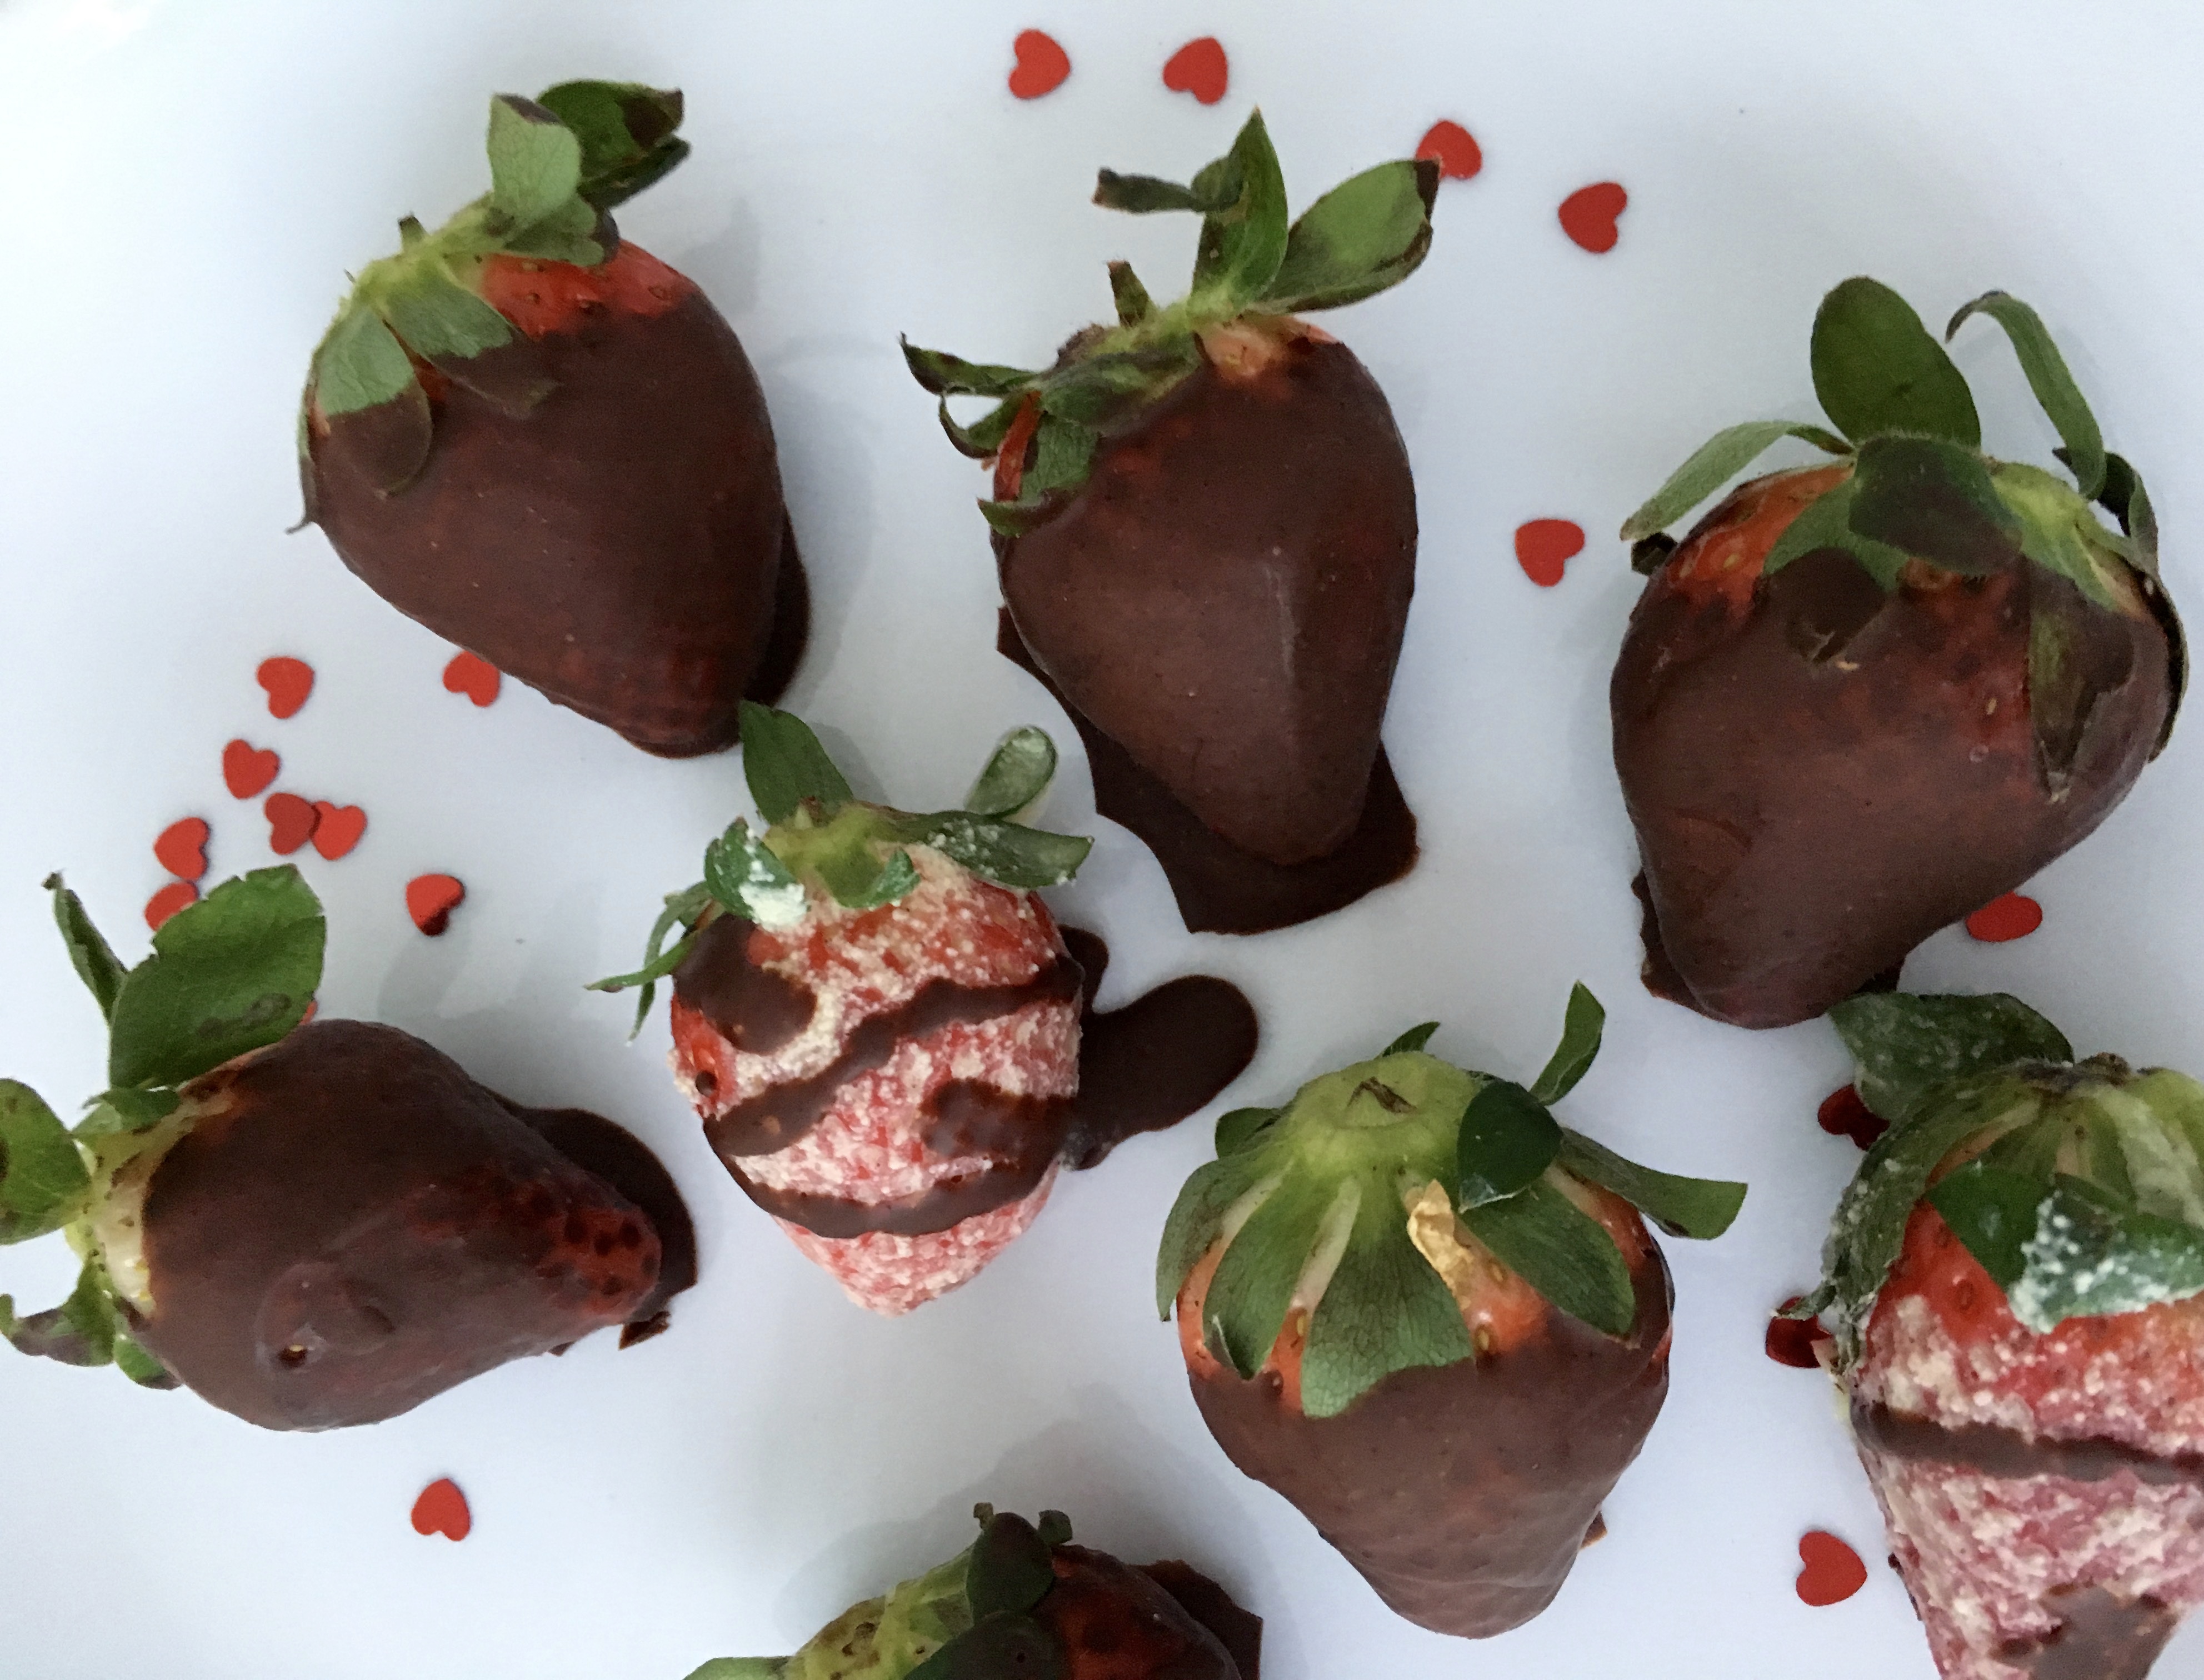
chocolate dipped strawberries


10 Yummy Sugar Free Christmas Recipes

sugar free christmas recipes

Christmas is that time of year when delicious treats and baking abound. Everywhere you go, there is something else to indulge in, something else that tempts you. You try to resist, but …

The good news is there’s no need to deny yourself. You can enjoy delicious sweet treats guilt free this Christmas by creating one (or more) of these yummy sugar free Christmas recipes. Super easy to make and all naturally sweetened they are actually healthy and good for you – so you can feel good about what you are eating and indulge guilt free.

sugar free Christmas recipes

Coconut Balls – Healthy Christmas Truffles

sugar free Christmas recipes

Peanutty Blondie Bars

sugar free Christmas recipes

Chocolate Quinoa Cupcakes

sugar free Christmas recipes

Chocolate Peanut Butter Cereal Squares

sugar free Christmas recipes

Gingerbread Cookies – A Traditional Cookie

sugar free Christmas recipes

Classic Sweet Butter Tarts

sugar free Christmas recipes

Best Paleo Buckeyes

sugar free Christmas recipes

Easy Homemade Paleo Mint Dark Chocolate

sugar free Christmas recipes

Festive Gingerbread Protein Bites

sugar free Christmas recipes

Hermit Cookies – A Soft Delectable Christmas Cookie

Do you have a favorite sugar free Christmas recipes? Share in the comments below.

10-yummy-sugar-free-christmas-recipes-pinterest

Gingerbread Smoothie – A Christmas Smoothie to Indulge In


gingerbread smoothieI love gingerbread and thoroughly enjoy all the different possibilities during the Christmas season. Last year I discovered this yummy gingerbread smoothie!

Last Christmas I had the unique opportunity and pleasure to spend it with my parents all by myself. No kids, no siblings, just me and Mom and Dad. It was a real treat to just spend time with them and not have to compete with everyone else. Because no offense I love and enjoy the company of all those other people but the visit becomes different.

gingerbread muffinsDuring this relaxing and enjoyable time with them I decided to get creative and experiment with a few festive smoothies. Many of the favorite holiday flavors like orange cranberry, peppermint, gingerbread. Why not? I had the time and it was the holidays after all.

This is when I discovered this yummy gingerbread smoothie! I had already explored gingerbread waffles and gingerbread muffins and knew that a smoothie would be a wonderful addition to my compilation.

So as I do, I hopped on the net and researched some gingerbread smoothie recipes. I found a few that I liked and in the end ended up combining ideas and creating my own.

Gingerbread Smoothie

1 cup non-dairy milk (almond, coconut, etc.)

1-2 tbsp. barley malt

1/2 tsp. cinnamon

1/4 tsp. fresh gingergingerbread smoothie

1 tsp. vanilla

1 banana

1 tbsp. chia seeds

sprinkle of nutmeg

Place all ingredients except the barley malt into the blender. Blend until smooth. Now add the barley malt a little bit at a time. If you like the flavor add closer to 2 tbsp.; if you want it more sublte then just add 1. Blend well, pour into glass and enjoy.

Note: Make the smoothie and allow it to sit for about 30 minutes. This allows the flavors to infuse and gives you a much stronger flavor than if consumed right away.

Serves 1

The smoothie was a hit! My parents and I enjoyed it quite a bit and I love the fact that you have chia seeds in there. They have many health benefits such as high in nutrients such as fiber, protein, antioxidants and low in calories!

I did not drink mine quickly as I was multi tasking at the time doing a bunch of different things and this is how I discovered that if you let it sit the flavors become stronger. Because honestly at first sip I thought it was a bit weak in the gingerbread flavor area.

orange cranberry smoothie

Of course after the time at my parents I came home and made it for the kids. Also a hit with them as well – though their favorite was the Orange Cranberry Smoothie I had created.

Glorified Turkey – Quick Easy Turkey Leftovers

turkey leftoversOne of the many things I love about Thanksgiving is all the turkey leftovers! There are so many yummy recipes out there to use up my turkey. In fact, I usually buy a turkey that’s a little bit larger than we need just to make sure we have some leftover.

First of all I love just having leftover turkey, gravy and mashed potatoes for meals during the week. I also love turkey sandwiches, especially hot turkey sandwiches (smothered in gravy – yum!) Then there’s all the fabulous turkey recipes I have to use up the rest.

Our absolute favorite turkey leftover recipe is definitely Turkey Crepes, which we usually make a on Christmas Day in lieu of the big dinner. We decided to do this years ago when we experienced a super simple Christmas and re-examined what we really wanted at Christmas – what was the most important. Making a simple yet yummy meal frees me up in the kitchen and allows me to play and enjoy on Christmas Day. But I digress, we also love Glorified Turkey which is a quick easy turkey leftover recipe that’s ready in 30 minutes. Just add rice or mashed potatoes and your favorite veg and you have a fast healthy meal.

Glorified Turkey

Glorified Turkey is a creamy hearty meal that uses mushroom soup, onion and cheese and creates a delectable meal. I have created a dairy free version, which is super yummy, but you can easily substitute dairy in if you wish.

turkey leftovers2 c. cubed turkey

1/4 c. flour

1/4 c. Earth Balance Vegan Spread

2/3 c. almond milk (or non dairy milk of choice)

1 – 10 oz. can *mushroom soup

1 c. Daiya shredded cheddar

3/4 tsp. salt

1/8 tsp. pepper

1/2 grated onion

1 can or sliced fresh mushrooms

sprinkle of paprika

Coat turkey pieces with flour. Put coated turkey into medium sized casserole dish with melted Earth Balance and heat in 325 F oven while preparing the rest.turkey leftoves

In a medium bowl mix together almond milk, soup, cheese, salt and pepper.

Grate onion and slice mushrooms. Add onion and mushrooms to heated turkey and stir well. Pour liquid mixture over turkey and sprinkle with paprika.

Bake at 325 F for 30 minutes. Serve with rice or mashed potatoes and your favorite vegetable for a perfect meal.

Serves 4

*I usually make my own mushroom soup, which is dairy free and fabulous btw – 3 kinds of mushrooms, creamy and thick. I also love that the recipe has lima beans in it. But you certainly don’t have to. Canned soup works just as well depending on your own dietary needs.

The kids love this dish! In fact we had it the other night and Luke expressed how he “Loved this dish!” and asked for some more. He even hoped there was leftovers and was asking if he could have that for supper the next day.

You can also get a little creative with this dish by using a variety of cheeses – mix of dairy free mozza, cheddar and even gouda. If you enjoy mushrooms you can increase the amount to suit your desire. The thing I love about this recipe is that it is a totally different taste from the regular turkey dinner and leftovers and how quick it is to make!

Halloween Dinner Ideas – Monster Brains

halloween dinner ideasEach year for Halloween I love to dive into the food and all the creative ideas there are. There are so many fabulous ideas on how to create spooky, fun and healthy meals and snacks that I often have a hard time picking just one.

We usually have an entire day of Halloween meals and snacks, starting with pumpkin pancakes in the morning in fun Halloween shapes, then boo-nanas for snacks and something creative for supper. In the past I have made dinners such as monster face pizzas and hot dog mummies.

Last year I happened to be at my girlfriends house just before Halloween and she had this cooking show on tv that was highlighting some spooky Halloween dinner ideas. Of course they had lots of fun things going on but the one that stood out for me was the idea for Monster Brains. It is a super easy creative idea to make spaghetti and meatballs and give it a Halloween twist. I loved it! and decided right then that I was going to make it for Halloween dinner.

I was super excited as it was not only going to be fun but quick and easy to make. I am all about getting creative but sometimes I need creative to be fast!

Monster Brains

halloween dinner ideasred, yellow, orange peppers (number of peppers depends on how many people you’re serving as it is 1 per person)

cooked spaghetti

cooked meatballs

tomato sauce

Cut off the top of your pepper like you would when carving a pumpkin – around the top in a circle so you can take the lid off. Clean out the seeds.

Cut a face on the front of your pepper. Design it any way you like. You can go with fancy but that takes more time! I went with simple triangle eyes, nose and slit mouth.

Bake meatballs in oven (I make my own and premade these the day before and just reheated them). Cook spaghetti according to package directions. Rinse spaghetti with hot water in a colander. Fill each pepper with spaghetti and meatballs. Top with tomato sauce and place ‘lid’ of pepper on top. Have some of the spaghetti spilling out the sides for effect. Voila! one spooky monster brain supper!

halloween dinner ideas

My kids of course absolutely loved these and are already asking me if they can have that again for Halloween dinner this year. We may… or I may get creative and do something else!halloween dinner ideas


A Plethora of Apples – Yummy Apple Recipes for Your Fall Harvest

apple recipes

Each Fall we end up with an abundance of fresh apples. Whether it be from our own tree or given to us by the grandparents we usually have large buckets of them. As a result over the years I have created and tested many different apple recipes to make use of all these delicious apples. Of course we make the traditional apple crumble and pie, but as yummy as that is, we do like a little variety. And I do like to experiment.

The kids love just coming home and grabbing a fresh apple from the bucket to enjoy. In fact they eat so many apples that you would think that we might actually make a dent in them. Unfortunately this is not the case – so baking it is! (and other creative uses)

I found and/ or developed a number of dairy free, sugar free and even some gluten free recipes that use apples. Giving us lots to choose from and enjoying whatever suits us on any particular day. I am still on the hunt though for a recipe that uses a large quantity of apples at once, as many of these recipes use maybe 4 apples at once. That’s a super long process of getting through our bucket! Even when I double the recipe.

If you have a plethora of apples this Fall or are just looking for some yummy apple recipes – here’s what I’ve discovered and tested so far:

Yummy Apple Recipes

Muffins:

Cakes:

Crumble:

Pie:

Pancakes:

Smoothies:

Snacks:

  • Apples & Peanut Butter (simply slice your apple and dip in peanut butter)
  • Apples & Caramel Dip (don’t be deceived this is a sugar free healthy dip)

I have yet to try an apple cookie – but it’s on the list! and when I am getting towards the bottom of the bucket I usually start to make apple juice with our juicer, or even apple sauce (just boil the apples til soft, drain and puree in blender, add a little cinnamon and voila!).

What are some of your favorite apple recipes? Share in the comments below

Easy Afterschool Snacks

easy afterschool snacks

It’s that time of day when the kids arrive home from school ravenous and hungry, ready to eat anything in sight! They are poking their heads in the fridge, looking for an easy afterschool snack. Eyeing things hopefully on the counter, hoping to grab a quick bite to fill their tummies. You’d like them to have something healthy and with sustenance what do you do?

Afterschool is one of those key times when kids need something nutritious and healthy, but not something that will fill them up so much they won’t eat their supper. You also want a combination of options that they can just grab and go or something that they can easily make themselves, so you don’t always have to pause what you’re doing and make it.

I love that my daughter will come home and grab her own yogurt, simply asking me for a bowl (and if I just move those into a bottom cupboard I wouldn’t even have to do that) and she scoops it up herself. This allows me to continue either working or making supper without having to stop and get her a snack.

The best afterschool snacks are ones that provide essential nutrients and that energy boost – so snacks that include protein, healthy fats and are rich in vitamins are important. Even a little of sweet or salty to please the palate.

Easy Afterschool Snacks

Some of the snack recipes and suggestions below are make ahead, but once made go into the fridge or freezer ready for the kids to help themselves. They are also easy recipes that you can make with the kids (so they can help), or depending on their age, may even be able to make it themselves.

Peanut Butter & Apples

easy afterschool snacksMy kids came home one day asking for this. I have no idea where they got the idea but it makes a great snack. Gives you your protein and sweet. For an extra added boost add in raisins or pumpkin seeds.

apple, sliced

big dollop of unsweetened peanut butter

Put peanut butter into a small bowl. Slice apple. Dip apple slices into peanut butter and enjoy.

Granola

Pumpkin seeds are a great energy food. High in magnesium, zinc phosphorus and omega 3’s they are also a great source of protein. Honey, a natural sweetener, has a long history of fighting infections and being good for colds, to name a few.

1 tbsp. honeyeasy afterschool snacks

1 tbsp. Earth Balance Vegan Spread

1/2 c. large flake rolled oats

2 tbsp. pumpkin seeds

1/8 tsp. ground cinnamon

1 tbsp. coconut

In a small saucepan on medium heat, melt Earth Balance and cook with honey for 2 minutes. Add remaining ingredients and cook until golden. Let mixture cool for 5 minutes until dry. Break apart and enjoy.

Store in an airtight container to enjoy later.

Kale Chips

Kale is a superfood that is high in fiber, iron, vitamins (such as A, C, K), filled with antioxidants and a great anti-inflammatory food. This is a basic kale chip recipe but you can play with the flavor by using different spices.

easy afterschool snacks1 bunch of kale, stem cut out and chopped

olive oil

sea salt

Place chopped kale into medium size bowl. Drizzle with olive oil and massage the oil onto the leaves, making sure they are well covered. Sprinkle with sea salt.

Place onto a large bar pan or cookie sheet. Bake at 250 F for 3-5 minutes. When kale is crisp take them out and let cool.

Keep an eye on your kale as it may not take long depending on your oven and they can easily burn. 

Other Delicious Easy Afterschool Snack Ideas

tropical green smoothieSmoothies – power pack with your favorite fruits and throw in chia seeds, hemp seeds or flax for protein and fiber. You can even add in some vegetables like carrots or a handful of spinach. The kids won’t even know it’s there.

Yogurt Parfaits – 3 simple ingredients (fruit, granola, yogurt) this fun snack is something the kids can easily make themselves.

Veggies & Dip – my kids love veggies, but when there is dip, they eat them even faster. What kid doesn’t like to dip stuff?

Raw Chocolate Pudding – made with avocado (a great healthy fat and high in vitamin E), this yummy chocolate pudding will fill the kids up and replenish their energy.

Energy Bites – a favorite at our house, this peanut butter and honey in a ball is a quick easy treat that is packed with all kinds of good stuff. It is also a great recipe to make ahead with the kids that they can just grab and go.

Fruit & Yogurt – simple easy and fun to make, choose your favorite fruit and top with yogurt. And if you’re looking for non dairy there are some great non dairy brands out there like Yoso Coconut Yogurt.

energy bitesCoconut Truffles – another great make ahead and super easy. This yummy healthy sweet treat is made with dates, coconut and chocolate all rolled into one.

Honey Roasted Nuts & Fruits – this yummy sweet treat is rich in vitamins, antioxidants, healthy fats and protein.

Strawberry Banana Ice Cream – no dairy added to this ice cream and super easy to make! Just pop frozen strawberries and bananas into the blender and voila.

Afterschool is a time when you want the kids to be able to help themselves to nutritious healthy snacks that will fuel them without ruining dinner. And it’s a great way to start giving them a little independence. Make it easy, make it fun and get them to help create!

It’s also a perfect time to introduce some new foods by incorporating foods that they like with new ones. Make it fun and encourage them to try it. You can foster a loving and supportive environment to try it in; and with them having making it themselves and gaining a little more independence, you’ll have even more success.

Tips for Making Healthy School Lunches that Kids Will Actually Eat

healthy school lunches

Back to school can be challenging enough without having to think about making healthy school lunches that your kids will actually eat. Packing kids lunches is not always an easy task. As parents it can be challenging figuring out what to put in there that won’t come back at the end of the day half eaten and you’re wondering what your child had for lunch that day.

There are many ideas on recipes and creative things to put in kid’s lunches that will entice the kids to eat a healthy well balanced lunch but what I have learned is it is not all the fancy recipes and creativity that does the trick, though that certainly may help, it is knowing what your kids like and putting those items into their lunches that is the key. Or one of. In order to make a healthy school lunch that your kids will actually eat I have discovered the following tips that will create success.

Tips for Making Healthy School Lunches

1.Put in foods that you know your kids like – this is not the time to try out this new healthy food recipes. If kids don’t know what it is they will likely not touch it or tentatively take a bite and skip it. The best time to try a new food or recipe is at home, where you can offer a supportive and happy environment. If you discover that they like it, then you can pop it in their lunch.

healthy school lunches2. Get the kids to help – depending on the age of the child they can help or do it all on their own. Research shows that when kids participate in creating their own meals that they are more likely to eat it.

3. Offer them choice – this can be a win win situation. You as the parent can choose two healthy options and ask them which one they would like, ie the tuna sandwich or the ham. The child feels empowered because they got to choose what they wanted and you are happy because they have made a healthy choice that you are happy with.

4. Have variety – put in a variety of healthy items into your child’s lunch but in smaller portions. This way they have lots to choose from and enjoy and food is not wasted. My daughter often has a sandwich in her lunch but usually eats her spinach dip, apple, muffin and a bit of her sandwich. She is happy and is full and I know that she has gotten a variety of nutrients into her growing  body. It’s ok that she did not eat all of her sandwich as she saves it for the next day. The point is if I had only put in the sandwich and apple then she would have likely still been hungry and not had enough energy for her afternoon. There is also value in having variety from day to day or week to week. Change it up! as no one really likes the same thing day after day after day.

healthy sweet treats for kids5. Add in a healthy sweet treat – who doesn’t love a little sweet treat in their lunch? The kids will love it and see it as a bonus. There are lots of recipes out there for healthy sweet treats that you can feel good about putting into your kids lunch. Ones that are delicious and rich in nutrients so even if they eat that first you know that they are still getting good healthy stuff.

6. Make lunches fun and interesting – adding a little creativity to your kids lunches can not only make it more enticing to eat but can make it fun for you as well. There are many quick easy things that you can do like making faces out of their vegetables, cutting cheese out in shapes, make two tone sandwiches, etc.

7. Make lunch the night before – this takes so much pressure off you and makes mornings smoother and easier, with one less thing to do before you head out the door. If you make it the night before (I do everything except the sandwiches as I like them fresh), then you have time to put things in that are healthy and have the kids participate without everyone having to feel rushed and just tossing in whatever so the kids have at least something for lunch. When you’re not rushed you make better clearer decisions and it enables you to do any extra prep if you need to.

how to make tacos with kids8. Lastly, talk to your kids about their lunches. Ask them what they would like in them, offering a variety of choices that you are happy with. Ask them each day what they ate and enjoyed, what they didn’t like. Did they have enough in their lunch? Having a dialogue about their lunch not only gives you an idea of what they need and like (yes kids tastes can change often) but also helps you create healthy lunches that they will eat. One thing that is very important is to make sure that you do not reprimand your kids for not eating something or become upset, this will have the opposite effect of what you want, to get them to eat. Instead, ask them why they did not eat it – it may be as simple as they were full – or if they didn’t like it – ask them what they would like instead – again offering them choices. For example, if they didn’t eat their apple and tell you they’re tired of apples, offer them a couple other fruits that you would be happy with.

The two most important things that will help you create healthy school lunches for your kids are putting in what they like and getting them to participate. It can also be a great opportunity to spend time with your kids in the busy day doing something you have to do anyway. And guess what? If they help that means you have a little more time for yourself in the evening because lunch is already done.

Favorite Healthy Lunch Recipes

That being said it’s always nice to have a pool of recipes to pull from to create variety in your lunches. Here is a list of some of our favorite healthy lunch recipes for you to try (and remember if it’s new to you, try it at home on a weekend first before popping it into your kid’s lunch).

Veggies & Dip

Wraps

Salads

Muffins

Healthy Sweet Treats

Do you have a favorite healthy lunch recipe? Share in the comments below.

Camping Recipes – Campfire Nachos

campfire nachosOne thing about exploring new camping recipes this summer is that it has definitely expanded my horizons and opened up my thinking; as well as adding more variety to our camping menu! For instance I had never thought of making nachos while camping. It just never entered my mind. And really the question is why couldn’t you?

Campfire nachos adds great variety to the camping menu and is almost a treat. It is also a quick easy, healthy, and well balanced recipe (ok except maybe the chips), but it’s another one of those quick ‘one pot’ deals that I love while camping.

campfire nachosWe made it on one of those lazy and enjoyable camping days where we had floated down the river in the morning and were just hanging around the campsite in the afternoon. I had precooked the ground turkey that afternoon, knowing that we were having the nachos for supper and saving me that step when it came time to actually put them together.

Matthew made the fire as usual and I prepped dinner. The thing that I like about this recipe for campfire nachos is that you do not need a bed of coals to cook it. Simply a good fire and cook on top of the grill. It also does not take very long as you are literally heating through and melting the cheese. Saves your hungry campers drooling over it and constantly asking when it is ready!

I did mine in two batches due to the size of our grill, but I would recommend doing it in two batches regardless. Doing it this way makes it easier to move on and off the grill without spilling it and carrying it to the table.

Everyone gobbled it up of course and asked for seconds. The beauty of nachos as well is you can really put any ingredients you like on them. I’ve even heard of people putting on fruit or pickles! Whatever ingredients you choose you know they are going to be delicious.

Campfire Nachos

1 lb. ground turkey meat (may also use chicken, beef, pork)

1 – 500 g bag tortilla chipscampfire nachos

2-3 fresh tomatoes, chopped

1 pepper, chopped (choose your color green, red, yellow, orange or a mix)

green onion, chopped

1 pkg. Daiya cheddar cheese shreds

Earth Balance Vegan Spread for lightly greasing foil

1 container Earth Island Vegan sour cream for topping

heavy duty aluminum foil

Brown meat in a frying pan either on camping stove or over the fire (this step can be done in advance and stored earlier in the day if you wish).

Chop tomatoes, peppers, green onion and set aside. Tear off 2 large pieces of heavy duty aluminum foil (approx 22 x 12 inches) and place shiny side down on table. Lightly grease both pieces of foil with Earth Balance.

Make two batches by doing the same for each or you can make two different kinds if you like.

campfire nachosPlace tortilla chips in a single layer on top of the foil, then sprinkle turkey, tomatoes and pepper evenly over chips. Sprinkle cheese and then green onions on top.

With a second piece of foil place shiny side in, lightly over top of nachos, tenting it so that it does not rest on top and stick to your toppings. The second piece of foil helps the cheese to melt faster and prevents any pieces of ash that may spark up from getting into your nachos. Place prepared nachos on top of grill on fire and cook, approximately 10-15 minutes. Check nachos periodically to make sure they do not burn. They may also be ready sooner depending on the heat of your fire.

Once done – heated through and cheese melted, remove from grill of fire using oven mitts and serve with sour cream. Enjoy!

Serves 4 

campfire nachos*a quick tip to help you transfer the nachos from table to fire is to use a wooden cutting board. I just slid them onto the board and took them over to the fire, then gently slid the nachos onto the grill. I did the same when taking them off, aligning the cutting board with the grill and then sliding them off using oven mitts onto the board. I recommend a wooden board because you can get it close to the fire even top the side of the grill without melting or damaging it.

Missed out on our other camping recipes this summer? Check out Campfire Lasagna, Potato Boats, Campfire Corn on the Cob, Cinnamon Apples, Banana Boats, and Pineapple Upsidedown Cake.

Camping Desserts – Campfire Pineapple Upsidedown Cake

campfire pineapple upsidedown cake

When I found this recipe for campfire pineapple upsidedown cake I was in heaven! Growing up pineapple upsidedown cake was always a treat in our house, my Oma being famous for making it.

My Dad absolutely loved it and every time my Oma came to visit she would make one for him (that and crumb cake, also delicious). So when I discovered this recipe we could make over the fire I knew that we had to try it. Plus I was excited to find a new camping dessert recipe, cause though I love banana boats and cinnamon apples I also like variety on the menu.

campfire pineapple upsidedown cakeWe made this recipe on our first camping trip this year on July long weekend. We actually made it in the afternoon on one of our days away, before we had supper. One of the things I find when camping is that because there is no schedule meals often run later than usual. Often we are not finishing supper til 7 or 8 and by that point not only am I full but I don’t feel like creating more food. So we decided – in the words of my father – that we would ‘eat dessert first’. Then worry about supper later.

I had made the pound cake at home and brought it with us which was easy enough to do. You can also buy a pound cake if you prefer but I needed a sugar free version. Plus honestly, regardless of if I was looking for sugar free or not, I usually bake cake from scratch no matter what it is. I am not one to buy cake from the store in general.

I had also experimented with the pound cake recipe using honey for the first time as the sweetener. Oh my it turned out well. Nice and moist. Yum! We had a hard time not eating just the cake before we made the rest of our dessert.

The recipe for campfire pineapple upsidedown cake is simple – pound cake, pineapple, coconut sugar (great natural alternative to brown sugar), Earth Balance and cinnamon and/or nutmeg. Baked in foil over the fire until the sugar melts and you get that nice googey syrupy liquid. You do need to be careful not to over cook it as it can burn, especially if you are doing it over the grate on the fire. Alternatively, you could burn your fire down to coals and bake it, but that would take longer!

Campfire Pineapple Upsidedown Cake (sugar free & dairy free)

pound cake, cut into chunks *recipe for pound cake belowcampfire pineapple upsidedown cake

fresh pineapple, cut into chunks

dash of cinnamon, nutmeg

coconut sugar

coconut cream for topping

1 healthy spoonful of Earth Balance Vegan Spread, plus a little bit to grease your foil so the dessert doesn’t stick

heavy duty tinfoil

Tear off piece of heavy duty tinfoil (about 12×12″) and place on table (or flat surface). Use a small amount of Earth Balance and spread evenly over the foil. Slice and cut pineapple and place on foil. Slice pound cake and cut into squares about 1 inch thick and place on top of pineapple. Put a healthy spoonful of both Earth Balance and coconut sugar over pineapple and cake, sprinkle with cinnamon and/or nutmeg.

campfire pineapple upsidedown cakeClose up the foil by brining two ends together and folding over then rolling down til tight. Then fold over and roll on each end. This creates a nice tight packet that keeps everything in and is easy to open when done.

Place foil packet on the grill over fire. (Also works well by putting into coals of fire, but no flame or BBQ). Cook for about 5 minutes and then check it (takes a little longer on the BBQ). It is ready when the butter and brown sugar have melted and formed that yummy syrupy liquid over pineapple cake mixture. Put a dollop of coconut cream on top if desired. Enjoy! It will be hot so be careful.

We loved these. Everyone inhaled theirs and then wanted more. And I loved how simple it was. The kids could make and put together their own (so making it as little or as big as they wanted) and it didn’t take long to cook as you are basically just melting the Earth Balance and coconut sugar. Then voila! it is ready at any time of day, whether you choose to have it before supper or not.

This is the recipe for the pound cake I made. It was also quick and easy and I really liked using honey as the sweetener. Make sure you sift the flour as though it takes a few extra minutes to do so, it makes the cake lighter and fluffier.

Honey Pound Cake

1 c. Earth Balance vegan spread

1 1/2 c. flour, siftedcampfire pineapple upsidedown cake

1 c. honey

1 tsp. vanilla

5 eggs, lightly beaten

1/2 tsp. sea salt

Lightly grease a 4 1/2 by 8 1/2 inch loaf pan. In a large bowl beat Earth Balance and honey together until light and fluffy.

Add vanilla and then gradually add eggs, beating well. With mixer on low, add salt and the flour. Beat well to combine.

Transfer batter into loaf pan and bake at 350F for about 65 minutes, until toothpick inserted in center comes out clean. Let pan cool on wire rack for 1 hour. Remove cake from pan and let cool completely on rack before slicing.

Cake may be stored in plastic wrap at room temperature for up to 3 days or frozen for up to 3 weeks.