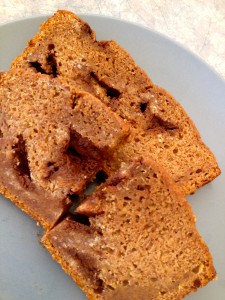
Sugar Free Banana Bread

A traditional favorite in most homes, banana bread is a great way to use up those overripe bananas, turning them into something delicious! I have tried a few banana bread recipes from the one my Mom makes to one from my roommates in university and all have been delicious. But when I discovered this banana bread recipe I was in heaven! It was the most moist and the best banana bread that I had ever had. Containing no sugar, sweetened with applesauce and honey, and a boost of flaxseed, this is one healthy, but extremely yummy banana bread.

When I make it at our house, it never lasts more than a day because the kids and I gobble it up 2 or 3 pieces at a time.

I use my own *applesauce and chocolate, both homemade and of which I usually have on hand. The twins enjoy applesauce and cinnamon each morning at breakfast and I make up plain chocolate pieces that I keep in the fridge or freezer for whenever we need our chocolate fix.

Though you may have a favorite banana bread recipe, give this one a try, you won’t be disappointed!

*to make the applesauce I simply slice and core 6 apples, boil them on the stove until soft, then drain the water and blend the apples in the blender until smooth. I do not peel the apples as the skin contains lots of vitamins that you lose when you peel them and blends up so small that you don’t  notice it in the sauce.

Banana Bread

1 1/2 c. whole wheat flour

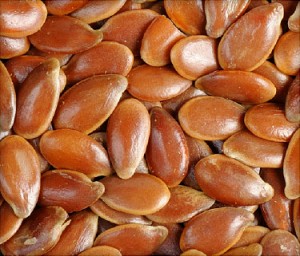
flaxseed

1 1/4 tsp. baking powder

1/2 tsp. baking soda

1 tbsp cinnamon

1 tbsp ground flaxseed

pinch of sea salt

3 ripe mashed bananas

2 egg whites

1/4 c. unsweetened applesauce

1/2 c. honey

1/4 c. flaxseed oil

1/3 c. chopped dark chocolate

chopped walnuts, optional

In a medium bowl combine flour, baking powder, baking soda, cinnamon, flaxseed and salt.

In a large bowl beat bananas until smooth. Add egg whites and mix. Gradually mix in applesauce, honey and flaxseed oil. Mix dry ingredients into banana mixture. Stir in chocolate.

Grease a 9×5 inch loaf pan with Earth Balance Vegan spread. Pour batter into pan and bake for 45 minutes or until cake tester when inserted comes out clean.

A Very Good Surprise

Matthew, age 9

I was surprised the other day to learn that I am not failing as a parent. I am sure you can all relate with the many joys and challenges of having children, that there are times when we are doing what we feel is best for them, and is the best we can do for them, yet we are met with opposition, fights and many “you are mean” comments.

I have been feeling this way with the dietary choices in our house. Luke and Chloe don’t know any differently because no sugar and no dairy is what they have always had. I never had to take them off it, or take it away because when they joined our family we were already there. But for Matthew this has been a challenge.

Chloe and Luke, 1 week old

Though I have done my best to provide alternatives for him that he can have and things that other kids around him are having, he still challenges me a lot on the no sugar thing especially. Often when we go grocery shopping he informs me when he is 18 he is going to come to the store and buy all kinds of sweets and candy and then eat it all. I know if he does that he will be soooo sick (my hope is that by that time he has fully come to accept and recognize that living sugar free is really a good thing for him and won’t end up doing it).

He complains at home, cries in anger and frustration and I am often called mean for doing this to him. Yet there are days when he is very rational and accepting about it all and talks about how it does affect him and what it does to his body. But it seems like days like this are not very frequent.

I get it, I understand. We live in a world where sugar is everywhere and in everything. He is surrounded by it at school, other kids, even other adults and he feels denied, different and like he is missing out on something really good. I don’t imagine it is easy. But I have been trying to teach him the benefits of living this way and the difference it makes not only in his life but in our family’s.

Like I said the other day I learned that I was getting through, that all my efforts were making a difference. Matthew has his own blog on which he posts all kinds of things, usually work/ reports he has completed at school about science, wetlands, etc. He really enjoys writing and posting and does so everyday. This week he put up 2 posts that surprised me. One was about sugar and it’s negative effects, how it affected him and why people should avoid it. He also did one that was similar about dairy.

I was so proud of him 🙂 When he came home from school that day that was the first thing I told him too. Not only does it make me feel like I am not banging my head against a brick wall, but that he does believe and recognize the reasons why we have eliminated sugar and dairy in our diets. Enough that he has chosen to share his knowledge and experience with the world.

He grinned from ear to ear when I told him how proud I was of him. I also told him this is how we change the world. We share and stand up for what we believe in and others may choose to take that stand with us. For a 9 year old to tell others that sugar is not good for us and that we should avoid it, amazed me. It affirmed that he was listening, he was understanding and he was ok with it all afterall.

I know there will still be days when he’ll argue with me about this, but I know in my heart of hearts that he is there with me and that I need to keep supporting him in this choice.

As a parent, we all have times when we really wonder if what we are doing is the right thing or if we are getting through to our children. It is moments/ discoveries like this that help me to know that I am – and it makes it all worthwhile.

A Teaspoon of Sugar – the Effects of Sugar on our Body

It’s been almost 2 years since we eliminated sugar from our home and about as long that I have been blogging about it, sharing recipes, and talking about alternatives. What I realized the other day is I have not shared the background, the proven effects, scientific research and studies that sugar has on our bodies and why it is so bad for us. I feel that it is important to not only share what we did it but the why behind it (otherwise I just feel like someone up on their soapbox telling you it’s bad and not telling you why).

It’s one thing to think that it is a good idea to take it out but if you are like me, it also helps to have the research to back up your decision from the experts and medical professionals. Because unfortunately we live in a world where a lot of people won’t believe or validate what you are saying/ doing without it. Plus I also believe it is important to be educated about what you are doing in order to make informed choices.

I read an article the other day by Carol Galanty, Natural Foods Chef, titled “Are you a Sugar Addict” where she talks about sugar being an addiction as well as the effects it has on both our physical and emotional bodies. It has been proven that things such as weight gain, mood swings and premature aging are all effects of consuming sugar and that is just the tip of the iceberg.

In my further exploration of refined sugar and it’s effects, I discovered studies conducted in London and Yale University proving these effects and more. The London study was with children who exhibited ADHD symptoms, where they disguised foods that had sugar in them as ‘natural’. The goal of the study was to learn whether how a food looked made a difference in how our bodies processed it. They observed that regardless of how it was presented that all the children exhibited hyperactivity immediately after consuming the sugary foods.

We have all seen examples of this in our lives. In classrooms, where kids are calm and functioning rationally, then they have a class party, which usually includes treats and the kids go haywire soon after; no longer able to focus or listen well. I have observed this with my LIT group when we have a celebration with sugary snacks, the energy level goes up tenfold as well as the chatter and inability to focus. At Halloween we decided to have a no sugar party and the event went quite differently, we did not send wired kids home to parents and the evening was much calmer and more ‘even’ for everyone (and I would even venture to say much more pleasant).

In the University of Yale study they measured children’s adrenaline levels before and after consuming sugar. The amount of adrenaline after consuming sugar was 10 times higher then before! Adrenaline being the chemical in our body that moves us into fight or flight mode – a state where we act on instinct and survival – if it is 10 times higher then no wonder children are difficult to deal with after consuming sugar as they are on heightened defense! It puts them into a state where they cannot rationally respond or make good choices. They also found that after consuming sugar children were irritable, anxious and had difficulty concentrating.

Other university studies have also found links between sugar consumption, aggressiveness and antisocial behaviour.

Now you might say well I eat sugar all the time and I don’t notice these things or my kids seem ok. Do you notice those times of day when you feel sluggish or tired for no apparent reason? Do you ever feel irritable for no reason? Those are the down swings, coming off the sugar high. Now food does affect each of us differently, so one person might be more sensitive or reactive than another. As a result, symptoms may appear to be more extreme in one person than another, and for some they may say they do not really notice.

You also need to keep in mind that we (as a society) are eating sugar all the time, it is in our bread, our concentrated orange juice, various canned goods like tomato sauce, salad dressings, ketchup, not to mention the cakes, muffins, donuts and cookies. Our bodies adjust, get used to it, but it still doesn’t mean that it is not affecting us or harming our bodies.

As an experiment go without sugar for a day, just one day and notice how you feel. Notice your energy levels, your moods, etc. If you don’t notice much the first day, try 2, then 3. By day 3 you will begin to notice changes in your body (whether it be mood swings, irritability or headaches to name a few). With our son Matthew, his moods became calmer, more consistent and stable, and his sleep drastically improved. Some of these changes we noticed right away and some took longer; with his sleep it was almost 3 weeks before we really noticed the difference.

This was due to the fact that Matthew was going through withdrawal and his body needed to readjust. What I think many of fail to realize is that sugar is highly addictive (which our family doctor avidly confirmed this morning), it is like a drug, one as addictive and as harmful as cocaine. Therefore when we reduce or eliminate sugar intake our bodies go through and experience symptoms of withdrawal. These symptoms include anxiety, restlessness, depression, irritability, headaches, poor concentration, headaches and insomnia (which in children often gets diagnosed as ADD or ADHD). So there is going to be a period where one may experience and go through these symptoms until the substance is completely out of the body’s system.

These facts alone are enough for me to stay the course with our decision to eliminate sugar. We have found lots of healthy and natural alternatives to still enjoy our sweet treats. And I believe in eliminating it completely not just reducing it. It’s like to the drug addict who says well I’ll only have a little bit. Really are you free of it’s effects and/ or the harm it has on your body?

Imagine if the whole world moved towards eliminating sugar how do you think that would look? Our classrooms would be calmer with children more engaged and focused, our moods more stable, our level of peace more present and consistent. So why are we not doing it, because it is what we are used to, there is a huge industry out there, and we are all addicted to it and addictions are not always the easiest to break.

I believe we can get there and are moving towards it. Years ago people who chose gluten free or dairy free did not have a lot of options nor was it well accepted in the ‘outside’ world, such as restuarants and schools. But now there are many restuarants who offer gluten free menus and dairy free options. So it’ll come, in baby steps. It takes people to educate, be informed and live that lifestyle and it’ll become more accepted in this world.


Peanut Butter Cookies

peanut butter cookies

I love peanut butter cookies! They are so tender and moist and they melt in your mouth. They are definitely one of my favorite cookies but I hadn’t made them for a while as I hadn’t figured out how to adjust the recipe without sugar in them.

My mother, bless her, since we have chosen to go sugar free, has been experimenting in her kitchen so that she could make treats for the kids when we come to visit. She has adjusted many of our favorite recipes so that we can still enjoy them. She was the one who figured out how to successfully make peanut butter cookies with no sugar. In her first attempt she substituted date sugar, which she found did not work so well as the cookies were dry ad crumbly. Her next attempt proved successful as she uses a combination of coconut sugar and agave nectar, which make a sweet, soft cookie, that literally does melt in your mouth. Luke and Chloe love her peanut butter cookies!

I had been craving them myself for a while so I whipped up a batch last night using my mother’s recipe. I was literally drooling over the batter, my mouth watering as I mixed it up (cause the next best thing to freshly baked peanut butter cookie is peanut butter cookie dough!)

I did resist eating all the dough and baked 5 dozen cookies. Some plain and some with sugar free jam, I make my own, in the middle (I love those best, they are even more soft and moist, peach jam is my favorite).

Matthew even came down after going to sleep as he smelled the cookies baking, the sweet smells wafting up the stairs. (I get an image like in one of those cartoons with the person asleep being ‘carried’ down the stairs along the wafting smell to the kitchen). This morning the twins saw them (even though I thought I had cleverly tucked them out of sight) and wanted some right away. It did not go so well when I said no that we would have some later.

As soon as Luke and Chloe were up from their naps they were asking for cookies. And when Matthew came in the door afterschool and saw a pear on the counter wondered aloud why he wasn’t getting any cookies. (The deal was to eat our pear and then have cookies). We dove in. Ok we had 2 each, though I could have easily eaten 5 or 6, and I am sure the kids would have too. In fact Chloe came bouncing into the kitchen looking for more and when I told her that was it and that she had 2 already she said, “No I didn’t” with the most innocent look on her face. I laughed out loud! How early they start with those things 🙂

Chloe enjoying her cookie

I am sure over the next few days there will be many requests for cookies and I am sure I will indulge as well. In fact I am resisting right now going over to the container and popping 1 or 2 into my mouth… The nice thing is is they do not contain sugar so the kids will not get the adrenaline spike related to it and it is something sweet for them to enjoy. They will also eventually run out, but I can always make more! and might do so 🙂

Peanut Butter Cookies

1c. Earth Balance Vegan Spread

1 c. coconut sugar

1/2 c. agave nectar

2 eggs, slightly beaten

1 c. unsweetened peanut butter

2 tsp. vanilla

2 1/2 c. flour

1/2 tsp. baking soda

1 tsp. baking powder

Cream Earth Balance. Add coconut sugar, agave nectar and eggs. Add peanut butter and vanilla. Mix in flour, baking powder and baking soda until well mixed and mixture is light and fluffy.

Scoop by the teaspoon and roll into a ball. Place ball on cookie sheet. With a fork press down once gently – dip fork in water so fork does not stick to dough.

Variation: may add a small amount of jam (any flavor you like) in middle of cookie. To do this form ball as above, with finger and press down in the middle of ball. Add small amount of jam in impression. We use sugar free jam that is sweetened with honey.

Bake at 350 F for 10-12 minutes.

Makes 5 dozen cookies.

Yummy Raw Chocolate Pudding

Chloe enjoying her chocolate pudding

As a parent who endeavors to provide good healthy snacks for my kids, as I know many of us do, I was thinking the other day about what to provide for snacks other than fruit. Not that there is anything wrong with fruit, but I like variety, and so do my kids. As I think all human beings do, if we have oranges everyday for snack we may start out loving them but eventually be wishing for an apple, or some popcorn.

I read an article once that described things that appeal to kids most in their meals. They were foods that are sweet, salty, or crunchy and that if you appeal to one or more of these when planning meals and snacks you will always have success with them eating whatever you are serving.

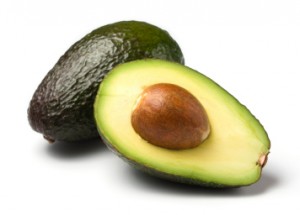
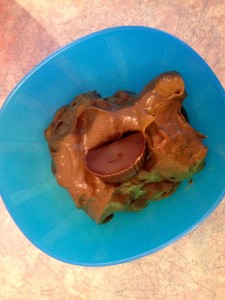
So there are some days we make popcorn, others we have fruit, but the other day I realized that I have a great healthy chocolate pudding recipe, made from avocado and bananas. What a great snack option, sweet, chocolate and delicious! So I have added this to our snack list for afterschool. The kids love it, it is a great treat and it satisfies the sweet without the added sugar, cause there is no sugar (or dairy) in it!

And the great thing is because it has avocado in it, it curbs our body’s craving for any further sweets. My mother’s naturopath said that when our bodies crave sweets to have an avocado – and the reason is our body actually wants fat not sugar, and avocados are high in (monounsaturated) fat, so when we eat one we satisfy and give what our body needs.

I also find this pudding to be quite filling, a small portion is enough to enjoy and fill your tummy (which is good because it means there are leftovers for later!) The pudding once made will keep in the fridge for 3-5 days – if it lasts that long.

It is very easy to make, put all the ingredients in the blender and within minutes you have smooth, fluffy and delicious chocolate pudding.

Raw Chocolate Pudding

2 ripe bananas, peeled and sliced

1 avocado, pitted and peeled

2 tbsp. raw cacao powder (please note this is different than cocao powder – they are not the same things)

1 tsp. agave nectar

Put all ingredients in Vitamix blender in the order listed. Start on low, slowly turn speed up to high. Blend for 30 seconds on high or until desired consistency is reached.

Luke's pudding mustache

Makes 1 1/2 c. of pudding

Note: If you do not have a Vitamix blender, you can use your regular blender but you may find that it is too thick to mix well. What I have done is mix it in the mixer first so that everything gets fairly well mixed and then I transfer it to the blender – blending it on high- to make it smooth and fluffy.

Delicious Dairy Free Dips

Matthew and Chloe enjoying a cucumber

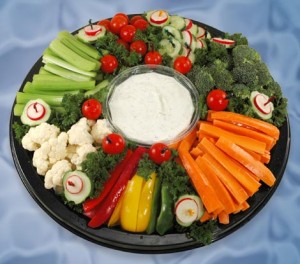
While having all the kids at home over the Christmas holidays I discovered that my kids will eat pretty much anything, that they are not fussy eaters. I also discovered that whatever I put in front of them they ate. So even with the surplus of yummy sweet treats around, if I put  fruit or vegetables in front of them that is what they would eat. Not that they did not ask for the sweet treats mind you, I did too at some points. But I noticed that when I was prepping a veggie tray and Matthew came wandering by, he would pick up a carrot or celery stick and start eating – without being asked! – and then he would come back for more. I felt I was onto something…

Now my kids will eat their fruit and veggies regardless if there is a dip to go with it or not. Which is great because sometimes when I am running out of time, the dip is the thing that does not get done! But they and I do enjoy a yummy dip to go with it. In fact, often Chloe will eat only the dip, which I know defeats the purpose, but the dips I provide have good stuff in them too so it is ok. Sometimes though I do use it as a bargaining tool, “more dip if you eat your carrot stick”, not always the best tactic in getting kids to eat I know, but I think you would agree that we all do it to some degree.

So today I am sharing you with some of my favorite dips that are great with a variety of things, fruit, veggies, fish even, depending on the dip. (My sister made a fabulous dinner at Christmas of fish and chips and I could not get enough of dipping my fish in the Peppery Dip, it was delicious!)

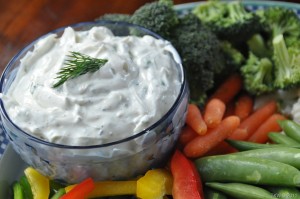
Dill Dipgreat with veggies and/ or tortilla chips

1/3 c. veganaise

1/4 c. vegan sour cream*

1 tsp. parsley flakes

1/2 tsp. dill weed

1/8 tsp. onion powder

1/16 tsp. celery salt

1/16 tsp. salt

Mix all ingredients in a small bowl. Serve immediately or chill until ready to use.

Recipe can easily be doubled. Makes about 1/2 c. dip

Peppery Dip

1 c. veganaise

2 tbsp. grated onion

2 tsp. tarragon vinegar (can use regular vinegar and tarragon seasoning)

2 tbsp. chopped chives

2 tbsp. chili sauce

1/2 tsp. curry powder

1/2 tsp. salt

1/4 tsp. pepper

1/8 tsp. thyme

Mix all ingredients together. Serve with veggies, also great with fish!

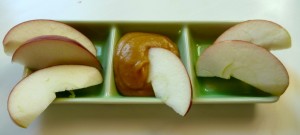
With fruit I use this homemade caramel sauce that is made from dates. It is especially good with apples, but goes with any fruit well. All the dips will keep in the fridge for at least a few days, so make ahead of time or keep until later -that’s if you have any left 🙂

Enjoy and happy dipping!

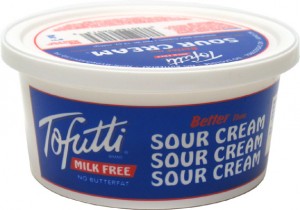
*when I first started making dairy free dips I used Tofutti sour cream and cream cheese, a soy based product. I discovered that they use sugar in their product and since then have moved to using Earth Island, which has no sugar and I feel is a better product in general. Both work well and is up to you as the cook which one you’d like to choose – or maybe you have another favorite vegan sour cream 🙂

3 Easy Steps to Healthy and Nutritious Eating (The kids will LOVE it!)

Eating well is something that is on many of our minds at this time of year. After the overindulgence over the holidays of food and especially treats, many of us look to make changes in what we eat come January. Whether the goal is to lose weight, feel better or just have the entire family eating well balanced and nutritious meals, here are some quick and easy things you can do to make changes right away.

healthy dips for kids

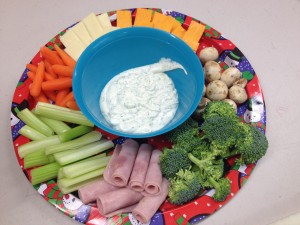
Veggie Cheese Tray

1.Have nutritious snacks on hand. I often find it is not our meals that get us but the snacks we have in between. I have found that my kids will eat what is put in front of them (I have even noticed this for myself as well). If there are veggies and dip out on the counter then that is what they will grab when they are hungry, but if there are cookies near by and accessible then they’ll go for those. So I have started putting together a veggie tray and setting that out afterschool. I like to include variety such as grape tomatoes, mushrooms and snow peas; include your kids faves and watch them disappear. I have some yummy dairy free dip recipes that are easy to make and great with vegetables. You can also do a fruit tray as well with this yummy healthy caramel dip.

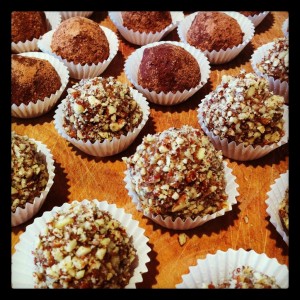
2. Provide sugar free sweet treats. There are lots of great recipes out there for sweet treats that do not contain the refined sugars and use natural sugars instead. My kids love banana candy, which is easy to make ahead and have on hand. Or raw chocolate truffles and chocolate pudding (my mouth is watering already!) We all love our sweet treats, it’s in our nature. By providing healthy ones, we satisfy our cravings for something sweet and can feel good about it – not only for ourselves but for our kids to.

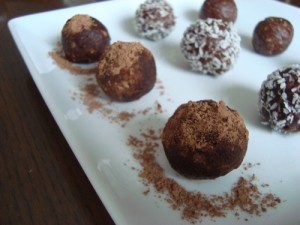
Raw chocolate truffles

3. Plan the menu for the week. If you plan out ahead of time your meals (especially dinner) this will not only reduce your trips to the grocery store and save you money but it will reduce stress and the “I don’t know what to make for dinner so I will grab this quick easy (and often unhealthy) option” -whether it be the frozen dinner or the scrambled eggs.

Starting with these 3 easy steps to healthy eating will put you on the road to eating a healthier and more balanced diet.

Tip: I have found that it is easiest to start small and break things down into steps that you can achieve easily, one at a time. If you take on too much at once and try to radically change everything not only are we more likely to give up because we are so overwhelmed, but those changes probably won’t stick. Aim for easy, aim for success!


Holiday Delights Sugar and Dairy Free Egg Nog

One of the many things I love about Christmas is the fun holiday drinks you can have. Things like hot apple cider, Christmas Jones, Angels Delight and my favorite Egg Nog. It is a rich creamy drink that you can have virgin style or add a dash of rum if you like. Either way it is delicious, especially if you sprinkle a little nutmeg or cinnamon on top.

Only available at Christmas, as soon as it came out in the stores I would buy it – sometimes as early as October – to enjoy and savour my first cup. Matthew also really likes egg nog and was asking me to buy some for him as soon as he saw it in the store. Unfortunately egg nog has the two things our family doesn’t consume anymore, dairy and sugar; therefore I was in a bit of a quandary. Some things I could live without, I did not want egg nog to be one of them! So I went on a hunt for one that would meet our needs. There had to be one out there.
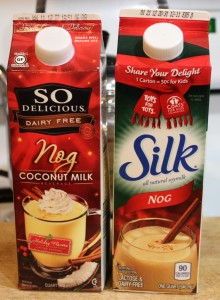
There are quite a few non-dairy options out there, Vita-soy makes a Holly Nog from soy milk, as does Earth Balance, Silk and So-Delicious (coconut milk) as well as nogs with almond milk. I even discovered a rice milk egg nog made by Rice Dream. But though these are all great dairy free options they are still sweetened with evaporated cane sugar, which we can’t have; we needed one with a natural sweetener.

Since I couldn’t find one in the stores,  I came home and hopped online to see what recipes I could find on the internet. (I love the internet it has opened up a whole new world for me and I often wonder how we ever got along without it). My preference was an egg nog made with almond milk so that is what I looked for; and I found 3 really good recipes that I have made and we all tried.
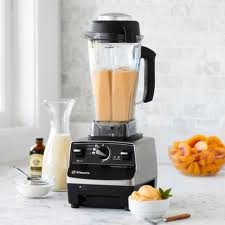
The first one I found on Incredible Smoothies, a website founded by Tracy Russell who eats a high raw vegan diet. She has all kinds of great smoothie recipes on her site. The recipe for egg nog, I really liked as it does not contain eggs, (which I was concerned about for the twins as egg nog usually contains raw eggs), and it was all made in the blender, sweetened with frozen bananas! It was fast, easy, simple and delicious!

The second recipe I found on Healthful Pursuit by Leanne Vogel, who shares recipes, travel, food and life experiences on her site. This recipe for egg nog contains egg yolks as well as coconut milk, but is cooked on the stove. At first I thought that this would not turn out so well as I thought “Warm egg nog? Really?” but it turned out to also be delicious! And the fact that it was cooked on the stove eliminated my concern about the twins having raw eggs, so they could have it too. It was also really good warm. Leanne says you can let it cool and enjoy it, but I found due to the coconut milk, it congealed in little chunks when it cooled, and though not bad you had small pieces of coconut milk in your egg nog. I have leftovers in the fridge that I will be heating up for sure when I enjoy it.

The last one I recently discovered this week, is completely vegan and is the new front runner for our favorite. Courtesy of SPUD (I love these guys but that’s a whole other post), a local & organic grocery delivery service, this egg nog recipe is creamy, delicious and super easy – just add all the ingredients to your blend and mix. Check out their recipe here.

The kids enjoyed both recipes too. Matthew’s favorite was the one from Incredible Smoothies, I really liked the one from Healthful Pursuit (I found it a little bit creamer and lighter) and the twins, well they liked both and didn’t seem to favor one or the other (they are so easy to please those two 🙂
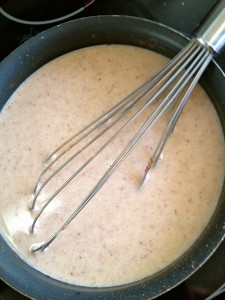
Dairy free egg nog with almond milk

The only downside with the stove top recipe is you end up with leftover egg whites and unless you have something to use them for they end up going to waste.

Either way we now have 3 delicious, dairy free, sugar free egg nog options, which even John tasted and said is “Way better than the store bought stuff.” And we can easily make them at home whenever we like, and as much as we like 🙂

So if you’re looking for a non dairy egg nog that you can make yourself or simply wish to try something new, these recipes are great (and they also happen to be gluten free as well). Once you’ve tried them come back and comment letting us know what your favorite is, or if you’ve found another egg nog recipe that you like and are willing to share!

Have fun and enjoy that glass of egg nog!

Raw Vegan Egg Nog with Almond Milk

1 1/4 c. plain almond milk (you can make your own almond milk, it’s super easy)

2 frozen bananas, peeled and sliced

1/4 tsp. nutmeg

1/4 tsp. cinnamon or 1 drop Cinnamon Bark essential oil

dash of clove or 1 toothpick dip* of Clove Bud essential oil

dash of sea salt

1 date (soaked for 10 minutes)

1/4 tsp. pure vanilla extract

Put all ingredients in a blender. Start on low speed and move up to high. Blend on high for 20-30 seconds until mixture is smooth. Serve with a sprinkle of cinnamon or nutmeg, if desired.

*a toothpick dip is used when you do not want a full drop of essential oil as it’s too much for the recipe. Simply dip a clean unused toothpick into the essential oil bottle and then dip the toothpick with essential oil into your mixture and swirl it around.

Almond Nog

4 egg yolks

2 1/4 c. unsweetened almond milk

1-400 ml can of coconut milk

1/4 c. coconut palm sugar

2 tsp. pure vanilla extract

1 tsp. ground nutmeg

1 tsp. cinnamon or 1 drop Cinnamon Bark essential oil

pinch all spice

Separate the eggs and place the egg yolks in a bowl. Set aside.

Combine the remaining ingredients in a medium saucepan on medium heat bringing mixture to a simmer. Once simmering reduce heat to low.

Slowly add 1/4 c. of the hot liquid to the egg yolks in a bowl, whisking continuously. Continue adding liquid to the egg yolks until you’ve added 1 cup, then transfer new mixture to saucepan. Turn heat back up to medium and simmer for 4 minutes, whisking continuously.

Remove from heat and serve immediately or put into a mason jar and refrigerate.

Sprinkle with a pinch of cinnamon or nutmeg, if desired.

*note recipes have been reposted with permission of the original authors


Shop Art Calendars at Calendars.com

Chocolate Additions

In my last post, I shared the basic recipe for making raw organic chocolate. Very easy to do, it is a healthy and delicious way to enjoy chocolate without the guilt!

Now here is the fun part! Once you have the basic chocolate made you can add all kinds of things to your chocolates that not only make them delicious, but also add vitamins and nutrients that are good for you! You can ‘soup up’ your chocolates and no one will even know what’s in there.

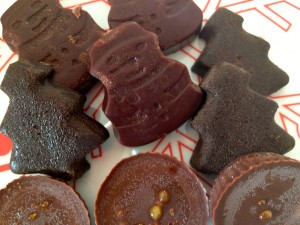
I make peppermint Christmas trees and add E3 Live to them, which is a form of algae, very high in protein and minerals. It darkens your chocolates but does not alter the taste, no one would ever know it’s in there. And Matthew loves them and as a result asks me to make them all the time!

chocolate additionsMatthew even helps me make chocolates; as it is very easy for kids to do. He loves to experiment so we have made a variety of kinds of chocolate. We make our base chocolate, which is a combination of cacao butter, cacao powder, vanilla bean and sweetener of choice, (see my previous posts for the basics on how to make it and natural sweeteners), then we add different ingredients depending on the kind of chocolate and flavor we want. We make peanut butter cups, caramel cups, orange ginger and peppermint; and this is only what we have done so far – there are many ingredients that can be added to your chocolates to achieve the flavors that you want.

When adding ingredients to chocolate this can be done in a few ways – mix it in, usually with essential oils or powders, you can pour the ingredients on top of the chocolate, after you have poured it onto a cookie sheet, for instance with nuts and seeds, berries, coconut or you can make/ use a filling. The ingredients you add depend on what type of chocolate you want and personal preferences. Here are some ingredients to try.

Nuts such as almonds, brazil nuts, cashews.

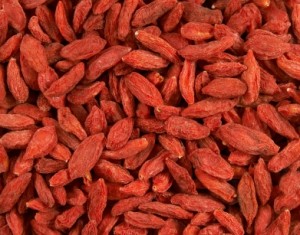
Goji berries

Seeds such as hemp seeds, sesame, sunflower or pumpkin.

Berries such as goji, incan or mulberry.

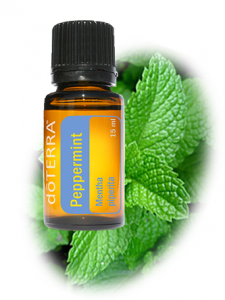
High quality essential oils such as peppermint, wild orange, cinnamon bark, etc. to flavor your chocolate. Use only a few drops and use the highest quality oils you can – they are better for you and could alter your chocolate if they are not.

Spices, such as ginger, cayenne, cinnamon, allspice.

Algae such as E3 Live, Spirulena or Chlorella. All are very high in protein, minerals and a variety of vitamins.

You can create combinations using ingredients that are high in vitamin C like coconut nectar and spirulena, or a high content of magnesium and calcium using ingredients such as mesquite and carob powder with any algae.

Some people even add medicinal mushrooms to their chocolates, which might sound distasteful, but the neat thing is is you can’t taste it, so would have no idea that it is in there if no one told you. We have recently discovered banana flakes as an addition to our chocolate making. They are quite yummy on their own and are delicious in chocolate.

The amounts you add will depend on the size of your batch of chocolate, how strong a taste you want and also depends on the herb/ spice that is being added (some are stronger than others). A good rule of thumb is to start with half a teaspoon, taste it, and then decide if you want to add more. The great thing about making your own chocolate is that there is lots of taste testing to get it just the way you want it!

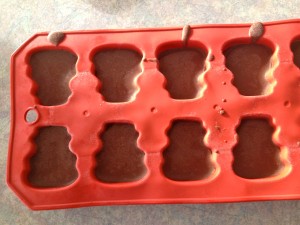
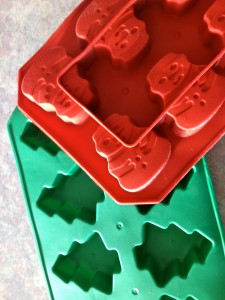
Once you have what you want you can set your chocolates in a number of ways. I buy silicon ice cube trays in a various shapes and fill those up to set. (tip – you don’t have to fill these all the way up as your chocolates can be quite thick if you do, but you want to fill them up enough so they are not too thin and break when you pop them out of the molds). There are lots of shapes to choose from; squares to hearts and around the holidays stores usually carry fun shapes related to that holiday. I have snowmen, trees and Halloween pumpkins. You can also use any of the candy molds that stores like Michael’s sell, this is where I found the mold to make peanut butter cups, they also have a variety of themes and shapes.

Of course you do not have to set your chocolate in shapes, you can just pour it onto a cookie sheet, let it set, then break it into pieces. You can also make clusters simply by mixing everything together and then dropping them by the teaspoon onto a cookie sheet lined with parchment paper.

For chocolates with fillings, make or find your filling (I use unsweetened peanut butter for my peanut butter cups and make the caramel filling using dates, vanilla, mesquite and lucuma powder), pour some chocolate let it set for a few minutes til firm, then drop or spread the filling over the chocolate, then add more chocolate on top and let set completely.

There are lots of things you can add when making chocolate. Many different flavors and combinations, depending on what you want and what you like. It is also fun to experiment with different combinations, flavors and shapes and it is easy to get the kids involved – they’ll love it. So get in there and try stuff out, worse case scenario is it does not turn out the way you want it and you might have to eat it yourself!

How to make Raw Organic Chocolates

About 8 years ago I took a class at The Light Cellar, here in Calgary, on how to make Raw Organic Chocolate. No sugar, no dairy and all natural ingredients. I was thrilled to find this course as I had been looking for an alternative so that we could enjoy chocolates at Christmas, Easter (and whenever else we wanted some!) without the refined sugars.

I had taken a chocolate making class before, bought the kit, came home and never made chocolates again. This time was different. The difference was you actually make your chocolate from scratch, from natural ingredients and it is very easy (the other class you made your chocolates from premade chocolate bars or pieces that you melted and molded into your own chocolates. I found this process finicky and the pieces were presweetened; so you could not choose your own sweetener).

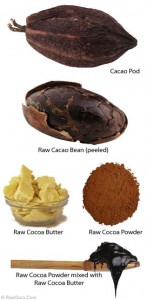
Chocolate actually comes from a cacao nut, which is made into various forms, such as cacao powder, paste, butter, etc. Making the chocolate is super simple, using four basic ingredients and only takes a few minutes. All you need is cacao powder or paste, cacao butter, some kind of sweetener (honey, agave nectar, pure maple syrup, etc.), and vanilla.

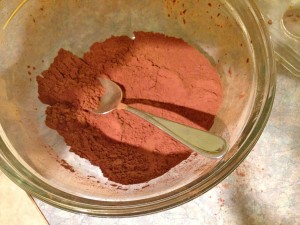
The first step is to melt the cacao butter in a bowl – use the double bowl method with the butter in the top bowl set over a bowl of boiling water (boil water put it into bowl and set on counter; then set your smaller bowl with cacao butter on top)- be very careful not to get any water into the top bowl as it will ruin your chocolate! Once the butter is melted add the vanilla bean and let it infuse (with a knife slice vanilla bean down the middle and scrape out the seeds with a spoon – put into cacao butter). Sift your cacao powder in another bowl and add to taste, then add sweetener of choice. Voila! you now have a nice chocolate sauce which you can leave as is, pour into a pan refrigerate or freeze, or use as a base and add other ingredients.

The instructor did not give us exact amounts of ingredients to make our chocolate. He would provide a starting point and then encouraged us to taste it; to make it how we wanted. He recommended we start with a 1:1 ratio, mix it and go from there. More cacao powder made it a darker, richer chocolate, more sweetener made it sweeter – adjusting it according to our palette and preferences, so we had to taste it as we went along! He also encouraged us to use natural sweeteners and ingredients. For instance, we were using vanilla beans for our vanilla -actually cutting them open and scrapping out the inside. He said we could use vanilla extract but encouraged us to use pure extract if we did, not artificial.
Cacao powder

He described using these pure ingredients as “upgrading” – making it more natural, tastier and better for you. He also told us how we can add other natural ingredients to our chocolates that not only taste good but are high in nutrients, minerals and vitamins,  making it a superfood. Ingredients like goji berries, nuts and seeds, coconut and algae and essential oils. Maca root powder, honey and mesquite powder. He even recommended in one recipe that we try a little cayenne. It was actually really good!

As for the cost, the ingredients to make your chocolate is quite reasonable. The instructor said that in the time it takes for us to go and buy chocolate at the store, we can make it at home faster with fresh ingredients for about $1.50 to $2 per 50 g – which is comparable to what you would pay at the store.

Shaped ice cube trays work great as chocolate molds

I also love the fact that I can add all these “superfood” ingredients to my chocolates so that chocolate really is good for me and the kids. So when they ask if they can have some chocolate, I can say “yes” without feeling guilty or worrying if they are having too much.

It’s also so much fun to make (I’ve already made 3 dozen caramel cups and orange ginger snowmen for Christmas) and easy to do with the kids. You can get different kinds of molds to make different shapes for your chocolates. Experiment and have fun!

In one of my previous posts I described various natural sweeteners that you can use not only in your everyday cooking and baking but for your chocolates as well. Check out that post for more details.

In an upcoming post I will share more about what you can add to your chocolates.

For your information The Light Cellar sells ingredients to make chocolate in bulk and is very well priced. I buy all my ingredients there and usually come out of the store with a big box of items! I find it hard to get out of there with only one or two things.

You can also find many of these products online – Amazon.ca as well as Superfoods.com will carry these products at reasonable prices.