Taste of Nature – a Fabulous Sugar Dairy & Gluten Free Snack in a Package

Today I am very excited to be doing my first official product review!

When we decided to go sugar free in our home, it meant making a lot of things that we normally purchased and enjoyed, from scratch. Bread, salad dressings, treats, and granola bars were some of the items that contain refined sugars, which was one of the ingredients we were avoiding. I spent hours in the kitchen creating and trying new recipes, finding things that worked and we liked. And though I was happy to be making this healthy change for my family, I was not loving being in the kitchen for most of my day. My oldest son, was also struggling with wanting the prepackaged stuff that everyone else had even though what I was providing was indeed tastier and better for him.
IMG_2951Each time I went to the grocery store I would look in the organic/ health food section to see what ‘packaged’ products they had come up with. Yes you could find all kinds but they usually contained ingredients that we couldn’t have, like dairy, refined sugar and on some occasions gluten. I could find a dairy free product but it had gluten, or sugar free but it had dairy and nowhere could I find one that met all 3 (and tasted good, we have tried some that looked promising but they did not taste good at all).

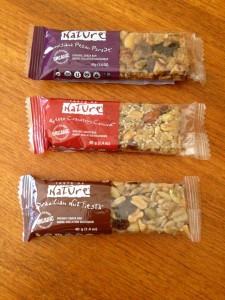
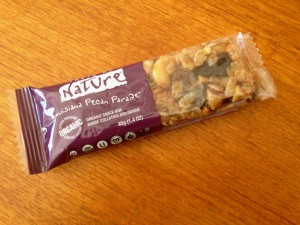
So last week when doing my regular shopping trip I was very pleased to discover these fruit and nut bars by Taste of Nature! A Canadian company, these organic snack bars are delicious and come in a variety of flavors such as Canadian Maple Forest, Quebec Cranberry Carnival and California Almond Valley. Each flavor is a different mix of nuts, seeds and fruit, such as raisins, almonds, sesame seeds to exotic ingredients like dried cherries, pomegranite and cashews.

I immediately bought a couple and brought them home to try. We didn’t even make it out of the parking lot and the twins were asking to have one. So we sampled and shared the Brazilian Nut Fiesta. Wow! These bars were good! Sweetened with agave nectar and brown rice syrup these bars contain no artificial flavors or additives, have no dairy and no gluten! They are also certified organic, vegan, and kosher! We had hit the mother load!

I was so excited to have found these that I immediately came home and checked out their website. I was thrilled to see that they offered many more flavors such as Niagara Apple Country, Nova Scotia Blueberry Fields and Persian Pomegranite Garden. This is where I also learned this company aims to produce zero carbon footprint, uses green business practices and that providing quality products and caring for our environment are very important to them.
IMG_2955I was sold! This was a great company and one that met all our dietary needs. Woohoo! I could now spend a little less time in the kitchen 🙂

Over the course of the next week we tried a few more flavors, Canadian Maple Forest, Quebec Cranberry Carnival and Louisianna Pecan Parade (one of their newest flavors and my favorite as it has cashews and dried cherries in it!) Their other new flavor is Polynesian Coconut Breeze, which I am very excited to try as I love coconut as well!

Of course the twins have enjoyed all the flavors and my oldest son’s favorite is also the Louisianna Pecan Parade.

I am so pleased to see Canadian companies being innovative and creating products that are meeting the growing demands and changes of a healthier population and recognizing that there is a need and market out there. And the variety that this company provides is fabulous!

The other thing I was pleased with was the price for this product. At less than $2 per bar I thought this was quite reasonable considering the quality and variety of ingredients. We will definitely be purchasing more of these great bars and adding them to our healthy snacks!

I’d like to thank Taste of Nature who provided a variety of their fabulous bars for us to try. Thank you! They are delicious!

Easter Activities and Ideas

easter-bunny-2Well I have to admit that Easter has snuck up on me again! You would think that with calendars and the kids talking about Easter for the past month or more that I would have been more on top of it. But here we are the week before, actually only a few days away, and I have ‘clued in’ that maybe I should get ready for Easter.

We did dye eggs last weekend, which Luke and Chloe have been asking to do since the beginning of March, but that has been it so far. I always find there are so many cute and fun things to do around Easter and I have such great ideas! Then it comes and goes and we have done very little. And honestly the kids don’t notice really, but it is me who knows that we could do so much more!

easter activitiesThe things we typically do for Easter are an Easter Brunch on the Sunday, an Egg Hunt and search for Easter baskets. Prior to the day we usually color eggs and make a craft or two. We used to participate in some of the community Easter events, which usually include an egg hunt, but the challenge is now, the treat at the end contains ingredients that we do not eat, so I think it’s unfair to take the kids out and not let them have the prize. So we find other things to do.

We also now have a sugar free Easter, which is a little more costly, but pretty easy to do. The Easter Bunny brings socks and toys, chalk, bubbles, play doh and the like. The twins love it and don’t know any different because that is what it has always been for them. Matthew still struggles with the lack of candy in his basket but overall does ok as they are all getting the same. It is challenging though as the kids get older and hear and see what other kids get for Easter, or any other holiday for that matter. I guess that’s one of our many challenges as parents, making a decision for your family and hope for the best, trusting that you have made that decision for a good and sound reason – though the children, nor others, may not always agree with you.

easter activitiesThe bottom line is my kids still get to enjoy Easter and the many things that are part of it. The Easter Bunny still comes to see them, he’s just changed what he puts in the baskets and eggs. I have an Easter mold so I make some chocolates, so still get chocolate to enjoy and it’s better for us. Yes it takes a little more prep and effort but it’s worth it in the end.

So if you’re looking for ideas for things to do this Easter here are some great crafts and activities I have found over the years. Our favorites are the Easter Chick and dying Easter Eggs.

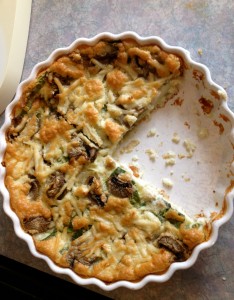
easter activitiesThere’s also some great tips and ideas on how to reduce or eliminate the sugar fest in the Easter baskets, as well as ideas to plan your own Easter Egg Hunt. Also some fabulous recipes for Easter Brunch, my favorite is always the Impossible Quiche, quick easy and I have modified it to make it dairy free and no one knows the difference!

What are some of your favorite activities and crafts or Easter Brunch recipes?


Broccoli Cheese Soup

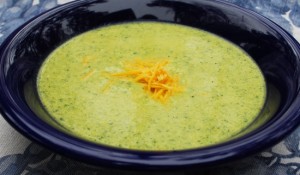
broccoli-soup-bryons-lrgI wanted to post a recipe today for something sweet, especially for all you party goers who are joining me from the UBP; but I finally perfected my Broccoli Cheese Soup recipe and had to share – now both dairy free, gluten free and delicious!
For the past while, I have been just making a straight creamy broccoli soup, which was ok, but I missed the cheese. And the kids, who use to gobble it up, were kind of taking it or leaving it when I made it. In fact I wasn’t eating it at all (ha ha)!

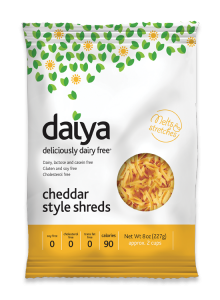
So earlier this week when I was making it for lunch I decided to experiment. First I decided to use brown rice flour instead of regular white flour, as I am trying to make more things gluten free in our house (plus I have noticed that I feel tired after some things with gluten). Then I decided that I was going to throw in some of this fabulous non-dairy cheddar cheese that I discovered by Daiya foods. See one of the things I really do miss about not having dairy is cheese. And though there are lots of choices out there now for non dairy cheeses, I just couldn’t find one that I liked. They either didn’t melt well, or taste good and they definitely weren’t tasty enough to put on a cracker (yuk!). But recently I discovered this vegan cheese made by Daiya, a Canadian company actually (Go Canada) based in Vancouver. It melts, it tastes good and everyone gobbles it up! I think it is very close to tasting like dairy cheese and they make it in all kinds of flavours! They even sell it in slices so, guess what? We are now having grill cheese once again, which honestly used to be a staple for lunch.US-Shreds-Cheddar

Anyway I tossed a handful of the Daiya grated cheddar into the blender and mixed it all up.  It was fantastic! Luke gobbled it up, I ate it and will eat it again (this is a good sign). And it tasted really cheesy, like you would expect a nice cheesy soup to taste. I think this means I can go back to making my Cheesy Potato soup now….

The recipe for this soup is really easy and doesn’t take any time at all to make. Give it a try! You won’t be disappointed.

And for those of you who are looking for a little sweet treat, check out Chocolate Peanut Butter Cereal Squares, Marshmallows, Chocolate Macaroons.

Do you have a favorite cheesy soup recipe? Please share it with us in the comments below.

Broccoli Cheese Soup

2 cups     fresh cut broccolibroccoli

1 cup      water

1 ¼ cup reserved juice, plus water if not enough juice left

1 cup      almond milk

1 tsp       chicken bouillon powder

¼ tsp     sea salt

1/8 tsp   pepper

2 tbsp    brown rice flour

1/3 cup   grated vegan cheddar cheese

Cook broccoli in water in covered saucepan until tender. Drain and reserve juice. Put broccoli in blender.

Add remaining 6 ingredients to blender. Process until smooth. Return to saucepan. Heat, stirring occasionally, until mixture boils and thickens. Makes 3 cups.

Serves 2-3

IMG_0753

Chocolate Peanut Butter Cereal Squares

Party! Party! Party!

scaled_photoWelcome! I am very excited to be joining the Ultimate Blog Party 2014 again this year! I think this is a great opportunity to get out there and connect with other bloggers while sharing the things that you love, including your own blog! Thank you to Janice and Susan of 5 Minutes for Mom for hosting this fabulous event.

If you are new to Momma on the Move I’d like to thank you for stopping by and for those of you who are returning welcome back. It is a pleasure to have you all here.

8095971047_2a93f46d0a_bMy name is Carmen and I have 3 beautiful children, 4 year old boy/ girl twins and an older son. I grew up on the East Coast and have a deep love for the ocean. I love the outdoors, travelling, exploring new places and to getting out there to enjoy and embrace life!

The kids keep me busy with the twins now in preschool and our decision to eat sugar and dairy free at our house. When not playing with or helping the kids, I am in the kitchen trying out or modifying recipes to meet our needs. I have even been dabbling in some gluten free recipes over the past year as well.

IMG_2646We made the decision to remove sugar, back when my Matthew, my oldest was in grade 2, due to behavorial and sleep challenges with him. It was amazing the difference it made! Shortly after we went dairy free as I discovered both myself and my daughter had an intolerance and the gluten well, when I discovered I was still feeling tired after eating a dairy free/ sugar free muffin, gluten was the only thing left!

I have always loved to write but started blogging because I felt that I could share more faster and reach a larger audience. I find that there are so many things to share and explore, as life is a story. Everywhere we go I am taking pictures and thinking about how I make this into an informative, yet interesting blog post for my readers. Everything from crafts and activities for kids, our adventures camping and in the outdoors, to the many sugar and dairy free recipes, I like to blog about it!

I also like to include tidbits about the importance of taking time for ourselves, gratitude and being ambassadors for our planet.

I like creating a community where we can share, interact and learn from each other. Plus it’s stretched me in the world of technology as well!

IMG_2106Now that you’re here, sit down grab a cup of coffee and take a look around. Let me know what your favorite posts are, what you’d like to see more of. Leave a comment sharing with me who you are and where I can find you so we can connect and get to know each other. I’m looking forward to visiting everyone’s sites and making new friends.

Here are some of my favorite posts:

Firewalking

Rainy Day Activities

All Things Pumpkin

Natural Sugar Substitutes

RAK your Brain

Firewalking

Firewalking


Grasshopper Popsicles

Enjoy! See you at the party!

Let’s stay connected! Here’s where you can find me

Facebook

Twitter

Pinterest

Google+

Fabulous Baked Beans

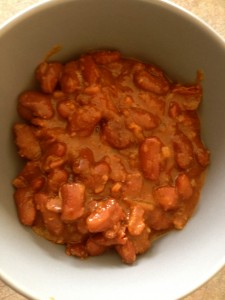
IMG_2839Growing up I always loved a can of baked beans. They reminded me of sitting around the campfire and enjoying them usually with hot dogs. But when we changed our diet canned baked beans was another thing that had to go! 🙁 Usually made with brown sugar and molasses (molasses being the worst culprit; which is 50% sucrose and is actually a by product of making refined white sugar, with the added chemicals) I had to forgo baked beans for awhile.

In fact, I never thought that I could make my own. Funny enough I thought they come in a can so how could I? Yet one day we went for supper at my neighbors house and he had made them from scratch. Thinking nothing of it, a little while later my mother said she wanted to make baked beans for the camping trip that she and my father were taking my oldest son Matthew on. I then remembered that my neighbor had made them and kindly asked for his recipe.

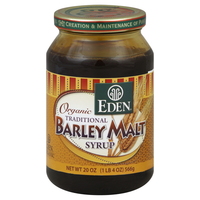
eden-foods-barley-malt-24412By this time I knew enough about different natural substitutes to make the necessary changes in ingredients. Barley Malt is often substituted for molasses and we had found a ketchup, that was not only organic but sweetened with honey. It was perfect!

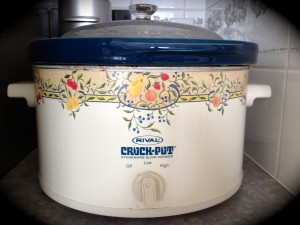
And of course I love using my slow cooker, putting something in in the morning and let it cook slowly all day, the sweet smells wafting through the house as it cooks. By the time they are ready to eat our mouths are watering in anticipation!

The recipe turned out beautifully and so delicious! I often make them myself when we go camping and just reheat when we get there. I even make them at home from time to time and they are always gobbled up! I have a friend who I introduced them to, who now says that he will never be able to go back to the canned ones. Which I guess is good and bad 🙂

True, this is not a recipe that you can whip up in 30 minutes, but it is totally worth the time it takes to make them. And really it only takes a little prep and preplanning.

IMG_2836Now the original recipe calls for only 1/3 pkg. of bacon but I use the whole thing. In fact I buy the cheapest and fattiest brand I can find, which is probably why mine are better than my Mum’s even though we are using the exact same recipe! (sorry Mum)

So whether you are looking for something around the campfire or warm comfort food at home these beans will not disappoint! Once you’ve tried this recipe please return and share your comments about how they turned out.

Baked Beans

2 cups red kidney beans (soaked overnight)

1 pkg. bacon

1 onion chopped

1/2 c. Honey Bunny Bodacious Ketchup

1/3 c. pure maple syrup

1/4 c. barley malt

1 tsp. dry mustard

Soak beans overnight in water. Use a large container and add in generous amounts of water as beans will soak up quite a bit of it. Cover with lid.

Boil gently soaked beans until soft. Put beans into crock pot. Mix the rest of the ingredients together in a bowl and pour over beans. Cover and put on low. Cook all day (for a minimum of 8 hours)

*if you prefer a sweeter recipe you can adjust maple syrup and barley malt to taste

A Few of my Favorite Muffins

8I have fond memories of muffins growing up. This may sound a little weird but I was a competitive swimmer for many years and that meant early morning practices before breakfast. My mother would often make muffins and after practice we’d have muffins and juice before being dropped off at school. As a result, my Mom tried all kinds of different muffin recipes, so that we could enjoy variety and not get bored with the same old banana muffins 3 times a week.

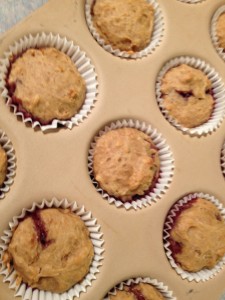
IMG_2690One of my favorite muffin recipes was one that was filled with jam. Though not quite as tasty as a jam filled donut, I loved these because of the ‘surprise in the middle’. I also found them to be quite tasty and very moist due to the yogurt that is in the recipe.

Of course when we moved to eating dairy free I had to forgo these muffins for a while. Until recently, when I discovered some of the non-dairy yogurts out there. Though most varieties are made from soy, you can find brands that are made using coconut or almond milk as well.

With this discovery, I was now able to recreate these delectable muffins! Of course I had to experiment a bit as I needed to substitute the sugar as well and although most natural sugars can be substituted one for one, I find that when you are also altering another ingredient sometimes the sweetness factor needs to be adjusted to.

This was the case with these muffins as though the kids gobbled them up the first time I made them, both my older son and I felt they could be a little sweeter. So the next time I made them I experimented a little adding a little more coconut sugar then the recipe called for. As I result, I did eventually find the perfect combination.

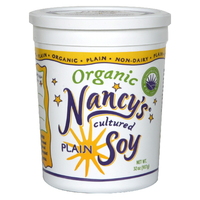
nancys-cultured-soy-plain-58308The yogurt I use is Nancy’s Organic Cultured Soy, plain. Though they offer many different flavors as well. It is a little thicker than dairy yogurt but definitely works. (Also works fabulously in the Cheesy Greens Macaroni dish that I make, which is soooo good!) I have yet to try a coconut milk yogurt but imagine that this would work out the same.

So if you’re up for a yummy nutritious treat with a surprise in the middle, give these muffins a try. And if you do use the coconut milk yogurt come back and comment and let others know how it worked out.

Jam Filled Muffins

1 1/2 c. flour

1/4 c. + 1/8 c. coconut sugar

2 tsp. baking powder

1/2 tsp. baking soda

1/2 tsp. salt

1/4 c. Earth Balance vegan spread

1 c. non dairy yogurt

1/4 c. almond milk (or favorite non-dairy milk)

1 egg

1/2 tsp. vanilla

Favorite sugar free jam

In a medium bowl blend dry ingredients. In a small saucepan melt Earth Balance. Take saucepan off heat and stir in yogurt, almond milk. Beat in egg and vanilla. Add liquid mixture to dry ingredients and stir until moistened.

*Line cupcake pan with liners or grease well. Spoon in half the batter. Place about 1 tsp. of jam in each muffin, then top with remaining batter.

Bake at 375 F for 15-20 minutes.

Makes 12 muffins.

*Note: I have found with these muffins if you have the cupcake liners that that is best due to the jam sometimes overflowing a bit.

Apple Cinnamon Pancakes

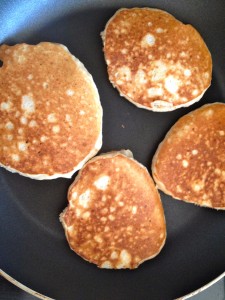
IMG_2805Yesterday many of us celebrated Pancake Tuesday. A tradition that began in the Middle Ages this day has grown and enjoyed by people around the world.

Enjoying pancakes for supper is one of my favorite things (in fact I love anything breakfast for supper, there are so many fabulous breakfast foods out there) but on Pancake Tuesday I like to spice it up a little and make a recipe that is more than just your regular plain pancake – though those are just as delicious!
There are so many kinds of pancakes to choose from. Some of our favorites are pumpkin and oatmeal banana. There are gluten free options, dairy free, coconut and fruit options. You name it, you can basically find it and make it.

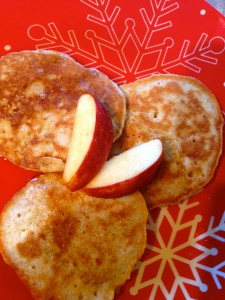
Yesterday I decided to try out an apple cinnamon pancake recipe (at the suggestion of my mother who was here on the weekend). I didn’t have one so I quickly googled it and found a number of apple cinnamon recipes to choose from. My favorite was on dairygoodness.ca, where they suggested using maple syrup as the sweetener as well as a mix of flours.

Of course I had to make a couple of other quick substitutions to make it dairy free (as that is part of our diet as well) and went to work mixing up the dough. The most time consuming part was shredding the apples but otherwise is a quick and easy recipe to make.

It was a huge hit! Everyone loved them. They had just the right amount of apple, not overwhelming and with a little bit of syrup…Yum! They were fabulous. My modified dairy and sugar free version is below.

Apple Cinnamon Pancakes

1 1/2 c. all purpose flourIMG_2808

1 1/2 c. whole wheat flour

1 tbsp. baking powder

1 tsp. cinnamon

1/2 tsp. sea salt

3 eggs

2 1/2 c. almond milk

1/4 c. Earth Balance vegan spread, melted

2 tbsp. pure maple syrup

1 1/2 c. shredded apple

In a large bowl mix flours, baking powder, cinnamon and salt. In a separate bowl, mix eggs, almond milk, melted Earth Balance and maple syrup. Pour over dry ingredients and add apples. Stir gently until just combined – a few lumps may remain.

In a large non stick skillet, heat a small amount of butter. Scoop about 1/3 c. of batter per pancake into skillet. Cook approximately 2 minutes or until bubbles form in batter. Turn over and cook 1 to 2 minutes more until golden and fluffy. Repeat with remaining pancake batter.


Sour Cream Coffee Cake

IMG_2676Well I’ve finally decided to take the plunge! This is the year, the one where I go big or go home! For the last couple of years a number of people have been suggesting to me that I write a recipe book. There are lots of books out there on eating gluten free and some dairy free, but very few sugar free and often if they are dairy or gluten free there may still be sugar present.

For a number of reasons I delayed and delayed in doing this, even though I was confident that it would many people would be interested in it and likely be a success. For whatever reason I have decided it’s time and am diligently outlining and creating.

Part of the fun in creating is that I am taking my old tried and true family recipes and methodically, one by one, making the appropriate adjustments and trying it out. I am a big believer in making sure it works out before actually sharing it and publishing it for others. It only makes sense to me. Besides my family is enjoying being my guinea pigs and making sure that it tastes good 🙂

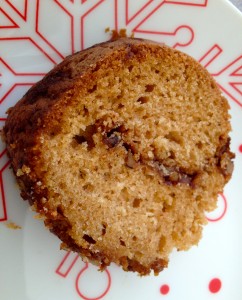
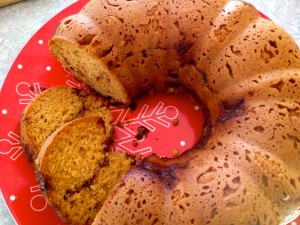
IMG_2674On the weekend I tried out my Mum’s coffee cake recipe, which I have always loved, making the appropriate adjustments. I was pleased that it turned out fabulously and to be honest if you had tasted the original and the sugar free one side by side you would not know the difference. I guess that is one advantage I have growing up with these recipes as I know what the originals taste like, so I can compare as to whether the new versions measure up.

Everyone gobbled it up and is now asking for more. But I am onto the next recipe to try…which I have not decided which one yet, but I am sure it’ll come to me soon enough. In the meantime if you are looking for a sugar and dairy free coffee cake, I would definitely give this one a try.

Sour Cream Coffee Cake

Batter:

1/2 c. Earth Balance vegan spreadIMG_2672

3/4 c. coconut sugar

1 tsp. vanilla

3 eggs

1 c. vegan sour cream

2 c. flour

1 tsp. baking soda

1 tsp. baking powder

1/2 tsp. salt

Topping:

1/2 c. coconut sugar

1/2 c. walnuts, finely chopped

1 tsp. cinnamon

1 tbsp. Earth Balance vegan spread

Mix Earth Balance, coconut sugar, vanilla and eggs. Add vegan sour cream. Mix separately flour, baking powder, baking soda and salt. Add dry ingredients into sour cream mixture.

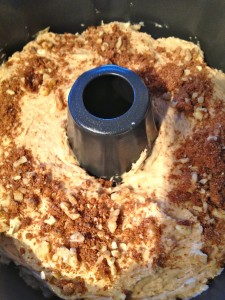
Spon half batter into well greased bundt pan. Sprinkle half topping over batter. Spoon in rest of batter. Pat firmly with remaining topping.

Bake at 350 F for 45-50 minutes.

Mushroom Turnovers

IMG_0799When I was in Junior High, a group of my girlfriends and I were into having dinner parties. We took turns hosting, dressed up and made a fancy meal complete with dessert for everyone. It was fun, each host making different meals, decorating the table, and trying new things.

On the evening that I hosted I, wanting to ensure everyone could enjoy what I was making, checked with the girls in regards to any allergies and/ or dislikes. Interestingly, they all came back with a resounding, “We don’t like mushrooms”. I clarified whether this was a dislike or an allergy and when they confirmed it was simply a dislike, I secretly smiled.

I had found this fabulous recipe for mushroom turnovers which I was dying to try and since they weren’t allergic to it… I made them and served them as the appetizer, saying nothing about what was in them. They LOVED them! No one noticing at all that it was mushrooms that they were eating. They thought it was ground beef.

After we were done the appetizer I then revealed to them that they had actually eaten mushrooms and no ground beef was present whatsoever. They were surprised (and thankfully not mad), and we went on to enjoy the rest of our meal and evening (which I have no idea what the rest of the meal was).

Needless to say, this recipe became a family classic in my  house. My Mum and sisters using it over the years for many events and parties. My Mum often has 4 dozen or more in the freezer at Christmas, ready to pull out and heat up whenever we want snacks or guests pop by. I have adopted the same philosophy and you’ll easily find turnovers (and other goodies) in my freezer this time of year.

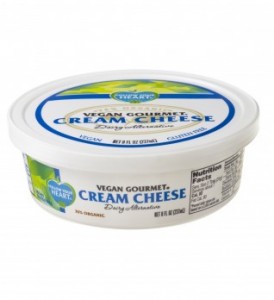
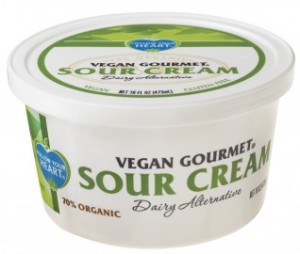
The original recipe does contain dairy, calling for cream cheese and sour cream, but I have been able to adapt the recipe. Using vegan cream cheese and vegan sour cream they are still just as fabulous! (which having had the original I can fairly compare)

Mushroom Turnovers

Pastry:wpid-CreamCheese31-318x348

9 oz. vegan cream cheese

1/2 c. Earth Balance vegan spread

1 1/2c. flour

In a medium bowl, cream vegan cream cheese and Earth Balance. Add the flour and work with fingers or a pastry blender until smooth. Chill well for at least 30 minutes.

Filling:

3 tbsp. Earth Balance vegan spread

1 large onion, finely choppedwpid-SourCream3-318x270

*1/2 lb. mushrooms, finely chopped

1/4 tsp. thyme

1/2 tsp. sea salt

pinch black pepper

2 tbsp. flour

1/4 c. vegan sour cream

In a skillet, melt the Earth Balance. Add onion and brown lightly. Then add mushrooms and cook, stirring often about 3 minutes.

Add the thyme, salt and pepper and sprinkle with flour. Stir in sour cream and cook until gently thickened.

Preheat the oven to 450F. Roll the pastry dough to 1/8″ thickness on a lightly floured surface. Using a biscuit cutter, cut into 3″ round circles.2585_enlarge

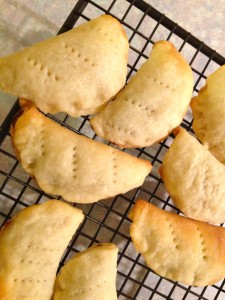
Place a teaspoon of mushroom filling on each circle and fold over so that the edges touch. Press the edges together using fingers and prick the tops to allow for steam to escape.

Place on an ungreased cookie sheet and bake until lightly browned, about 15 minutes.

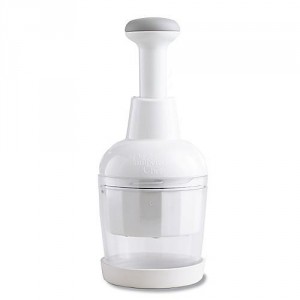
*To finely chop mushrooms I use a food chopper from The Pampered Chef. This makes it quick and easy to get them to the right size.

Makes about 3 dozen

Butternut Squash Soup

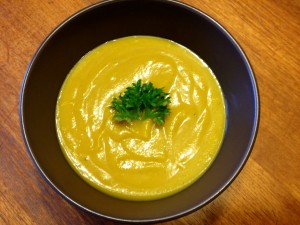
IMG_2432A couple of weeks ago I was visiting my sister in Vancouver, having a little me time and also there to attend my friend Stuart’s 40th Surprise Birthday; she made this fabulous Butternut Squash soup. Now I have not been a huge fan of squash in the past but this soup was really yummy!

I had found that the texture of squash was not always to my liking, it felt kind of grainy on my teeth so I avoided squash in general. But lately I have been finding many recipes with squash that I and the kids have quite enjoyed. Like Spaghetti Squash with chicken and pears from Clean Eating Magazine, Acorn Squash with harvest rice stuffing and now this soup!

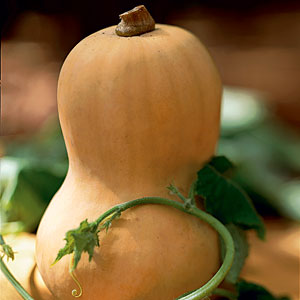
Butternut Squash

Butternut Squash

It is a dairy free, sugar free and gluten free soup, of which I think I had 3 bowls for dinner that night and then another 2 for lunch the next day!

I found the flavors delicious with coconut milk and cinnamon. The original recipe calls for 2 butternut squash but that day my sister used acorn and butternut squash and it was very tasty.

I was so excited about this soup when I returned home I went straight to the store to buy what I needed. Unfortunately, as life would have it, I did not make it until the other day as I could not get all the ingredients I needed, and then of course there was time and real life to get back to – you know 3 kids, running a household…

I made it with the 2 different squashes which I think just adds lovely flavor and served it to the twins for lunch. Both of them gobbled it up, asking for a second bowl, while I scarfed, I mean enjoyed, my own soup.

It is super easy to make as well and easily frozen if you don’t wish to eat it constantly for a week.

Butternut Squash Soup

2 medium butternut squash, or 1 butternut and 1 acorn

1 pink lady or royal gala appleIMG_2458

1 medium onion

1/4 c. Earth Balance vegan spread

900 ml chicken broth

1 c. coconut milk

1/2 tsp. dried sage

generous pinches of cinnamon and salt

1 tbsp. maple syrup (optional)

Chop and peel squash; cut in half and seed, then chop into small pieces. Chop onion and apple.

In a large saucepan over medium heat, melt Earth Balance, add onion and apple and saute until onion is soft. Add broth, squash, and coconut milk. Bring to boil and simmer for 20-25 minutes.

For the last 5 minutes add sage, cinnamon and salt. Squash should be very tender when done.

Use immersion hand blender in pot to blend until smooth or ladle soup into blender and whip on high until pureed. Pour back into pot and reheat if necessary. Serve.

You may add optional garnishes such as maple syrup drizzled on top, vegan sour cream, slivers of apple or dried sage.

Soup will keep well refrigerated for 5 days or in the freezer for up to 3 months.