Pancakes for Supper

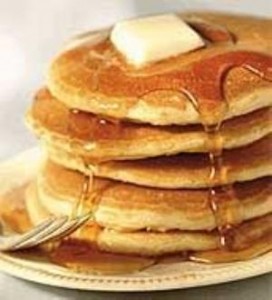
Pancakes 1I love that one night a year I can make pancakes for dinner! Shrove Tuesday or Pancake Day is the Tuesday before Ash Wednesday when Lent begins in the Christian faith.

Beginning in the middle ages, it was the last day for celebration and feasting before the period of fasting required during the lenten season. Food items like meat, milk, eggs and fats were restricted during this time; so to keep these foods from being wasted people would have big feasts on Shrove Tuesday in order to consume these items and prevent them from being wasted (as they would not keep over the next 40 days).

mardi-gras-2The English were the first to make pancakes on this Tuesday as it was an easy way to use these ingredients before Ash Wednesday began. In France, consumption of these fats or fatty foods on this day coined the phrase “Fat Tuesday” or Mardi Gras.

I always find these things fascinating and share them with my kids. My oldest often asks why we have Pancake Tuesday and though I know the traditional reason I had no idea of it’s origin.

And though we may not always observe all the traditions of the Christian faith we certainly enjoy and don’t mind observing this one! Usually I make the traditional plain pancakes and add some fruit on top, but with all our dietary changes and my hunt for new recipes, I have added to my repertoire of ‘kinds’ of pancakes.

So today if you are on the hunt for a little variety in your pancakes, give one of these recipes a try (and if you are not making pancakes for dinner then try them some other time, they are all delicious!) You’ll love ‘em and so will your kids. They are all sugar and dairy free and the last one is gluten free as well.

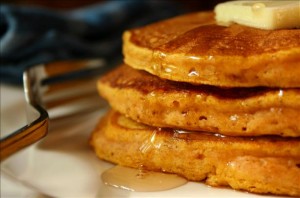
Pumpkin Pancakes from Williams-Sonoma Kitchen

1 1/2 c. flour (I used half whole wheat and half white)

1/4 c. date sugar

pic3R054P

Pumpkin Pancakes

3/4 tsp. baking powder

1/2 tsp. baking soda

1/2 tsp. salt

2 tsp. cinnamon

1/2 tsp. ginger

1/4 tsp. ground allspice

4 eggs, separated

3/4 c. canned unsweetened pumpkin

1 1/2 c. rice milk (I use a brand called Ryza as it has the least amount of additives and no sugar or you can make your own) or almond milk

4 tbsp. Earth Balance, melted

1 tsp. vanilla extract

Maple syrup for serving

In a large bowl whisk together flour, sugar, baking powder, baking soda, salt, cinnamon, ginger and allspice. Set aside.

In another bowl, beat the egg whites until medium peaks form. Set aside.

In another bowl, whisk together the egg yolks, pumpkin puree, rice milk, Earth Balance and vanilla until well combined. Whisk the pumpkin mixture into the flour mixture just until the batter is smooth and no lumps of flour remain. Fold in egg whites in 2 additions.

Heat griddle over medium heat until a few drops of water flicked onto the surface skitter across it. Lightly grease the griddle.

Pour 1/4 c. pancake batter onto griddle. Cook until bubbles form on top and the batter is set, 3 to 4 minutes. Flip the pancakes over. Cook until golden brown on the other side, about 3 minutes more. Keep warm until all pancakes are cooked.

Oatmeal Peanut Butter Banana Pancakes from purecanadamaple.com

1/3 cup whole wheat flour

1/3 cup all purpose flour

1 teaspoon baking soda

½ teaspoon salt

2 cups rice milk or almond milk

2/3 cup old fashioned oats, not instant

2 overripe bananas, mashed with a fork to a fine pulp

2 egg whites, whipped to stiff peaks

2 teaspoons canola oil or non-stick pan spray

Gobs of crunchy or creamy peanut butter

Pure maple syrup

In a mixing bowl, combine both flours, baking soda and salt. Set aside. In a non-reactive mixing bowl, combine milk, oats and bananas. Fold in dry ingredients. Fold in egg whites and mix until just combined.

Heat one teaspoon of oil in a 12-inch non-stick skilled over medium high heat. Drop batter by the scant ¼ cup full into pan and cook, turning once until lightly browned. Hold pancakes warm on a platter until you’ve got them all cooked.

Spread a teaspoon or so of peanut butter on each pancake and then the Pièce de résistance of course…a generous drizzle of maple syrup.

Makes 15 pancakes.

Pancakes

This recipe is sugar free, dairy free, gluten free and is yummy! Courtesy of Ryza rice milk.

1 egg

1 cup Original or Vanilla Ryza

2 tbsp oil

1 3/4 cups brown rice flour

3 tbsp tapioca starch

2 tsp baking powder

1 tsp cinnamon

1/2 tsp baking soda

Beat egg until frothy. Add Ryza and oil; beat until well blended. In another bowl mix brown rice flour and the remaining dry ingredients. Make a well in the center of the dry ingredients and add the liquids. Stir until well blended. Do not over stir. Batter will be slightly thin. Lightly grease a frying pan. Pour small circles and fry pancakes until golden. Serve with pure maple syrup.

You can also try apple cinnamon pancakes or if you prefer a simple plain pancake try this recipe.

What is your favorite pancake recipe? Share in the comments below.


Sour Cream Coffee Cake

IMG_2676Well I’ve finally decided to take the plunge! This is the year, the one where I go big or go home! For the last couple of years a number of people have been suggesting to me that I write a recipe book. There are lots of books out there on eating gluten free and some dairy free, but very few sugar free and often if they are dairy or gluten free there may still be sugar present.

For a number of reasons I delayed and delayed in doing this, even though I was confident that it would many people would be interested in it and likely be a success. For whatever reason I have decided it’s time and am diligently outlining and creating.

Part of the fun in creating is that I am taking my old tried and true family recipes and methodically, one by one, making the appropriate adjustments and trying it out. I am a big believer in making sure it works out before actually sharing it and publishing it for others. It only makes sense to me. Besides my family is enjoying being my guinea pigs and making sure that it tastes good 🙂

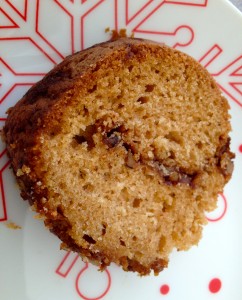
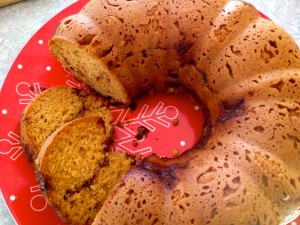
IMG_2674On the weekend I tried out my Mum’s coffee cake recipe, which I have always loved, making the appropriate adjustments. I was pleased that it turned out fabulously and to be honest if you had tasted the original and the sugar free one side by side you would not know the difference. I guess that is one advantage I have growing up with these recipes as I know what the originals taste like, so I can compare as to whether the new versions measure up.

Everyone gobbled it up and is now asking for more. But I am onto the next recipe to try…which I have not decided which one yet, but I am sure it’ll come to me soon enough. In the meantime if you are looking for a sugar and dairy free coffee cake, I would definitely give this one a try.

Sour Cream Coffee Cake

Batter:

1/2 c. Earth Balance vegan spreadIMG_2672

3/4 c. coconut sugar

1 tsp. vanilla

3 eggs

1 c. vegan sour cream

2 c. flour

1 tsp. baking soda

1 tsp. baking powder

1/2 tsp. salt

Topping:

1/2 c. coconut sugar

1/2 c. walnuts, finely chopped

1 tsp. cinnamon

1 tbsp. Earth Balance vegan spread

Mix Earth Balance, coconut sugar, vanilla and eggs. Add vegan sour cream. Mix separately flour, baking powder, baking soda and salt. Add dry ingredients into sour cream mixture.

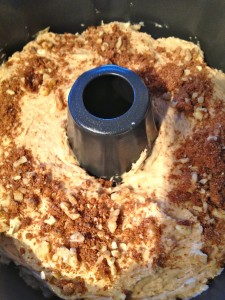
Spon half batter into well greased bundt pan. Sprinkle half topping over batter. Spoon in rest of batter. Pat firmly with remaining topping.

Bake at 350 F for 45-50 minutes.

Sun Dried Tomato & Goat Cheese Bruschetta

I love appetizers! They are small bite size morsels full of flavour and delight! You can sample many different ones without feeling full, guilty or like you’re overindulging. And there are so many good, delectable recipes out there, I’m never at a loss for variety or a recipe to choose.

IMG_0799

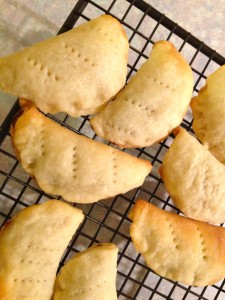
Mushroom Turnovers

Of course I have my favorites, like Mushroom Turnovers and good old fashioned meatballs in a sweet and sour sauce, but like with everything else in food I like to branch out and try new things. A couple of years ago I found this recipe in a magazine at the gym. It looked good so I copied the recipe and tried it. It was an instant hit with everyone! Matthew, my spouse and dinner guests. So much so that my dinner guests asked for the recipe.

I loved it too and made it often over the next few months, sharing it with different guests or enjoying it ourselves. Then I went for a while without making it, until recently when I hosted a wine and cheese with friends and decided to pull it out and dust it off.

Tragedy struck though when I realized I could not find the recipe! A little while back I was organizing recipes and putting them onto my computer. When I did, I would throw away the paper copy. I thought I had done this with this recipe but I hadn’t. What I had done was post it on my first blog which I could no longer access, and then thrown it away, thinking that I would be able to access it forever. I was wrong and completely saddened that I no longer had this recipe.

But you know what they say, nothing on the internet is ever lost if you know where or how to look. It took a bit of figuring and looking but I found it. I was overjoyed to have it once again. I quickly copied it onto my computer and now keep it safe and sound in my files.

cold-platter1It also inspired me to have appetizers at my Christmas party this year. I will make some of my own and asked guests to please bring one to share. It’s a great way to discover more great appetizers and share some of my favorites with friends.

So if you’re an appetizer lover and looking for something new, I highly recommend the Sun Dried Tomato and Goat Cheese Bruschetta. Sugar and dairy free, you won’t be disappointed.

And for all fellow appetizer lovers 5 Minutes for Mom is hosting a Twitter party tonight at 8 pm Eastern where everyone will share their favorite go to holiday recipes. Go here for details.

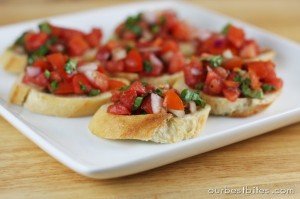
Sun Dried Tomato & Goat Cheese Bruschetta

1/3 c. sun-dried tomatoes, coarsley sliced

1/3 c. roasted peppers (bottled), patted dry and coarsely diced

1/3 c. artichokes (canned or bottled in water)bruchetta 1

1 large garlic clove, finely minced

6 medium leaves fresh basil, thinly sliced

2 tsp. extra virgin olive oil

1/2 tsp. balsamic vinegar

Pinch ground pepper

12 thick, sturdy crackers or slices of whole wheat baguette

1/3 c. goat cheese

1/4 tsp. salt

In a medium bowl, gently fold together sun-dried tomatoes, roasted peppers, artichokes, garlic, basil, olive oil balsamic vinegar and ground pepper. Spread each cracker or baguette slice evenly with goat cheese. Top with vegetable mixture. Sprinkle bruschetta with grains of salt, if desired.

Makes 12 pieces

Homemade Marshmallows

Well it’s official! I can now make anything without sugar in it. When we went sugar free we really struggled at first, having to avoid things that we loved and enjoyed. But it was just going to take time to figure out how to make these things like cakes, cookies, chocolate, etc. without the sugar in it. What were the substitutes? How did you do it? It was a huge learning curve.

I assured Matthew, my oldest son that I would figure it out. Cause one of the things I did not want to happen in going sugar free was for him to feel denied. That he could still have the yummy treats that his friends did, with the difference being healthier, better for you.

Slowly I began to build my reperatoire, cookies, cakes, muffins those were easy. Bread, new sweet treat recipes, chocolate…we were getting there. Matthew was pretty happy too, except for one last thing, marshmallows. There was no substitute in the store to buy and I had no idea what to do to make them.

He reminded me of this when we went camping this summer, mentioning that it would be nice to roast marshmallows… “I know” I said and assured him that I was on a mission; as marshmallows were the only thing that I could not make sugar free but I knew there had to be a way.

A little while back I found this recipe for homemade marshmallows on Facebook and just about died! This was the ‘missing link’ that I was looking for. The recipe I needed, and it was totally healthy! Sweetened with honey and very easy to make.

So yesterday was the big day. I tried it out and Wow they were stupendeous! They look and taste like an original marshmallow and I don’t care how many my kids eat!

Unfortunately the marshmallows had to sit to set, but I let the kids lick the beaters. As you can see Luke and Chloe were thoroughly enjoying it! Attacking the beater with vigor. Matthew has attested that they taste just like regular marshmallows and just in time for our Halloween campfire tomorrow night.

We are also set for camping next summer! S’mores, rice krispie squares and other marshmallow treats here we come!

IMG_2354

A couple quick tips when making this marshmallow recipe:

When letting it sit to set don’t worry about covering it. I made this mistake and ended up losing some because it stuck to the cover. Oops! lesson learned.

When storing them make sure you line the bottom of your container with parchment paper, and layer it with paper in between. Again, they’ll stick and they’ll peel right off the parchment paper. Don’t forget to put one on the top before you put on the lid!

The mixture starts to set quite quickly so have your pan ready to go, and as soon as the soft peaks form, pour it right into the pan. Don’t worry about the beaters you can take care of those later 🙂

Spooky Halloween Appetizers – Bat Bites

halloween appetizersOne of the things that I have enjoyed about Halloween over the past few years is the unique fun recipes that I have discovered. Now when I say unique and fun I mean ways of taking healthy food and making it into something Halloween themed.

I know I could have been doing this years ago, but since eliminating sugar and going to a sugar free Halloween, my focus has shifted to seeking these things out. I wanted to take the focus off the sugar fest at Halloween and show the kids the other fun aspect of things, like the decorating, festivities and food.

As a result I have made things like Boo-nanas and Apple Bites, which are banana ghosts and ghoulish looking smiles with teeth. I have found veggie platters made into skeletons and this year Bat Bites!

healthy halloween snacks

Apple Bites

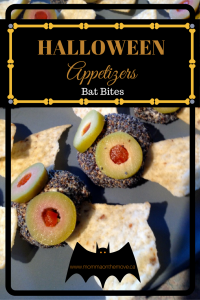
These I think are by far the most fun yet. They are made from goat cheese, cream cheese and pesto (of which I have all non dairy substitutions for) and they are not only easy to make but look super cool. These treats are likely more for the adult crowd as some kids may not like the tastes and texture of them.

The trick was when do I make them? Luckily I had planned a wine and cheese for my neighbors and friends very close to Halloween, so I was able to try them out. Of course they were a hit! People loved them, not only how they looked but how they tasted as well.

So if you’d like to get a little creative this Halloween with your eats definitely give these a try! And there are all kinds of ideas out there. Hop on the net and Google it to find a variety of ideas to fit every taste bud.

Bat Bites

4 oz. vegan cream cheese

8 oz. soft mild goat cheese

1/4 c. pesto

2 tbsp. coarsely ground pepper

2 tbsp.poppy seeds

8 pitted olives, sliced

32 triangular corn chips (I just used Tostitos and broke them into smaller triangles)

Mix together cream cheese, goat cheese and pesto. Chill for 40 minutes.

Shape mixture into 16 2 inch balls, about 1 heaping tsp. each. Mix pepper and poppy seeds together in a bowl. Roll balls in poppy seed mixture to cover. Press olives into ball for eyes and insert chips on either side for wings.

healthy halloween snacks

Boo-nanas

Happy Halloween!


Save on Music, Books and DVDs at Indigo.ca

Amazing Homemade Pesto

In our journey to eliminate sugar and dairy from our diets I am constantly on the lookout for new recipes as well as ways to still make the recipes we love without having to ‘sacrifice’ an ingredient. I have found that in many cases it means I am making my own salad dressings, condiments and even pasta (I made an italian sausage tortellini soup in the slow cooker which was fabulous btw! but all the tortellini in the store had some kind of cheese in it – so I grabbed a recipe and made my own substituting with vegan cheese. It worked perfectly!) Yes it means more time in the kitchen, though I am learning how to cut that down, but it also means better healthier and tastier meals.

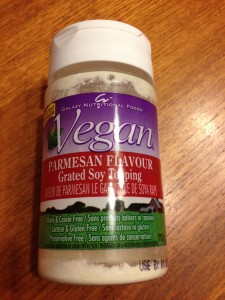
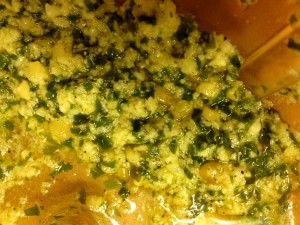
IMG_2331So you can imagine how happy I was to find this homemade pesto recipe. The ingredients are simple and it was super easy to make! I love pesto for pasta dishes and for this slow cooker Lemon Pesto Salmon I make – oh my gosh soooo good! And I always cringed when I used it because of the dairy in it. But making my own allowed me to substitute the vegan parmesan and presto I had a delicious and super tasty homemade pesto! It was so good my daughter and I were eating it with a spoon BEFORE we added it to anything else.

This recipe calls for pine nuts, which are quite expensive, but you only need a small amount and if you buy them in bulk you can get only what you need; then it’s not so bad. And honestly I don’t think you’d want to leave them out as they add to the overall result!

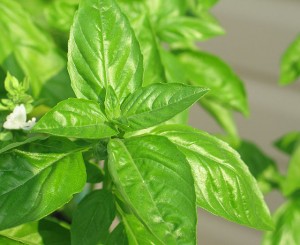
Fresh_BasilIt also calls for fresh basil, which I love! the scent is so refreshing. I recently bought a basil plant which is producing way more fresh basil than I am using, so I was happy to discover this which calls for a good amount of it.

The thing that impressed me the most with this recipe was how easy and fast it was to make. Within 5 minutes it was all together and done.

If you’re looking for a great pesto recipe definitely try this one out, cause you know it does go with just about anything (yes I am thinking of other recipes I can make that use it so I can make some more 🙂 and for my fresh basil too.

Homemade Pesto

3/4 c. packed basil leavesIMG_2332

3 tbsp. pine nuts

1 clove garlic

1/4 c. vegan parmesan cheese

1/2 virgin olive oil

Place basil, pine nuts, garlic, vegan parmesan cheese and oil in hand food chopper (I use Tupperware’s Quick Chef® but any small hand food chopper will work). Turn handle until finely chopped. Season with salt and pepper.

Makes 2/3 cup


A Few Apple Muffins

Apple Cinnamon Muffins

For those of you who caught up with me last week, you’ll be pleased to know that I am still plugging away at using up the apples from my apple tree. Which is really good for you because I am finding and testing some great apple recipes which I then share. Plus my kids and D’Wayne are thoroughly enjoying being the taste testers, as are some of my neighbors.

Like I said there is a serious amount of baking at my house right now. There is not a day that goes by that I am not whipping up something in the kitchen and I am getting good at doing it quickly. Yesterday morning I whipped up some apple muffins between breakfast and heading out to my friends for coffee at 10 am.

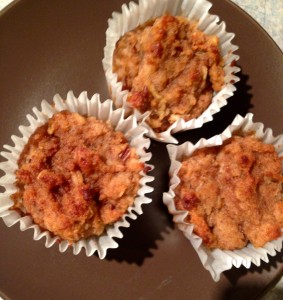
Yesterday’s Apple Cinnamon muffin was a gluten, dairy and sugar free muffin, sweetened with maple syrup with coconut oil and flax seed meal. I am finding that I really like those recipes with that little extra kick of nutrition in there. You just mix it in and can’t even taste it.

I found this recipe on another blog site called the The Simple Veganista who shares raw and vegan recipes – who actually found it originally on the blog The Vanilla Bean. And I have to say these muffins are very good! In fact my oldest son Matthew’s response when he came home afterschool was “Damn these are good!” with his face all lit up with excitement.

They are super moist and very tasty. The only downside to this recipe is that one batch does not make enough – only 9 muffins! I did stretch it to 12 but got some very small muffins out of it.

Apple Cake Muffin

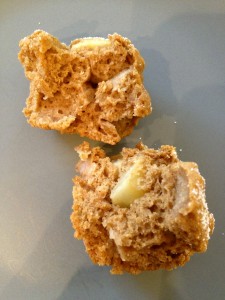
Last week I tried the Gluten Free Goddess’s Apple Cake muffin recipe, which we also enjoyed as this muffin has chunks of apple in it which I really liked. Many of the recipes I found called for grated apple and though this was good I wanted to really taste and notice the apple, so I liked the chunks. Her recipes still call for refined sugar so a quick substitution of coconut sugar and I was able to whip these babies up! It even called for powdered sugar sprinkled on top once they were done baking and I was able to substitute for this as well! See recipe below.

I love muffins that have a little sprinkle of something on top, and both these muffin recipes do -the first being a coconut sugar and cinnamon mixture. Yum! There is just something fun about sprinkling something on top 🙂

The only thing I find with the Gluten Free Goddess is many of her muffin recipes are the same base with slight changes in them to make them apple, blueberry or whatever kind of muffin it is. Though I do admire her, as all her recipes are original, tried and true; I like a little more variety in my muffins, which is why I search out other recipes to try. Regardless I do have to say even though her base is the same, I have never gone wrong with one of her recipes. They are always delicious!

Either way I would recommend either recipe if you are looking for a gluten free apple muffin, though the Apple Cinnamon one is the favorite at our house (I used coconut milk for our non-dairy milk, though you can use rice or almond milk if you prefer).

I still have a huge basket full of apples and am not sure what to do with them next as I am really looking for something that will use them up in large amounts! If you have any apple recipes to share please post them in the comments for everyone to try, especially me.

In the meantime go whip up one of these and then sit down for a few minutes and enjoy, savor, maybe grab a cup of coffee, while the kids play quietly….ha ha oh I’m dreaming again!

Regardless enjoy!

Sugar Free Powdered Sugar (replacement for regular icing sugar)

1 cup nonfat dry milk (for dairy free use powdered coconut milk)

1 cup cornstarch

2/3 cup Krisda Stevia for baking

Combine all the ingredients in a food processor or blender and whip until blended and powdered. Store in an airtight container.

This replacement can be used in any recipe calling for icing sugar.

The Magic of Chia Seeds

Chia seeds

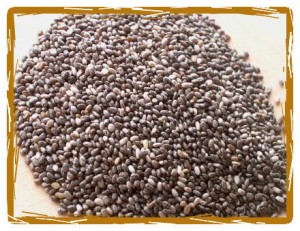
Recently I have discovered a lot of recipes with chia seeds in them. I haven’t been purposely looking for them, the recipes I have been picking up lately (such as Chocolate Macaroons) just happen to have them in it. The nice thing about this, I discovered, is that chia seeds are considered another superfood with multiple health benefits. They stabilize blood sugar, reduce cravings for sweets, improve mental focus, are a high quality protein, improve cardiovascular health and many more.

When I first heard about chia seeds I actually wasn’t sure what to do with them and thought they were funny things, these tiny seeds that look like poppy seeds. I knew they had great health benefits but what was the use if I could not use them? Then I found this recipe for chia seed pudding, which I have to admit when I first looked at it thought “Eww! seeds in my pudding”. But since I am into expanding my repertoire of sugar free and dairy free treats I thought I would try it.

I decided to make it for the first time when I was in BC this summer visiting my parents. My Mum is into these things as well and I always like a willing crowd to be my guinea pigs. The first thing I loved about this recipe is that it takes no time at all to make; less than 5 minutes. You literally whisk together the ingredients in a bowl and let it sit. That’s it. I didn’t even divide it amongst individual glasses like it suggested, I just left it in the bowl I made it in. (I also found that though this recipe says serves 4 but you can easily serve 6 and everyone has a decent sized portion).

chia seed pudding

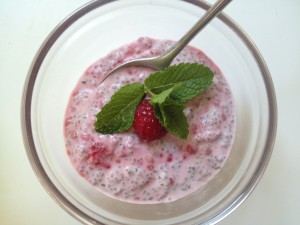
Raspberry Chia Seed Pudding

The second thing I really liked is that when you let the chia seeds sit for a bit they actually expand (size and weight), so it gives the pudding some texture, similar to tapioca. Which is another health benefit, as this ‘gelling action’ when the seed is exposed to water gives you a full feeling for hours – which is great for maintaining a healthy weight. (I also think it’s fascinating 🙂

The pudding was a hit with my parents and the kids. Enough that I have made it again recently and will do so again. I have also discovered a recipe for a Raspberry Chia Seed Pudding, which I have yet to try, but imagine will be just as good.

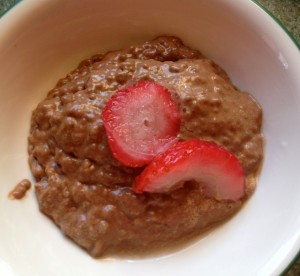
Chocolate Chia Seed Pudding

chia seed pudding

Chocolate Chia Seed Pudding

1 1/2 c. coconut milk

4 tbsp. maple syrup or honey

2 tbsp. cacao powder

1 tbsp. vanilla extract

1/3 c. chia seeds

**top with berries or coconut cream if desired

Whisk coconut milk, maple syrup or honey, cacao powder and vanilla until smooth. Stir in chia seeds. May divide evenly between 4 glasses or leave in bowl. Let sit at room temperature for 2 hours and serve.

Serves 4 **(You can easily serve 6 with this recipe and have decent sized portions if desired)


Yummy Easy Vegan Treats (with chocolate!)

I love shopping at Community Natural Foods, a local organic and natural food store. Not only do they have a wide variety of products available and good prices, they often have someone there sampling yummy recipes. Not only do they provide the samples for you but they also have the recipe printed out and ready for you to take a copy!

Not only are the recipes delicious they are good for you, often a vegan recipe with natural sweeteners and usually a little pinch of some kind of superfood in there. This is where I have gotten the Cinnamon Salted Caramel Brownie recipe that I made and shared with all my friends in Kananaskis last January – which everyone loved and would never have known that it was no dairy, no sugar unless I had told them. So I was quite excited when I went in on Saturday and discovered 2 yummy recipes to try.

I was so excited I came right home and made them both, even having to run back out to the store to grab a missing ingredient. Fairly quick and easy they both turned out fabulously! I even shared a sample with a couple of my neighbors who quickly asked for the recipe.

I love it when I find good recipes like this as I think that a lot of people feel that eating healthy means more fruits and vegetables and that you have to give up a lot of the sweet treats, which just isn’t true. You can find many, if not even more delicious in some cases, treats that not only satisfy your ‘treat fix’ but provide many essential vitamins and nutrients that our bodies need. It’s great, have a sweet and it’s actually healthy and beneficial for you!

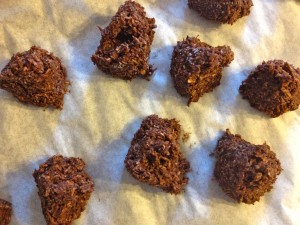
No Bake Chocolate Macaroons

1 banana

1/4 c. coconut oil

1/4 c. pure maple syrup

1/2 tsp. vanilla extract or 2-3 drops madagascar vanilla essential oil

6 tbsp. cacao powder

1.5 c unsweetened coconut

1 tbsp. chia seeds

small pinch sea salt

In a medium size bowl mash banana well until there are no clumps. Stir in melted coconut oil, maple syrup and vanilla. Sift cacao powder and stir into banana mixture. Stir in chia seeds, coconut and salt.

Line baking sheet with parchment paper. Drop a teaspoon at a time onto parchment paper. Put in freezer for 20 minutes or until firm. Store in freezer until ready to enjoy.

Makes approx 15 macaroons.

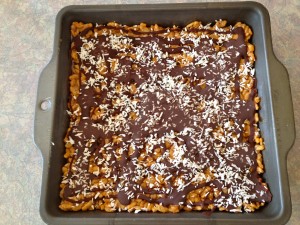
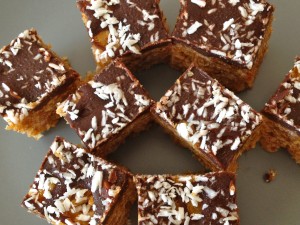
Almond Butter Rice Crispy Treats

1/2 c. chunky almond butter

1/2 c. brown rice syrup

1 tbsp. vanilla

1 tbsp. Earth Balance

1/2 tsp. sea salt

3.5 c Erewhon Brown Rice Crisp cereal

Chocolate Drizzle

1/4 c. homemade raw organic chocolate, left in liquid form

1 tbsp. almond butter

pinch salt

Shredded coconut for garnish

Line an 8×8 inch square pan with parchment paper.

In a large pot put in brown rice syrup, Earth Balance, almond butter and salt. Melt over medium low heat until well combined and heated through. Remove from heat, stir in vanilla; then stir in brown rice cereal.

Scoop and spread evenly into 8×8 pan. Press down with finger or roll with a pastry roller (just a note about the pastry roller – I had never thought of using this before and seriously it is the cat’s meow. Way easier then trying to press it into the pan with your fingers and makes it flatter and smoother). Place in freezer for 5 minutes while you make chocolate glaze.

Make raw organic chocolate according to recipe (cacao butter, vanilla, natural sweetener and cacao powder – for full recipe and directions go here). Stir in almond butter and salt.

Remove pan from freezer and drizzle with chocolate. Sprinkle with coconut and place in freezer until firm – about 15 minutes. Slice into squares.

Bars will hold their shape quite well at room temperature but may be stored in freezer or fridge.

Summer Tidbits

Summer is here! Hooray! It seems like we wait all year for this season and when it finally gets here there is so much to do. I always find that the summer is so short and chalk full of activities. Before summer even begins we have it fully planned out with lots of trips, adventures and explorations. I am often thinking about summer in April or May making the plans that I want to make as I know it fills up so quickly.

We do a lot of car travel in the summer, going to the mountains, camping and visiting my family in the Okanogan. It is busy but we have a great time as I like to make the most of the season and do and see as much as we can.

With these things in mind I am recapping my favorite summer posts, activities, recipes, games that help make the road trips easier, the hot summer days more enjoyable and keep everyone eating healthier. Of course I’ll add more as this summer goes on but here are some great tidbits to get you started – with my favorite Car Games for Kids! (I have to say Counting Cows is my absolute favorite and one that we play again and again)

Summer Road Trips – Car Games for Kids http://www.mommaonthemove.ca/index.php/archives/111

Grasshopper Popsicles http://www.mommaonthemove.ca/index.php/archives/44

Crunchy Broccoli Feta Salad http://www.mommaonthemove.ca/index.php/archives/1597

Hiking with Children http://www.mommaonthemove.ca/index.php/archives/295