For the Love of Fall… and a peek of what’s to come

IMG_3169

Camping in Drumheller

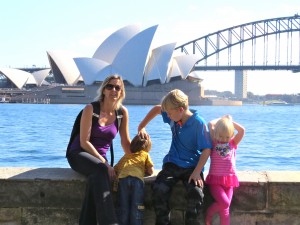
It’s that time of year again, back to school, back to routines and also time to try new things.   We had a fantastic summer full of camping trips, days at the lake and all kinds of other adventures. You may have noticed I was suspiciously absent during the month of August. This is because I packed up the kids and went to Australia for 3 and a half weeks! My sister is there for a year with her family as her husband is on a teacher exchange.

I couldn’t resist the opportunity, as Australia is a place I absolutely love! And even though I have been before there is so much to see and do, it was time to go again. Plus this time we included a week in New Zealand, which I had not been to before.

IMG_0110

Sydney Harbour, Australia

As a result I have tons of things to share with you and lots of blog posts to write about where to go and what to see in that area of the world. So this Fall I will include a weekly feature about some fabulous place in Australia or New Zealand. Giving you the scoop on how it works for families and children and what recommendations we have.

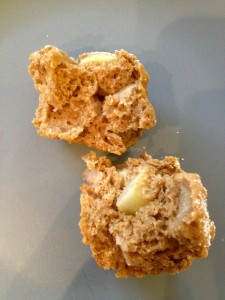
Also this Fall I will continue with sharing fabulous recipes that I have found and tried, that are sugar and dairy free, and sometimes gluten free. There seems to be an endless stream of yummy recipes out there! and I have a big bag (literally) full of them to try. For instance this morning I made Apple Cinnamon muffins again, which I tried last year and we really enjoyed. This year I tried something a little different, using leftover almond mash from making almond milk. They were so moist and yummy… Of course I promptly shared them with my neighbor and friends this morning over coffee as we sat outside amongst the beautiful fall leaves.

IMG_2135

Apple Cake Muffin

These are the posts I will guarantee in amongst all the joys, trials and insights of having 3 children, whether it be tips on how to get them out the door in the morning or programs and crafts that I would recommend. And sometimes whatever moves me, whether it be a good book I’ve enjoyed or a moment I need to share. This is the joy of blogging!

Right now I am up to my ears in apples, like last year, we have reaped an abundant crop from our tree and are enjoying apple everything. I have made more crumbles than I can count, as well as pie, muffins, smoothies (ever tried an apple pie smoothie? Yum!), juice, etc. Though I have recently discovered apple butter – OMG! delicious and might try making that.

Fall is also my most favorite time of year! and I get super excited and motivated at this time of the year. Seasonally it is a time of ending, getting ready for a period of ‘rest’, but I see it as a time of new beginnings with all kinds of things that I want to try, or the kids want to try. Plus I love the warm golden sunny days, and the crisp Fall evenings. Gorgeous.
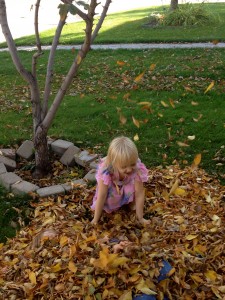
IMG_4087With that, I will leave you with the promise of what’s to come, and thoughts of what you’re favorite things about Fall are, or famous apple recipes you love. May you enjoy all that the season has to bring and more.

What are your favorite things/ activities in Fall? Have any good apple recipes? I’d love to try them. Please post in the comments below.

The Perfect Dill Pickle – How to Make your Own

IMG_1871My mother has always made the best dill pickles! Ever since I was little I remember having homemade pickles. I remember going out to the valley in the summertime and picking mountains of cucumbers and how Mom always said I was a ‘good picker’ (which meant I would get in there and pick well and for hours until we were done).

I always enjoyed going up to the farmer at the end of our day and weighing the cukes to see how many pounds we had picked. Then we would head home and Mum would get to work pickling the cukes for the yummy pickles that were to come.

IMG_1917She made jars and jars of them. At least 80-100 each time, as we would go through a jar of pickles a week in our family. The kitchen was set up industriously, or it seemed so, while my Mum completed all the steps for making pickles. We often had sandwiches or leftovers for dinner during this time as Mum did not want to stop to make dinner! But we didn’t mind and it was what we expected at that time of year.

When I first moved away I asked my Mum to make me pickles and send them to me. I had become a pickle snob and I would only eat my Mum’s homemade. I would refuse to buy the ones in the store! She lovingly did this for a while, but when my parents moved to the Okanagan, it was then the perfect time for her to teach me the art of making the perfect dill pickle.

IMG_1867When the pickling cukes were ready she called and I packed up the family and went out to BC to make pickles. The first time I did it I don’t think I was paying that close attention – (ha ha sorry Mum), but I think I was just so excited to be making my own that the information on what I was doing didn’t stick. Last summer, when we were out of pickles and I headed to BC once more, was the time that it stuck on what to do.

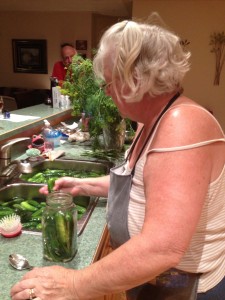
I remember commenting to my mother how many steps there were and I didn’t realize that there were so many. Now I more fully understand why she was in the kitchen for days doing the cucumbers.

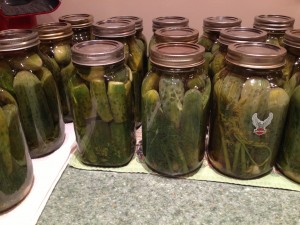
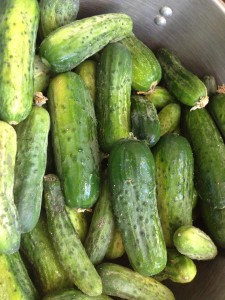
I had bought 40 lbs of cucumbers, which usually works out to about 40 jars of pickles; and some fresh dill from a local farm in Kelowna. With everything ready to go we set to work. We had soaked the cucumbers during the day so by the evening after supper we were ready to go.

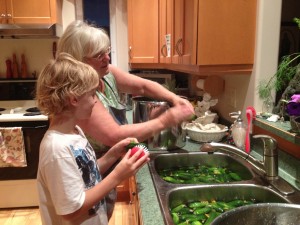
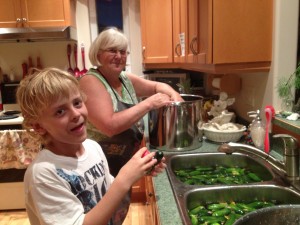
Matthew assisted with the cleaning and scrubbing of the cucumbers as that night he was given the option of going to bed or scrubbing cucumbers. He chose the cukes! which I thought was a hilarious way to avoid going to sleep but enjoyed his company and appreciated his help nonetheless.

IMG_1913We moved through all the steps and in only a few hours had finished all the jars and were ready to put our feet up and relax. Now the traditional dill pickle recipe does call for a tablespoon of brown sugar, which due to living sugar free I had to make a decision. I decided to leave it as I loved these pickles so much. But what I did do was an experiment. I made a number of jars using coconut sugar in place of the brown sugar, then I marked those jars so I would be able to tell which ones were which. I have yet to open a jar in which we used the coconut sugar, but I am very interested to see how they taste. I am hoping of course that it works, then we can also make our dill pickles sugar free and just as delicious! Of course, once we open them and give them a taste I will definitely share the result!

In the meantime, here is the traditional recipe for fabulous homemade dill pickles. One of the things I really enjoy about making them is doing it together with my Mum (and Matthew when he’s wanting to help). Not only does it make the job go by faster but it is a great bonding experience, where we can chat and connect, while completing the task at hand.

The only downside is we have to wait a few months before we can eat them! as they are not instantly ready. But trust me, it is worth the wait – and you to will become a dill pickle snob 🙂

Dill Pickles  

freshly picked cucumbers in a variety of sizes (choose the size of pickles you like but it is also nice to have some small ones to fit the ‘holes’ in the jars)  1 lb cucumbers yields approx one quart jar

fresh dillIMG_1869

pickling salt

brown sugar (coconut sugar)

pickling vinegar

fresh garlic

water

1 quart jars

Prepare the Cucumbers:

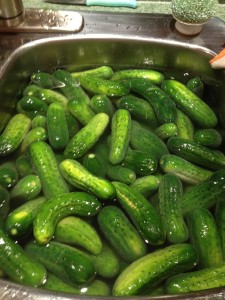
IMG_1916Soak freshly picked cucumbers in ice water overnight or at least, six hours. (This aids in removing the prickles off the cucumber as well as cleansing them).   Add more ice, at least once, as water begins to cool.  Scrub each cucumber with a vegetable brush, and return to cold water.

Wash and sterilize the jars:

Wash jars in hot soapy water and rinse well.  Then add a bit of water, just to cover the bottom, in each jar.  Place the jars on the rack in the oven, heated to 200 F.  This will sterilze them and make them hot, which is what you want because you will be pouring hot brine into them.  Option:  jars can also be heated in the microwave, again bit of water in the bottom of each jar and heat on high for 2-3 minutes; time varies depending on the number of jars you do at one time.

Sterilize and heat lids:

Place the lids and tops of the jars in a pot filled with water to cover them and heat to the boiling point.  Turn down heat, but keep them hot to pack the jars.

Prepare the Brine:

water

pickling vinegar

For each 4 cups of water, add 3/4 cups of pickling vinegar. The total amount  you make will depend on how many jars of pickles you are making. Using a large dutch oven pot you can make a triple batch, and then more as needed.

Mix water and pickling vinegar together and bring to a boil.  Keep hot until ready to pour into packed jars.

Pack the Jars:

IMG_1915

Fresh Dill

Put about 3 medium size pieces of garlic in bottom of jar. Add fresh dill, approx 2-3 “sprays” including the stalk.  Bend and arrange to fit in jar. Pack cucumbers in jar, quite tightly, using smaller cucumbers to fill the top space.  Add 1 tbsp of pickling salt and 1 tbsp of brown sugar or coconut sugar on top of packed cucumbers.  Pour hot brine over everything in jar to just below the rim of jar.

Seal the Jars:

Wipe the top of the jar with a cloth to make sure there are no particles of anything to interfere with the seal.  Place hot lid on top.  Add screw top.  Press down on lid as you are turning the screw top to seal.  Tighten securely.

Cool and Store:

Let stand, away from drafts until jar cools completely.  Label and store in cool, dark place.  It will be approx eight weeks minimum before pickles will be ready to eat.  Best if left for 3-4 months.

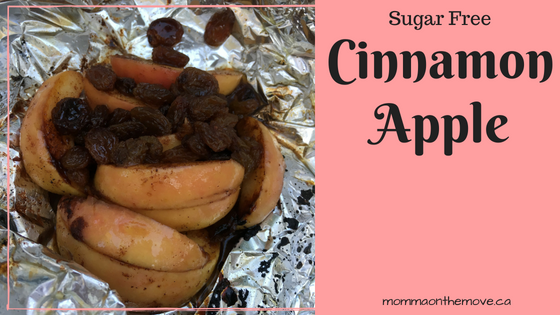
Camping Desserts – Cinnamon Apple

sugar free cinnamon apple

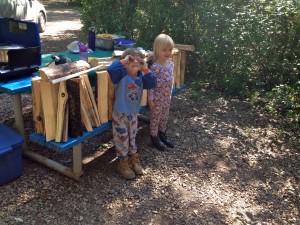
I love the variety of neat camping recipes there are. Especially ones that you can do over the fire that are yummy, sweet and delicious. Usually done over hot coals and in tin foil it makes for even less dishes and a delicious treat or meal.

Our family camping trips always involved TFD’s, or Tin Foil Dinners, which my father usually requested that we have at least twice. But I often enjoyed the dessert options, like s’mores, banana boats and cinnamon apples. Cinnamon apples have always been my favorite, as the brown sugar would melt and make a nice sticky syrup over the apples and raisins, so much that I would often lick the tin foil to make sure I did not miss one drop! Until recently, these camping desserts were something that I had to forgo – until I figured out how to do it sugar and dairy free.

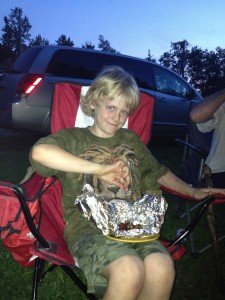
Matthew enjoying his Cinnamon Apple

Matthew enjoying his Cinnamon Apple

As with any recipe I am ‘transforming’, my goal is to figure out how to make so that it is the same as the original, or only a slight difference in taste. My Mum was actually the one who figured this one out. A couple of summers ago she bought coconut sugar and tried it out with the cinnamon apple. It worked perfectly! (Coconut sugar is an excellent natural substitute for brown sugar. It melts just like brown sugar and gives you the syrupy juice.)

I have also figured out how to do banana boats sugar free, also very good, but have yet to try it out on the campfire. (Will post it once I do! )I believe though that it will turn out just as yummy.

Cinnamon apples are easy to make sugar free without compromising the taste! Worth a try on your next camping trip this summer.

Sugar Free Cinnamon Apple

1 apple

cinnamon

coconut sugar

raisins

spoon of Earth Balance vegan buttery spread

heavy duty tin foil

Tear off a large square of heavy duty tin foil. With the shiny side up do the following:

Using Earth Balance, butter middle of tin foil, spreading evenly around. A spoonful is good but if you like you can use more. Slice and core apple, put apple on top of buttered area spreading out slices so they are not on top of each other. Best to slice apples thinly as opposed to in chunks as they soften and cook more quickly. Sprinkle with cinnamon to taste, add raisins. Sprinkle a couple of spoonfuls of coconut sugar over apple mixture. The more coconut sugar you use the more juice you will create. You may add a few dollops of Earth Balance on top also to create more juices.IMG_3357

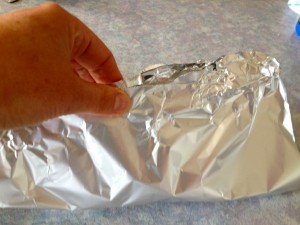
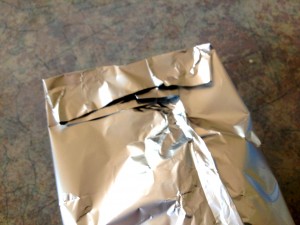
Close foil by matching the edges and folding it down until it is tight.IMG_3361

Then fold over and close each side.IMG_3362

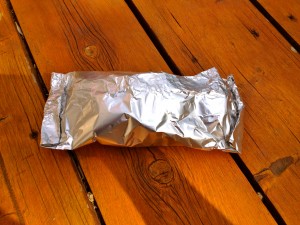
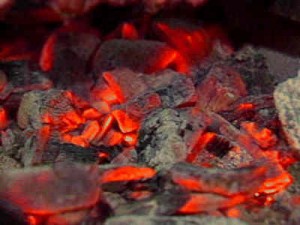
Place foil packet on top of hot coals. Important – ensure that there is no flame amongst your coals otherwise it will burn. Let cook for 5 minutes, then flip over using tongs. You’ll hear the apple sizzling. Check after a few more minutes. Apple should be soft and coconut sugar and butter melted. If it’s not ready wrap it back up and put it back onto the coals and cook for a few more minutes.Bed-Of-Hot-Coals

Once ready unwrap and enjoy! Caution Cinnamon Apple will be very hot. If giving it to small children unwrap and let it cool some before they enjoy.

Strawberry Rhubarb Pie

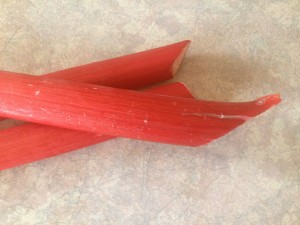
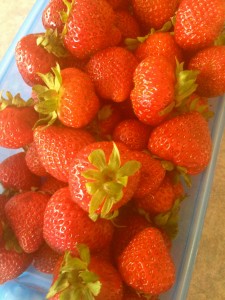
IMG_3349The other day one of my neighbors offered me some fresh rhubarb from her garden. I am not a big fan of rhubarb (and don’t really know a lot about what to do with it) but I do really enjoy strawberry rhubarb pie (and I love making things with ingredients fresh from the garden). Years ago I had found a recipe and tried it. So when Matthew came in and said the neighbor asked if we wanted some I said yes! right away.

IMG_3330Rhubarb is a tart fruit that on its own is not to my liking but combined with strawberries I find the whole thing delicious. Now those years ago when I first made this pie it was the traditional white sugar filled filling, so this was my first attempt making it sugar free. I was a little nervous because it called for mixing the flour and sugar together but thought that would not work well with the agave nectar (what I chose to substitute for the sugar) being a liquid.

What I decided to do was to mix the flour and salt together and then once everything was in the pie shell to then pour the agave over top, letting it fill in the holes, as well as being on top.

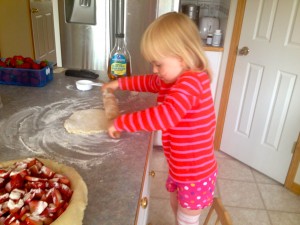
IMG_3335The kids of course love pie, so it didn’t matter to them what kind of pie I was making, just that we were having pie after supper. Chloe actually helped me make the pie and enjoyed assisting in rolling out the pie crust. She also watched me cut the fruit and asked many questions along the way as to why I was doing this or that.

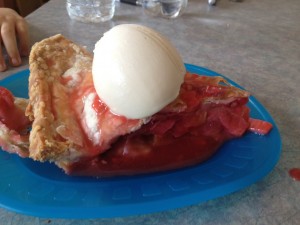
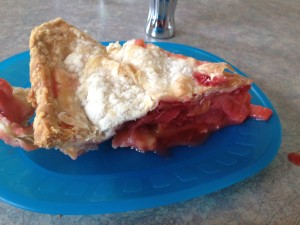
Once the pie was in the oven, everyone settled down. But as soon as it came out after supper I barely had time to let it cool before everyone was asking for a piece. I would have prefered to let it cool much more to allow for the filling to set but they weren’t having any of it. So I cut pieces for everyone and topped it with ice cream.

Oh. my. God. It was delicious! In fact it was even better than the sugar version I had made before. The kids licked and practically ate the plates it was on. And then promptly asked for more!

I feel that anything made fresh and with fresh garden grown ingredients is going to turn out quite well. But this was beyond my expectations, it was sooo good. With just the right combination of sweet.

Strawberry Rhubarb Pie

2-9 inch pie crusts (one for top and bottom)IMG_3331

2/3 c. agave nectar

¼ c. flour

¼ tsp. salt

3 c. chopped rhubarb

3 c. sliced strawberries

Mix flour and salt together, put 1/3 of mixture on the bottom of the pie crust. Add fruit in pie shell, leave slight mound in the center, and pour remaining dry ingredients on top. Pour agave nectar over top of fruit and dry ingredients. Cover with top crust. Pinch edges together to seal. Cut small slits in top of crust.

Bake at 425 F for 10 minutes, then reduce heat to 350 F and bake for 40-50 minutes. Let pie cool for at least 15 minutes before serving to allow the juices to cool and set.IMG_3345

Broccoli Cheese Soup

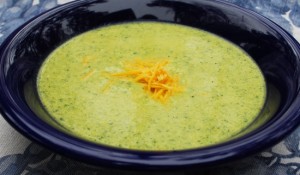
broccoli-soup-bryons-lrgI wanted to post a recipe today for something sweet, especially for all you party goers who are joining me from the UBP; but I finally perfected my Broccoli Cheese Soup recipe and had to share – now both dairy free, gluten free and delicious!

For the past while, I have been just making a straight creamy broccoli soup, which was ok, but I missed the cheese. And the kids, who use to gobble it up, were kind of taking it or leaving it when I made it. In fact I wasn’t eating it at all (ha ha)!

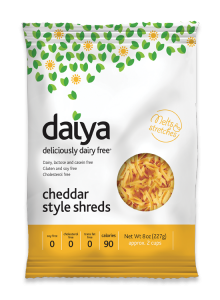
So earlier this week when I was making it for lunch I decided to experiment. First I decided to use brown rice flour instead of regular white flour, as I am trying to make more things gluten free in our house (plus I have noticed that I feel tired after some things with gluten). Then I decided that I was going to throw in some of this fabulous non-dairy cheddar cheese that I discovered by Daiya foods. See one of the things I really do miss about not having dairy is cheese. And though there are lots of choices out there now for non dairy cheeses, I just couldn’t find one that I liked. They either didn’t melt well, or taste good and they definitely weren’t tasty enough to put on a cracker (yuk!). But recently I discovered this vegan cheese made by Daiya, a Canadian company actually (Go Canada) based in Vancouver. It melts, it tastes good and everyone gobbles it up! I think it is very close to tasting like dairy cheese and they make it in all kinds of flavours! They even sell it in slices so, guess what? We are now having grill cheese once again, which honestly used to be a staple for lunch.US-Shreds-Cheddar

Anyway I tossed a handful of the Daiya grated cheddar into the blender and mixed it all up.  It was fantastic! Luke gobbled it up, I ate it and will eat it again (this is a good sign). And it tasted really cheesy, like you would expect a nice cheesy soup to taste. I think this means I can go back to making my Cheesy Potato soup now….

The recipe for this soup is really easy and doesn’t take any time at all to make. Give it a try! You won’t be disappointed.

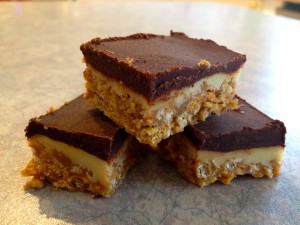
And for those of you who are looking for a little sweet treat, check out Chocolate Peanut Butter Cereal Squares, Marshmallows, Chocolate Macaroons.

Do you have a favorite cheesy soup recipe? Please share it with us in the comments below.
Broccoli Cheese Soup

2 cups     fresh cut broccolibroccoli

1 cup      water

1 ¼ cup reserved juice, plus water if not enough juice left

1 cup      almond milk

1 tsp       chicken bouillon powder

¼ tsp     sea salt

1/8 tsp   pepper

2 tbsp    brown rice flour

1/3 cup   grated vegan cheddar cheese

Cook broccoli in water in covered saucepan until tender. Drain and reserve juice. Put broccoli in blender.

Add remaining 6 ingredients to blender. Process until smooth. Return to saucepan. Heat, stirring occasionally, until mixture boils and thickens. Makes 3 cups.

Serves 2-3

IMG_0753

Chocolate Peanut Butter Cereal Squares

Party! Party! Party!

scaled_photoWelcome! I am very excited to be joining the Ultimate Blog Party 2014 again this year! I think this is a great opportunity to get out there and connect with other bloggers while sharing the things that you love, including your own blog! Thank you to Janice and Susan of 5 Minutes for Mom for hosting this fabulous event.

If you are new to Momma on the Move I’d like to thank you for stopping by and for those of you who are returning welcome back. It is a pleasure to have you all here.

8095971047_2a93f46d0a_bMy name is Carmen and I have 3 beautiful children, 4 year old boy/ girl twins and an older son. I grew up on the East Coast and have a deep love for the ocean. I love the outdoors, travelling, exploring new places and to getting out there to enjoy and embrace life!

The kids keep me busy with the twins now in preschool and our decision to eat sugar and dairy free at our house. When not playing with or helping the kids, I am in the kitchen trying out or modifying recipes to meet our needs. I have even been dabbling in some gluten free recipes over the past year as well.

IMG_2646We made the decision to remove sugar, back when my Matthew, my oldest was in grade 2, due to behavorial and sleep challenges with him. It was amazing the difference it made! Shortly after we went dairy free as I discovered both myself and my daughter had an intolerance and the gluten well, when I discovered I was still feeling tired after eating a dairy free/ sugar free muffin, gluten was the only thing left!

I have always loved to write but started blogging because I felt that I could share more faster and reach a larger audience. I find that there are so many things to share and explore, as life is a story. Everywhere we go I am taking pictures and thinking about how I make this into an informative, yet interesting blog post for my readers. Everything from crafts and activities for kids, our adventures camping and in the outdoors, to the many sugar and dairy free recipes, I like to blog about it!

I also like to include tidbits about the importance of taking time for ourselves, gratitude and being ambassadors for our planet.

I like creating a community where we can share, interact and learn from each other. Plus it’s stretched me in the world of technology as well!

IMG_2106Now that you’re here, sit down grab a cup of coffee and take a look around. Let me know what your favorite posts are, what you’d like to see more of. Leave a comment sharing with me who you are and where I can find you so we can connect and get to know each other. I’m looking forward to visiting everyone’s sites and making new friends.

Here are some of my favorite posts:

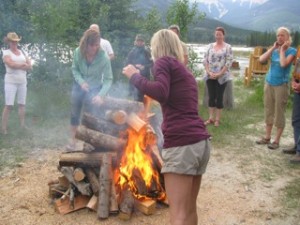
Firewalking

Rainy Day Activities

All Things Pumpkin

Natural Sugar Substitutes

RAK your Brain

Firewalking

Firewalking


Grasshopper Popsicles

Enjoy! See you at the party!

Let’s stay connected! Here’s where you can find me

Facebook

Twitter

Pinterest

Google+

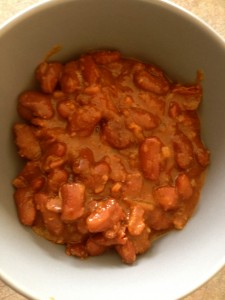
Fabulous Baked Beans

IMG_2839Growing up I always loved a can of baked beans. They reminded me of sitting around the campfire and enjoying them usually with hot dogs. But when we changed our diet canned baked beans was another thing that had to go! 🙁 Usually made with brown sugar and molasses (molasses being the worst culprit; which is 50% sucrose and is actually a by product of making refined white sugar, with the added chemicals) I had to forgo baked beans for awhile.

In fact, I never thought that I could make my own. Funny enough I thought they come in a can so how could I? Yet one day we went for supper at my neighbors house and he had made them from scratch. Thinking nothing of it, a little while later my mother said she wanted to make baked beans for the camping trip that she and my father were taking my oldest son Matthew on. I then remembered that my neighbor had made them and kindly asked for his recipe.

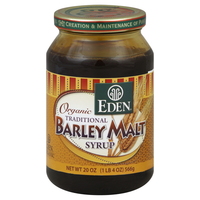
eden-foods-barley-malt-24412By this time I knew enough about different natural substitutes to make the necessary changes in ingredients. Barley Malt is often substituted for molasses and we had found a ketchup, that was not only organic but sweetened with honey. It was perfect!

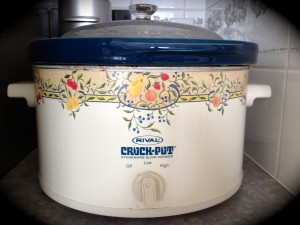
And of course I love using my slow cooker, putting something in in the morning and let it cook slowly all day, the sweet smells wafting through the house as it cooks. By the time they are ready to eat our mouths are watering in anticipation!

The recipe turned out beautifully and so delicious! I often make them myself when we go camping and just reheat when we get there. I even make them at home from time to time and they are always gobbled up! I have a friend who I introduced them to, who now says that he will never be able to go back to the canned ones. Which I guess is good and bad 🙂

True, this is not a recipe that you can whip up in 30 minutes, but it is totally worth the time it takes to make them. And really it only takes a little prep and preplanning.

IMG_2836Now the original recipe calls for only 1/3 pkg. of bacon but I use the whole thing. In fact I buy the cheapest and fattiest brand I can find, which is probably why mine are better than my Mum’s even though we are using the exact same recipe! (sorry Mum)

So whether you are looking for something around the campfire or warm comfort food at home these beans will not disappoint! Once you’ve tried this recipe please return and share your comments about how they turned out.

Baked Beans

2 cups red kidney beans (soaked overnight)

1 pkg. bacon

1 onion chopped

1/2 c. Honey Bunny Bodacious Ketchup

1/3 c. pure maple syrup

1/4 c. barley malt

1 tsp. dry mustard

Soak beans overnight in water. Use a large container and add in generous amounts of water as beans will soak up quite a bit of it. Cover with lid.

Boil gently soaked beans until soft. Put beans into crock pot. Mix the rest of the ingredients together in a bowl and pour over beans. Cover and put on low. Cook all day (for a minimum of 8 hours)

*if you prefer a sweeter recipe you can adjust maple syrup and barley malt to taste

A Few of my Favorite Muffins

8I have fond memories of muffins growing up. This may sound a little weird but I was a competitive swimmer for many years and that meant early morning practices before breakfast. My mother would often make muffins and after practice we’d have muffins and juice before being dropped off at school. As a result, my Mom tried all kinds of different muffin recipes, so that we could enjoy variety and not get bored with the same old banana muffins 3 times a week.

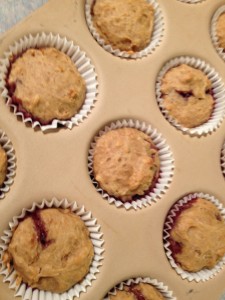
IMG_2690One of my favorite muffin recipes was one that was filled with jam. Though not quite as tasty as a jam filled donut, I loved these because of the ‘surprise in the middle’. I also found them to be quite tasty and very moist due to the yogurt that is in the recipe.

Of course when we moved to eating dairy free I had to forgo these muffins for a while. Until recently, when I discovered some of the non-dairy yogurts out there. Though most varieties are made from soy, you can find brands that are made using coconut or almond milk as well.

With this discovery, I was now able to recreate these delectable muffins! Of course I had to experiment a bit as I needed to substitute the sugar as well and although most natural sugars can be substituted one for one, I find that when you are also altering another ingredient sometimes the sweetness factor needs to be adjusted to.

This was the case with these muffins as though the kids gobbled them up the first time I made them, both my older son and I felt they could be a little sweeter. So the next time I made them I experimented a little adding a little more coconut sugar then the recipe called for. As I result, I did eventually find the perfect combination.

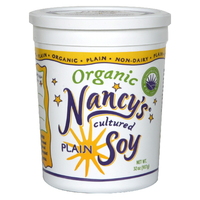
nancys-cultured-soy-plain-58308The yogurt I use is Nancy’s Organic Cultured Soy, plain. Though they offer many different flavors as well. It is a little thicker than dairy yogurt but definitely works. (Also works fabulously in the Cheesy Greens Macaroni dish that I make, which is soooo good!) I have yet to try a coconut milk yogurt but imagine that this would work out the same.

So if you’re up for a yummy nutritious treat with a surprise in the middle, give these muffins a try. And if you do use the coconut milk yogurt come back and comment and let others know how it worked out.

Jam Filled Muffins

1 1/2 c. flour

1/4 c. + 1/8 c. coconut sugar

2 tsp. baking powder

1/2 tsp. baking soda

1/2 tsp. salt

1/4 c. Earth Balance vegan spread

1 c. non dairy yogurt

1/4 c. almond milk (or favorite non-dairy milk)

1 egg

1/2 tsp. vanilla

Favorite sugar free jam

In a medium bowl blend dry ingredients. In a small saucepan melt Earth Balance. Take saucepan off heat and stir in yogurt, almond milk. Beat in egg and vanilla. Add liquid mixture to dry ingredients and stir until moistened.

*Line cupcake pan with liners or grease well. Spoon in half the batter. Place about 1 tsp. of jam in each muffin, then top with remaining batter.

Bake at 375 F for 15-20 minutes.

Makes 12 muffins.

*Note: I have found with these muffins if you have the cupcake liners that that is best due to the jam sometimes overflowing a bit.

Apple Cinnamon Pancakes

IMG_2805Yesterday many of us celebrated Pancake Tuesday. A tradition that began in the Middle Ages this day has grown and enjoyed by people around the world.

Enjoying pancakes for supper is one of my favorite things (in fact I love anything breakfast for supper, there are so many fabulous breakfast foods out there) but on Pancake Tuesday I like to spice it up a little and make a recipe that is more than just your regular plain pancake – though those are just as delicious!

There are so many kinds of pancakes to choose from. Some of our favorites are pumpkin and oatmeal banana. There are gluten free options, dairy free, coconut and fruit options. You name it, you can basically find it and make it.

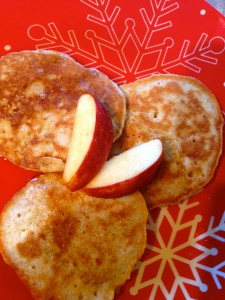
Yesterday I decided to try out an apple cinnamon pancake recipe (at the suggestion of my mother who was here on the weekend). I didn’t have one so I quickly googled it and found a number of apple cinnamon recipes to choose from. My favorite was on dairygoodness.ca, where they suggested using maple syrup as the sweetener as well as a mix of flours.

Of course I had to make a couple of other quick substitutions to make it dairy free (as that is part of our diet as well) and went to work mixing up the dough. The most time consuming part was shredding the apples but otherwise is a quick and easy recipe to make.

It was a huge hit! Everyone loved them. They had just the right amount of apple, not overwhelming and with a little bit of syrup…Yum! They were fabulous. My modified dairy and sugar free version is below.
Apple Cinnamon Pancakes

1 1/2 c. all purpose flourIMG_2808
1 1/2 c. whole wheat flour

1 tbsp. baking powder

1 tsp. cinnamon

1/2 tsp. sea salt

3 eggs

2 1/2 c. almond milk

1/4 c. Earth Balance vegan spread, melted

2 tbsp. pure maple syrup

1 1/2 c. shredded apple

In a large bowl mix flours, baking powder, cinnamon and salt. In a separate bowl, mix eggs, almond milk, melted Earth Balance and maple syrup. Pour over dry ingredients and add apples. Stir gently until just combined – a few lumps may remain.

In a large non stick skillet, heat a small amount of butter. Scoop about 1/3 c. of batter per pancake into skillet. Cook approximately 2 minutes or until bubbles form in batter. Turn over and cook 1 to 2 minutes more until golden and fluffy. Repeat with remaining pancake batter.


Pancakes for Supper

Pancakes 1I love that one night a year I can make pancakes for dinner! Shrove Tuesday or Pancake Day is the Tuesday before Ash Wednesday when Lent begins in the Christian faith.

Beginning in the middle ages, it was the last day for celebration and feasting before the period of fasting required during the lenten season. Food items like meat, milk, eggs and fats were restricted during this time; so to keep these foods from being wasted people would have big feasts on Shrove Tuesday in order to consume these items and prevent them from being wasted (as they would not keep over the next 40 days).

mardi-gras-2The English were the first to make pancakes on this Tuesday as it was an easy way to use these ingredients before Ash Wednesday began. In France, consumption of these fats or fatty foods on this day coined the phrase “Fat Tuesday” or Mardi Gras.

I always find these things fascinating and share them with my kids. My oldest often asks why we have Pancake Tuesday and though I know the traditional reason I had no idea of it’s origin.

And though we may not always observe all the traditions of the Christian faith we certainly enjoy and don’t mind observing this one! Usually I make the traditional plain pancakes and add some fruit on top, but with all our dietary changes and my hunt for new recipes, I have added to my repertoire of ‘kinds’ of pancakes.

So today if you are on the hunt for a little variety in your pancakes, give one of these recipes a try (and if you are not making pancakes for dinner then try them some other time, they are all delicious!) You’ll love ‘em and so will your kids. They are all sugar and dairy free and the last one is gluten free as well.

Pumpkin Pancakes from Williams-Sonoma Kitchen

1 1/2 c. flour (I used half whole wheat and half white)

1/4 c. date sugar

pic3R054P

Pumpkin Pancakes

3/4 tsp. baking powder

1/2 tsp. baking soda

1/2 tsp. salt

2 tsp. cinnamon

1/2 tsp. ginger

1/4 tsp. ground allspice

4 eggs, separated

3/4 c. canned unsweetened pumpkin

1 1/2 c. rice milk (I use a brand called Ryza as it has the least amount of additives and no sugar or you can make your own) or almond milk

4 tbsp. Earth Balance, melted

1 tsp. vanilla extract

Maple syrup for serving

In a large bowl whisk together flour, sugar, baking powder, baking soda, salt, cinnamon, ginger and allspice. Set aside.

In another bowl, beat the egg whites until medium peaks form. Set aside.

In another bowl, whisk together the egg yolks, pumpkin puree, rice milk, Earth Balance and vanilla until well combined. Whisk the pumpkin mixture into the flour mixture just until the batter is smooth and no lumps of flour remain. Fold in egg whites in 2 additions.

Heat griddle over medium heat until a few drops of water flicked onto the surface skitter across it. Lightly grease the griddle.

Pour 1/4 c. pancake batter onto griddle. Cook until bubbles form on top and the batter is set, 3 to 4 minutes. Flip the pancakes over. Cook until golden brown on the other side, about 3 minutes more. Keep warm until all pancakes are cooked.

Oatmeal Peanut Butter Banana Pancakes from purecanadamaple.com

1/3 cup whole wheat flour

1/3 cup all purpose flour

1 teaspoon baking soda

½ teaspoon salt

2 cups rice milk or almond milk

2/3 cup old fashioned oats, not instant

2 overripe bananas, mashed with a fork to a fine pulp

2 egg whites, whipped to stiff peaks

2 teaspoons canola oil or non-stick pan spray

Gobs of crunchy or creamy peanut butter

Pure maple syrup

In a mixing bowl, combine both flours, baking soda and salt. Set aside. In a non-reactive mixing bowl, combine milk, oats and bananas. Fold in dry ingredients. Fold in egg whites and mix until just combined.

Heat one teaspoon of oil in a 12-inch non-stick skilled over medium high heat. Drop batter by the scant ¼ cup full into pan and cook, turning once until lightly browned. Hold pancakes warm on a platter until you’ve got them all cooked.

Spread a teaspoon or so of peanut butter on each pancake and then the Pièce de résistance of course…a generous drizzle of maple syrup.

Makes 15 pancakes.

Pancakes

This recipe is sugar free, dairy free, gluten free and is yummy! Courtesy of Ryza rice milk.

1 egg

1 cup Original or Vanilla Ryza

2 tbsp oil

1 3/4 cups brown rice flour

3 tbsp tapioca starch

2 tsp baking powder

1 tsp cinnamon

1/2 tsp baking soda

Beat egg until frothy. Add Ryza and oil; beat until well blended. In another bowl mix brown rice flour and the remaining dry ingredients. Make a well in the center of the dry ingredients and add the liquids. Stir until well blended. Do not over stir. Batter will be slightly thin. Lightly grease a frying pan. Pour small circles and fry pancakes until golden. Serve with pure maple syrup.

You can also try apple cinnamon pancakes or if you prefer a simple plain pancake try this recipe.

What is your favorite pancake recipe? Share in the comments below.