Holiday Delights Sugar and Dairy Free Egg Nog

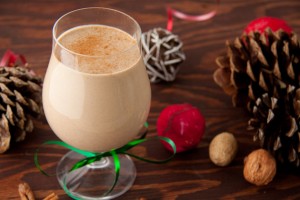
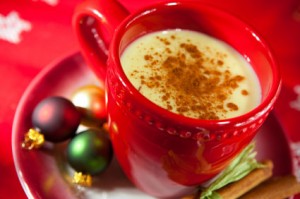
One of the many things I love about Christmas is the fun holiday drinks you can have. Things like hot apple cider, Christmas Jones, Angels Delight and my favorite Egg Nog. It is a rich creamy drink that you can have virgin style or add a dash of rum if you like. Either way it is delicious, especially if you sprinkle a little nutmeg or cinnamon on top.

Only available at Christmas, as soon as it came out in the stores I would buy it – sometimes as early as October – to enjoy and savour my first cup. Matthew also really likes egg nog and was asking me to buy some for him as soon as he saw it in the store. Unfortunately egg nog has the two things our family doesn’t consume anymore, dairy and sugar; therefore I was in a bit of a quandary. Some things I could live without, I did not want egg nog to be one of them! So I went on a hunt for one that would meet our needs. There had to be one out there.
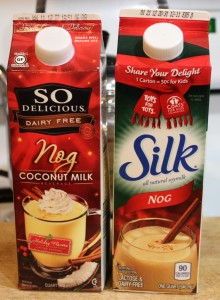
There are quite a few non-dairy options out there, Vita-soy makes a Holly Nog from soy milk, as does Earth Balance, Silk and So-Delicious (coconut milk) as well as nogs with almond milk. I even discovered a rice milk egg nog made by Rice Dream. But though these are all great dairy free options they are still sweetened with evaporated cane sugar, which we can’t have; we needed one with a natural sweetener.

Since I couldn’t find one in the stores,  I came home and hopped online to see what recipes I could find on the internet. (I love the internet it has opened up a whole new world for me and I often wonder how we ever got along without it). My preference was an egg nog made with almond milk so that is what I looked for; and I found 3 really good recipes that I have made and we all tried.
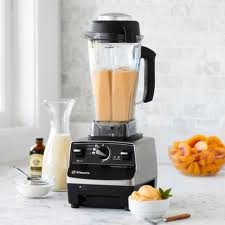
The first one I found on Incredible Smoothies, a website founded by Tracy Russell who eats a high raw vegan diet. She has all kinds of great smoothie recipes on her site. The recipe for egg nog, I really liked as it does not contain eggs, (which I was concerned about for the twins as egg nog usually contains raw eggs), and it was all made in the blender, sweetened with frozen bananas! It was fast, easy, simple and delicious!

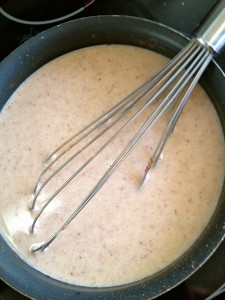
The second recipe I found on Healthful Pursuit by Leanne Vogel, who shares recipes, travel, food and life experiences on her site. This recipe for egg nog contains egg yolks as well as coconut milk, but is cooked on the stove. At first I thought that this would not turn out so well as I thought “Warm egg nog? Really?” but it turned out to also be delicious! And the fact that it was cooked on the stove eliminated my concern about the twins having raw eggs, so they could have it too. It was also really good warm. Leanne says you can let it cool and enjoy it, but I found due to the coconut milk, it congealed in little chunks when it cooled, and though not bad you had small pieces of coconut milk in your egg nog. I have leftovers in the fridge that I will be heating up for sure when I enjoy it.

The last one I recently discovered this week, is completely vegan and is the new front runner for our favorite. Courtesy of SPUD (I love these guys but that’s a whole other post), a local & organic grocery delivery service, this egg nog recipe is creamy, delicious and super easy – just add all the ingredients to your blend and mix. Check out their recipe here.

The kids enjoyed both recipes too. Matthew’s favorite was the one from Incredible Smoothies, I really liked the one from Healthful Pursuit (I found it a little bit creamer and lighter) and the twins, well they liked both and didn’t seem to favor one or the other (they are so easy to please those two 🙂

Dairy free egg nog with almond milk

The only downside with the stove top recipe is you end up with leftover egg whites and unless you have something to use them for they end up going to waste.

Either way we now have 3 delicious, dairy free, sugar free egg nog options, which even John tasted and said is “Way better than the store bought stuff.” And we can easily make them at home whenever we like, and as much as we like 🙂

So if you’re looking for a non dairy egg nog that you can make yourself or simply wish to try something new, these recipes are great (and they also happen to be gluten free as well). Once you’ve tried them come back and comment letting us know what your favorite is, or if you’ve found another egg nog recipe that you like and are willing to share!

Have fun and enjoy that glass of egg nog!

Raw Vegan Egg Nog with Almond Milk

1 1/4 c. plain almond milk (you can make your own almond milk, it’s super easy)

2 frozen bananas, peeled and sliced

1/4 tsp. nutmeg

1/4 tsp. cinnamon or 1 drop Cinnamon Bark essential oil

dash of clove or 1 toothpick dip* of Clove Bud essential oil

dash of sea salt

1 date (soaked for 10 minutes)

1/4 tsp. pure vanilla extract

Put all ingredients in a blender. Start on low speed and move up to high. Blend on high for 20-30 seconds until mixture is smooth. Serve with a sprinkle of cinnamon or nutmeg, if desired.

*a toothpick dip is used when you do not want a full drop of essential oil as it’s too much for the recipe. Simply dip a clean unused toothpick into the essential oil bottle and then dip the toothpick with essential oil into your mixture and swirl it around.

Almond Nog

4 egg yolks

2 1/4 c. unsweetened almond milk

1-400 ml can of coconut milk

1/4 c. coconut palm sugar

2 tsp. pure vanilla extract

1 tsp. ground nutmeg

1 tsp. cinnamon or 1 drop Cinnamon Bark essential oil

pinch all spice

Separate the eggs and place the egg yolks in a bowl. Set aside.

Combine the remaining ingredients in a medium saucepan on medium heat bringing mixture to a simmer. Once simmering reduce heat to low.

Slowly add 1/4 c. of the hot liquid to the egg yolks in a bowl, whisking continuously. Continue adding liquid to the egg yolks until you’ve added 1 cup, then transfer new mixture to saucepan. Turn heat back up to medium and simmer for 4 minutes, whisking continuously.

Remove from heat and serve immediately or put into a mason jar and refrigerate.

Sprinkle with a pinch of cinnamon or nutmeg, if desired.

*note recipes have been reposted with permission of the original authors


Shop Art Calendars at Calendars.com

Chocolate Additions

In my last post, I shared the basic recipe for making raw organic chocolate. Very easy to do, it is a healthy and delicious way to enjoy chocolate without the guilt!

Now here is the fun part! Once you have the basic chocolate made you can add all kinds of things to your chocolates that not only make them delicious, but also add vitamins and nutrients that are good for you! You can ‘soup up’ your chocolates and no one will even know what’s in there.

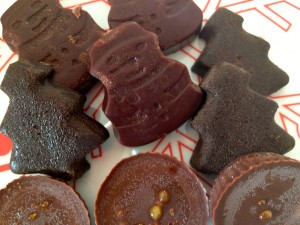
I make peppermint Christmas trees and add E3 Live to them, which is a form of algae, very high in protein and minerals. It darkens your chocolates but does not alter the taste, no one would ever know it’s in there. And Matthew loves them and as a result asks me to make them all the time!

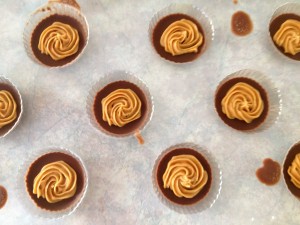
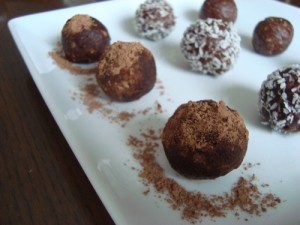
chocolate additionsMatthew even helps me make chocolates; as it is very easy for kids to do. He loves to experiment so we have made a variety of kinds of chocolate. We make our base chocolate, which is a combination of cacao butter, cacao powder, vanilla bean and sweetener of choice, (see my previous posts for the basics on how to make it and natural sweeteners), then we add different ingredients depending on the kind of chocolate and flavor we want. We make peanut butter cups, caramel cups, orange ginger and peppermint; and this is only what we have done so far – there are many ingredients that can be added to your chocolates to achieve the flavors that you want.
When adding ingredients to chocolate this can be done in a few ways – mix it in, usually with essential oils or powders, you can pour the ingredients on top of the chocolate, after you have poured it onto a cookie sheet, for instance with nuts and seeds, berries, coconut or you can make/ use a filling. The ingredients you add depend on what type of chocolate you want and personal preferences. Here are some ingredients to try.

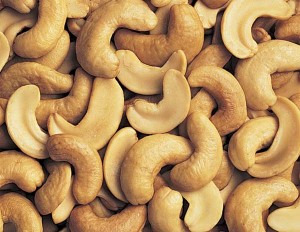
Nuts such as almonds, brazil nuts, cashews.

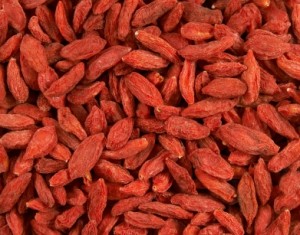
Goji berries

Seeds such as hemp seeds, sesame, sunflower or pumpkin.

Berries such as goji, incan or mulberry.

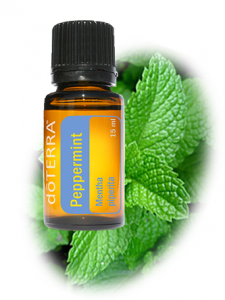
High quality essential oils such as peppermint, wild orange, cinnamon bark, etc. to flavor your chocolate. Use only a few drops and use the highest quality oils you can – they are better for you and could alter your chocolate if they are not.

Spices, such as ginger, cayenne, cinnamon, allspice.

Algae such as E3 Live, Spirulena or Chlorella. All are very high in protein, minerals and a variety of vitamins.

You can create combinations using ingredients that are high in vitamin C like coconut nectar and spirulena, or a high content of magnesium and calcium using ingredients such as mesquite and carob powder with any algae.

Some people even add medicinal mushrooms to their chocolates, which might sound distasteful, but the neat thing is is you can’t taste it, so would have no idea that it is in there if no one told you. We have recently discovered banana flakes as an addition to our chocolate making. They are quite yummy on their own and are delicious in chocolate.

The amounts you add will depend on the size of your batch of chocolate, how strong a taste you want and also depends on the herb/ spice that is being added (some are stronger than others). A good rule of thumb is to start with half a teaspoon, taste it, and then decide if you want to add more. The great thing about making your own chocolate is that there is lots of taste testing to get it just the way you want it!

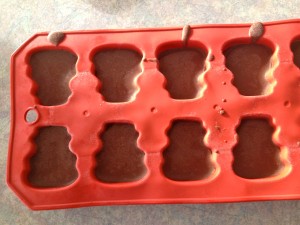
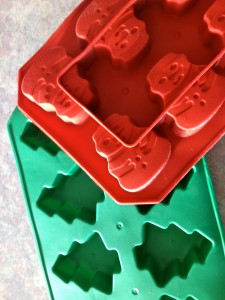
Once you have what you want you can set your chocolates in a number of ways. I buy silicon ice cube trays in a various shapes and fill those up to set. (tip – you don’t have to fill these all the way up as your chocolates can be quite thick if you do, but you want to fill them up enough so they are not too thin and break when you pop them out of the molds). There are lots of shapes to choose from; squares to hearts and around the holidays stores usually carry fun shapes related to that holiday. I have snowmen, trees and Halloween pumpkins. You can also use any of the candy molds that stores like Michael’s sell, this is where I found the mold to make peanut butter cups, they also have a variety of themes and shapes.

Of course you do not have to set your chocolate in shapes, you can just pour it onto a cookie sheet, let it set, then break it into pieces. You can also make clusters simply by mixing everything together and then dropping them by the teaspoon onto a cookie sheet lined with parchment paper.
For chocolates with fillings, make or find your filling (I use unsweetened peanut butter for my peanut butter cups and make the caramel filling using dates, vanilla, mesquite and lucuma powder), pour some chocolate let it set for a few minutes til firm, then drop or spread the filling over the chocolate, then add more chocolate on top and let set completely.
There are lots of things you can add when making chocolate. Many different flavors and combinations, depending on what you want and what you like. It is also fun to experiment with different combinations, flavors and shapes and it is easy to get the kids involved – they’ll love it. So get in there and try stuff out, worse case scenario is it does not turn out the way you want it and you might have to eat it yourself!

How to make Raw Organic Chocolates

About 8 years ago I took a class at The Light Cellar, here in Calgary, on how to make Raw Organic Chocolate. No sugar, no dairy and all natural ingredients. I was thrilled to find this course as I had been looking for an alternative so that we could enjoy chocolates at Christmas, Easter (and whenever else we wanted some!) without the refined sugars.

I had taken a chocolate making class before, bought the kit, came home and never made chocolates again. This time was different. The difference was you actually make your chocolate from scratch, from natural ingredients and it is very easy (the other class you made your chocolates from premade chocolate bars or pieces that you melted and molded into your own chocolates. I found this process finicky and the pieces were presweetened; so you could not choose your own sweetener).

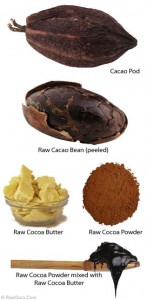
Chocolate actually comes from a cacao nut, which is made into various forms, such as cacao powder, paste, butter, etc. Making the chocolate is super simple, using four basic ingredients and only takes a few minutes. All you need is cacao powder or paste, cacao butter, some kind of sweetener (honey, agave nectar, pure maple syrup, etc.), and vanilla.

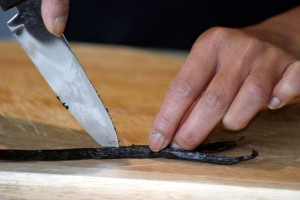
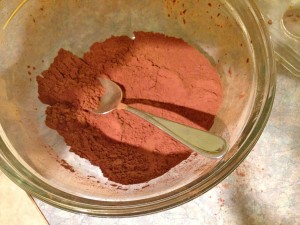
The first step is to melt the cacao butter in a bowl – use the double bowl method with the butter in the top bowl set over a bowl of boiling water (boil water put it into bowl and set on counter; then set your smaller bowl with cacao butter on top)- be very careful not to get any water into the top bowl as it will ruin your chocolate! Once the butter is melted add the vanilla bean and let it infuse (with a knife slice vanilla bean down the middle and scrape out the seeds with a spoon – put into cacao butter). Sift your cacao powder in another bowl and add to taste, then add sweetener of choice. Voila! you now have a nice chocolate sauce which you can leave as is, pour into a pan refrigerate or freeze, or use as a base and add other ingredients.

The instructor did not give us exact amounts of ingredients to make our chocolate. He would provide a starting point and then encouraged us to taste it; to make it how we wanted. He recommended we start with a 1:1 ratio, mix it and go from there. More cacao powder made it a darker, richer chocolate, more sweetener made it sweeter – adjusting it according to our palette and preferences, so we had to taste it as we went along! He also encouraged us to use natural sweeteners and ingredients. For instance, we were using vanilla beans for our vanilla -actually cutting them open and scrapping out the inside. He said we could use vanilla extract but encouraged us to use pure extract if we did, not artificial.

Cacao powder

He described using these pure ingredients as “upgrading” – making it more natural, tastier and better for you. He also told us how we can add other natural ingredients to our chocolates that not only taste good but are high in nutrients, minerals and vitamins,  making it a superfood. Ingredients like goji berries, nuts and seeds, coconut and algae and essential oils. Maca root powder, honey and mesquite powder. He even recommended in one recipe that we try a little cayenne. It was actually really good!

As for the cost, the ingredients to make your chocolate is quite reasonable. The instructor said that in the time it takes for us to go and buy chocolate at the store, we can make it at home faster with fresh ingredients for about $1.50 to $2 per 50 g – which is comparable to what you would pay at the store.

Shaped ice cube trays work great as chocolate molds

I also love the fact that I can add all these “superfood” ingredients to my chocolates so that chocolate really is good for me and the kids. So when they ask if they can have some chocolate, I can say “yes” without feeling guilty or worrying if they are having too much.

It’s also so much fun to make (I’ve already made 3 dozen caramel cups and orange ginger snowmen for Christmas) and easy to do with the kids. You can get different kinds of molds to make different shapes for your chocolates. Experiment and have fun!

In one of my previous posts I described various natural sweeteners that you can use not only in your everyday cooking and baking but for your chocolates as well. Check out that post for more details.

In an upcoming post I will share more about what you can add to your chocolates.

For your information The Light Cellar sells ingredients to make chocolate in bulk and is very well priced. I buy all my ingredients there and usually come out of the store with a big box of items! I find it hard to get out of there with only one or two things.

You can also find many of these products online – Amazon.ca as well as Superfoods.com will carry these products at reasonable prices.

Gingerbread Cookies – A Holiday Favorite (& sugar free!)

sugar free gingerbread cookies

Gingerbread is a favorite and common Christmas recipe in most households during the holiday season. It’s fun to make, fun to decorate and of course delicious!

When we went sugar free I was unsure how to make sugar free gingerbread cookies, as it seemed silly to make and decorate them, then not eat them. I had found a website with sugar free recipes that offered an alternative but when I tried it though it was edible, it was not the same and I decided that I would not make it again. Matthew though really liked them, which I thought was interesting.

This past summer, I started using barley malt and coconut sugar more. Barley malt is a great substitute for molasses and coconut sugar for brown sugar. I made a delicious baked bean recipe when we went camping using the barley malt in place of the molasses, oh it was yummy!

Once I discovered these substitutions and that they worked well, I took a look at my original gingerbread recipe and realized that I now had the appropriate substitutions to adjust this recipe. I was very excited!

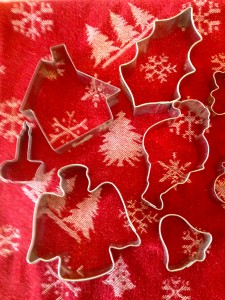
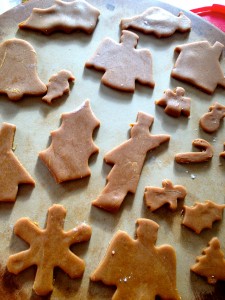
So I tried it out last week for the first time. I got out all my Christmas cookie cutters, which I have many, big and small and all different shapes. The kids love to use the cookie cutters and enjoy making the shapes. We made Santas, reindeer, angels and bells. Hollies and wreaths, snowmen and tin soldiers. Luke and Chloe were very excited and once we had them in the oven, asked to have the oven light on so they could see the cookies.

They did not eat much for lunch that day as they were waiting for cookies! (but I also used it an incentive to finish their lunch 🙂 They gobbled them up and of course wanted more, but after a few I said we would wait until later, as I actually had to bake the rest.

In adjusting the recipe I found that I would increase the spices a little, so though I have posted the recipe with the spice amounts as is, I would recommend increasing the ginger and maybe the cinnamon by 1/4 tsp. each, but it depends on your personal preference. I like my gingerbread cookies to be a bit more gingery than they turned out, though they were still very good.

We did not ice them this time around as we enjoyed them straight from the oven, but you could ice them with the recipe that I have included below. It is a basic sugar free icing recipe, which you can color using food coloring if you like. (Though food coloring is not good for us due to all the processing and effects it has on our body. You can buy natural food coloring in the store, I have seen it at Community Natural Foods here in Calgary, but you can also make your own. My sister has been experimenting with beets, spinach and other foods to color her icing for her cookies. More on that coming…)

Sugar Free Gingerbread Cookies

2 1/2 c. flour

sugar free gingerbread cookies1/2 c. shortening

1/2 c. coconut sugar

1/2 c. barley malt

1 egg, beaten

1 tsp. ginger or 1-2 drops Ginger essential oil

1/4 tsp. cinnamon or 1 drop Cinnamon Bark essential oil

1/8 tsp. cloves or 1-2 drops Clove Bud essential oil

1/2 tsp. baking soda

1 tbsp. hot water

1 tsp. vinegar

Sift flour, measure, resift. Cream shortening, blend in coconut sugar and add barley malt and beaten egg. Beat well. Mix spices with baking soda and blend until smooth with hot water and vinegar. Stir into creamed mixture. Add flour and mix.

Roll out dough on a well floured surface to 1/4″ thick. Dough may be quite sticky. Use cookie cutters to make desired shapes. Put on cookie sheet. Bake at 375 F for 10 minutes.

Cookies may be iced after fully cooled.

Simple Buttercream Icing 

1 c. Powdered Sugar Replacement (see recipe below)

1/2 c. Earth Balance Vegan Spread

1/2 c. Rice Milk or Almond Milk

Put all ingredients in a bowl and mix together until smooth. Proportions can be adjusted to make icing thicker or thinner as desired. Add food coloring if desired, ice cookies.

Sugar Free Powdered Sugar (replacement for regular icing sugar)

1 cup nonfat dry milk (for dairy free use powdered coconut milk)

1 cup cornstarch

2/3 cup Krisda Stevia for baking

Combine all the ingredients in a food processor or blender and whip until blended and powdered. Store in an airtight container.

This replacement can be used in any recipe calling for icing sugar.


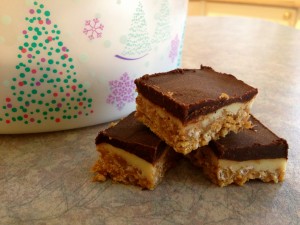
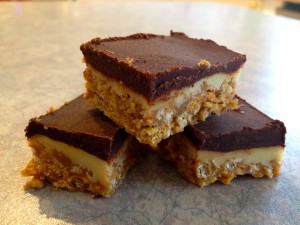
Chocolate Peanut Butter Cereal Squares

As promised I am sharing with you today the sugar and dairy free recipe for one of my all time favorite sweet treats. I have no idea where this recipe originally came from. It was one that my Mum made all the time when we were growing up and we all loved! It was very hard to have just one or two, as they were so good.

When we went sugar free at our house I thought that I would simply not make these anymore as they are so full of sugar and I had no idea what the possible substitutes could be. It seemed like a daunting task as many of the ingredients needed to be changed. But as I learned and adapted other recipes, discovering the various natural sugar substitutes out there I started to feel that I could easily adapt this recipe too. It might be a challenge and take a little time but I felt I could do it.

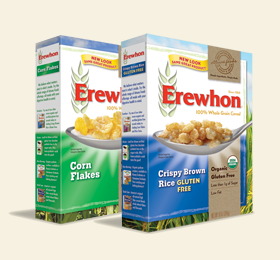
The first challenge was finding a brand of rice krispies and cornflakes that did not have any added sugar (because many cereals do). In my search I discovered Erewhon, a cereal company by Attune Foods that had both of the cereals I needed. Their brown rice krispies are sweetened with brown rice syrup, while their cornflakes have no added sugar at all.

Slowly slowly over the period of about a year I found what I was looking for and determined what alternatives could work in this recipe. And finally a few weeks ago I had everything I needed so I gave the new recipe a try. I am happy to report that they turned out great! and taste very similar to the original square. Taste tested by Matthew, he said that they did not taste different at all! And they must be good because he kept going to the fridge and scooping a few at a time.

Pleased with the results I shared the new recipe with my Mum and sisters – happy to have an alternative to our favorite treat. And today I am sharing the recipe with you. They are an easy no bake square and can be put together in less than 30 minutes. Make sure that you have your powdered sugar alternative ready and premixed as this can add to your time if you have to make this as well. The recipe for this is below.

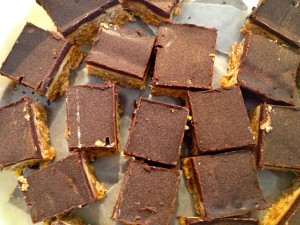
My only tip is once they have set in the fridge, take them out and leave on the counter for a few minutes so they soften a little, this will make them easier to cut. I usually precut the whole pan and put them in a container in the freezer – the only downside is that they are too easy to grab and feast on! But great when you want to pull something out for company!

Chocolate Peanut Butter Cereal Squares

Bottom:

3/4 c. coconut nectar

1/2 c. coconut sugar

1 c. unsweetened peanut butter

1 1/2 c. crushed Erewhon Corn Flakes

1 c. Erewhon Brown Rice Krispies

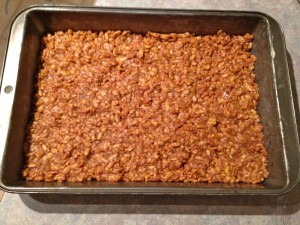
Heat the coconut nectar and coconut sugar until coconut sugar melts. Add peanut butter. Mix well. Then add corn flakes and rice krispies. Mix together well and press into greased 9×13″ pan.

Filling:

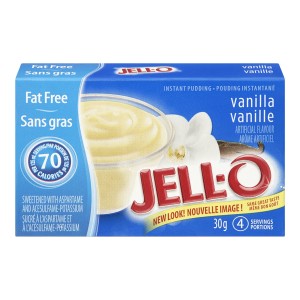
2 tbsp. fat free Jell-o vanilla instant pudding (this is not an ideal replacement due to the asparthame in it, but it is sugar free – I am on the lookout for a better substitute for this)

Rice or almond milk (approx. 2 tbsp.)

1/4 c. melted Earth Balance vegan spread

2 1/2 c. powered sugar replacement

Beat together well. Pour over bottom.

Top:

4 squares unsweetened chocolate, melted

1/2 c. Earth Balance vegan spread

Melt chocolate and Earth Balance in a small pot on the stove over medium heat. Stir frequently to ensure that chocolate does not burn. Lower heat if necessary. Mix together. Once completely melted spread on top and refrigerate.

Sugar Free Powdered Sugar (replacement for regular icing sugar)

1 cup nonfat powdered milk (for dairy free use powdered coconut milk)

1 cup cornstarch

2/3 cup Krisda Stevia for baking

Combine all the ingredients in a food processor or blender and whip until blended and powdered. Store in an airtight container.

This replacement can be used in any recipe calling for icing sugar.

Yummy!


Mmmmm… Chocolate Brownies (and oh yes sugar free)

Usually at this time of year I start preparing for Christmas, decorating and transforming the house into that cozy little sanctuary that is filled with love and laughter, children screaming in delight, sharing meals and good conversation with friends and family.

It is also the time of year that we are bombarded with sweets and treats and many of us tend to overindulge (a little) because there are so many good things to choose from. I usually start baking about now too, getting the treats ready and putting them in the freezer ready to take out when I need them, when company arrives or if I’d like a little treat myself:)

The challenge over the last year has been making some of my favorite recipes, which are full of sugar, and finding the appropriate sugar substitutions still getting the same taste and result. One of the absolute favorites in our house has been Chocolate Peanut Butter Cereal squares, which after a year of figuring out how to adjust it, I perfected the recipe. It was quite challenging as there were a lot of required ingredients that I had to find sugar free replacements for, such as cereal. The recipe calls for both cornflakes and rice crispies which are sweetened with added sugar. But more on that recipe next week when I post it. (Yes I am going to make you wait for that one)

Today I am going to share with you a delicious and very easy brownie recipe. It is a recipe from my Grandma that I used to make all the time, but hadn’t yet figured out what the appropriate substitution for brown sugar was. I had tried date sugar, and though sweet enough does not melt, so does not work in a lot of recipes where you require the sugar to actually melt. My mother was the one who actually found and tried coconut sugar and said it was a great substitution for brown sugar.

I had heard of coconut sugar but for whatever reason had not picked it up and tried it myself. In the summer when my parents took Matthew camping, my Mom was on a mission to adapt a good old camping recipe that we make on the coals of the fire, called a Cinnamon Apple. Delicious, it’s a baked apple with raisins and cinnamon and the brown sugar creates this wonderful sweet syrupy delight. Mmmmm. Anyway, she had found the coconut sugar and tried it in the Cinnamon Apple and it turned out perfectly; because the coconut sugar was not only sweet enough, it melts just like brown sugar. In fact, when you look on the package of coconut sugar, it says right on the package that you can substitute it for brown sugar.

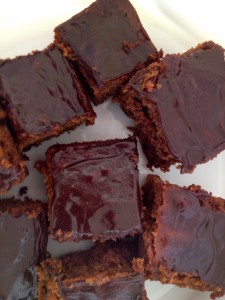
So I started using coconut sugar in more of my recipes and all the ones that I had been ‘waiting on’ a brown sugar substitute. My first trial was with the chocolate brownies. Not only did they turn out, I found them to be more delicious, lighter and fluffier than the original recipe. In fact they are so good that you don’t really need to put icing on top of them, they are delicious all by themselves.

If you would like to put icing on them I am including an easy chocolate icing recipe that will do the trick. So make, enjoy, eat and freeze (so that you don’t eat them all! though that does not always stop me as I Know they are in the freezer).

Chocolate Brownies

1 c. coconut sugar 

1/2 c. melted Earth Balance

1/2 c. flour

2 tbsp. cocoa

2 eggs, beaten

Mix dry ingredients. Add butter, then beaten eggs. Grease 9″ square pan, pour batter into pan and bake at 350 F for 30 minutes.

Chocolate Icing

1 cup cocoa powder

3/4 cup Earth Balance

1 tsp vanilla

1 cup 100% pure maple syrup

Process all ingredients in a food processor or blender until smooth and creamy.

Happy Baking!

Coming soon… Chocolate Peanut Butter Cereal Squares

Breakfast Foods Comfort and Ease! Sugar Free Waffles

I love breakfast. It is my favorite meal of the day. I don’t know if it’s because I also love mornings that I love breakfast or if it is because there are so many yummy breakfast foods to choose from! Pancakes, eggs, bacon, oatmeal, waffles, cereal and toast! Oh and crepes, crepes are delicious, with all the different yummy fillings you can put inside. Yummy!

It’s no wonder that sometimes I like making ‘breakfast’ for supper. Not only is it easy and fast but it is a nice treat. I usually add in some fruit of some kind or maybe a veg depending what I am actually making, but you can never go wrong. The kids always gobble it up and get very excited when they hear that we are having pancakes or waffles for dinner. In fact Luke and Chloe start clapping, jumping and screaming in delight. (I do too actually, on the inside).

As with other foods that are our favorites I have had to adjust these recipes to a dairy and sugar free version, which is quite easy to do. By now I have got the substitutions for things down pat and am able to take any recipe and make the appropriate adjustments.

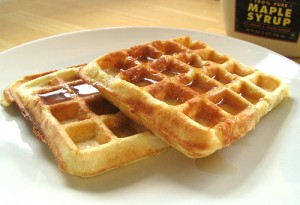
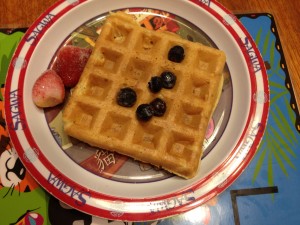
Last night we had waffles for supper. Waffles have always been one of my favorites, maybe because of the funky shape they come out in, maybe because it is another ‘bread’ type food and that is definitely one of my comfort foods. I like waffles because you can put so many things on them. You can put on the traditional butter and maple syrup or top it with fruit and ice cream or whip cream. I always find it fun as well to fill each little square with something. Yesterday I watched Luke do just that as he took blueberries and put one in each square of his waffle.

I have substituted date sugar in these recipes but have also used coconut sugar, which I tried with the plain waffles for the first time last night. Though they turned out lovely and tasted great, for some reason I enjoy the ones with date sugar better. Depending on your taste preferences you may choose to use one over the other as well.

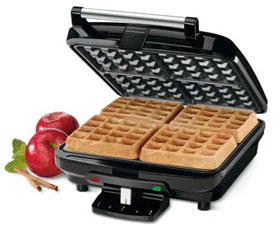
You do need a waffle iron to make waffles of course and my recommendation is to go with a non stick one. It is so easy to clean afterwards, you just wipe it down with hot soapy water. Sometimes I brush a little Earth Balance Vegan Spread over the plates before I make the first batch of waffles, but that’s it – after that they are stick free and easy clean up!

So whether you are having breakfast or supper, try out these waffle recipes and enjoy them guilt free!

Plain Waffles

1 ½ c. flour

1 3/4 tbsp. date sugar or 2 tbsp. coconut sugar, optional I have made this recipe not using any kind of sugar at all and they do not affect the taste or turnout of the waffle

1 tbsp. baking powder

½ tsp. salt

2 egg whites, room temperature

2 egg yolks

¼ c. Earth Balance vegan spread, melted

1 ½ c. rice or almond milk

Stir first 4 ingredients together in a bowl. Make a well. Beat egg whites until stiff. Using the same beaters, beat egg yolks in separate bowl. Add Earth Balance and milk, mix. Pour into well. Fold in beaten eggs whites. Cook in hot waffle iron until browned, using about 1/3 c. batter for each.

Makes 12 waffles

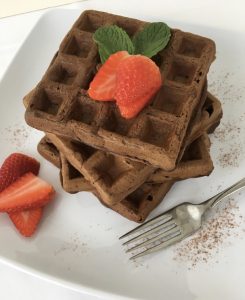
Chocolate Waffles (these are quite yummy! but the recipe is small. Definitely double it)

1 egg

3/4 c. rice or almond milkchocolate waffles

1 tbsp. cooking oil

1/2 tsp. vanilla

3/4 c. flour

1/4 c. cacao powder

3 tbsp. date sugar

1 tsp. baking powder

1/2 tsp. baking soda

1/4 tsp. salt

Beat egg in bowl. Add milk, cooking oil and vanilla. Beat in. Add next 6 ingredients, mix. Cook in hot waffle iron until crisp, using 1/3 c. batter for each.

Makes 6 waffles

Orange Dessert Waffles

1 c. flour 

1/4 c. date sugar

2 tsp. baking powder

1/2 tsp. salt

2 tbsp. Earth Balance, melted

2 egg yolks

2 egg whites, room temperature

1 c. orange juice

Measure first 4 ingredients into bowl. Stir together. Add butter, egg yolks and orange juice. Mix lightly. Beat egg whites together in a small bowl until stiff. Fold into batter. Cook in hot waffle iron until browned using 1/3 c. batter for each. Arrange waffles on plates, sift icing sugar over top if using.

Makes 10 waffles

All original recipes are from Company’s Coming Breakfast and Brunches. These recipes have been modified to a dairy free and sugar free recipe.

A Halloween Breakfast -Pumpkin Pancakes

pumpkin pancakes

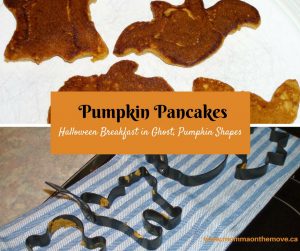
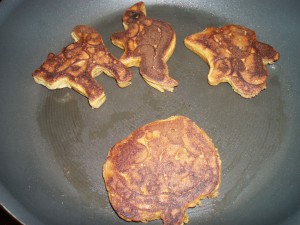
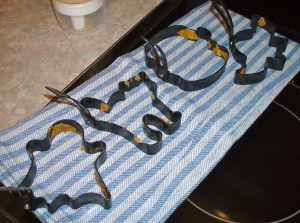
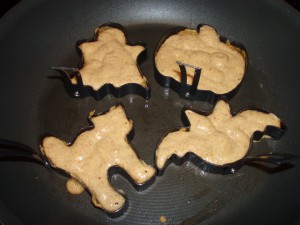
Last year I made Pumpkin pancakes Halloween morning for the kids.  I found these mini Halloween pancake molds at Williams Sonoma -in the shape of a cat, pumpkin, bat and ghost. It came with the pancake recipe so I thought I would try it out. It was so fun! It was a great way to start the day and to make it fun especially when meeting our no sugar requirement.

I am planning to make them again this year, except I will make them the night before and reheat them in the morning. Because Halloween falls on a school day, I would have to get up quite early to make them fresh and I am having a hard enough time getting up on school days as it is 🙂 It’s way too early for me.

Tips for Using Molds for Pumpkin Pancakes

When using the molds there are a few tips and tricks that I would recommend in order to make your pancake making experience successful.

First, is to buy a pancake pen. They are also available at Williams Sonoma and it is well worth the money spent. You fill the pen with batter on one end and then you squeeze it out of the tip on the other when you are ready. It has a cover on the “pen” end so you can stand it up with the batter at the end and ready to go. This is way easier and faster than spooning it into the molds.

Second, make sure that your griddle or pan is hot before you start and that you grease the pancake molds with a little bit of oil. They are non stick molds but you still need that extra grease to keep the batter from sticking, especially in the corners. And even with that I found that I had to gently push around the edges with a butter knife to get them to come out. And grease them EVERY time you put in a new batch of batter.

Third, don’t overfill the molds. If you use the recipe below they will puff up so only fill them about halfway. If you overfill them they will be hard to get out regardless if you grease them.

pumpkin pancakes

Fourthly, they do have little handles on them to help you take them out, but they become hot as they are metal like the rest of the mold – make sure you use a pot holder or oven mitt to handle them.

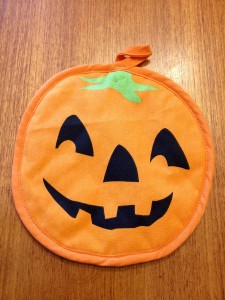
Interestingly last year I discovered I had no pot holders as I never found them to be useful and were just taking up space, so I gave them all away. Now I have found a reason to have at least one around, as using an oven mitt is too bulky and awkward to handle the molds. Fortunately I found a Halloween pumpkin pot holder on sale after Halloween last year, so I’ll put it to perfect use.

My last tip is be patient with yourself and give yourself enough time to make them; hence doing them the night before. I have to admit they are a bit finicky to make but once you get the first few under your belt you get the hang of it and it becomes easier. By the time I was done my batch I could get the pumpkin and the ghost shapes out without having to use my butterknife around the edges.

And oh they are delicious! The kids loved them. They found the shapes super fun and now ask for them each year.

So try something unique this Halloween for breakfast; even if you don’t have the molds the kids will still gobble them up. You could Hallloween -ish by simply make faces on them using pieces of fruit like sliced bananas, blueberries, strawberries, apples, etc.

I adjusted the original recipe to sugar and dairy free to meet our needs and is the recipe posted here.

Pumpkin Pancakes

1 1/2 c. flour (I used half whole wheat and half white)

1/4 c. date sugar

3/4 tsp. baking powder

1/2 tsp. baking soda

1/2 tsp. salt

2 tsp. cinnamon (or 1 drop Cinnamon Bark essential oil)

1/2 tsp. ginger (or 1 drop Ginger essential oil)

1/4 tsp. ground allspice (or 1 drop OnGuard essential oil)

4 eggs, separated

3/4 c. canned unsweetened pumpkin

1 1/2 c. almond milk or other preferred non dairy milk

4 tbsp. melted Earth Balance

1 tsp. vanilla extract

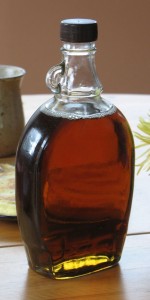
100% pure maple syrup (for serving)

In a large bowl whisk together flour, date sugar, baking powder, baking soda, salt, cinnamon, ginger and allspice. Set aside.

In another bowl, beat the egg whites until medium peaks form. Set aside.

In another bowl, whisk together the egg yolks, pumpkin puree, rice milk, Earth Balance and vanilla until well combined. Whisk the pumpkin mixture into the flour mixture just until the batter is smooth and no lumps of flour remain. Fold in egg whites in 2 additions.

Heat griddle over medium heat until a few drops of water flicked onto the surface skitter across it. Lightly grease the griddle and the inside surface of the mini pancake molds. Set the molds with handles up on the griddle and heat until hot.

Pour 1/4 c. pancake batter into each mold. If necessary use a butter knife of small spatula to spread the batter into the corners of the molds. Cook until bubbles form on top and the batter is set, 3 to 4 minutes. Remove molds, and flip the pancakes over. Cook until golden brown on the other side, about 3 minutes more. Keep warm until all pancakes are cooked. Makes between 24-32 pancakes.

*Please note that if using essential oils in this recipe to ensure that your essential oil brand is safe to take internally. Not all essential oil brands are created equally and some use synthetic fillers and chemicals in their processing of the oil or added to the oil itself. Due to no governing regulations on producing essential oils a company can say they are 100% or Organic. Due your due diligence and research the brand you are using to ensure your safe usage.

Enjoy! And Happy Halloweening!

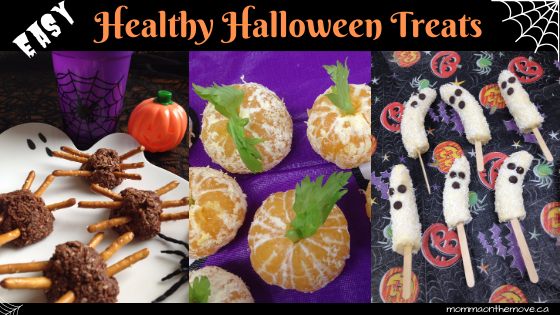
Fun Healthy Halloween Snacks

healthy halloween snacks

Getting around the sugary treats at Halloween can be a challenge. But with a little creativity you’ll find that not only will your kids love the alternatives you provide but you will have a lot of fun making them.

Halloween is one of the best holidays to get creative! There is so much you can do, especially with your snacks! You can carve and shape your food into something gruesome! healthy (without all the sugar) and that the kids will enjoy.

Last year I planned a whole menu of healthy Halloween meals and snacks, starting with pumpkin pancakes for breakfast, pumpkin smoothies for afterschool snack and spooky mini pizzas with a veggie man for dinner. It was awesome and so much fun!

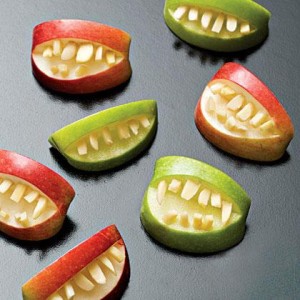
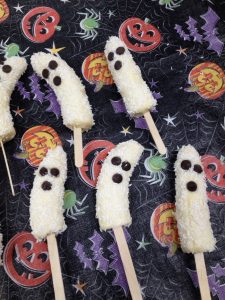
Matthew’s class also decided that they were going to have a Horribly Healthy Halloween, and as a group decided not to bring in sugary treats for the class party. So everyone who brought food had to make sure that it was sugar free. They had veggie trays, fruit, cheese and crackers. Our contribution of Witches Teeth and Boo-nanas were a big hit and the kids gobbled them up, with the Boo-nanas being the favorite!

I’ve found that it is really easy and fun to go healthy at Halloween if you choose to. And I have found that the kids will eat what is put in front of them and the things that look fun and cool are the ones that go first, regardless if it’s healthy.


Witches Teeth healthy halloween snacks

Apples

Slivered Almonds (if you can’t do nuts use shelled sunflower seeds)

Quarter and core an apple, cut a wedge from the skin side of each quarter, then press slivered almonds in place for teeth.

Tip – If you are not going to serve them right away, baste the apples with orange juice to keep them from browning.


Boo-nanas 

Bananas

healthy halloween snacksUnsweetened shredded coconut

Raisins

Orange juice

Popsicle sticks

Depending on the size of your banana, cut them in half or thirds. Dip peeled bananas in orange juice, then roll them in the shredded coconut. Add raisins for eyes. Insert a stick in the bottom to make them “float”. Can be served as is or frozen.


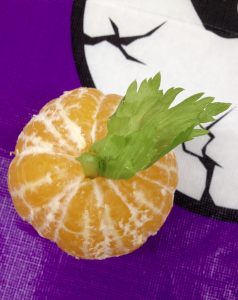
Tangerine Pumpkins

tangerine or mandarin oranges

stalk of celery with leaves – cut into small pieces

This is the easiest and fastest fun treat yet! Peel your orange, do not take it apart and section it, keep it together. Cut small piece of celery and stick it in the middle of your orange (there is a natural hole there). Use a celery leaf and stick that in beside your stem. Voila! Donehealthy halloween snacks

Spooky Drinks

Make your own juice ie. apple carrot and then add some carbonated water and a few peeled grapes. The kids will think it’s gruesome, but they will love it and likely squeal with glee!

Nina Manolson of Healthy Yummy Kids shares many healthy Halloween recipes such as Caramel Apples (my favorite!), Banana Candy and many more. They are easy to make with ingredients that you likely have and use in your home already; and your kids will love them!

Looking for more? There are lots of websites out there that have many ideas for healthy, fun, cool snacks and meals for Halloween. If you google “Healthy Halloween snacks for kids” you’ll have a plethora to choose from. Enjoy and have a spooky, fun and healthy Halloween!


Save on Music, Books and DVDs at Indigo.ca

Autumn Turkey Chili

One of the things I love about Fall is all the savory dishes that there are. The soups, the stews and all the fresh harvest vegetables that we have to put in them. Yummy! My mouth is watering just thinking about it.

I call them cozy foods, foods that are not only good for you, but make you feel warm and cozy inside. The smells wafting through the house as it cooks and the pleasure of sitting down to a nice warm meal.

Many of these meals I make using my slow cooker, which I also love! With busy schedules and activities, it is so nice to put something into the slow cooker in the morning, pretty much forget about it, and presto! ready for you at suppertime. Plus it adds to the anticipation of the meal as those flavors I was talking about, that waft through the house all day!

One of my favorite slow cooker recipes is Autumn Turkey Chili. I love how it combines fresh apples, butternut squash and coconut milk to create an amazing flavor and taste. It is chalk full of vegetables and spices – a really unique combination – that at first when you look at it you might not think so, but trust me it is delicious! Everyone loves it! And it usually makes enough that we can have it over 2 meals.

I found this recipe on the Crock Pot® website, where they have a large variety of slow cooker recipes. The only thing that I have modified in the recipe is the amount of chili powder, which I cut in half, as though we enjoy spice and flavor, we do not like it too hot 🙂

It does take a bit of time in the morning to chop and prep the vegetables and turkey, about 20 minutes, but it is well worth the time spent for the result at the end of the day!

Autumn Turkey Chili

1 onion, chopped

1 carrot, chopped

1 stalk celery, chopped

2 cups apples, diced

2 cups butternut squash, diced

4 cloves garlic, finely chopped

1 pound ground turkey, cooked

2 tablespoons chili powder

1 tablespoon ground cumin

1 teaspoon dried oregano

1/4 teaspoon salt and pepper, each

10 ounces chicken broth, canned, undiluted (I use 10 ounces of homemade chicken broth and this works well)

8 to 12 ounces coconut milk, canned

2 tablespoons tomato paste

1 cup black beans, canned, drained and rinsed

coconut flakes and cilantro, to garnish

Combine all ingredients (except garnishes) in slow cooker. Cook on HIGH 4-6 hours or LOW 8-10 hours. Open the lid for last 45 minutes of cooking to thicken if desired. Mash the squash with the back of a wooden spoon to thicken further if you wish.

Serve with rice or mashed potatoes, or just by itself.

Note: Use can use 4 cups diced cooked turkey or chicken in place of ground turkey.)

Enjoy!

If you try this recipe, please come back to the site and leave a comment. It’s great to share recipes and experiences with others!